We may receive a commission when you use our affiliate links. However, this does not impact our recommendations.
The magazine’s August 2014 article by Mario Rodriguez on building a mid-century coffee table features a terrific section about working with veneer for a patterned top. You can read Mario’s technique description below.
Subscribe to the digital version of the magazine for fastest delivery of all our wonderful content.
–Dan Farnbach
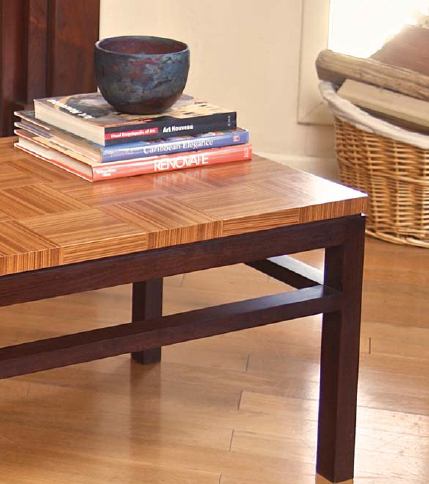 The veneered top for this coffee table is arranged in a pattern of squares, with each square’s grain running perpendicular to those surrounding it. This easy arrangement achieves an attractive design that resembles a basket-weave pattern that’s made even more striking by the strong linear grain pattern of the teak veneer I used.
The thought of working with veneer usually strikes terror in the hearts of most woodworkers. Veneering can be messy, difficult and unpredictable – but on this project, it’s a piece of cake. Many of the problems commonly associated with veneering are easily avoided.
I chose reconstituted teak veneer for its straight grain and strong contrast. Unlike conventional veneer, reconstituted veneer is made up of sliced veneer that is re-glued into a distinctive yet uniform color and pattern, then sliced into sheets. This produces an unusually stable and well-behaved material, well-suited to this veneering technique and perfect for this project.
Click on the image for a larger view.
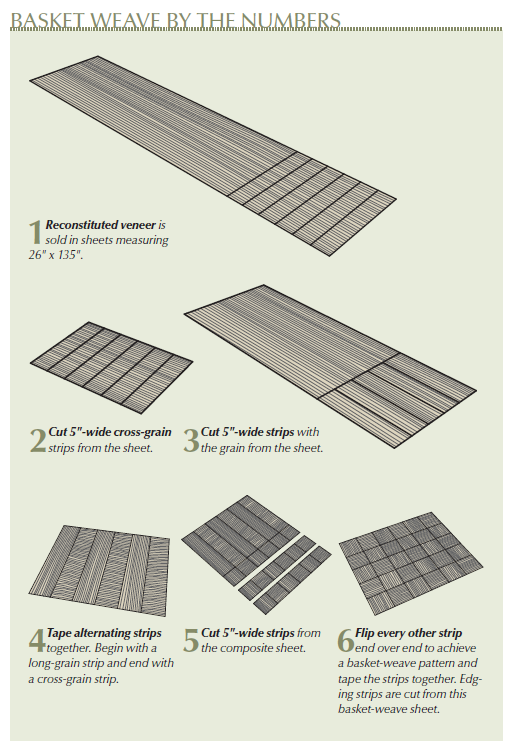
The veneer is sold in sheets measuring 26″ x 135″ and is available in several wood species. Because of its unique constitution, the veneer is fairly easy to handle and not prone to cracking or tearing as easily as conventional veneer.
After reducing the large sheet to smaller, easier to handle sections, cut several 5″-wide strips across the grain and a number of 5″-wide strips along the grain. Then tape these strips together, alternating long-grain with cross-grain strips.
Next, cut this reconfigured sheet into 5″-wide strips, producing strips with alternating grain squares. Finally, flip every other strip end over end to achieve the basket-weave design and tape this arrangement together. (As a precaution, I applied tape along the perimeter to prevent any damage.)
From offcuts and leftovers, form enough edging to cover the tabletop’s edges, then generously apply tape to these strips.
–Mario Rodriguez
Philadelphia Furniture Workshop
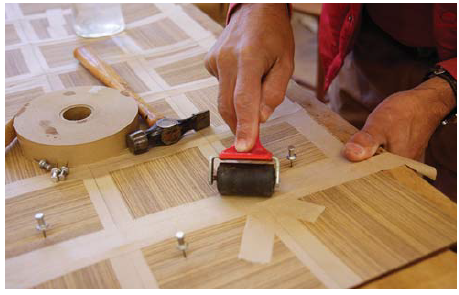
Working with veneer tape: A roller secures the tape and ensures a strong bond and a tight seam.
Here are some supplies and tools we find essential in our everyday work around the shop. We may receive a commission from sales referred by our links; however, we have carefully selected these products for their usefulness and quality.