


We may receive a commission when you use our affiliate links. However, this does not impact our recommendations.
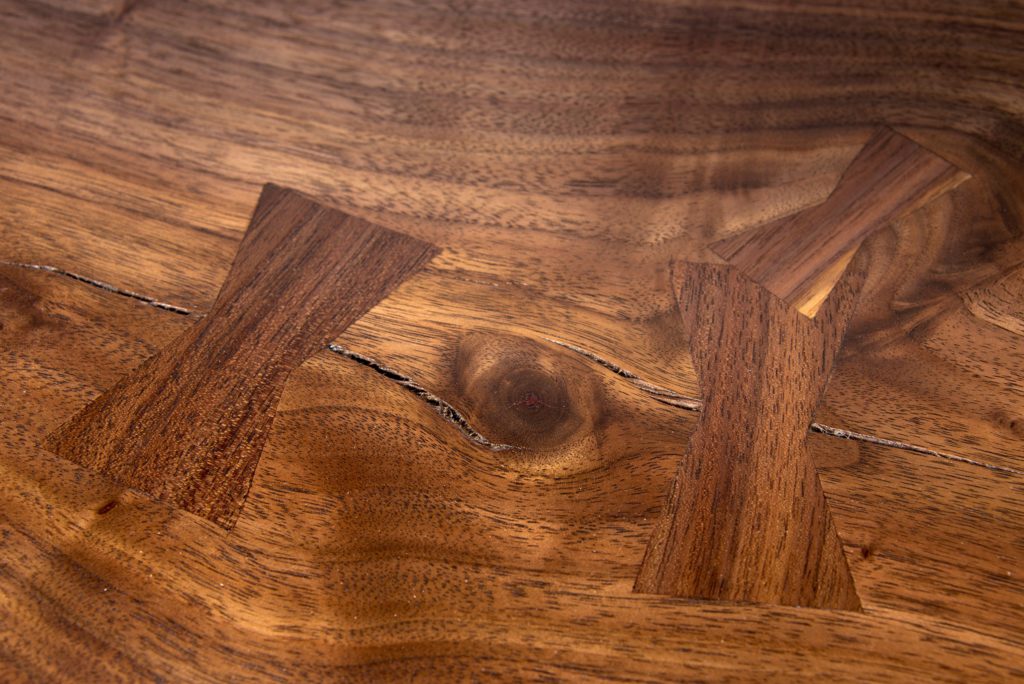
Butterfly keys offer a decorative way to reinforce splits and cover up small knots typical in lumber from backyard trees (Photo: Kendall Reeves, Spectrum Studio)
The beloved backyard tree
No store-bought lumber’s story can compete with that of boards from your own backyard. It can be wrenching to fell a beloved tree, but transforming it into a piece of furniture helps dull the pain by giving an old friend new life.
Working with lumber from backyard trees tends to be far more labor-intensive than with wood that was commercially grown. Commercial lumber comes from forest trees that have grown straight up, competing with their neighbors for sunlight. That same need to reach for the sun means forest-grown trees have few knots along the length of their main trunk: Sending out branches at the sides would be a waste of energy, because the leaves would be shaded by other trees.
In contrast, backyard trees are often encouraged to branch out for shade. Growing lots of branches makes for lumber with knots. Furthermore, because backyard trees are usually stand-alone specimens, they bear the full force of all conditions the seasons bring. While trees in the forest are sheltered from high winds by their neighbors, the lone tree has to develop more resistance to such force; this can mean less stable wood. And because we love our backyard trees and want to keep them going as long as possible, we don’t usually cut them down at the optimal point for lumber production; as a result, they often develop some rot.
A desk I recently built provides a good example of characteristics common to this kind of lumber and techniques for working with it. After my clients had their walnut tree cut down they left the log on the ground for about four years — far longer than ideal — which resulted in extensive rot in both the sapwood and the heart. Robert Woodling, who sawed and kiln-dried the lumber, expected to find little usable material when he first encountered the log, but we were surprised to find that there was more than enough to make a desk to celebrate one of my clients’ recent job promotion.
The key to using the lumber successfully was patching. I spent two full days inlaying dovetail keys and long sections of sound wood to reinforce or replace stuff that had rotted. My clients had recently adopted a pair of kittens who would certainly have been irresistibly drawn to sharpen their claws on the punky sapwood.
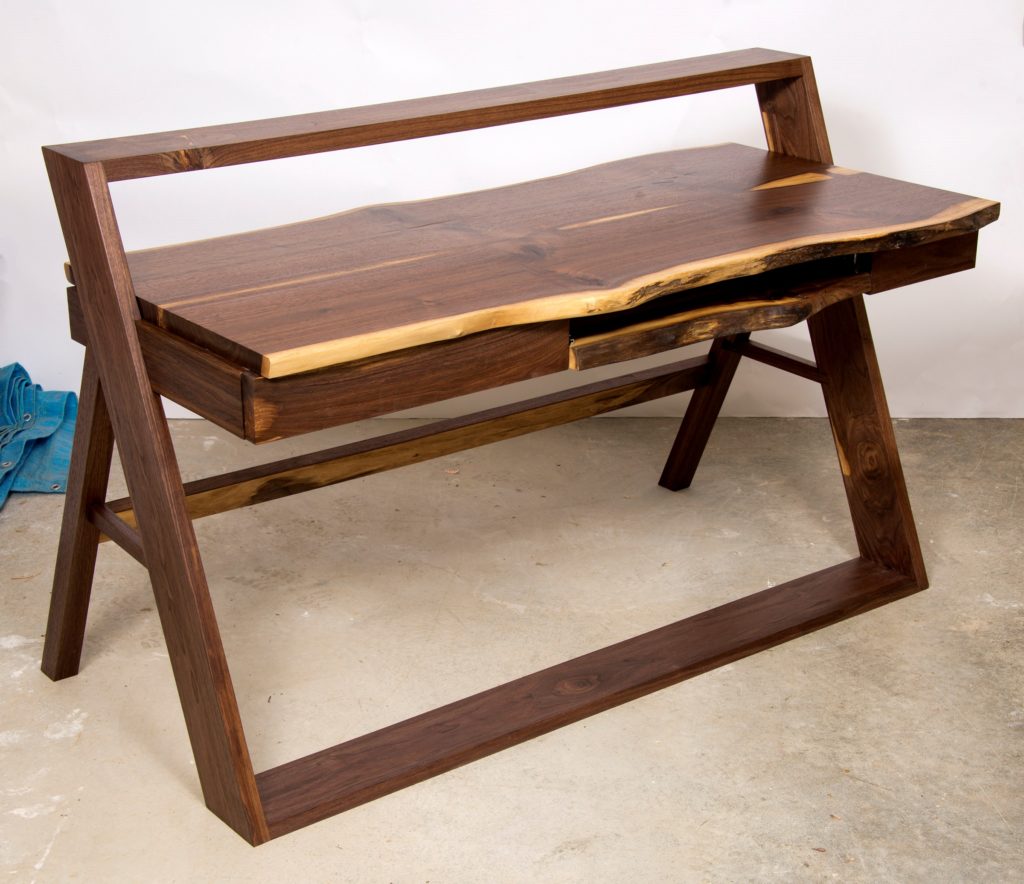
Deceptively simple: The entire back stretcher had punky sapwood along its outer face. To keep the kittens from shredding it, I laminated a piece of sound walnut onto the back and top faces. The keyboard tray had a section (at the right side) that proved just too punky to salvage, so I inlaid a large chunk of sound material, then traced the live-edge outline of the original section I’d removed and shaped the patch accordingly.
1 Dealing with punky wood on live edges
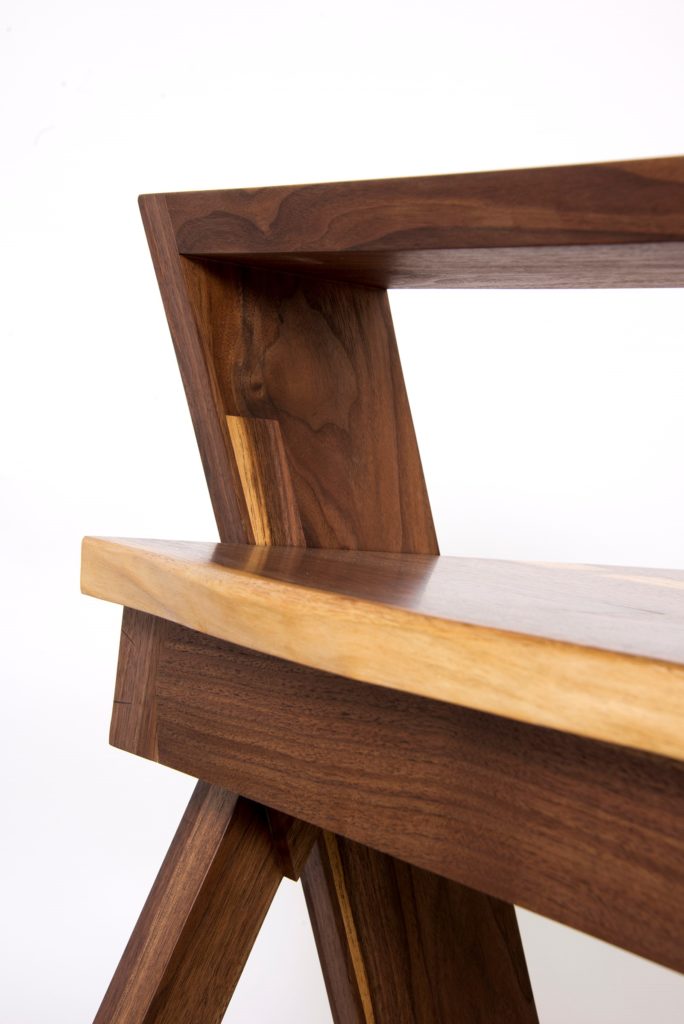
This apparently simple corner has far more going on than meets the eye. First, the top’s live edge was so rotten that I had to remove a good amount of material, while still preserving the basic shape. Second, a long strip at the back of the angled upright was rotten, so I routed the rot out and inlaid a contrasting piece of sound material. Then I laminated the entire length of the back edge with a piece of dark brown walnut to ensure that there was no sapwood my clients’ kittens could reach. And third, you’ll see that the corner of the apron under the desk top has a butterfly running across the grain. The end, which had to be mitered, was so rotten that it needed to be beefed up; hence the butterfly inlay. I reinforced the miter joint with a pair of splines. (Photo: Kendall Reeves, Spectrum Studio)
My clients wanted to keep the live edges at the front and back of their desk’s top, but I found the edges had sections of rot so severe that I could press my thumb into them. To maintain the contours, I removed the punky stuff with a spokeshave until I got down to sound material, carefully following the original shape of the edge.
2 Replacing rotten wood with solid material
There were several areas on this desk where I wanted to keep the appearance of a wide board but needed to remove rot. One was the back inside edge of the wide, angled leg in the image above (the same image as for “punky wood on live edges”). The process for patching in this case was the same as for any Dutchman patch. I determined the full extent of the rot, then ripped a piece of good walnut (with sap and heartwood) a little longer than the area I needed to replace. I cut the patch to length — it has angled ends, top and bottom — then laid it on the leg, marked its outlines with a marking knife, and removed the rot with a router. I trimmed the ends and corners with a sharp chisel, then glued the patch in place. As noted in the caption, I then laminated a thin strip of heartwood onto the whole length of the back edge, to keep the little bit of sapwood from attracting the kittens.
3 Structural or decorative patching with butterfly keys
Butterfly (also known as “bowtie” or “dovetail”) keys have long been used to reinforce joints such as those in long table tops. The first step in making a butterfly key is to determine the thickness you need. In traditional work, butterflies were sometimes the full thickness of a table top. In my walnut desk, the keys performing structural reinforcement are 1/2″ thick. Those that are decorative, such as the ones I made for covering up unsightly knots, can be more like 3/16″ to 1/4″.
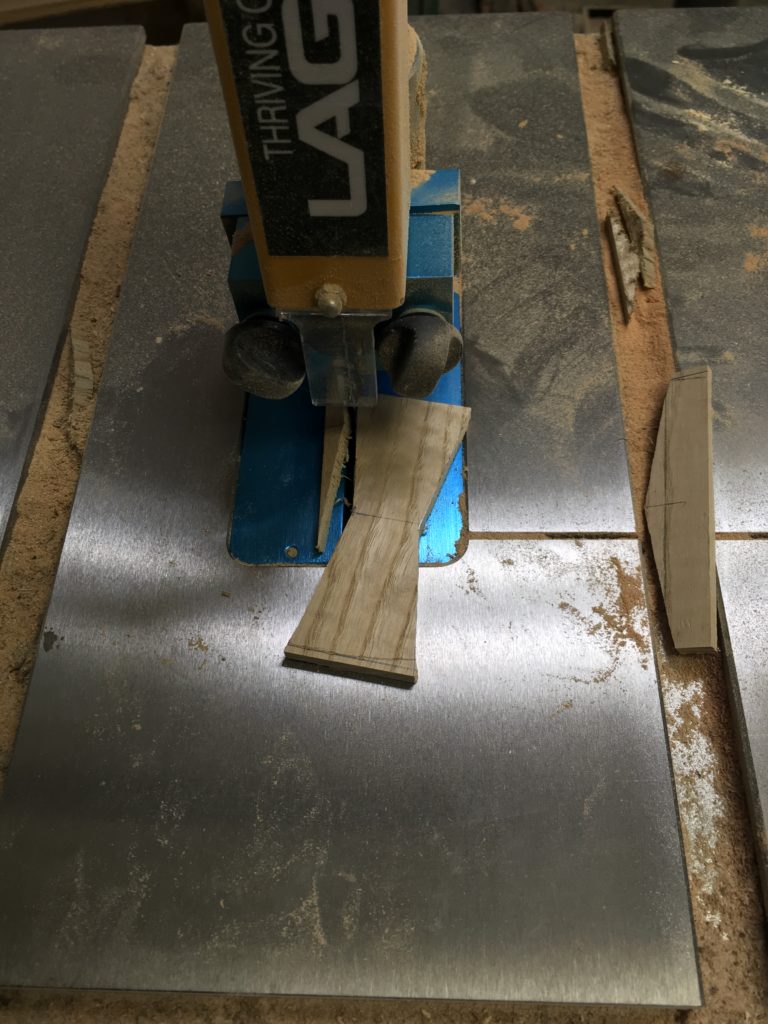
Step One: Make your keys. I start by cutting the ends to length, then draw out the shape in pencil. I cut them on the bandsaw, then clean them up by hand. Alternatively you can cut them with a backsaw, on a table saw, or simply pare them to shape with a chisel.
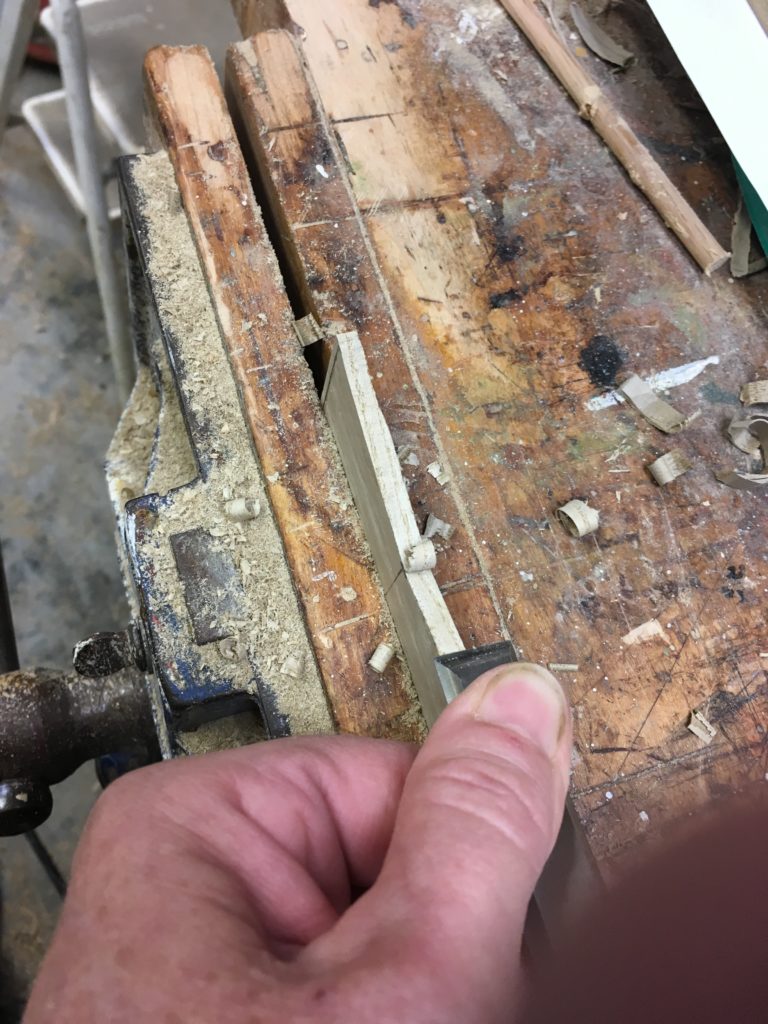
Step Two: Clean up any saw marks on the long edges with a sharp chisel. Take care to keep the edges square for accuracy in marking out the inlay.
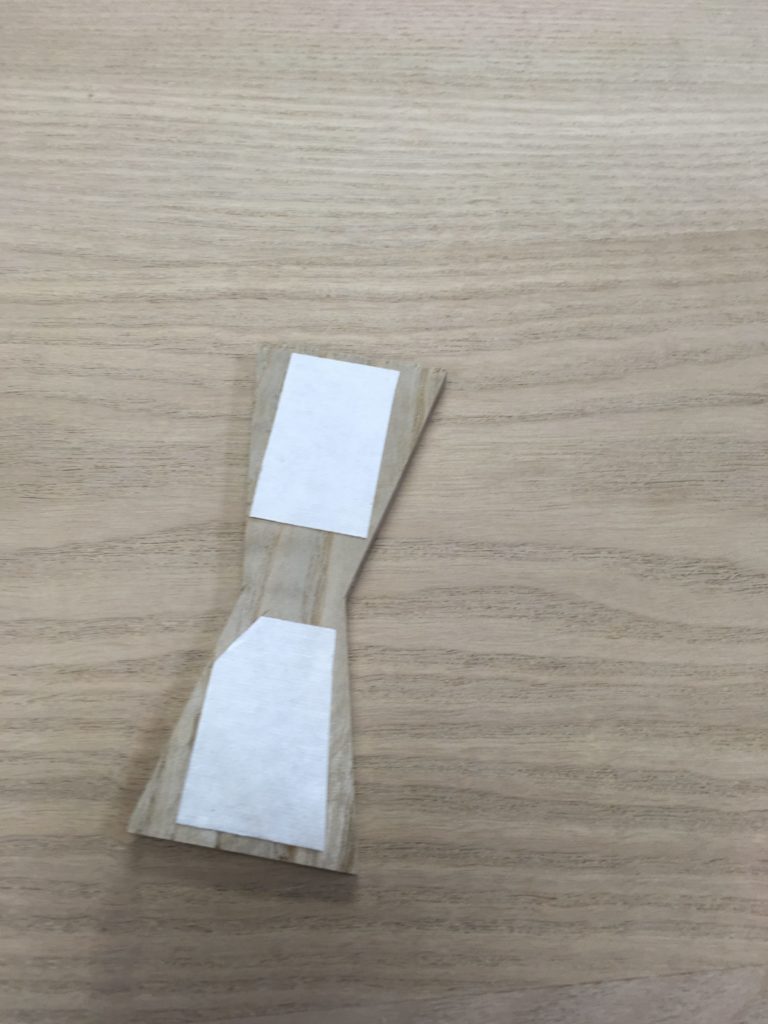
Step three: Apply double-sided tape to the back (or underside) of the key to hold it firmly in place while you trace the outline onto the ground.
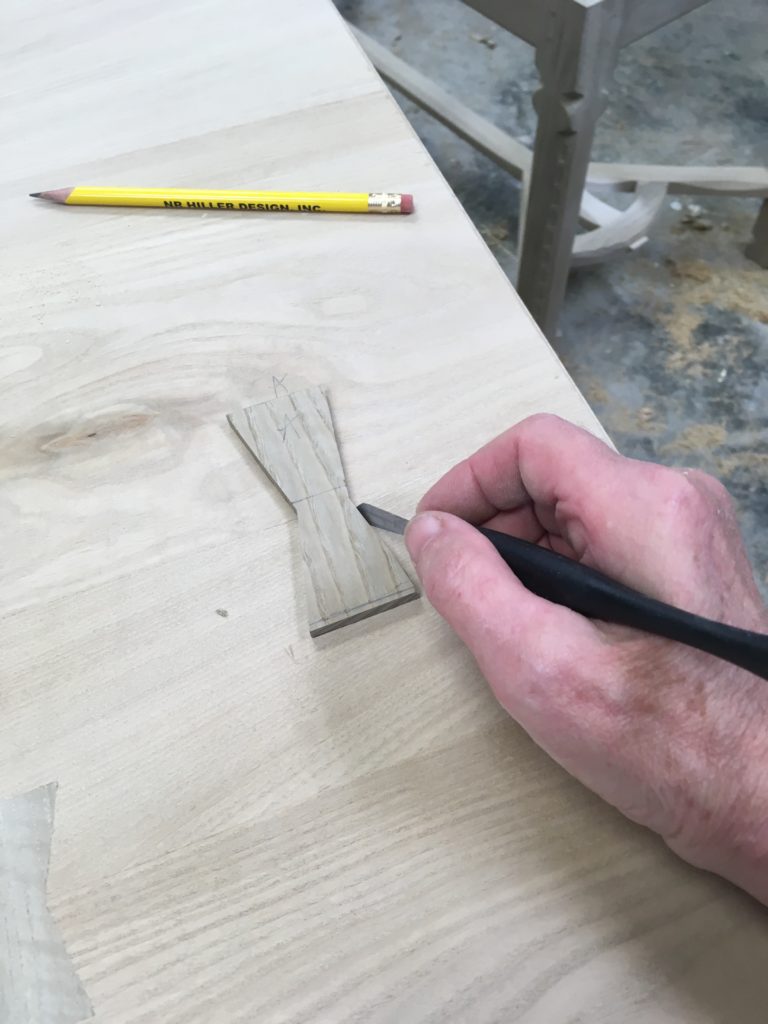
Step Four: Stick the inlay to the ground. Mark each part (inlay and ground) to identify it with its position (in cases that involve more than one inlay) and maintain consistent orientation. I trace the outline with a marking knife, making one light pass on each edge, followed by a couple more. Be careful to avoid cutting into the edges of the inlay.
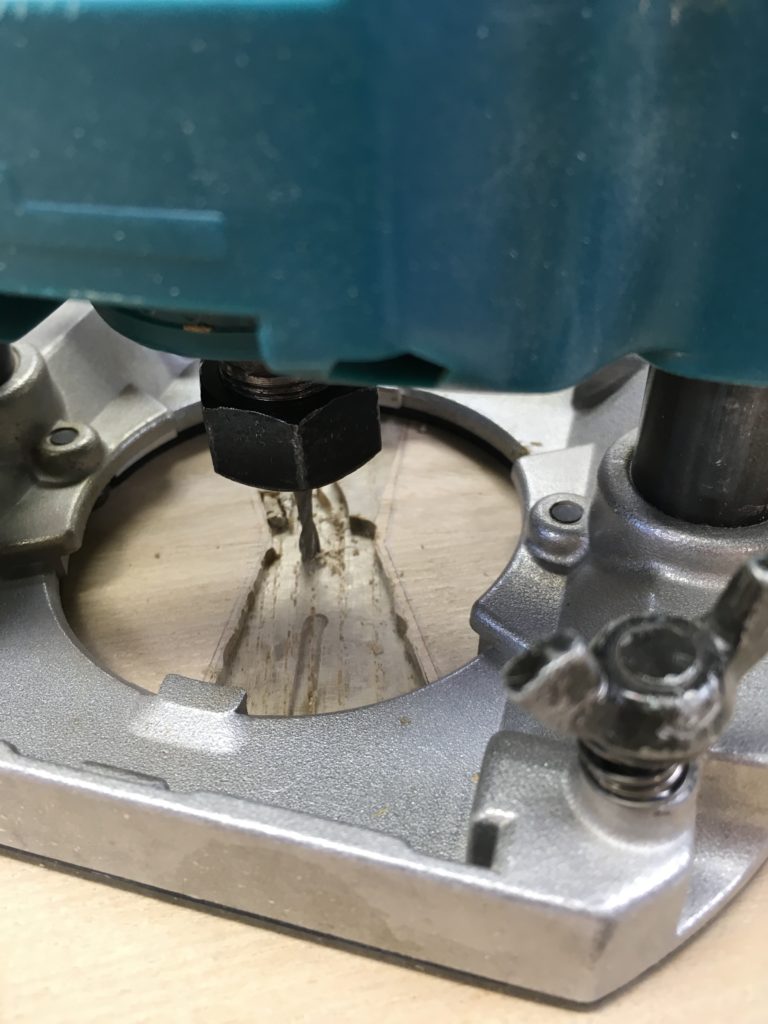
Step Five: Rout. I use a 1/8″ straight cutter for finer work such as this, which involves sharp inside corners. A larger cutter works well for less fiddly areas. Set the depth of cut to just a little less than the thickness of your key, to allow a bit of material to protrude above the surface for cleaning up. Cut close to your knife marks but not right up to them.
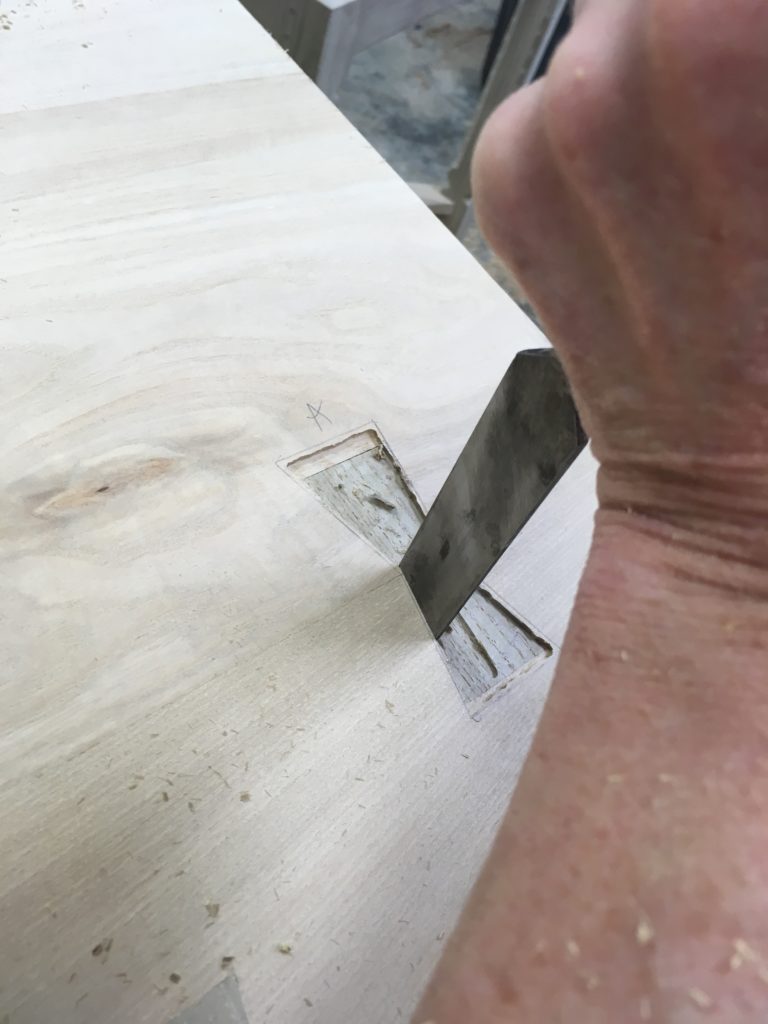
Step Six: Pare the edges carefully with a chisel. Remove the bulk of any remaining material with a chisel and mallet, but when there’s just a sliver remaining, put the mallet away. Lay the tip of the chisel in your knife mark and press down carefully; it’s fine to undercut a little. Just make sure you don’t go beyond the knife mark at the surface. When you get to the sharp inside corners, cut carefully. It’s best to begin with the section across the grain and sneak up on the corner. If you start with the edge that runs parallel to the grain, you’re more likely to split the grain beyond your knife mark.
To finish up, check the fit by laying the butterfly key in place. Trim the ground judiciously until the key just fits the outline. Don’t try to insert it before gluing.
Spread a thin layer of glue on the bottom and edges of the ground, then lay the key in place. Tap into place starting at one end, using a rubber mallet. Once I have the entire key basically situated, I switch to a hammer and really whack it a few times to make sure it’s firmly in place.
When the glue is dry, clean up with a plane or scraper.
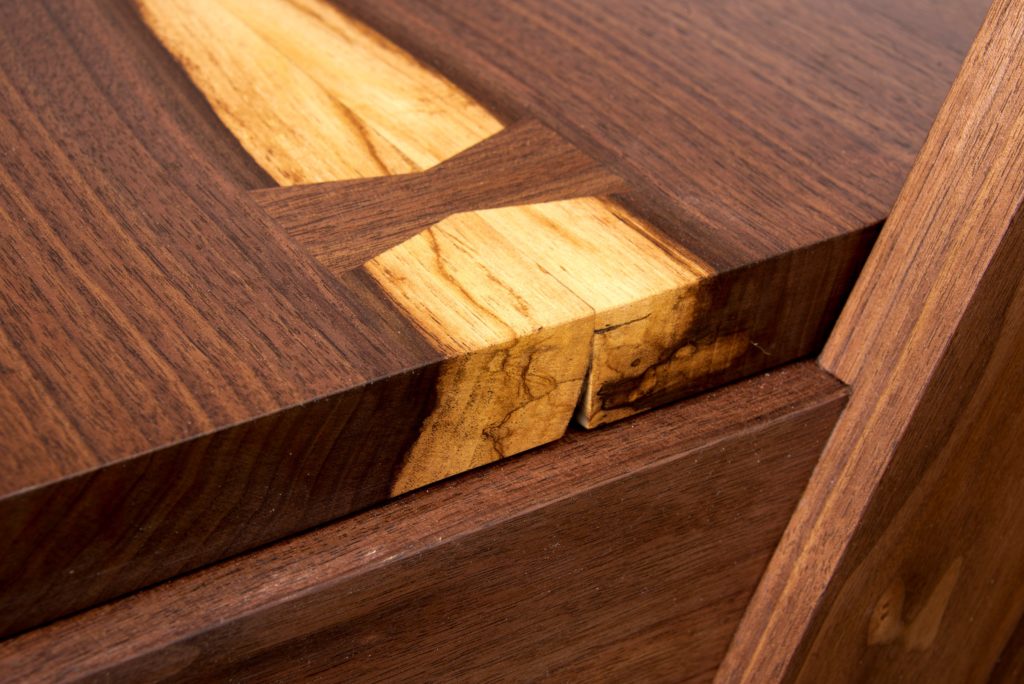
My clients wanted to keep the joint between the two boards live-edge, but I had to remove much of the live edge on each board to get to sound material due to rot. This end still retains its earlier shape. To reinforce it, I inserted a butterfly key, which also makes for a lovely bit of contrast with the sapwood.
For more on making a live-edge keyboard tray, go here.
Here are some supplies and tools we find essential in our everyday work around the shop. We may receive a commission from sales referred by our links; however, we have carefully selected these products for their usefulness and quality.


That is a gorgeous piece of work!