We may receive a commission when you use our affiliate links. However, this does not impact our recommendations.
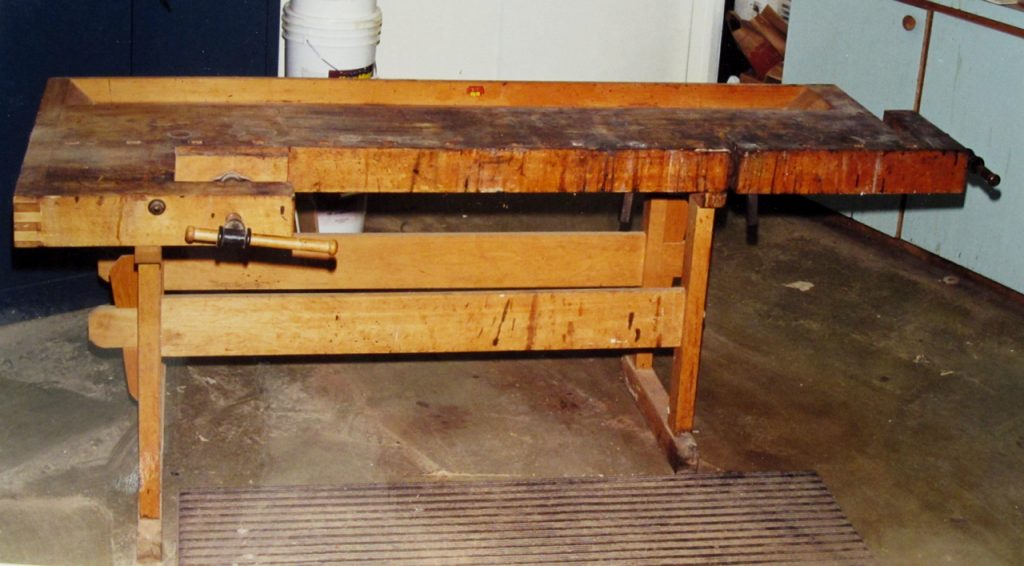
My workbench, clean and posed for a formal picture.
I was thrilled to see the article by Bill Rainford in the current issue of Popular Woodworking Magazine in which he gives directions for making a traditional Danish workbench. It’s been a long time (more than three decades) since Tage Frid provided these directions, and lots of new people have taken up woodworking in the meantime. For my money, this Danish style is the most user-friendly of all workbench styles for doing woodworking because of the unique vises, sturdy construction and versatile design.
(Small point, but I believe it’s inaccurate to call this a Scandinavian style. So far as I know this style has been made only in Denmark. The Swedish company, Sjoberg, makes an entirely different style.)
When my wife and I moved back to the U.S. from Denmark in the mid-seventies, I bought one of these workbenches and shipped it with our other possessions. So my bench is 40 years old, still in perfect condition (if you don’t count the stains I’ve spilled on it and one slip of a router), and is my favorite tool. I do all my hand-tool and handheld machine-tool work at the workbench. It sits in a central location among these tools, free-standing, not up against a wall. You see it in many of the pictures in my articles and books.
I had become acquainted with this style of workbench at the cabinet shop I worked at in Denmark. Everyone employed there (16 of us) had one of these workbenches at his station. Most of the benches were over 100 years old and were black from having had linseed oil applied many times over the years.
I don’t apply any finish to my workbench; I just don’t see the purpose. And I also don’t treat the workbench like a piece of furniture, often planing or sanding the surface flat and clean like some woodworkers apparently do. I treat it as a workbench.
I can’t say enough about this workbench style. I even named my shop after it, The Workbench.
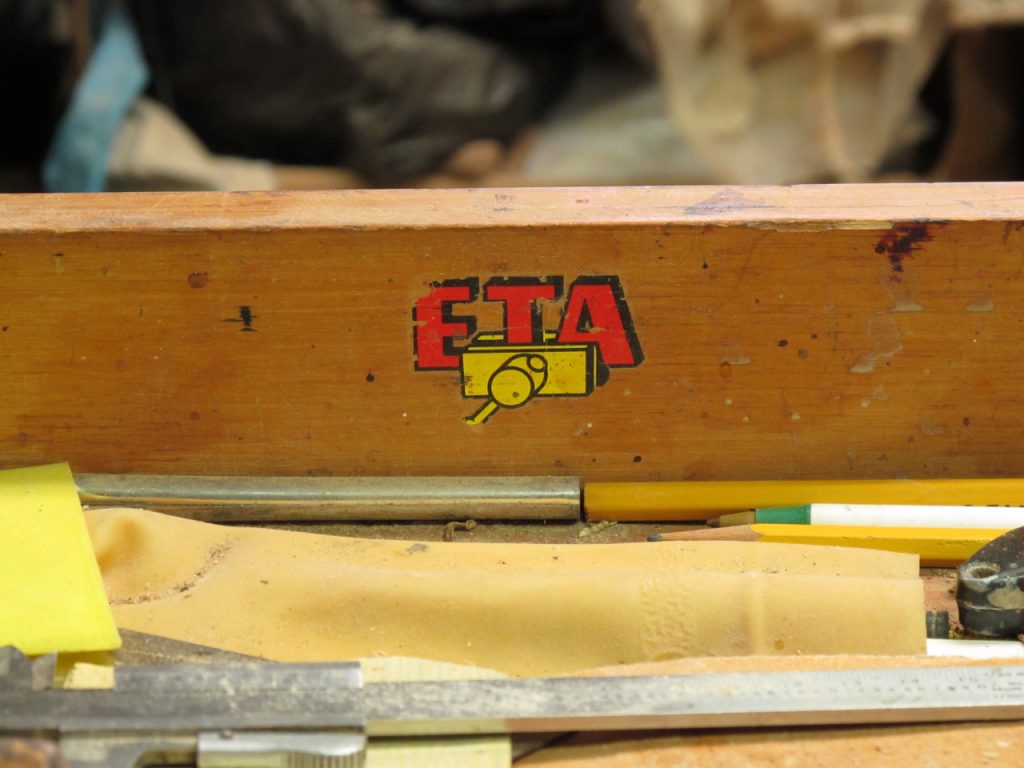
The logo of the Danish company that made this workbench.
On trips back to Denmark, I became acquainted with the small, family-owned-and-run factory that made these workbenches. I even imported 30 or 40 of them (I can’t remember which) and sold them to friends and acquaintances at cost. Also, I believe that Laguna Tools imported them for a while (they don’t anymore). So one or two could show up for sale on the used market now and then.
So far as I can determine, the workbench factory, called ETA, no longer exists, and I don’t know of another Danish company making these workbenches.
Back to the Rainford article, I noticed two significant differences between his workbench plans and my workbench.
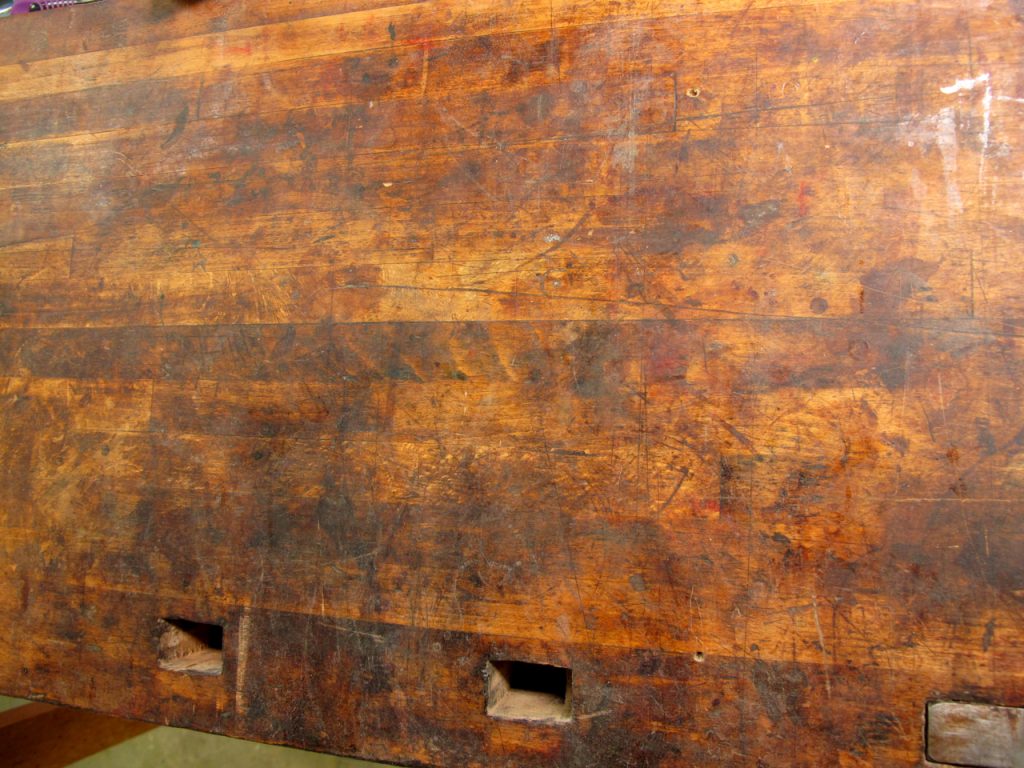
A close-up of the laminated beech top on my workbench.
The first was the top surface. Bill uses two 12¼-inch wide “slabs.” He suggests using three boards instead of two if you can’t find these widths. My workbench is made with slightly less than 1-inch wide boards laminated to form the wide surface. Wider boards could warp over time with humidity changes and water spills. The laminated narrower boards seem to me a better idea.
(Bill uses hard maple instead of Danish beech, but I don’t consider this a significant difference. Beech could be thought of as Denmark’s hard maple.)
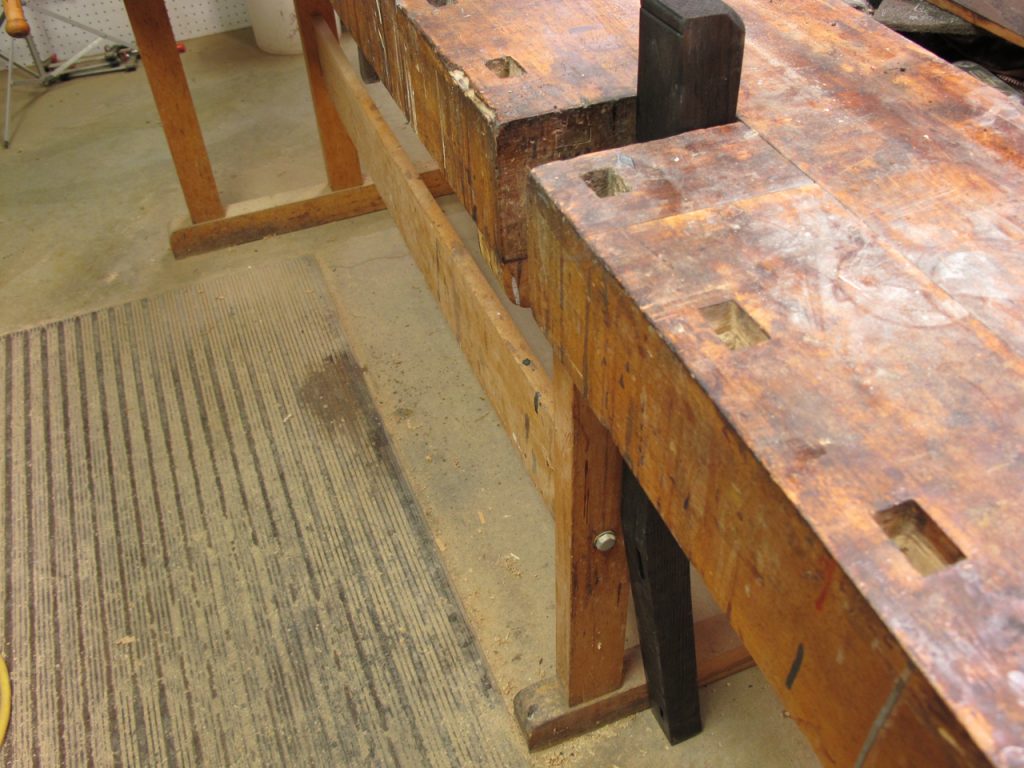
The stretcher under the right-hand vice is bolted to the leg to provide room for wood or parts to be held in place.
The second difference is the method he uses to attach the lengthwise stretchers to the legs with bolts. My workbench uses a bolt for attaching the front stretcher to the leg under the right vice to allow space for boards to be clamped. But the other three “joints” are held tight by wedges. So when the joints work loose over time due to humidity changes and wood compression (it has happened to me three or four times in 40 years), all I have to do is give the wedges a whack with a dead-blow hammer and the bench tightens up again.
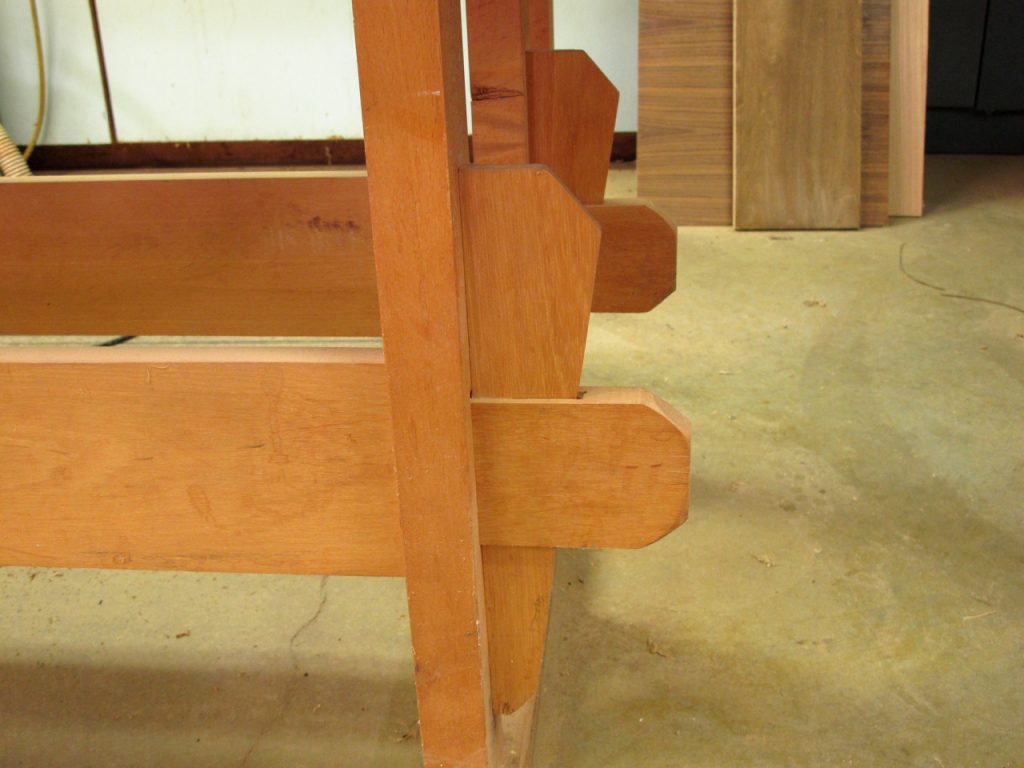
The other three joints are held in place by wedges so the joints can be tightened with a simple whack from a dead-blow hammer.
I like this system. Though bolts can also be tightened, I don’t see that they are better.
One more thought. Once or twice in forty years the mortise-and-tenon joints at the top and bottom of the legs have worked loose and the workbench became lose front-to-back. To tighten them I removed the bench top, which just sits on the frame, and drove the wedges that tighten the joints a little deeper. So I don’t understand Bill’s rationale for gluing the wedges in place.
And a final, rather humorous, thought in retrospect. When I got the workbench back to the U.S. and set up my shop, I went for weeks without using it. It was so beautiful. I just couldn’t get myself to risk damaging it. Finally, I said to myself that this was stupid. This was a workbench, after all, and I was a woodworker. I could fix any damage that I might cause.
So I took a carpenter’s hammer and gave the top four or five good whacks, hard enough to leave noticeable dents. Now the workbench wasn’t perfect any longer, so I had no problem starting to use it.
I surely recommend that you build Bill’s or Tage’s Danish workbench if you have the inclination.
— Bob Flexner
Here are some supplies and tools we find essential in our everyday work around the shop. We may receive a commission from sales referred by our links; however, we have carefully selected these products for their usefulness and quality.


I beg to differ regarding the Scandinavian/Danish style of workbench. This type of bench is EXACTLY the type of bench I had in woodworking class(träslöjd) when I grew up in Sweden. It is the archetype of a woodworking bench here.
It was the type of bench Sjöbergs used to make before they started putting face vises and end vises on their benches, probably to cut down production cost and maybe to try to cater to wood workers using more power tools than hand tools.
Every school in Sweden were equipped with this type of benches(and still are if they haven’t bought new benches in the last decade)
Bob, I’ve had a bench based on the Tage’s design I built back in 1980. The top is still the same with the only addition being Gramicy hold downs and the trestle base has been replaced with an enclosed base with 5 drawers to the right and a cupboard beneath the shoulder vice, sort of a scaled down version of the Hancock Shaker bench base. It house’s all my bench tools. I’ve been professionally working at this bench since I built it and I can’t find any fault with it. I think if I was to make another the only change would be to make the top at least 10′ long.
I ran across another article on this “Danish” workbench here http://www.carpentryarchive.org/files/english_mechanic_1892.pdf (see pages 6 & 7). The writer saw his example(s) in Russia. Though the trestle appears lightly built, it has the wedged through-tenoned stretchers of Bob’s ETA bench along with the usual shoulder and tail vises, tool till, dog holes for 1-1/4″ steel(!) or wood dogs, planing stop (noted as bench hook in drawing) and an interesting toggle saw-stop at the right end (noted as ‘P’).
Hi Bob,
Thank you for the shout out and the interesting post. 🙂
I wrote up a reply to a couple of your questions on my blog here if you want to check it out (along with some other recent posts that cover a simple deadman and side clamps also inspired by Frid’s work). Also includes a photo of one of Frid’s own early workbenches.
https://rainfordrestorations.com/2017/01/23/flexners-danish-workbench/
Take care,
-Bill
My ‘big boy’ bench was just built recently and roughly based on some of Christopher Schwartz’s guide lines with a bow to what I had around to build it – i.e. 3 layers of 3/4″ plywood (too soft – I wouldn’t do that again) on 4×4 legs and 2×6 stretchers dado’ed together. About 18″ wide by 6 ft long. Has bottom shelf for rigidity and (as it turns out) necessary storage for this and that. Added a small 10″ wide tool tray on the back edge when I got very tired of having stuff fall off the back and onto the floor!! Very stable and hardly moves when I am planning or cutting or whatever.
I was fortunate enough when I started getting serious about woodworking to take a class with Tage Frid. At the end of the class he told me not to come back for another class until I had built a workbench. I found his plans in a Fine Woodworking article and proceeded to spend every weekend for six months working on the bench. Forty years later it is still the center of workshop and the one tool that is used on every project. Besides tightening up some wedges and the bolts for the stretchers the only other thing that I have had to do was flatten the top – I moved from Chicago to Las Vegas and the wood dried out. The only changes that I have considered are adding onto the front legs so they are flush with the edge of the top and taking out the stretchers and adding a storage cabinet with doors and drawers. Best project that I have built – taught me a lot about woodworking, made me love woodworking and has provided a base for every project that I have built since.
Nice article, but I don’t think it’s correct to call this style “Danish”. I know Sjöberg’s benches have a different tail vise, but a lot of Norwegian benches have the L-shaped vise. Hamran, a Norwegian company, have made this style since 1930, and still do.
Best regards,
Erik
“… I tend to avoid trying to “improve” on hundreds of years experience.”
Seems to me that everything we do in woodworking is based on hundreds, if not thousands, of years of improvements. Otherwise we would be using Egyptian-inspired rocks for workbenches instead of wood ones inspired by Danes/Germans/Moravians/French/Japanese/Romans/etc. Even on your bench, the laminated top was a “new-fangled improvement” over the massive slabs of its predessors, made practical by the rise in affordable mechanized woodworking (saws, jointers, planers). Likewise its shoulder vise, an “improvement” on its predessors’ crochets. Or am I missing something?
One of my first “serious” woodworking projects was the bench from Tage Frid’s plans. Still in daily use some 30 years later. There are times (like assembly) where I wish it was a little wider. Maybe I’d forgo the tool tray next time, it just seems to collect junk, including planing, chips and sawdust.