


We may receive a commission when you use our affiliate links. However, this does not impact our recommendations.
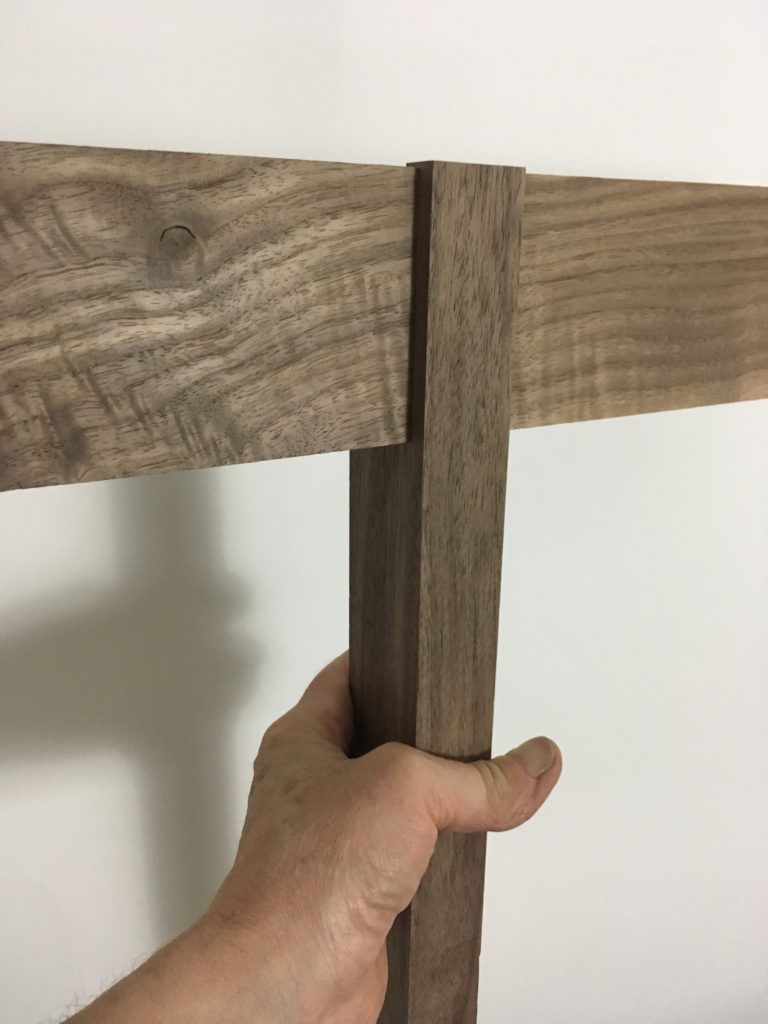
A well fitted T-bridle joint is handsome and extremely strong.
One of the first joints I learned to cut during my City & Guilds of London training was the T-bridle, which we used for the leg-to-rail connection on a modern end table, one of the projects that made up the curriculum. Like other variants of the bridle joint, this one is often used for table bases and benches. You can see an especially elegant example of this joint here.
Interlocking notches offer outstanding resistance to racking and gobs of surface area for glue.
The T-bridle makes a rock-solid joint by integrally interlocking the two parts. A well fitted joint will hold together firmly even without glue (though I would not recommend leaving it unglued in your final assembly, as shrinkage could loosen the joint over time). It’s a champ at resisting racking. And depending on how you work it into your design, it can provide a subtle decorative enhancement.
You can use this joint with parts that are the same thickness as each other or in cases where the legs are thicker than the rail. For parts that are the same thickness, make the notch in the leg 1/3 of the rail’s width for maximum strength. If the leg is thicker than the rail, you can leave the notched part of the rail a little thicker. (Note: For pieces where the rail is considerably thinner than the leg, it’s more typical simply to notch the leg to house the rail’s entire thickness; i.e., the rail in such cases is not notched to accept the leg.)
1. Mark the width of the leg onto the rail for the bridle joint
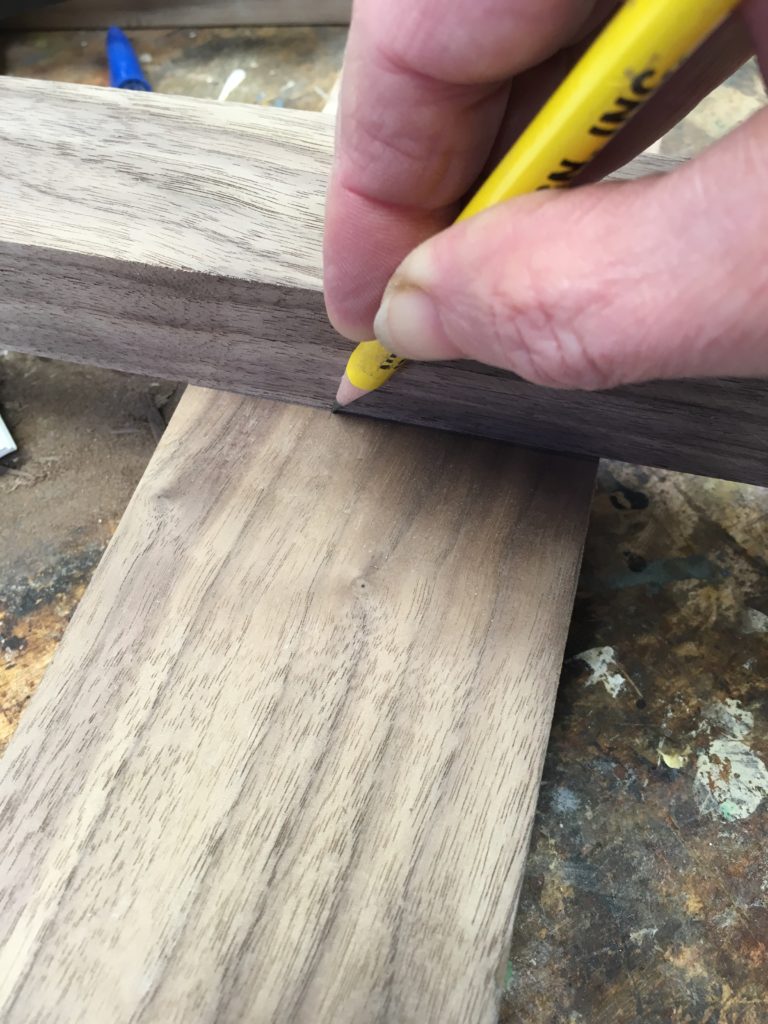
Make sure the leg is cleaned up so you don’t have to remove material later, which would alter the fit. All parts must be square. I make my marks in pencil, hugging the edge as close as possible. Extend the lines around all sides.
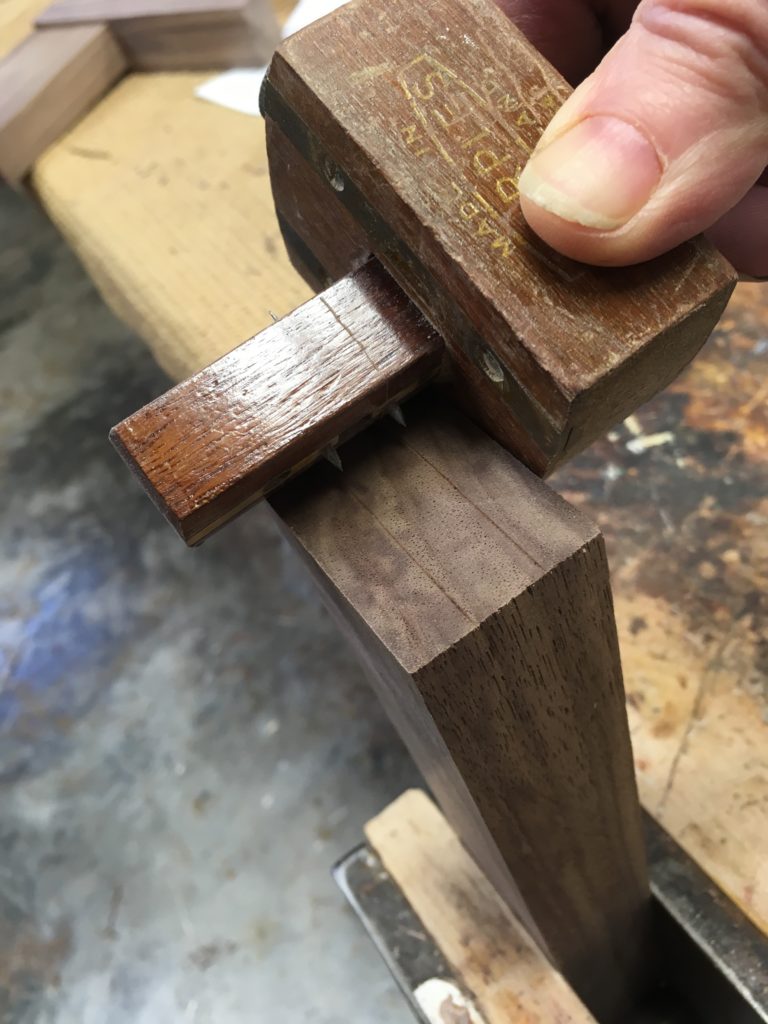
2. Mark and cut the notch that makes this a bridle joint on the leg
You can use a mortise gauge or a marking gauge.
Cut the cheeks of the notch with a backsaw, a bandsaw with a fine tooth blade, or on a table saw. I used a table saw with a tenon jig.
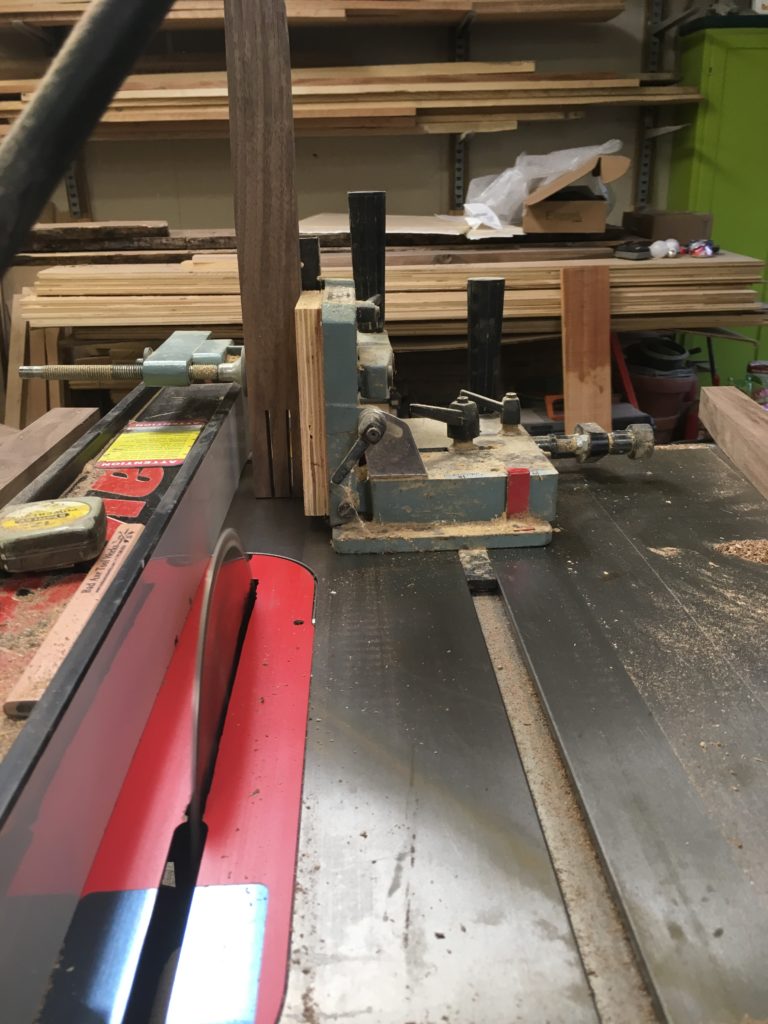
The setup I used to notch the legs: a tenoning jig guided by the slot in the saw’s table. This is one of the applications where you have to remove the riving knife and guard. Be sure to replace them before you use the saw again.
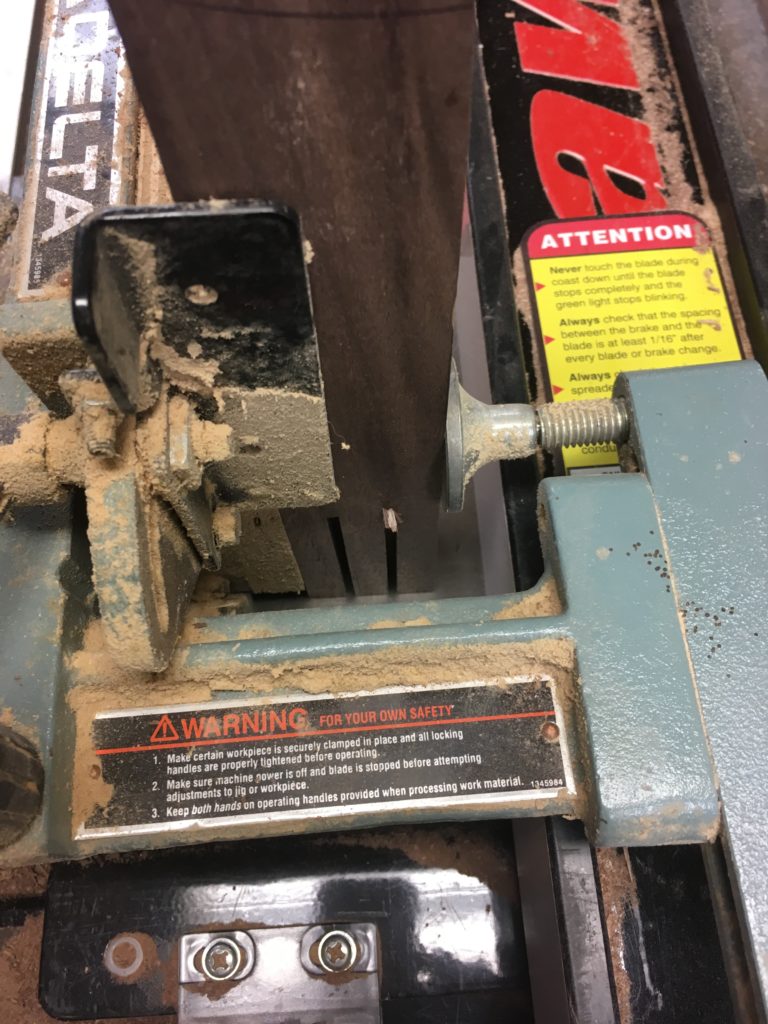
Looking down at the tenoning jig (which, as you can see, I use rarely). The workpiece is clamped in place, perfectly plumb and square. The blade is raised to just under the final depth of cut. Cut one cheek of the notch, then adjust the position of the workpiece in the jig to cut the other.
My table saw blade cannot be raised quite high enough to achieve the depth of cut my bench’s top rail required, so I removed the rest of the material by hand as shown below.
Clean out the waste on the saw or by hand, with a chisel. Because my saw couldn’t cut deep enough for this particular joint, I made the rest of the cut by hand.
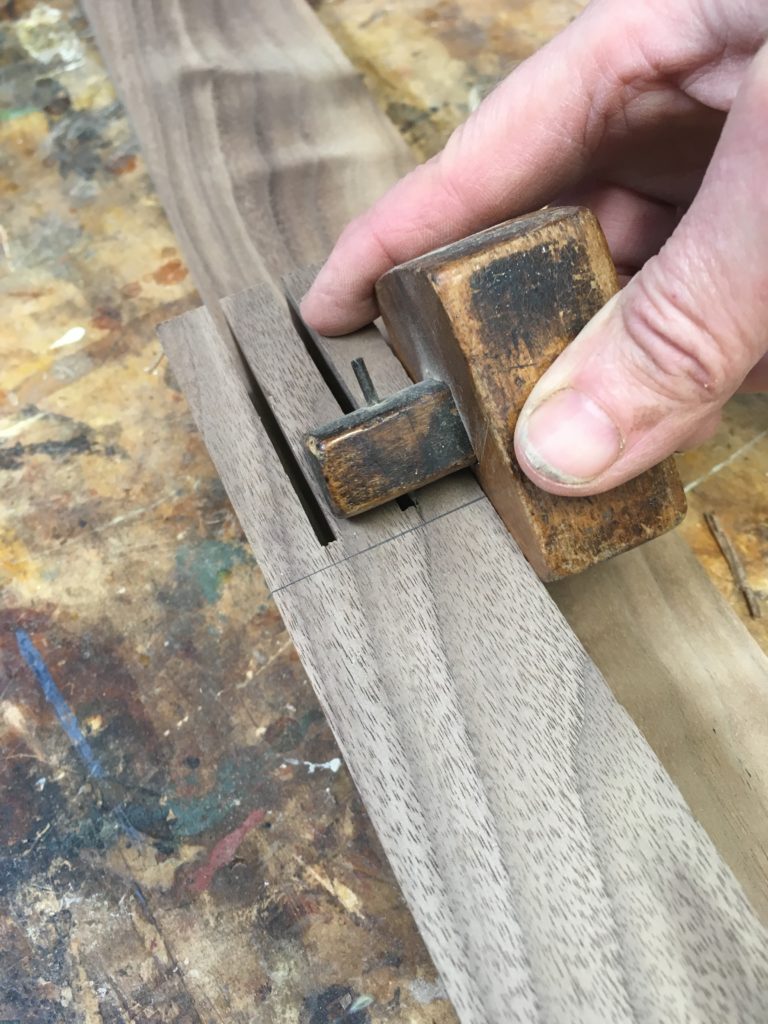
First I marked the area to be removed, using a marking gauge. If you were cutting this notch by hand with a saw, you would have gauged this line already.

Next, I sawed out the waste with a coping saw. I finished up by paring to the cheek lines with a Blue Spruce paring chisel (heaven), then cleaned out the bottom of the notch as shown below.
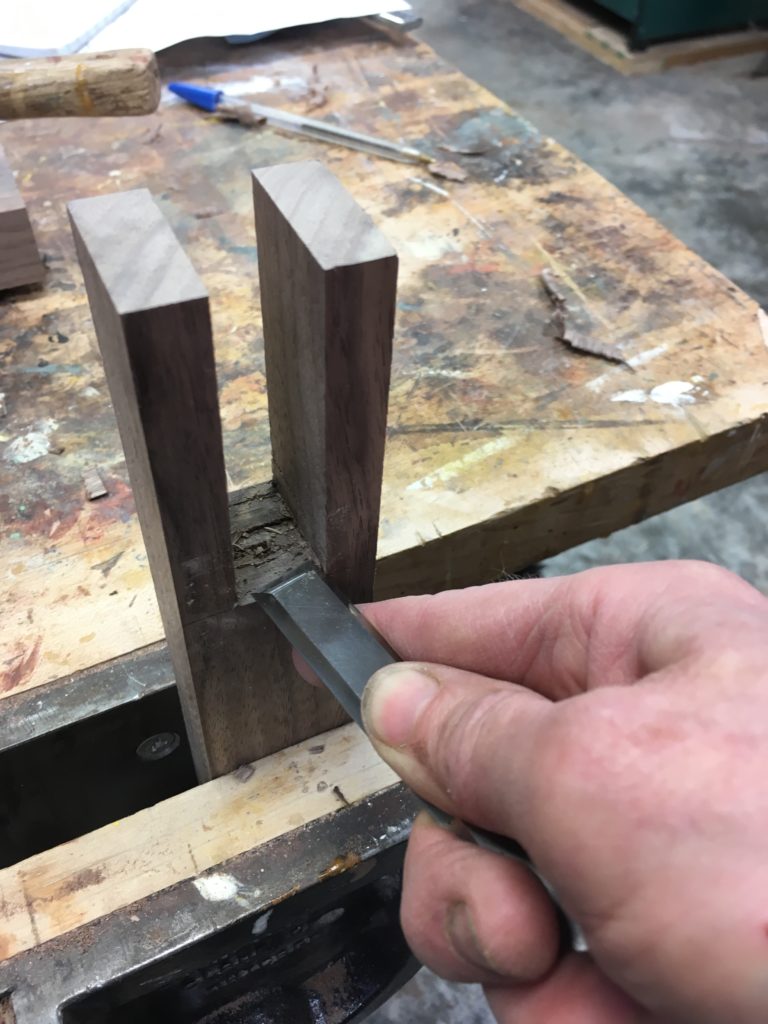
In real life (i.e., when my left hand is not holding a camera), I use my second hand to steady the chisel, which helps with accurate cutting. As you can see, I did a bit of undercutting.
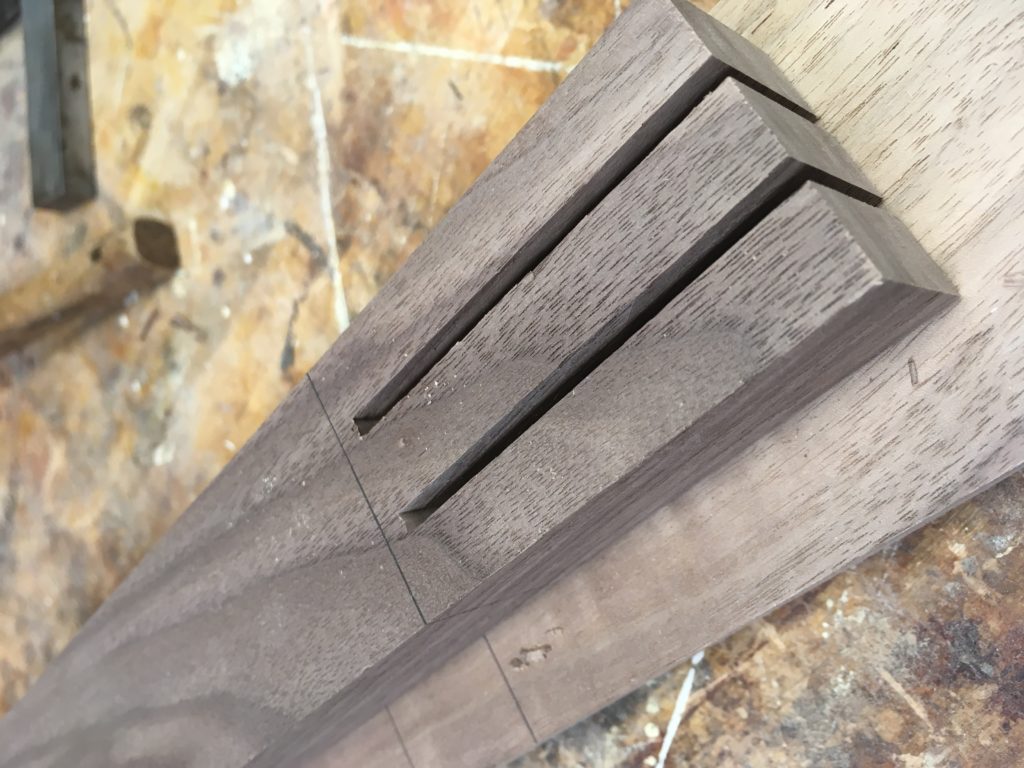
4. Mark and cut the notch on the rail
Reset the gauge as needed* to transfer the notch on the rail. Score the shoulders with a knife and make a V with a chisel, then saw with a backsaw. Alternatively, you can cut these using a miter gauge on the table saw, cleaning out the waste by moving from one side to another, as I did. Clean up any remaining blade marks by paring down to your gauge lines with a sharp chisel.
*If your rail and leg are the same thickness and you reference from the face side each time, you won’t need to reset the gauge. If your leg is thicker than the rail, you will have to reset the gauge to take that additional thickness into account.

The sliding miter gauge offers a handy guide to cut the notches on the rail. I use the table saw’s fence as a stop for the outside cuts. Be sure you cut all of the shoulders at one setting before you move the fence to act as a stop for the other shoulder. After both shoulders have been cut you can move the fence out of the way and just use the miter fence to hold the work square while you kerf out the rest of the waste.
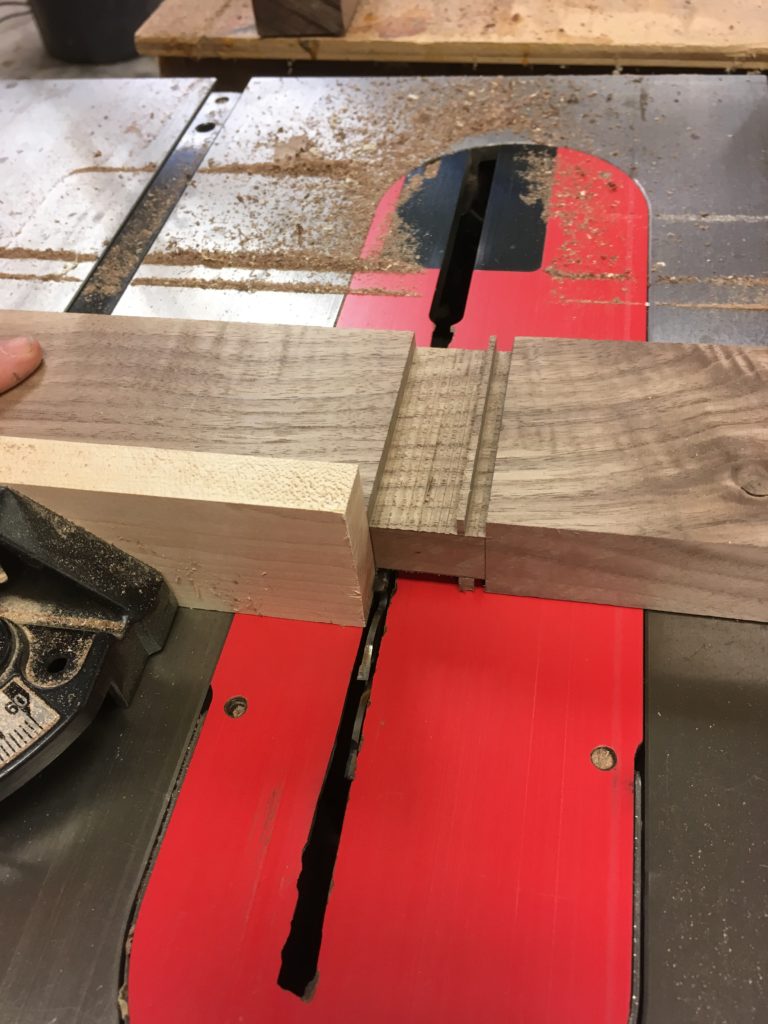
Cleaning out the waste in the two notches on the rail, which will accommodate the mating notch on the leg.
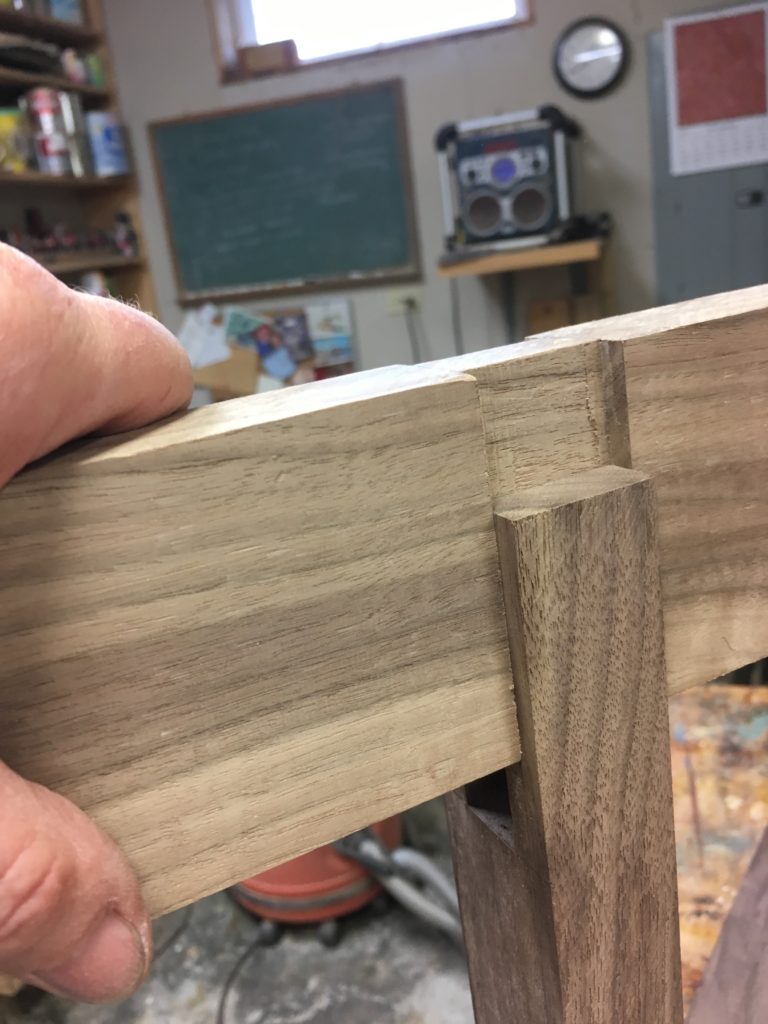
5. Test the fit
Here you can see the paring marks from my hasty clean-up of the notches on the rail.
The fit should be snug. But beware of making it too tight, which could cause the leg to split.
6. Glue
This joint offers a lot of surface area for gluing, which reinforces the joint’s strength. If the joint is well cut you shouldn’t even need a clamp, other than perhaps to pull the rail fully into the notch in the leg. Check with a framing square or by comparing diagonals, depending on the type of construction you’re making.
To make this joint even more bombproof you could add a drawbored peg.
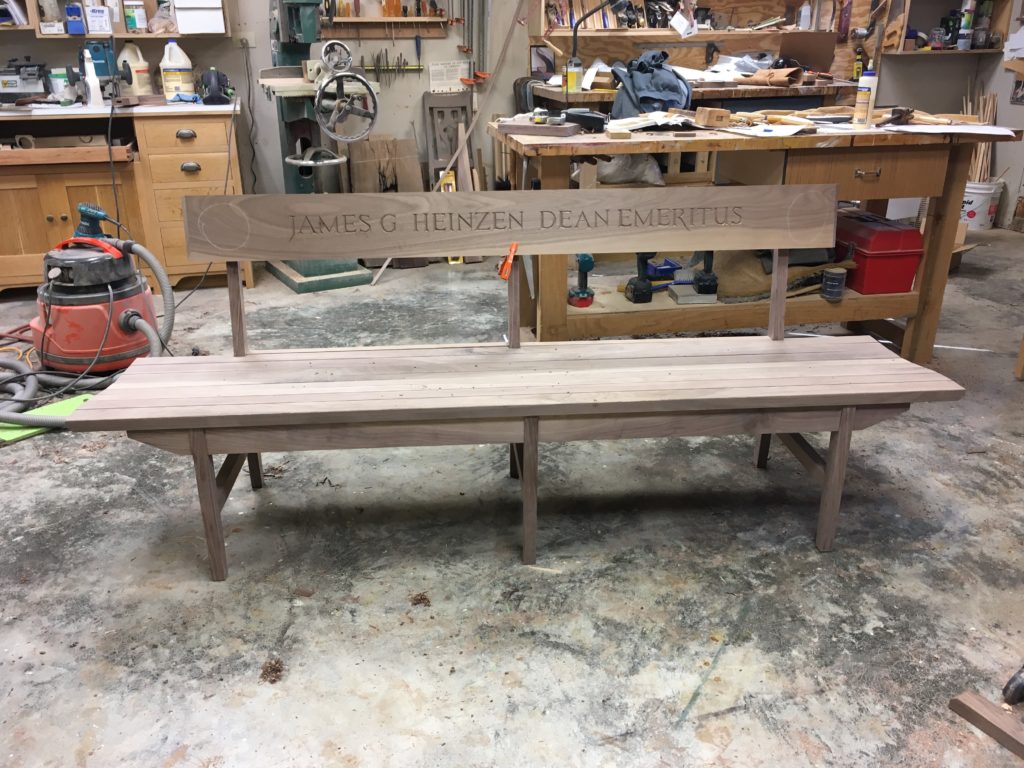
The bench below is one of my current commissions. The front rail is joined to the leg assembly by means of T-bridle joints.
Here are some supplies and tools we find essential in our everyday work around the shop. We may receive a commission from sales referred by our links; however, we have carefully selected these products for their usefulness and quality.


Great rundown on a joint that gets little respect given how tough it is vs. how easy it is to make. I find that the trickiest bit is cleaning the bottom of the groove especially as the parts get taller/wider. Is there some efficiency gain to adding another shoulder to the bottom of the rail to potentially come right from the coping saw and eliminate the paring, yet maintain the nice corner?