


We may receive a commission when you use our affiliate links. However, this does not impact our recommendations.
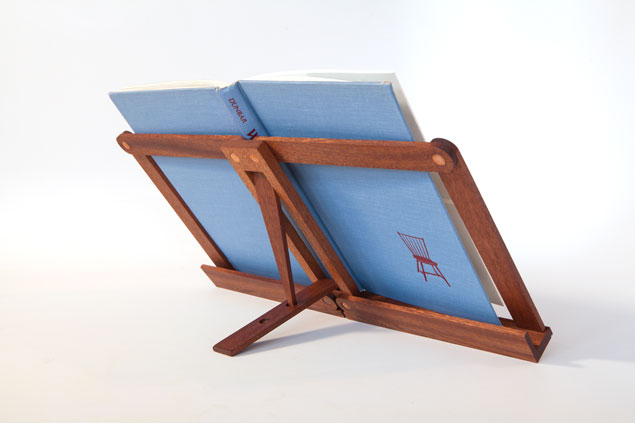
I built a folding bookstand (above) for an upcoming issue of Popular Woodworking Magazine that uses traditional copper rivets to join the components and allow them to pivot.
After posting a few photos of the bookstand, a lot of people were curious about how to use copper rivets. So here is a quick tutorial – full details and measured drawings will be in the June 2018 issue of the magazine.
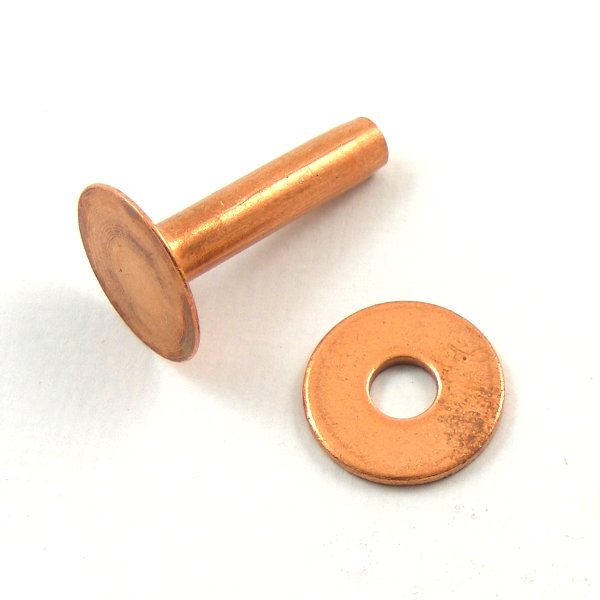
Copper rivets have two components: the rivet (the part with the shank) and the burr (which looks like a washer). When fastening pieces using rivets here’s the traditional routine: You drive the burr onto the rivet with a tool called a “rivet setter.” You snip the excess shank off. And then you peen, mushroom or deform the end of the shank to lock the rivet and burr together.
Here’s how to do all this without buying any new tools.
Pick Your Rivet Size
Rivets come in a variety of sizes. Here is a great chart that describes their important dimensions. To install the rivet, you’ll need to bore a hole through both pieces of wood that allows the shank to pass through. You’ll might also need a counterbore for the burr and the head of the shank – depending on what you are building. (In the article I show you how to do it with a counterbore bit in one operation.)
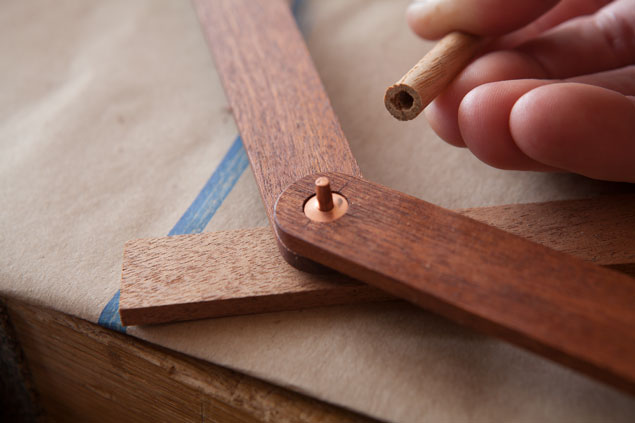
Insert the Shank & Set the Burr
Press the shank of the rivet through the hole and then set the bur. It will need significant pressure to set it. A metal rivet setter is the traditional tool. If you aren’t riveting things every day, make a rivet setter from a dowel. Bore a hole into the end that is a bigger diameter than the shank.
Place the homemade rivet setter on the end of the shank and drive the burr down with hammer taps until the burr stops moving.
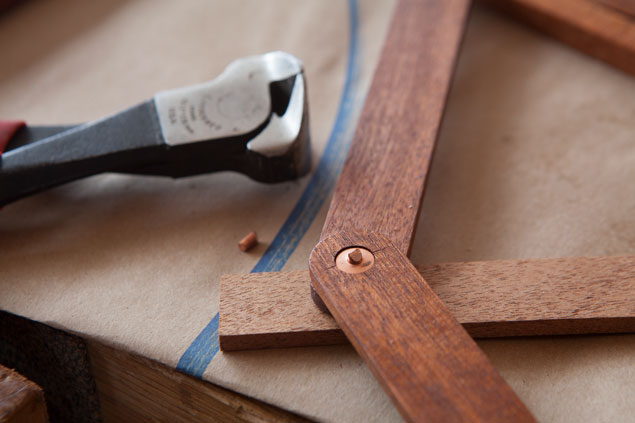
Snip the Shank
I use nail snips, but almost any snipping tool will do. I like to leave about 1/16” of copper shank above the burr.
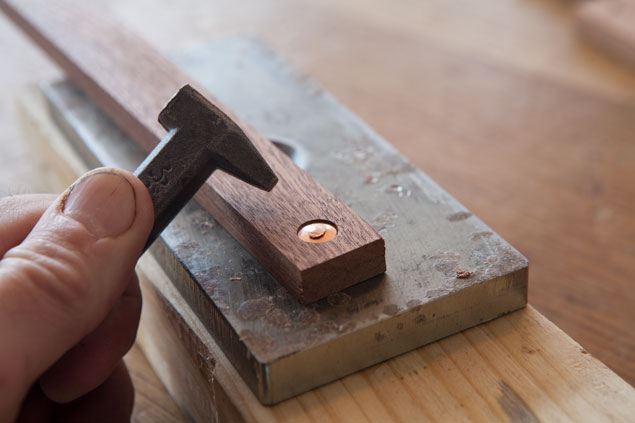
Peen the Shank
I use a nailset to peen over the shank and shape it. There are lots of ways to do this, even with a bit of a metal dowel. The tool just needs to be harder than copper and able to get inside any counterbore you’ve made.
And that’s it. Make a test joint before you start riveting your parts – rivets are no fun to undo.
— Christopher Schwarz
P.S. To learn to rivet leather for your projects, check out my video on building this Campaign Chair.
Here are some supplies and tools we find essential in our everyday work around the shop. We may receive a commission from sales referred by our links; however, we have carefully selected these products for their usefulness and quality.


If you are seeking a little looser joint, slip a piece of paper or thin brass into the joint before riveting it, against the rivet shank. After peening, pull it out. That will leave something like a .002 to .004 inch gap behind, allowing the parts to turn more easily.