


We may receive a commission when you use our affiliate links. However, this does not impact our recommendations.

One of my current jobs involves adding some cabinets to a kitchen in a 1912 house. Luckily, the kitchen still has its original built-in, which guided the design of the new pieces.
“Hang on,” you may be wondering. “What do you mean, ‘its original built-in,’ singular? Surely there would have been a set of built-ins.”
No, there would not. Most kitchens of that era had just a single cabinet, if they had any at all. (For more – much more – on this, see my book The Hoosier Cabinet in Kitchen History.)
Like many built-ins of the time, this one was made with an integral wooden counter that forms the top of the carcase. The counter was made from the same species of wood and nailed onto the cabinet sides. Wood movement was not a concern because the grain ran in the same direction all the way around the cabinet. The counter was in good shape, largely because the house’s previous owners had <choke> protected it with a layer of plastic. I suspect it was pour-on epoxy, though not having used the product myself, I can’t say for certain.
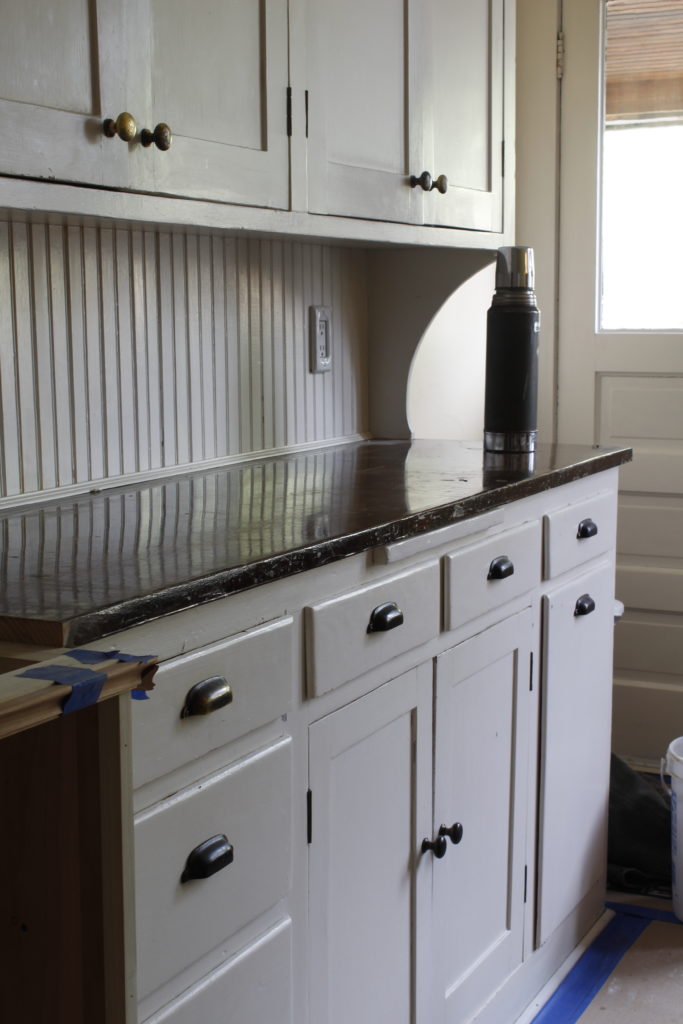
Before: The gloss is blinding, not to mention an insult to this century-old built-in.
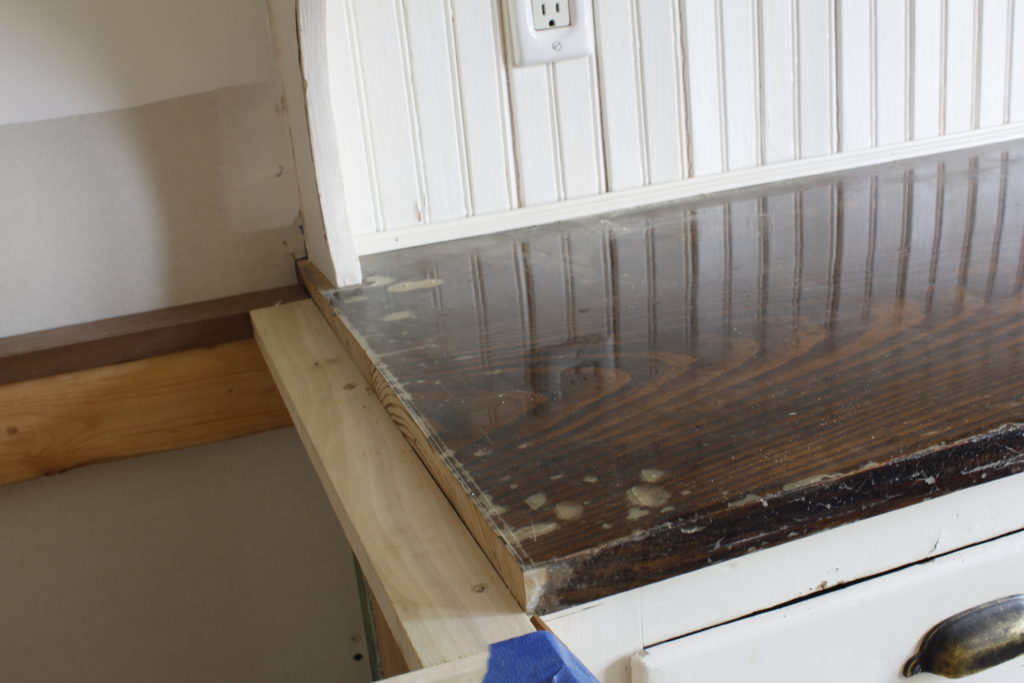
A closer look reveals the shine in all its glory, along with a few of the bubbles that had formed below the finish.
My client wanted to have the counter refinished, and I was happy to do my part in liberating a lovely original wooden cabinet top from its prison. I arrived with a random orbital sander, Fein shop vac (with a HEPA filter and automatic switch, two features that make it ideal for dust collection), and a variety of sanding discs starting at 60 grit. As soon as I began sanding, I realized that the finish was tougher than I’d expected: Instead of being removed, it was simply getting scratched to the point where it turned white.
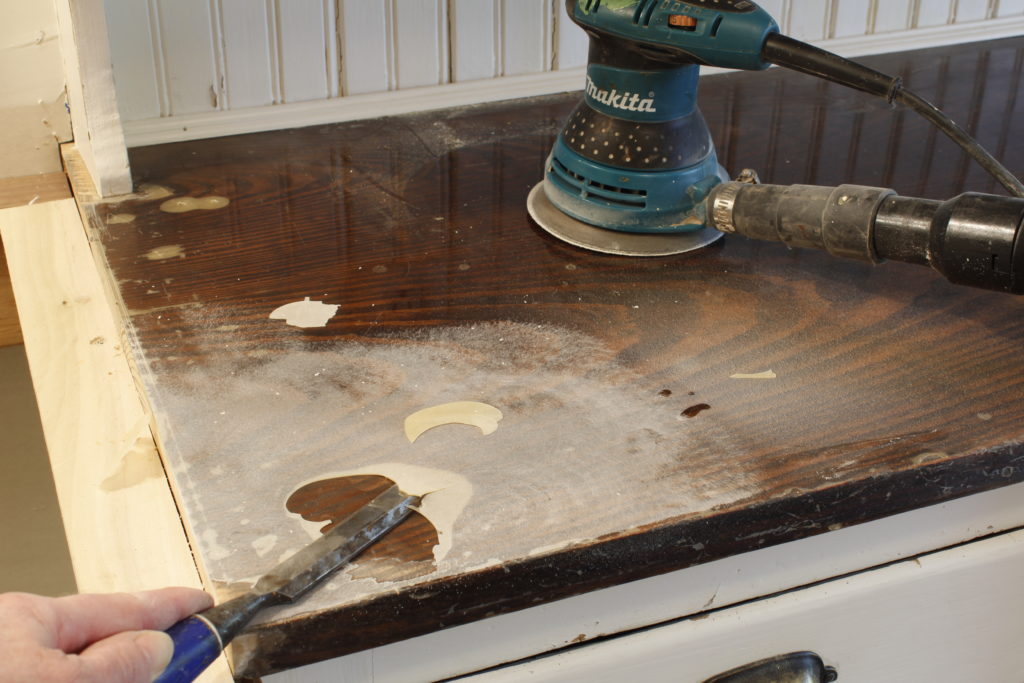
That was one tough finish. Sanding with 60-grit paper just scratched the surface into a milky mess, barely diminishing the thickness of the film.
In an ironic stroke of luck, the brittle finish had refused to move with the counter through the seasons over its many years, creating some bubbles. These, combined with poor adhesion between the coating and the dark stain underneath, suggested I might have more success if I tried to chip the finish off rather than abrading it. I stuck my old chisel into one of the bubbles and was elated to feel the finish break free. (You can see a video of the process here. A surprising number of Instagram viewers found it “oddly satisfying.”)
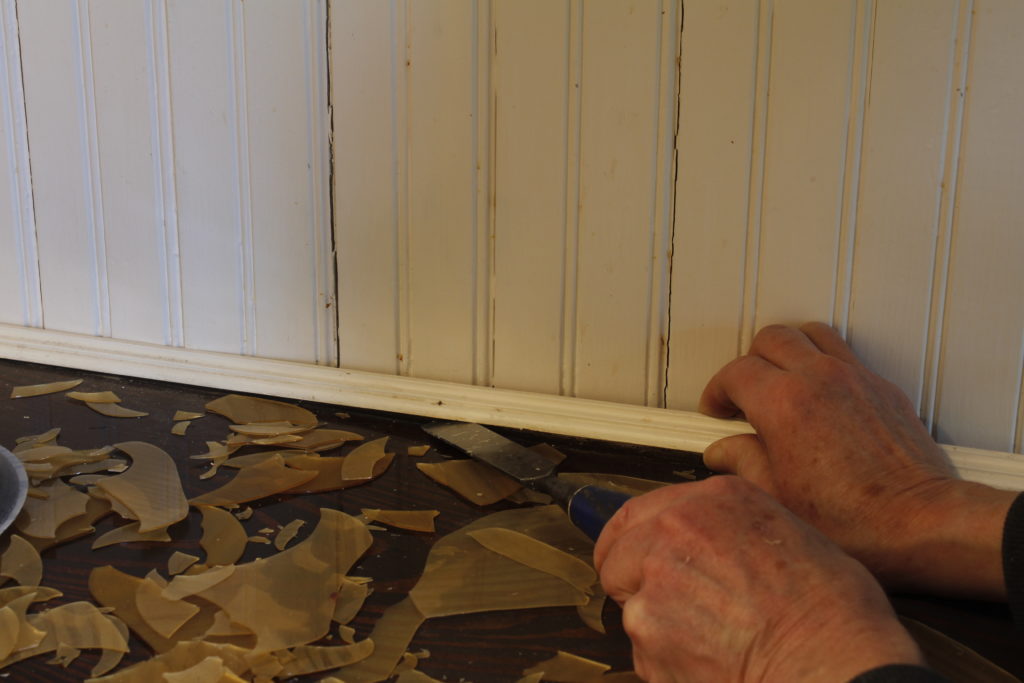
Before going too far I removed the trim at the back of the counter, a simple piece of glass bead. As is common for trim installed to hide a gap in a corner, this bead had been nailed at an angle. To remove it safely I used a wide chisel (a putty knife would have done just as well) first from behind, then from below, alternating between these positions, until it was loosened enough to get a finger behind the back. Then I pulled at 45 degrees while continuing to pry from both directions, moving along the moulding’s length until I’d removed the whole thing.
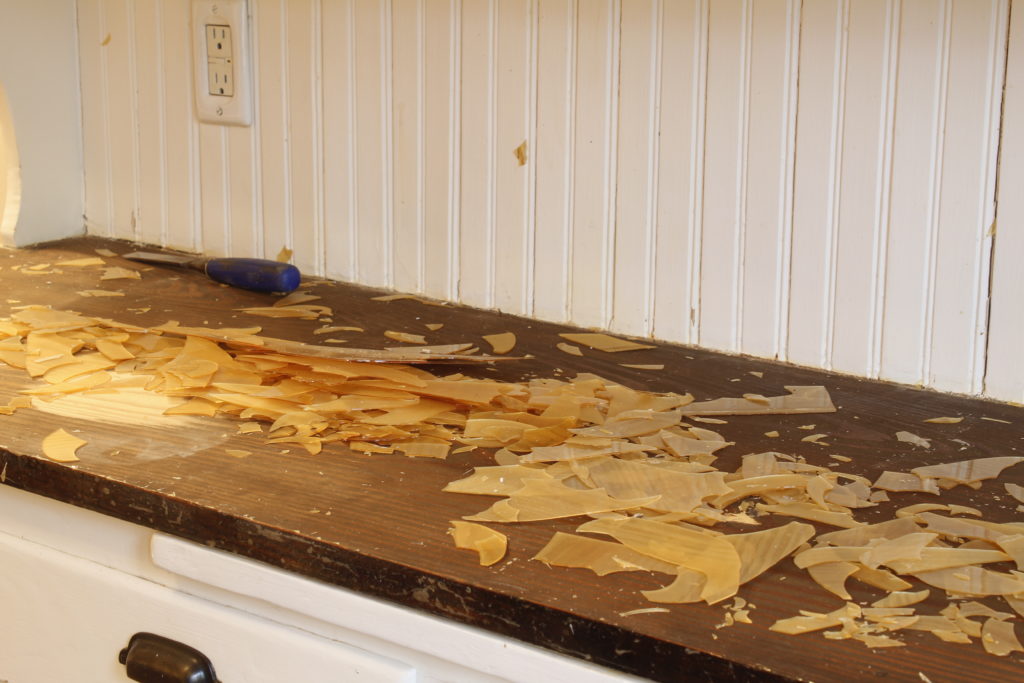
The shards of plastic were sharp enough to cause physical harm. When stripping such a finish, be sure to wear eye protection in addition to a respirator.
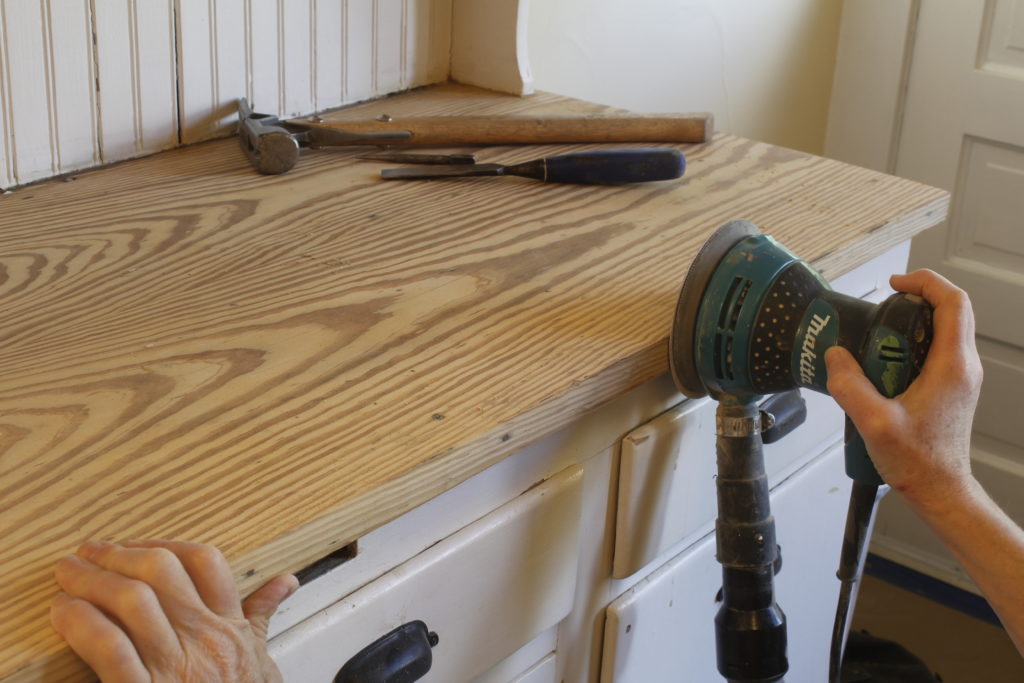
After the topcoat was entirely gone I returned to sanding, progressing from 60 through 80 and then 120 grit. Then I sanded to 120 by hand and finished with 180.
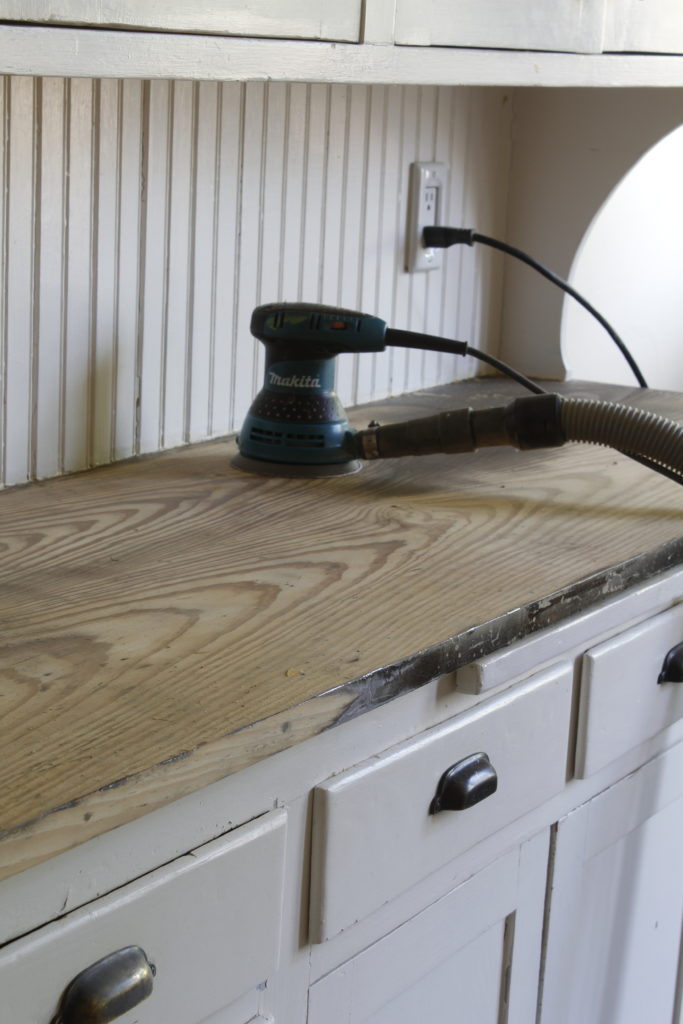
When sanding edges, hold the sander (or block) perfectly square to avoid distorting the edge. You can finish up by easing the corners; I use a piece of sandpaper wrapped around a block, which gives me far more control than using a random orbital sander.
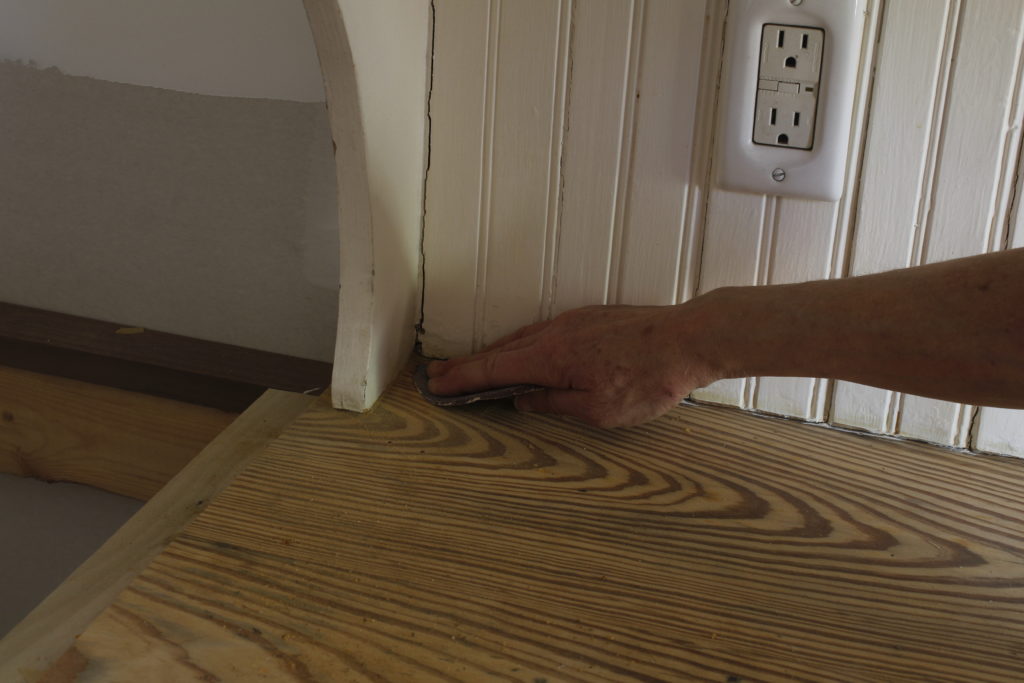
The inside corners at the back had to be scraped with a chisel in the direction of the grain, then sanded through all the grits, again with the grain.
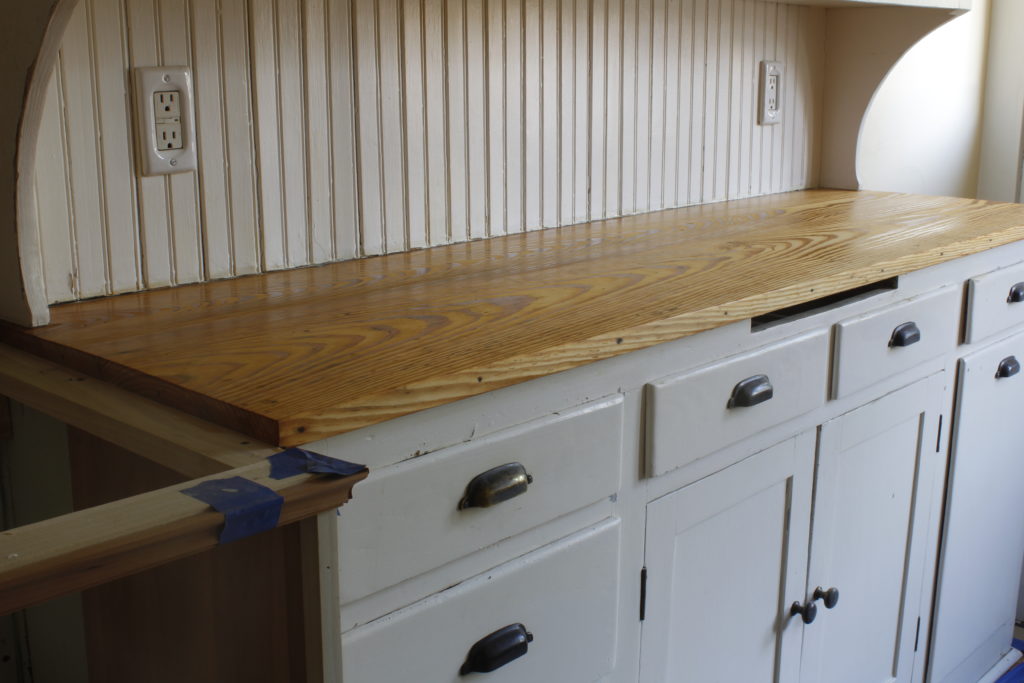
After sanding, I removed the dust with a shop vac fitted with a brush attachment, then used a shop rag with a few drops of mineral spirits as a tack cloth. When the mineral spirits had fully evaporated I brushed on a coat of Zinsser Sealcoat, a dewaxed clear shellac, to provide temporary protection from dust. I will brush on three thin coats of oil-based poly (no, it will NOT look like plastic! trust me) when dust-producing activity at the jobsite has died down.
– Nancy Hiller
Here are some supplies and tools we find essential in our everyday work around the shop. We may receive a commission from sales referred by our links; however, we have carefully selected these products for their usefulness and quality.


Looks good Nancy!