


We may receive a commission when you use our affiliate links. However, this does not impact our recommendations.
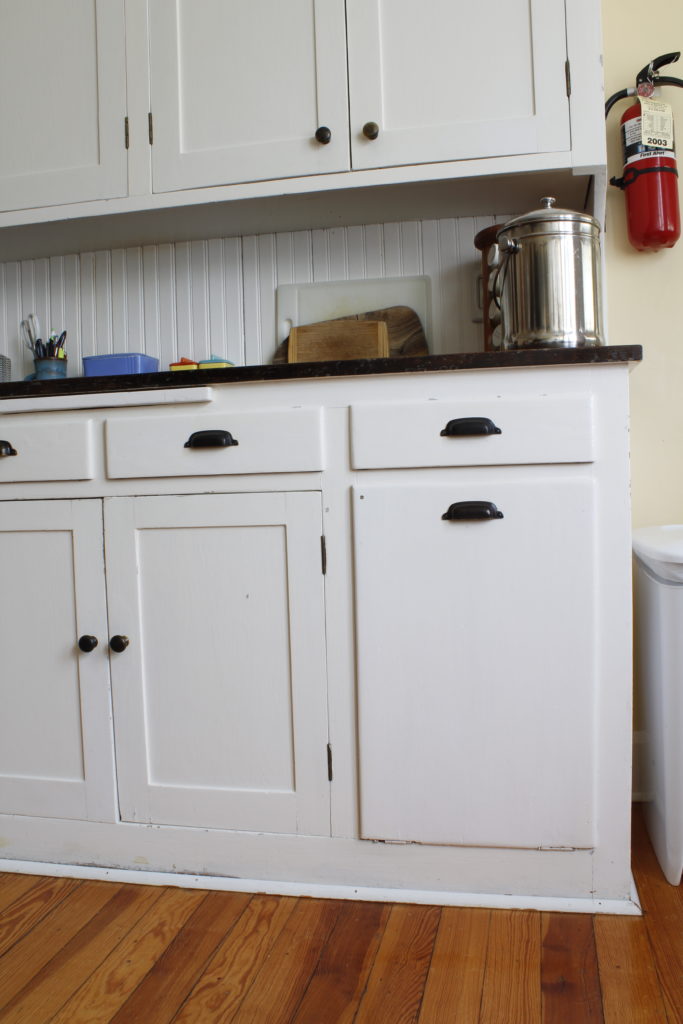
The kitchen’s original cabinet. (Its door knobs and bin pulls are not original.)
One of my current jobs involves adding a few cabinets to a 1912 kitchen. The kitchen’s lone original built-in has frame and panel doors hung on traditionally mortised brass butt hinges. The original hinges are unswaged, or what the English shops where I worked early in my career called solid-drawn brass butts. They have fixed pins and no finials. And they are a dark brown-black.
One of my go-to sources for loose-pin butts with ball tips is Rejuvenation, which sells reproduction hinges that are all but indistinguishable from their original 2-1/2″ counterparts in many an original built-in from a century ago. Although Rejuvenation is not the only source for hinges of this sort, I’ve found theirs a good balance of quality and affordability; they also have the virtue of being available in several finishes, which is handy when you’re trying to match the hardware in an original cabinet.
But as I mentioned, this job doesn’t call for loose-pin butts with finials. So I went to another regular source, Paxton Hardware – again, not the only source for fixed-pin butts, but the one I’ve dealt with for decades because of their quality, service, and prices.
One more feature I appreciate about these hinges from Paxton Hardware is that they have not been lacquered. Many manufacturers lacquer their brass to keep it looking new and shiny, but century-old brass is only shiny if someone keeps it polished. Over the years, regular handling will give new brass a nice patina, but when you’re adding new parts to an existing historic kitchen, it’s jarring to see the contrast between old and new.
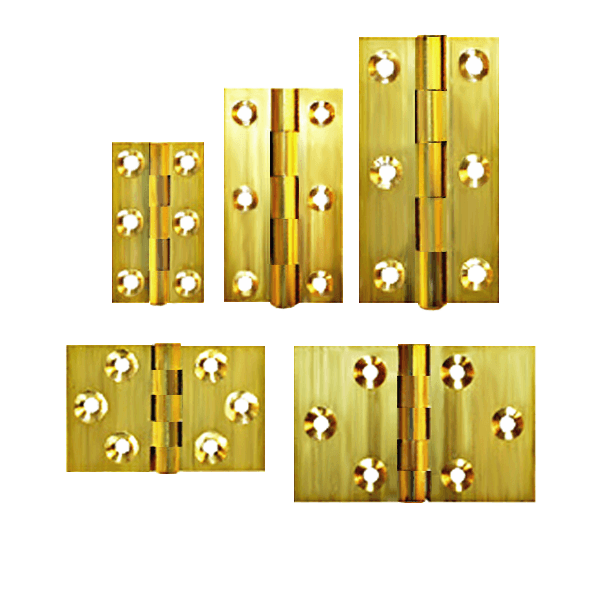
Grab your shades. Furniture hinges from the Paxton Hardware website.
You can darken brass in a matter of minutes to match the patina of 100 years. I used to soak hardware in muriatic acid, but a client introduced me to a proprietary product (listed below) that works much faster and allows you to stop the process whenever the metal reaches the desired shade. Here’s the process.
Materials
- A work surface you don’t have to protect
- Safety glasses
- Chemical resistant gloves
- Needle-nose pliers (or regular pliers; channel locks will also do)
- Shop cloths or paper towels
- A glass jar
- Antiquing solution
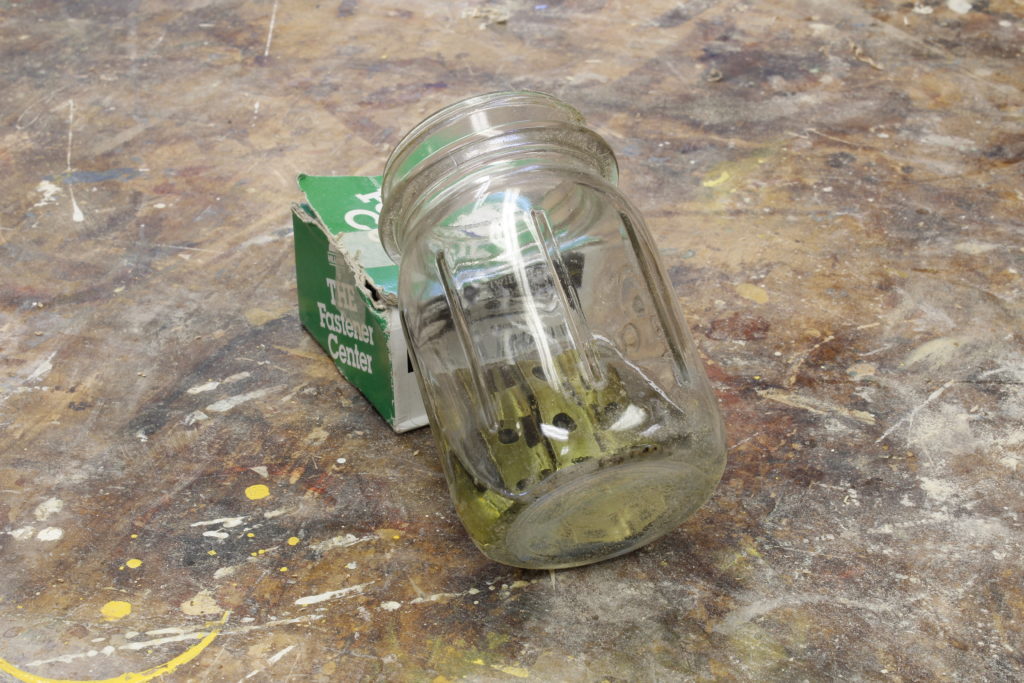
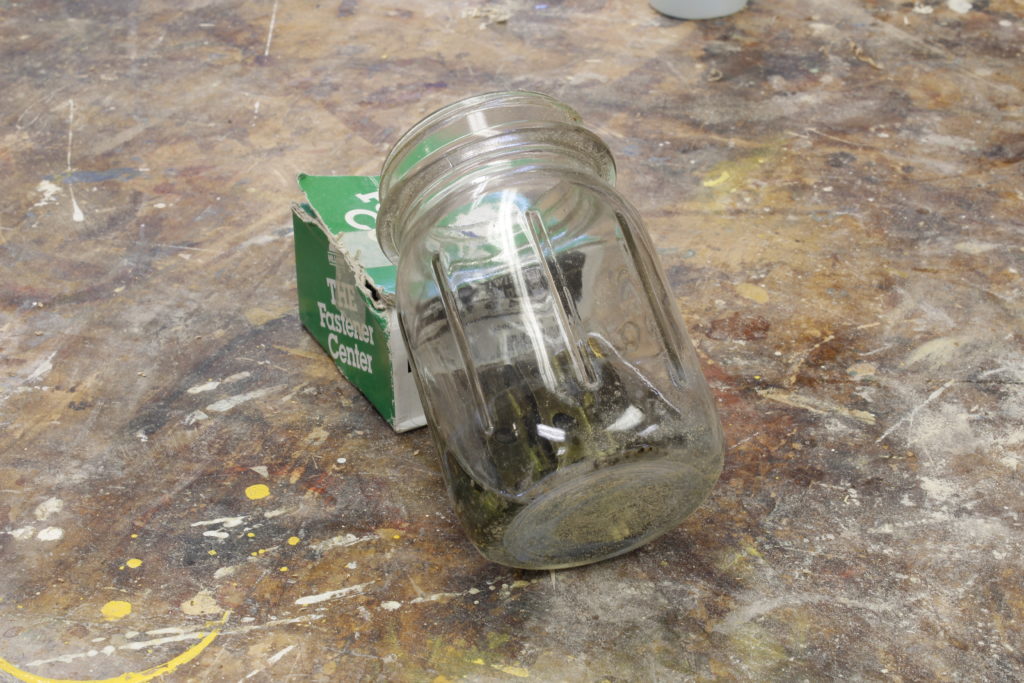
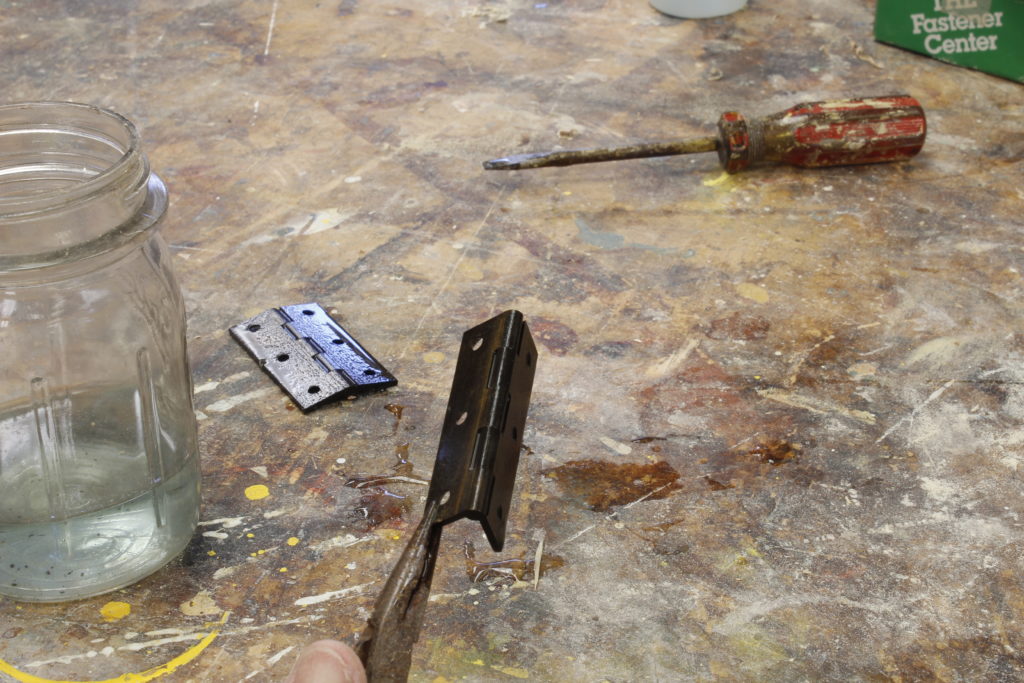
Step 1: Put the hardware in a glass jar or chemical-resistant ceramic bowl
Because the chemical solution reacts with metal, you need to use an impervious receptacle.
Step 2: Pour in enough solution to cover the hardware
In this case I tilted the jar to reduce the amount of liquid required, using an old cardboard box to support the jar while the chemicals did their magic.
Bright and shiny, but not for long
Step 3: Keep an eye on the progress
This solution works quickly – these hinges went from bright brass to dark brown-black in five minutes. Watch the progress so that you can stop it when the hardware has reached the color you desire.
A couple of minutes in: You can see the brass darkening.
Use pliers to remove a piece of hardware to check the progress. Rolling the jar (or agitating a bowl) gently to move the solution around the hardware can help create an even tone.
Step 4: Remove and rinse
Lift the hardware out with pliers and rinse in cold water. I hold the hardware under running water and rinse it thoroughly to remove the acid; any remaining acid will continue to darken the metal and may end up damaging the hardware of left too long.
Finished. This is the tone I was looking for: a dark brown-black with highlights that mimic those in my client’s original hardware.
Be sure to rinse and dry the work surface if any of the acid has dripped onto it. You can decant the acid back into the original bottle — be careful to avoid drips or spills – and reuse it multiple times. Wash the jar or bowl thoroughly to remove all traces of acid.
The hardware is ready to install when dry. Be aware that particles from the surface may rub off onto skin, clothing, or furniture. To limit this you can wipe the surface with a disposable cloth and apply a thin coat of mineral oil, then rub off any excess.
– Nancy Hiller
Here are some supplies and tools we find essential in our everyday work around the shop. We may receive a commission from sales referred by our links; however, we have carefully selected these products for their usefulness and quality.


I wondered whether the relatively small amount of liquid could be reused, and on reading the label in the image at the link you provide, it appears you can reuse it: “After use, return solution to original container…”
Darkening hardware is one thing, but if you can get a good match to existing hardware, that is impressive.
Do you have experience using muratic acid with copper? Does it work very well?
Rather cool tip. I have never done this with brass, but I have done something similar with zinc covered steel. For this I soak in white vinegar to strip off the zinc and then rub with raw flax seed oil (very thin film so try to wipe off all you can) and then I bake in the oven at 400 degrees for an hour. I can repeat this several times wiping a thin coat of oil and re-baking each time to darken. I find that 3 times gives a nice finish that appears very similar to blacksmith forged hinges. I did this for all the hardware on my dutch tool chest (hinges and handles). Just once almost makes the hinges look like antique bronze or brass.
Plus, this has the benefit of preventing rust as well.
Thanks for this tip on the brass and the additional HW sources.