


We may receive a commission when you use our affiliate links. However, this does not impact our recommendations.
 I’m a huge fan of installing a grippy liner on your bench vise. Wood faces grip your work OK. Add the right liner and the grip will become fantastic. Here are some details on choosing and installing a liner.
What’s a Good Liner?
Most people prefer leather, cork, felt or a rubber such as Crubber. Each has advantages and disadvantages. Peel-and-stick cork is fast to install but isn’t very durable. Thick felt is difficult to glue but can hold odd-shaped pieces (chairmakers love it). Leather can be a little pricey and isn’t particularly easy to glue. Crubber is also a bit pricey but seems to take adhesive better than leather.
For the last decade I’ve mostly used leather and cork. Today I decided to remove cork from one of my vises and replace it with Crubber.
 Installing a Liner
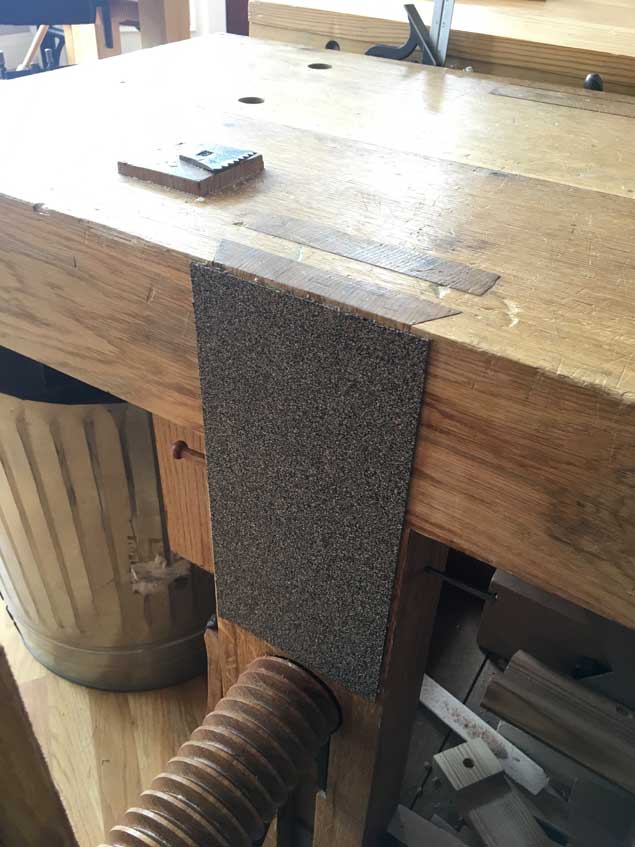
The liner can be installed on the benchtop, the vise’s jaw or both. The most important part of the installation is – in my opinion – getting the edges of the liner firmly glued. If the edges aren’t glued securely it will peel away gradually from the bench.
Second tip: Eliminate all glue-squeeze-out after installing the liner. Hard bits of glue will damage your work.
Cut the liner to size and decide what adhesive you are going to use. Epoxy is my default choice because I always have it on hand. Contact cement works, but you get only one shot to position the liner. Hide glue works fine with leather liners. Yellow glue is my last choice for a liner. I haven’t tried polyurethane glue.
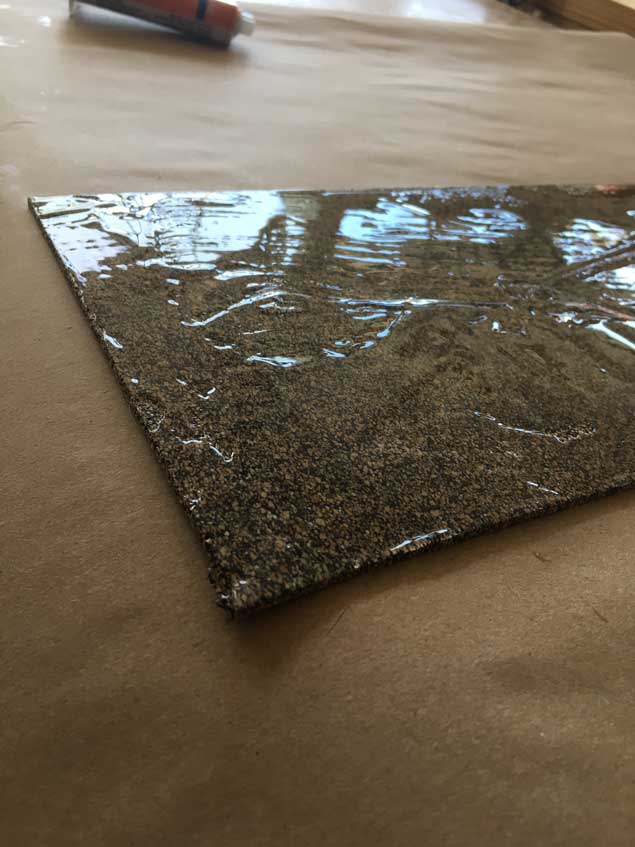
Spread the adhesive on the liner. Make sure to get glue on the edges of the liner. This will create some squeeze-out, but you can cut it away later with a razor.
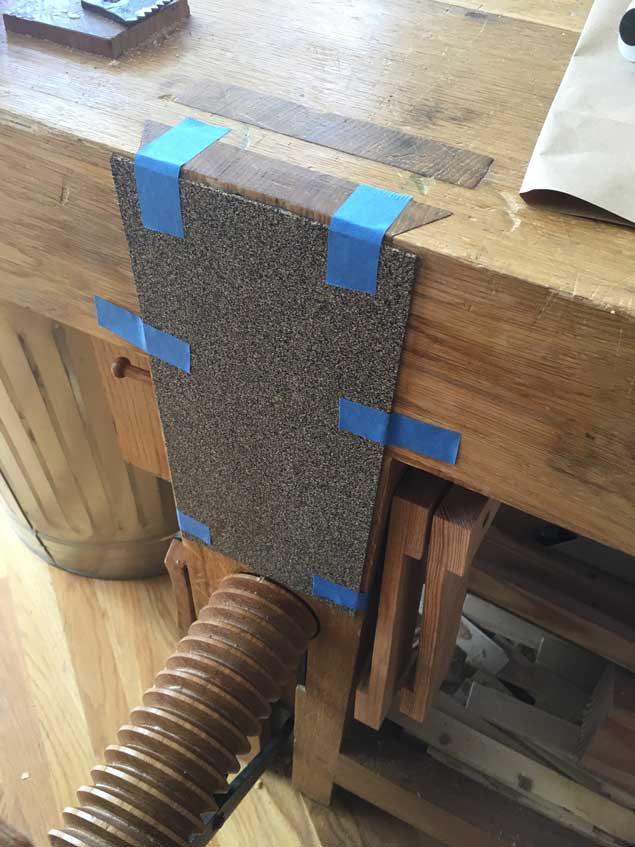 Position the layer on the vise chop or benchtop. Tape it in place to prevent it from shifting when you apply clamp pressure. You can use the vise itself to apply pressure, but I have had better luck with a caul and clamps. To prevent the squeeze-out from sticking to the caul, tape on a layer of wax paper or wax the caul.
Clamp the caul in place and let the adhesive dry. Remove the caul and cut away all the squeeze-out you can find.
So far, the Crubber performs great. It feels as grippy as suede. We’ll see how durable it is in the coming months of use and abuse.
— Christopher Schwarz
Here are some supplies and tools we find essential in our everyday work around the shop. We may receive a commission from sales referred by our links; however, we have carefully selected these products for their usefulness and quality.


Anyone ever try linoleum?
I went to ‘Tandy Leather’ and bought some suede and ‘leather glue’. The glue has the consistency and look of Elmers white glue (don’t buy the large bottle–it goes a long way!). Works well, but if one isn’t careful… you can catch (and peel) the edge of the suede when putting in a board with a sharp corner. I like the idea that it is easily replaceable. Example: I accidentally got CA glue on the edge which hardened on the top edge of the suede and was marking up pieces. I can’t imagine how much work it would be to remove the epoxy ‘glue’.
For gluing leather to wood (might work with the Cruber… not sure). Use contact cement (even the cheap DAP works). Put an even layer (starting from center of piece and spread outward) on BOTH surfaces and let dry (should not be tacky to touch). Once dry, carefully put the 2 pieces together and you’ll have yourself an amazing bond. Its a bit tricky, but if you start lining up the pieces at the top without applying pressure, you will be able to make adjustments. Once pressure is applied, your stuck! Literally. The best part is you can remove excess dried cement off with a rubber eraser.
Tip: once the first layer is dry, you can add a second border layer of cement to the leather and let that sit for 10-15 mins before bonding both surfaces
I have found 3 M Safety-Walk (no slip) 2″ tape to be a permanent and tenacious lining for my vise (really a double bench clamp with 18″ wooden jaws). You can get a 15′ roll for about a dollar a foot.I have used it for years. I also use it under my doe’s foot, or foots or feet. Whatever is correct when I have more than one
I had the same result with cork. It got chewed up fairly quickly and is difficult to remove.
Currently, I am using 1/16″ Cork-Rubber gasket material found at auto parts store, using contact cement to attach.
It’s about the same cost as Crubber and much more durable than cork.
I find it baffling that you are adamant that the front face of the bench be co-planar, yet you are advocating placing a spacer on that surface. Could you please elaborate?
to Comboprof – “crubber” is the term used by Benchcrafted for their vise lining material.
Gasp I meant crubber. Where do you buy it? Googling crubber I was unsuccessful, I do find “cork rubber sheeting”. I suppose it the same.
Last time this gripping issue came around I tried the stick on cork on my leg vise. It quickly got chewed up and made the vise unusable and had to be removed. Removing it damaged the vise surface, minor damage, but damage nonetheless. I do not recommend stick on cork. You are correct it is not very durable. I may try leather/suede. But will look for your review of crudder when you have a chance to access its durability.
Could use the vise to clamp the caul?
I’ve found that spray trim adhesive, available at auto parts stores, works great for gluing cork. It opens up your cork choices beyond the thin stuff that comes with adhesive.