We may receive a commission when you use our affiliate links. However, this does not impact our recommendations.
For this work, hand tools are better than power tools.
Fitting butt hinges is exacting work. For precision, you might think that power tools are the way to go, but I always turn to a small set of hand tools to do the job. Using a marking knife, pin gauge and chisel, you can precisely lay out and cut hinge mortises in a very short time.

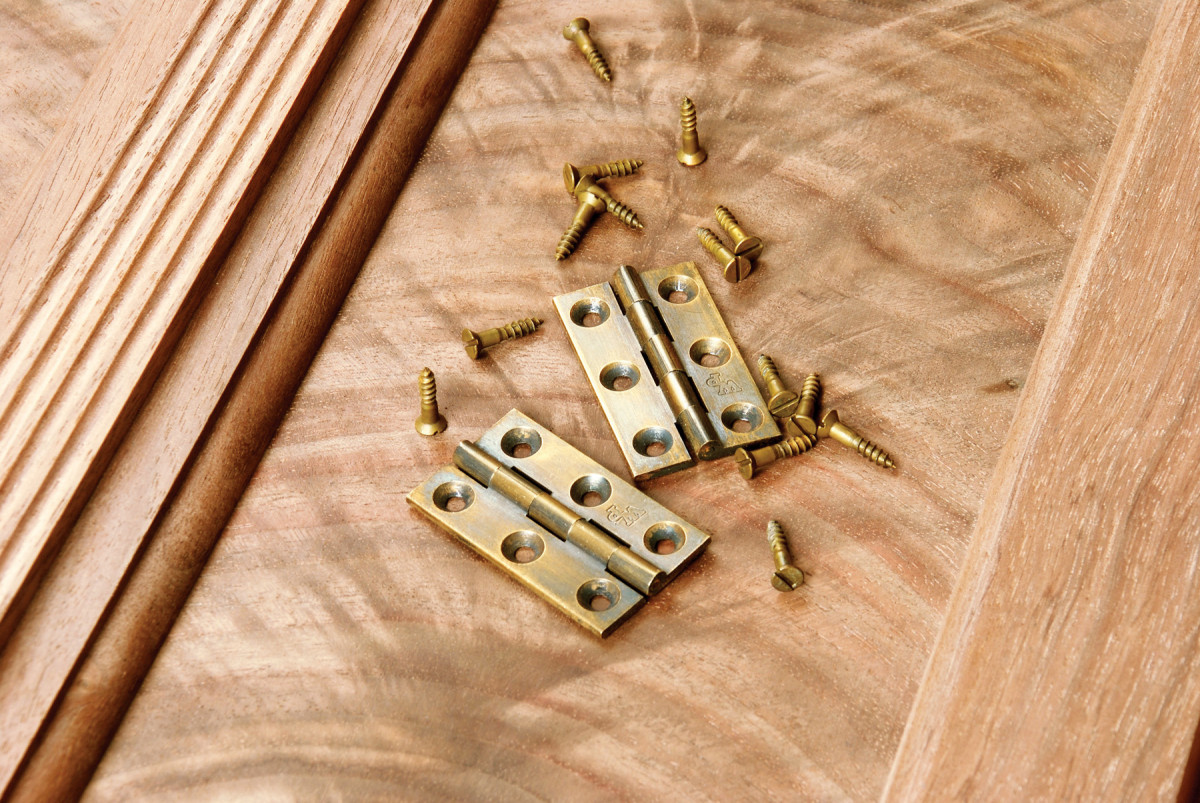
First, let me share a few thoughts with you about the hinges themselves. When selecting butt hinges, I steer clear of the inexpensive stamped variety and instead purchase high-quality extruded and machined hinges made from solid brass. The leaves of these hinges are typically thicker and stronger than those found on stamped hinges. They pivot smoothly and precisely. Look for hinges that appear proportional in size to the door and cabinet. I usually select a hinge that’s approximately the same height as the lower rail of the door.
Bevel the lock stile
After carefully fitting the door to the cabinet, with a small but even margin all around, bevel the edge of the lock stile (the stile opposite to the one that receives the hinges). A bevel here prevents the back edge of the stile from striking or binding on the case as the door closes. To determine the degree of bevel required, use a compass to strike an arc with a radius equal to the width of the door.
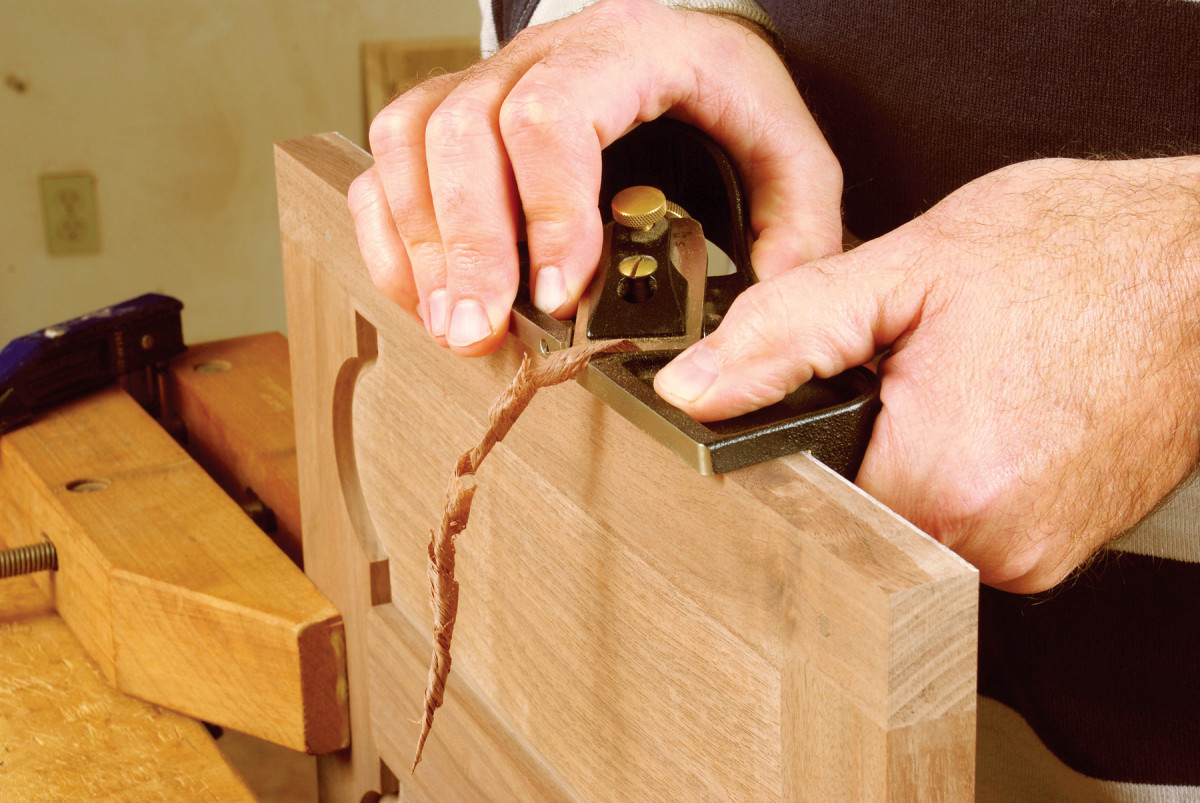
1. Fit the door to the opening before laying out the hinges. To minimize the gap on the side opposite the hinges, I bevel the lock stile using a Veritas edge-trimming block plane.
I use an edge-trimming block plane, which has a built-in 90° fence, to cut the bevel (Photo 1). I change the angle of the fence by attaching a wooden wedge to it with spray adhesive. (You could use a standard block plane without a fence for this operation, too.) Pencil a reference line on the outside corner of the stile and stop planing when the shaving reaches the line.
Mortise the door
The next step is to layout the hinge mortises on the door. First determine where you’d like to locate the hinges along the length of the door stile. This is primarily an aesthetic decision; as a rule of thumb, I position each hinge so that it aligns with the inside edge of the door rail.
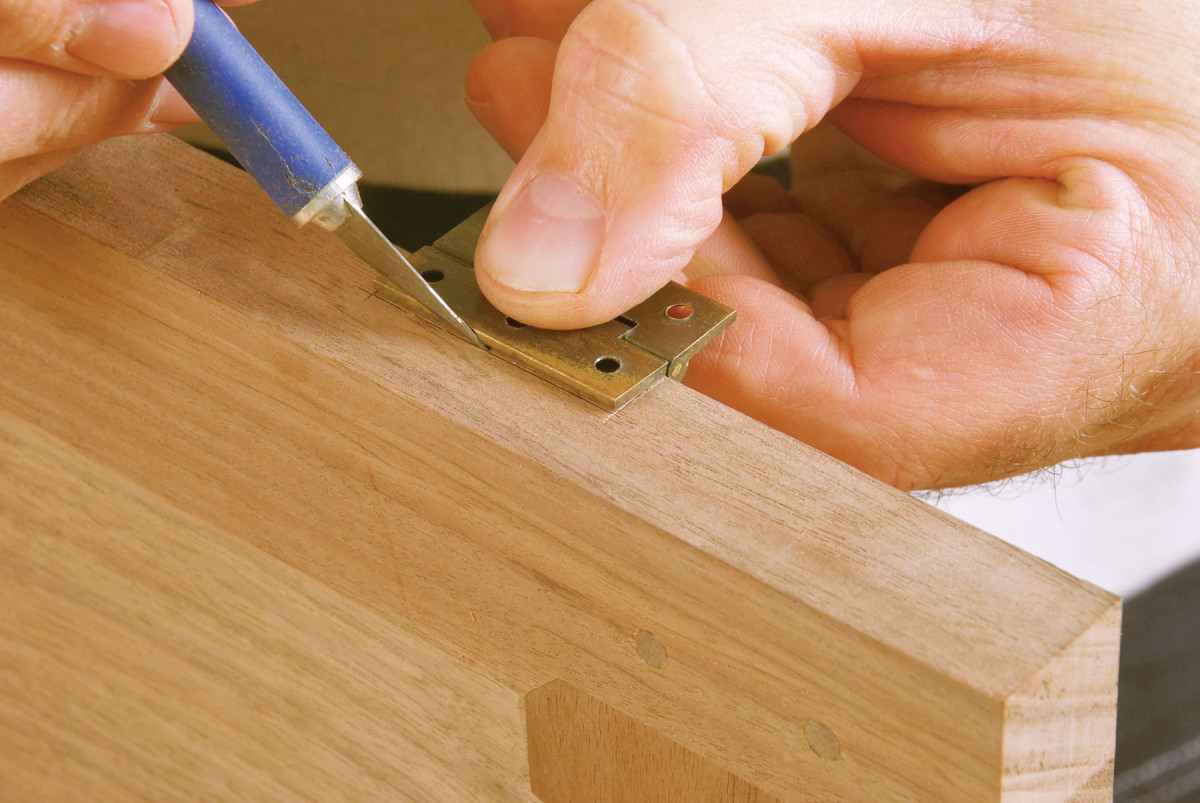
2. Lay out the mortises on the door first. Mark each mortise by tracing around the hinge with a knife.
Invert the hinge and position the barrel against the corner of the door stile. Use a thin knife to scribe lines around the hinge (Photo 2). A knife is more accurate than a pencil—it creates an incision that serves as an indelible stopping point during the mortising process. The edge of a chisel will slip into the incision; you simply cannot achieve an equally high level of accuracy by trying to cut along a pencil line.
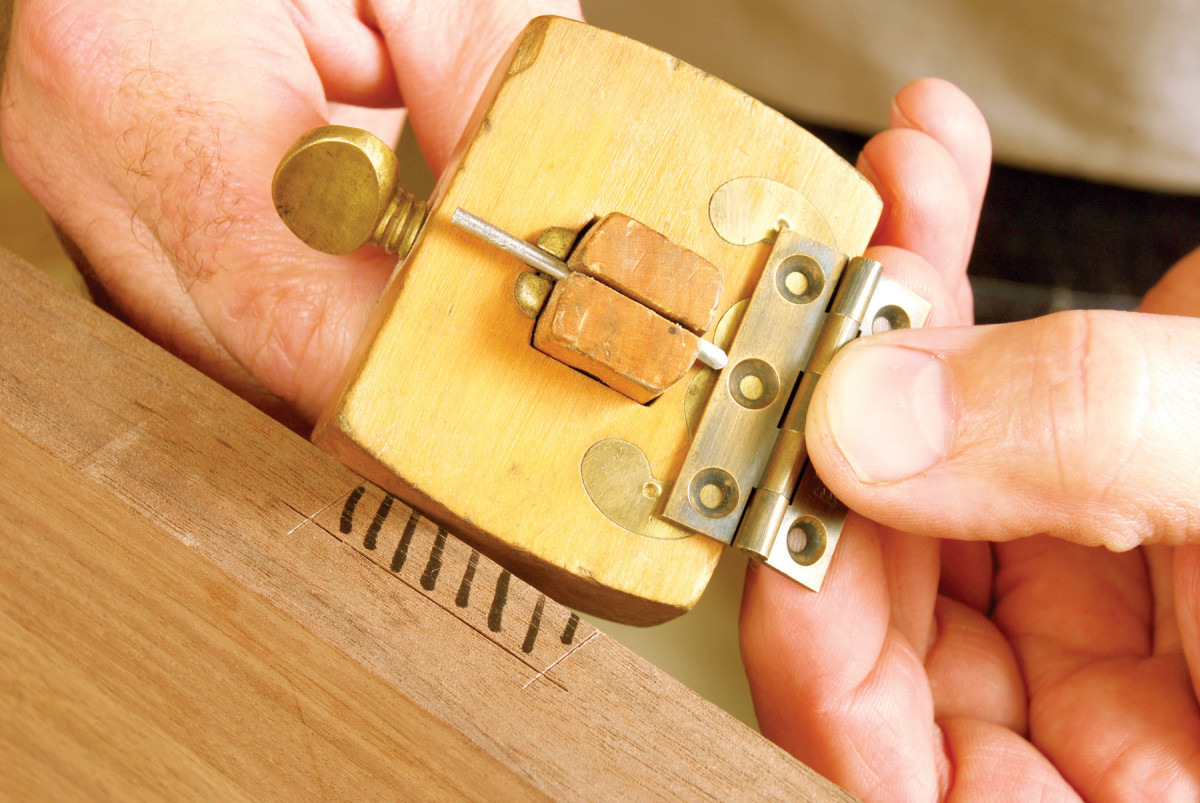
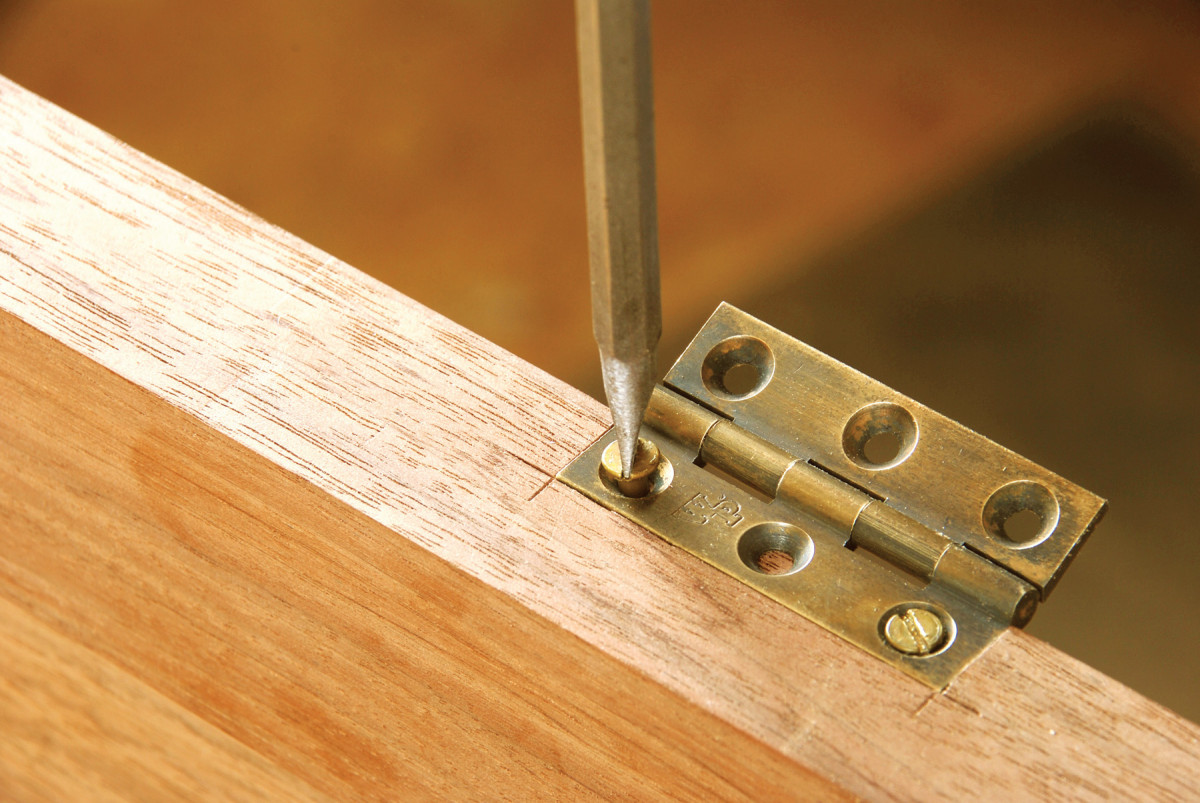
3. Set a marking gauge to the thickness of the hinge’s leaf.
Mark the mortise depth with a marking gauge. Set the gauge by aligning the end of its pin adjacent to the hinge leaf (Photo 3). Then scribe the face of the door stile (Photo 4).

4. Mark the depth of the mortises along the inside face of the hinge stile.
Begin cutting the mortise by making a row of shallow chisel cuts within the layout lines (Photo 5). It’s important to make these cuts across the grain; chopping parallel with the grain risks splitting the stile.
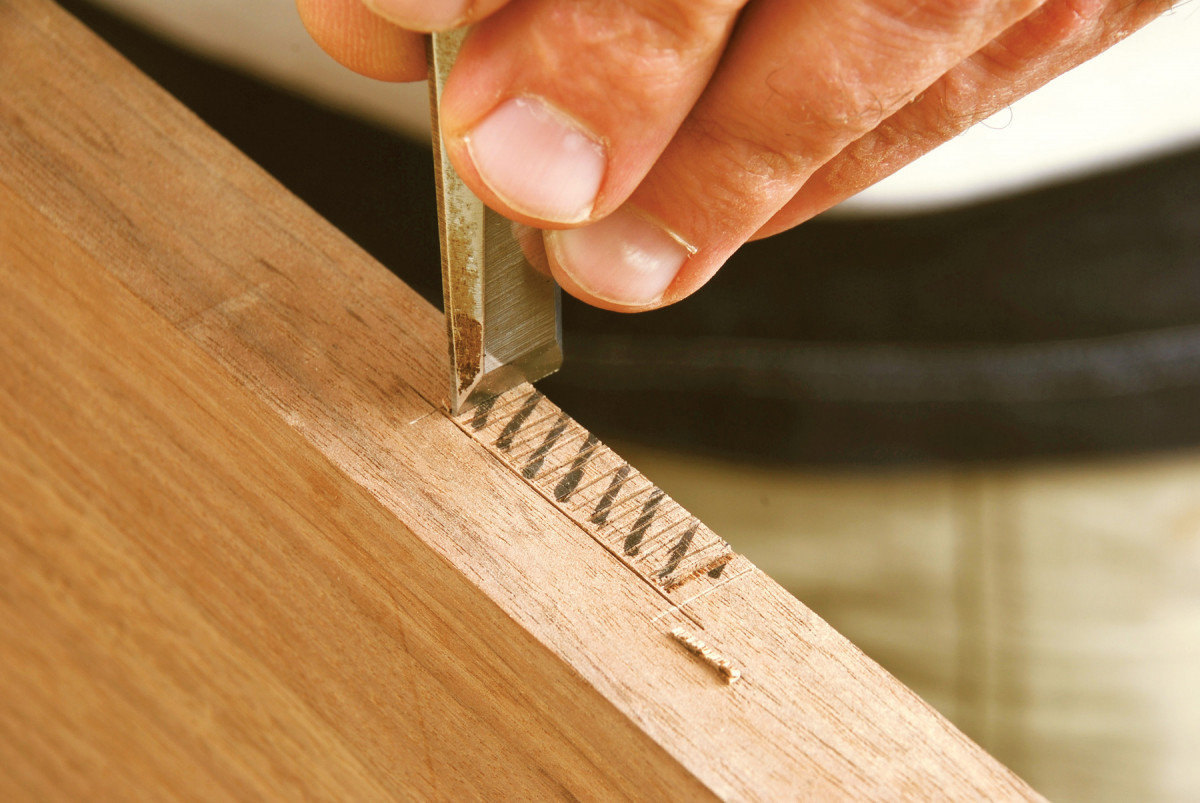
5. Make a row of shallow chisel cuts the full length of the mortise. Gently tap the chisel with a mallet for each cut.
Gently tap the chisel with a mallet nearly to the full depth of the mortise.
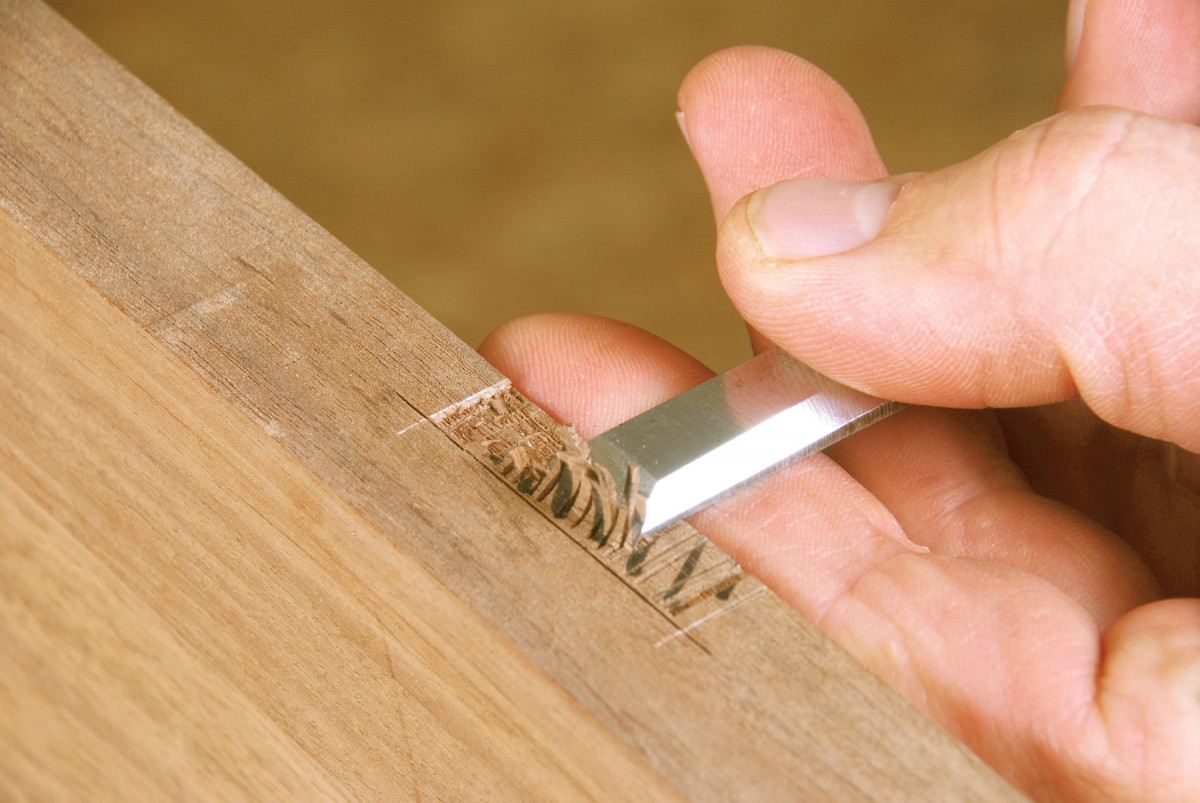
6. Pare across the grain to remove the waste. For the best control, your chisel must be very sharp.
Next, pare to the layout lines (Photo 6). Be sure your chisel is sharp; if it’s slightly dull, greater pressure is required and you may overshoot the lines.
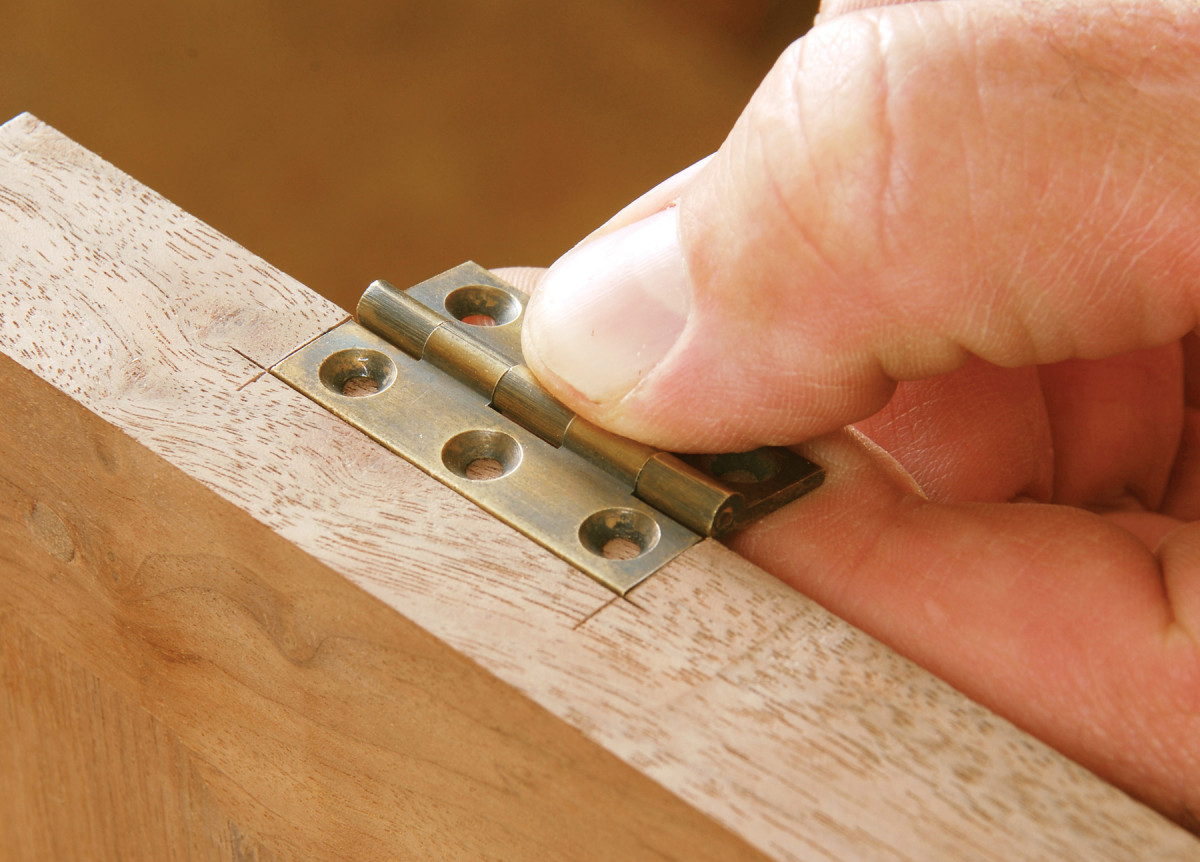
7. Test the fit. The hinge should be flush with the surface of the rail. Use a self-centering bit to drill pilot holes for the screws.
Once you reach the lines, test the fit of the hinge in the mortise (Photo 7). Ideally, the hinge leaf should be flush with the stile, but it’s best to err on the side of a slightly shallow mortise. You can easily pare the mortise a shaving deeper to fine tune the door’s fit later on, if necessary. If the mortise is too deep, shim the hinge with veneer.
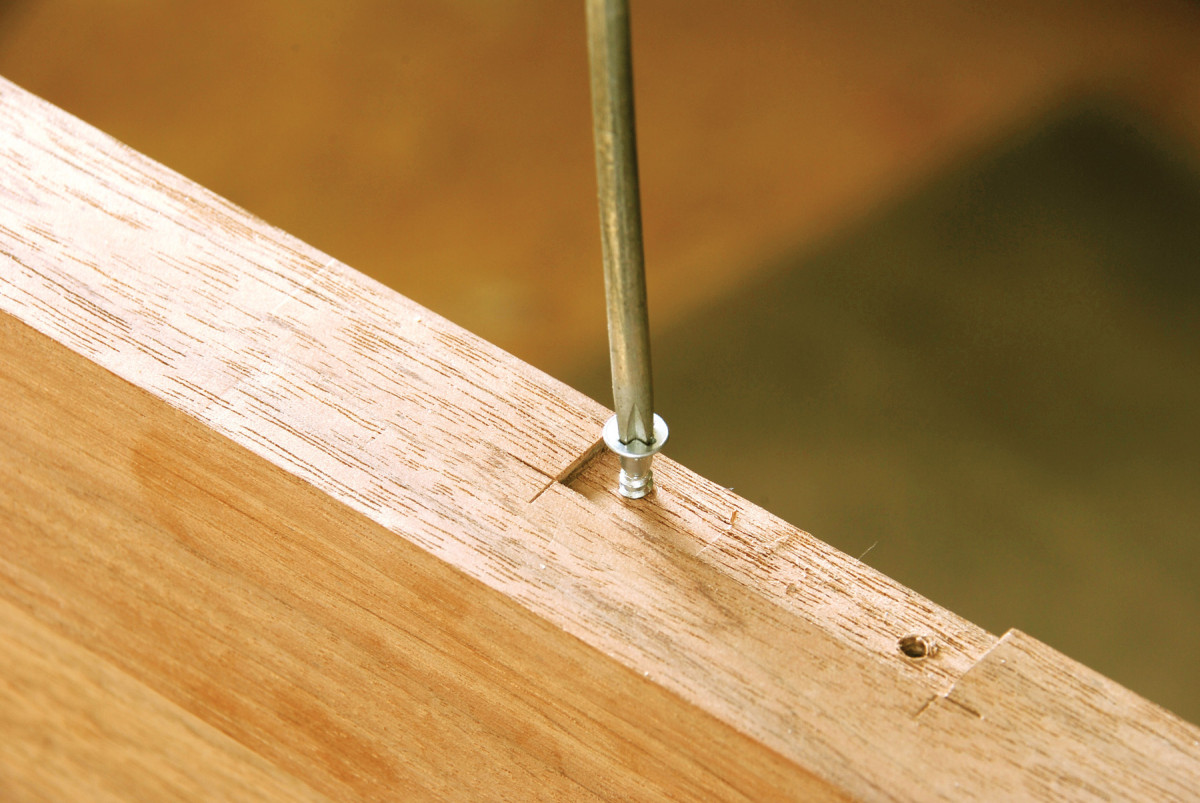
8. Tap the holes with a steel screw. A steel screw is stronger than a brass screw and is less likely to break.
Finally, drill pilot holes for the screws. Tap each hole with a steel screw (Photo 8). Tapping the holes reduces the torque and strain on the soft brass screws that typically come with hinges.
9. Install the brass screws. Mount both hinges on the door. Install the door in the cabinet, centering it with shims.
Tapping also prevents damaging their slotted heads, or worse, twisting off the screws. Fasten each hinge in its mortise (Photo 9).
Mortise the cabinet
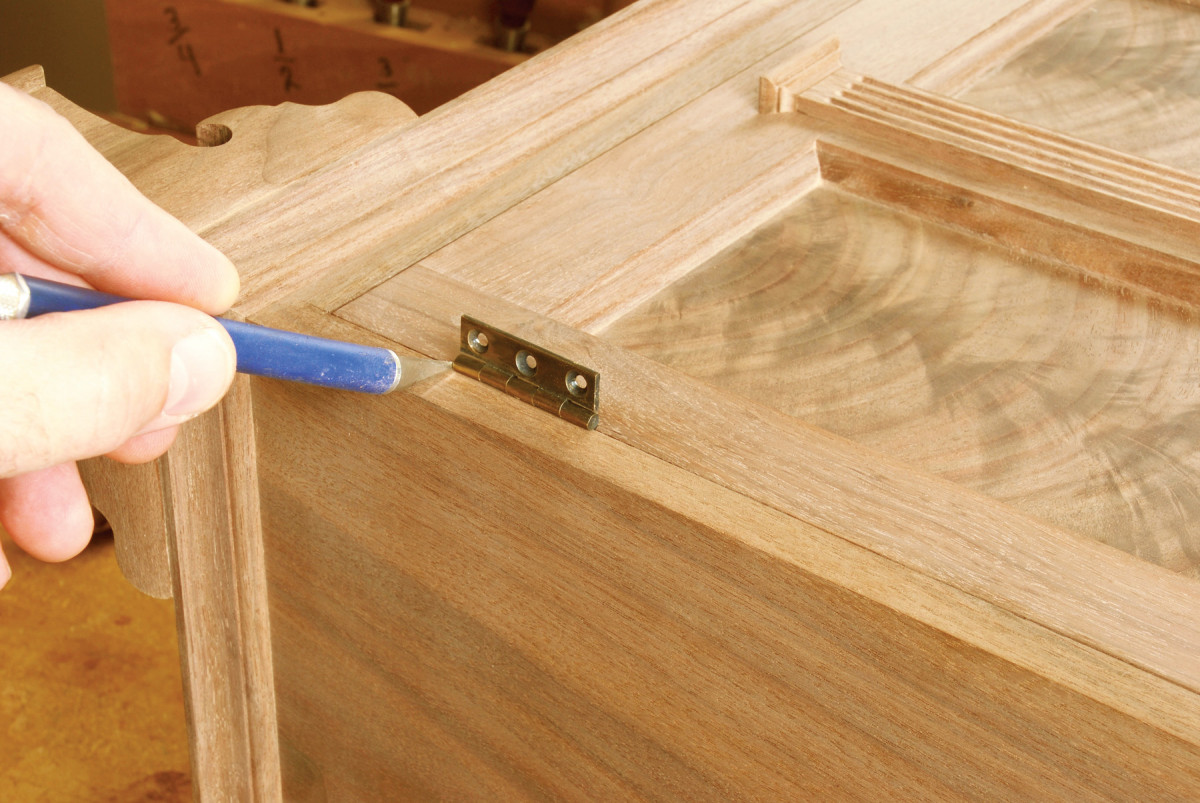
10. Mark the ends of the mortises on the cabinet’s side. Lift off the door, remove the hinges and cut the mortises using the same method as above.
Before marking the cabinet, make certain that the door is accurately positioned in the cabinet opening; if necessary, use shims of paper or veneer between the door and cabinet stiles to hold the door in place. Use the layout knife to make a small incision at the ends of the hinges to mark their locations (Photo 10). This method ensures that the door and cabinet mortises will be in perfect alignment. Once you’ve marked the corner of the cabinet stile, simply extend the incised lines.
Using the same layout process that you used on the door, mark around the leaf of the hinge with a knife. To avoid removing the hinges from the door, I keep a spare hinge on hand. Chiseling the mortises on the cabinet is easier if the cabinet is lying on the side and supported at bench height.
Once the mortises on the cabinet are cut, you’re ready to hang the door and test the fit. The door should swing smoothly without binding on the rails or stiles, but you may find it necessary to trim a shaving or two from one edge of the door. As another test, shut the door to see if it remains closed. If it springs open when released, the mortises are too deep. This causes the stiles of the door and cabinet to bind; a thin shim of veneer under the hinges will correct the problem.
Here are some supplies and tools we find essential in our everyday work around the shop. We may receive a commission from sales referred by our links; however, we have carefully selected these products for their usefulness and quality.