We may receive a commission when you use our affiliate links. However, this does not impact our recommendations.
 If you can build a box, you can build this planter. It’s much sturdier than most commercial versions, so it should last for many years. It’s also the perfect opportunity for you to try your hand at shingling.
Not sure what to grow in your planter? Start here: Meet 12 of The Best Container Plants
The opening accommodates a 30″ drop-in plastic window-box planter. They’re available at any garden store in several lengths. You could easily alter the design to fit a different-size box, or to accommodate individual pots. A square version of this planter would also look great.
 All the materials you need lie waiting at a full-service lumberyard. You don’t have to be choosy about the CDX exterior-grade plywood, but it pays to look through the cedar stock for straight, knot-free boards. If you invest in a bundle of top-grade red cedar shingles (about $45), you’ll easily have enough to cover two planters. Lower grade bundles cost half as much, but have lots of knotty pieces that you won’t use. Our total cost, including the plastic planter and top-grade shingles, was about $95.
We cleaned up the 2×6 stock and 5/4 decking with a jointer and planer and cut all the pieces to size on a tablesaw. We used a bandsaw to cut the wide bevels on the top pieces, and a biscuit cutter and biscuits to reinforce the top’s miter joints. However, you can make a simpler version of this planter without having a shop full of tools. Except for the wide bevels, all of the cuts can be made with a circular saw and a 10″ miter saw. Just make the top out of thinner stock and leave it flat (substitute 7/8″ thick cedar siding, the stuff with one rough and one smooth side, for the top and the legs). You don’t have to use biscuits in the miters. Keep the pieces aligned by pin-nailing the corners and let the weatherproof glue hold the joint. A drill, hammer and clamps complete the gotta-have tool list.
How to Build It
 1. Cut plywood box pieces to size.
2. Assemble the box. Exterior-grade plywood is often twisted, so clamp the ends (A) between the sides (B) to help get all the edges flush. Fasten one corner at a time and drill pilot holes before driving the screws.
3. Square up the box by installing the bottom (C).
4. Glue the L-shaped legs (D and E) together. Square the ends and trim them to 14″ final length.
5. Fasten the legs to the box (below).
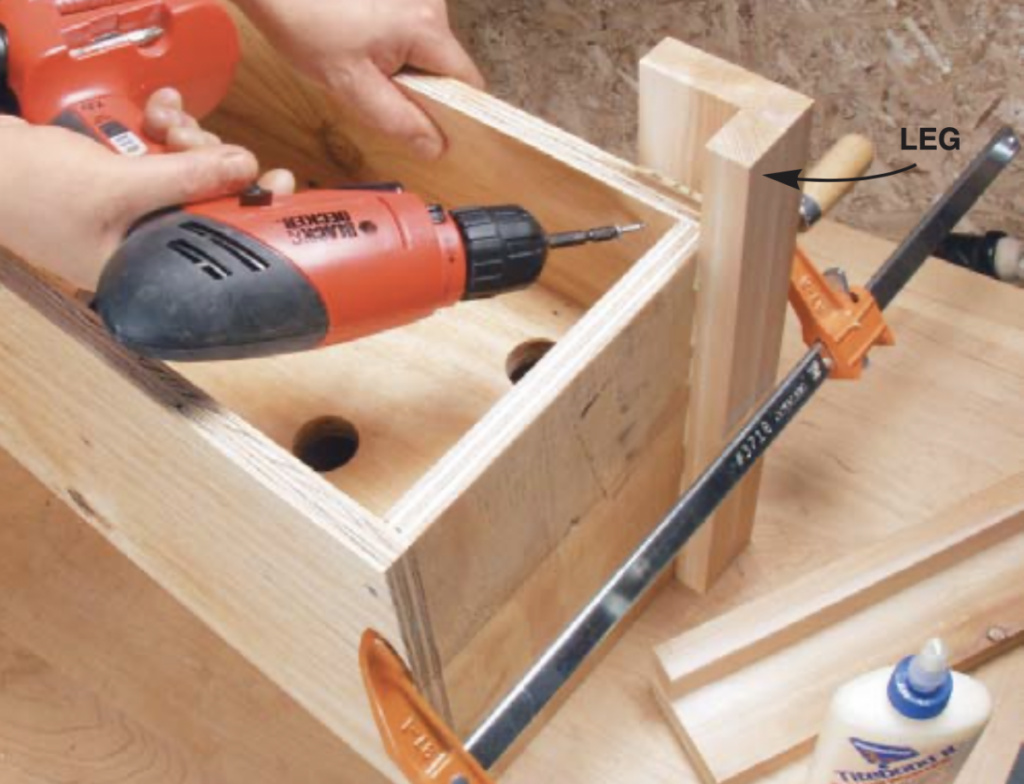
Fasten the legs to the box with the box upside-down. Keep the legs flush with the top of the box, and the planter will sit square. Apply glue and hold the leg with a clamp so it doesn’t slip when you drive the screw. Flip the assembly over and install another screw near the top. Remove the clamp and move on to the next leg.
6. To match the scale of the planter, the shingles (F) have to be made smaller. Shorten them all to 8 in., measuring from the thin edge, except for the second course, which runs full length. Trim the shingles to width as you go and stagger the seams. Keep the fasteners covered— those on the last course are protected by the overhanging top.
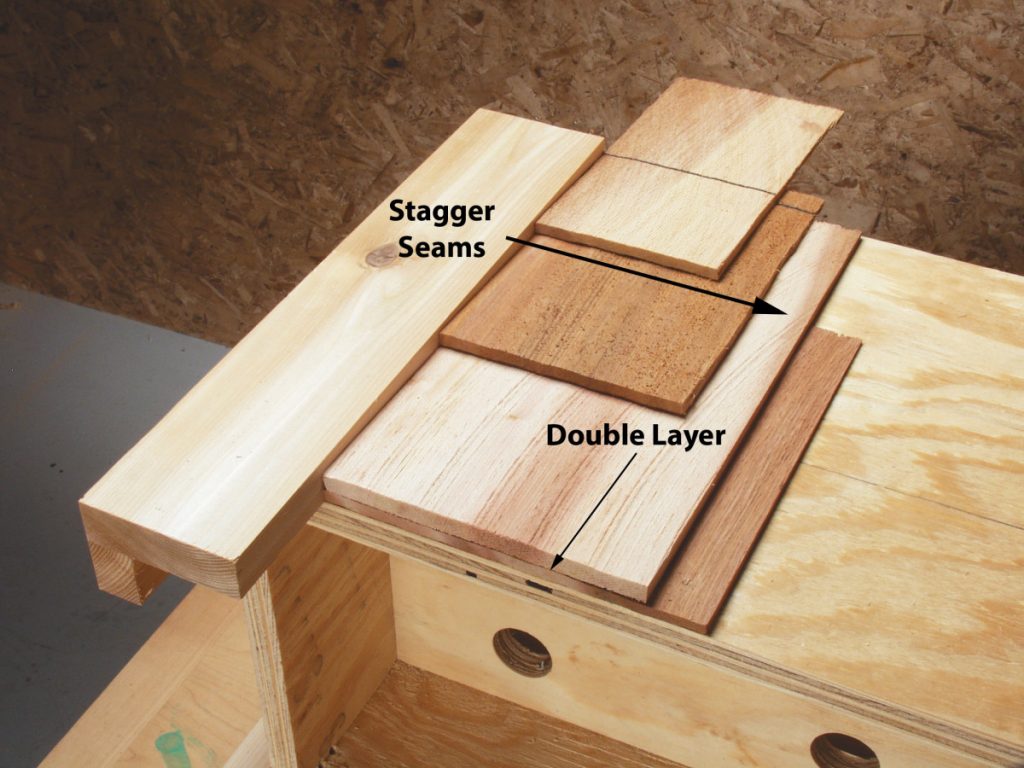
Install the shingles in four courses. Lay the second course directly on top of the first, so there’s enough pitch to make water run off. Stagger the seams from course to course, so water won’t seep in behind. Locate nails or staples so they’ll be covered.
7. Mill the top pieces (G and H, Fig. A). Clean up the wide bevels by sanding or planing, after cutting them on the tablesaw or bandsaw.
8. Measure under the rim of your plastic planter to determine the correct size for the opening in the top. Make adjustments to the dimensions given in the Cutting List and Fig. A, if necessary.
9. Cut the miters. Measure from the inside edges. Make sure both pairs of pieces (sides and ends) are the same length.
10. Reinforce the miter joints with #20 biscuits.
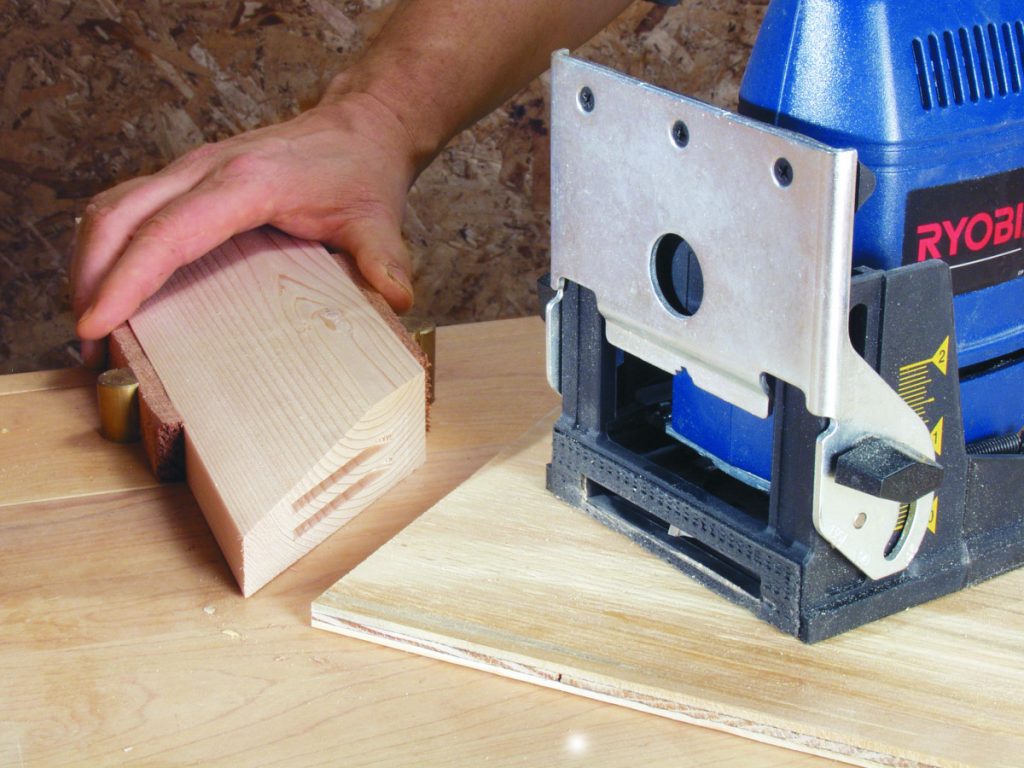
Cut stacked slots for biscuits, to reinforce the miter joints. Use a spacer to lift the second slot above the first.
11. Glue up the top.
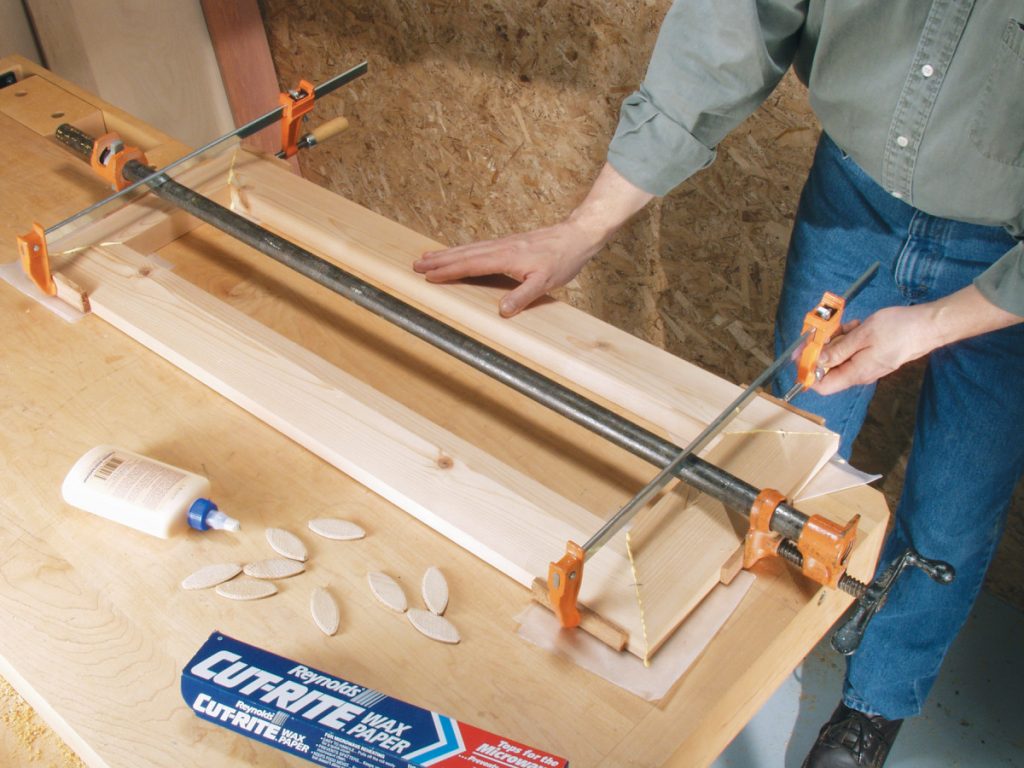
Glue the mitered top on a flat surface. Draw the joints together by alternately adjusting the pressure on the three clamps. Waxed paper keeps the top from gluing itself to your bench!
12. Add cleats (J) and install the top.
Shopping List
• One 6″ x 30″ plastic window-box planter
• One half-sheet (4×4) 3/4″ exterior-grade ply
• One bundle of 16″ #1 red cedar shingles
• 12 lin. ft. of 2×6 red cedar
• 8 lin. ft. of 6″ wide 5/4 red cedar decking
• One box #6 x 1-5/8″ deck screws
• Weatherproof glue

Here are some supplies and tools we find essential in our everyday work around the shop. We may receive a commission from sales referred by our links; however, we have carefully selected these products for their usefulness and quality.