We may receive a commission when you use our affiliate links. However, this does not impact our recommendations.
 I do only a little production work in my shop, so I don’t have a lot of jigs and fixtures. In fact, I think I can count them on one hand: a sliding table for my table saw, a shooting board/bench hook, my doe’s feet for my workbench and a V-block for planing objects to octagons.
But when I build a jig, I want it to last.
This week I decided to build a jig that is dedicated to bending crest rails for chairs. I find myself bending about 12 or more of these a year, so a jig that makes it easy (and foolproof) seems a good idea.
This jig is based on details from several bending forms I’ve seen through the years. I am certain it is nothing new. And I’m sure there are better bending forms out there. But here are some details you might want to consider if you ever need to build your own.
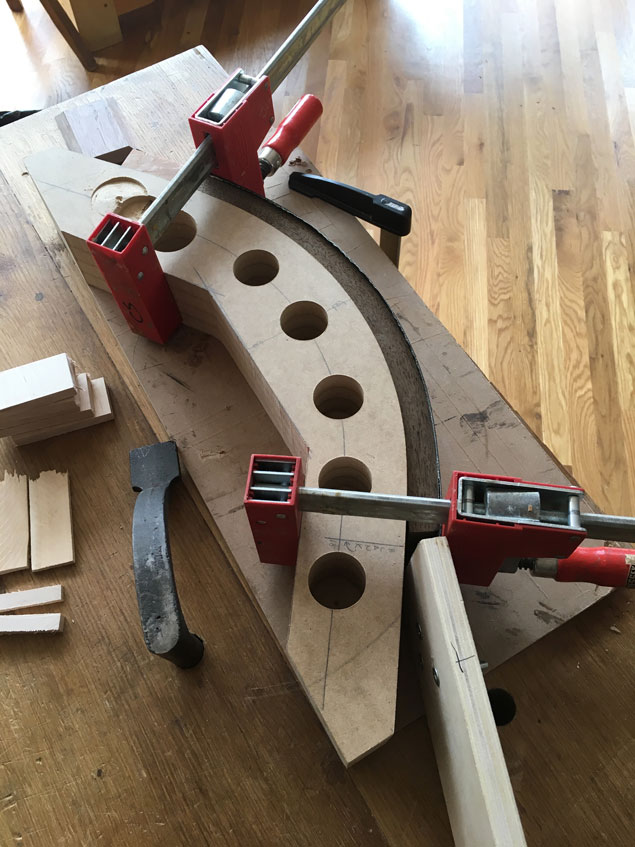
- Clamping. The form offers two ways to clamp the work, which helps me perform the job alone. When the hot stick is dropped into the form, the first thing I do is clamp it to the form at one end with a parallel-jaw clamp. As you can see, the shape of the form allows me to clamp across the end easily. Then there are a series of holes along the form. These are for F-style clamps that I can use to temporarily hold the position of the crest as I make the bend and reposition my body. After the bend is complete, the F-style clamps are removed.
- A bending strap. This form has an integrated bending strap to prevent the outside of the crest from bursting open during the bend. The strap is made from four strips of 3/4” wide steel strapping (the kind you find on boxes and pallets). The straps are attached to the form with 3”-long screws. The straps are attached to the stick on the end (which gives you leverage) with nuts and bolts.
- Stain protection. Because the strap is steel, it can stain tannic woods, such as oak. So the inside of the strap is lined with a waterproof duct tape. This also helps keep the straps in line during the bend.
I’ve done a run of crest rails this week using the jig and couldn’t be happier with the way it works. It almost – but not quite – makes me like jigs.
— Christopher Schwarz
To see other ways of bending chair parts, check out Don Weber’s great video on building Welsh stick chairs: “Build a Welsh Stick Chair.”
Here are some supplies and tools we find essential in our everyday work around the shop. We may receive a commission from sales referred by our links; however, we have carefully selected these products for their usefulness and quality.


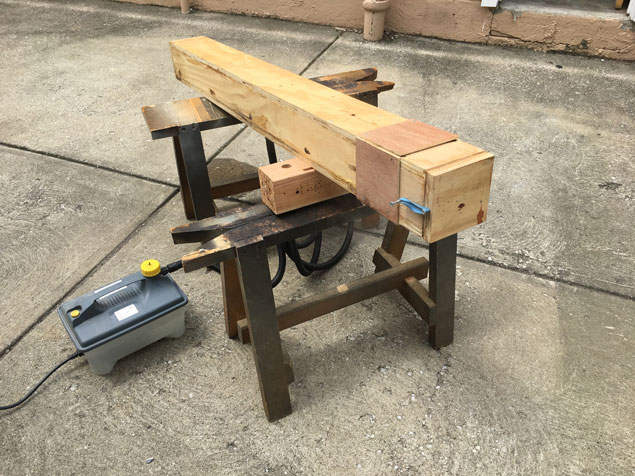
Dear Megan and Chris, Thanks for the bending-jig description and how to assemble. Now I need to know how to build the steam box. Do you have some rough plans? Or where can I get a “how to” on making the steam box?
Steve
Why would anyone want to bend steam? 😉
I can only describe my experience with Windsor chair arms, crests, and bows: Green wood works better than air dried wood. Kiln dried wood didn’t work at all for me.
Does the shape of the jig: (1) match the curve of the final design of the crest rail, (2) have an increased curve to allow for some spring back, or (3) isn’t critical because the crest rail is going to be shaped further anyway?
Gah, now I’m going to have to build this, the steel strap is a revelation. I can’t tell you how many times I’ve tried to bend crest rails and they’ve burst in the middle before I can get the form halfway closed!
It probably doesn’t help that I keep trying kiln dried wood for my crest rails but I absolutely cannot buy firewood anywhere that isn’t “kiln dried.” I even took a shot at a sopping wet log from a downed tree down the street and it still burst open.
Maybe it’s because I’m not following the recipe correctly for “Momma’s Wood Brisket” or something but I think it’s my forming technique. I think the left to right clamping along with the steel band will give me more success.