We may receive a commission when you use our affiliate links. However, this does not impact our recommendations.
 The trick to fitting wooden pieces into impossible recesses is to learn about “ticking sticks.” These simple sticks – plus a sheet of paper – can make monstrous tasks into a easy job. Here’s how they work.
“Ticking sticks” go by many names in the historical record, but they are the best technology for cutting a piece of wood to fit an odd opening. All you need to perform this feat is a pointed stick, a piece of paper and a pencil.
 The basic idea is that you use the ticking stick to “record” an irregular shape onto a piece of paper. Then you use that sheet of paper and ticking stick to draw that shape on the wood. Let’s start by describing the stick. The only thing that’s important about the stick is that it be pointed at one end. Mark one face of the stick as “up” and draw a line on one of the stick’s edges, as shown in the photos. We call this line the “tick line.”
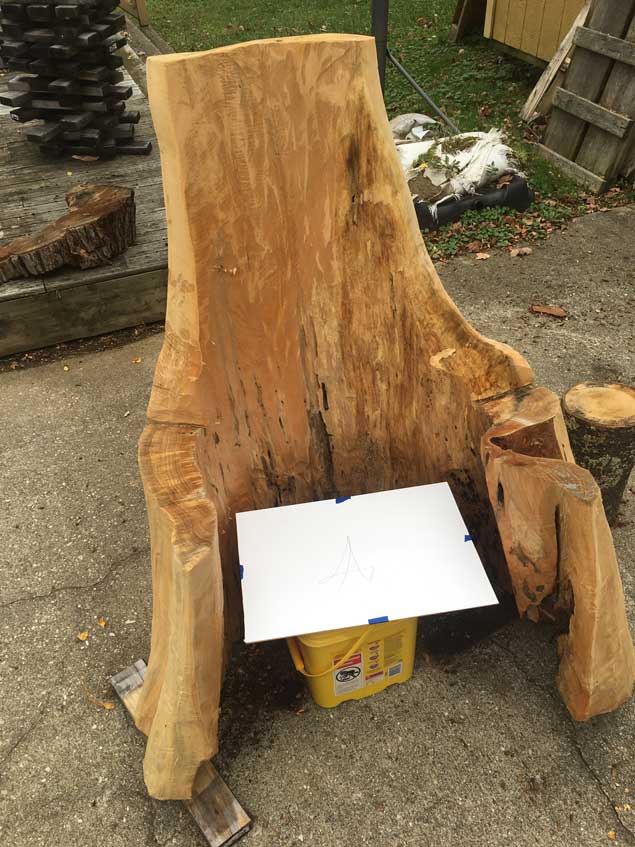
The piece of paper is almost always smaller than the opening you are trying to “record.” In this case, it’s a piece of posterboard I’ve placed inside a rotted tree trunk. I want to fit a seat inside the hollow trunk.
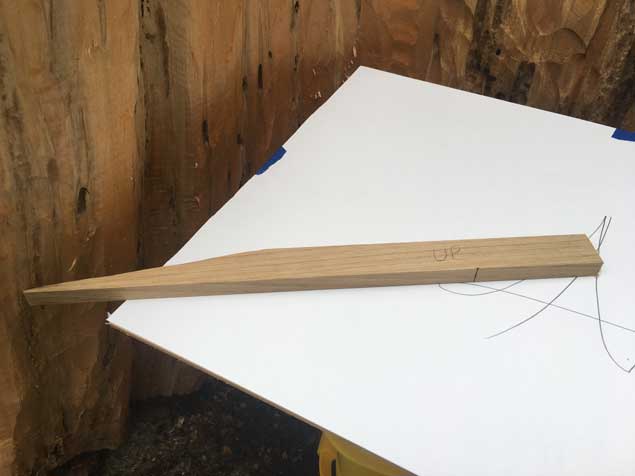
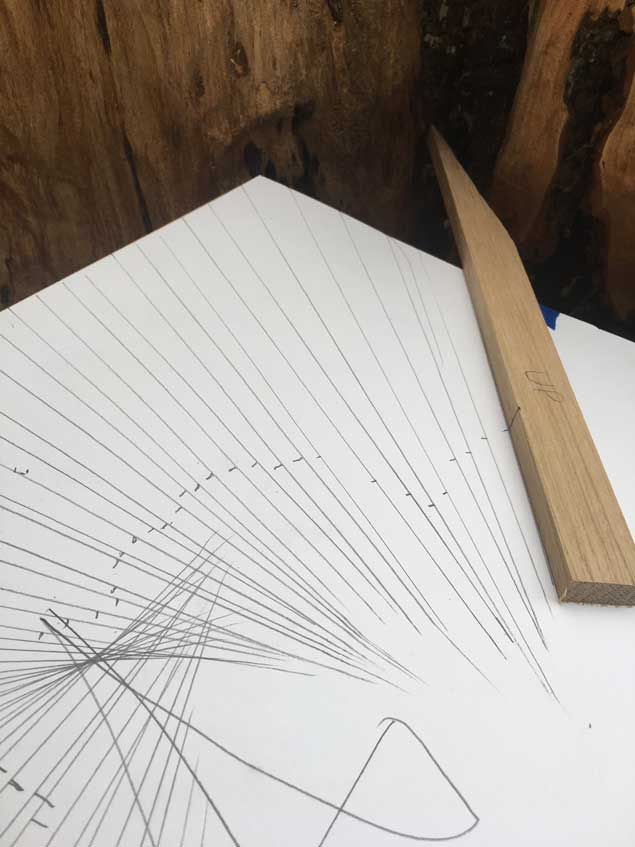 Touch the ticking stick to the inside edge of the trunk. With your pencil, draw a line along the straight edge of your stick. Then make a mark on your line – the “tick” – at the tick line. Repeat and repeat. Move the ticking stick along the inside of your irregular opening. The more “ticks” you make, the more accurate the final shape will be. For this project I think I made about 100 ticks – that’s quite a lot.
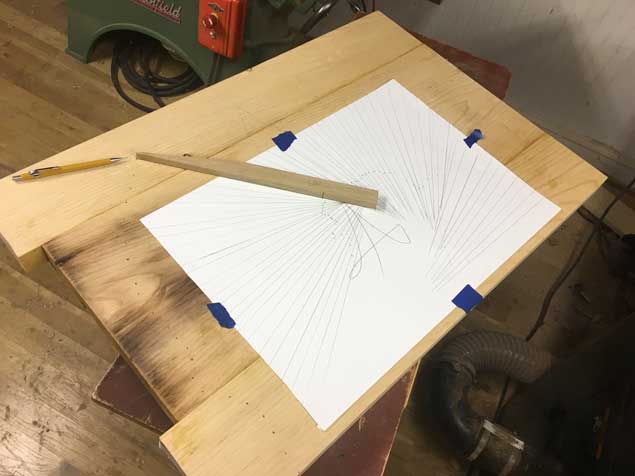
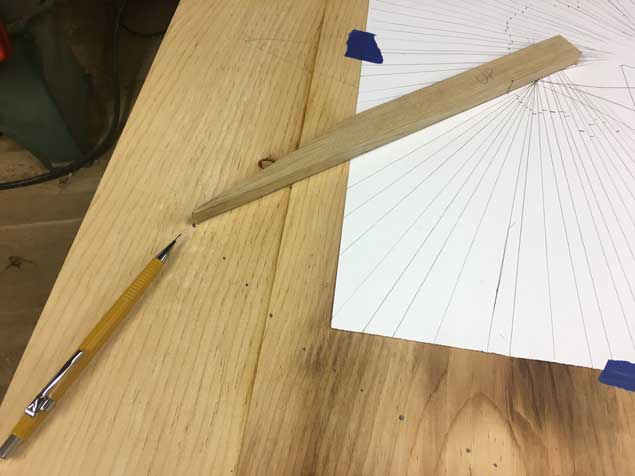 Now tape the posterboard to the piece of wood that needs to fit in the irregular hole. Use the same ticking stick. Place it on each line and line up the “tick line” with the “tick” on the posterboard. Now mark the wood at the tip of your stick. Transfer all the ticks to your wood.
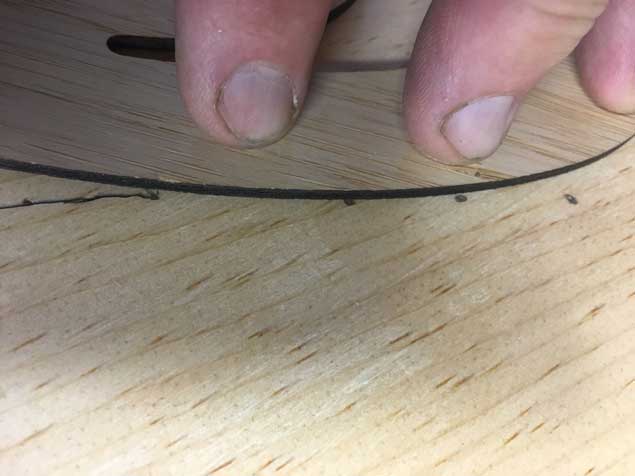 To join the lines, use a French curve. These curves excel at joining three points, Rotate each curve until three adjacent points fall on the curve. Mark them with a pencil. Work your way all around the shape, three points at a time.
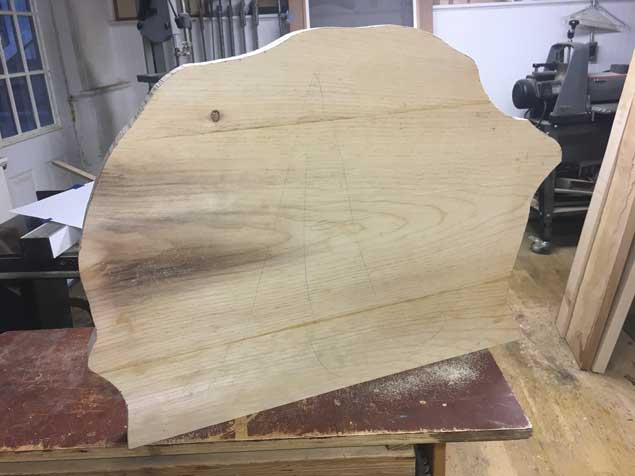 Cut along the line and you will be really close to the final shape you need. In my case, I had a small bump that had to be chiseled away. Then the seat fit right in.
So stop saving your money for a 3D scanner. Find a stick and a piece of posterboard and you’ll quickly become an expert at this old-world technique.
— Christopher Schwarz
Here are some supplies and tools we find essential in our everyday work around the shop. We may receive a commission from sales referred by our links; however, we have carefully selected these products for their usefulness and quality.



I would be honored to have this chair in my backyard, near a fire, with a nice stout in hand. For every need a chair and for every chair a need…..or something like that. If anything, its a nice change of pace. Looking forward to seeing how it gets finished.
Thank you.
I, as a carpenter, have used this before but somewhat differently for much larger surfaces one might encounter in building. it is the same process but a measurement is used in stead of a stick. Neither the length of the measurement or the angle matter. Using this method overcomes the problem of unusually shaped pieces with wide variance in lengths and being forced to use the same distance on each line. The measurement is simply written on the line.
Although there is no known cure for wanting to build a stump chair (a.k.a. Schwarz derelictitis) there are self-help therapy groups forming throughout the country. Scientific studies do continue, however, it appears years of woodworking without proper dust abatement may have contributed to the development of the malady. Until a cure is found those afflicted are advised to resist the stump chair building impulse, get plenty of fresh air and have a beer instead.
Does the stick have to be perpendicular to the wood at the place where the point touches? Like Megan, I’m trying to visualise this.
Or, is the key the combination of a line and a point, so that as long as you reverse the process correctly along the lines, it doesn’t matter if the stick is perpendicular?
Is this what quantum theory feels like?
Help me if you can . . . I’m confused!
When using a French Curve, like the wonderful layout tools from Crucible Tool (plug intended from true appreciation), do you:
1 ~ Fit the curve to three points and draw between the first two, or
2 ~ Do you draw a line between all three?
Your guidance will be appreciated !!!
What are you going to do with that thing? My suggestion is to donate it some outfit in Estonia or Finland that saves stray cats. That way, you kill two birds with one stone. Help a cat and send that thing so far away you’ll never see it again.
Fascinating!
Is there a discussion somewhere about what is the best wooden chair design? I would like to read it.
I remember how much trouble I had wrapping my head around this when Carl wrote about it in 2010 – so you kindly did this video for me 🙂 https://www.popularwoodworking.com/woodworking-blogs/chris-schwarz-blog/new-video-fit-doors-with-ticking-sticks
You need to make a wooden crown, get a scepter and some regal looking clothing once it’s finished.
Thank you for sharing…as soon as I saw the insta post, I was thinking how the heck is that seat fitted–really cool technique. In the next post, can you share how you routed the groove to hold the seat 🙂
Very nice. But I don’t have any poster board with an “LA” on it…
. . . And the dugout chair is looking amazing – such a unique, creative piece.
Very helpful technique. Thanks for sharing!