We may receive a commission when you use our affiliate links. However, this does not impact our recommendations.
In previous posts, I drew the basic 2D curved shape for the BARN Workbench vise chop using CAD software. Because I was still at the beginning stage of the project, I also designed and built a jig that holds the blank stock during machining on a CNC. Now that the basics are out of the way, it’s time for the fun part: Turning a simple 2D shape into a 3D vise chop.
Here’s the 2D shape we started with.
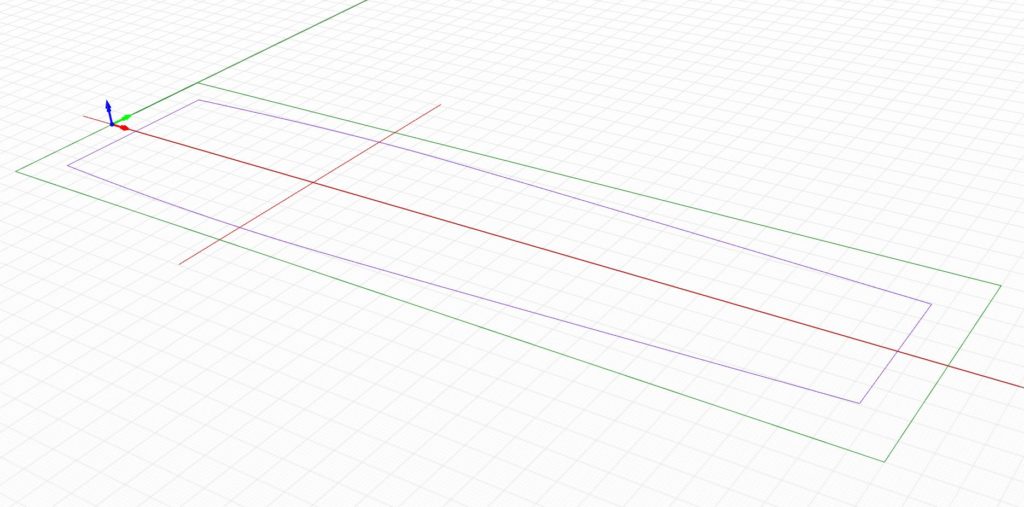
That purple line, with the red guide lines in the middle, is the basic shape of the vise chop and the basis of all the 3D work to follow.
Now, let’s take that 2D shape and use it to create a 3D object. One way to do this is a process that’s almost universal amongst 3D CAD programs. We’ll use the extrude function to turn the 2D lines into a 3D form. Essentially, as you’re pulling the lines up to a chosen height, a surface is formed along your lines. When you’re done, you have a 3D object. In our case, I extruded to the height of the blank vise chop, 2.75”. Voila! Instant 3D. Extrusion may be simple CAD process, but it’s one that’s particularly useful for woodworkers. Furniture makers in particular, will use it often.
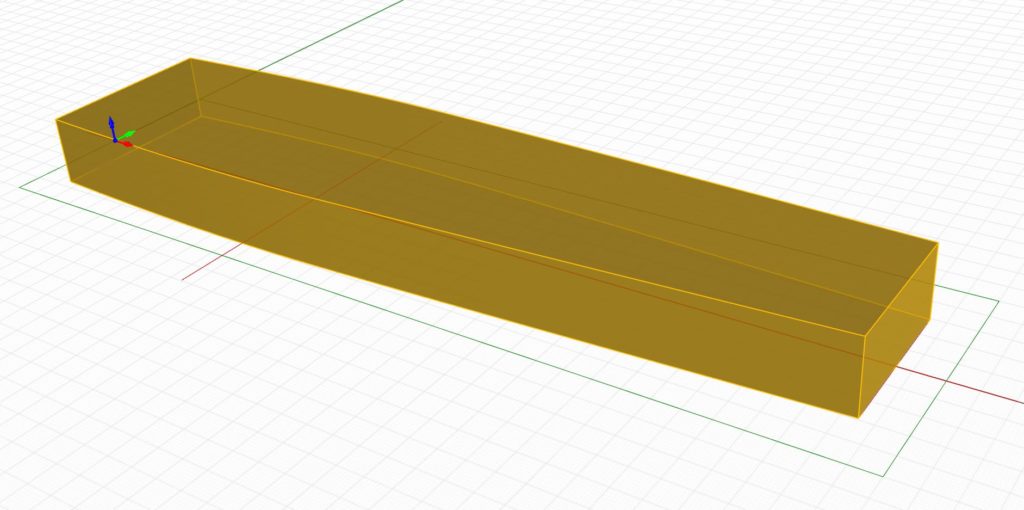
Extrusion is a simple but powerful process available in any 3D CAD program. I extruded the base shape of the chop to 2.75″ thick to create a 3D model. It works, but the result is thick and clunky. If we’re going to create cool 3D surfaces, we going to need to refine this a bit.
Above is the extrusion of the vise chop. Yes, it works, but from a designer’s perspective, it’s thick, flat and pretty clunky. We need to taper and soften that top surface a bit — something we can do with our 3D tools.
I’d like to create a 3D surface that curves on all sides. First, from the front view, I’ll draw a tapering curve from the top (left side) to the bottom (right side) of the vise using a single curved line. The peak of the curve is at the centerline of the vise screw’s location.
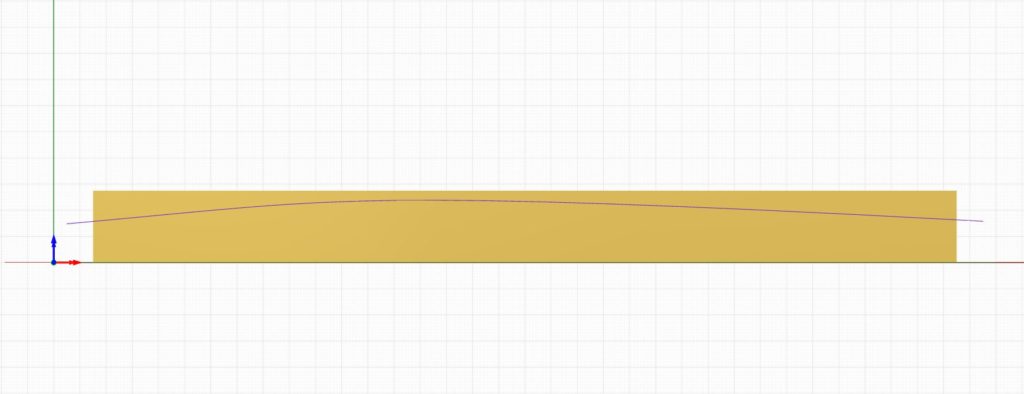
From the front view, I draw a new curve line that sweeps from left to right, peaks at the vise screw location and then slowly tapers down to the foot of the chop.
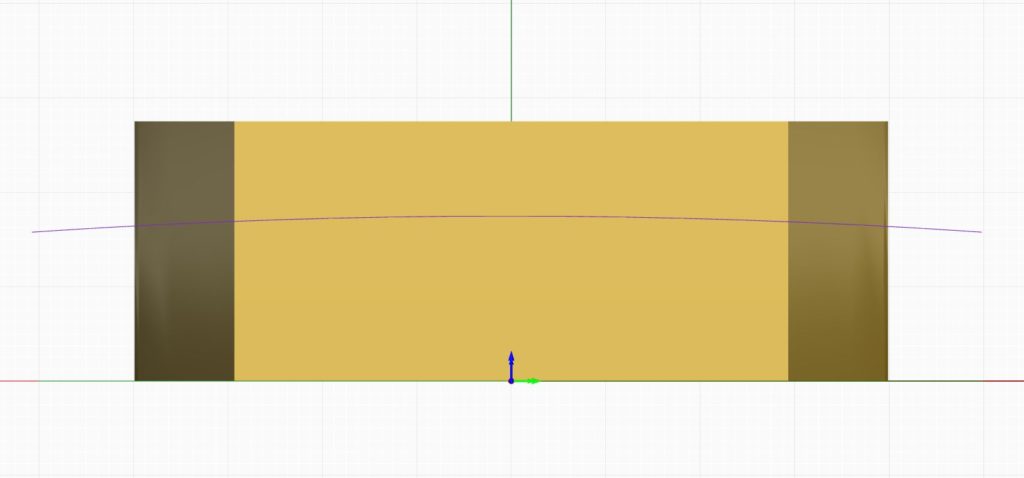
Time to soften up the top and bottom profile. Just a gentle sloped symmetrical line from the center out to the edge of the blocky shape.
Again, thinking in 3D, I do the same from the right view where I can see the bottom and top of the chop. In this view, the vise is symmetrical, and that makes it easy. So, I draw a smooth taper from the center out to one side of the chop and mirror a copy of it over to the other side. Note: As in previous drawings, I’m using center construction lines as a visual aid to keep everything lined up.
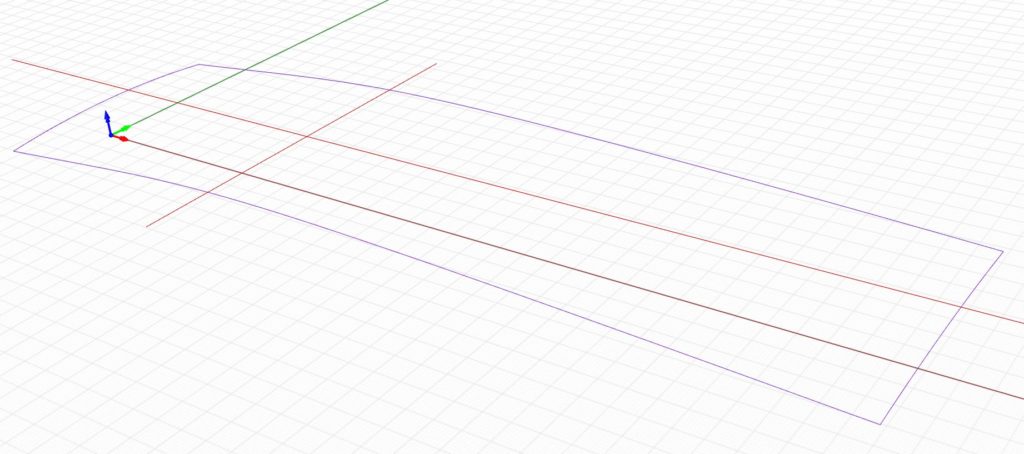
After copying the curved lines or the sides and the top and bottom curves, I connected them at their end points. From this perspective view, you can see the soft curves flowing in all directions. Time to make it into a surface.
Taking a bit of a short cut in my explanation, I make copies of the sides and end lines and connect them together at their end points. Above is what the four curved lines look like from a perspective view. Now, using a surface creation CAD tool (Sweep 2 Rails, in Rhino3D) I use the four lines to create a sweeping, curved 3D surface.
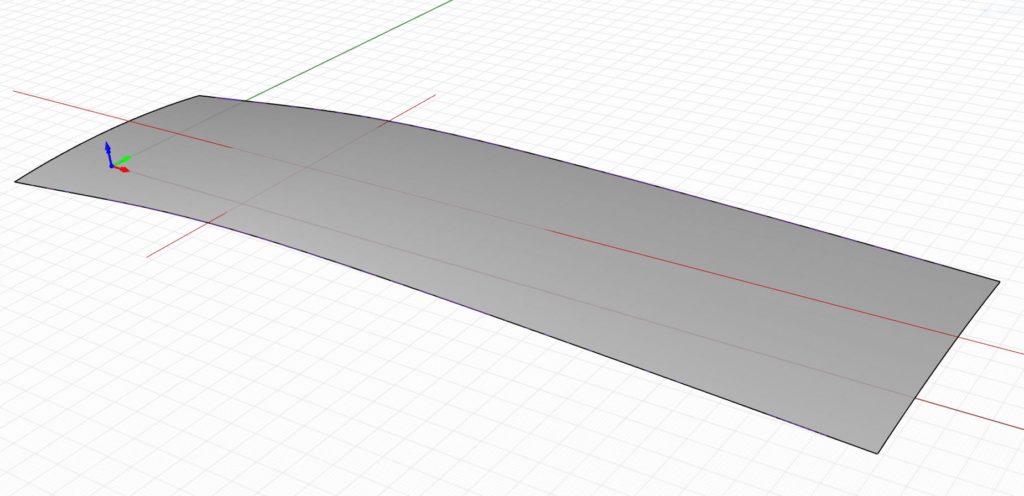
Now for the magic of surface modeling. Using the four lines, I create a surface that flows along all four curves using the Sweep 2 Rails routine in Rhino3D. Other 3D CAD software can do something similar with various lofting techniques.
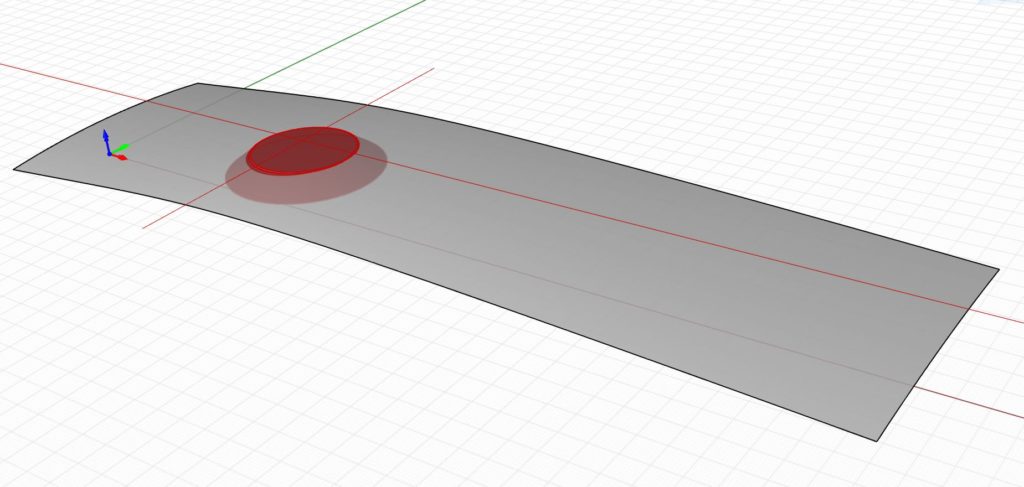
As long as I’m working on the base surface, it’s time to add one more detail. Where the vise screw hub is mounted, I need a flat, round area for the hub to rest. So, I created a truncated cone, because it’ll slope gently into the base surface. I just need a little bit of the top. I softened the top edge a bit and poke it through the newly created curved surface.
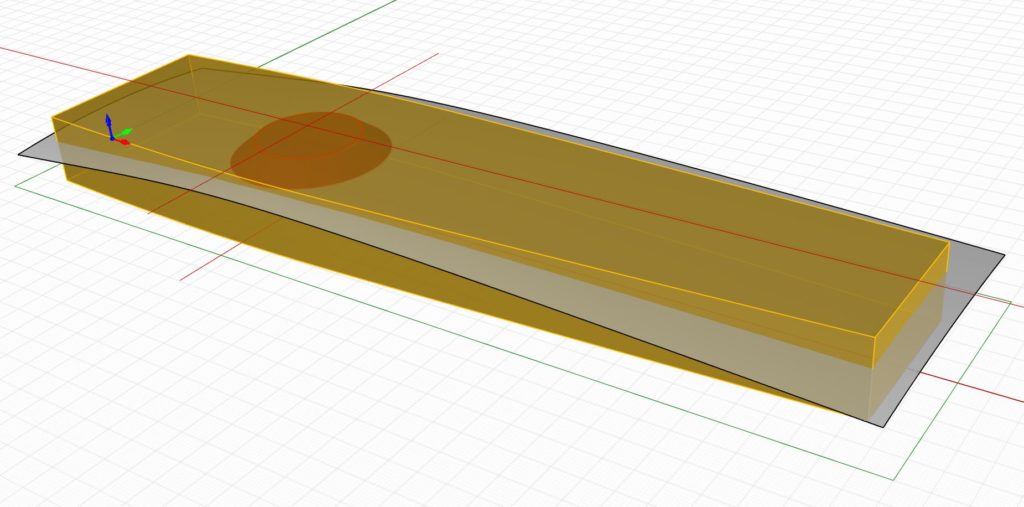
Overlaying the new surface and vise mount with the original extruded model, everything lines up along the guidelines I drew earlier. Note that I made the surface oversized. That will come in handy later. Time to slice and dice.
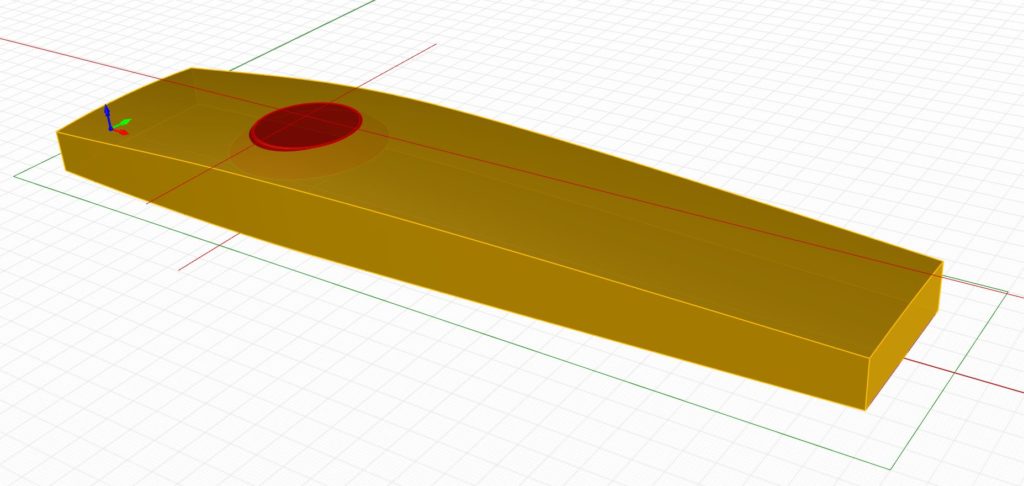
After applying a few trimming routines, the result is a smooth and tapered base 3D surface that I’ll use to build upon for the patterns, textures and shapes to come. Much better than the blocky version extruded earlier. Note: I haven’t thrown anything away, yet. That curved surface and vise mount area will be used again and again once the surface patterns and textures are created.
Now, we have a base 3D vise chop shape to work with, it’s time for patterns and textures. We’ll show some of the techniques I used to create them in future posts. Now, the real fun begins!
Additional Resources
- All posts on the BARN workbench click here.
- Photos of the BARN workbench chops click here.
- A video about how the chops were made click here
- Additional Digital Woodworking videos click here.
Here are some supplies and tools we find essential in our everyday work around the shop. We may receive a commission from sales referred by our links; however, we have carefully selected these products for their usefulness and quality.


