


We may receive a commission when you use our affiliate links. However, this does not impact our recommendations.
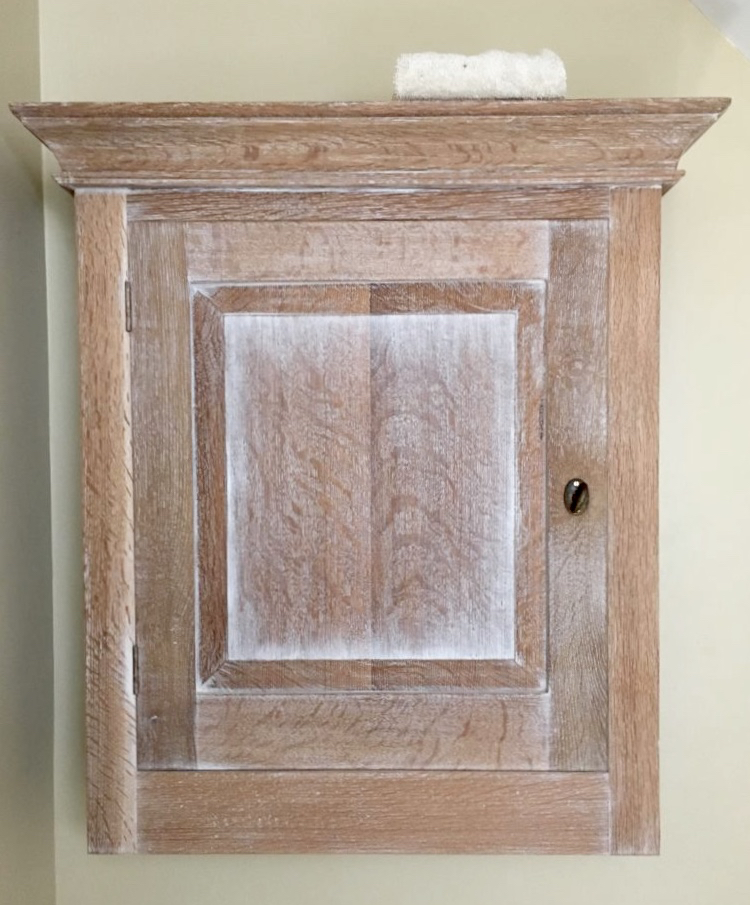
This bathroom cabinet* is an example of the milk paint pickling technique. I made the cabinet specifically to demonstrate the technique; hence the varied effect in different areas, to illustrate some of the finish’s possibilities.
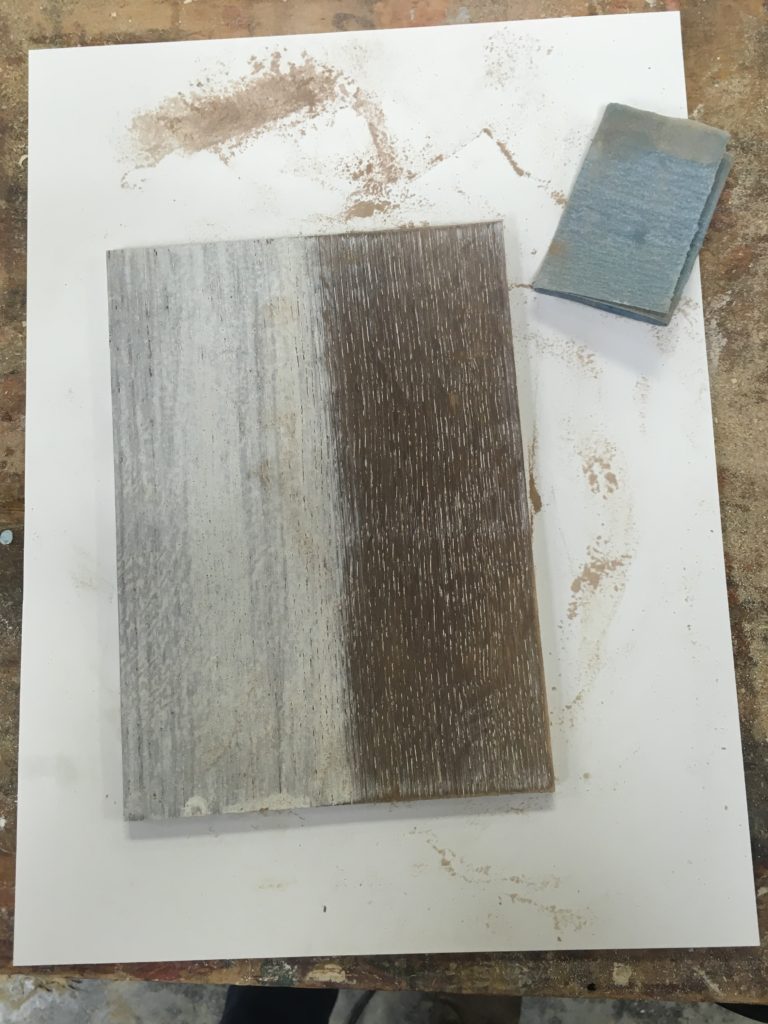
Several years ago I made a bookcase in red oak as a birthday gift for my husband. I wanted to make it looked like old wood that had been painted, then stripped…poorly. (Yes, some readers will conclude that I have a warped aesthetic.) I decided to use milk paint because the relatively brittle finish seemed like a good candidate for easy sanding. So I mixed up the paint as usual and started brushing it on a shelf.
To my horror, the oak turned dark gray. Then a light bulb went off in my head as I remembered Miss Prosser, our high school chemistry teacher, saying that lime is alkaline. The tannic acid in the oak was reacting with the lime. I had discovered a new finishing technique for my repertoire, by accident. This method has one huge advantage over some of the other pickling products out there: It’s non-toxic. And if you seal it with beeswax or mineral oil, the whole process qualifies as “green” (which is appropriate whenever you’re talkin’ pickles.)
Materials needed:
- Oak (red or white)
- White milk paint
- Water
- A receptacle with a lid (see Step 1)
- Bristle brush
- Sandpaper (This can be 180-grit or coarser.)
Step 1: Mix white milk paint (here I used The Old Fashioned Milk Paint Company’s “Snow White”) with water in approximately a 1:1 ratio. Use a glass, plastic, or ceramic container with a well-fitting lid; don’t use metal, as the lime will react with it.

Step 2: Shake the container vigorously for about a minute to mix the powder with the water. Open the jar and use a stick to make sure there’s not a clod of dry powder lurking at the bottom. If there is, stir it in, then shake some more.
Step 3: Leave the mixture to slake about 10 minutes. Then shake again.
Step 4: Get a bristle brush (I use a chip brush from the hardware store; instead of throwing it away, I wash it out over and over) and apply a good coat of milk paint.
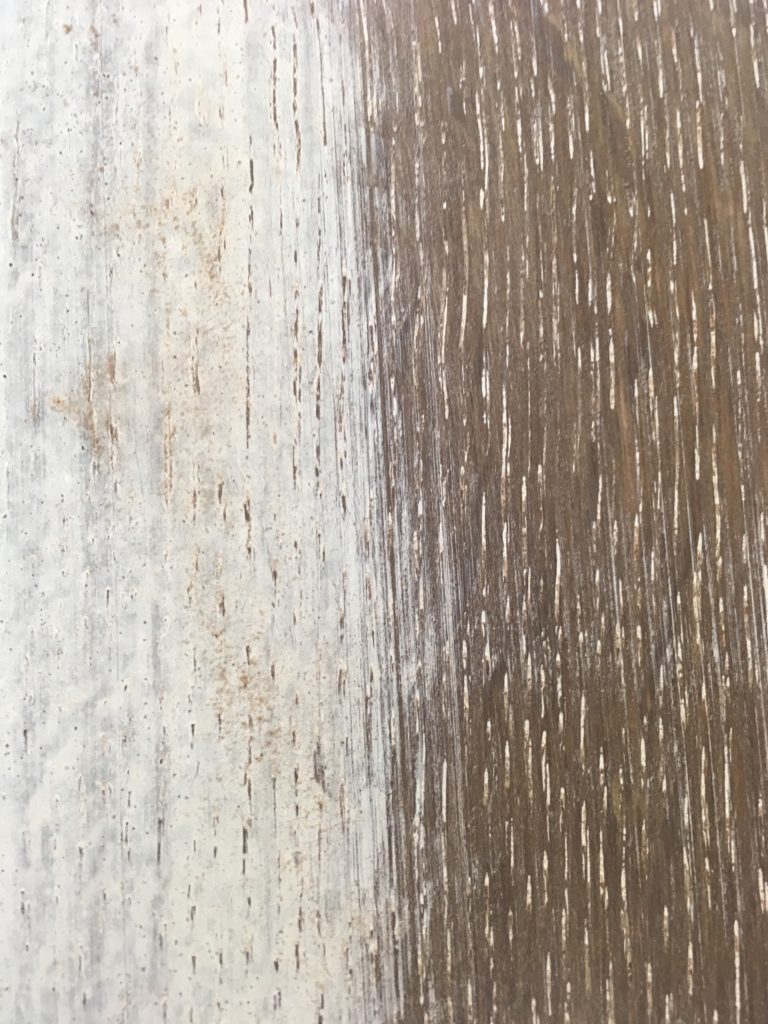
The wood will start to turn gray almost immediately. Let the paint dry thoroughly.
Step 5: When the paint has dried, get a piece of sandpaper–I used 180-grit here–and have at it, sanding with the grain. That’s it, really. Just sand until you reach the effect you like. You can topcoat the piece, if you wish, with oil- or water-based finish. I sealed this piece with food-grade mineral oil because I wanted the materials to be 100% non-toxic and also wanted to keep the gray-ish look. An oil-based finish would have added too much amber for my taste.
Close up
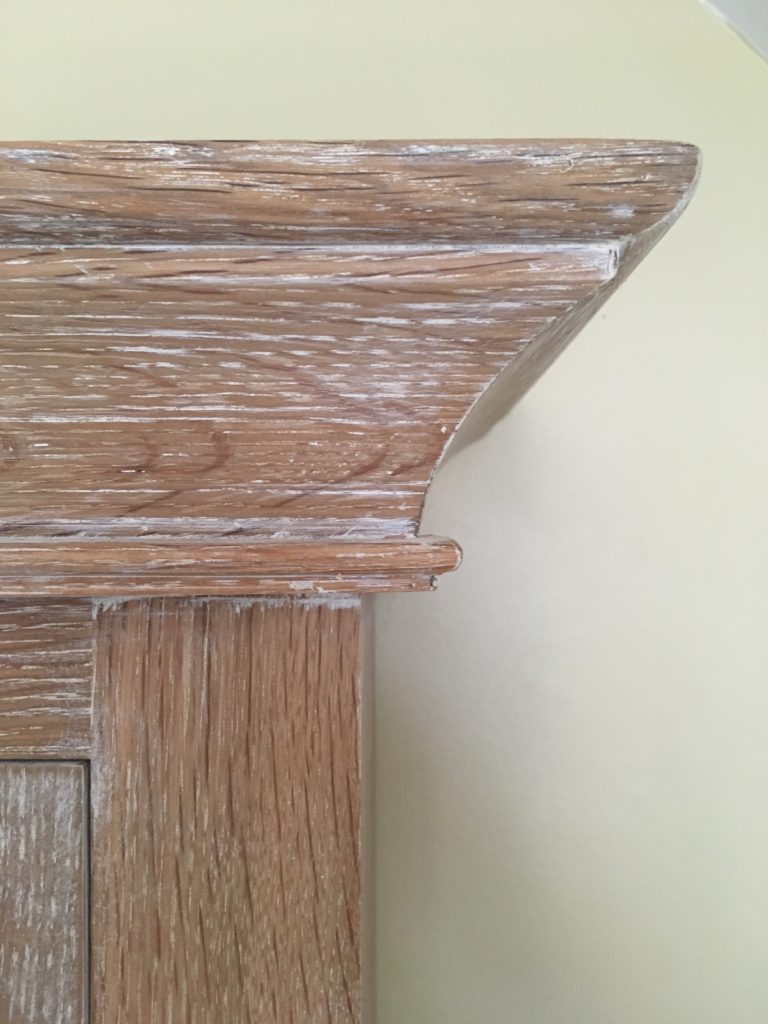
I sanded the crown of this wall cabinet to look as though it had been painted, then stripped (poorly!), leaving more paint in the inside corners.
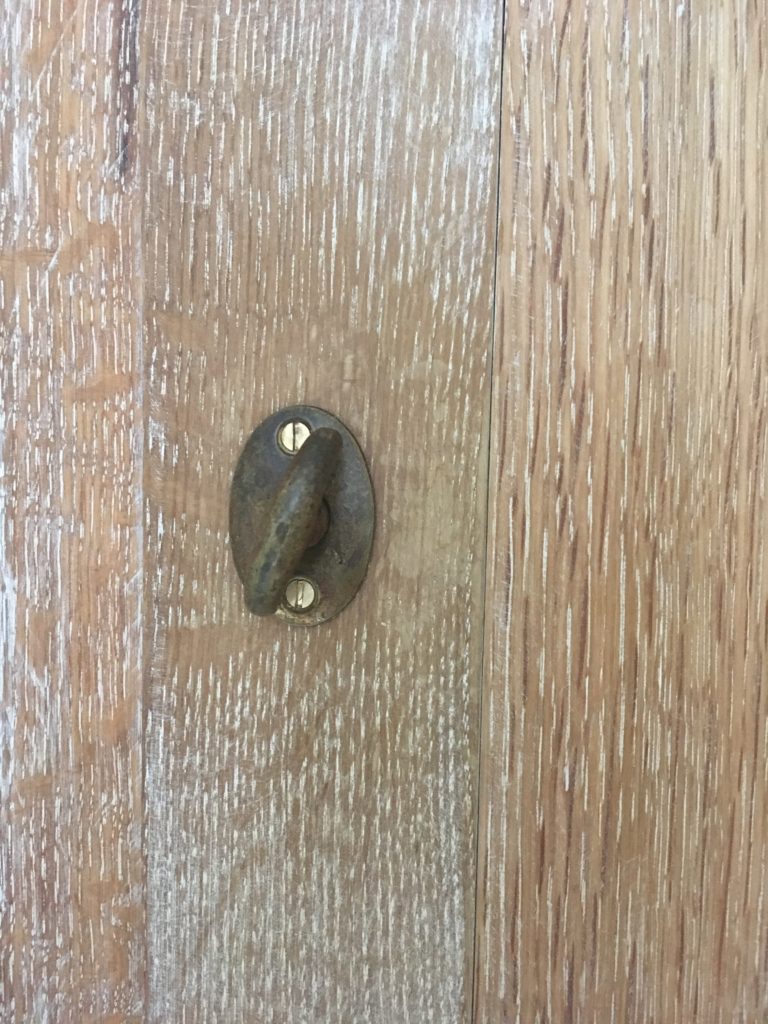
This image shows the latch area of the door. The latch is salvaged. I could have darkened the screws with an antiquing solution, but I didn’t think of that at the time. I sanded away more of the paint from the latch area because the area around such a latch would get a lot of wear in real life (well, this piece is in our upstairs bathroom, so that qualifies as real life).
*Before you comment that mineral oil is a dumb finish for a bathroom cabinet (it is), let me mention that this bathroom has a 4′ clawfoot tub, the kind that was made originally for servants’ quarters. There is no shower, as a result of which the room never gets steamy. The cabinet has been there for a year; the finish you see here is after a year’s use. I would do my best to talk a client out of having mineral oil in a bathroom cupboard, but when I’m making something for our house, all bets are off. Our house is furnished with experiments.
Here are some supplies and tools we find essential in our everyday work around the shop. We may receive a commission from sales referred by our links; however, we have carefully selected these products for their usefulness and quality.


