


We may receive a commission when you use our affiliate links. However, this does not impact our recommendations.
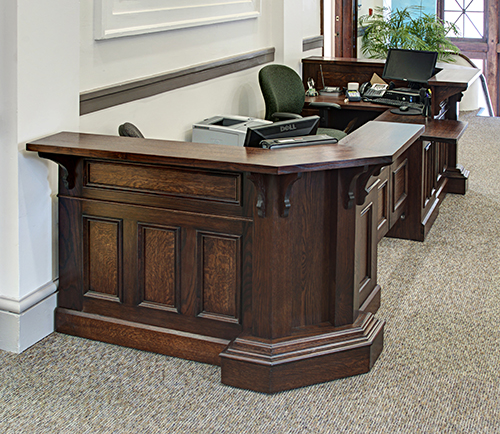
A job with moldings that meet at multiple inside corners offers many opportunities to practice coping. This reception desk, which I built several years ago for the Ivy Tech John Waldron Arts Center in Bloomington, Indiana, is a good example. (Photo: Kendall Reeves, Spectrum Studio)
I’ve long been struck by the aptness of our English word “cope” – “I just can’t cope,” “I’m barely coping” – in light of its meaning in a woodworker’s lexicon. Sure, some of us may use the word when describing our emotional state, but more often we use it to denote a technique for joining two pieces of trim or molding where they meet at an inside corner.
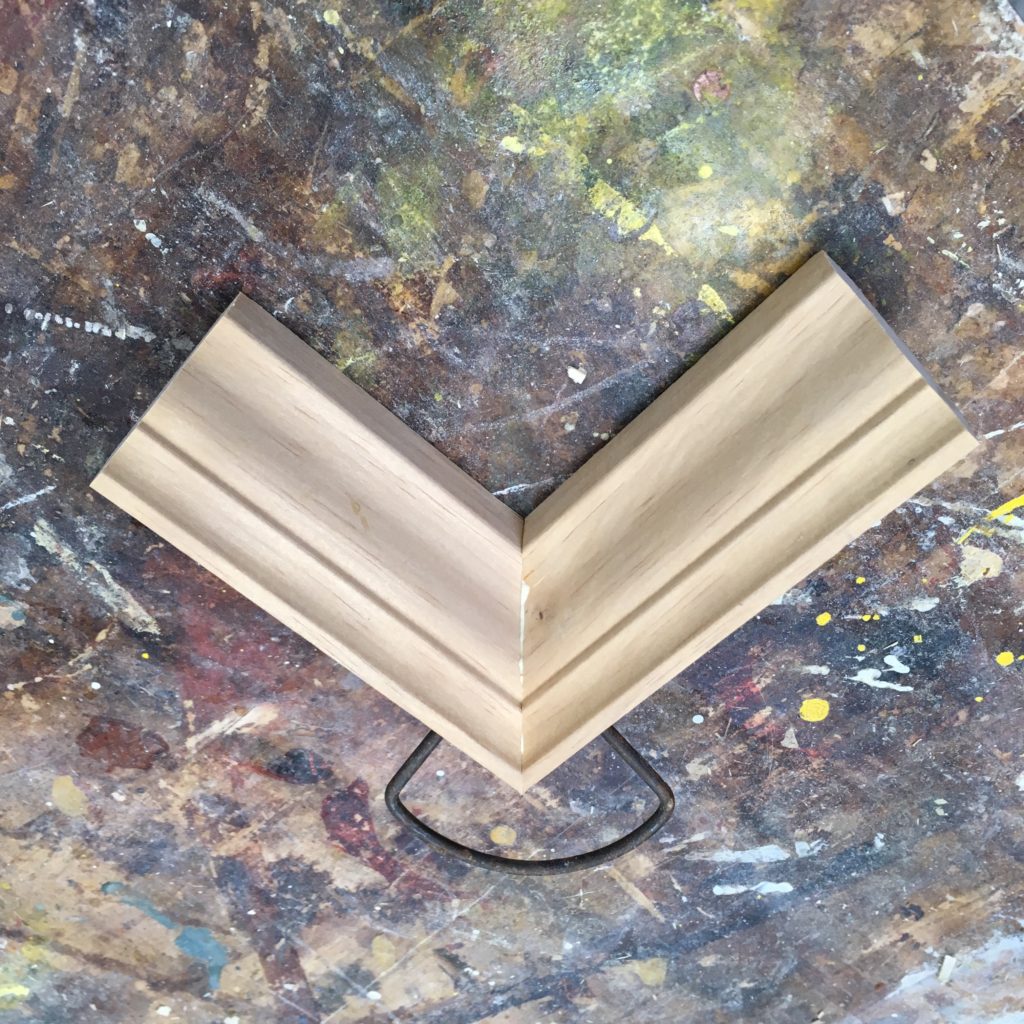
A conventional inside miter joint, made by mitering the end of each piece, then glued and held together with an Ulmia miter clamp until dry
There’s nothing wrong with joining two pieces of baseboard or crown molding by means of a miter, but a coping joint is an elegant solution that’s more likely to look good as wooden parts move over time.
The word cope comes from the French verb couper, which originally meant to strike (as in hitting) but in modern times has shifted to mean to cut. Among the definitions given by my edition of the Oxford English Dictionary are “to strike; to come to blows, encounter, engage” and also “to be or prove oneself a match for, contend successfully with [a thing, person, or situation]” – a pretty good metaphor for the woodworker’s version of the term.
To cope a joint is to cut precisely along the profile of the molding, but not at the customary 90 degrees. Instead, the goal is to remove enough material at the back of the workpiece that it can slide over its mating section for a perfect fit.
The players
With a regular miter joint, we miter the end of both pieces where they will meet. When coping, the primary piece (in psychological terms, this one would be the stressor :-)) is left square; the secondary piece (i.e., the poor soul who has to figure out how to deal with the situation) is cut, i.e. coped, to fit. In other words, number two literally falls in line with, or conforms to, the character of number one.
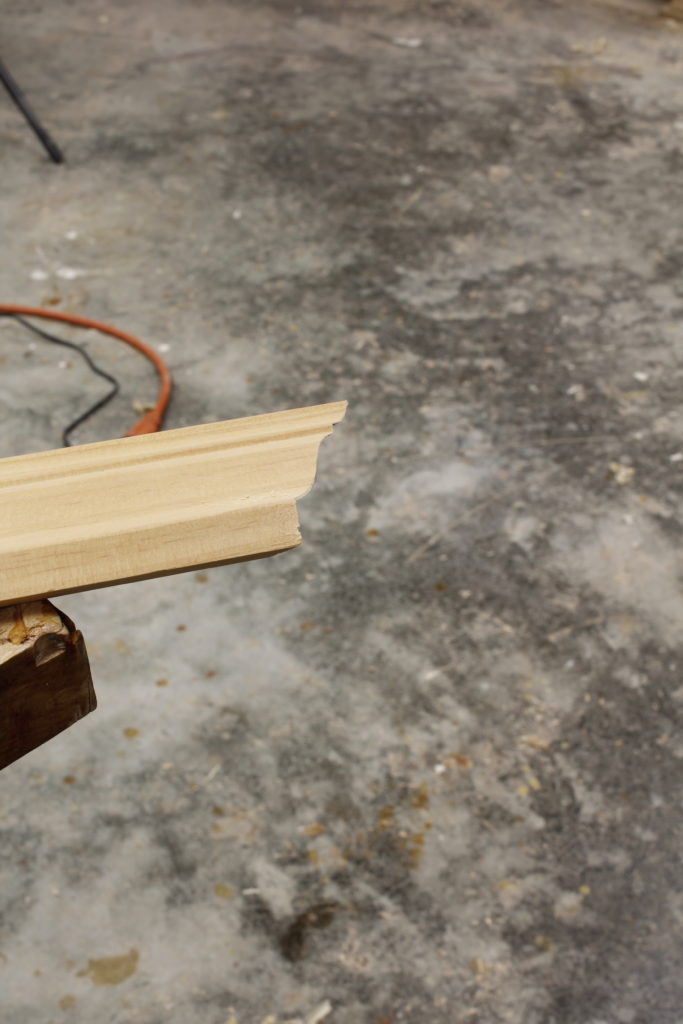
For this demonstration I used a piece of stock crown molding.
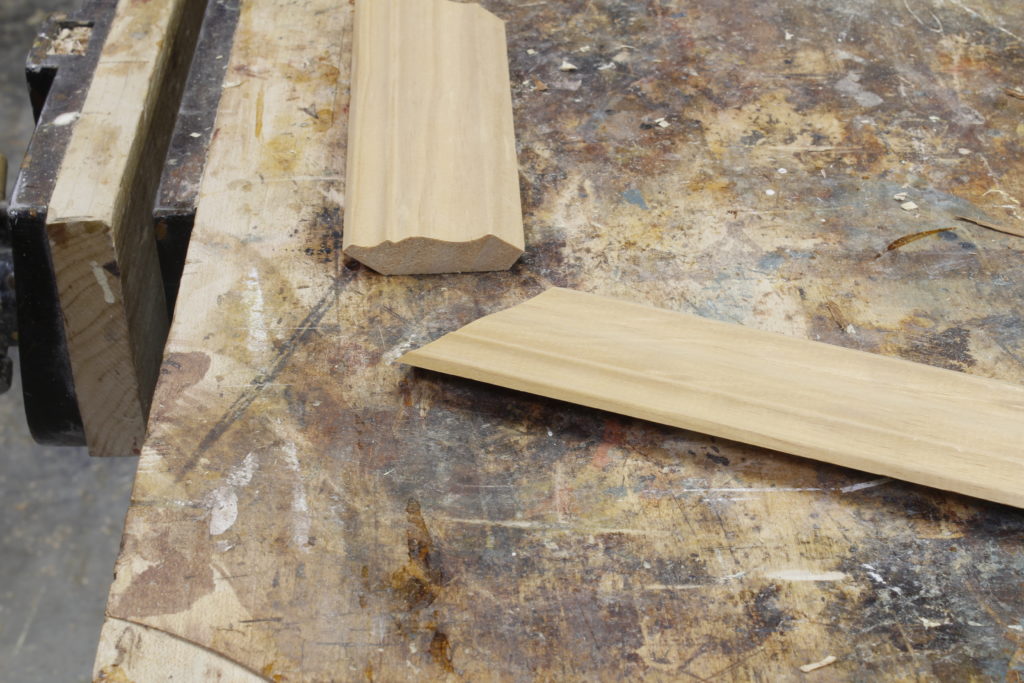
Two parts: The primary section of molding (left) has a square end. That end does not need to be exactly 90 degrees. In fact, its angle is irrelevant, because the other piece of trim will cover it completely. If we were installing the crown at a ceiling, the primary piece would be pinned in place before we started the work of coping. The secondary piece (at right) is the one that will receive our attention.
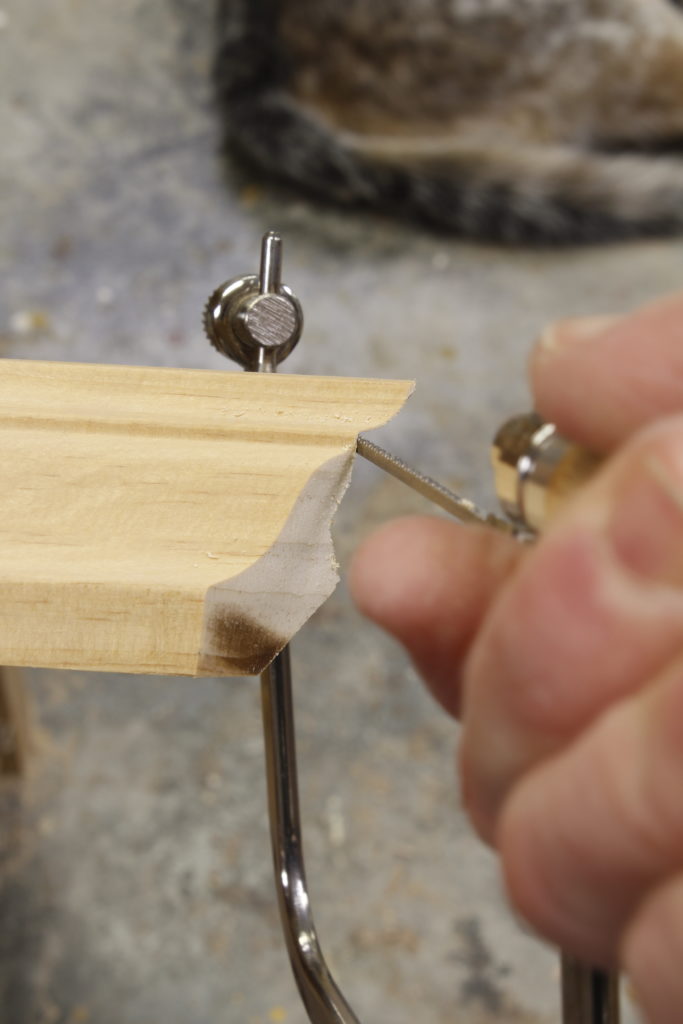
1. Miter the end
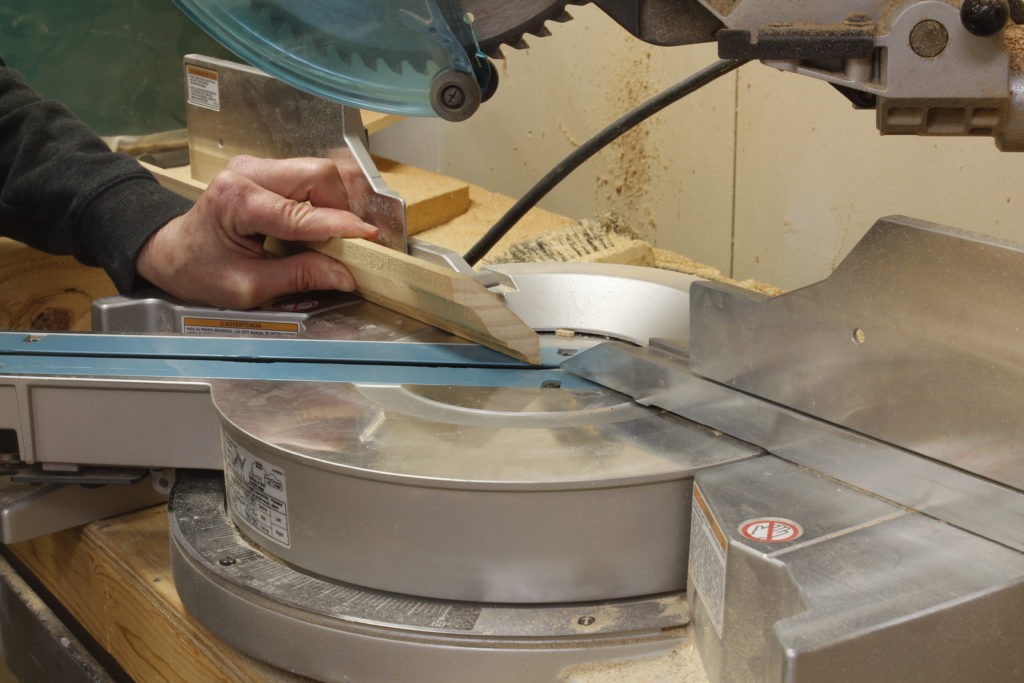
Cut an inside miter on the end of your workpiece. You can cut this by hand, with a chopsaw, on a sliding miter gauge at the tablesaw, or by any other means available to you. When cutting crown, I hold the molding with the back face (the flat angle that will be nailed to the cabinet or wall) firmly against the fence.
2. Clamp
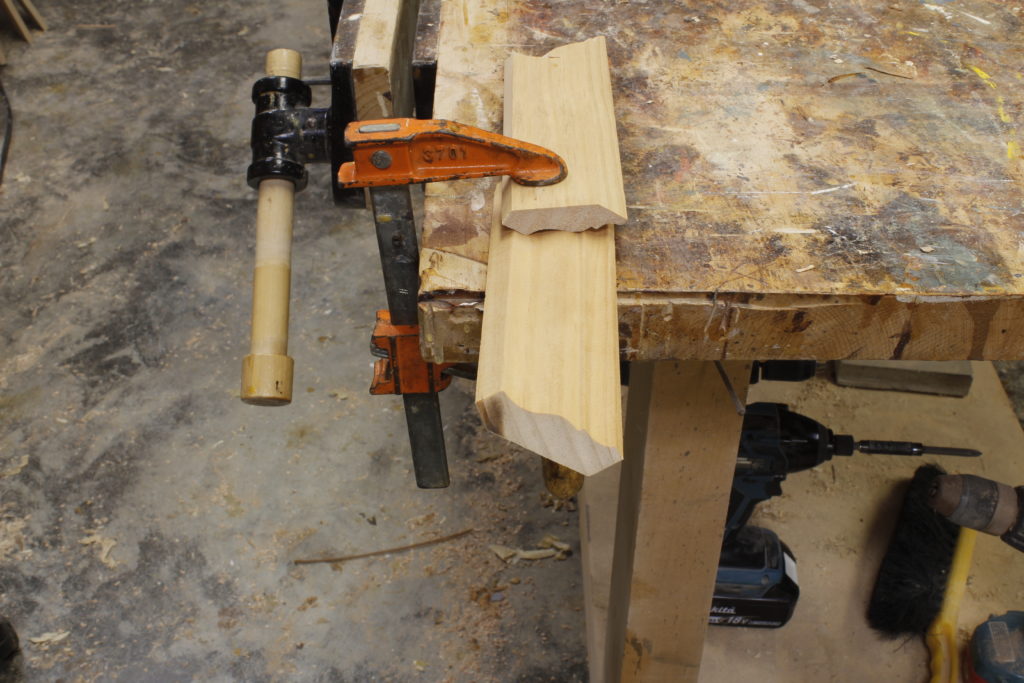
You can use an offcut of the molding, turned upside down, to hold your workpiece steady. (Apologies for the burn. I moved the molding slightly at the end of the cut.)
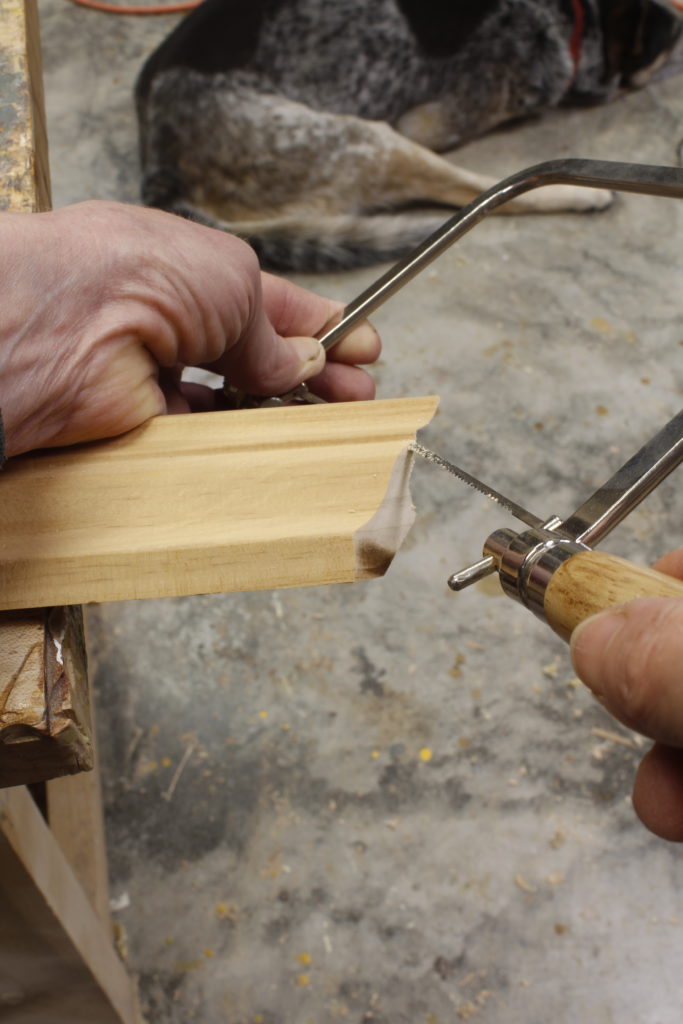
3. Cut the first section
To keep the cut as precise as possible, it’s best to work in sections instead of trying to bend your saw to conform to the shifting profile.
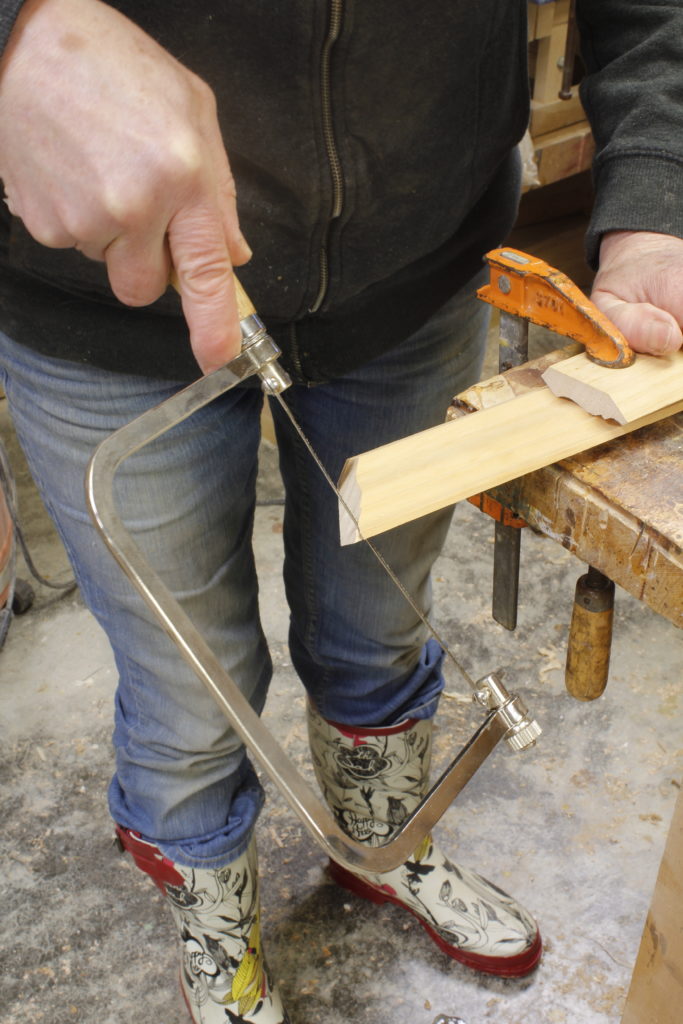
Hold your coping saw blade-down, but angle it at about 45 degrees. (Boot inquiries They were a gift from my sister.)
A slightly different perspective on the same cut
Back-cut. A close-up shot of the first part of the cut makes clear that this is no ordinary cut at 90 degrees. For coping, you need to hold the saw at 45 degrees or more. In cases where the molding will be pinned or nailed to something solid, such as the ceiling and walls in a room, it’s fine to remove a little extra from the back of the workpiece.
4. Remove the waste
Before you go on to the next part of the profile, cut in from the end of the workpiece to remove the waste from your first cut. Notice that I am holding the saw at 45 degrees to the end of the piece, to create a backcut.
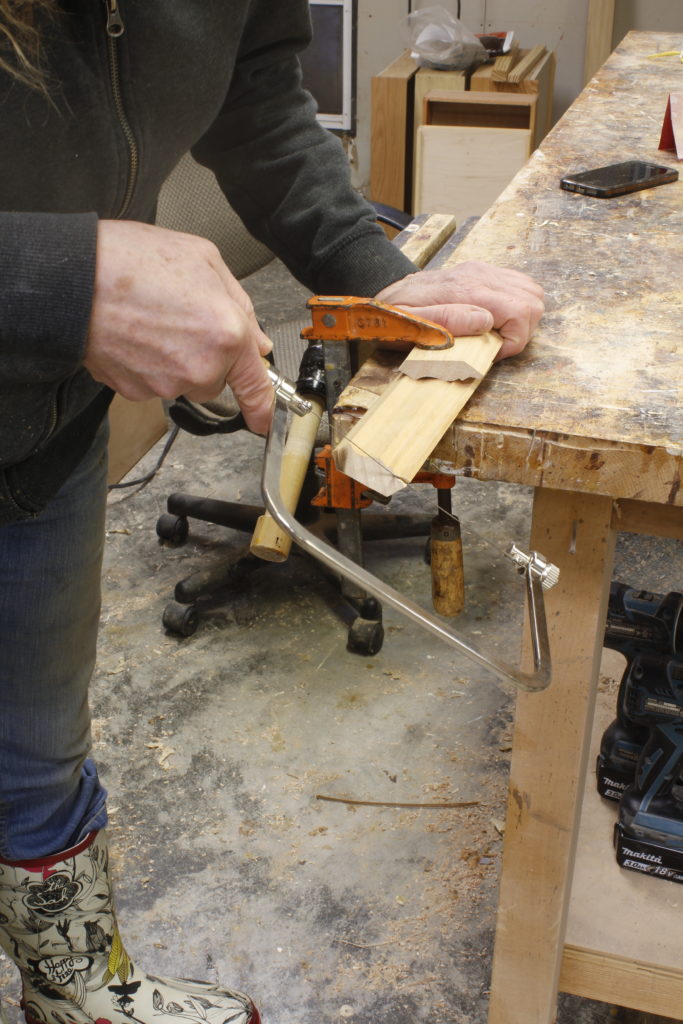
5 Move on to the next section
Never mind the dog; he’s keeping guard while I cope. Start the second section, again holding the saw at an angle of at least 45 degrees. Sometimes a second hand is helpful in keeping the saw steady.
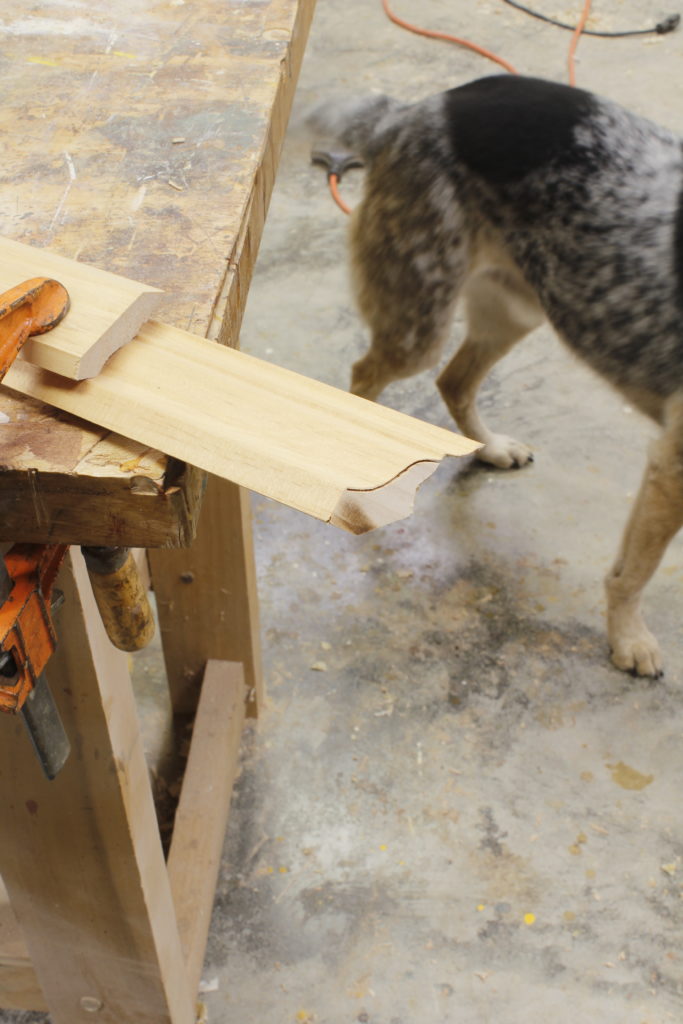
“My work is done here,” says the dog. Not so, mine. Here, the second section is outlined by the saw.
6. Make the final cut
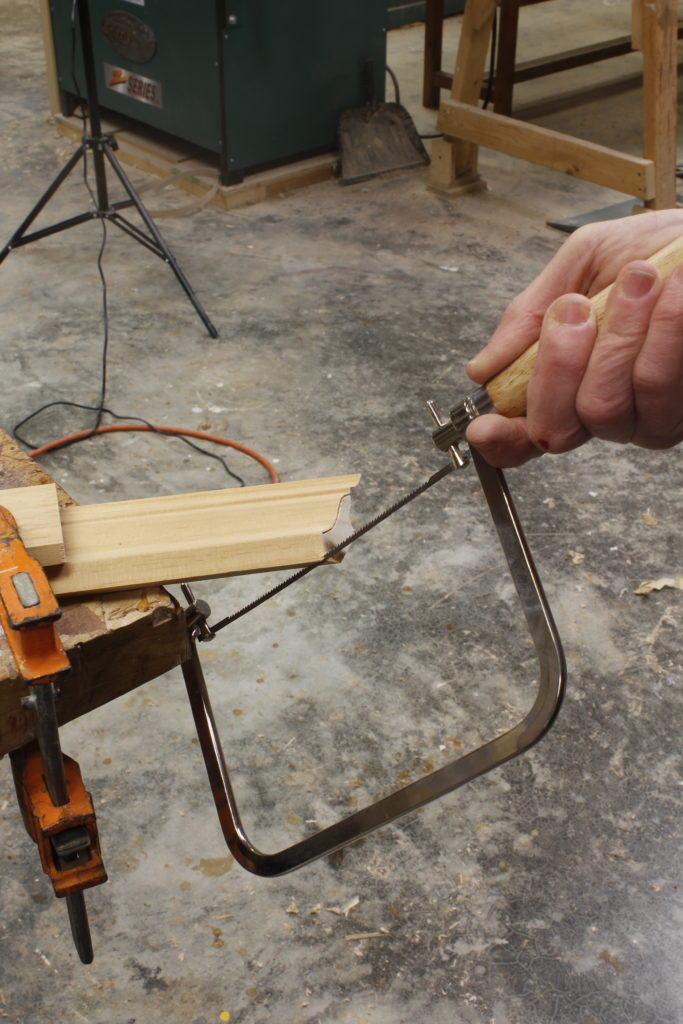
Coup de grace. For the final section of the profile, hold your saw upside down, still at a minimum of 45 degrees.
7. Clean up the back
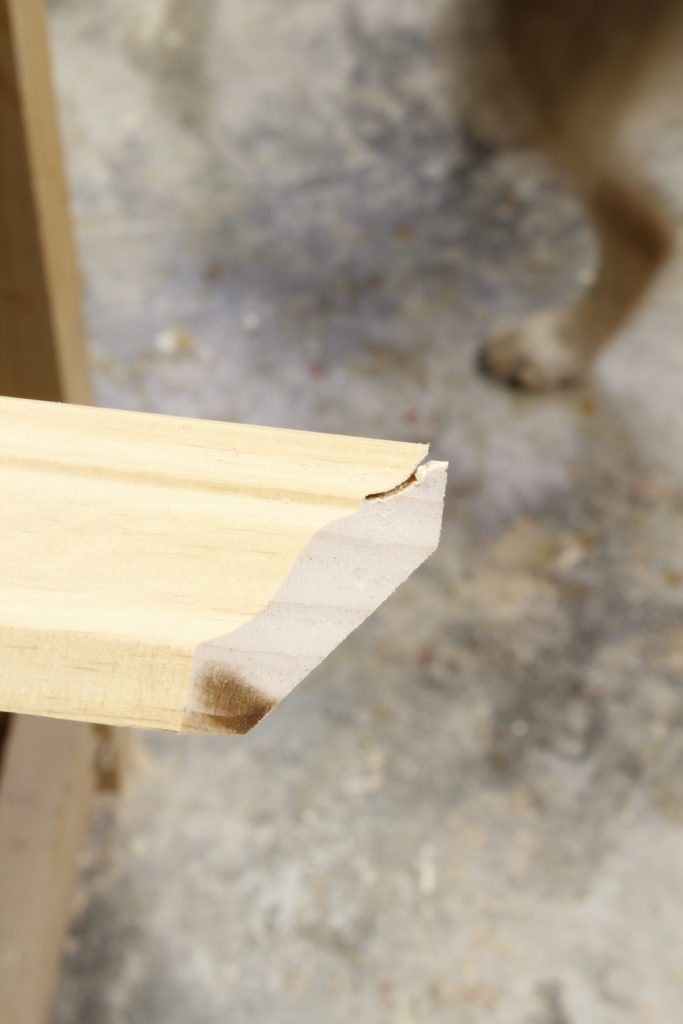
Nearly there. In this close-up you can see a thin ledge of material along the central profile. I also nicked the flat section at the top (a hazard when trying to photograph the process while holding a coping saw in the other hand).
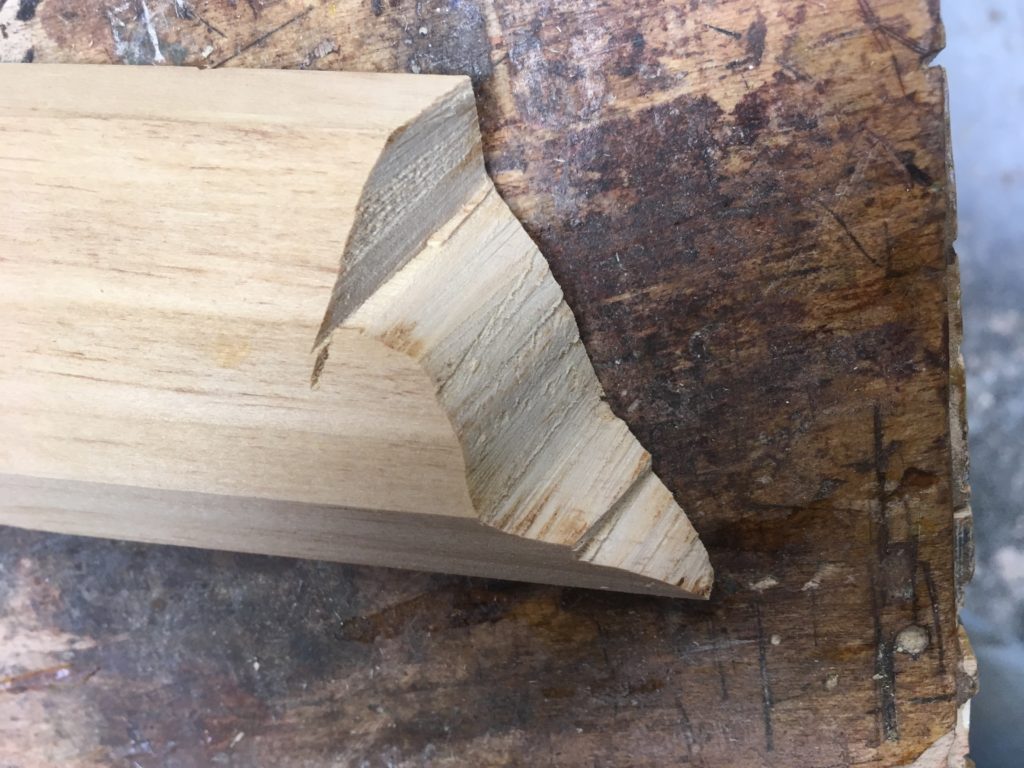
Not pretty. Consult the back of the coped section for guidance in how to improve the fit. Every protruding bit of waste, such as the little ledge immediately below the sheer face at the top, will keep the joint from coming together perfectly. Remove these obstructions by careful paring with a sharp chisel, filing, or sanding. It’s helpful to trace the point of the profile in pencil; your aim is to remove all offending waste from behind that line while keeping the pencil line intact.
8. Come together
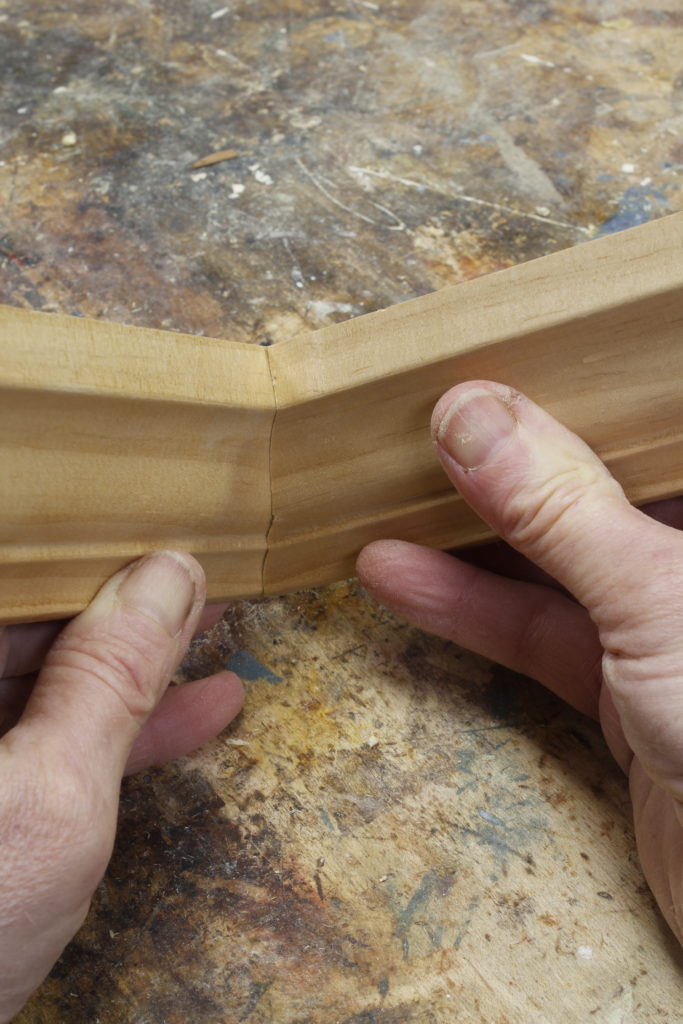
With a little more filing and paring at the back, the beta dog (right) will conform to its alpha’s dictates.
With thanks to those who taught me how to cope: Ben Sturbaum and John Cantwell (and chocolate)
– Nancy Hiller
Here are some supplies and tools we find essential in our everyday work around the shop. We may receive a commission from sales referred by our links; however, we have carefully selected these products for their usefulness and quality.


A nice post. Thank you.
One small tip: Depending on the installation, I find that building a plywood “test corner” can help check the fit of mitered and coped corners. Test-fitting and fine-tuning crown molding at the bench saves a lot of trips up and down the ladder!
Lightly marking the ‘edge’ of the mitre cut that you are trying to follow with the edge of a pencil helps in less than ideal lighting.
Using a cutoff as clamp pad is a nice touch.
Do you cope with a jig saw also?