We may receive a commission when you use our affiliate links. However, this does not impact our recommendations.
 On my most recent project I needed an elliptical arc. Although my arc conforms to the Golden Ratio (1:1.62), the method I use works for an ellipse of any proportion.
Determine the overall size of the ellipse you need and cut a piece of pattern material large enough to encompass it. Next, draw vertical and horizontal lines that bisect the pattern stock. This divides the material into quarters; the arc is drawn in one quarter at a time.
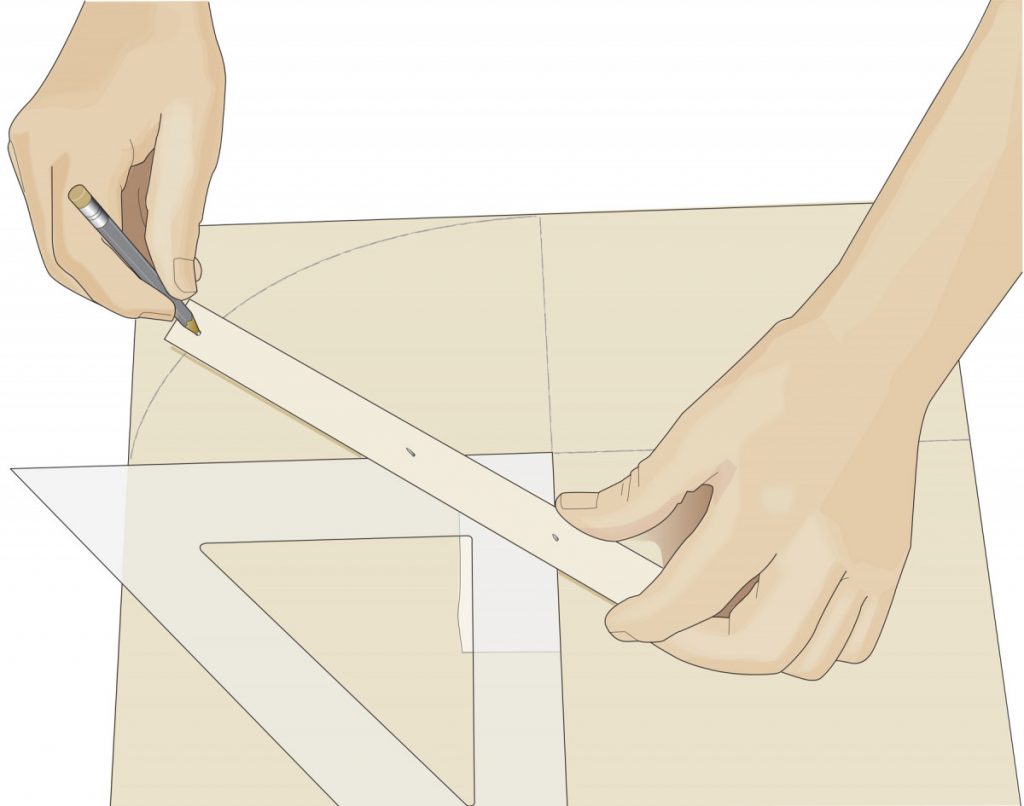
Now make a simple scribing tool that allows you to draw the arc. Start with a thin strip of wood that is a little longer than half the longest dimension of the ellipse. Drill a hole near one end for a pencil point. From the pencil point, at a distance equal to half the height of the ellipse, drive a finish nail. Then drive another at a distance of half the width of the ellipse. Make sure to drive the nails so only about 1⁄16″ protrudes below your wooden strip.
Use double-sided tape to attach a 45° drafting triangle to the pattern; the 90° legs should line up with the vertical and horizontal lines, and the corner of the triangle should be placed exactly at the intersection of the two lines. Make sure the triangle is firmly in place before proceeding.
Hold the nail heads of the scribing tool against the edges of the triangle, and slide the nails along the edges as you mark the arc with the pencil. Flip the triangle into an adjacent quadrant to draw an arc, or into all the other quadrants for a complete ellipse.
This method works quickly and easily for ellipses of any size – though you might have to purchase a fairly large drafting triangle if your ellipse gets too big (of course, you can always substitute a piece of plywood if necessary).
Once you get the method down, you’ll be able to draw elliptical arcs of any size in a snap. –Bill Wells
Here are some supplies and tools we find essential in our everyday work around the shop. We may receive a commission from sales referred by our links; however, we have carefully selected these products for their usefulness and quality.


