We may receive a commission when you use our affiliate links. However, this does not impact our recommendations.
Accurate Inside Measurement
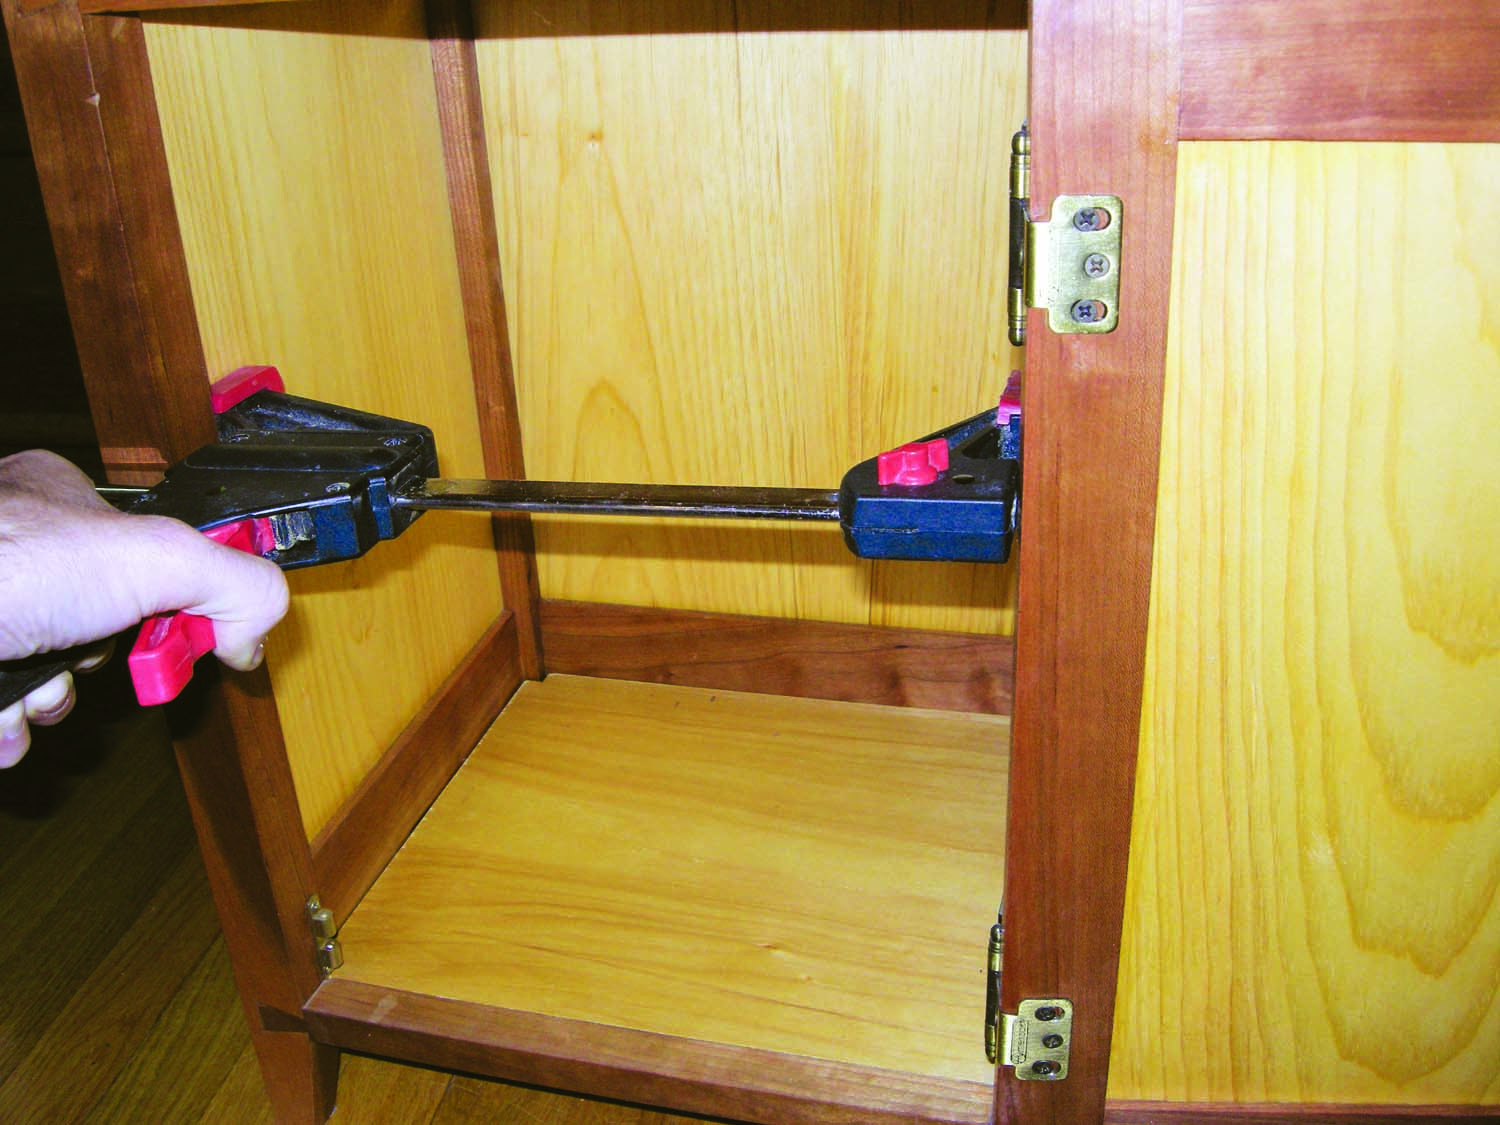
An accurate inside measurement is sometimes difficult to obtain. For example, I needed to take a measurement behind a cabinet’s face frame to fit a new shelf. Typically, most people would solve this one of two ways. Some would try the quick and dirty method of bending the tape into the corner which is a close guess at best. Or, some might use the noted dimension of the tape’s body added to the reading at the tape’s mouth.
 The problems with the second method are three-fold; you can forget to actually add the dimension, make a math addition error, or just plain not realize that it’s a flawed, inaccurate method. Here’s my solution.
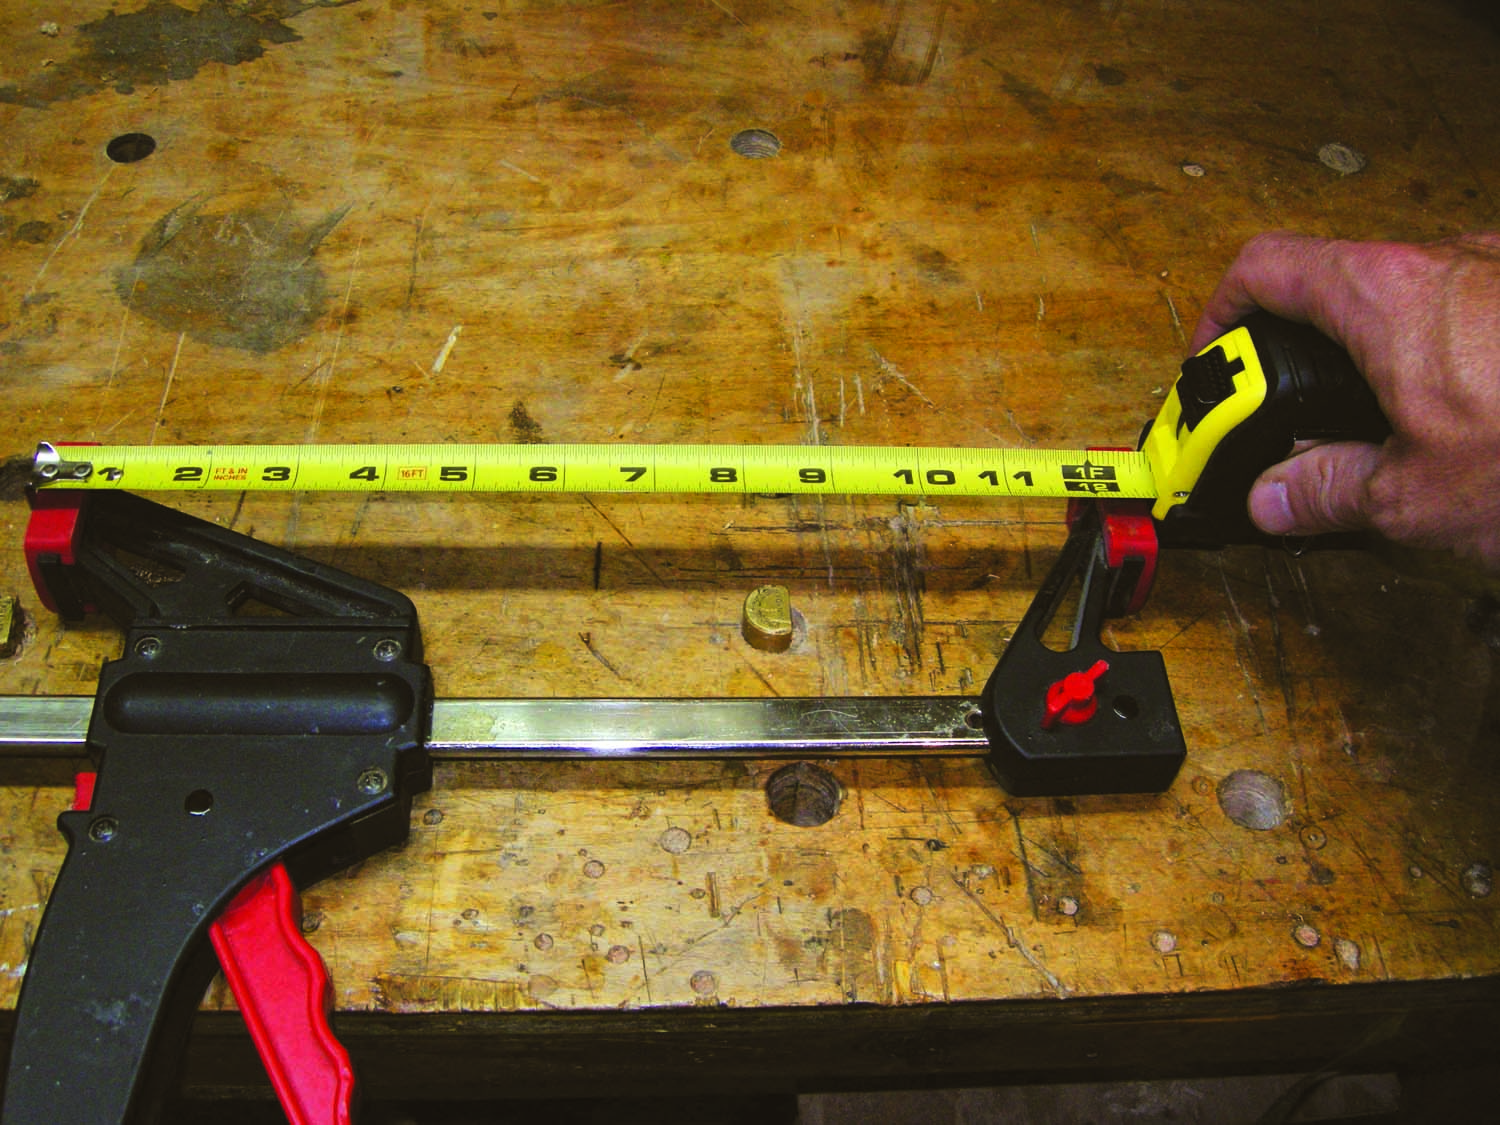 I switched one of my quick-clamps to the spreader position, opened the jaws until they just touched the cabinet’s sides, and then measured the jaws from outer face to outer face for an exact dimension.
Alejandro Balbis
Hinge Flattener
Mounting doors using this type of self-closing hinge is frustrating. They’re “sprung” so they don’t lay flat, to make them self-closing. With the hinges attached to the door, that feature also makes it next to impossible to hold the door in the proper position, apply pressure to “flatten” the hinge and simultaneously drill centered pilot holes for the screws.
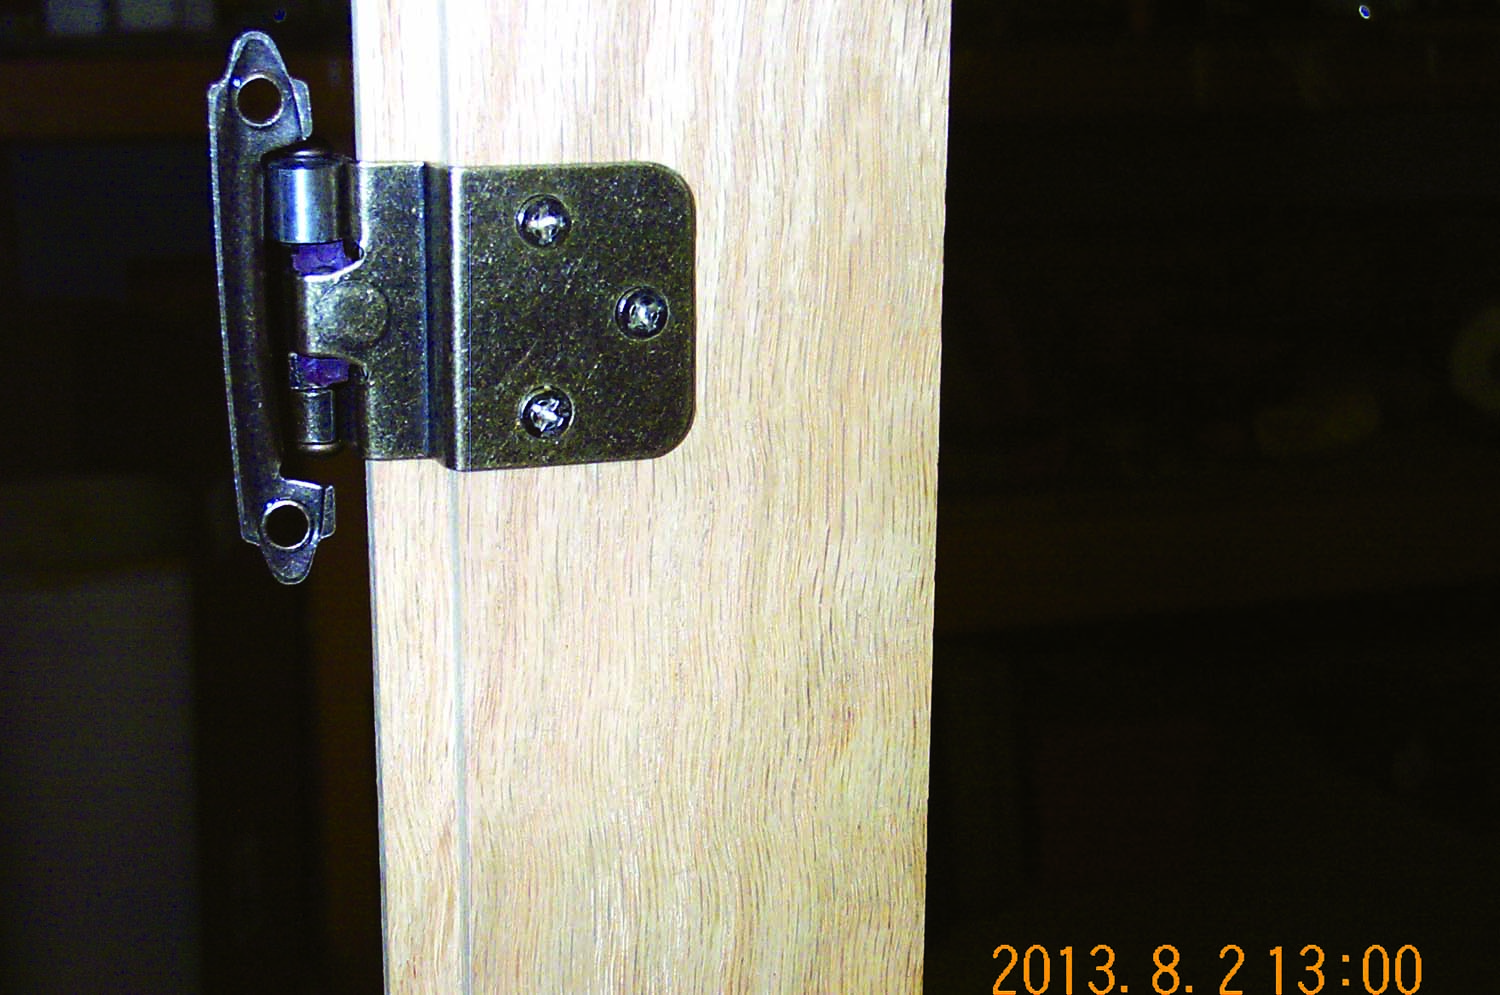 I came up with a way to remove this sprung preset while mounting the doors to the cabinet frames. I cut short lengths of 3/8″ diameter steel rod and inserted one inside each hinge on the door. 3/8″ happens to be just the right diameter to make the hinge lay flat for mounting. When you’re done, open the door and the dowel drops right out.
Initially, I tried using a 3/8″ wooden dowel, which worked, just not as well as the steel dowel.
Fred Burne
Blade Box
Proper saw blade storage not only keeps things organized, it also helps keep the teeth from getting dinged. This box is actually a variation on one I found in an old issue of American Woodworker. It’s simply a hinged plywood box with slots to organize the blades and keep them from bumping into one another.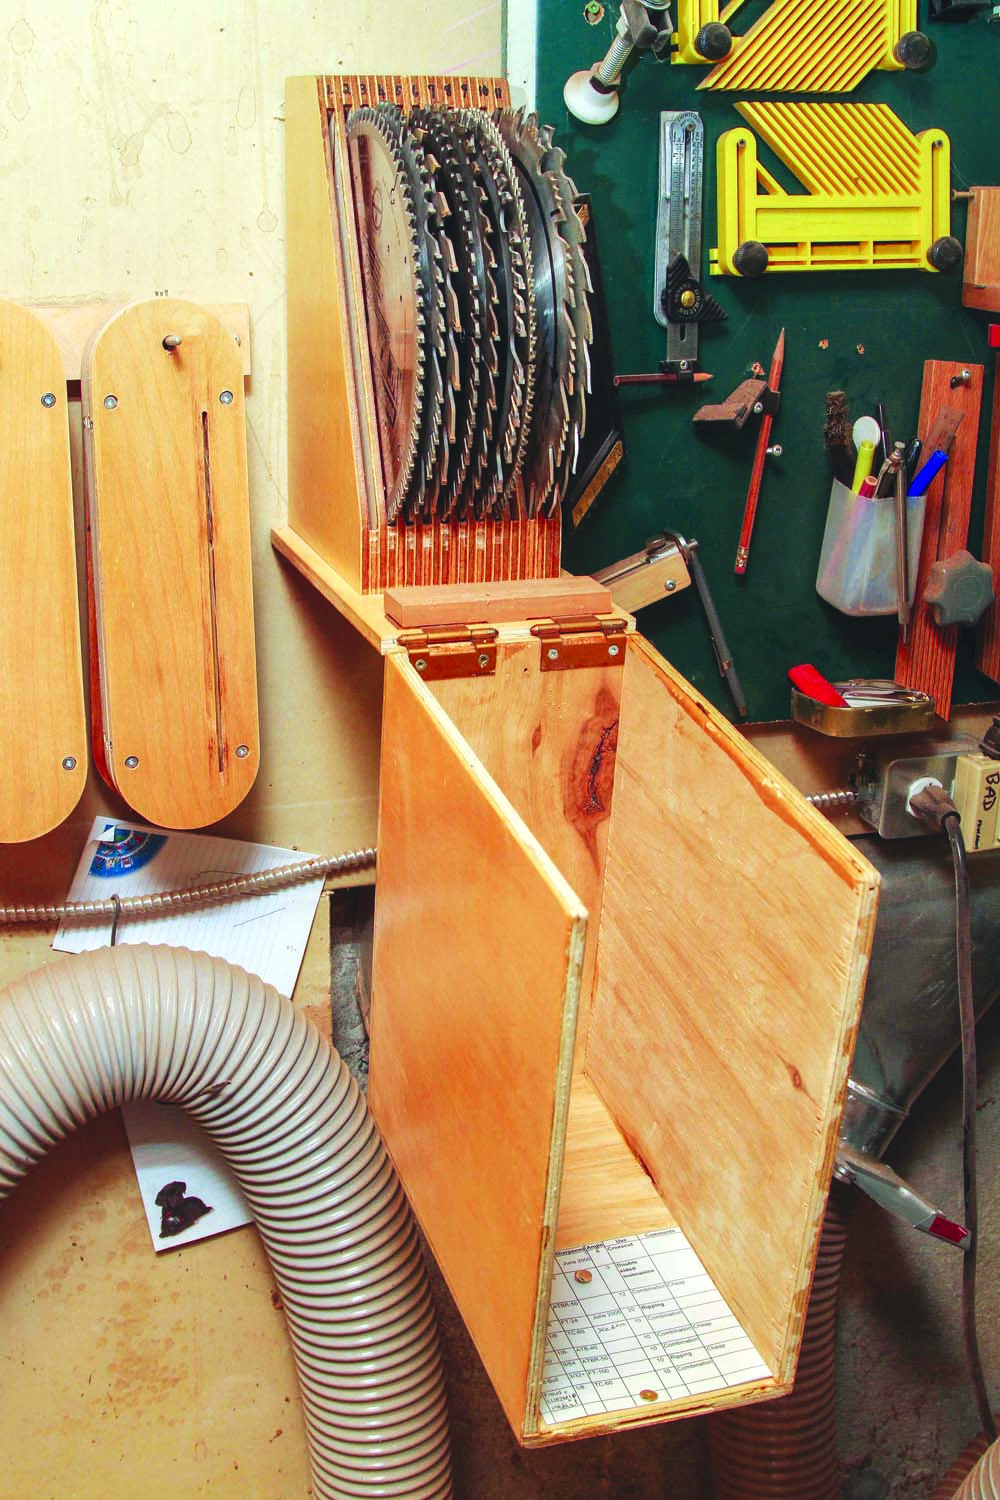
To make the storage slots, you’ll need a stack of thin plywood cut as shown in the illustrations. For storing 10 blades, you need eleven “A” parts and ten “B” parts. Starting with an “A”, glue all these parts together in a stack, alternating A’s and B’s. Besides adding more slots than the original, I made a couple more changes that to me are notable improvements.
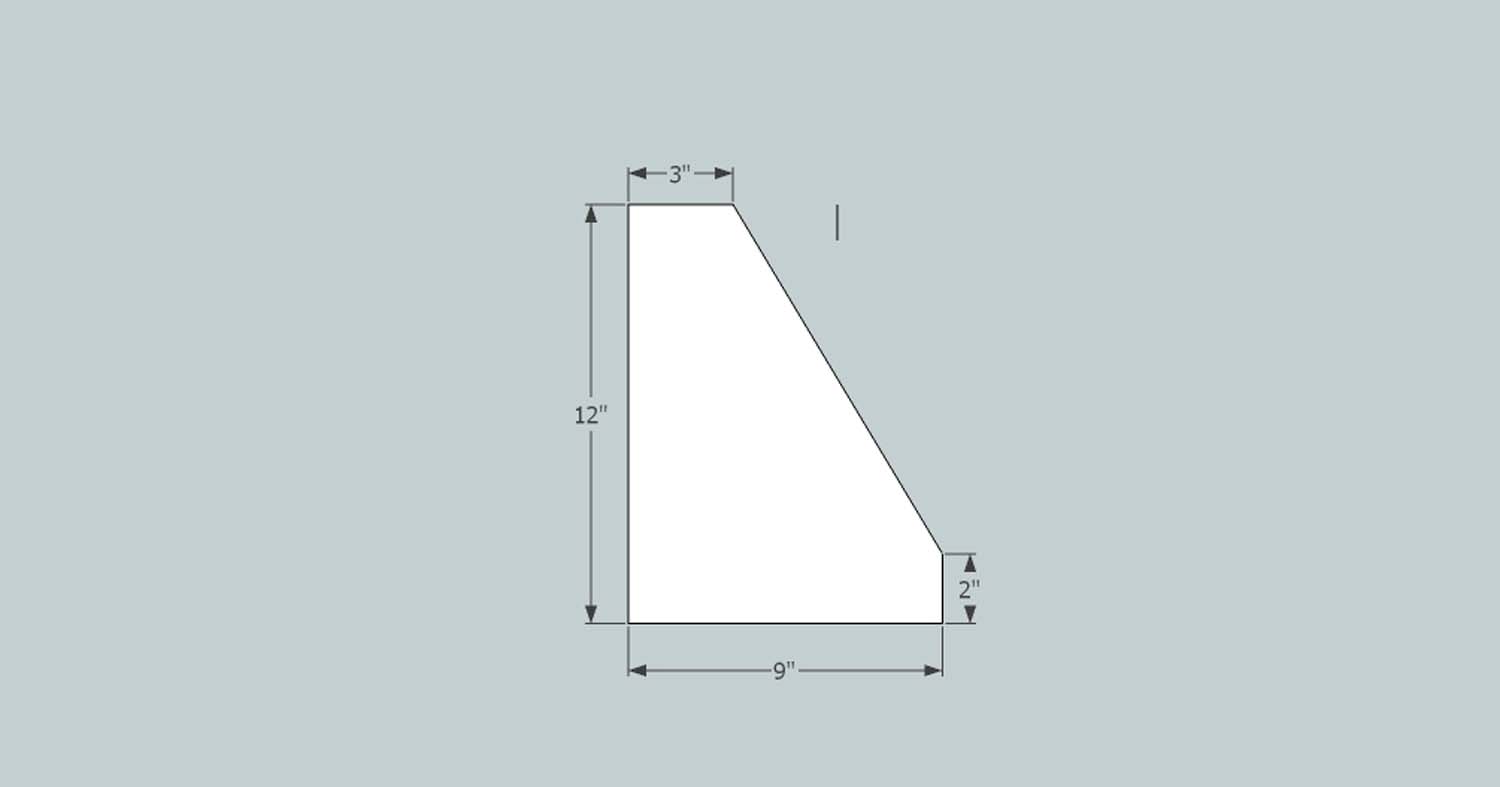
Part “A”

Part “B”
I used cabinet hinges instead of butt hinges. This allows the lid to flip all the way down so it’s much easier to access the blades. I covered the hinges with a piece of wood because I found that it was too easy to bump the teeth against a hinge when taking the blades out or putting them away.
Next, I numbered each blade and attached a “data sheet” with numbers corresponding to each blade inside the box’s lid. The sheet tells me all the information I need about each blade; i.e. kerf width, purpose, and when it was last sharpened.
Pierre Falzon
Clamp I.D.
The actual opening capacity of a clamp is valuable information going into a glue-up. When the dimensions of your workpiece are close to the full capacity of a clamp – which often seems to be the case – it avoids a lot of trial and error.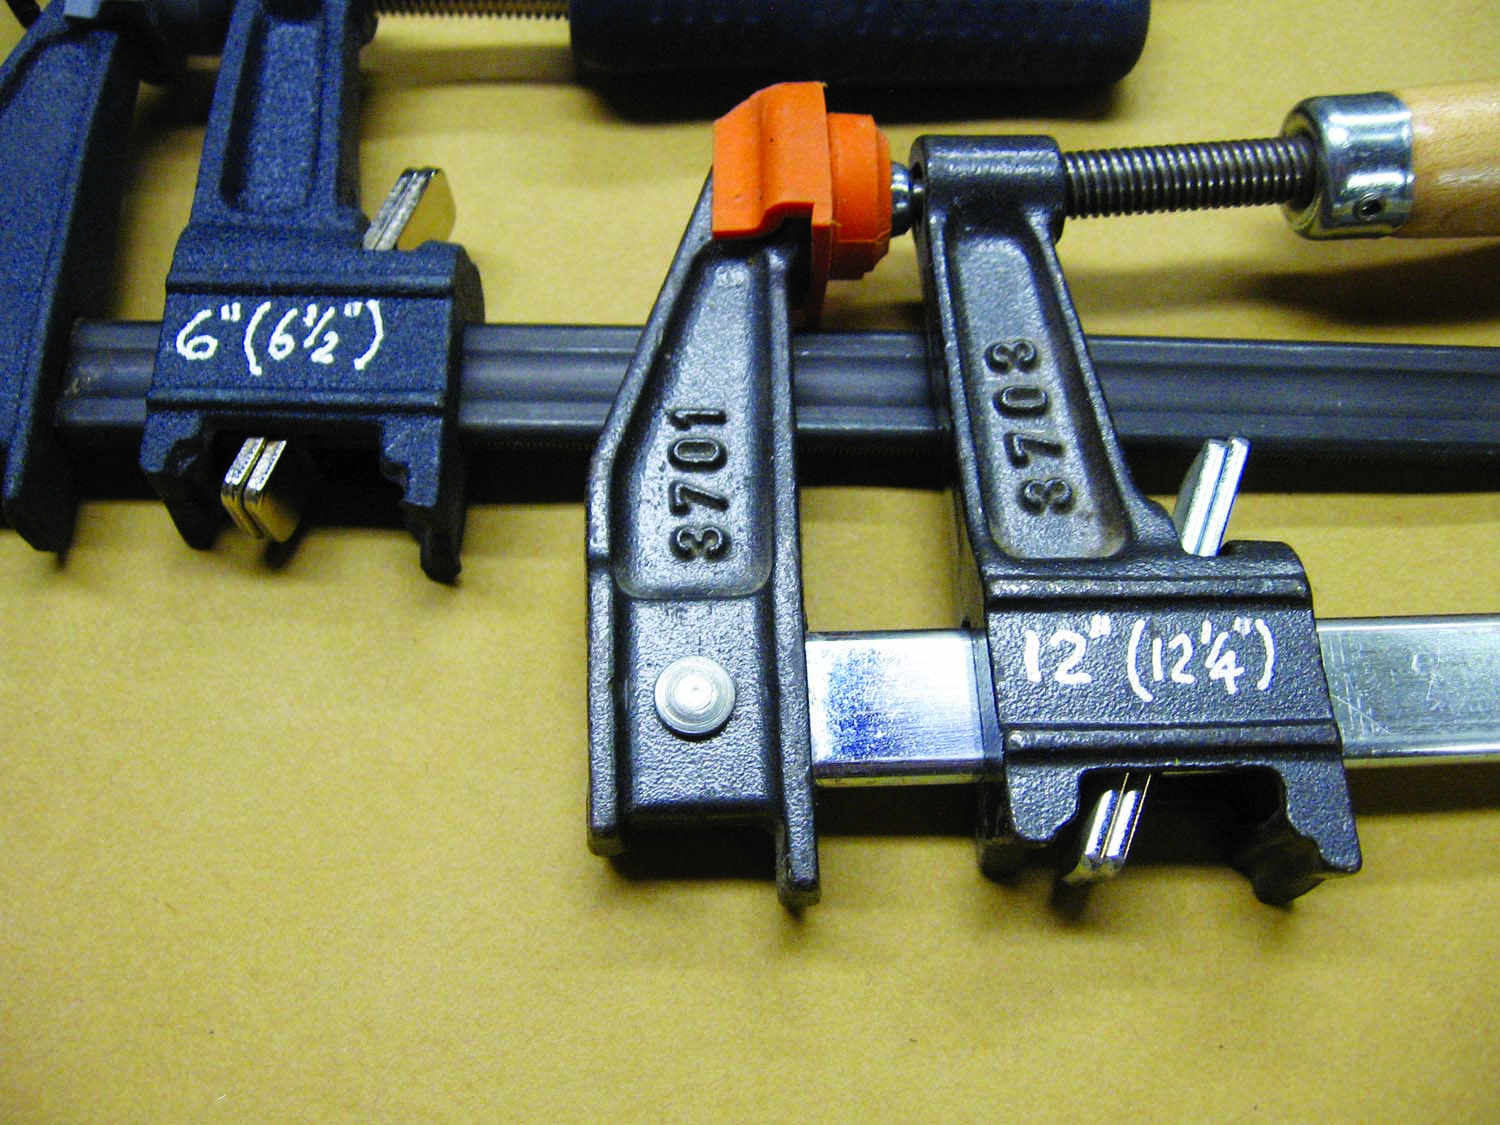
I’ve started measuring and marking the exact maximum opening of my clamps, with and without their work protecting pads, so I know just what they’re capable of clamping.
John Cusimano
Flip Your Glue
All woodworking glues contain a mixture of ingredients and fillers that are held in suspension. In order for the glue to perform as intended, this mixture needs to remain constant. If you go through lots of glue, it probably doesn’t get to the point where settling is an issue.
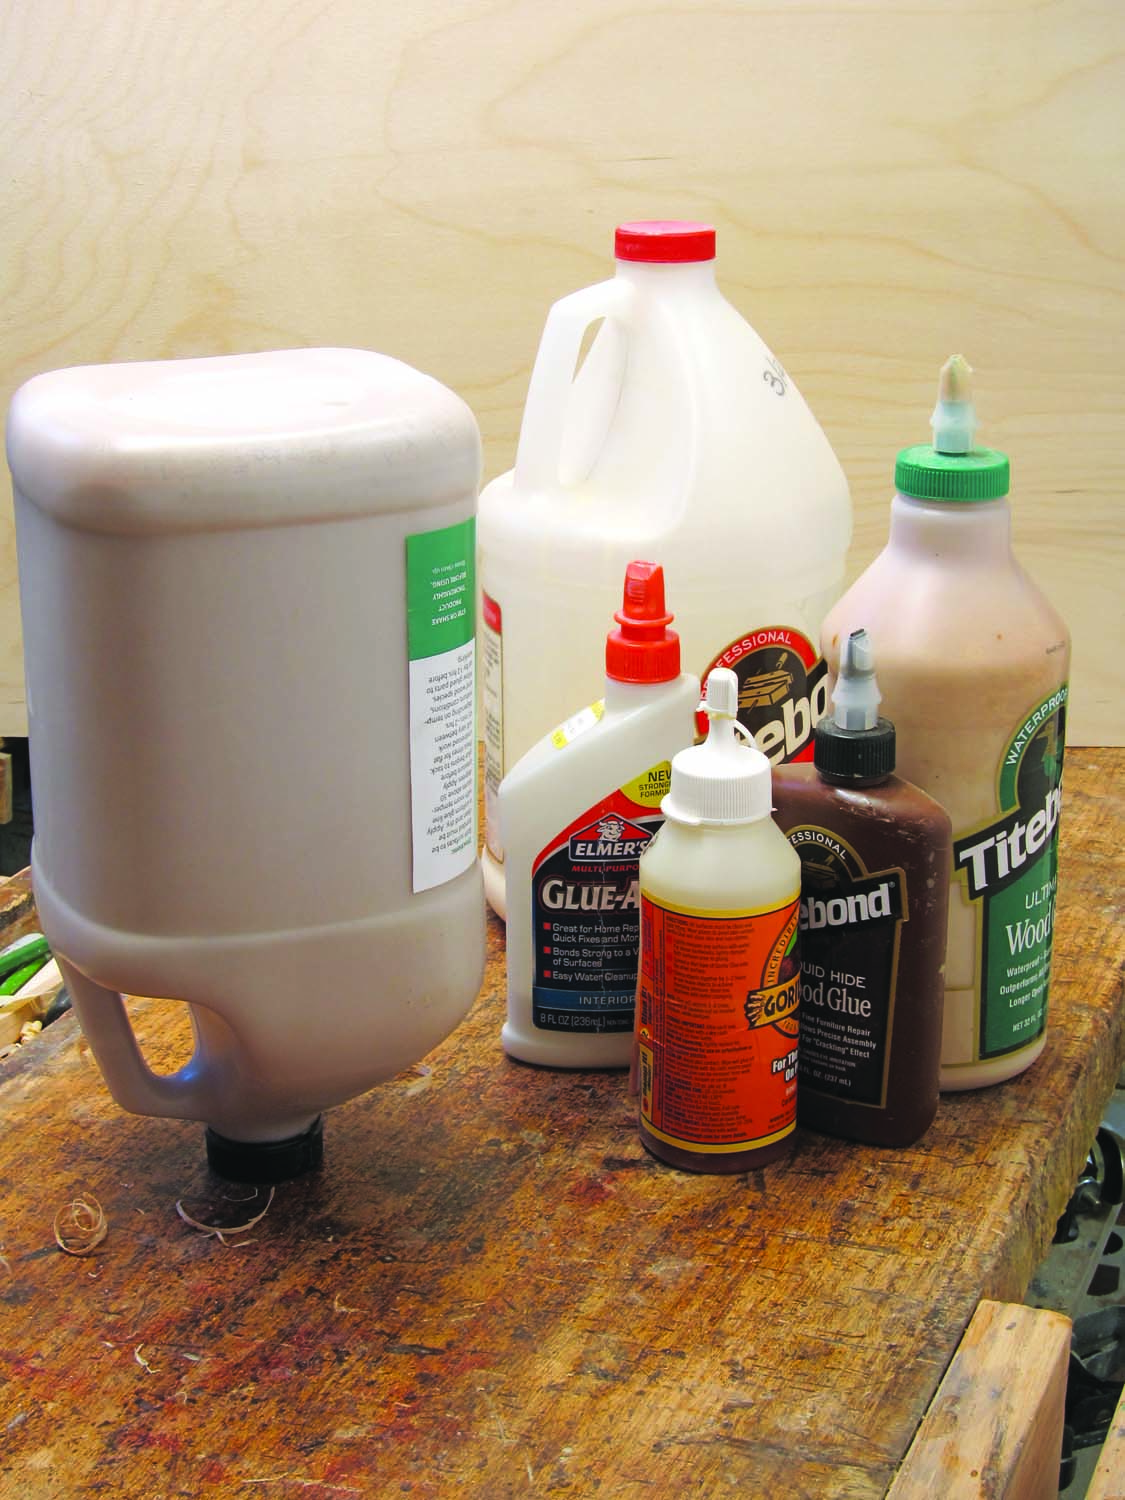 Many woodworkers, however, don’t use up their glue quickly enough to prevent some settling to occur. To safeguard against my wood glues settling and diminishing their effectiveness, I’ve started the habit of flipping my glue every time I come in the shop. If the top isn’t flat, I put it upside down in a can. I asked one of the major glue manufacturers if this was a beneficial practice. The answer was yes; that frequent rotation prevents settling. At the very least, flipping your glue bottles does no harm.
Richard Helgeson
Comfy Handle
The handles on hand-wheels are uncomfortable. The one on my lathe, for example, was difficult to turn when drilling into hard wood with a Forstner bit.
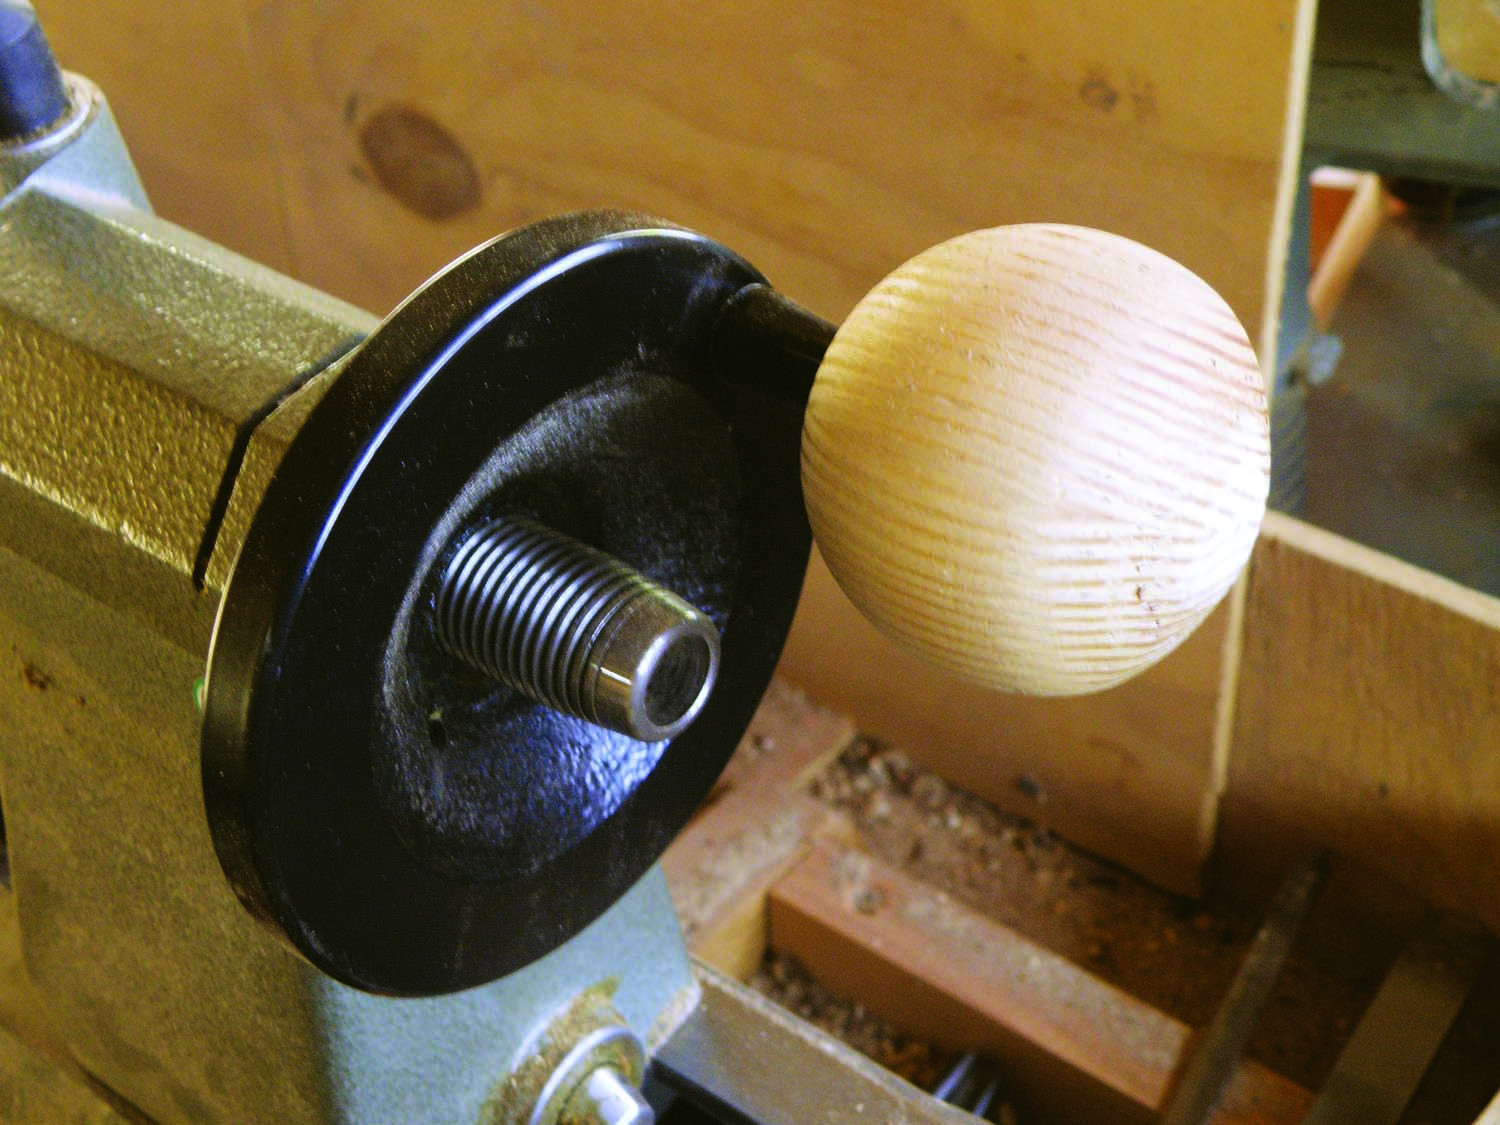
Using a chunk of scrap, I turned a 2 1/4″ ball, and then drilled a hole slightly larger than the diameter of the handle. Now, when need to drill, I slip this ball over the handle and it fits nicely in my palm, giving me better leverage without tiring my hand. In fact, I’ve made one for all of my tools with this type of handle.
If your skill set doesn’t include the ability to turn a ball, you can just buy one from a craft store.
Ken Sharrah
Auxiliary Vise
A single face vise is typical on most woodworking benches. Usually, that’s enough, but there are times when a second face vise is needed. I bought an inexpensive vise just for those times.
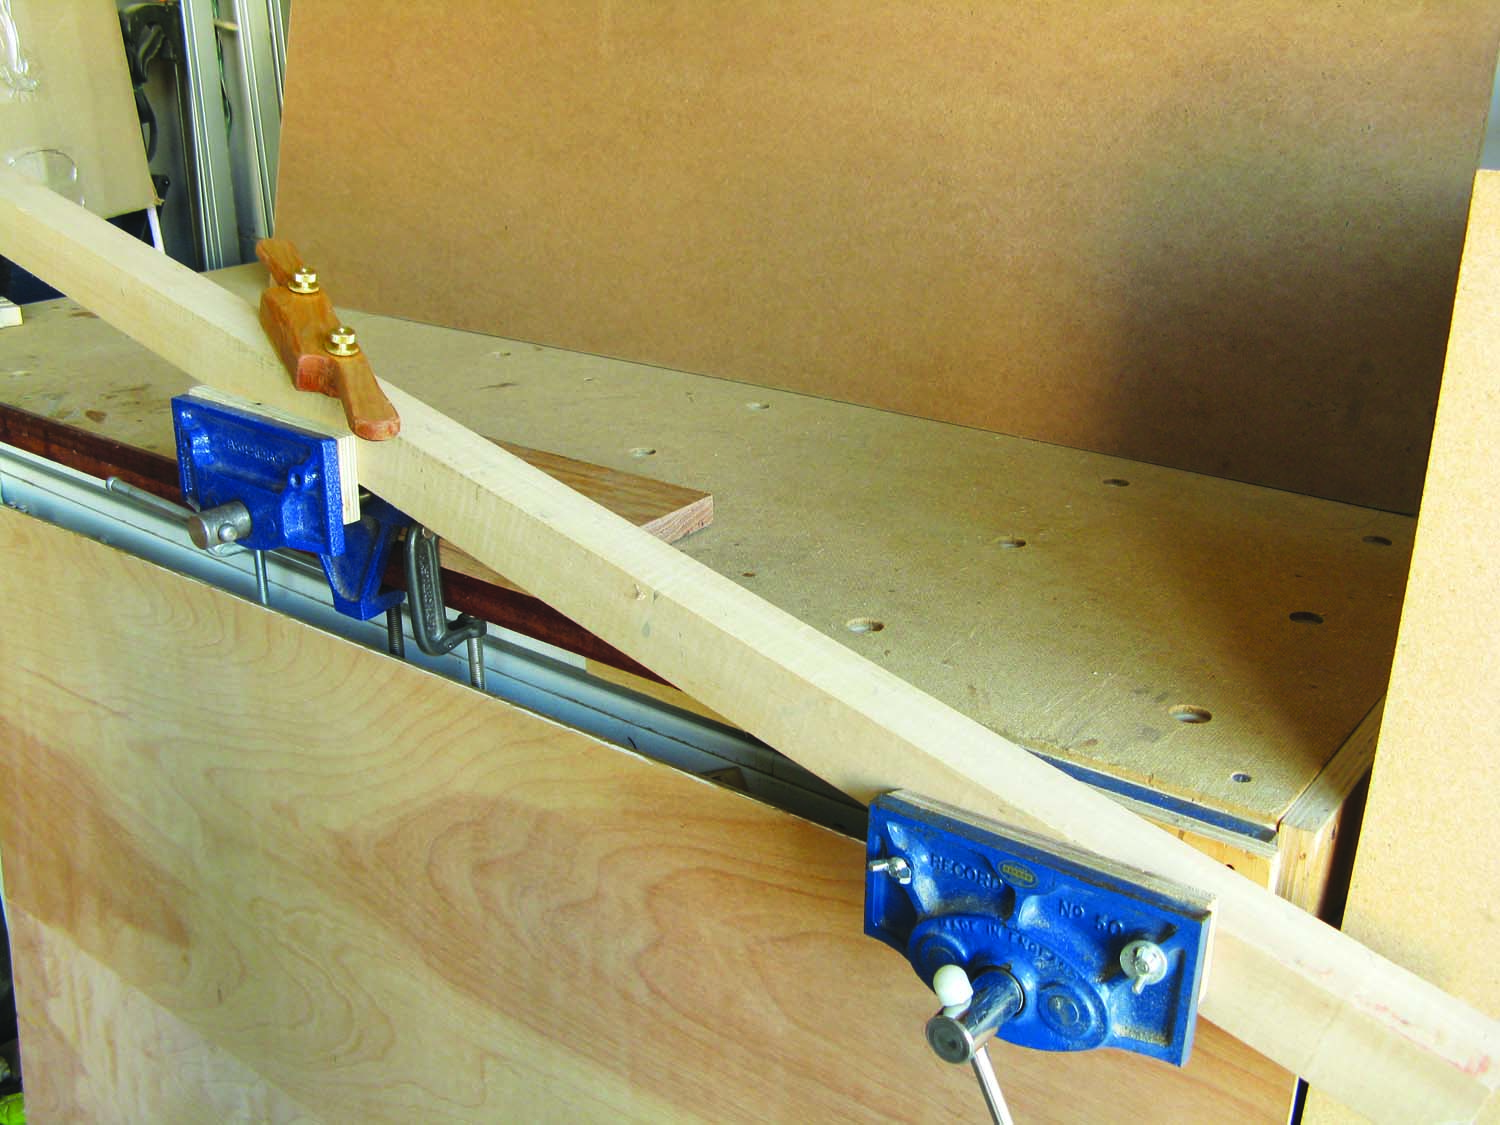 This vise doesn’t mount like a traditional face vise where the mounting flange is milled to be fastened to the underside of the bench. This is a portable vise with a built-in clamp for attaching it to a bench. I mounted this one permanently to a piece of hardwood so I could more solidly clamp it to my bench.
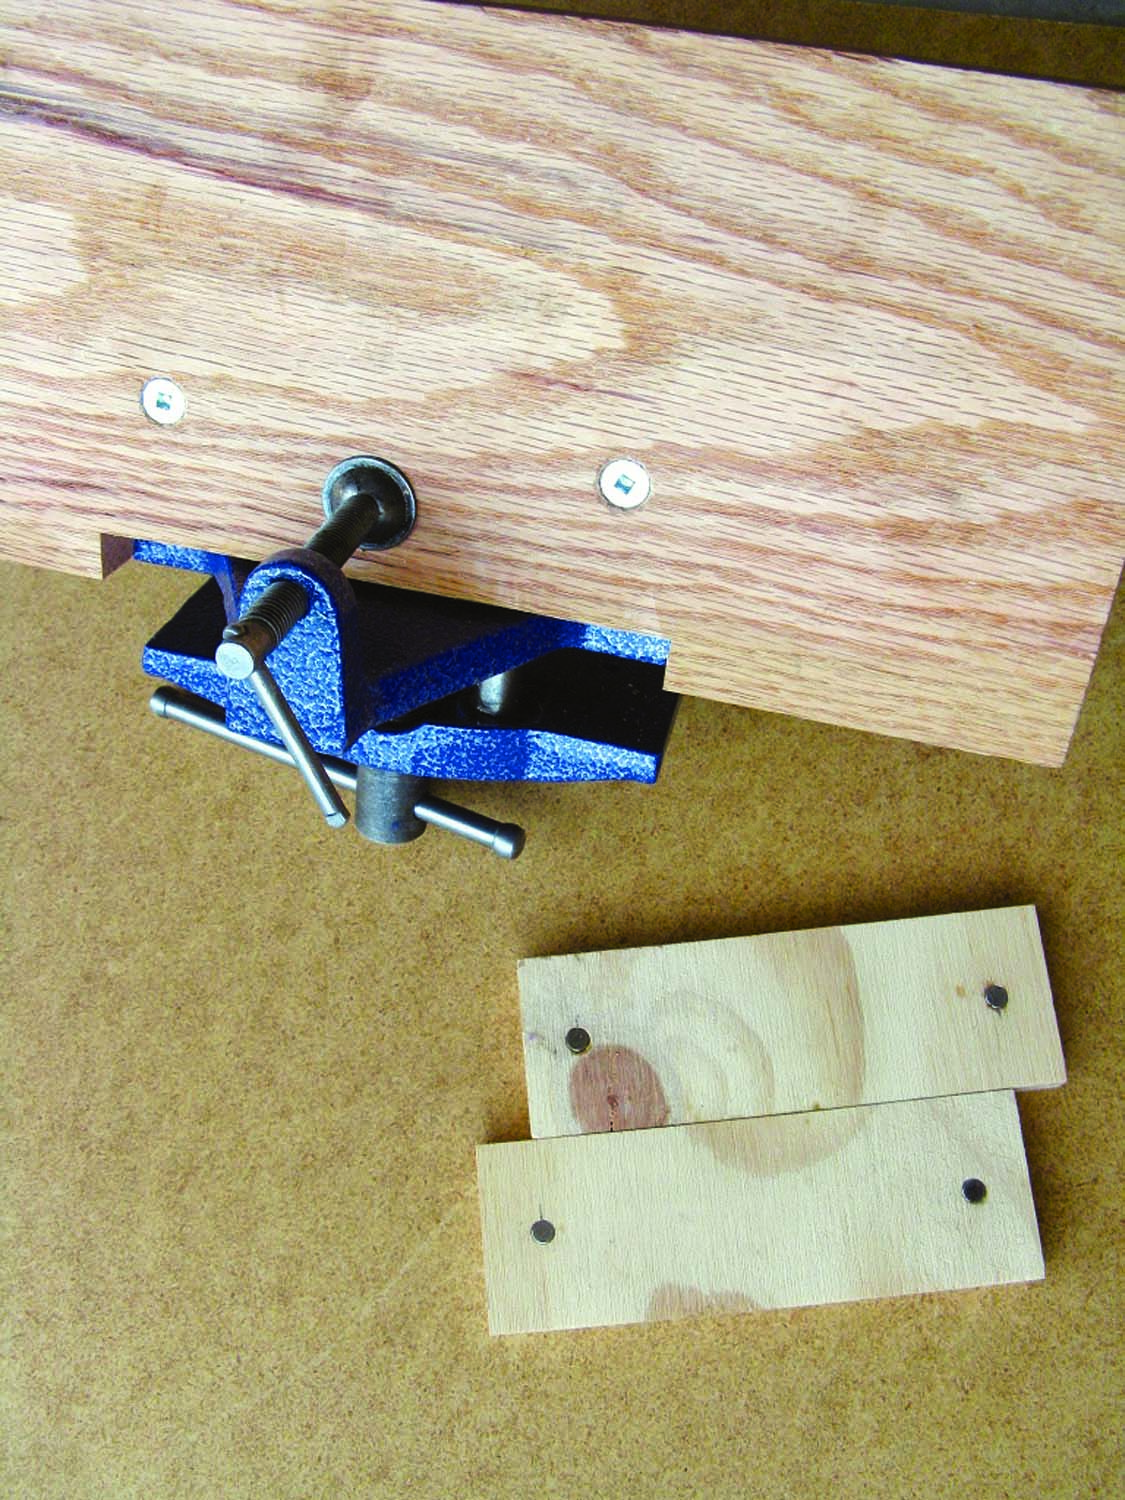
Obviously, the auxiliary vise is very handy when you need support at both ends of a long workpiece. An unforeseen benefit stemmed from the fact that it’s significantly higher than my permanent vise. Perfect for those times when you need your work closer to your eyes, such as sawing dovetails.
Charles Mak
Shop-made Bandsaw Fence
Unsatisfactory bandsaw fence? This simple shop-made fence and track system could be the answer. The tracks are formed by gluing up three pieces of hardwood. A slotted fence provides adjustment for blade drift, and is locked in place at any angle using T-bolts and jig knobs.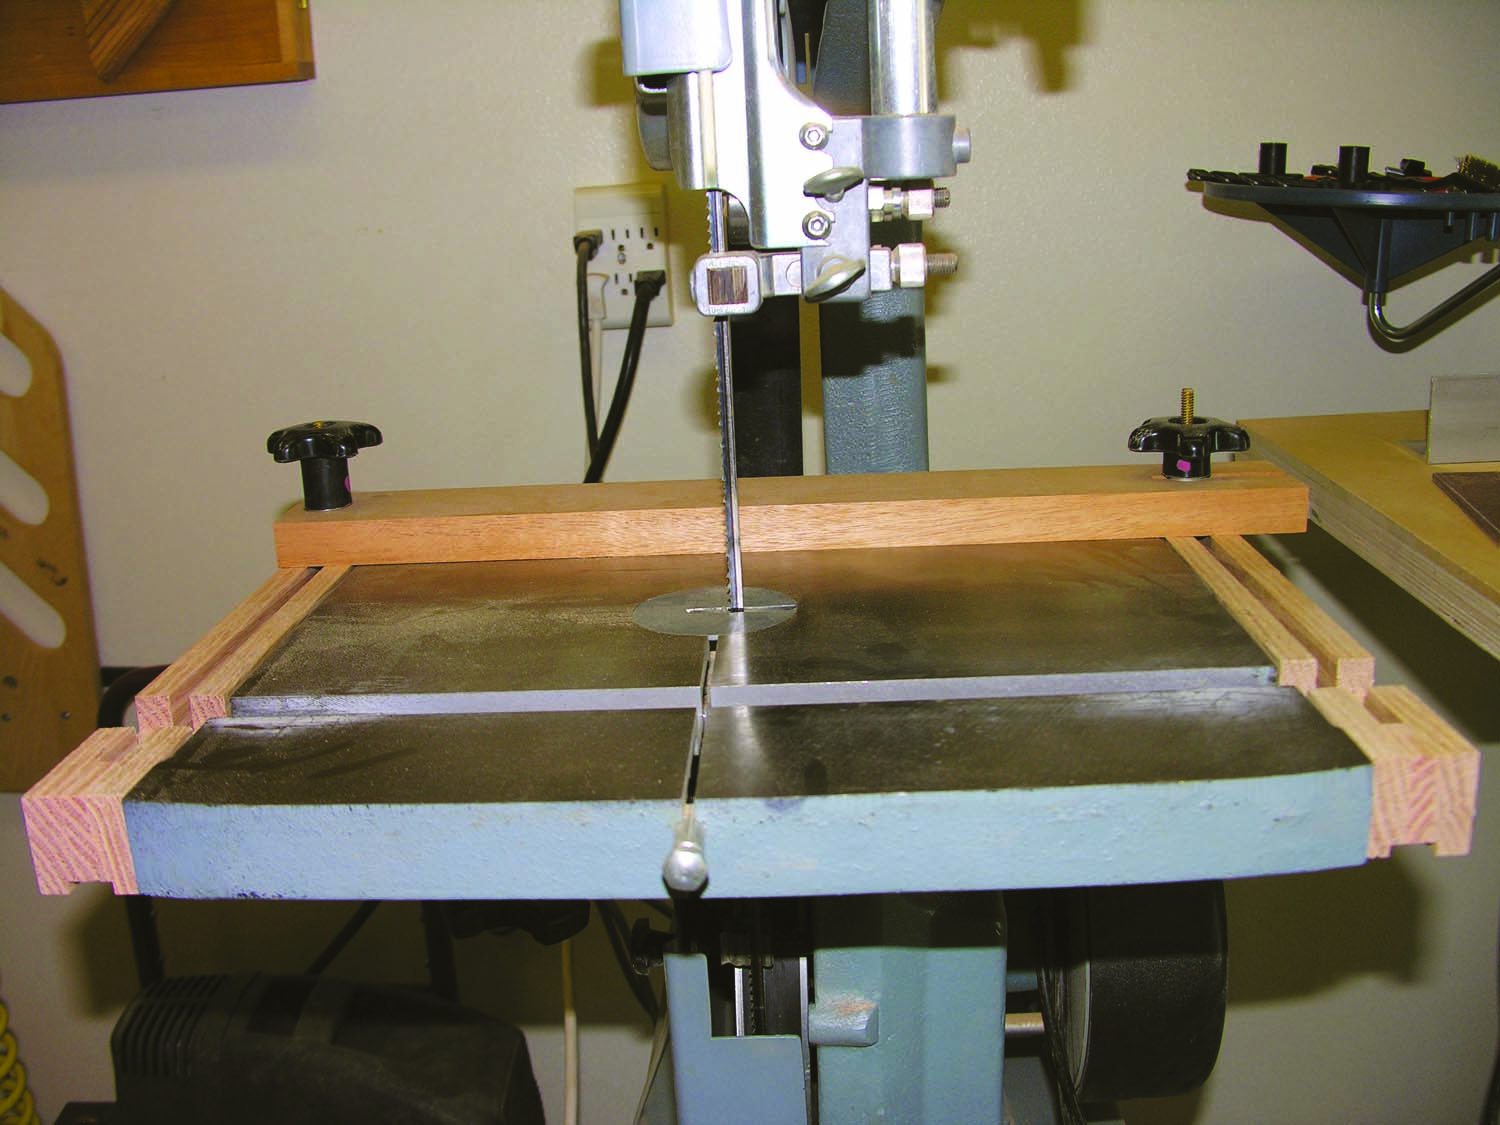
To make the tracks, cut two pieces of hardwood 2″ x 1-1/4″ and the same length as your table’s width. Cut a centered 3/4″ wide by 1/4″ deep groove in one 2″ face of each piece. This creates the recess for the T-bolt’s head to keep it from turning. Rip each of these pieces in half, down the center of the grooves, so you have four 7/8″ wide strips, each with a rabbet along one edge. Make a notch through all of the strips in alignment with your saw’s miter gauge slot. The notch needs to be dimensioned so that when the tracks are mounted to the table, your miter gauge’s bar can pass through.
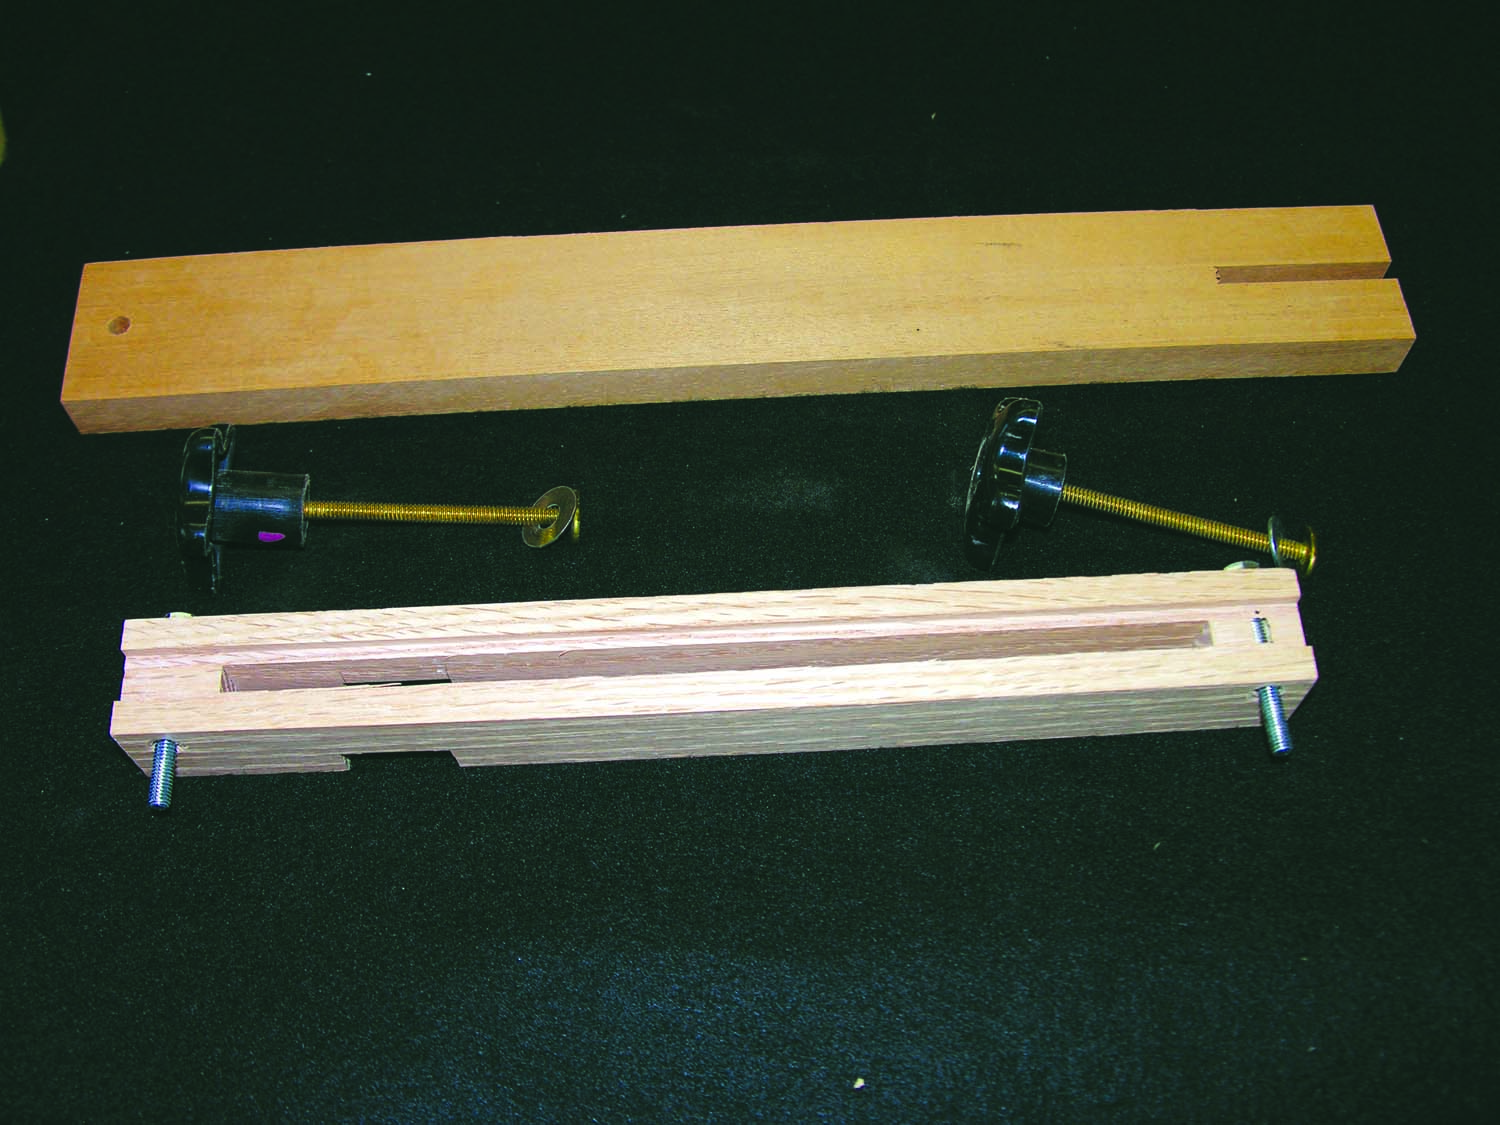 Glue 5/16″ thick x 1-1/4″ square spacers in between each pair of mounting strips. Drill mounting holes through the tracks’ ends and spacers, and mating holes through the table’s edges. Bolt the tracks in place.
The only downside – and I’m still looking for the best solution – is that each time I move the fence I need to re-square it to the blade.
Len Urban
Think Spring
Featherboards are an important accessory, providing both accuracy and a measure of safety. Typically, a featherboard is just a board with thin fingers sawn into the end that act as springs to keep your workpiece from wandering away from the fence.
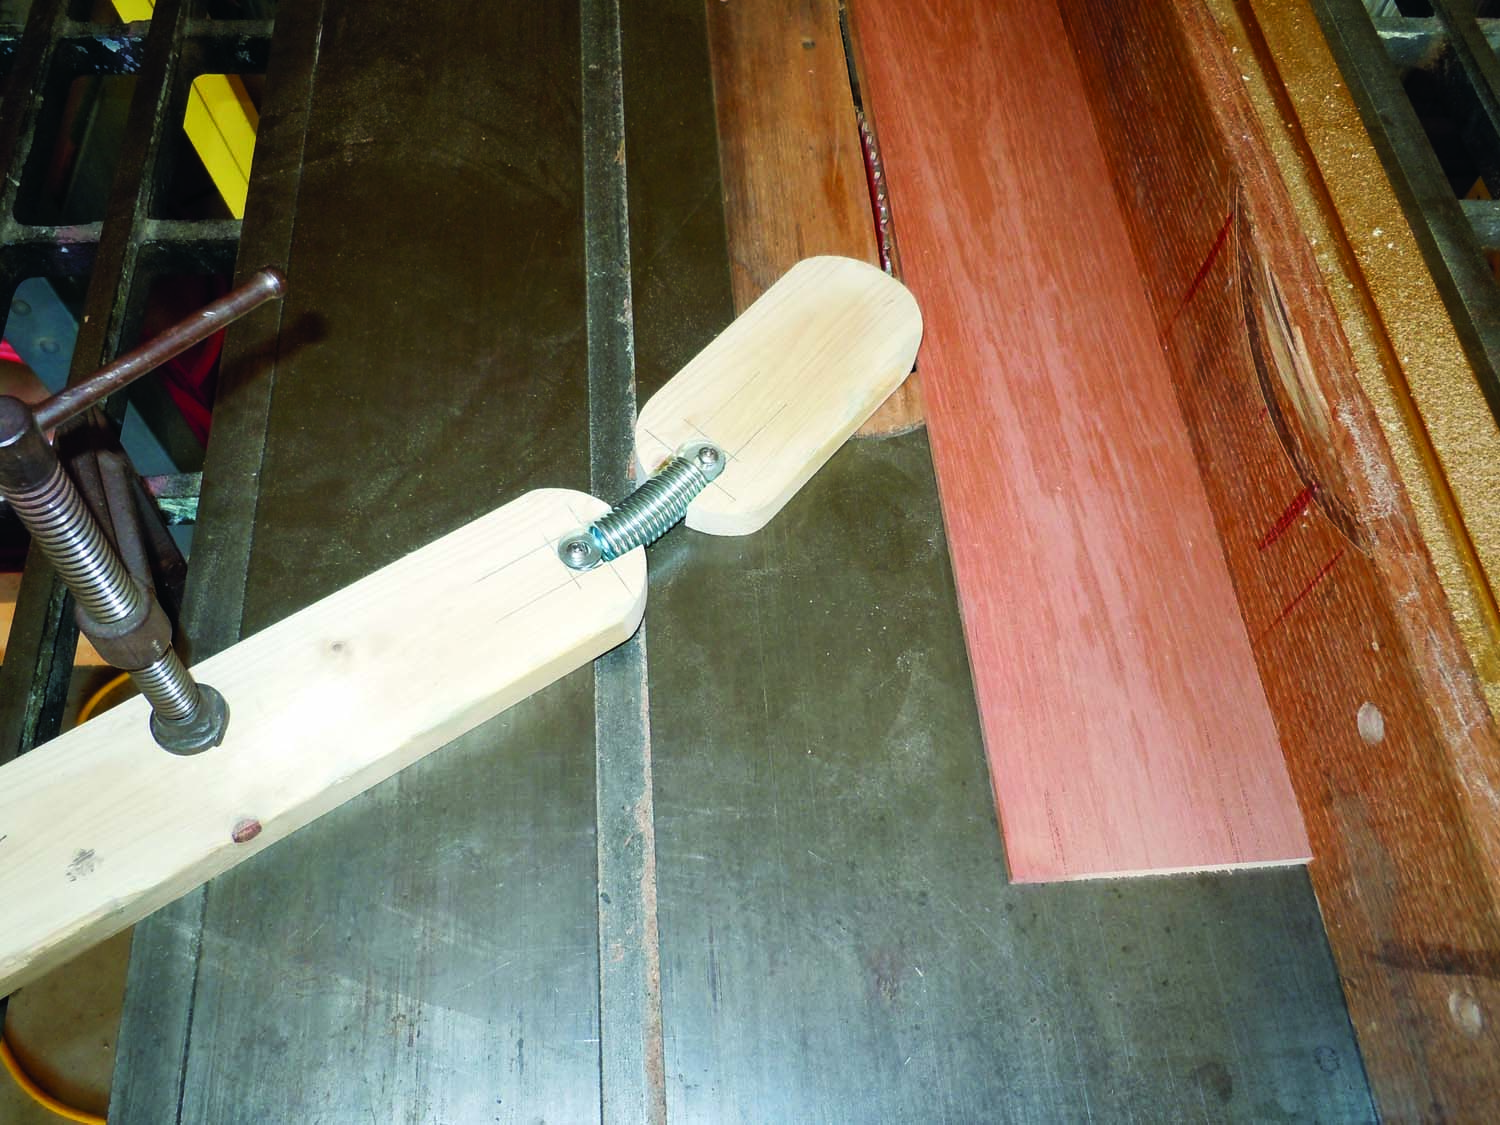 The problem I’ve always had with this type of featherboard is adjusting it to provide the pressure I want, and keeping it adjusted properly. I came up with this variation using common, home center hardware that uses a spring, so the adjustment problem isn’t that critical.
My featherboard is just a 3/4″ x 3″ extension spring fastened between two wooden blocks; one long and one short. The long block is for clamping the jig to my saw, and the short block flexes against the workpiece. Extension springs have a loop at one end, and a hook at the other. I recessed these spring ends into the blocks and then screwed them in place.
Mark Thiel
Helping Hand
I need three hands! It’s a frequent exclamation when working the shop, particularly if you work alone. It seems like I always need something to hold up the “other end.” I used to stack scraps and/or blocks of wood but no more. I designed this riser block that’s infinitely adjustable anywhere between 1-1/2″ and 13-1/2″. A jig knob and T-bolt lock the jig at whatever height you need.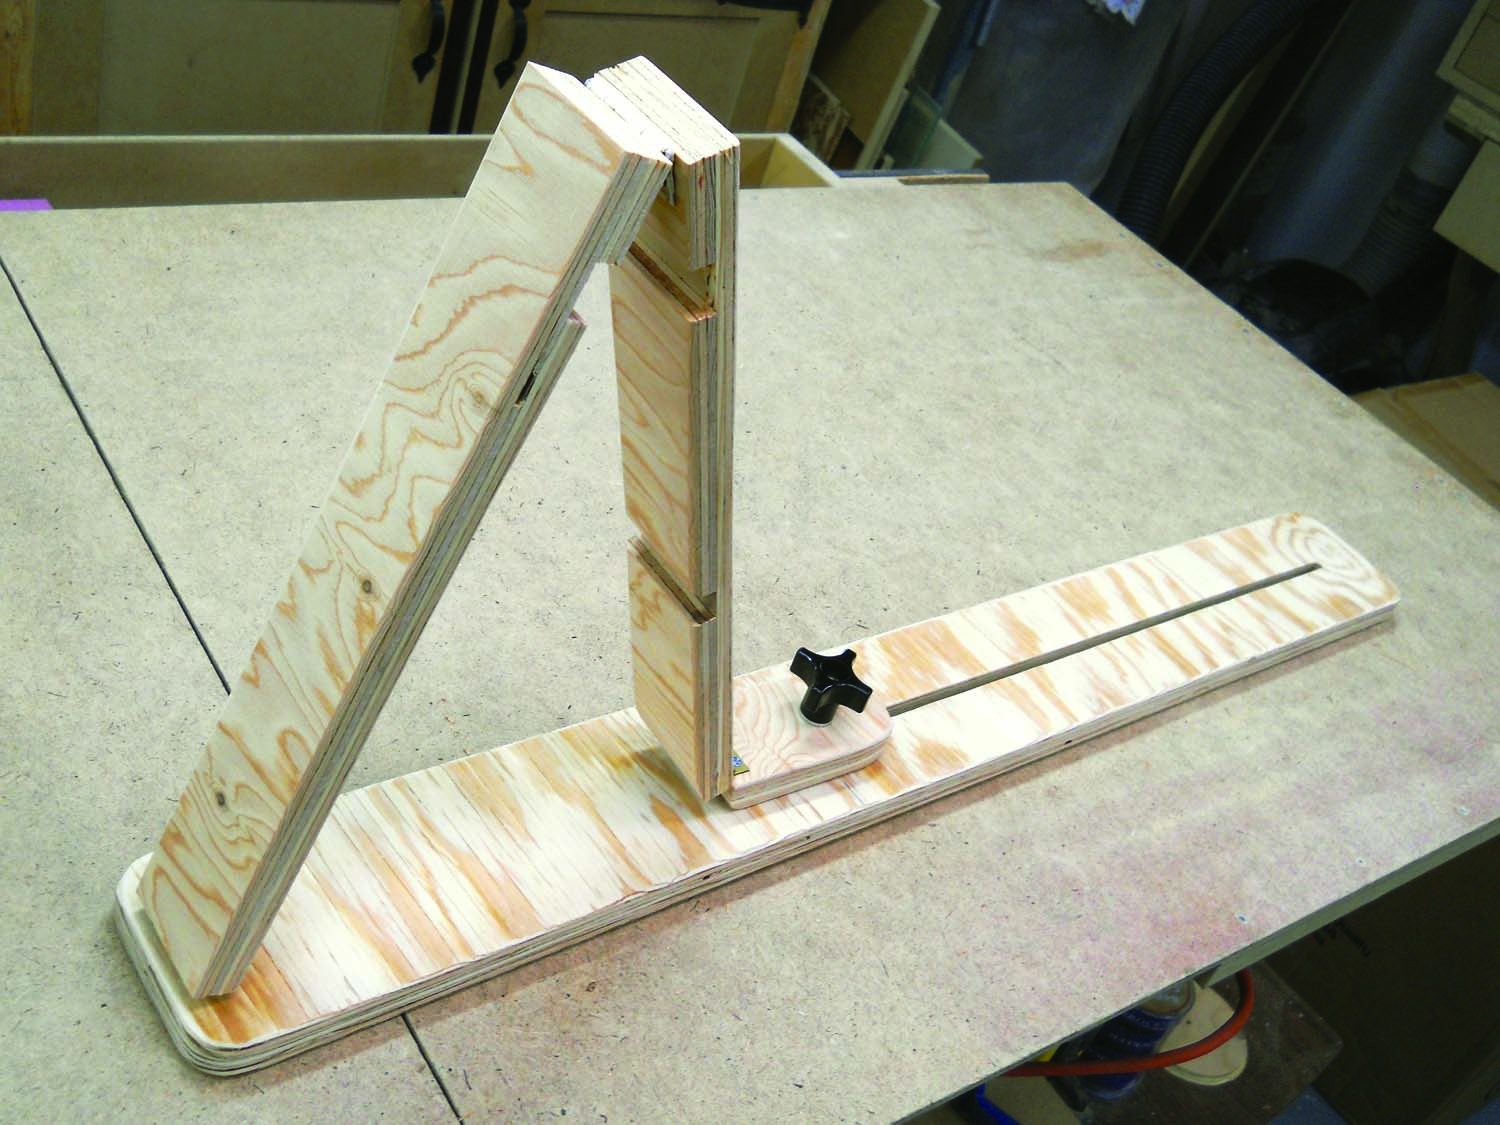
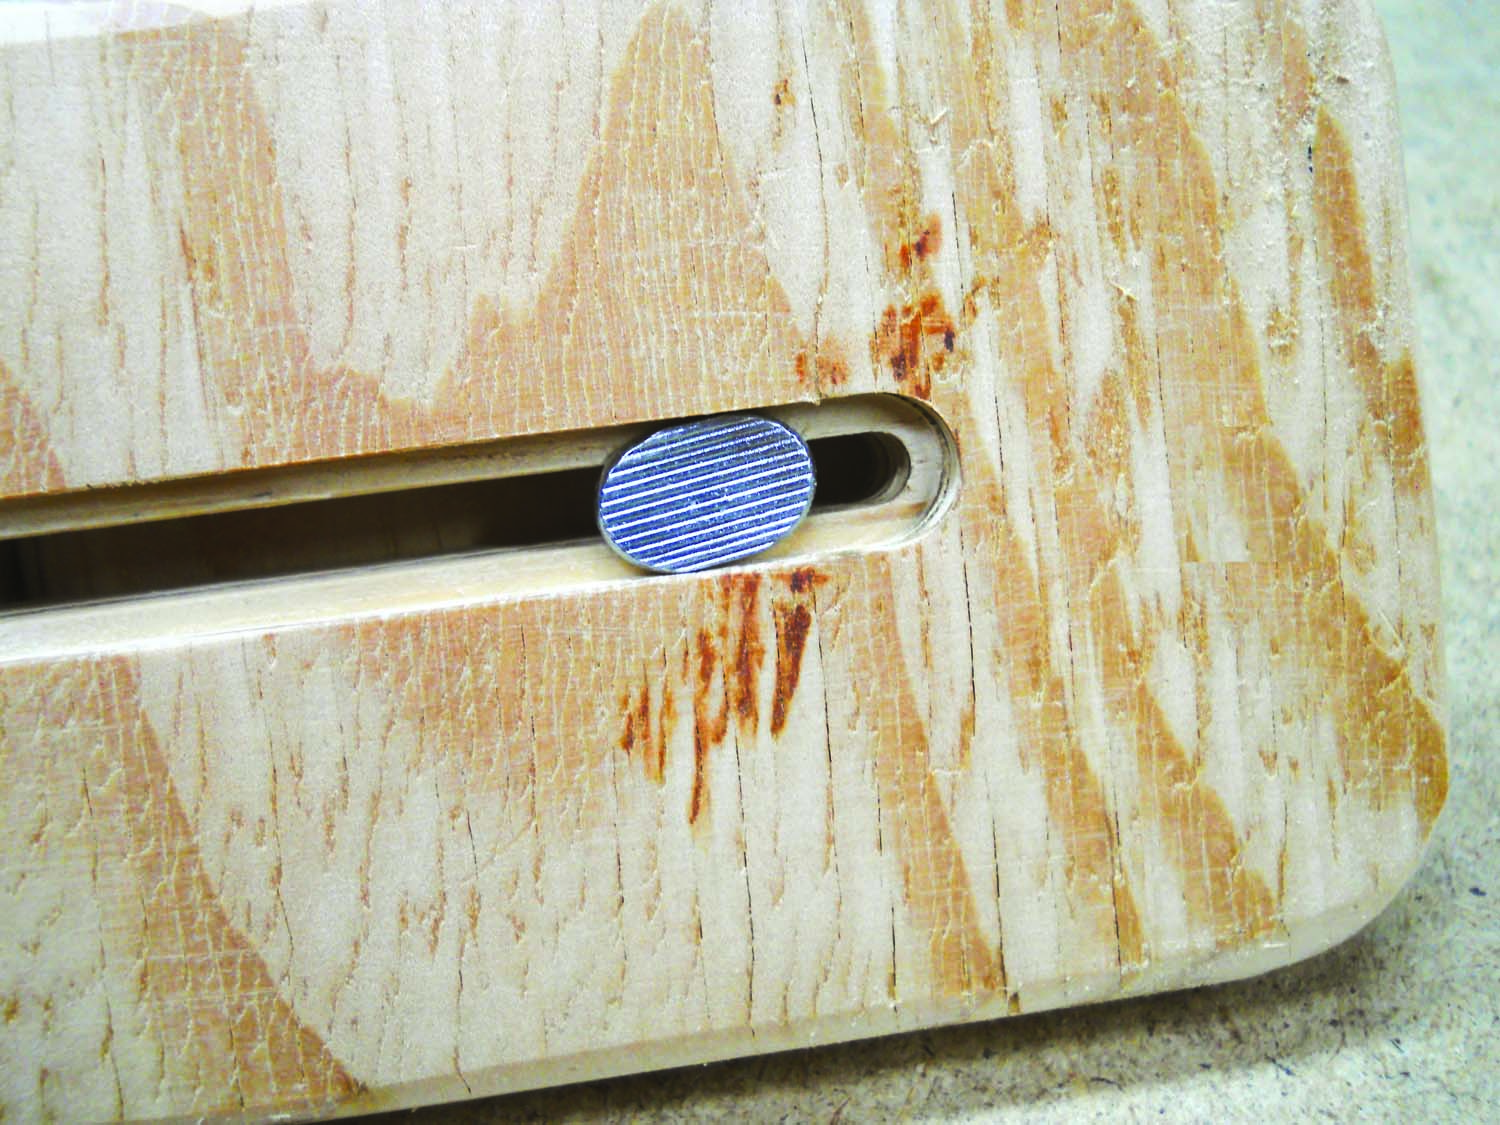 My third hand is 4″ wide x 36″ long, and made from 3/4″ plywood. To make it, first mill a 1/8″ x 1/2″ recess centered in the base’s bottom for the head of the T-bolt. Then rout a 1/4″ through-slot for the T-bolt’s body.
The two legs are 2″ x 13″. They’re attached to the base using three butt hinges.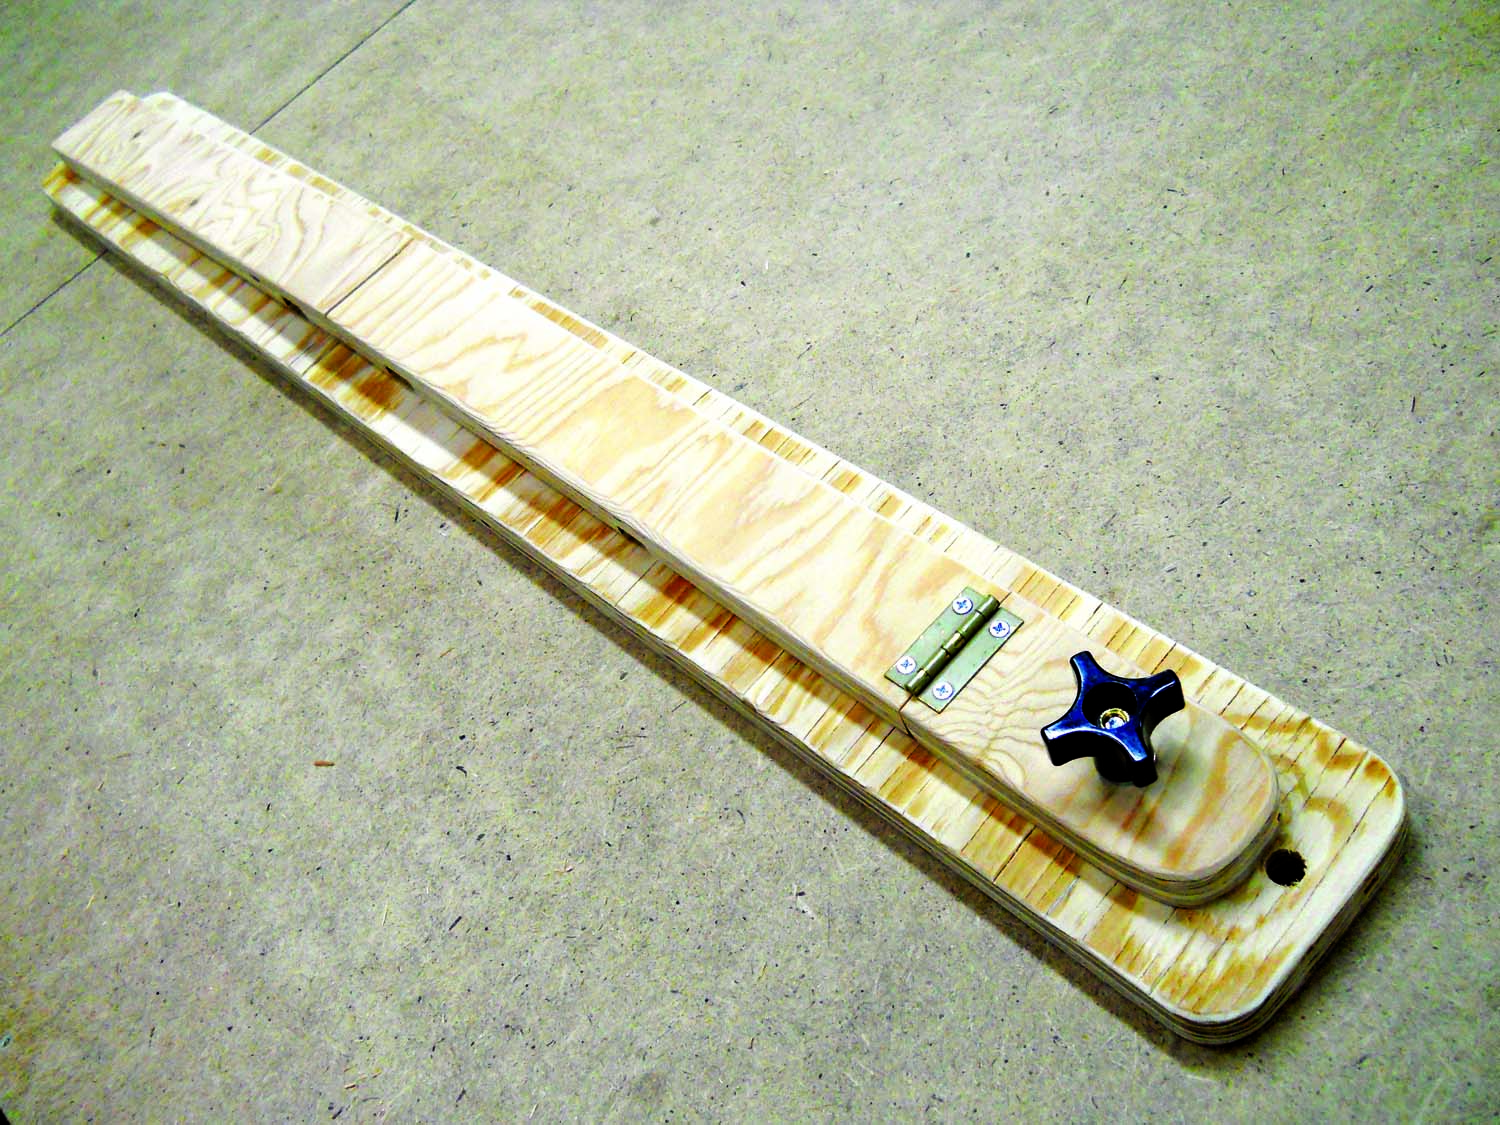
The dadoes seen in the legs themselves don’t serve a purpose, other than using up scraps.
Serge Duclos
Contact Cement Cover
Applying contact cement with a roller is my preferred method, as opposed to spraying it on. There’s not as much clean-up, and I don’t have to deal with overspray.
There are drawbacks to this method, however. Mainly, the glue needs to be covered to keep it from skinning over between applications. Also, if you’re trimming laminate nearby, laminate chips in your glue spells disaster.
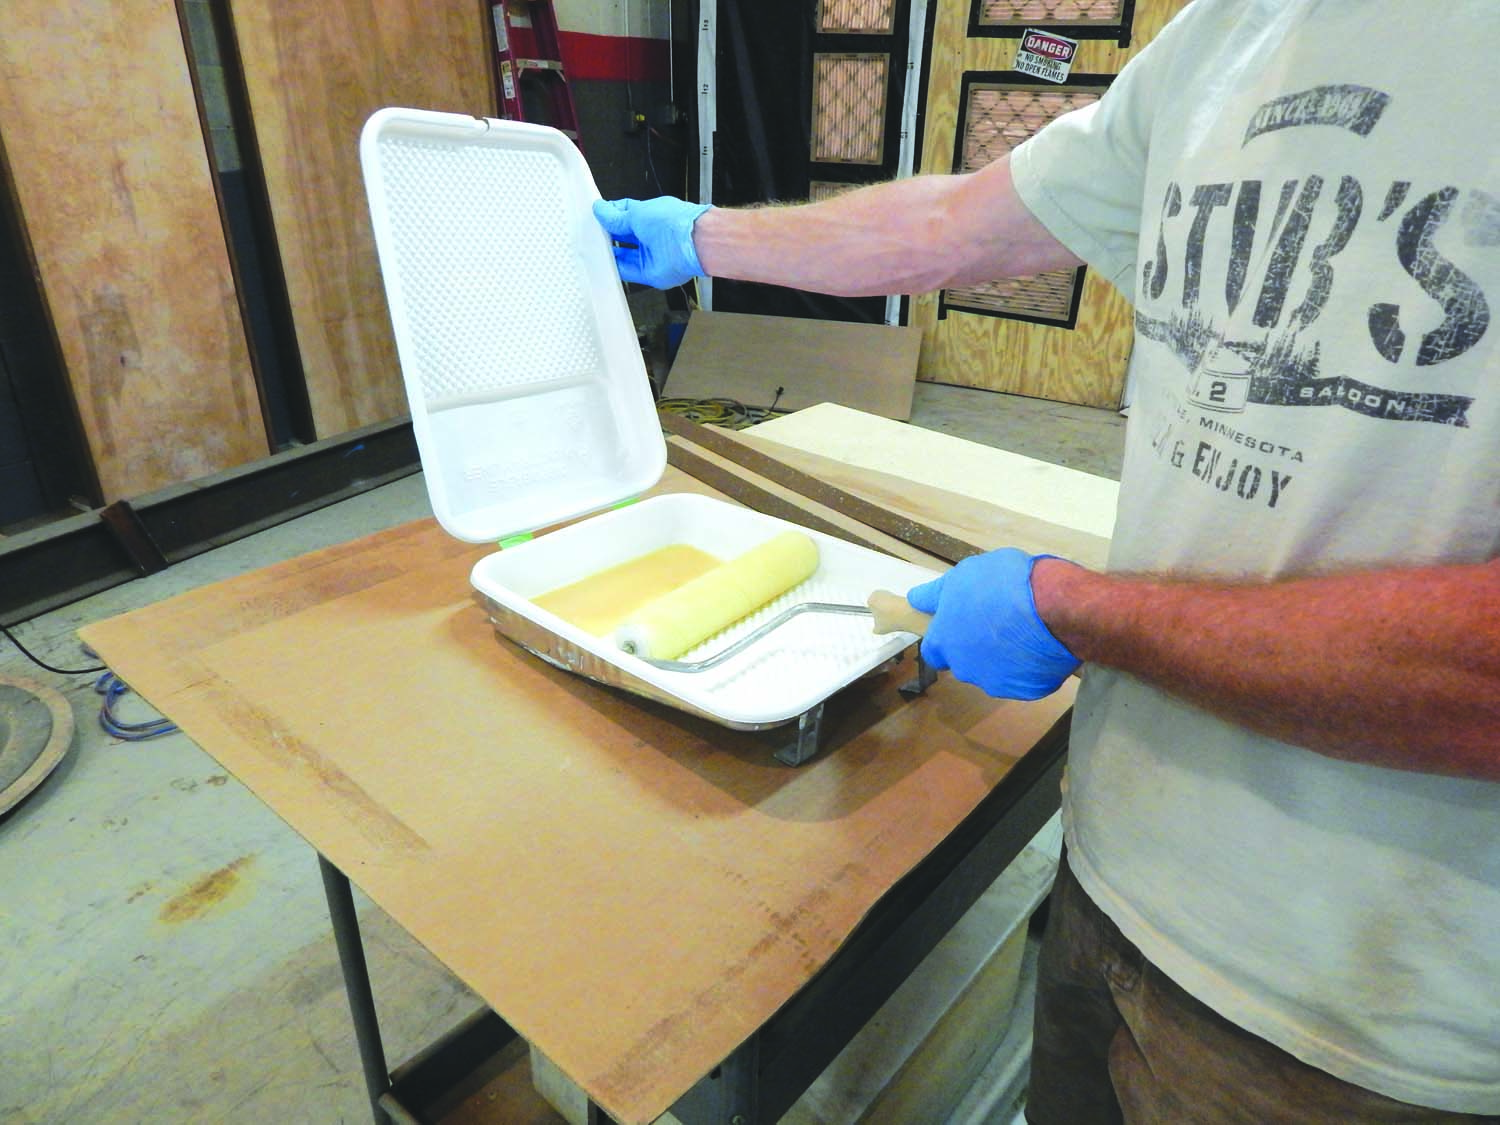 Here’s my simple, low-tech solution. I use disposable roller tray liners to avoid clean-up, and it occurred to me that I could use one of these liners upside down as a cover. I attached the liners with two pieces of masking tape on one end to act as hinges. I also made a small notch for the roller’s handle on the other end. The mating liners seal up well enough to protect the glue from debris and keep it from skinning over.
Kelly Neumann
Bench Blob Detector
Glue blobs are inevitable. While they may seem innocuous, they can cause problems. For example, when they harden, these blobs of glue are difficult to see, and can put nasty dent in a workpiece that’s on your bench. As a precaution, every so often I run the edge of a straight piece of hard maple over my bench to find the blobs of glue.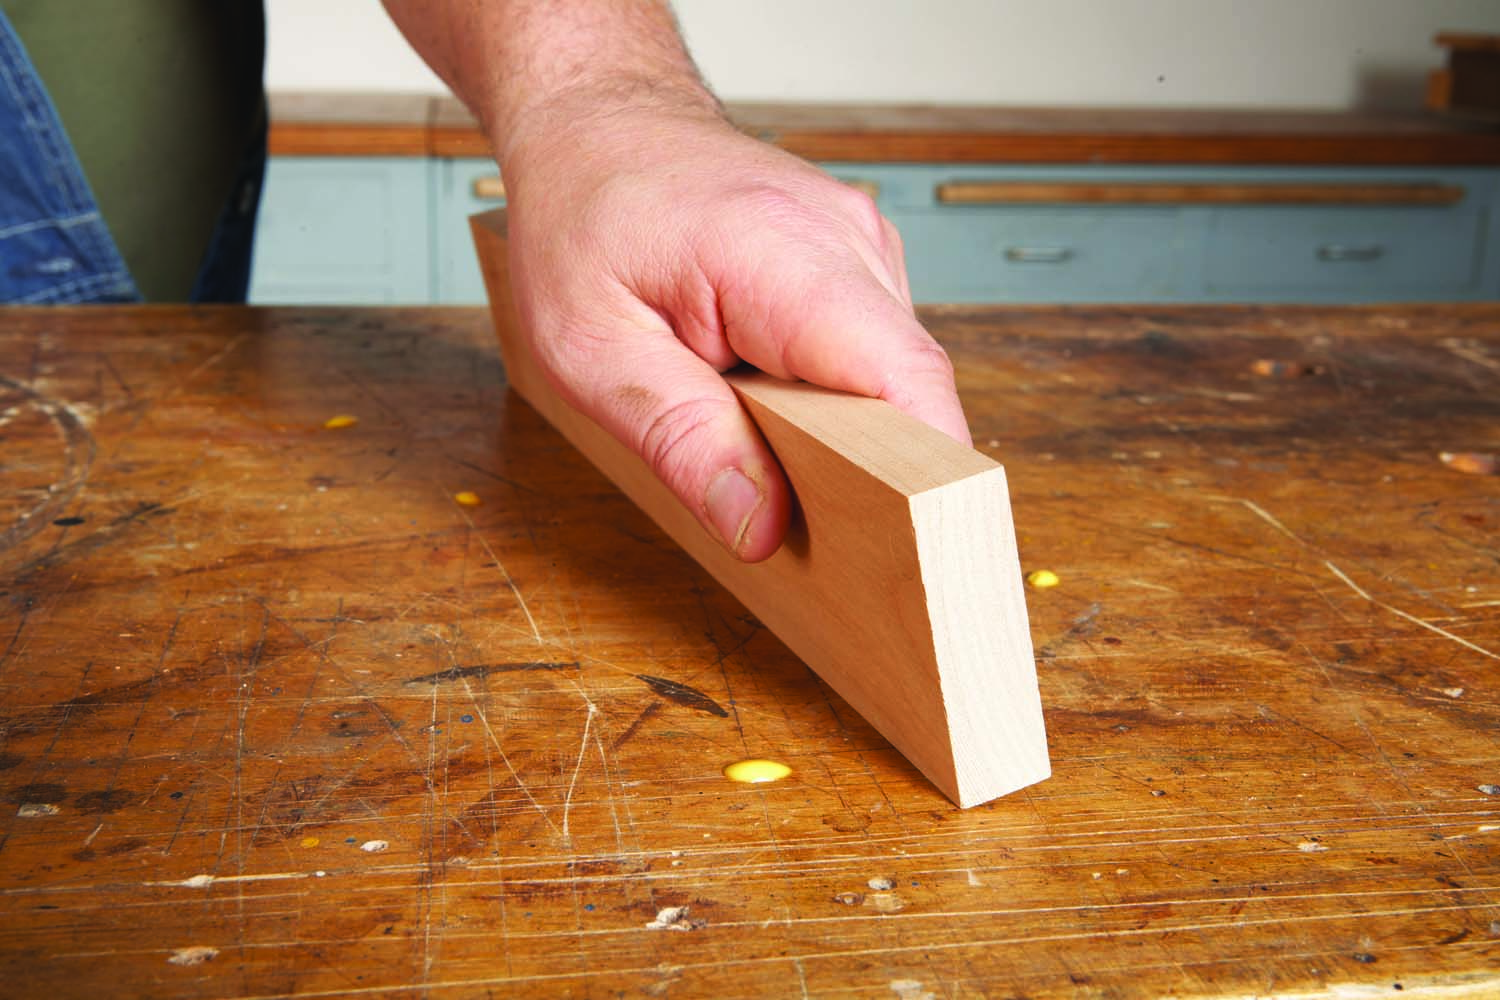
Sometimes the board will actually chip the blob off, but its main purpose is to locate them, so I can remove them with a scraper or chisel.
Tom Caspar
Square Drive Extractor
Stripped Phillips heads are a pesky problem that’s not always solved by a screw extractor; especially if you don’t happen to have one at hand.
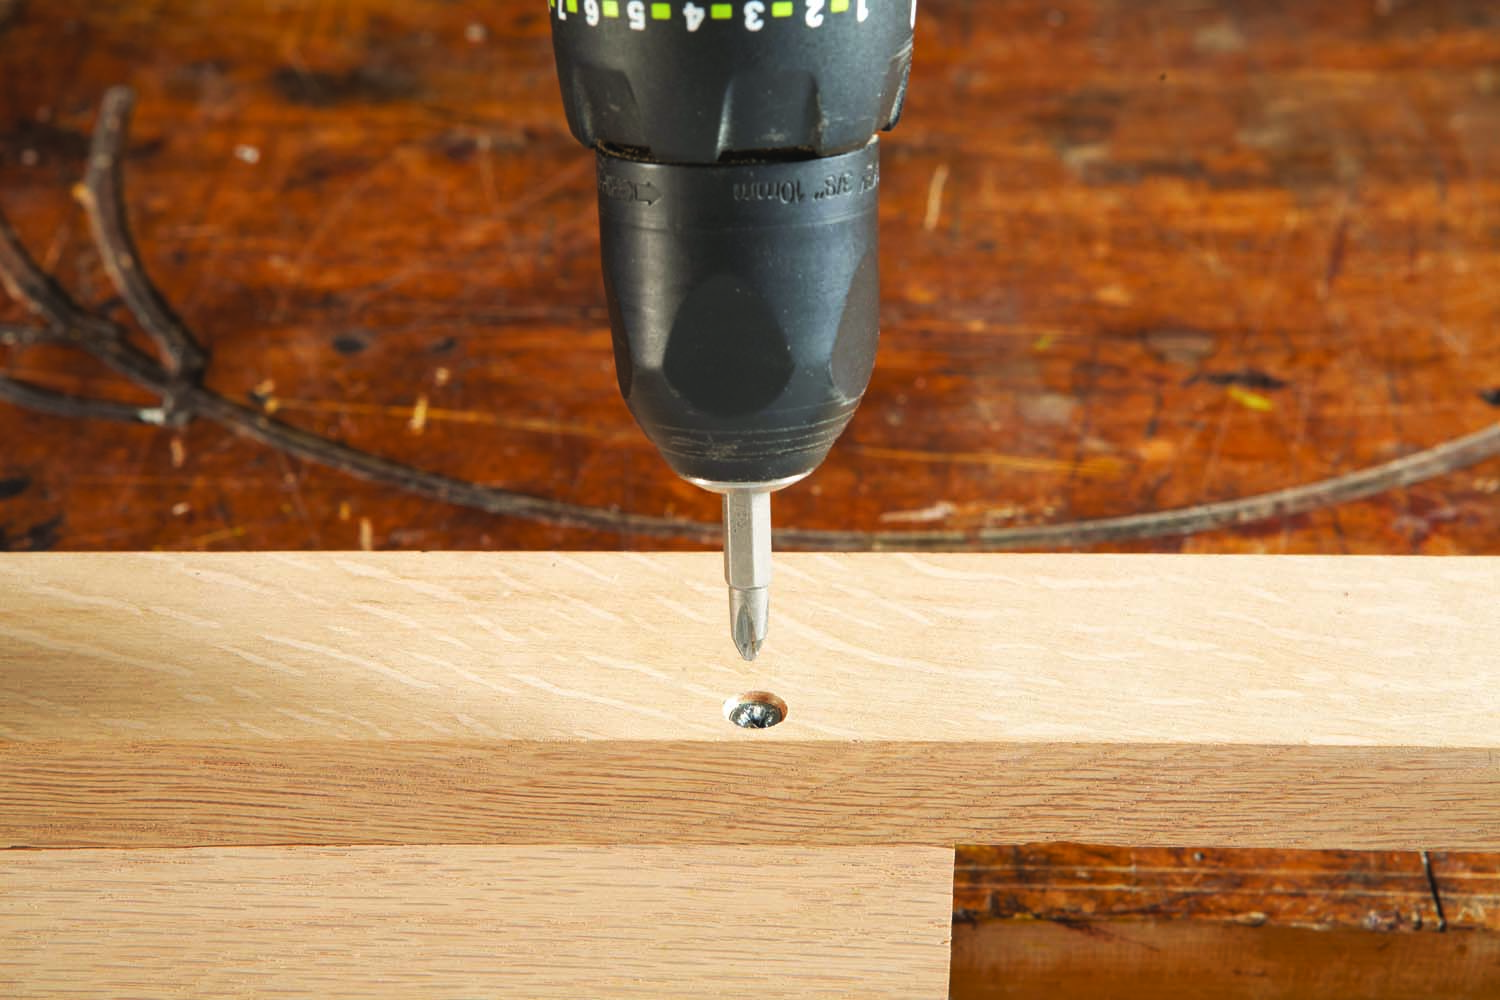
Step 1.
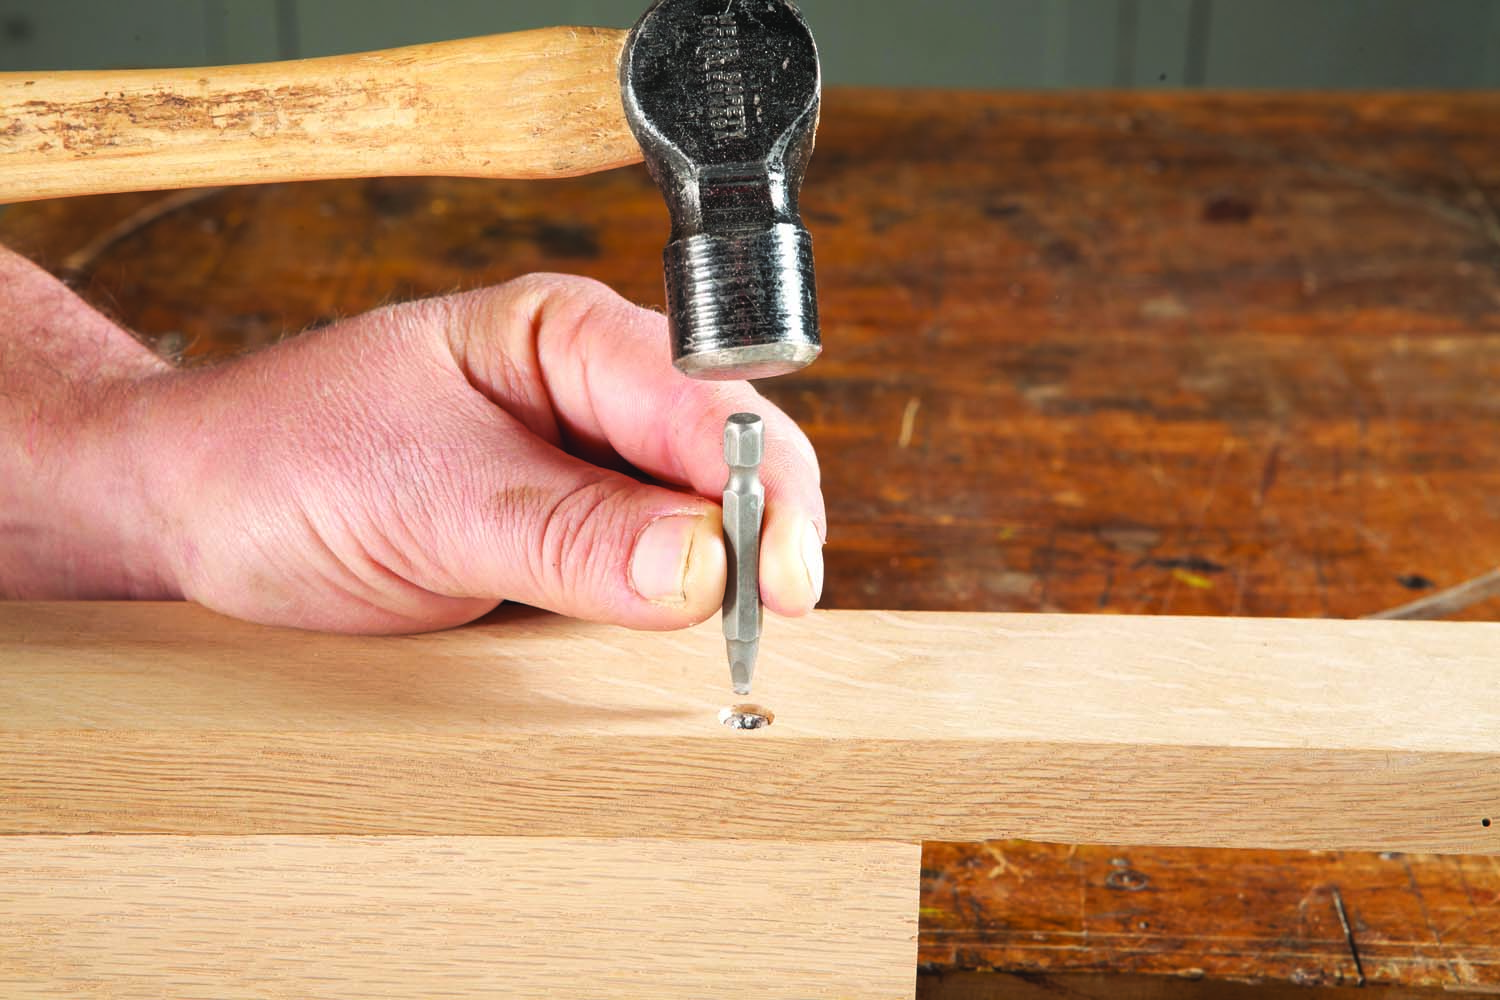
Step 2.
Necessity being the mother of invention, I found another solution to add to my arsenal. Just pound a square drive bit into the head until you feel it bite.
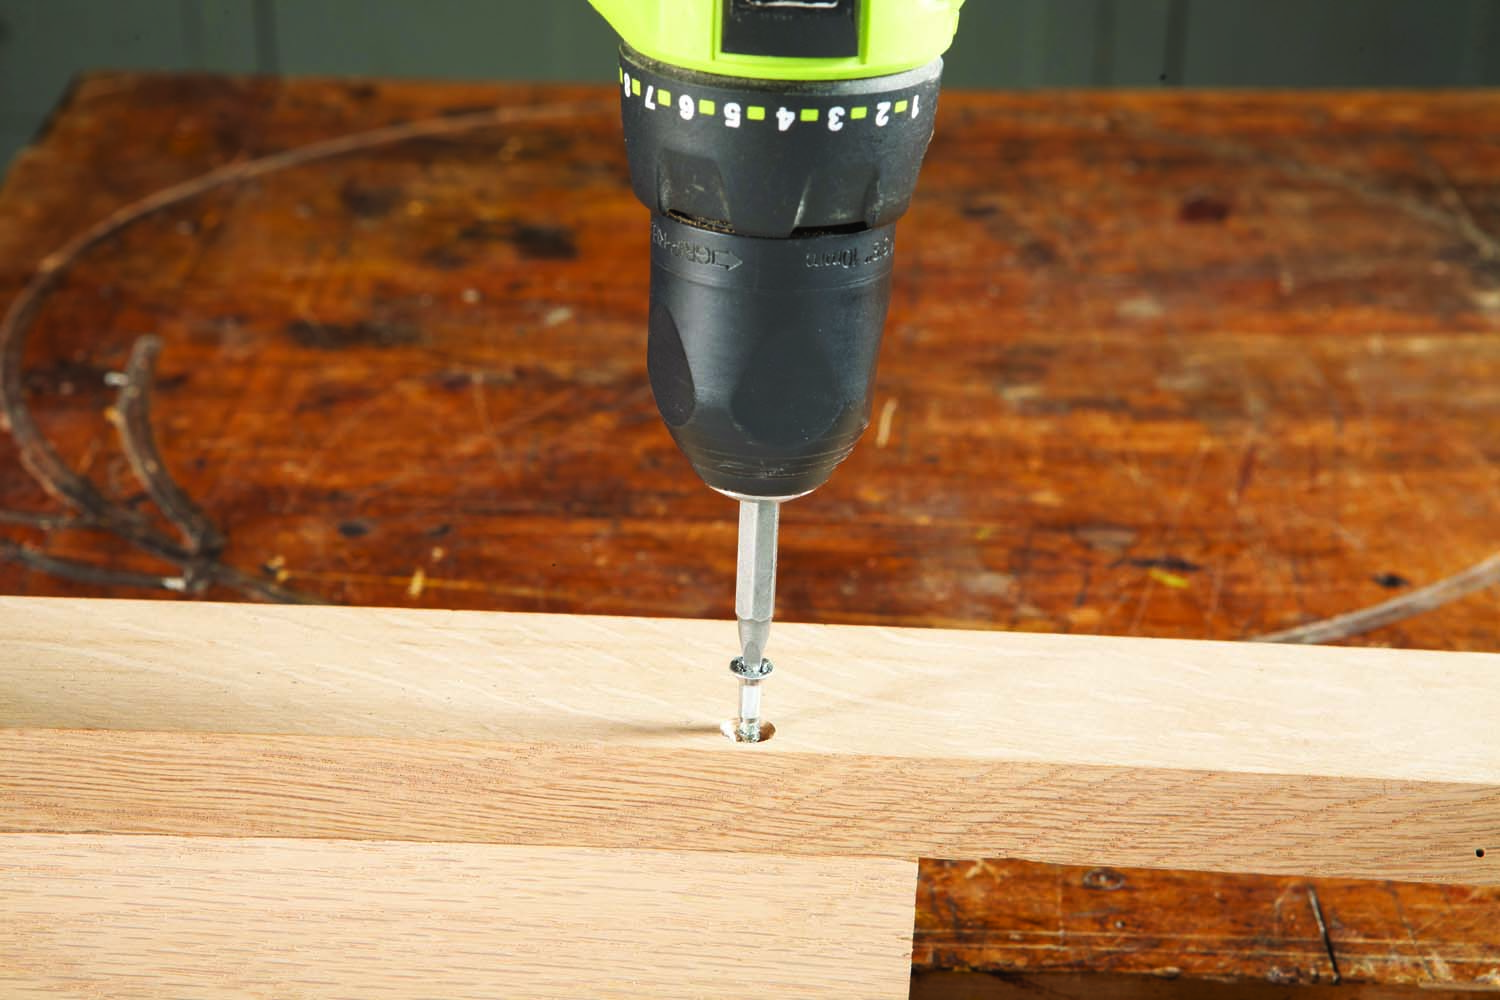
Step 3.
You can then install the bit in a driver and turn the screw out. This works great as long as the screw’s head isn’t harder than the bit.
Richard Tendick
Krud Kutter
Resin build-up on saw blades makes them less effective. A clean blade runs cooler, doesn’t cause burning on your workpiece, stays sharp longer and cuts more accurately. Cleaning blades is a chore, however, so I’m always on the lookout for ways to make it easier.
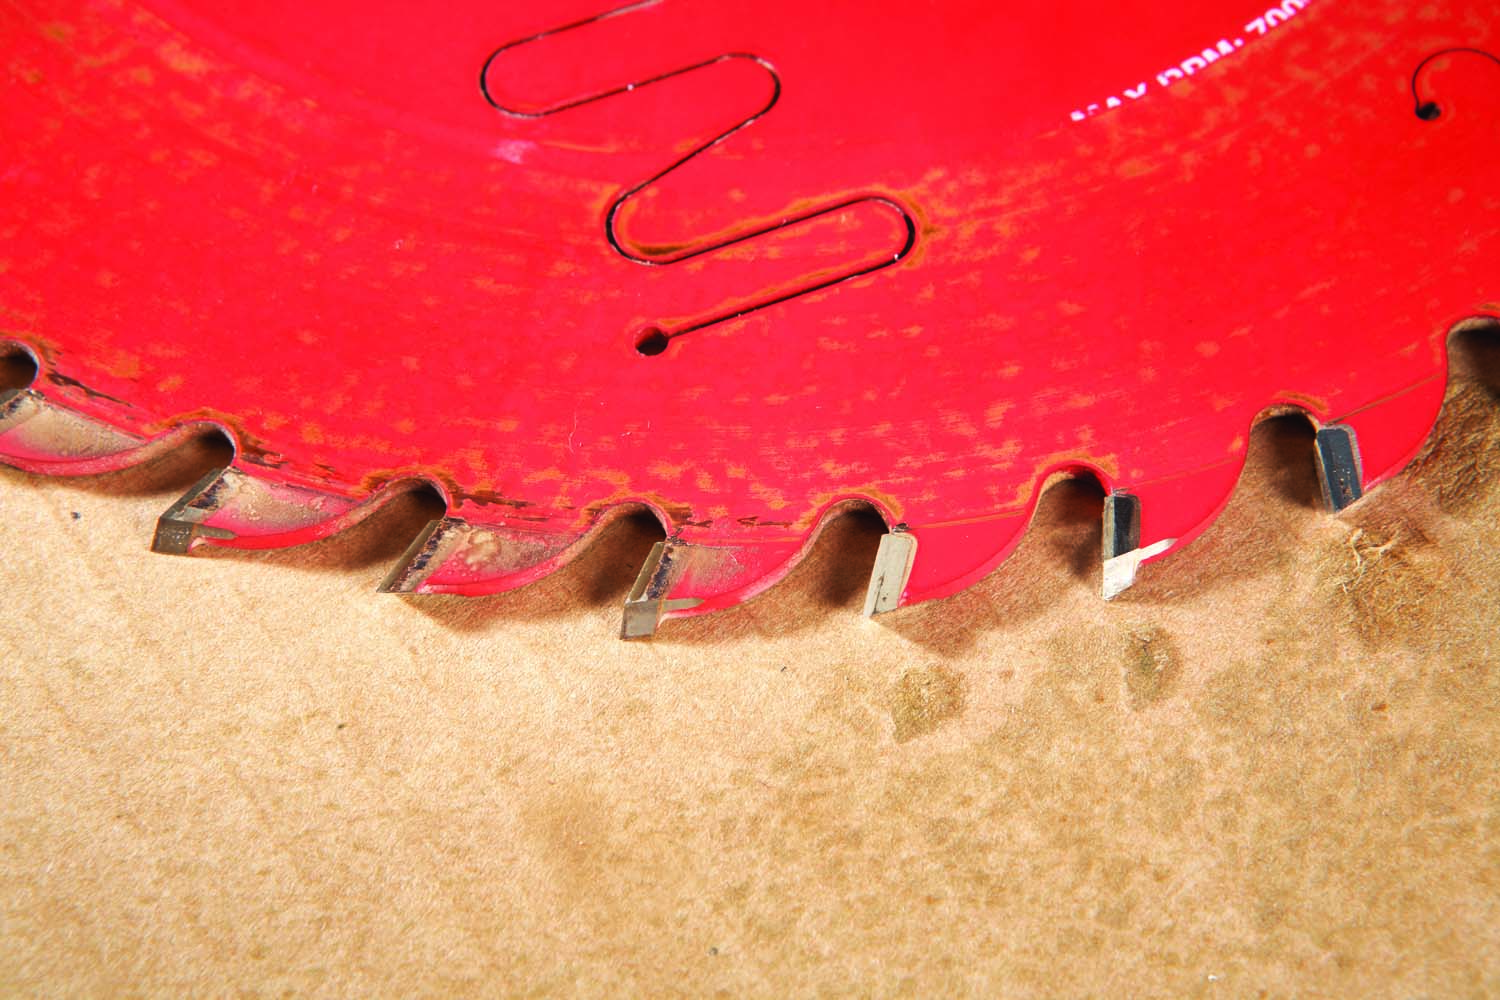
Before cleaning on left; cleaned blades on right.
Krud Kutter Cleaner/Degreaser seems to take off resin build-up pretty easily. It’s bio-degradable and non-toxic, but it’s still recommended that you wear gloves when you use it. Just spray it on, let it soak for a minute, and then wipe it off.
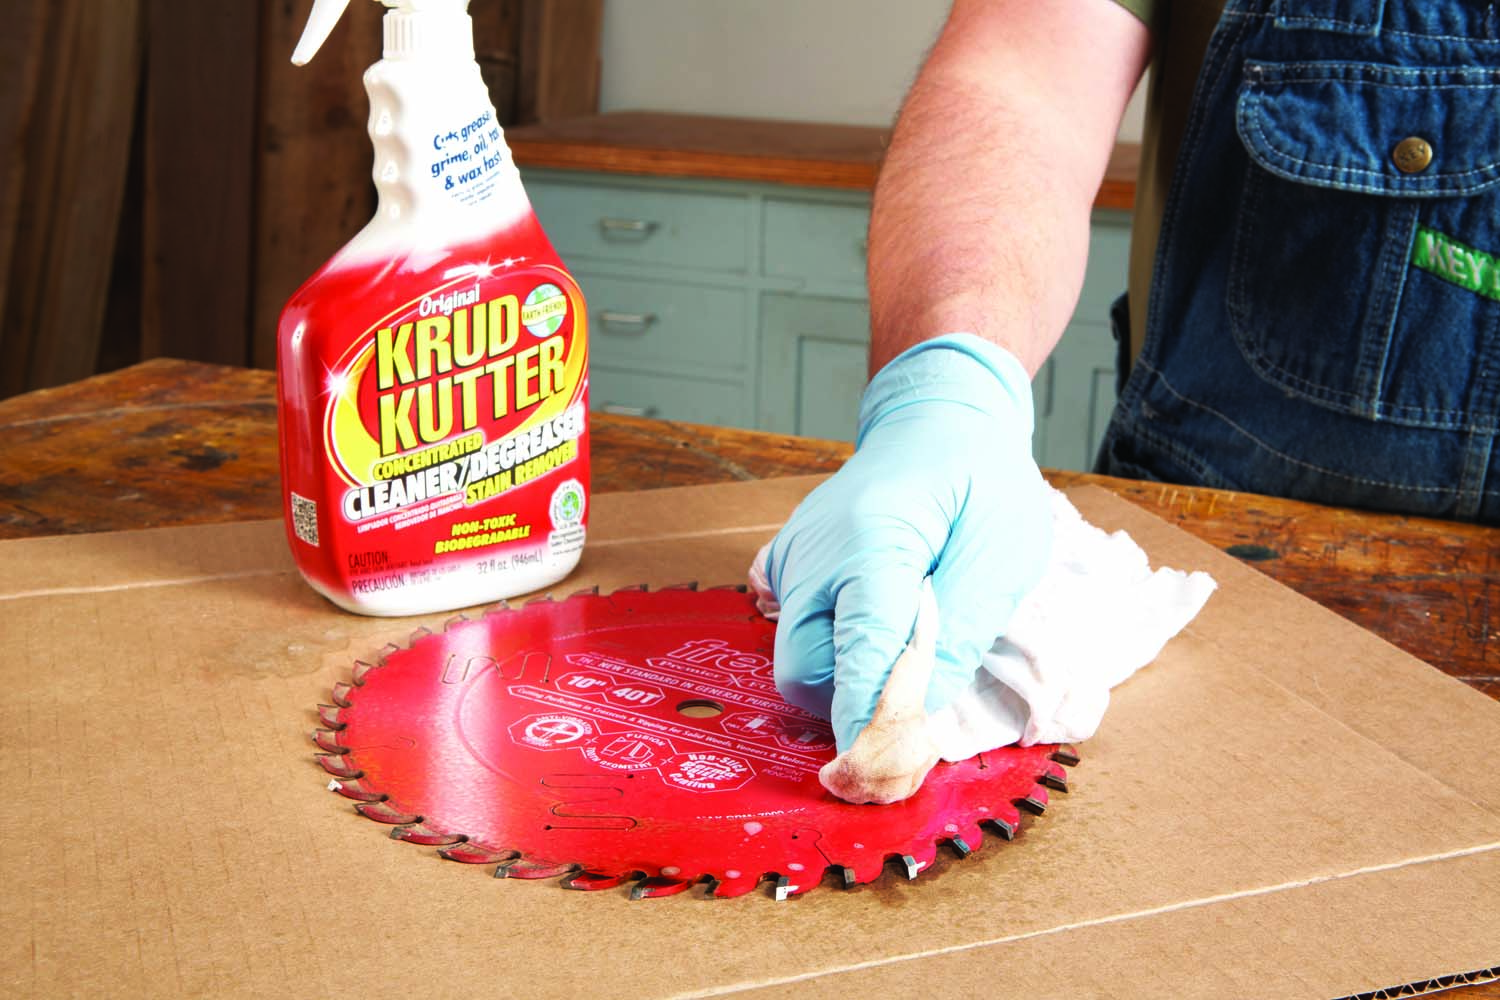 Tough deposits may take a couple applications and some elbow grease. Krud Kutter Cleaner/Degreaser is available at hardware stores and home centers.
Brad Holden
Here are some supplies and tools we find essential in our everyday work around the shop. We may receive a commission from sales referred by our links; however, we have carefully selected these products for their usefulness and quality.


