We may receive a commission when you use our affiliate links. However, this does not impact our recommendations.
 During the last year or so I have been searching for a versatile, dependable, yet affordable wire-tip wood burning kit for my woodworking program. And now after buying and testing such tool I feel confident enough to recommend it to my readers.
In our program we are happy to teach our students how to use wood burning tools to decorate, personalize or just denote a student initials on his or her project. Where in the past we had only used the “soldering iron” style of wood burning tools, which were cumbersome to work with, today we have embarked on a brand new, convenient to work with, and much more accurate form of etching instrument: the Creative Woodburner from Walnut Hollow.
The issues with the inexpensive “soldering iron” tools are numerous. First it take them a while to heat up. Then the tips are difficult to maneuver, so a beginner student can’t etch with precision and consequently over burn the wood, dig into the grain and such. Then there is the issue of the tool cooling down. It take the tool some time to cool down since the heat that amassed in the core of the heating element dissipate slowly. This last point is quite important. As a teacher who oversees a crowded classroom with students toiling on different projects I strive for coherency and safety. And a tool that emits a burning heat minutes after being disconnected from electricity can be really hazardous. You can’t store it away because it might burn down its resident cabinet or the drawer it lives in, and so you struggle to monitor its location to make sure that no one accidentally touches it until it cools down.
So in order to increase our level of accuracy, the ease in which the burning stylus will be choreographed on the wood, and to allow us to reduce the thickness of the burned line (to facilitate a higher degree of etching detailing during pyrography) I was on a quest to find an alternative to the soldering iron burners. Needle burners and those that uses wire, ball and other fine tips are usually expensive. They heat up instantly and cool down immediately after the regulator which control the heat level is turned off. Plus, the handle that holds the replaceable wire burning tips is way more ergonomic than the soldering iron burners. So when I saw that Lee Valley began carrying a tool under $100 dollars I decided to give it a try. After buying the first kit and trying it out and seeing how well it performed, I ordered another one*.


The Kit
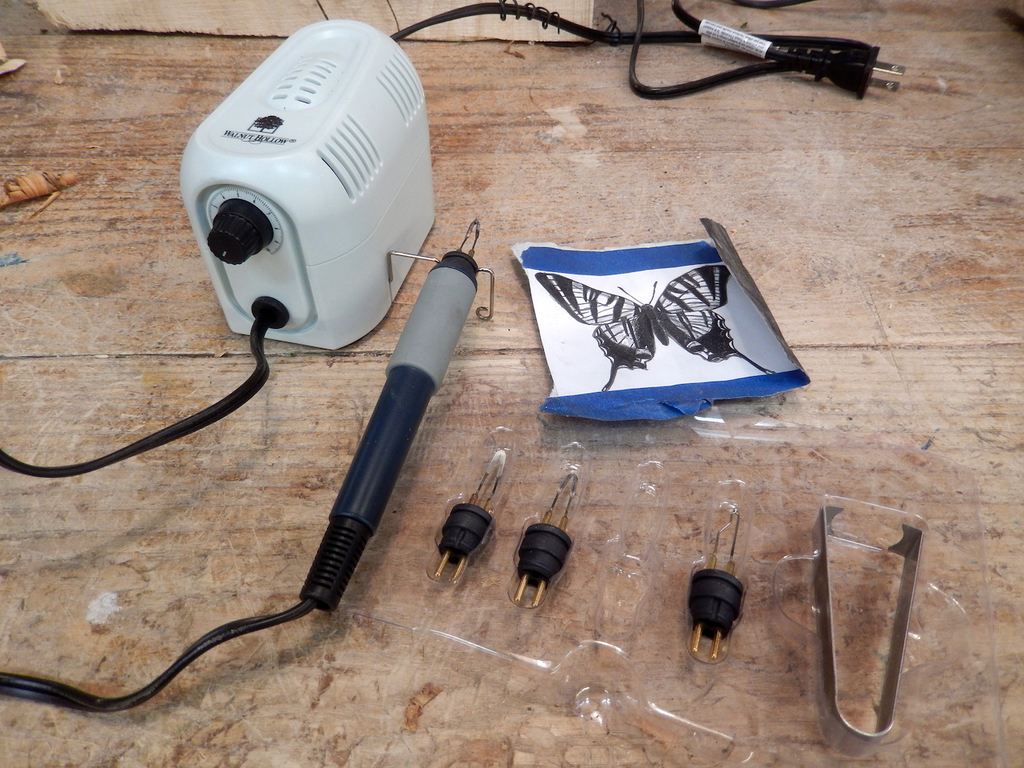
The wire-tip kit comes with 4 different heads, a dedicated tweezer for extracting them, a pretty nice instruction manual and some carbon papers for transferring your design onto the wood.
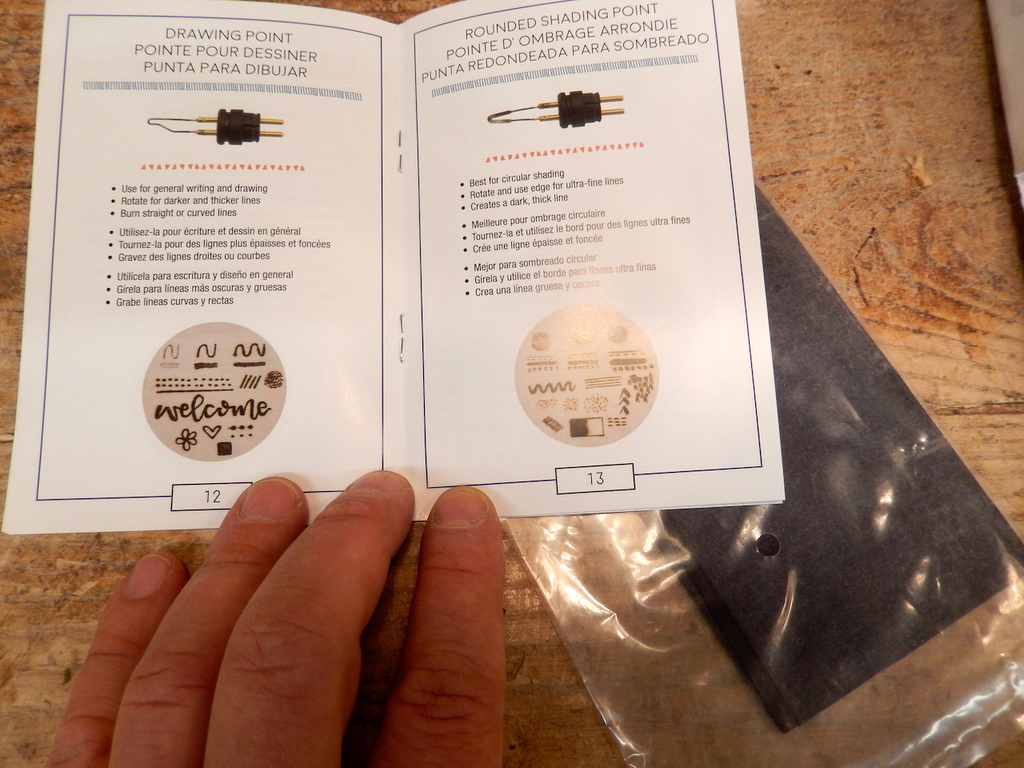 The different tips allow the user to create unique burning impressions, line thickness and shading effects. I found that the Drawing point and the Universal Shading point are the one that are most frequently used by our students. Obviously, each species of wood react to the tips differently and require user adaptation in both burning speed and nominal heat level. I found that pulling the tip backwards (think about Japanese sawing technique) is the most convenient way to work with the tips, as pushing then forward might cause, especially with the sharp tips, to dig into the wood. I also found that setting the heat regulator dial to ¾ of the scale works well for us in most applications. I always tell my students not to press on the wire-tip too much and I add: “Remember, what burns your design is the heat from the tip, and not your finger pressure”. Unfortunately not all of my students are able to apply moderate pressure so sometimes at the end of the class I find that the tips have been slightly bent. So far, none of them broke off during work or while I successfully attempted to straighten them.
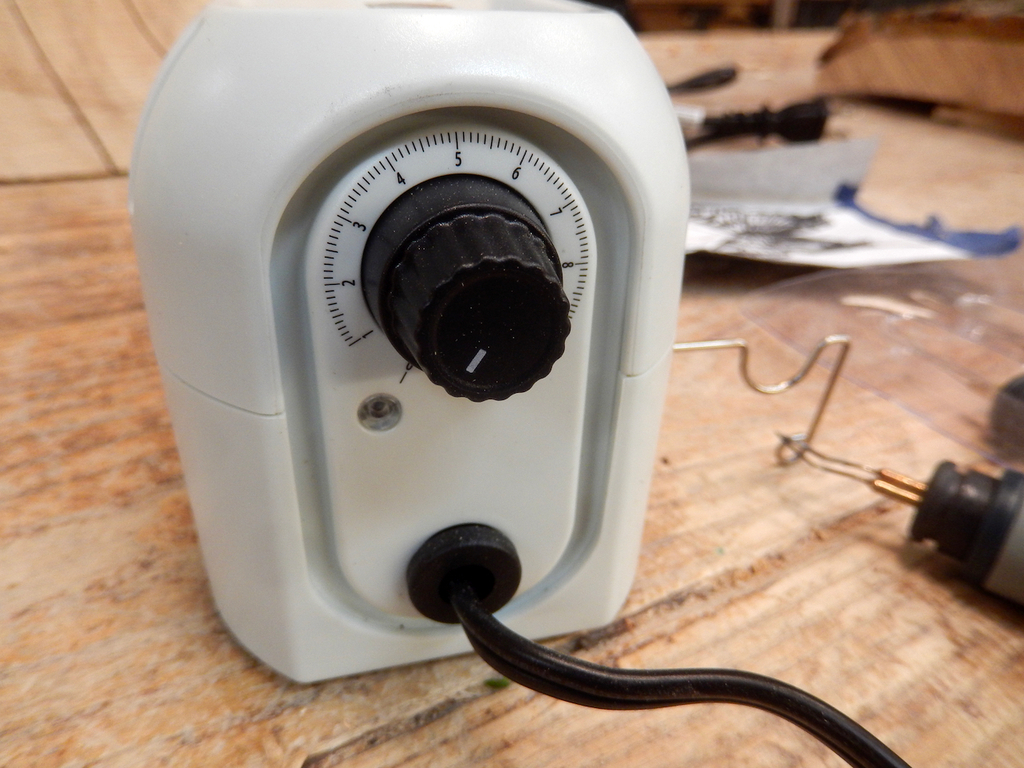
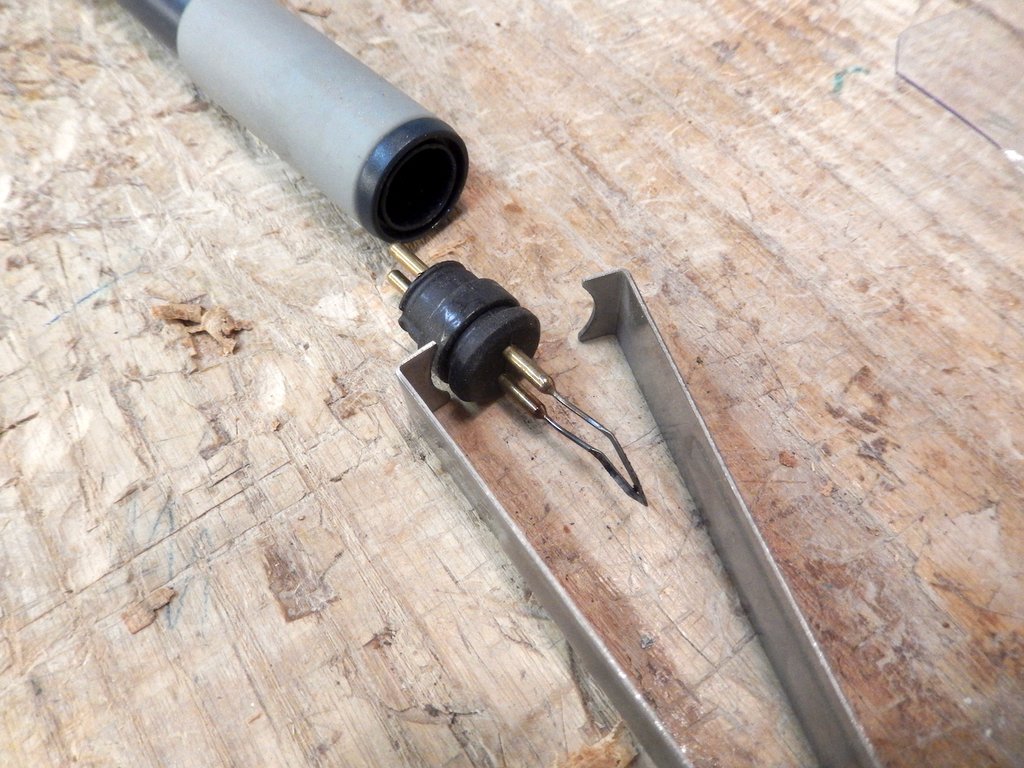
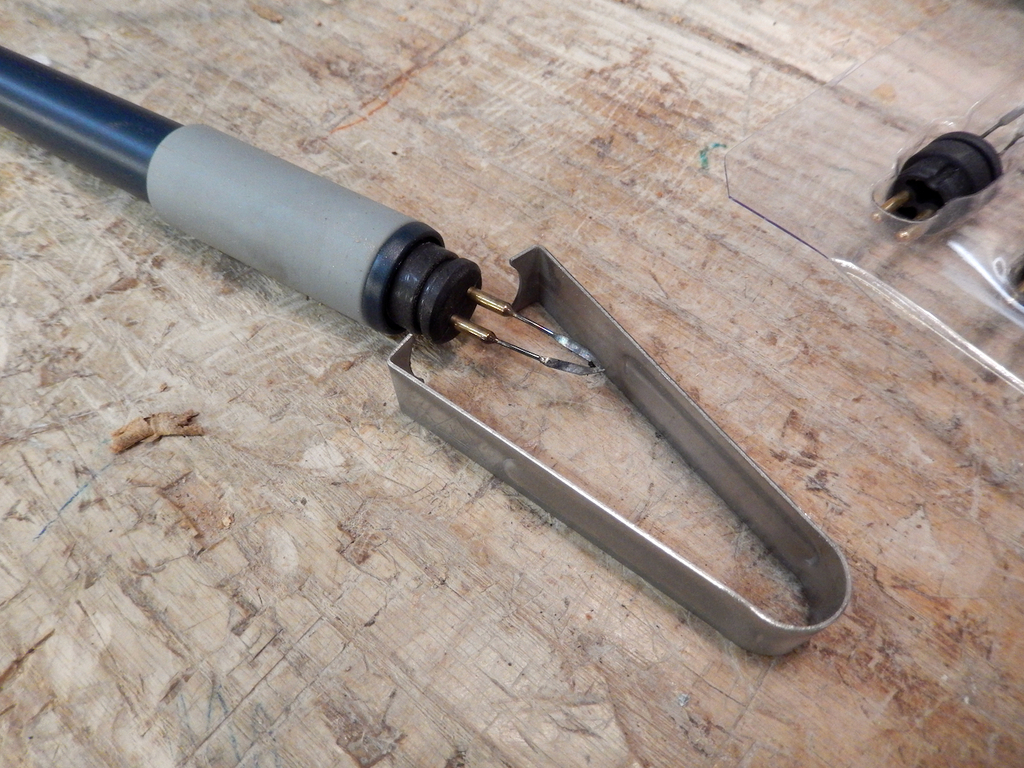
The handle is comfortable to use and the wire-tip exchange is easy. That said, make sure to align the tabs on the wire-tips cylindrical plastic bases before you tuck them into the handle as those tabs are small and might be missed.
The kit comes with a special tweezer to help in the extraction of the burning head.
Price variations
Both Lee Valley and the maker of the tool price the kit at around $100. After I got our second kit I discovered that many online stores, including Amazon and Blick Art Materials price it at around $50 ….. go figure. Replacement tips can be bought separately on Walnut Hollow website. They cost around $5 each.
In conclusion. Both me and my students really like this kit, so at a price point of around $50 I feel that it is a good investment.
Next time I will show how one of my 9th grade students used the Wire-tip tool to burn a butterfly design on her projects.
* We paid full price for each kit.
Here are some supplies and tools we find essential in our everyday work around the shop. We may receive a commission from sales referred by our links; however, we have carefully selected these products for their usefulness and quality.