


We may receive a commission when you use our affiliate links. However, this does not impact our recommendations.
To try and inspire you to give wooden planes a try I have endeavored to keep things within this post as simple as possible, but before we get started a bit of preamble. I’m going to avoid waxing lyrical about these planes and try to let history give you a nudge.
Although wooden planes across the board may look different than many of the excellent metal offerings of today, this format of plane was the “tool of the trade” when hand work was at the fore. That’s quite a proving ground for any type of tool and it should reassure you that these are highly evolved forms. However, thinking on the coffin smoother layout, especially the lack of mass, low friction, plain carbon steel iron and no levers or knobs to adjust, are quite a contrast and will quite likely take some getting used to. But for me, at leas,t it’s worth it and I’m pleased with the results.
I’m sure I’ve mentioned elsewhere the good value that these plane offer but that being said I’d like to pull back from that as I think it sells them short. Sure, for me in the U.K. they are at least plentiful and relatively cheap, but there are always risks when buying second hand. Mismatched irons and/or wedges, with some pitting thrown in, are real possibilities. I quickly mentioned in my last post about what to look for, but I’ll condense and refresh now: Good color match between wedge & body, a tight fitting wedge, an iron that has seen “some” use (a slightly mushroomed top to the iron is a good thing), no pitting on the iron but light rust will most likely be OK and, finally, the color should look nice and mellow. I’ll confess, I don’t always follow those tips but they do reduce the risk of buying a lemon.
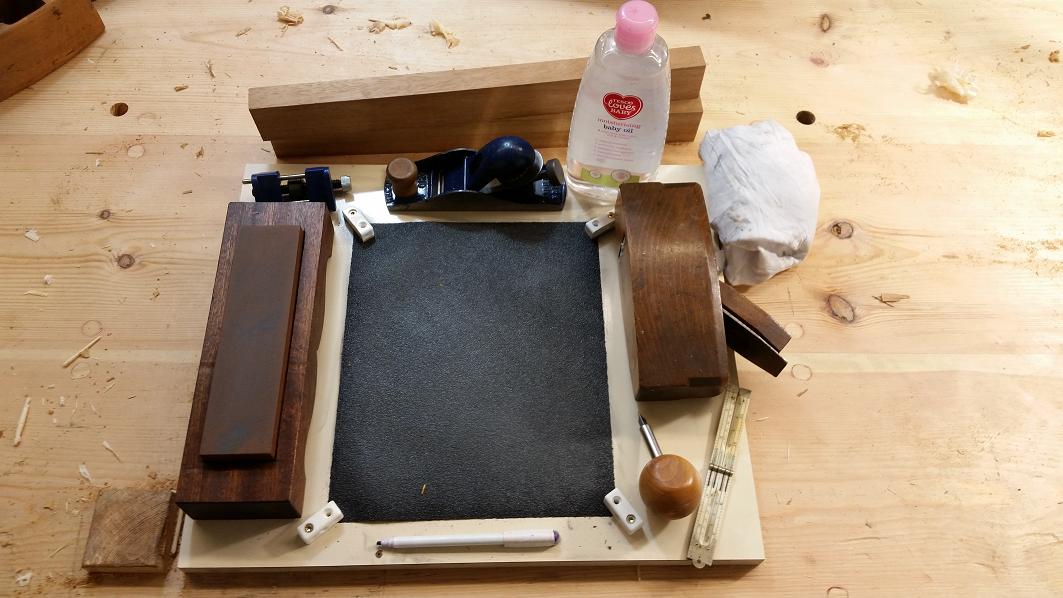
Preamble over. Now the way I describe here is not my “tried and true”; it’s done from a perspective of keeping it simple. I figured most people have access to a block plane (ah the irony of using a metal plane to flatten the sole of a wooden plane), some abrasive, some flatish substrate to fit the abrasive to, access to an eclipse-style honing guide, some honing media and some straight bits of something to act as winding sticks. And let’s face it, there is no mystery; what we want is a pretty flat sole and a sharp iron.
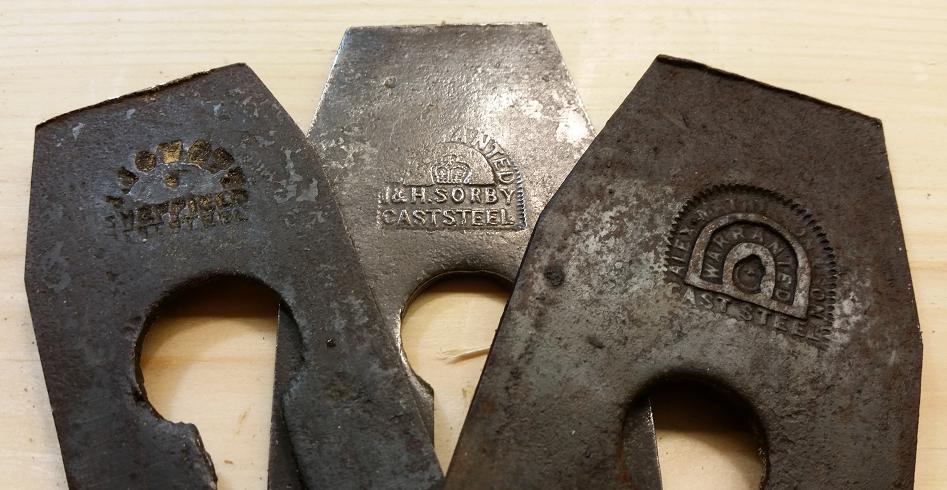
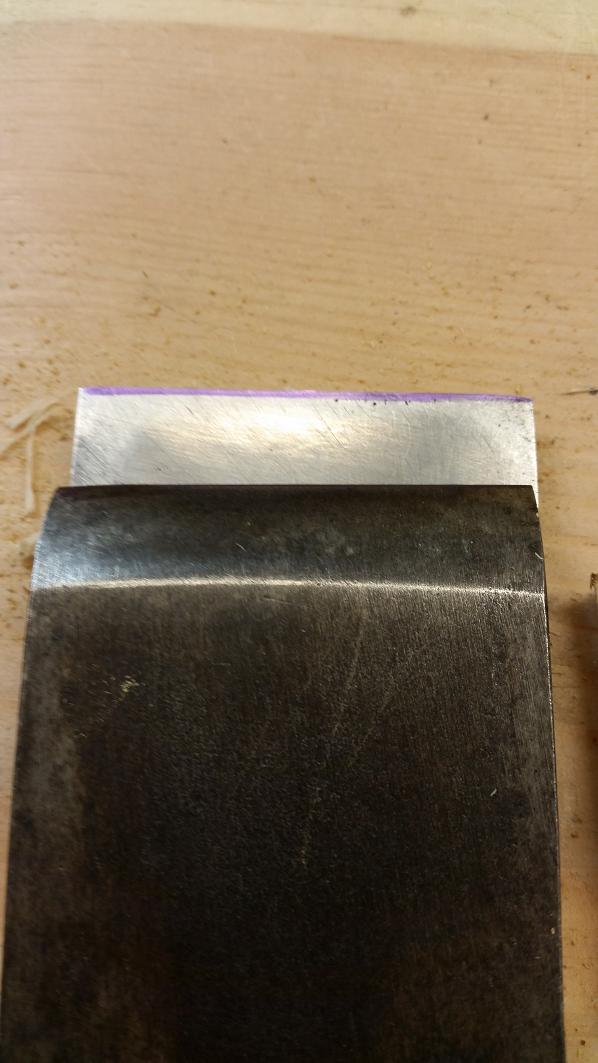
First to the iron. I truly love the aesthetic; I know that offers nothing, really, but the stamps look good and the whole texture of the thing has a certain verve unique to this style of plane. The iron, although a simple steel, is a joy once you have it ready
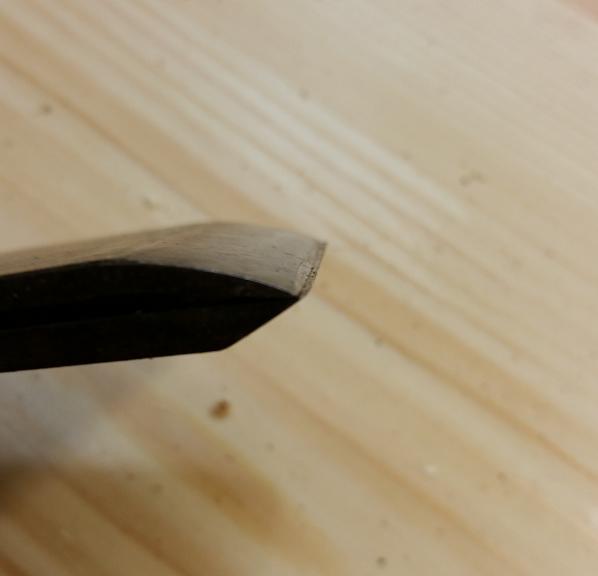
Grind bevel first. I affixed a sheet of #80-grit wet/dry paper to a melamine-faced substrate with some little fixing blocks (small bits of batten would also work). I avoided sticking the abrasive down, although feel free to do that if you wish. The fact there is a little movement in the paper is not an issue for me because I’m just getting the grind good and it always seems a pretty flat bevel when I’m done. Depending on how good or bad the existing bevel is, allow 5 to 15 minutes for this. If you have access to and are happy using an appropriate powered grinder then go for it. I’ve gone for a 25° grind but I might give a shallower angle a try given that many irons I have seen seem nearer to 20°.
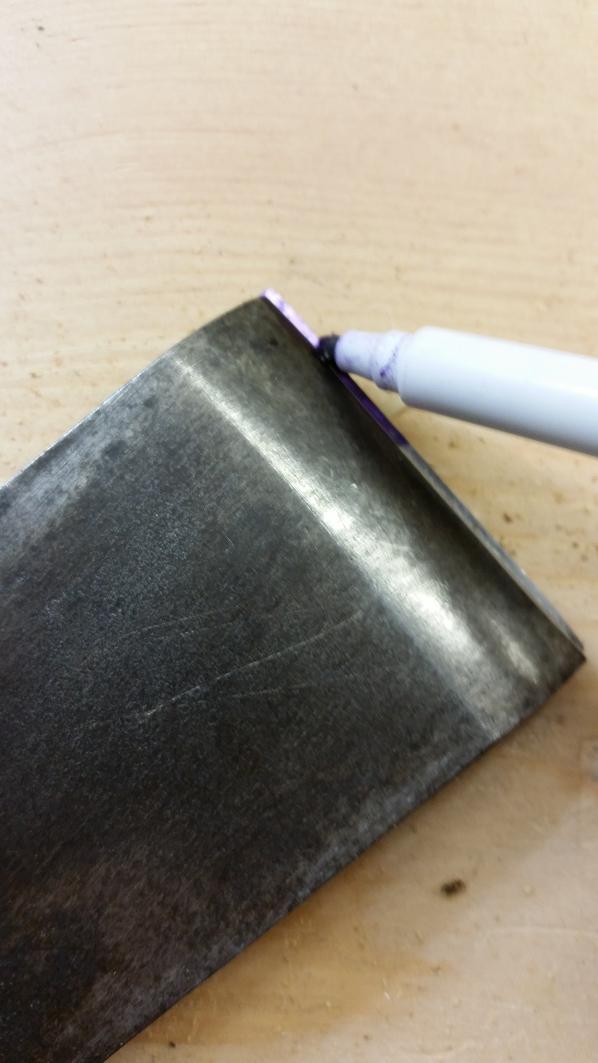
Because the iron is tapered in its length (so as to provide lateral adjustment when in the plane) you will not be able to use a square to check your progress. My advice in the video below is OK for judging square on a single-iron plane, but for double irons I missed the best method. The cap iron should be your guide for this. Fix it in position and use a marker to create a line parallel to the front of the cap iron. Take a look at the notes in my video and follow the first link to an excellent series of videos that covers that aspect very well. If the cap iron is a mess you will need to tidy that up. The honing guide can help you get the front edge back to where it should be.
Once ground it’s time to get to work on the back; this can be a problem area. Depending on how the last person worked will determine how tricky this will be. For starters, just put the back on your coarsest honing stone and see what you’ve got. Nine times out of 10 expect to see the stone only working the middle of the iron. You’ve hit a fork in the road. You can try to flatten the back and if you have a bad one, you might lose the will to live. You could go the ruler-trick route or you could try a method I find success with. I accept the back is not flat and literally roll with it. You’ll see it in the video, but it means keeping pressure at both edges of the iron and apply pressures to each side as you move it forward and back. Although I prefer registering a nice flat iron on the stone, I use this method because it removes the need for a session flattening. Once happy, simply hone in your preferred way. I did the whole thing on my India stone but all mediums will work.
Fix the cap iron on and hold it up to the light. Look for any gap and take action as required. Because my India stone is hard-wearing, I used it to tweak as needed. I also use a burnisher to help tweak it because the iron is quite soft. The front edge of the cap iron can be gently rounded on your honing stones so it has a similar look to the pressed Stanley items. I’m looking forward to discussing the cap iron more, but that can be for another day.
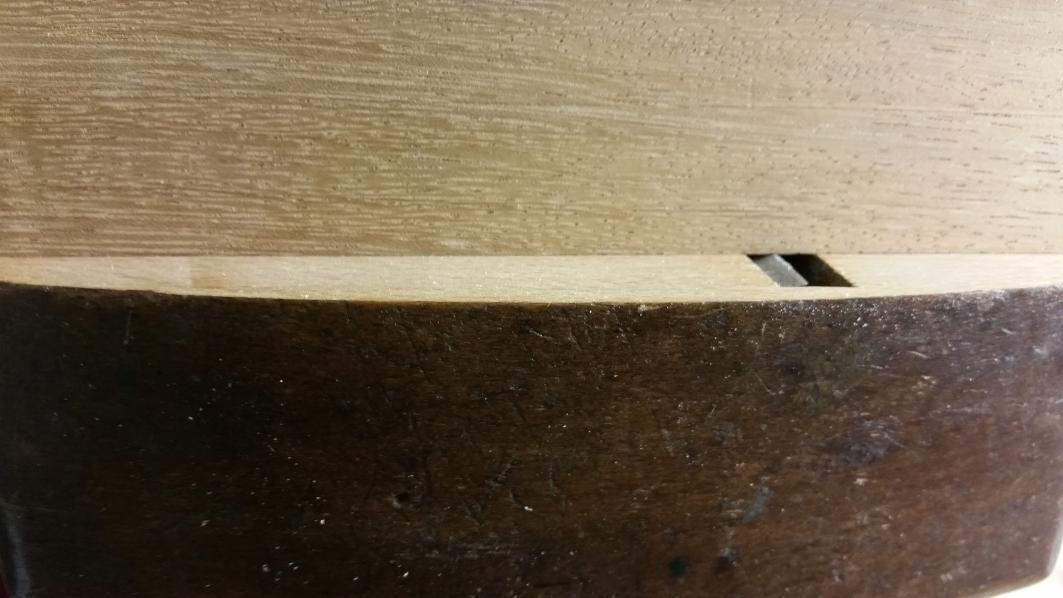
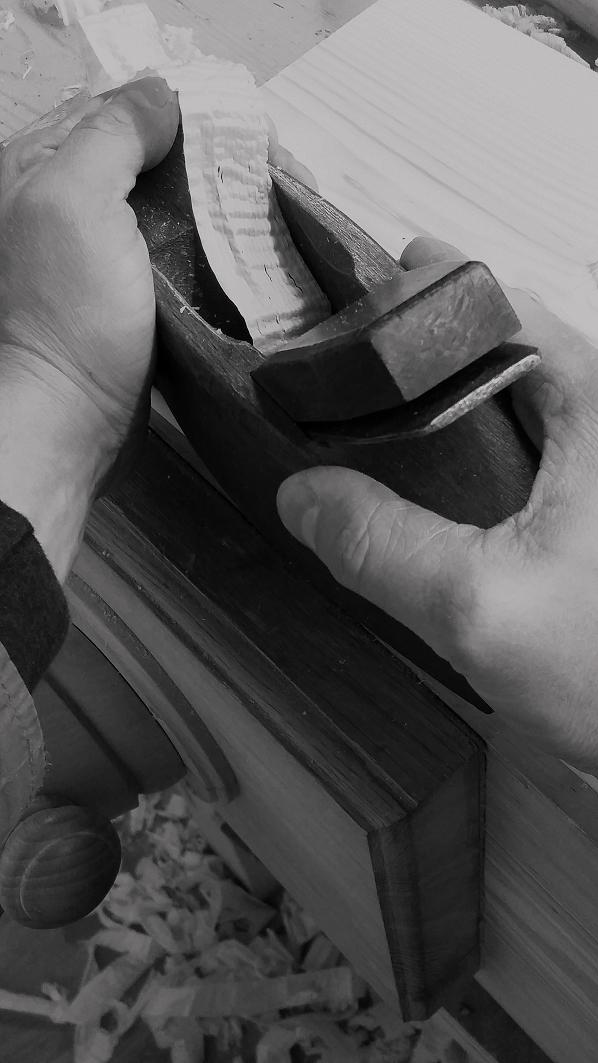
Now comes the easy bit…well when you compare it to a big metal plane it’s easy: flattening the sole. Insert the iron and pull it back a 1/4″ so it’s clear from the sole then tap home the wedge. Wooden planes can and will deflect and they want to be in the state they are when in use for best results. You can see in the video that the set up is basic. I screw a block onto my vice and use that to gently squash it against the bench stop. You’ll find most wear is in front of the mouth. I work down to this level taking light passes with a block plane and checking progress with winding sticks. I don’t check the plane along in it’s length because I trust my planing. If you’re not confident in your planing, though, it would be wise to check with a straightedge along the length to make sure you’re not making a compass plane.
And with a bit of luck, that’ll be it.
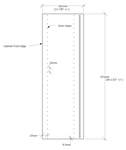
If you are using a double-iron plane and the plane Is new to you, for now, at least, set it back about 1.5mm. Although for me using a cap iron properly has become essential when getting started, keep it easy and keep it back and focus on adjusting and using it.
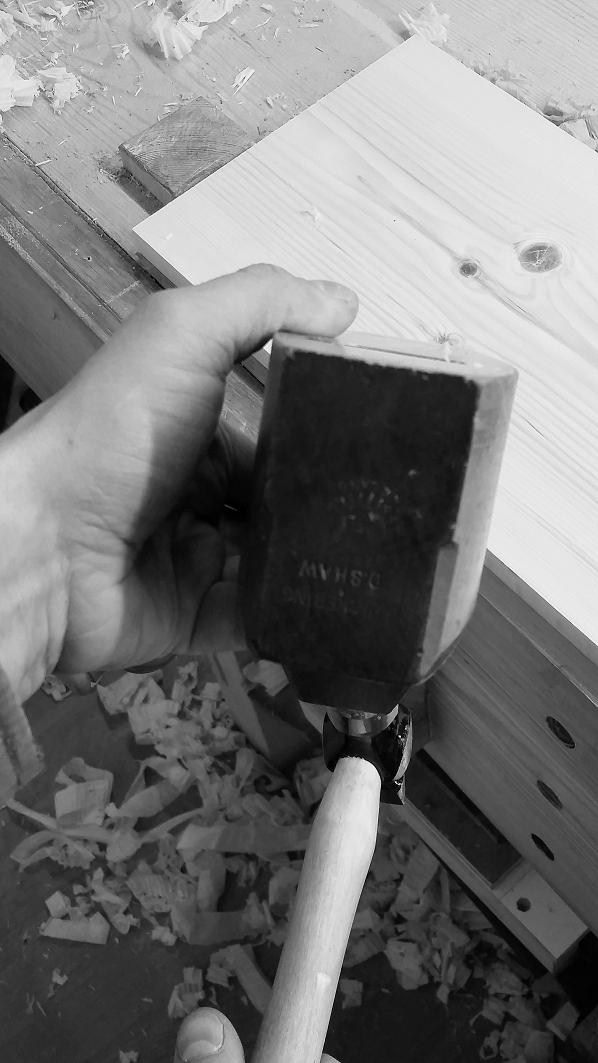
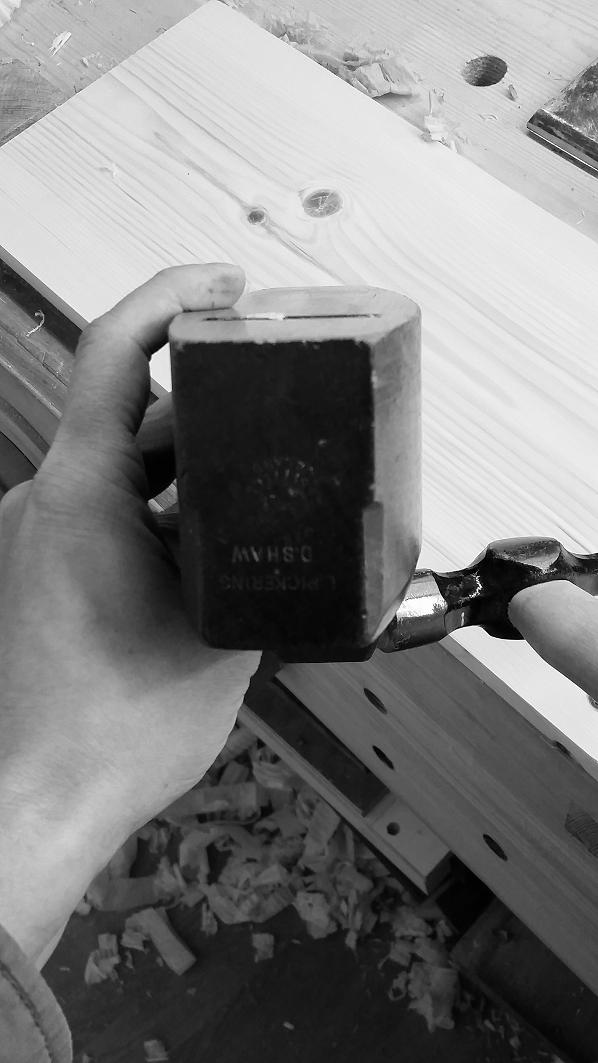
To set the iron, I like to have the plane sole down ready to use. I then insert the iron so it touches the surface supporting the sole, then pull it back a 1mm or so. Next the wedge goes in and I apply light but positive pressure with the heel of my hand to make it snug followed by a tap with a hammer. Then it’s tappa, tappa, tappa. It is simple; it’s just a case of getting a feel for your plane. Simply tap the iron down for more cut, tap it side to side for lateral adjustment. if you go too deep, a tap on the back will back the iron out. Remember to tap the wedge after adjustments to make sure it’s secure. Then use it!
in future articles I hope to cover the cap iron and, critically, some troubleshooting if things don’t work, and as we all know life has a habit of doing that. I’ve also found Bernard E Jones, Practical Woodworker to be a good recourse on these tools.
— Graham Haydon
Here are some supplies and tools we find essential in our everyday work around the shop. We may receive a commission from sales referred by our links; however, we have carefully selected these products for their usefulness and quality.


Thanks, Graham. I appreciate your perspective on these planes and look forward to future blogs on them.
So here is the real question: Would you prefer a coffin style smoother over a Bailey style? I can’t say because I’ve never used a coffin style plane, but I can say that I prefer the feel (and look) of the more traditional wood plane. As far as sole flatness, I think most people who have used a traditional wood plane will agree that they are rarely perfectly flat, and they don’t need to be. I’ve discovered that the area directly behind the mouth is the most crucial point of a plane sole, though that is just an opinion.
To me, besides the feel of a traditional wood plane, their greatest benefit is the fact that they make the user depend on his/her senses and dare I say, instincts, rather than worrying about how accurately the sole of his plane was milled. When others talk about developing “traditional skills”, I find it rather contradictory that they are measuring their 18th century tools with micrometers, etc.