We may receive a commission when you use our affiliate links. However, this does not impact our recommendations.
1 On the bandsaw, use a 4 TPI blade with hardened teeth. Finer teeth may clog up while a blade without hardened teeth will dull.
Tools and techniques for general metalwork in the shop.
While the woodshop may be where I’m most comfortable, I’ve been fascinated by metalwork for some time. I’m always watching for tips and tricks I can steal for my own use, and as such I’ve become attached to a few methods of working with metal in my own shop. Of course, metalwork is far too expansive to cover in a short article, but here are several things that have helped a woodworker like me bridge the gap to metalwork.
It’s Basics Week 2024! Use the code Basics25 to save 25% off your first month or full year of PopWood+.
Cutting
When I need to work with metal, that almost always means some cutting. I find there are two ways to go about it, depending on whether you’re working with ferrous or non-ferrous metal.
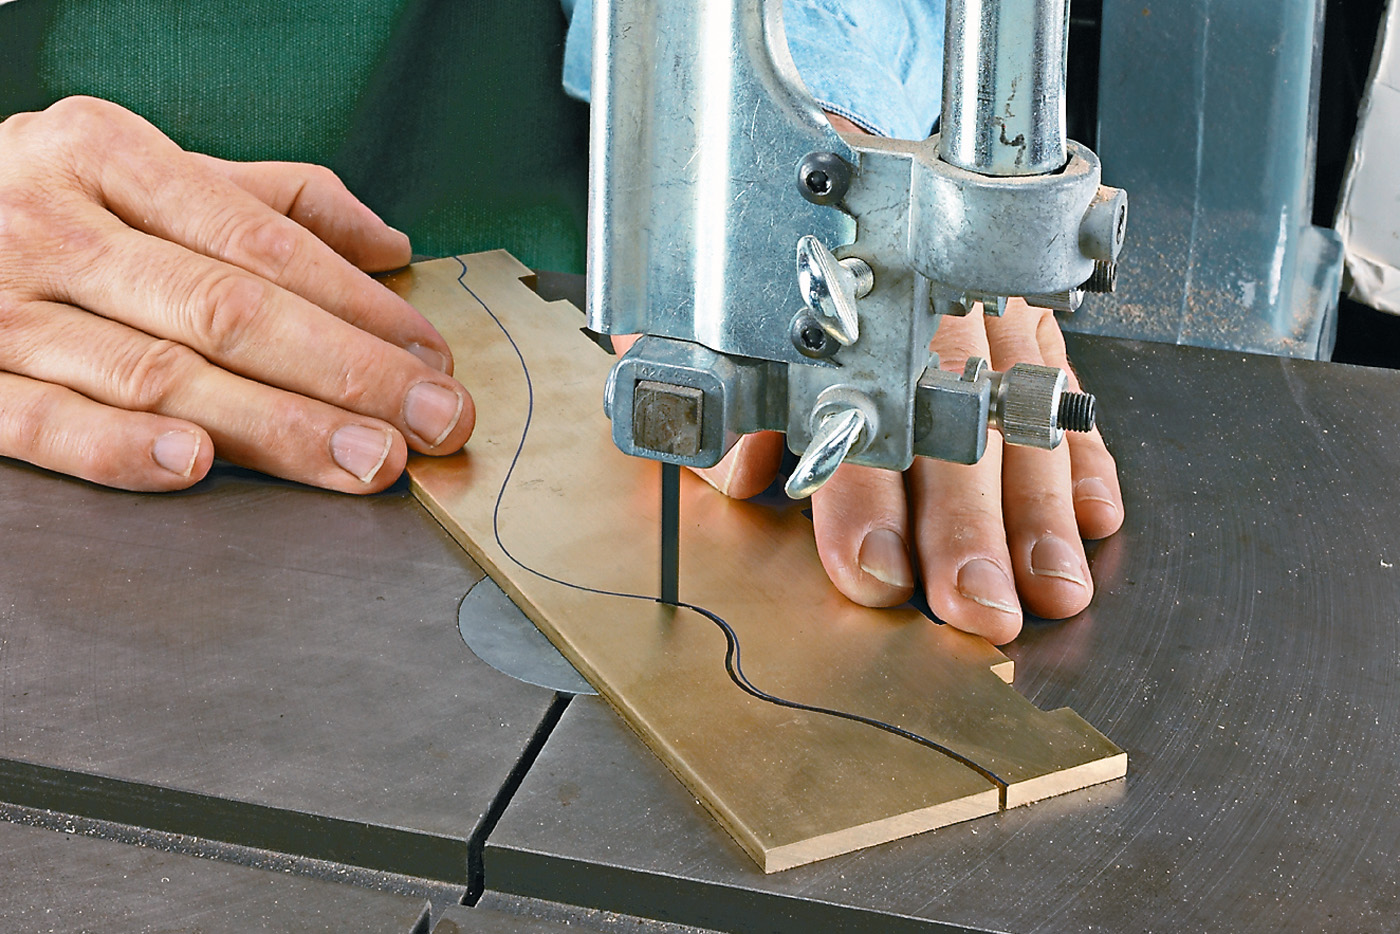
The term non-ferrous metal refers to any pure metal that isn’t iron (“ferrum” being Latin for iron), as well as any alloys which contain no iron. I consider these the most woodworker-friendly, as metals like brass and aluminum are soft enough that standard woodworking power tools can do the job. The bandsaw and table saw are standouts for me in this category, as long as you make the right adjustments.
First, you’ll need a non-ferrous cutting blade. These are typically made of carbide rather than high-speed steel. Second, you’ll need to slow your feed speed. Even on softer metals, trying to make a cutter do too much work will cause it to grab rather than cut. Lastly: lubrication. On the bandsaw, the motor sits off to the side, so you’re safe to use a liquid lubricant applied to the cutting area, such as WD-40. When using the table saw, I prefer a dry lubricant applied to the blade. Most dry lubricants actually go on wet and dry after a few minutes. A piece of cardboard with a kerf for the blade will work to keep the rest of the saw clean. Once the lubricant dries, take off the cardboard and you’re ready to cut.
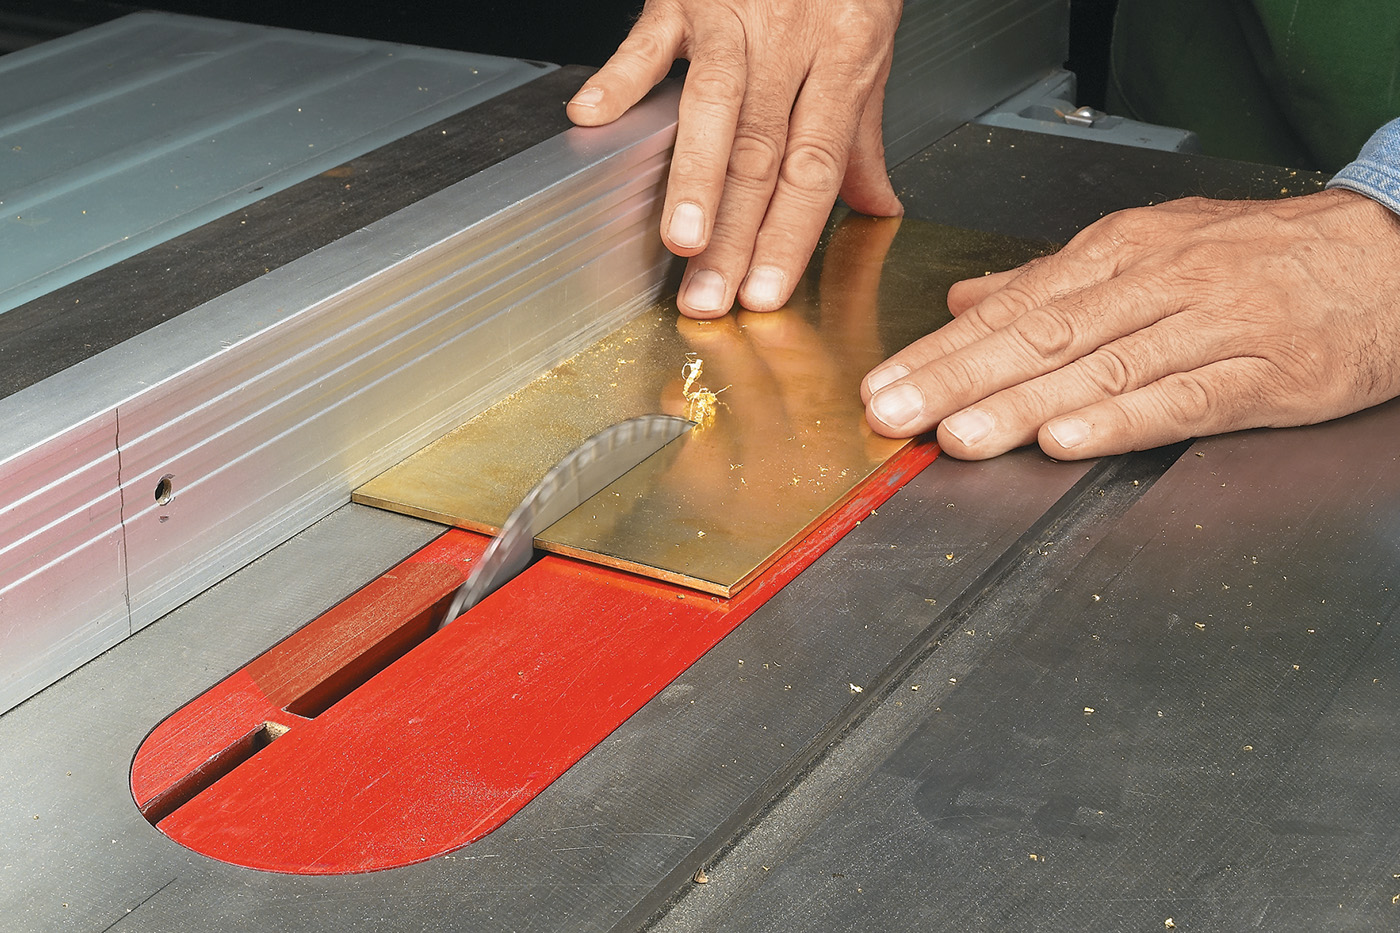
2 A non-ferrous cutting blade and a slower feed rate is all you need to make reliable cuts to brass or aluminum on the table saw. Applying some dry lubricant will give you a smoother cut and extend the life of your blade
Ferrous metals (iron or alloys like steel) require a different approach, as your normal tools won’t cut it (pun fully intended). In my opinion, the best two tools a woodworker can have in this case are a reciprocating saw and an angle grinder.
The reciprocating saw is just a motorized hack saw. I find having a battery-powered reciprocating saw with a metal blade at the ready invaluable, as it usually takes care of all my simple metal cutting needs.
The angle grinder is a more precise and versatile tool. I find the rotational motion gives me more control over a cut, as opposed to the constant back-and-forth of a reciprocating saw. I can cut a piece to size with a cutting disc, then finish the piece by switching in a grinding wheel to shape and polish it. In my eyes, the only downfall of the angle grinder is safety. A quick Google of “angle grinder accidents” will show you what I mean. Cutting and grinding discs are made of composite material, which if worn or damaged can come flying apart, often towards the user. Discs that get wet, that fall on the ground, or that have worn down significantly all pose a risk of disc failure. As a result, it’s best to be liberal with replacements. As somebody who wears his socks until they’re more hole than wool, this feels wasteful to me, but I’ll take it over ending up on someone else’s “angle grinder accident” search results.
Shaping
Once your pieces are cut, you may want to shape them more finely. Whether ferrous or not, I find the best method of shaping metal to be good old hand filing.
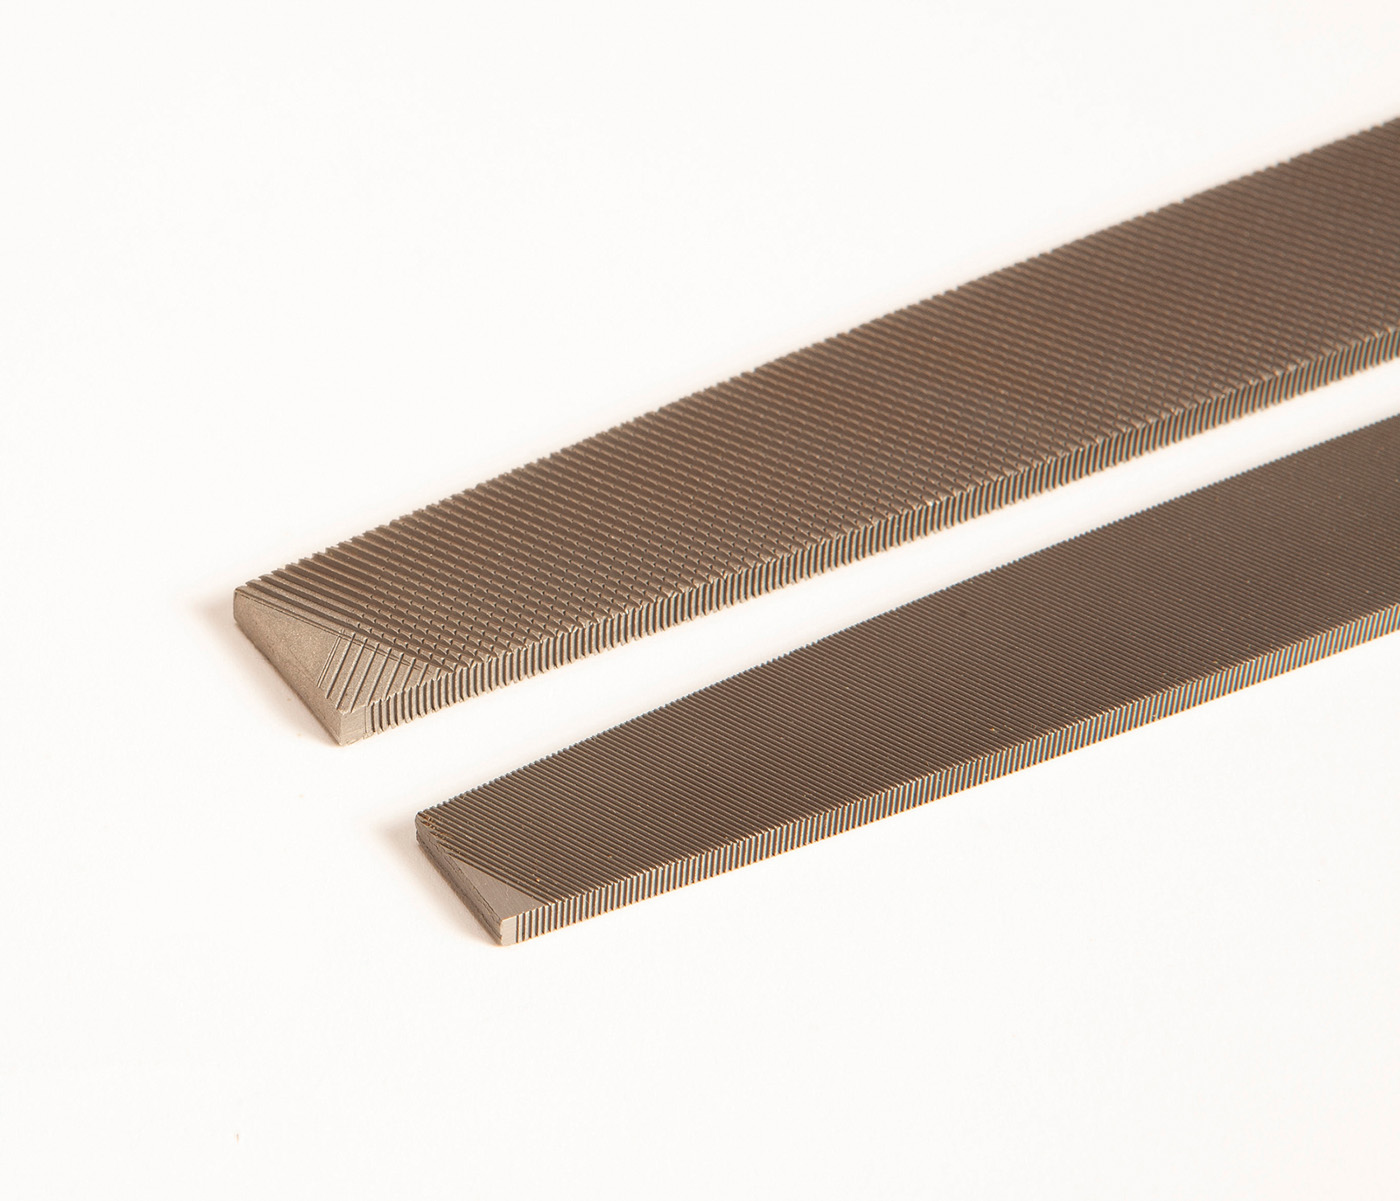
3 The cross-hatched pattern of a double-cut file (top) helps to hog out material. On the other hand, the single-cut file (bottom) is best when precise, finished edges are needed.
When it comes to choosing a file, there are a few options. Course files work fast, but leave a rough surface. Smooth files are ideal for finishing that surface up. Single-cut files cut cleanly, but a double-cut file takes off more material. Files come in a variety of shapes as well, so it can be nice to have a selection on hand.
When it comes to technique, there’s two methods. Straight filing (Photo 4) is useful for rounding or smoothing a piece quickly. Moving in a diagonal direction across the workpiece will help to prevent low spots. Draw filing cuts sideways with the file for a more finished surface. Hold the file with both hands and move it back and forth over the piece. You don’t need to worry about damaging the teeth with the back stroke at this angle.
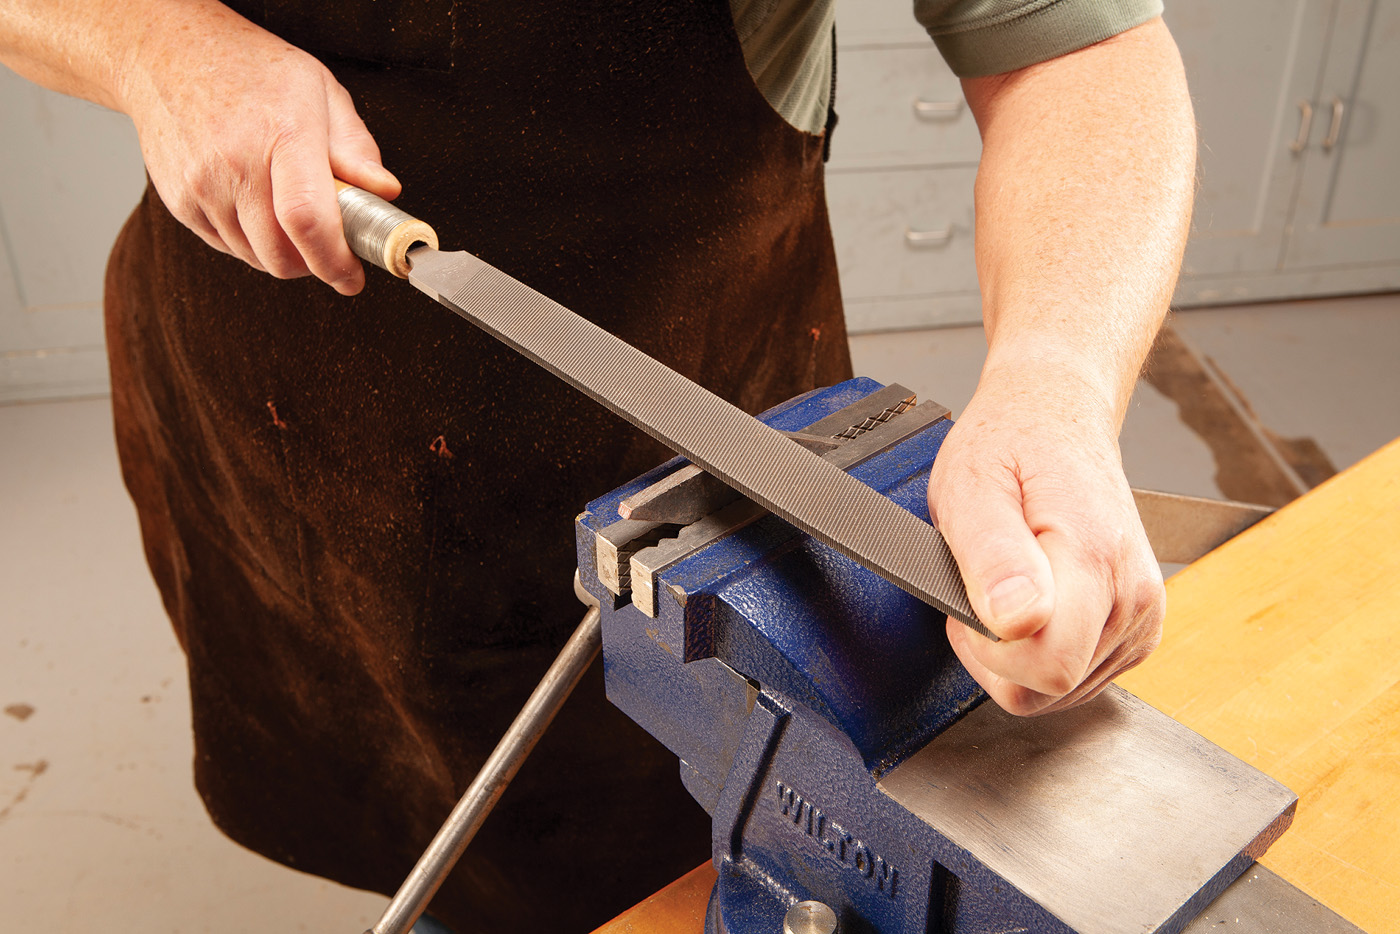
4 When straight filing, lay the file flat on the piece and cut on the push stroke, lifting the file off the piece after each cut to avoid damaging the teeth.
For non-ferrous metals, there is another method: the router. Router bits are made of carbide, so they’ll cut wood, aluminum, or brass. Just be sure to use a lubricant and limit yourself to shaving off a small amount with each pass.
Drilling
Whether it’s for screws, bolts, or just style, sometimes you’ll need to drill a hole in metal. As opposed to wood, whose surface can be dented by a drill bit before drilling, bits have a tendency to “wander” across the surface of most metals until they find purchase, often not where intended. The answer is center punches.
Center punches come in two kinds: standard ones that need to be hammered, and automatic punches, which have a spring-loaded self-striking mechanism inside. Although standard punches take a tad more time, the force you can deliver with a hammer far outweighs the self-striking mechanism.
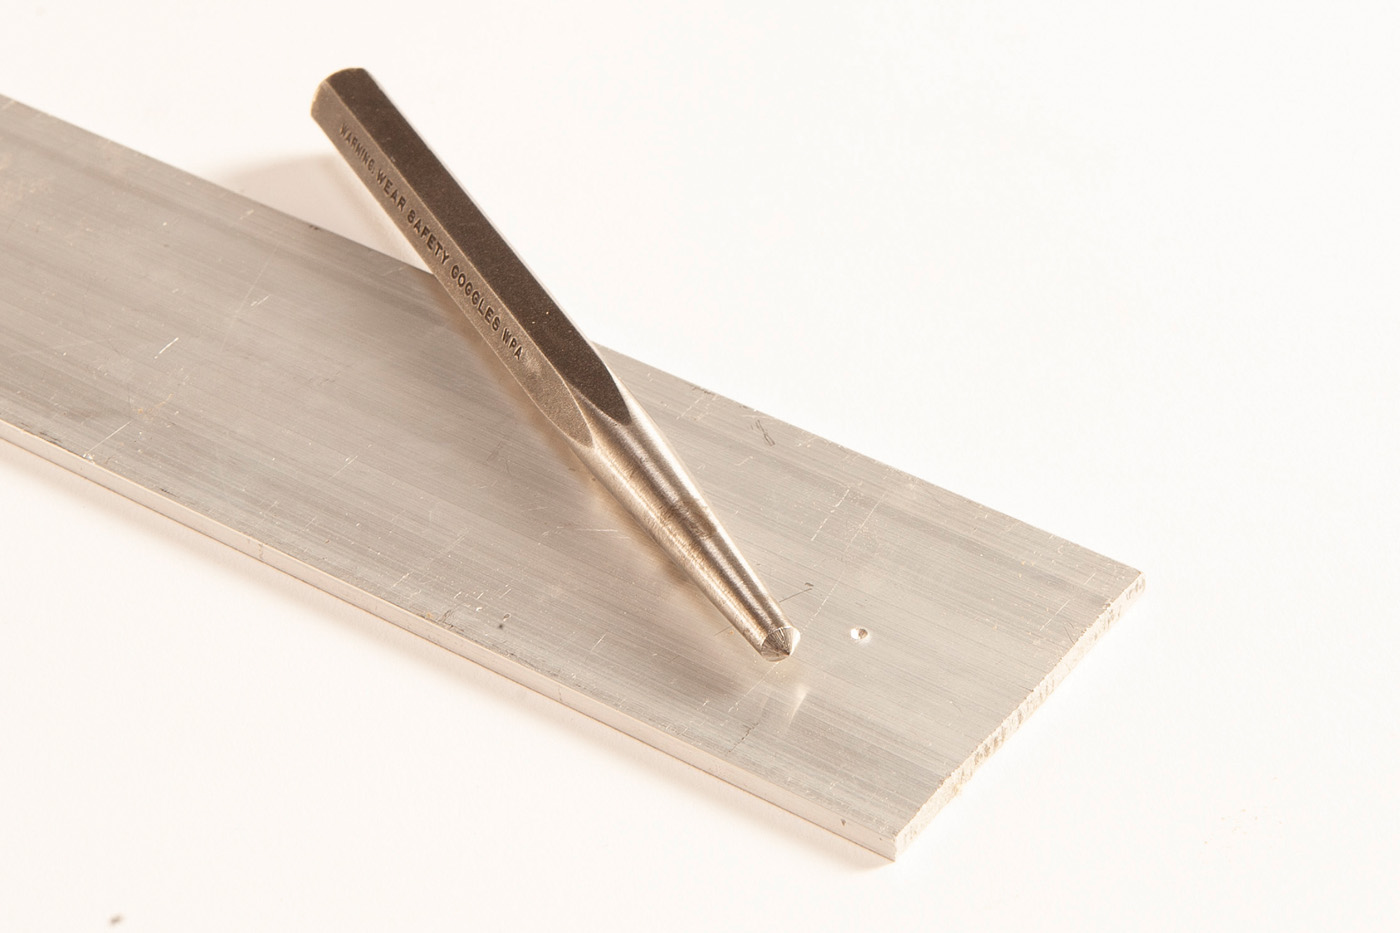
5 When lining up your center punch, don’t eyeball it from over-top. Tipping it at an angle and “walking” it up to your mark will give more accurate results.
With the divot punched in, the question now is what bit to use. Standard woodworking bits are hardened steel, and they can drill through non-ferrous metals as well as mild steel. They work, though I wouldn’t recommend them for large holes.
Because a standard bit wants to carve out long chunks with its cutters at one time, it tends to grab the metal and tries spinning it instead of cutting through. Due to that, it’s often best to work your way up from a smaller bit to a larger one. This is an exercise in tedium. Luckily, there’s other options.

6 When equipped with a carbide-toothed hole saw, a drill press is more than capable of making a decently-sized hole in most metals.
The first is a hole saw. For me, a hole saw is often the best choice, as I’ll be cutting far less material than if I were to bore out the hole. Most metal hole saws are made of tungsten carbide, and with a little lubrication they can cut fairly large holes in most pieces.
The second option is a step bit, which cuts like a standard twist bit, but it slowly “steps” up in size. Since all material in the hole is being removed, a step bit is a less efficient waste-remover than a hole saw, but it does leave a cleaner, burr-free hole. I’d recommend a hole saw for larger operations and a step bit for your smaller holes, but either is a good option.
Here are some supplies and tools we find essential in our everyday work around the shop. We may receive a commission from sales referred by our links; however, we have carefully selected these products for their usefulness and quality.