We may receive a commission when you use our affiliate links. However, this does not impact our recommendations.
 A bevel is a bevel… except when it’s a miter, unless it’s a chamfer. Confused yet? You’re not alone.
 A bevel is a bevel… except when it’s a miter, unless it’s a chamfer. Confused yet? You’re not alone.
To the uninitiated, woodworking can be a tough nut to crack. Even the most basic of projects assume a certain level of prior knowledge.
In order to create any of the projects on this website, you need to be able to follow the instructions and understand the intent of the author. And while for many readers that’s second nature, everyone’s a beginner at one point in time. A simple instruction like “joint the face and edge, then rip to 6“ wide” is effectively a foreign language to someone who isn’t familiar with what that means.
So we’re introducing a new series that’s going to go back to basics, teaching common terminology and basic techniques that are the building blocks for a lifetime of woodworking. In this inaugural article, we’re going to tackle the anatomy of a board, and the types of common cuts you’ll be making.
Looking for more woodworking definitions? Check this out: Woodworking Glossary
Use the code Basics25 to save 25% off your first month or full year of PopWood+.
Board Basics:
Face, edge, end grain, and grain direction
First, we’re going to look at the orientation and layout of the wood itself. Every other pieces of knowledge going forward will be built on these principals. The photos below highlight the key elements to know when looking at a piece of lumber.
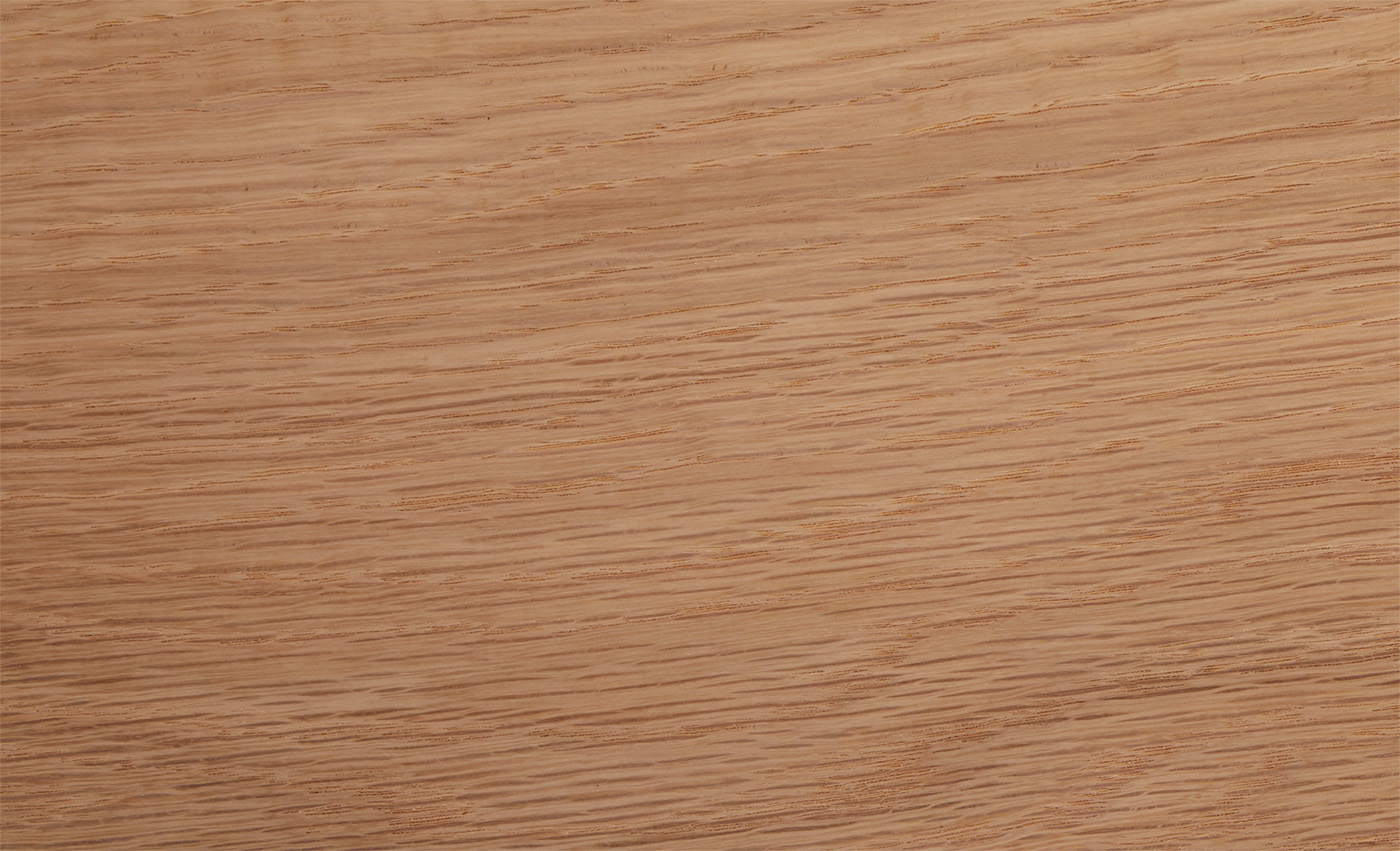
1 Here you can clearly see the grain direction of this long grain segment.
Grain Pattern
For the intent of this article we’re only going to focus on two directions of grain pattern—long grain and end grain. A tree grows in two directions—up and out. The upwards growth is characterized by long strands in a (mostly) uniform direction, called long grain wood. Looking at the long grain shows you the grain direction, which is what dictates the the rest of the cuts discussed in this article. In photo one, the grain direction is horizontal, or side to side

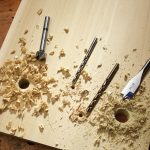
2 End grain is where you can see visible growth rings and open fibers.
The outward growth of a tree is demonstrated by growth rings, visible as a cross section of the long grain. This is commonly called end grain. End grain is sometimes referred to as cross grain.
Face, Edge, and End
The core terms to understand here from an instruction standpoint are face, edge, and end. To generalize, the face of the board is the largest flat surface with a horizontal grain pattern. The edge of the board is the smaller surface with a horizontal grain pattern. And the end of the board is the only surface with cross or end grain pattern. Check out the image in at the top of the article for a visualization.
In practice, there’s no real difference in the woodworking properties of face grain and edge grain. The term is used simply to make clear which surface you are supposed to be working on. However, end grain has unique properties we will cover in a future article.
Board Feet
While we’re discussing the various parts of each board and where to find them, it’s as good of time as any to discuss board feet. (Feet as in measurement, not the things you stand on.) While it’s not used often in the magazine, board feet is the unit of measurement the lumber yard uses when selling wood. The measurement refers to the overall volume of the board, not any one dimensions that would be specifically useful when shopping for a project. We show you how to calculate board feet at the bottom of this article.
Cutting basics:
Crosscut, rip, and kerf
The two main types of cuts you’ll need to know for following most instructions are crosscut and rip.
A crosscut is (as the name implies) a cut that is made across the grain of the wood, creating a new end grain surface. A rip cut is one that goes with the grain of the wood, creating a new face or edge of the board.

3 A crosscut goes across the grain of the wood.
To put it more plainly, if you’ve making a board shorter, it’s a crosscut. If you’re making a board narrower, it’s a rip cut.
4 A rip cut goes in the same direction as the grain.
Now it might stand to reason that if you have a 6“ wide board and you make a rip cut down the middle, you’ll end up with two 3“ boards, right? Well not quite.
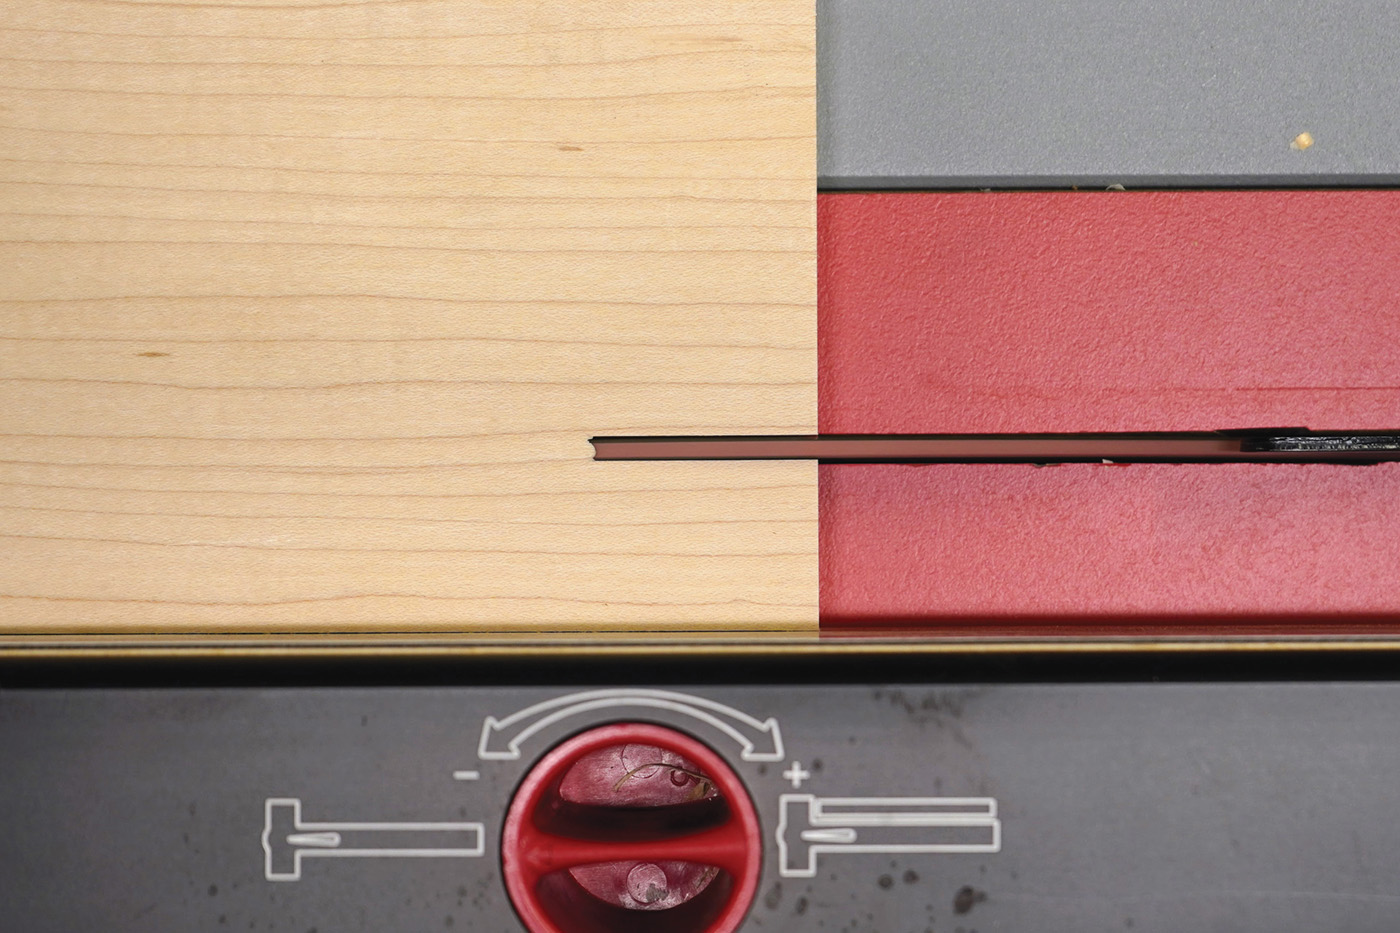
Any time you cut a board using a saw, you’re going to have kerf. The kerf is simply the material removed by the saw teeth during the cutting process. Certain saws, like a bandsaw for example, leave a thin kerf that removes minimal material. Others, like a table saw blade, can remove a full 1/8“ of material or more. So if you used a table saw in our earlier scenario, you’d actually end up with two boards that were 2-15/16“ wide.

5 The kerf of this table saw blade is clearly visible here.
Angled Cuts:
Square vs. bevel, miter vs. chamfer, and chamfer vs. taper
Okay now we’re getting into the weeds a bit. There are official names for different types of crosscuts you can make at different angles. The terminology is not always used uniformly though, especially if the cut is being made for joinery purposes instead of aesthetic. I will do my best though.
If an angle isn’t specified for a cut in the instructions you can safely assume the cut should be made at a 90° angle to the work surface. Two board surfaces that are 90° to each other are referred to as square. Square can also be used as a verb to dictate a 90° cut being made to prepare stock.
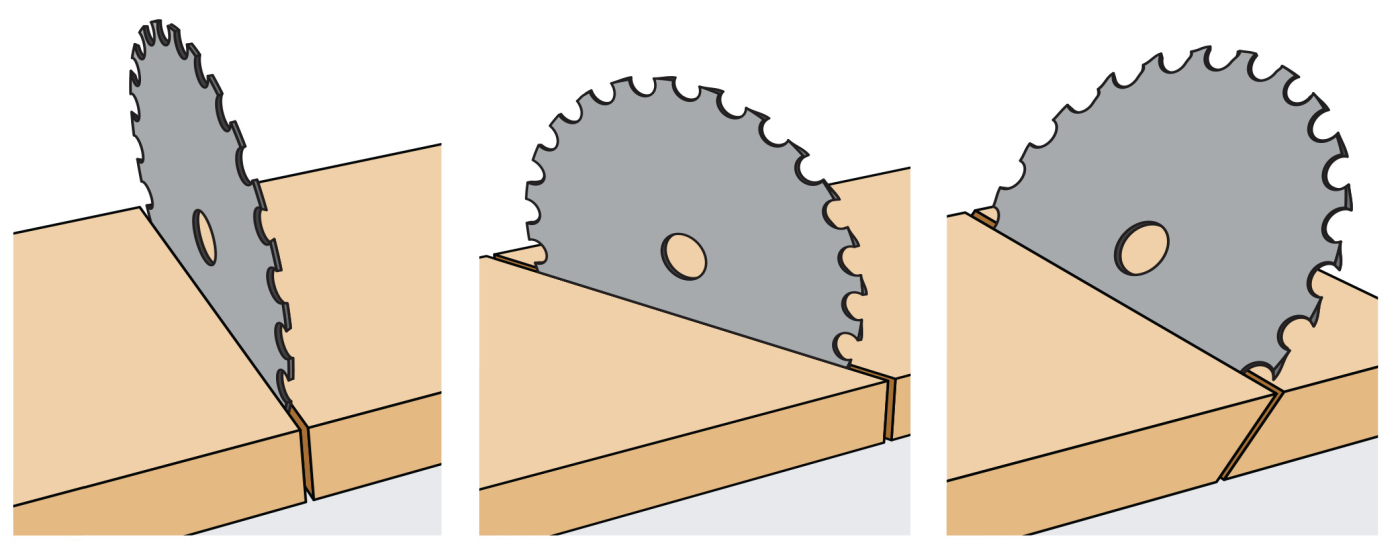
Left to right: A standard, square cut. — Miter cuts are made at angle. — Bevel cuts are made at angle to the face of a board
A miter cut is simply any cut made across the grain at an angle that is not 90°. More specifically it’s a cut made across the face of a board at an angle that is not 90° to the edge surface of the board.
A bevel is a cut that is made across that grain on the edge of a board that is not at a 90° angle to the face.
Now you would think that a miter joint is when two miter cuts are butted together, and you’d be correct. But what about when you make a joint between bevel cuts, wouldn’t that be called a bevel joint? You’d be sadly mistaken my friend. That is also called a miter joint. In fact, a miter joint between two bevel cuts is far more common than a miter joint between two miter cuts.
To top this all off, it is standard practice to call the type of cut used in a miter joint a miter, regardless of the orientation of the cut. This is why we include diagrams and images in our articles, to give you the proper context of the correct cut to make.
While your head is still spinning, I have a few more angled cuts to throw your way.
Compound Miter. If you’re making a cut that is both at an angle to the edge and to the face of a board (a cut that is mitered and beveled) that’s called a compound miter.

9 A chamfer is usually used for aesthetic purposes, or to soften a corner.
Chamfer. A chamfer is a cut made for aesthetic purposes along the edge or end of a board at an angle that is not 90°. Think tabletops or ornamental tops of bookshelves and you’ll get the idea. Unlike a bevel cut, and chamfer generally leaves a portion of the original edge or end, instead of coming to a point.
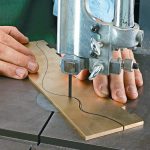
Taper. As a rule of thumb, miter cuts are measured from the edge of board, leaving parallel edges and ends that are at different angles. On a taper, the opposite is true; the ends of the board are parallel while the edges are angled to each other. Since the cut is more with the grain instead of against it, it’s considered a rip cut.
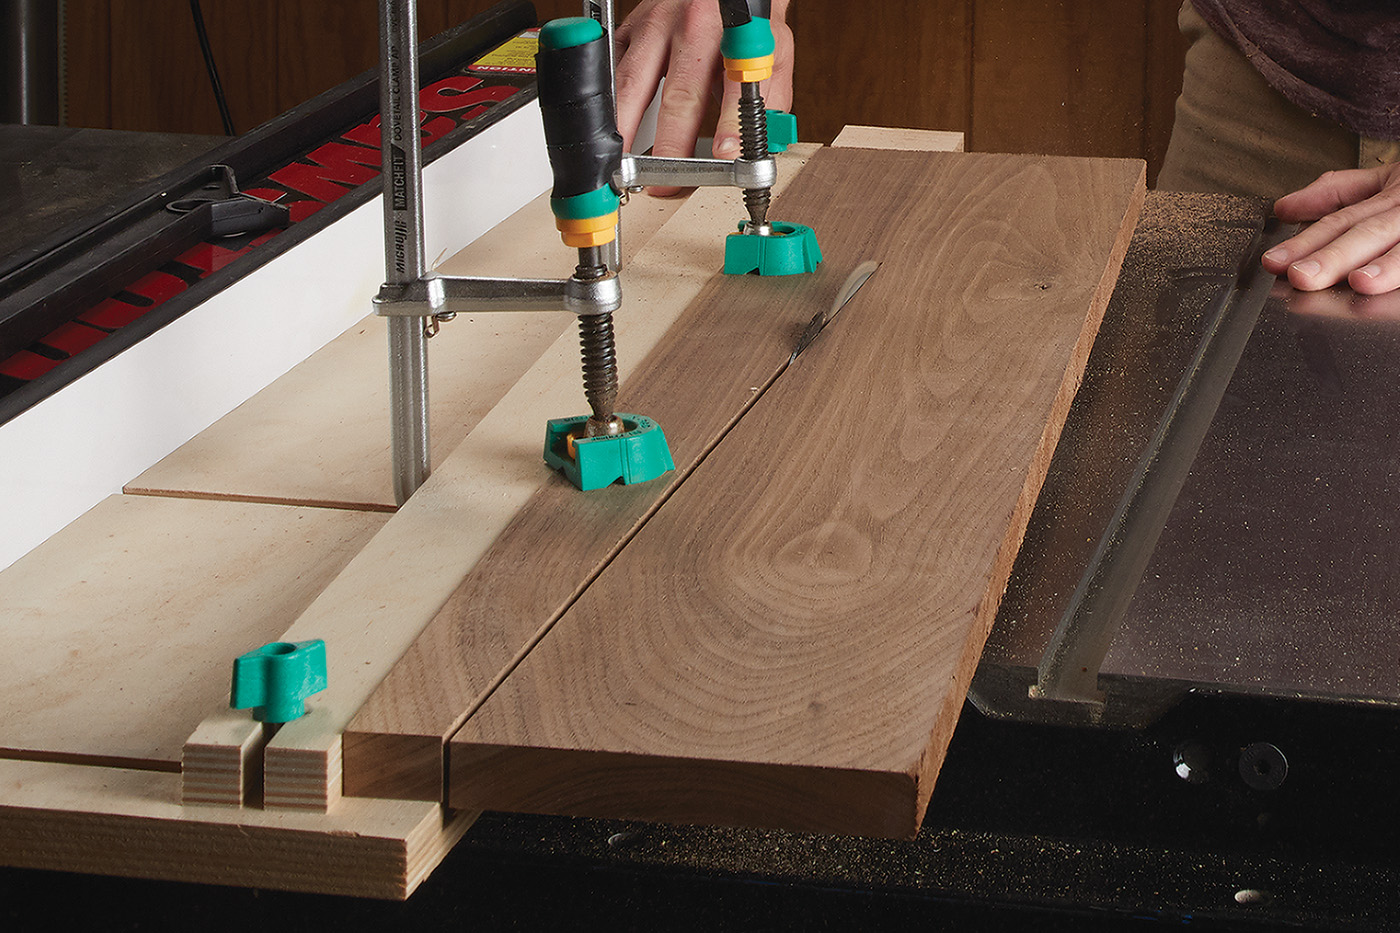
10 Here’s a taper being ripped on the table saw for a table leg.
Looking Ahead
If you’re going to build a house, you need a strong foundation. The same goes for building a new hobby. Keep an eye open for us adding to this groundwork in future articles, covering everything from processing lumber to basic case construction.
Bonus: Be Prepared at the Lumberyard
Take a tape measure and calculator with you on trips to the lumberyard and easily determine how much your selected boards will cost. Rough-sawn boards come in random widths and lengths; therefore no two are alike. Each are measured by volume, which can be calculated by using a simple formula.
The standard unit, a board food (bd. ft.), measure 12″ x 12″ x 1″ thick or 144 cubic inches. Because bd. ft. is a measure of volume, any combination of thickness (minimum 1″), width, and length that equals 144 cubic inches also equal some board foot. Rough lumber is sold based on its cost per board foot. Some species are more pricey than others and thicker boards cost more per board foot than thin ones.
To determine cost, multiply the total number of board foot in the boards you have selected by the board foot price. See an example below.

Here are some supplies and tools we find essential in our everyday work around the shop. We may receive a commission from sales referred by our links; however, we have carefully selected these products for their usefulness and quality.