


We may receive a commission when you use our affiliate links. However, this does not impact our recommendations.
With the glue dry, it’s time to see if your square is square – or if it’s a doorstop.
Squaring a wooden square is a simple operation if you plan to use it for woodworking – not for building equipment for a nuclear reactor. It’s easy to go overboard with squareness.
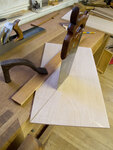
Here’s how I do it. I get a big sheet of termite barf (MDF), which is what I use for finishing and as a backing board when cutting leather and veneer. I press the stock of my alleged square against a factory edge of the MDF and carefully scribe a line with a mechanical pencil that has a fine lead.
As you scribe this line, press the square’s blade firmly down against the MDF. If the blade lifts even slightly, you will get an erroneous result.
Now flip the square over and compare the blade to the pencil line. If the blade isn’t parallel to the pencil line, then the square isn’t square (or you have performed the test incorrectly). If you are new to this testing procedure, perform the test again and see if you get the identical result. Beginners tend to allow the blade to lift or the stock to shift.
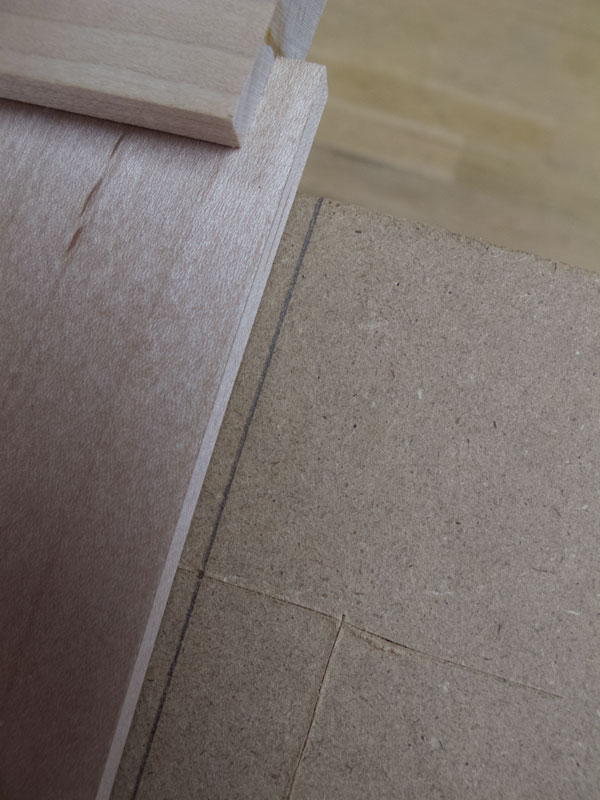
If the pencil line and the blade touch at the toe of the tool, then you need to remove material from the toe. If the line and blade touch by the stock, then you need to remove material near the stock. Remember that the apparent error is doubled by this test. If you have a 1/16” gap at the stock, then you need to remove 1/32” at the toe.
If you have a lot of material to remove, mark the waste using a square and a knife.
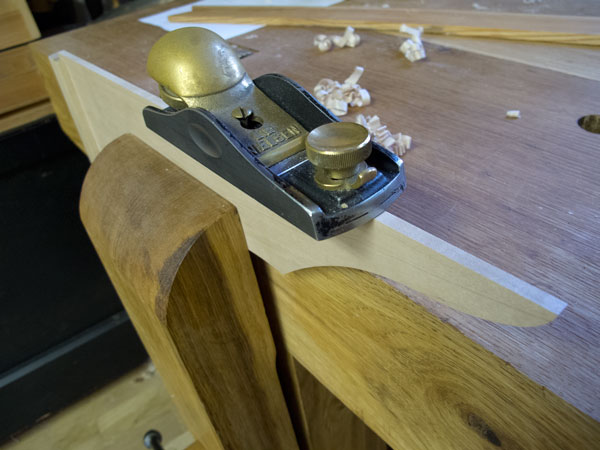
I remove the waste using tapering cuts that I make with a block plane. If I need to remove material from the toe, then I take a short shaving along 3” of the toe. Then I back up the plane and take a slightly longer stroke. I take longer and longer strokes until I finally take one complete stroke all along the edge of the blade.
After I work down to my knife line, I repeat the test again on the MDF. I repeat these cycles until the square reads as dead square – at least to my eye and my fine-point mechanical pencil. This is plenty good accuracy for woodworking.
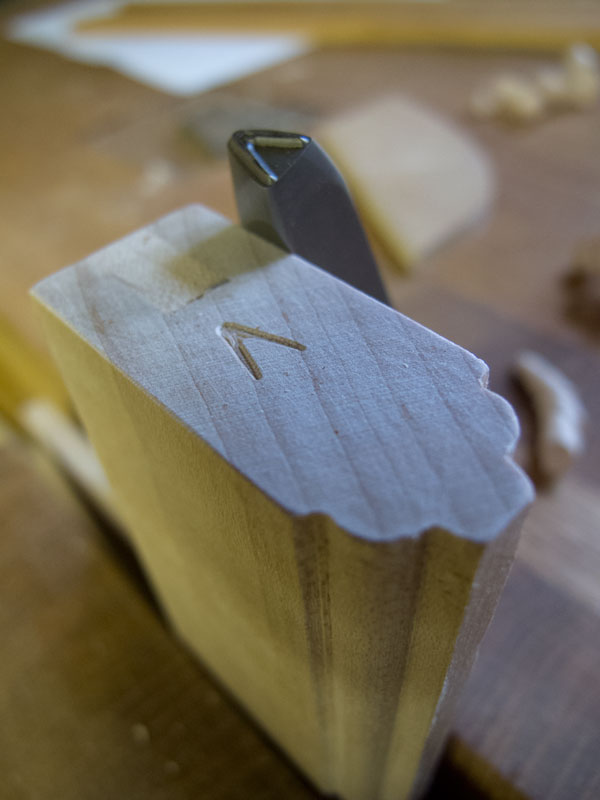
To mark the square as square, I stamp my shopmark into the base of the stock. This is a handy rite of passage for the tool if you have a dozen half-finished squares lying about.
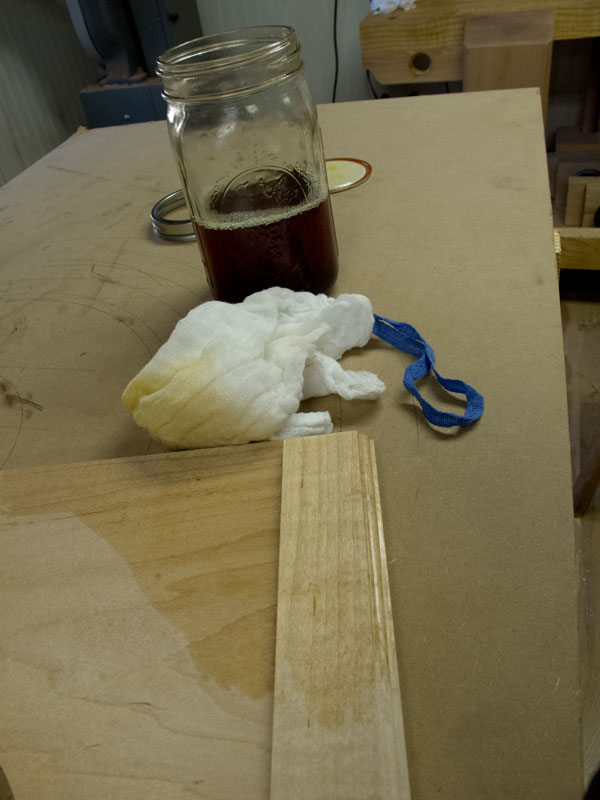
I break all the edges of the square with some fine sandpaper and then apply a simple shopmade finish. I mix equal parts satin spar varnish, boiled linseed oil and low-odor mineral spirits in a mason jar. I rag this mixture on fairly heavy, let it sit for a few minutes and then wipe the excess off.
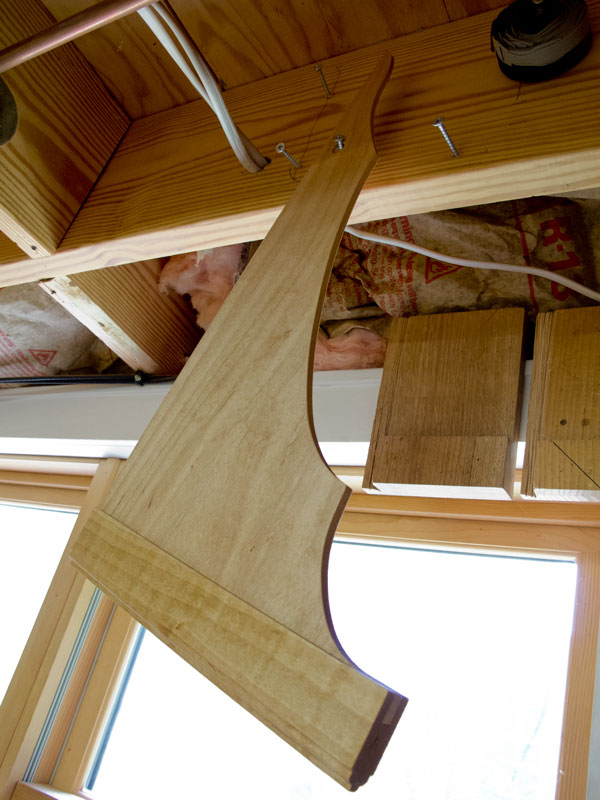
Then I hang the square to dry – it’s a great use for the hang hole.
After a couple of hours I apply a second coat of finish. Two coats are plenty for a square. But feel free to French polish it if it makes you happy.
— Christopher Schwarz
Here are some supplies and tools we find essential in our everyday work around the shop. We may receive a commission from sales referred by our links; however, we have carefully selected these products for their usefulness and quality.


I made a couple of these. They turned out square, but… not what I wanted. So I threw ’em up for sale in my Etsy store. More here http://lumberjocks.com/projects/107842
Chris
You make a real nice square but looking at the
last photo you don’t know much about installing
insulation
Very nice Chris, I enjoy making and using hand made tools. I think this is the forth square that I have made with your teaching.
Thank you,
Jerry