We may receive a commission when you use our affiliate links. However, this does not impact our recommendations.

Parting and Pulling Techniques
Part 1: Introduction • Part 2: Push and Peel Knife Maneuvers • Part 4: Rounding the Tree • Part 5: Sculpting the Branches • Part 6: Attach to The Base
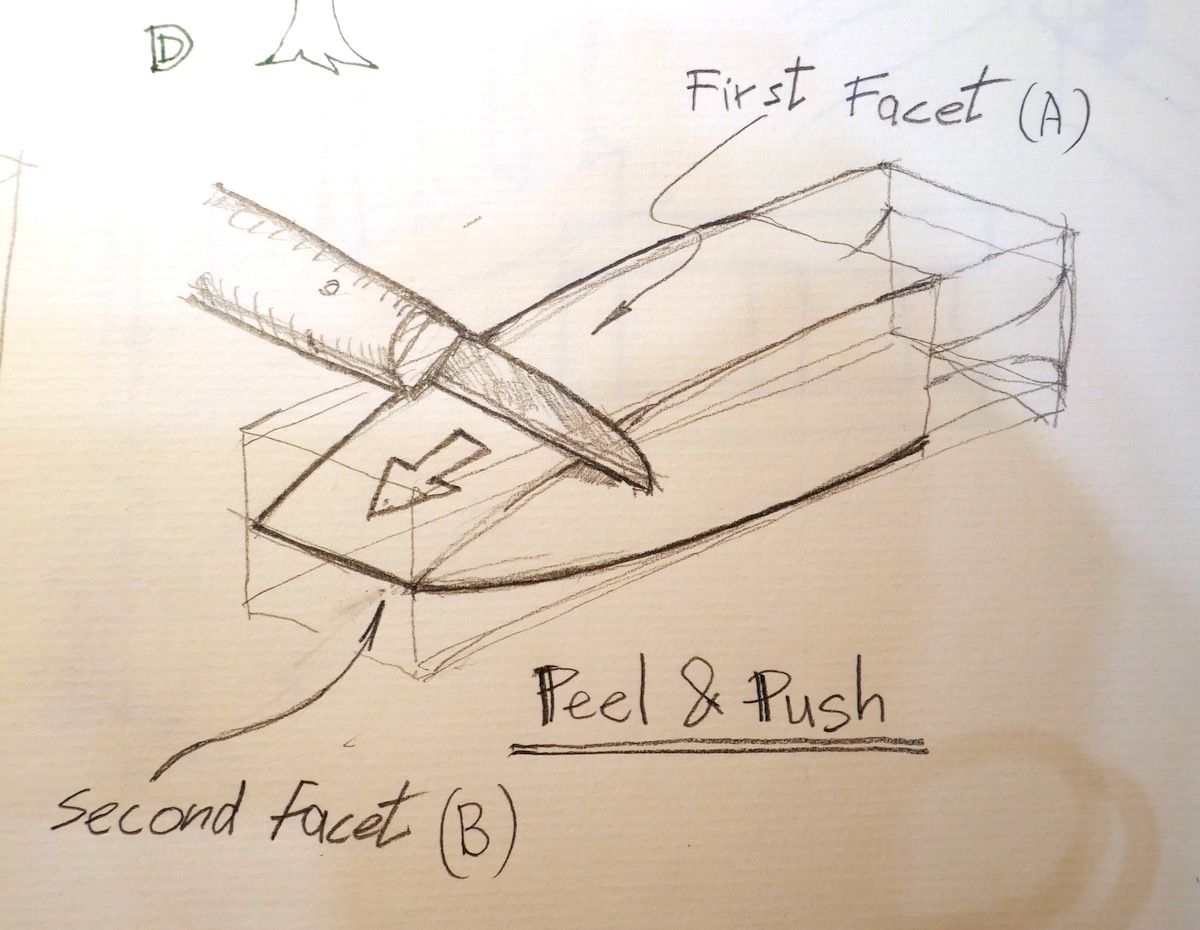
Continuing our journey through the art of whittling, we arrive at the third part of our series. After successfully carving out the foliage outline on one side (Facet A), let’s rotate the blank by 180 degrees and replicate the tree’s silhouette once again. Employ the familiar push and peel techniques to shape the tree spear-shape (cone) on the opposite facet (B) and on the two adjoining surfaces (C and D). Now, let’s delve into sculpting the trunk and the root base.

For this task, we’re introducing two new cutting methods: Parting and Pulling. Parting and pulling techniques come into play when the goal is to create corners, such as the right-angle corner connecting the base of the tree cone to the top of the trunk.

The proximity of the cone’s base to the blank’s base can make securely holding the blank challenging using the push or peel technique. This is where the part and pull techniques prove valuable.

The Part
Place the blade perpendicular to the wood along the corner line to initiate the first cut, called the ‘part’ (to separate). Apply pressure to the blade’s back from above using your opposite thumb’s pad. Remember, the aim is not to split the wood like an axe (which is impractical), but to create a slight serration that separates the wood fibers. This trench will serve as a terminal (or a stop) for the next step, the ‘pull.’
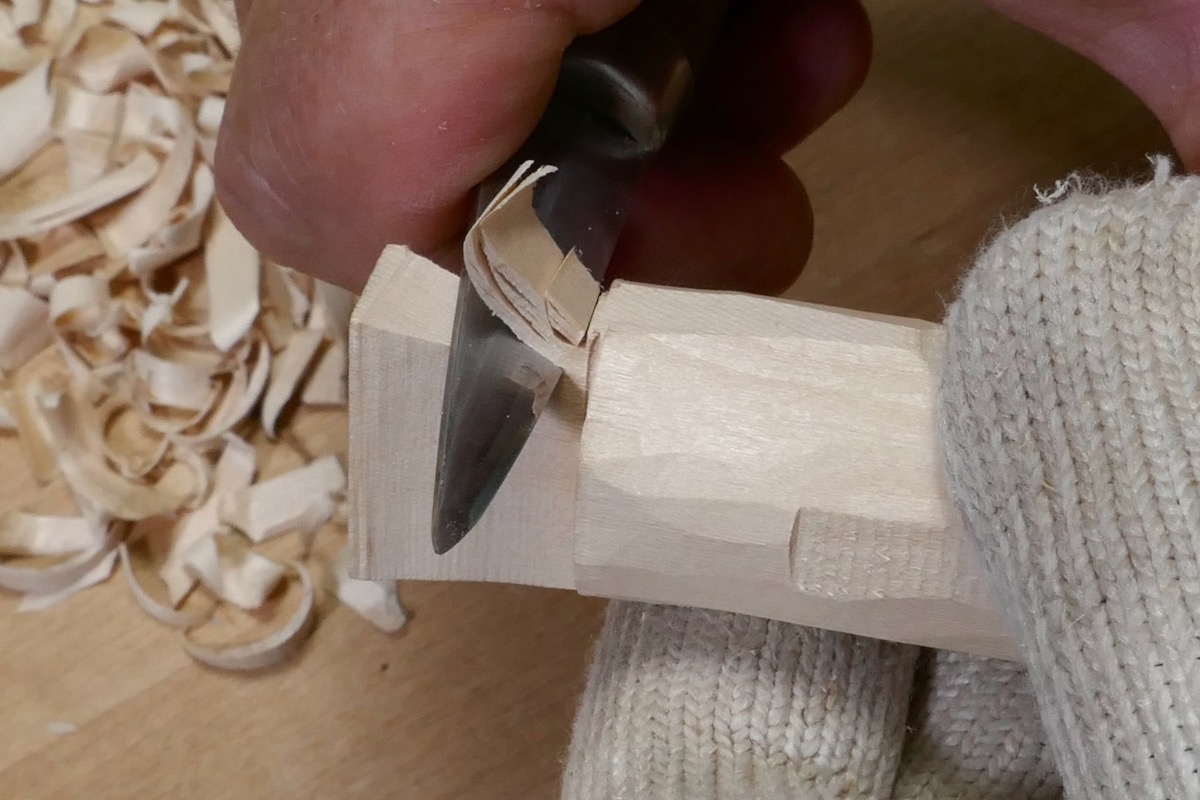
Refer to the images for a visual demonstration. Images without safety gear illustrate grip and finger placement. When practicing, always use a glove and thumb protector.


 The Pull
Once the small right-angle cut is made, rotate the knife to position the blade facing your palm and readjust the opposite thumb’s pad to allow it to sweep the blade and pull its edge towards you at a low angle. I prefer tucking the blade under my thumb’s pad or into the space between the pad and the main section of the thumb. Gently pull the edge backward to shave a thin chip towards the stop cut created earlier using the Part technique. This marks the beginning of the corner of our tree trunk (facet E).


Repeat the part and pull (back) cuts a few times until the corner reaches the design line. Next, create the opposite corner. Once both corners are formed, address the central ridge between them. Apply this process to the other side of the trunk. (F)


After completing the tree’s four core facets, you’re ready to begin the rounding process, which I will show next time.
Here are some supplies and tools we find essential in our everyday work around the shop. We may receive a commission from sales referred by our links; however, we have carefully selected these products for their usefulness and quality.


