We may receive a commission when you use our affiliate links. However, this does not impact our recommendations.
Mastering the Push and Peel Knife Maneuvers
Part 1: Introduction • Part 3: Parting and Pulling Techniques • Part 4: Rounding the Tree • Part 5: Sculpting the Branches • Part 6: Attach to The Base
In this installment, I’ll be your guide through the fundamental knife techniques that my students and I employ to sculpt and shape our projects. Our practice project involves a conifer tree, so let’s prepare our basswood blank and embark on the art of whittling.
Start by grabbing your blank and sketching a tree onto it, following the example shown in the image below.


Now, let’s delve into the core knife maneuvers. I’ve identified four key wood-shaving techniques: Push, Peel, Pull, and Part; of these, the most widely used are peel and push. Let me walk you through how each of these techniques is executed.
The Push: To utilize the push technique, position your non-dominant hand’s thumb against the blade’s back to initiate the shaving motion away from your body. Initially, maintaining consistent pressure might prove challenging, as your thumb may not possess the strength for extended use. However, practice will refine your skill.

Many intuitively push the knife away from them, using force from the dominant hand that holds the blade—a technique often learned from childhood. However, this method, though familiar, is less safe than providing impetus and a pivoting point to the blade with the opposite thumb. While it might be more challenging initially, investing effort in using the opposite hand’s thumb as a guide pays off. With time, your non-dominant hand’s thumb gains strength and precision, allowing you to wield the push technique like a seasoned pro.

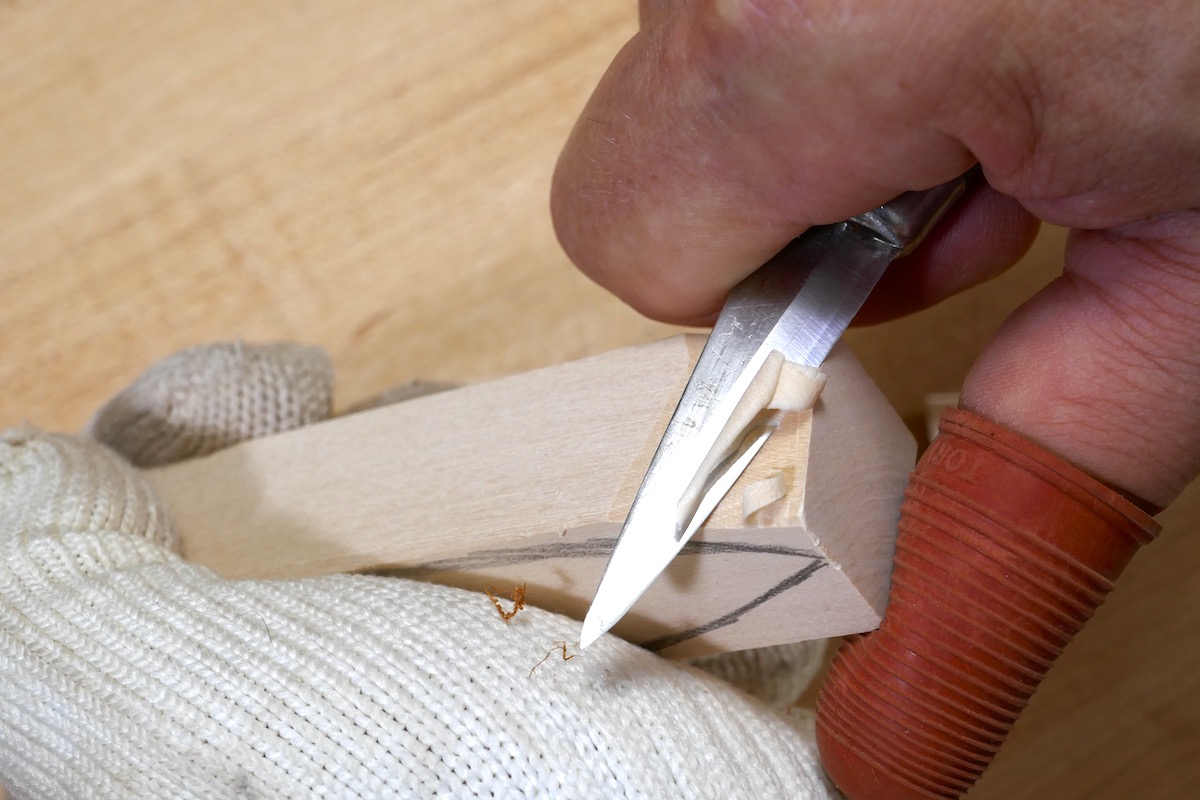
 Hold the tree blank in your non-dominant hand, align the blade’s edge near the top corner of the tree, and with your thumb, exert pressure on the back of the whittling knife, moving it away from you. Remember, always whittle downhill (with the wood’s grain). Avoid trying to plunge the blade too deeply or using an acute angle, as this can cause the blade to get lodged in the wood. Begin by shaving the corner and proceed to make additional cuts slightly away from the corner. Repeat this process, gradually extending the slope to remove more wood.


A variation on the Push technique is holding the workpiece against a bench, a bench hook, etc., as seen in this image.
Now, onto the Peel technique: Sometimes referred to as the Apple or Potato peeling technique, this is a personal favorite. Rotate the knife 180 degrees within your palm so that the blade faces your thumb. Position your thumb on the blank near the tree’s top, and with the cutting edge moving toward your thumb, shave downhill. Ensure your thumb lies below the blade’s trajectory, and consider wearing a thumb protector for added safety. Practice this technique and then move on to the Pull technique.


 As you practice these techniques, use both to shape the tree’s cone (the foliage). If fatigue sets in, you’re allowed to call in the aid of a band saw to assist in refining the tree’s contours. However, it’s important to bear in mind that this should be considered a temporary solution. Without honing your skills with the manual techniques, you won’t be able to build up the necessary dexterity and strength that are essential for achieving true proficiency. In our next session, we’ll be delving into the remaining two whittling techniques, so keep that enthusiasm alive!

Stay tuned for our next meeting, where I’ll continue exploring the intricacies of the remaining whittling techniques. Your journey into the art of whittling has only just begun!
Here are some supplies and tools we find essential in our everyday work around the shop. We may receive a commission from sales referred by our links; however, we have carefully selected these products for their usefulness and quality.