We may receive a commission when you use our affiliate links. However, this does not impact our recommendations.
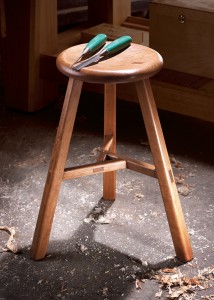
Build the infamous and seemingly impossible Chinese stool with Bob Lang, in a special weekend class at the Popular Woodworking Magazine Shop.
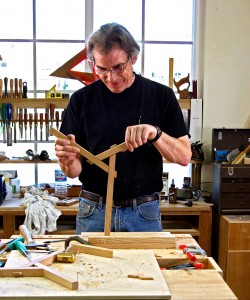
Once in a great while, we invite readers into the Popular Woodworking Magazine shop to build a project along with one of the editors while we film a video. Back in 2010, readers joined Chris Schwarz and Glen Huey to make sawbenches and dovetailed boxes. This coming August, over the weekend of the 17th and 18th, I’ll be building one of these stools along with six of our readers.
Why this stool?
If you were a reader of our short-lived sibling publication Woodworking Magazine, you’ll recognize it as the cover project of the last of 16 issues, Winter 2009. If you’re a long-time reader of our blogs, you’ll remember that the original build didn’t go as smoothly as we intended. 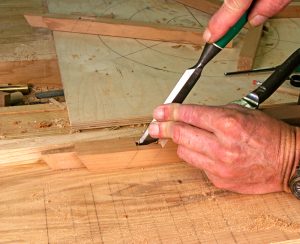 It’s been one of the most popular projects I’ve made, judging by the number of photos I’ve been sent and the number of times it has appeared online in woodworking forums, blogs and social media.
The joinery is straightforward, but nothing is square – when you build one you have to rely on other references and trust your own judgment. These stools are attractive, practical and sturdy; building one isn’t that difficult, but it will change the way you think about woodworking and enhance your skills. If you’re wondering how to lay this out, how to cut the joints or how to fit it all together, you’ll learn the methods we uncovered and ways to avoid the traps we fell into in our early attempts. There is a lifetime’s worth of lessons in a few sticks of wood and a couple of days at the bench.
 Why The Class format?
The quick answer is it makes a better video. I have a lot of fun when I make this stool, but it’s a lot more fun and a lot more rewarding to show someone how to do it than it is to show off my skills. With “regular guys” there to ask good questions and keep me honest, the finished video will be far more useful, interesting and entertaining. In addition to seeing a guy do this who has done it several times, you’ll also get to see what it looks like for the guy making his first attempt – what questions he has, the things he struggles with and the coaching he receives. The final video will be far closer to the experience of taking a class in person.
WHY SHOULD YOU SIGN UP?
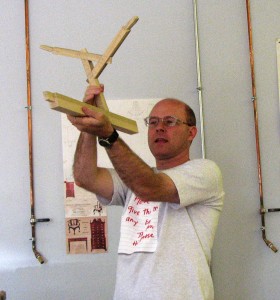 This will be a class that is recorded, not a video shoot with an audience. You’ll get expert instruction in a small group in a well-equipped air-conditioned shop. Materials will be prepared ahead of time, so we all can get right to work making the layout and cutting the joinery. Glen Huey and Megan Fitzpatrick will also be around over the weekend to help with the class and filming, and to keep a steady supply of donuts and coffee on hand throughout the day. You’ll go home with a full belly, a great stool and some great memories. And, you’ll get a copy of the DVD when it’s done.
Cost of the class is $250, with a $40 fee for materials. Participation is limited to six students, and the class will be held in our shop located at
8469 Blue Ash Road, Cincinnati, OH 45236
CLICK HERE TO SIGN UP FOR THE CHINESE STOOL CLASS
Here are the first few paragraphs from original article:
In my 35 years of woodworking, there are a handful of projects that stand out as landmarks of change, points in time where I had a different attitude and a more developed set of skills at the end than at the beginning. This seemingly simple stool is one of them. And like all good 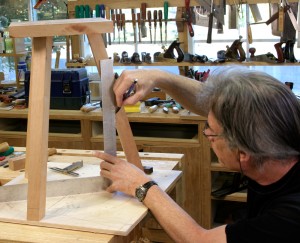 things from the Orient, a paradox presents itself every time you think you have a problem solved.
We found an antique version of this stool in a catalog, thought it looked interesting and ordered a couple. The joinery is as simple as it appears. The three stretchers join with one another and with the legs using through-tenons; and this same type of joint connects the legs to the seat. The complexity was revealed as I disassembled one of the originals.
This little stool is seat-of-the-pants engineering at its finest. The beauty of a triangular assembly is that it cannot rack, and in this stool each mortise-and-tenon joint reinforces another. The legs push the stretchers together while the stretchers wedge the legs into the seat. Taking the sample stool apart was difficult at first, then there came a point where it became easy.
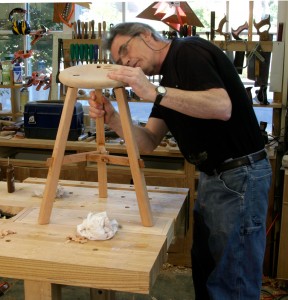 The good news here is that this also works in reverse; less-than-perfect joints can combine in rather loose assemblies to form a very strong unit. The joints in the original were all wedged to hold them together, and there were several places where damage had been done during fitting.
My joinery was less than perfect, yet I’m very happy with the finished product. I also managed to inflict nearly identical damage around the joints, though not because of any desire to be authentic. Challenging work has its risks, and the original contained fixes that worked. If I really wanted to be authentic, however, it would have been handy to know how to cuss in Mandarin.
Click here to read about an earlier class in building this stool.
SPACE IS LIMITED TO 6 PARTICIPANTS
CLICK HERE TO SIGN UP FOR THE CHINESE STOOL CLASS AUG 17 & 18, 2013
my personal blog is at readwatchdo.com
If you want a glimpse of what the magazine shop looks like, and what I’m like in person, check out the video of me building the Voysey Clock, the cover project of the August 2013 issue of Popular Woodworking Magazine.
Here are some supplies and tools we find essential in our everyday work around the shop. We may receive a commission from sales referred by our links; however, we have carefully selected these products for their usefulness and quality.




Bob,
Did this video ever get made? I can’t find it. Can you share any information on it?
Thanks.
Josh
A few weeks ago I dug out this article from my stack of back issues and reread it repeatedly, trying to get my mind around how it goes together, and thinking “I really must tackle this thing.” Suddenly this class appears. Coincidence? I think not. I’m in.