We may receive a commission when you use our affiliate links. However, this does not impact our recommendations.
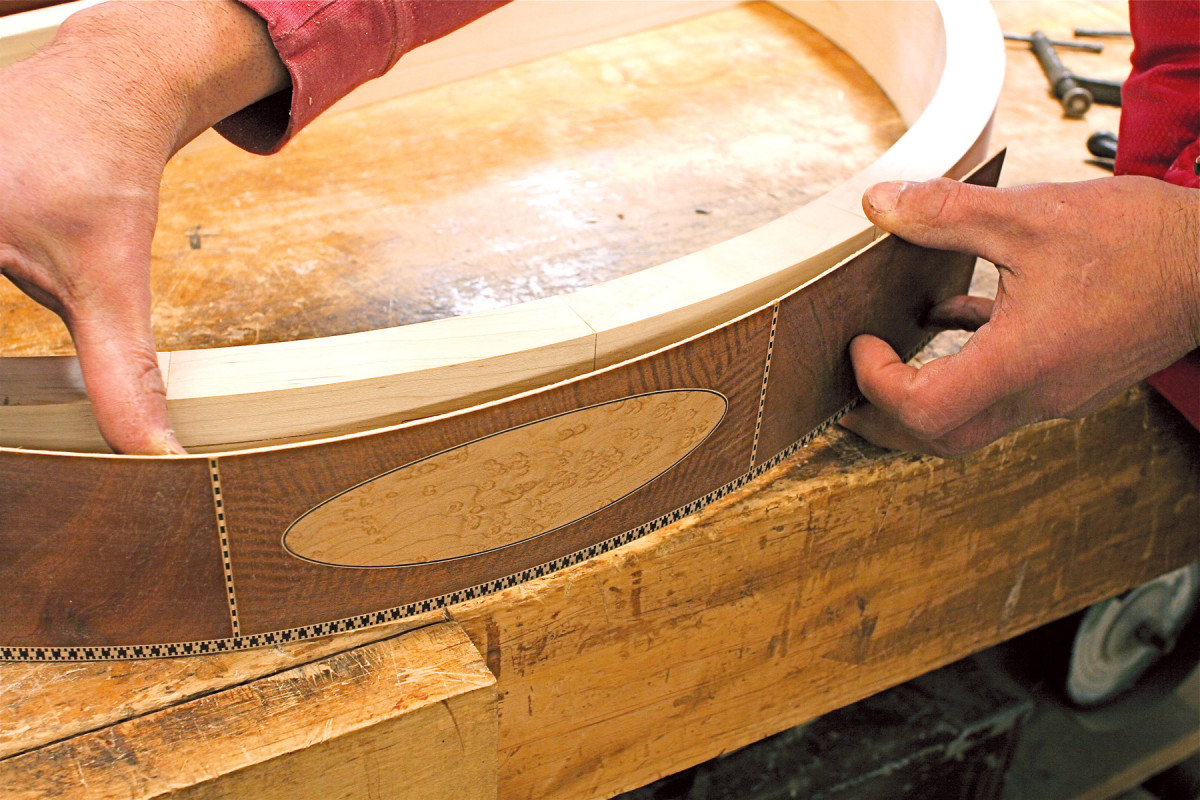
The ‘flat-board-first’ method enables you to veneer a curved part with any pattern you want.
Boldness with balance—that’s how I see the front apron of a classic Federal card table. I love the way it curves, adding drama to those vibrant veneers and bandings. For a woodworker, building up those patterns on a flat piece of wood is difficult enough, but how do you do it on a curved one?
That’s the question I struggled with trying to figure out how to teach a class on building this table. Traditionally, veneers, inlay and banding would have been directly applied to the curved apron, one piece at a time. Experience tells me that this method is too
difficult and exacting for many students to master during one class. My alternative: Perform all the intricate veneering on a flat piece of wood first, then resaw the board and glue the new, thicker piece of veneer, pattern and all, directly onto the curved apron.
Experimenting with this “flat-board-first” technique, I found that it worked perfectly. My students really like it! I’m sure it will become the standard way for individual craftsmen to make these aprons from now on.
About the apron and veneer
Let’s start by talking about how to make a curved apron. You can laminate it or build it up in the traditional way, as I did here. This apron is constructed like a masonry wall, with staggered wooden “bricks.” After the bricks are stacked and glued, their sharp, jutting corners are cut to a smooth curve on the bandsaw. If there are any voids, they are filled or patched.
You may have to prepare the veneer about the same time that you’re milling the bricks. If you’ve ever handled highly figured veneer, you know that it can be stiff, brittle and prone to cracking, much like a potato chip. In fact, it can be shaped like a potato chip! You can’t work with it this way.
In order to cut a sheet of veneer into smaller pieces and fit the pieces into a precise pattern, the veneer has to be rendered flat and pliable. Fortunately, that’s easy to do. First, you soak the veneer in a mixture of water, glycerine, alcohol and glue. Then you clamp it in a makeshift press for a day or so.
Lay out the veneer
Begin by making the “staging board.” You’ll glue the veneer on this board first, so it should be made from a wood that’s stable, bends easily and is nice to resaw. I use yellow poplar. I rip the staging board from the edge of a wide poplar board that is straight-grained and free of defects. This edge piece, which will be quartersawn or riftsawn, will move less and is less prone to warping than the plainsawn wood in the middle of that wide board. I can’t emphasize this too much: The staging board must stay absolutely flat until you resaw it.
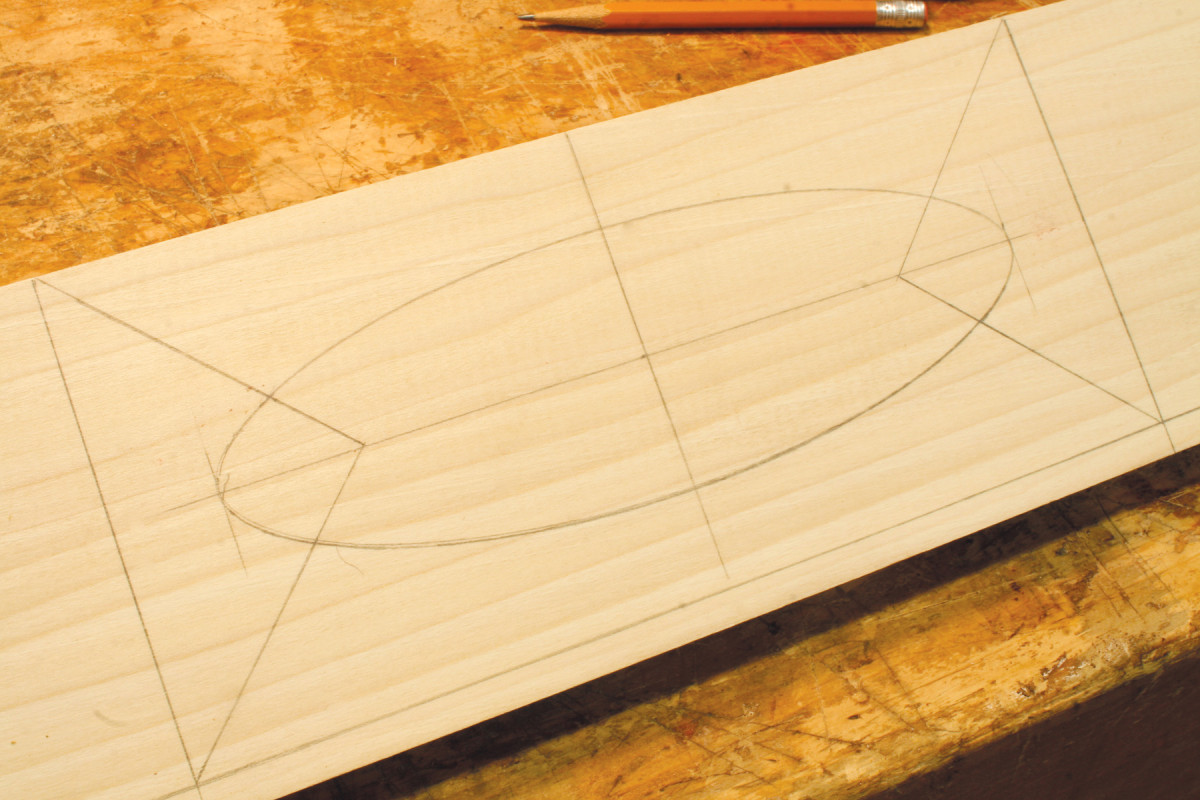
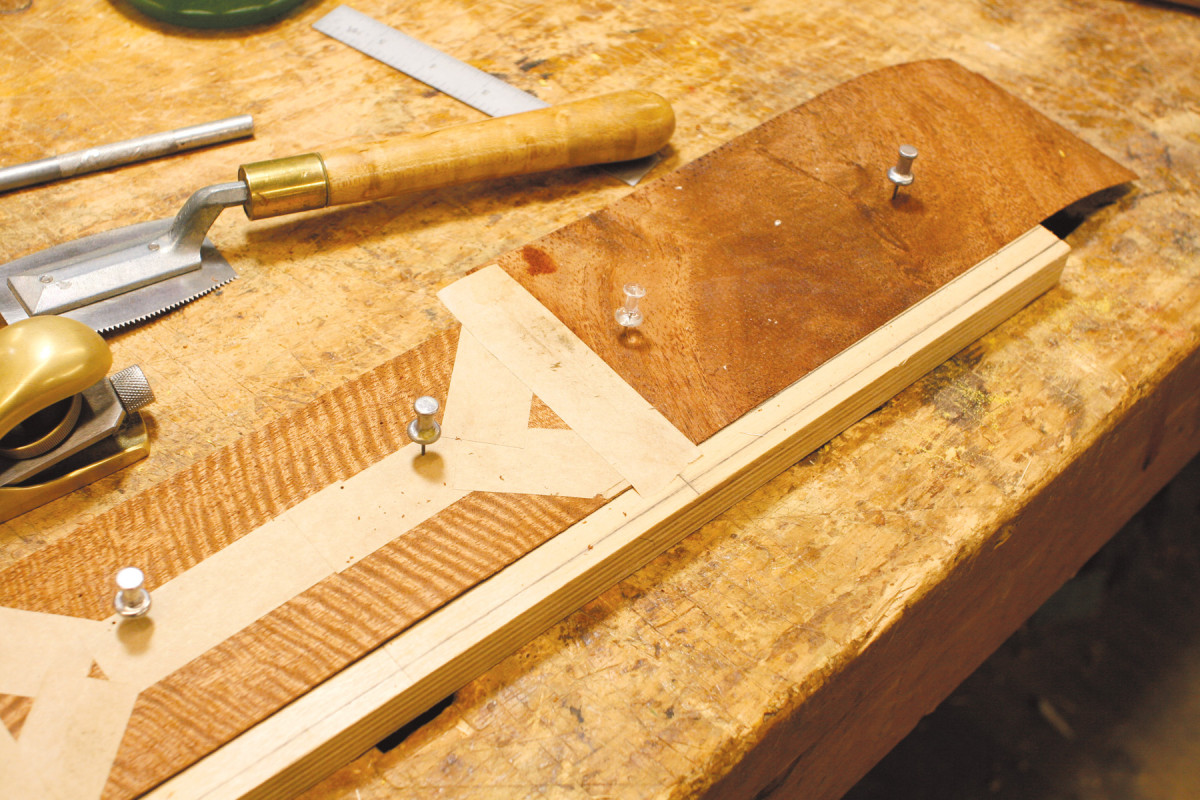
1. My technique of veneering a built-up pattern on a curved apron starts with a flat 3/4″ thick “staging board.” Draw the outline of the pattern on the board.
Mill the staging board at least 3/4″ thick, about 1/16″ wider than the table’s apron and a few inches longer than the veneered pattern you’ll be creating.
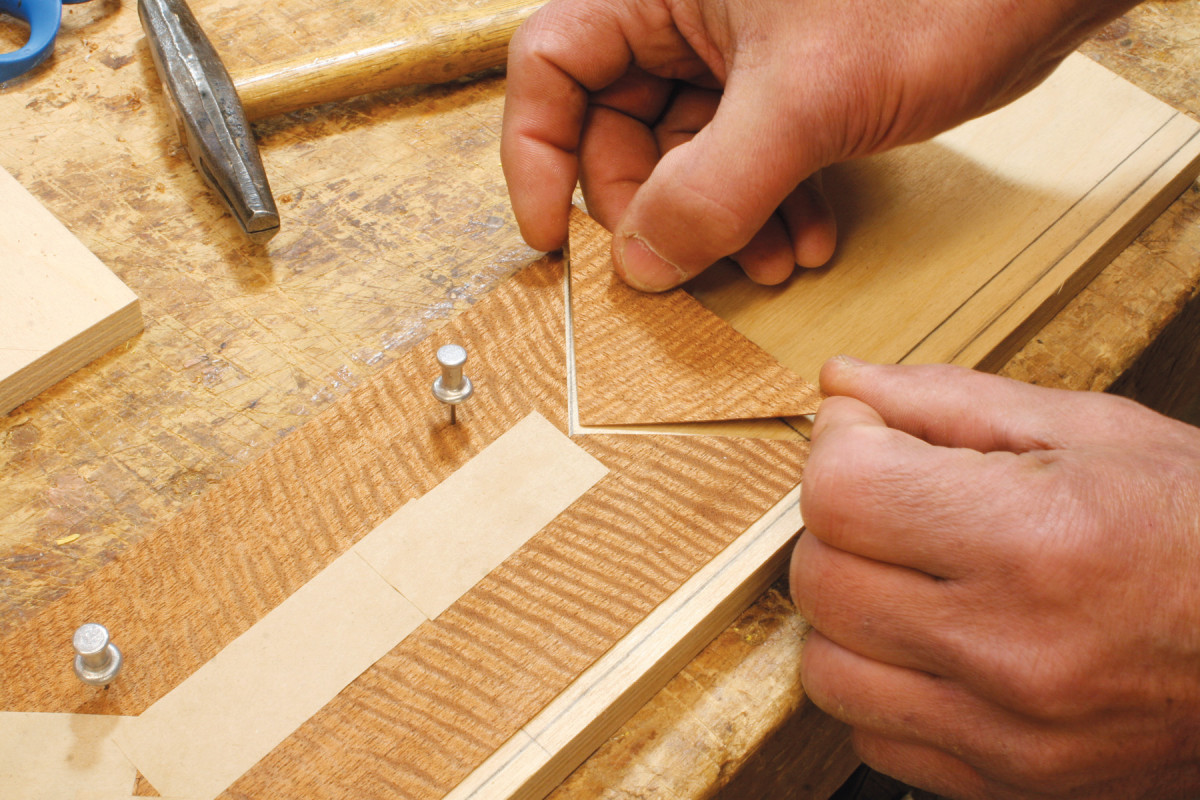
2. Cut the pieces of the pattern and pin them to the board, so they don’t shift. When the pieces fit well, bind them together with veneer tape.
Draw the pattern on the staging board (Photo 1). I’ll be using fiddleback mahogany for the mitered field and vertical-grain crotch mahogany for the flanking sections. We’ll cut and inlay the center oval later on.
3. Build out the pattern by adding more pieces to the staging board. The center pieces of this pattern are made from fiddleback mahogany; the side pieces are crotch mahogany.
Start with the four mitered pieces of the center section. As you cut each piece of veneer, pin it to the board (Photo 2). When all of the pieces of the center section fit well, bind them together with veneer tape. Finally, add the side pieces (Photo 3).
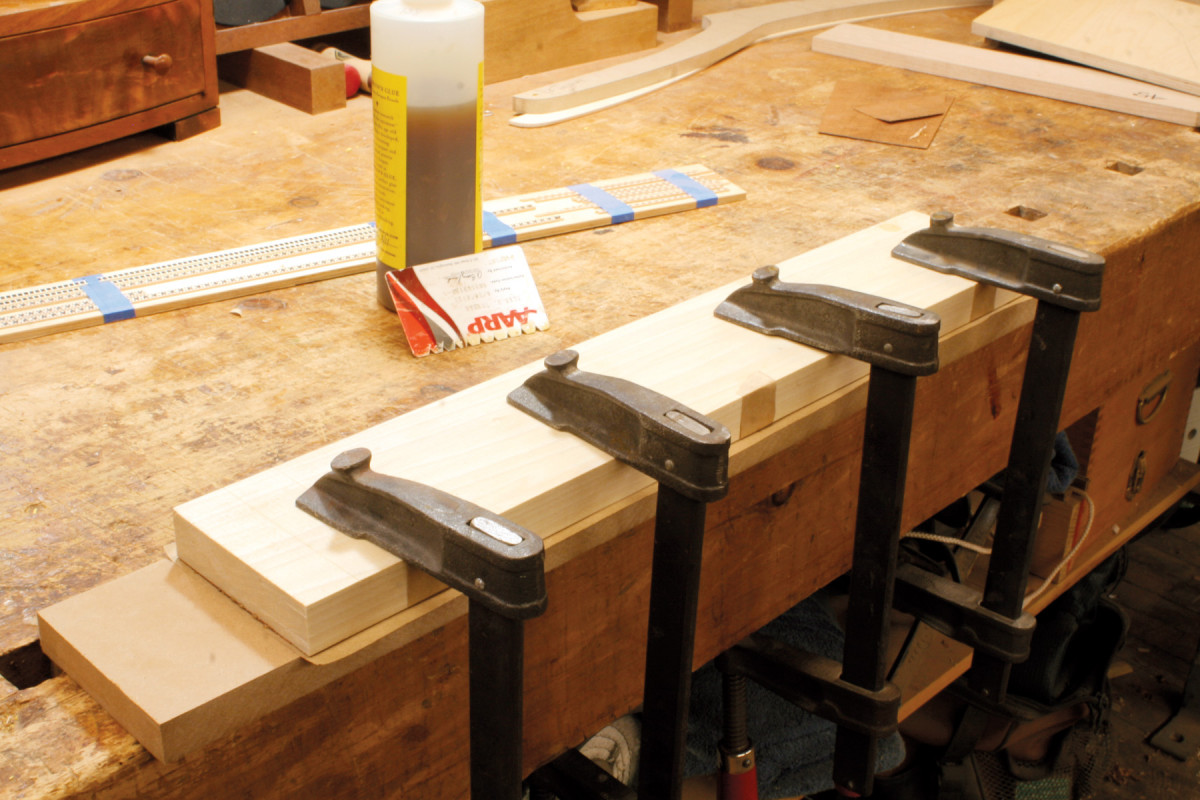
4. Glue the veneer to the staging board. After the glue dries, trim off any excess along the sides.
Glue the veneer to the staging board (Photo 4). I use liquid hide glue (see Sources, page 72). Spread the glue with an old credit card that has notches cut into it. Use a melamine caul to spread the clamping pressure; glue squeeze-out won’t stick to it.
Add the banding
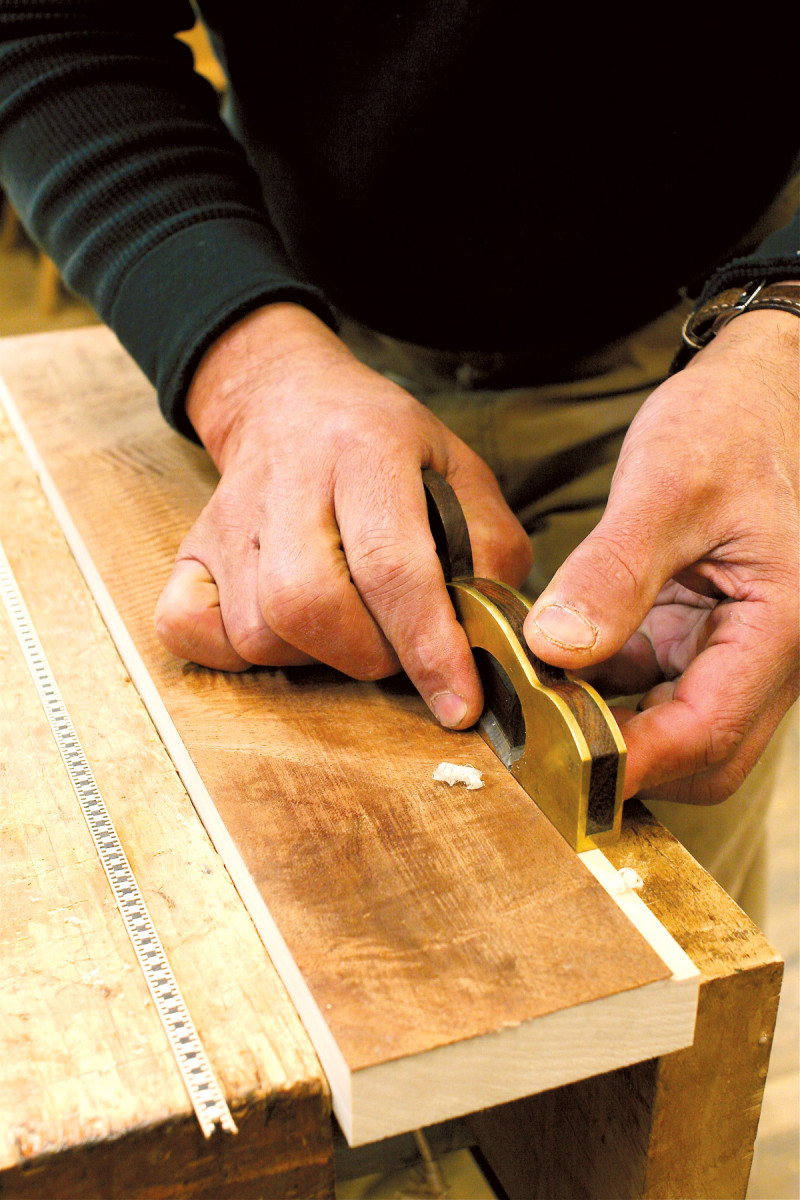
5. Scribe and plane a shallow rabbet along the bottom edge of the board to receive a strip of checkerboard banding.
Next, cut a rabbet for the checkered banding that goes along the bottom of the apron. (for more info on bandings, read this article.) Scribe a line 3/8″ from the bottom of the board, then use a shoulder plane or router to cut the rabbet (Photo 5). The depth of the rabbet should be about 1/64″ less than the thickness of the banding.
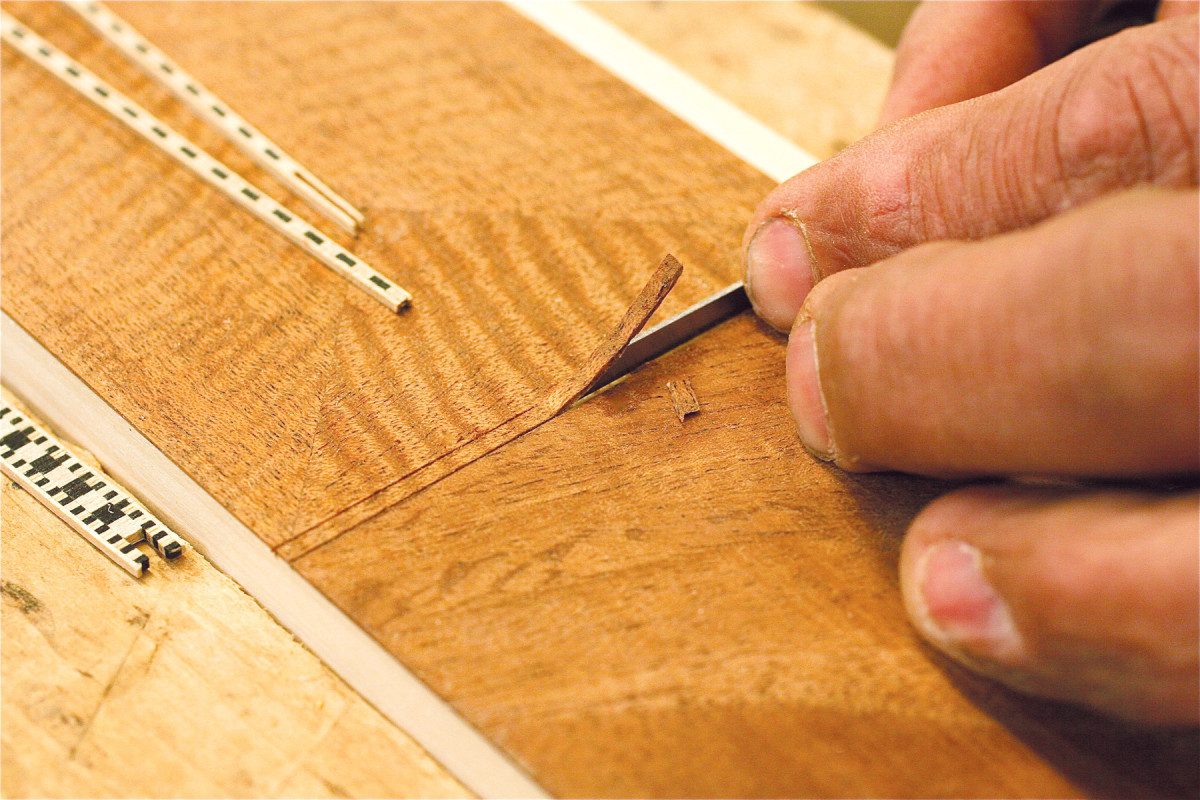
6. Pare away a narrow strip of veneer between the fiddleback and crotch sections using a 1/16″ wide chisel. Score the sides of this groove with a marking knife before you pare.
Cut grooves for the narrow banding that separates the mitered field from the side sections (Photo 6). First, outline the groove by scribing two parallel lines with a marking knife. Then pare away the center waste with a 1/16″ chisel.
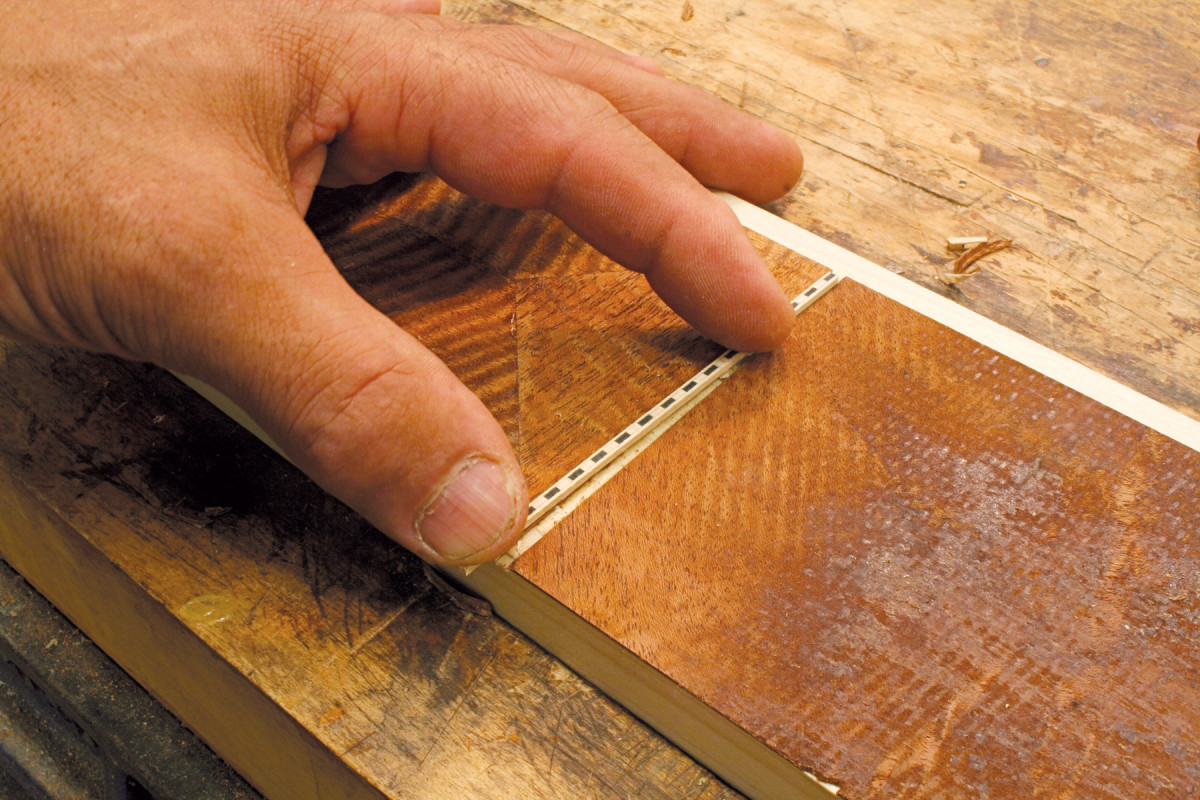
7. Glue a narrow piece of banding into the groove. Next, glue the checkerboard banding in the rabbet on the bottom of the board.
Glue the bandings in place (Photo 7). Rather than use cauls, hold the banding in place with binding tape (see Sources). This tape is used in acoustic guitar making for gluing purfling around the instrument’s body; it’s slightly elastic but has plenty of holding power.
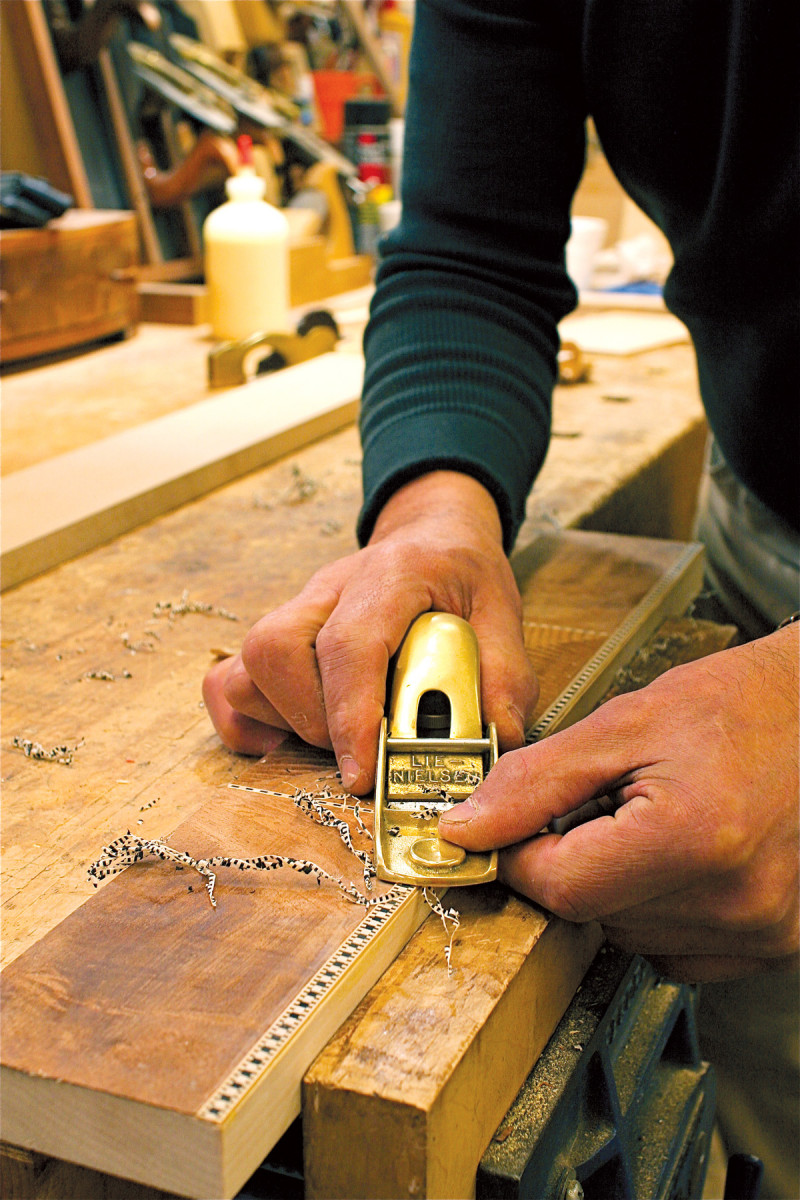
8. Plane all of the banding flush with the veneer.
After the glue is dry, plane all of the bandings flush (Photo 8). My favorite tool for this delicate work is a Lie-Nielsen #102 low-angle block plane (see Sources).
Inlay the oval medallion
I use solid wood to make the center oval. Veneer won’t work. Most veneer is too thin to survive planing and leveling in the steps ahead—you might cut right through it.
You’ll be using an inlay kit for your router to cut both the recess for the inlay and the inlay itself (see Sources). To use the kit, you’ll need an oval template made from 1/4″ plywood or MDF. While it’s not difficult to make the template yourself, I hired a local woodworker to make one with his CNC machine. (It took him less than 10 minutes!)
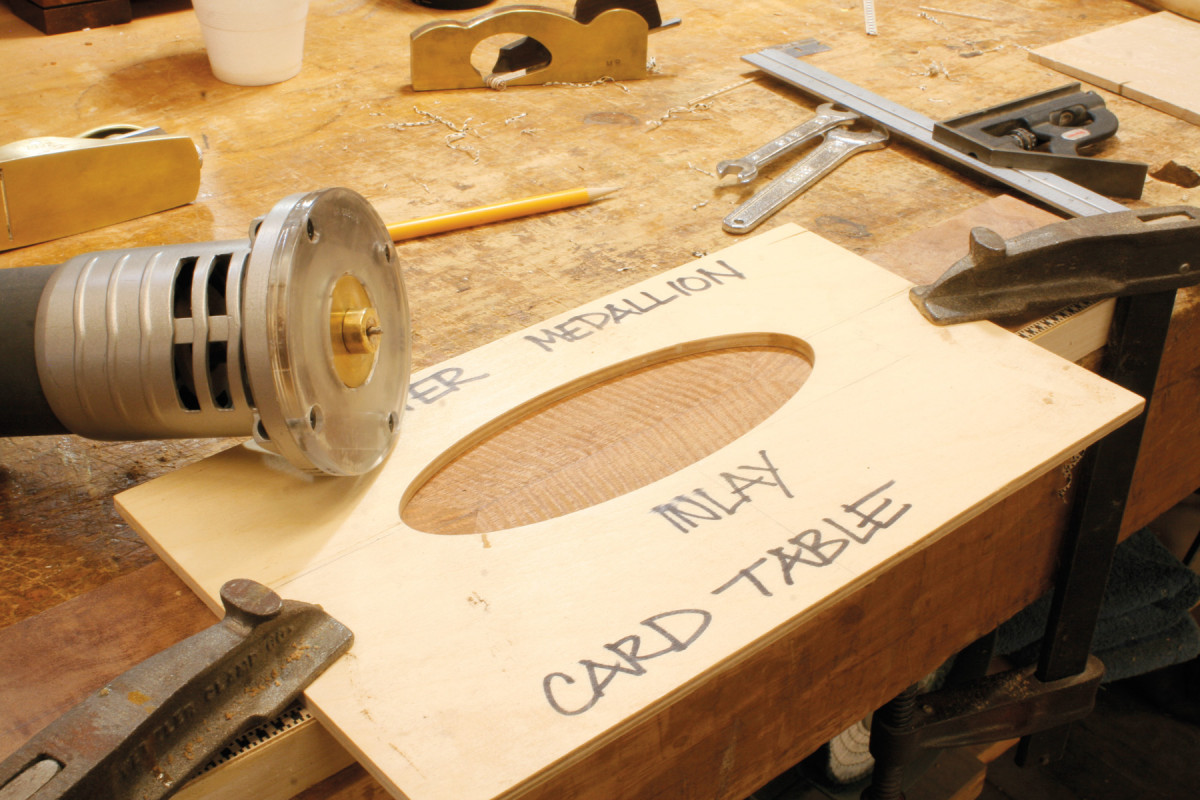
9. Rout an oval recess in the middle of the pattern. First rout a border using a 1/8″ bit and a special two-part guide bushing for making inlay. Remove the rest of the waste with a larger straight bit.
The template’s oval has to be a bit oversize, however. Here’s why: The kit consists of a 5/16″ Porter-Cable-style guide bushing, a 9/16″ dia. donut that snaps onto the bushing and a 1/8″ solid-carbide up-cut spiral bit. To cut the recess, you place the donut on the bushing and rout around the inside of the template about 1/16″ deep (Photo 9). The groove you rout will be 7/32″ away from the edge of the template. This means that the template should be 7/16″ larger in length and width than the oval you want to make.
After you’ve routed the groove, remove the template and install a 1/4″ or larger bit in a second router. (The 1/8″ bit is fragile; don’t use it for hogging out large areas.) Set the bit to the same depth as the groove and remove the waste inside the oval.
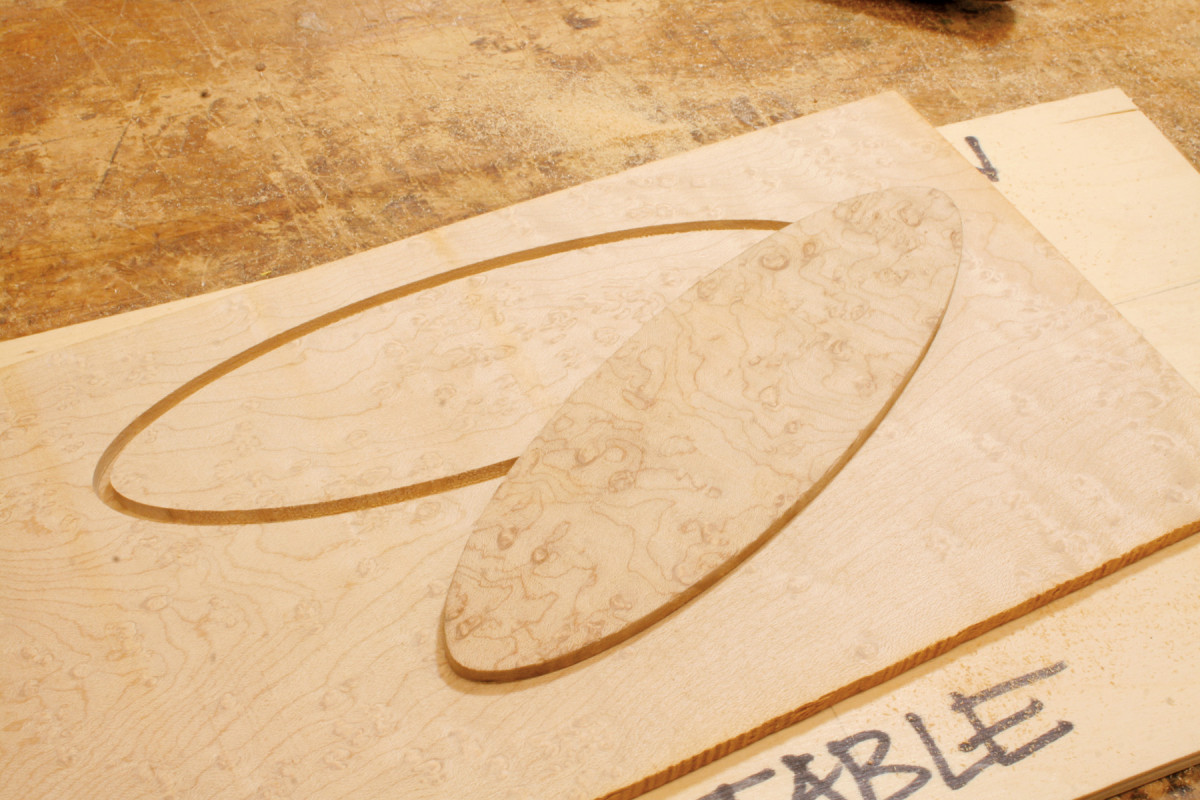
10. Rout a medallion from a piece of solid bird’s eye maple, using the same template and a smaller guide bushing. Resaw the piece to release the inlay. This piece will fit perfectly into the recess.
Next, cut out the medallion that will fit into the recess (Photo 10). I made the medallion from a 3/8″ thick piece of bird’s eye maple (a thicker piece would be OK, too). Place the template on the wood and remove the donut from the router’s bushing. Set the depth of cut to a little bit less than 1/16″ and rout around the template. Be careful to keep the router’s bushing tight against the template. Any deviation from the template will result in a flawed inlay.
Reset the depth of cut two more times. On the last pass, the groove should be about 1/8″ deep. Resaw the board on the bandsaw to release the medallion; it should be about 1/8″ thick. If all has gone well, it will fit perfectly into the recess.
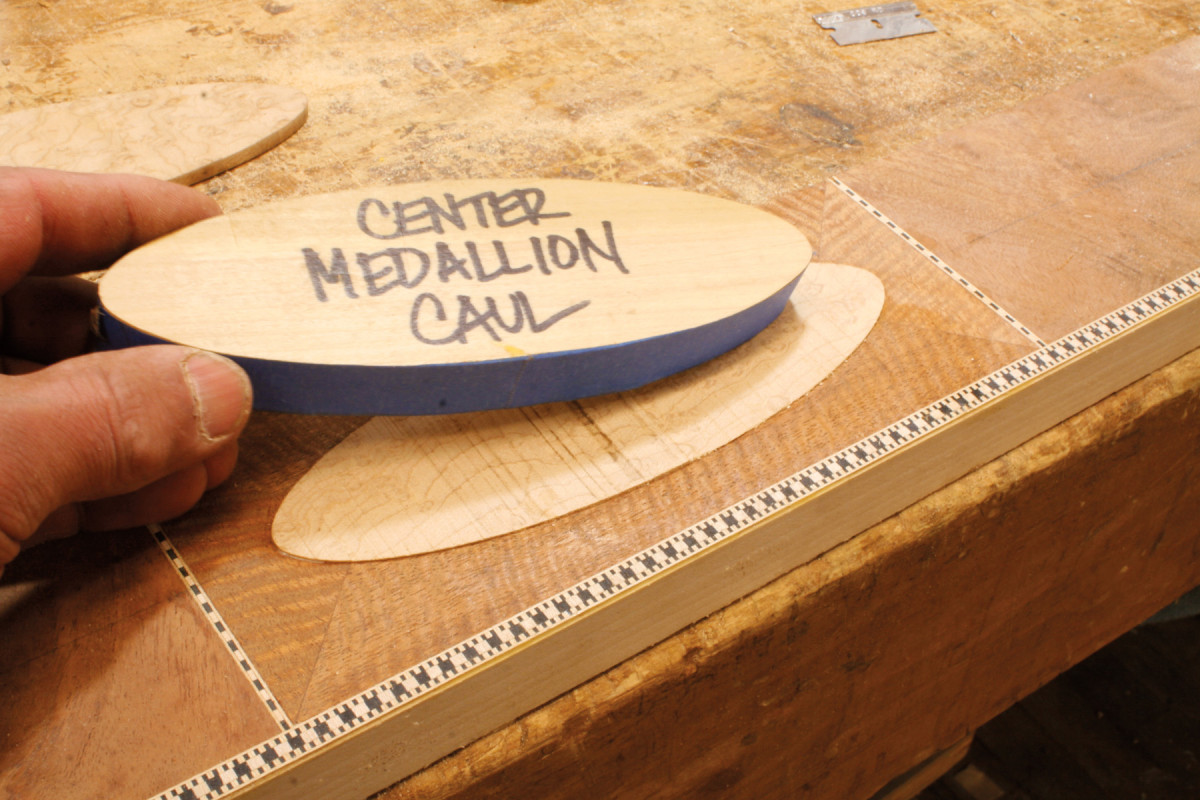
11. Glue the medallion into the recess. Make a caul slightly smaller than the medallion to spread clamping pressure. After gluing, plane the medallion flush with the veneer.
Make a caul 1/16″ smaller in length and width than the medallion (Photo 11). Put tape around the sides of the caul—and on its bottom, as well—to prevent glue from sticking to it. Use the caul to glue the medallion into the recess. Plane the medallion flush with the surrounding veneer.
Use narrow black-and-white purfling to outline the medallion; it gives the design punch and distinction (see Sources). The purfling must precisely follow the border of the medallion. This requires a second template exactly like the one you used before, only 5/32″ smaller all the way around. You’ll also need a Dremel and a special base for the Dremel from Stewart-
MacDonald (see Sources). (I used the same tools to rout the grooves for the stringing in the legs—see “Stringing Inlay,” AW #157, Dec./Jan. 2012, part 1 of this series.)
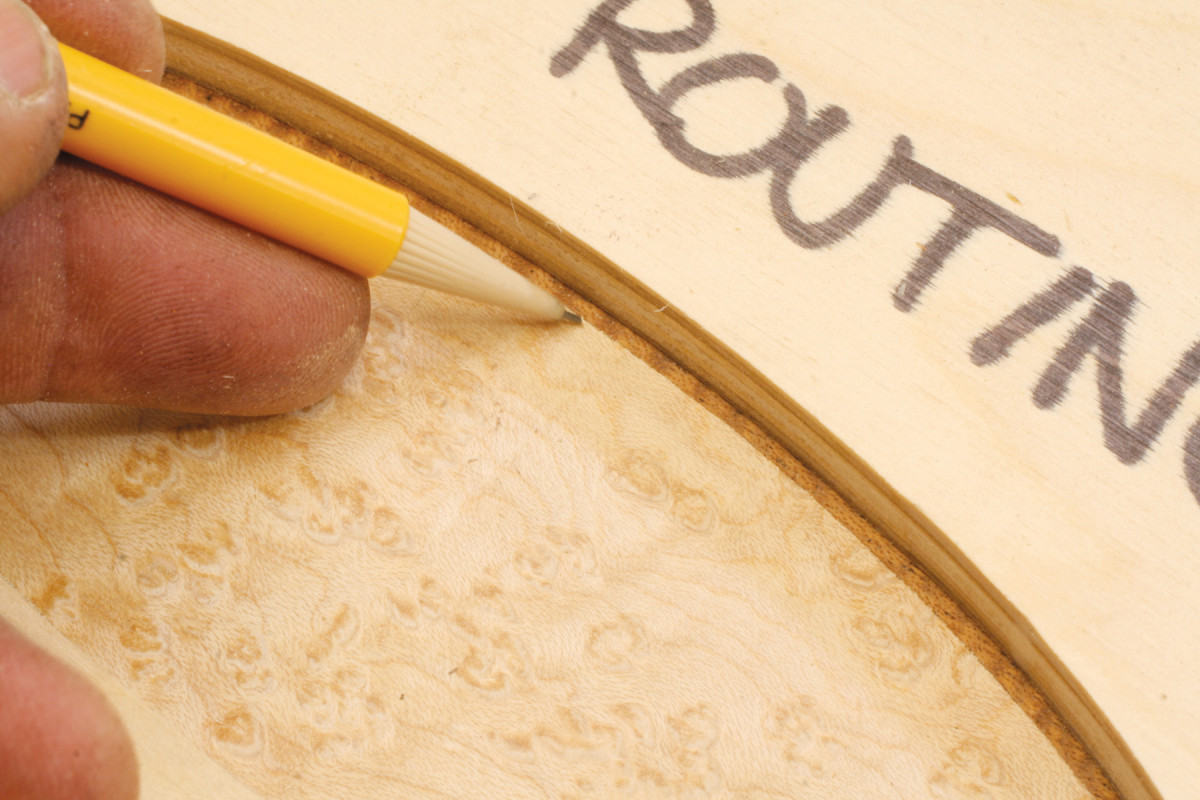
12. Rout a narrow groove around the border of the medallion. This requires making a slightly smaller template and using a small end mill whose shank acts as a pilot.
Make the new template by tracing around the old template with a 3/8″ straight bit outfitted with an 11/16″ bearing and a bearing lock collar (see Sources). (The bearing and bearing lock collar go on the bit’s 1/4″ shank, above the cutters.) Then install the Stew-Mac base on your Dremel and insert a 3/64″ end mill into the Dremel’s collet (see Sources.) The shank of this bit will ride directly against the template, much like a router bit with a solid pilot. Carefully position the new template on the medallion and rout a groove slightly less than 1/16″ deep (Photo 12).
Installing the stringing requires some finesse. The ends of the medallion are curved too tight to accept the stringing as it is, but you can pre-bend the stringing by heating it up. (I used the same process to bend the stringing for the table’s legs.) Mark the sections of the stringing that will have to bend the most, then gently bend these parts over a hot curved iron (see Sources). Heat makes the stringing more pliable; when it cools, it will remain bent.
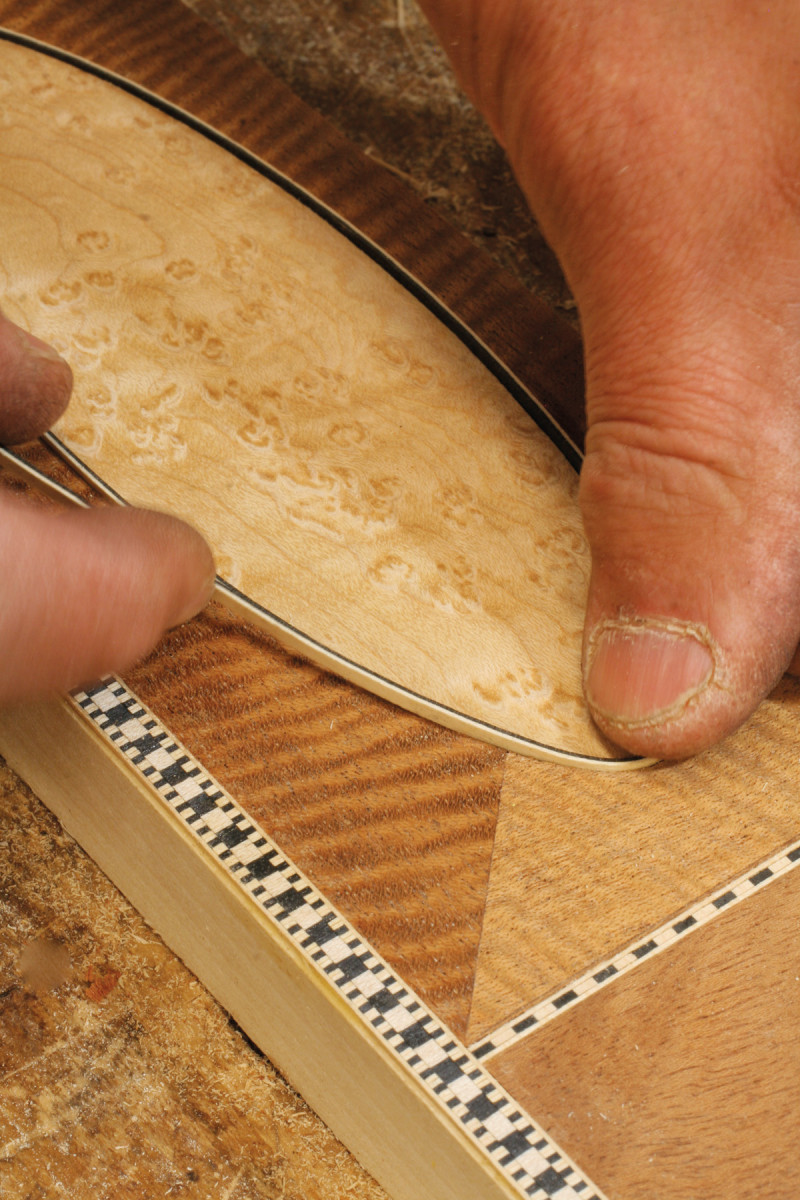
13. Glue black and white stringing into the groove. You’ll probably have to bend the stringing first over a hot curved iron so it will fit this tight radius without breaking.
Lay a small bead of glue in the groove with a syringe (see Sources), then fit the stringing into the groove (Photo 13). After the glue is dry, level the stringing with a block plane using gentle, circular strokes. Finally, sand the entire center section with 180 grit paper.
Cut the veneer free
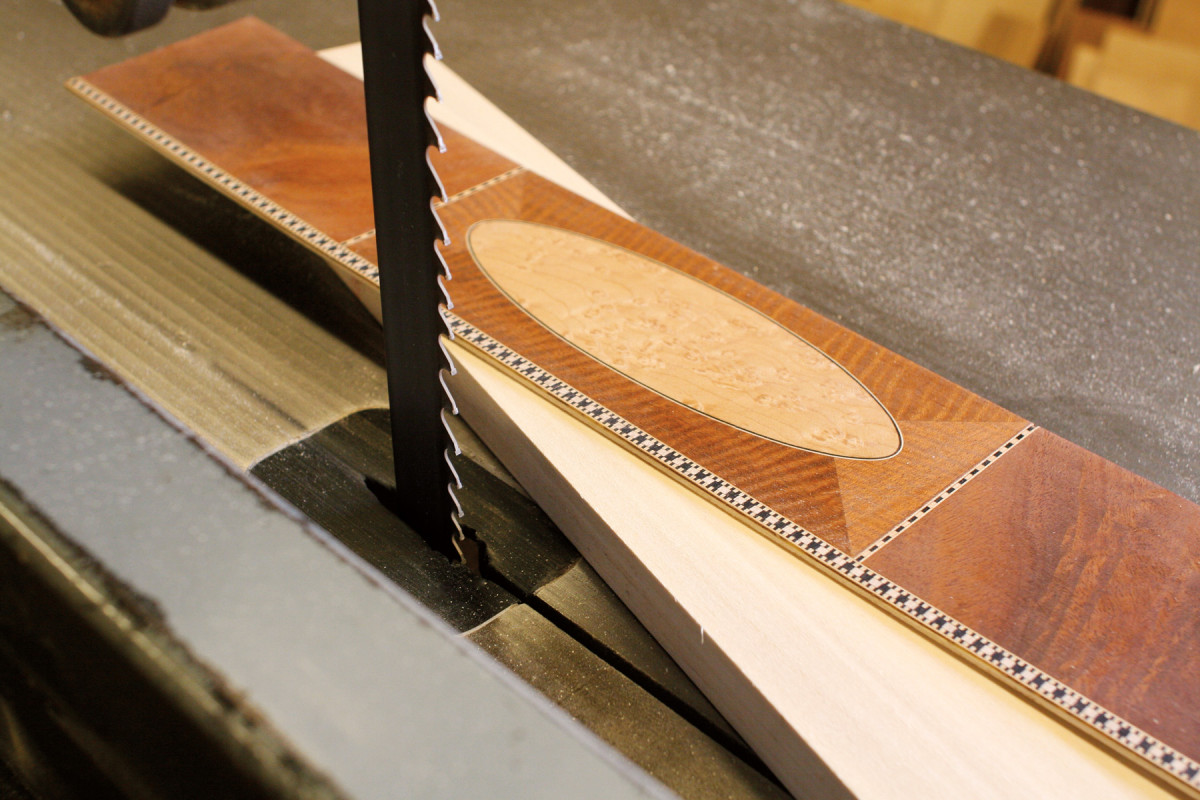
14. Resaw the staging board, releasing a piece that’s only about 3/32″ thick.
Now comes the critical part of the whole operation—resawing the staging board. Install a sharp, fine-toothed blade that’s at least 1/2″ wide in your bandsaw and carefully adjust the saw’s guides and bearings. Set up a fence 3/32″ away from the blade and make a test cut in a piece of poplar that’s approximately the same width as the staging board. If all goes well, the surfaces of your cut should be smooth and straight. If the cut wanders, or if the surface is uneven, replace the blade or give your saw a tune-up.
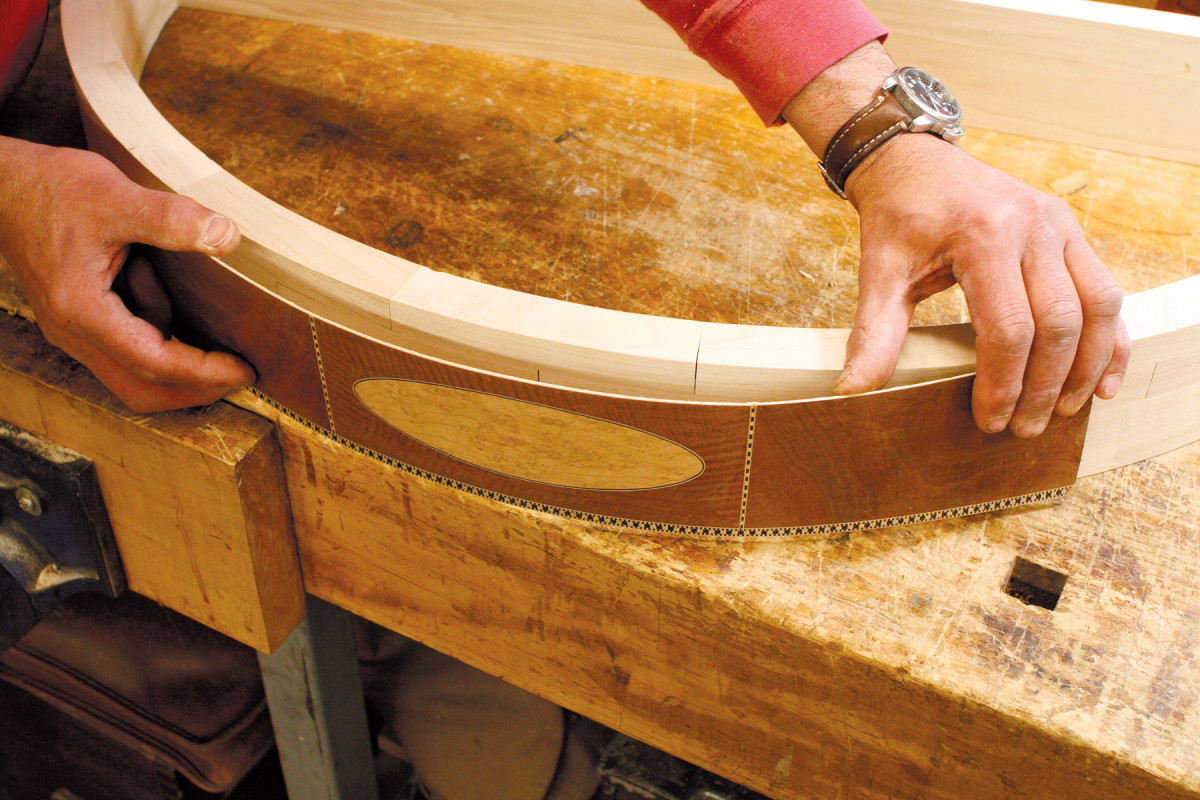
15. Flex the piece to make sure it will take the curve of the table’s apron. The apron is composed of short pieces laid up like bricks, then sawn and sanded into a curved shape.
Re-saw the staging board (Photo 14). At 3/32″ thick, the resulting piece should keep the veneer work, banding and inlay intact and provide a generous poplar backing. The piece should also bend easily enough to match the curve of the table’s apron (Photo 15).
Glue the veneer on the apron
To prepare the apron for gluing, sand its surface and cut mortises for the table’s front legs. Cut the piece you’ve resawed to length—it should extend about 1/8″ over the mortises. You’ll trim off the excess later, before fitting the legs.
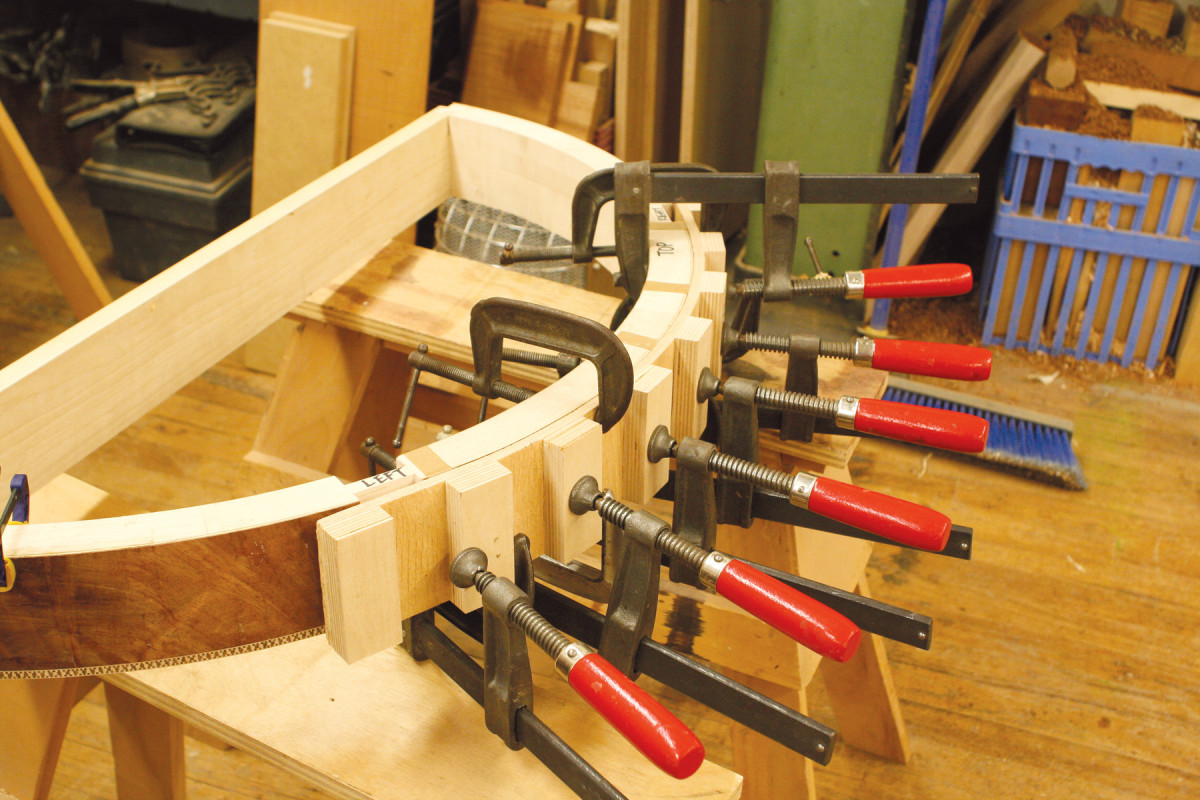
16. Glue the strip onto the apron. To apply even pressure, use a length of bending plywood with blocks glued on at regular intervals.
Make a clamping belt by gluing blocks every 3″ or so on a piece of 3/8″ thick bending plywood. Apply glue to the apron, then use purfling tape to register the resawn piece in position. The bottom of the piece should be 1/32″ or so higher than the bottom of the apron. (You don’t want the banding to end up below the apron!) Situate the belt and add clamps (Photo 16). After the glue dries, plane off any overhanging veneer on the top of the apron. Round off or bevel the bottom of the apron so it’s flush with the banding.
Here are some supplies and tools we find essential in our everyday work around the shop. We may receive a commission from sales referred by our links; however, we have carefully selected these products for their usefulness and quality.


