We may receive a commission when you use our affiliate links. However, this does not impact our recommendations.
With SketchUp, you can use a photo of a piece of furniture to make a model of the piece. From that model you can develop your plans for building a reproduction. Here’s an example using the Shaker Stepback Cupboard made by Glen D. Huey for our April 2010 issue. I swiped the image off the cover, and I know the overall dimensions. Images from the web are often too low a resolution to be really useful, and the best photos are ones you take yourself. If you can get a dead-straight view from the front and side, the process will be easier. Otherwise, you’ll need to take into account the perspective of the photo when you take dimensions in SketchUp and make the model. The first step is to import the model into SketchUp.
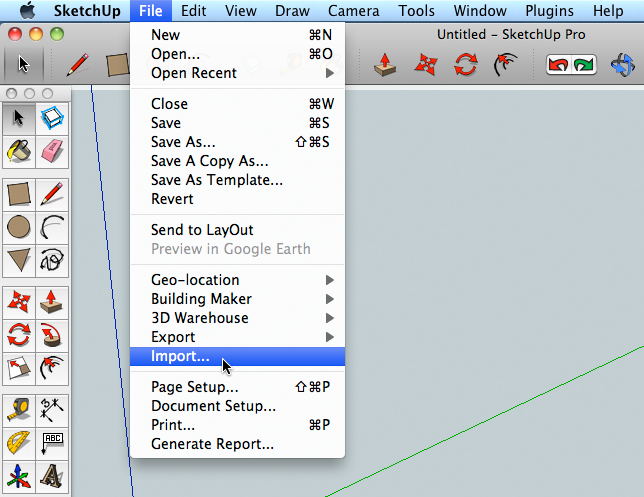 Go to the file menu and select “Import”. That will open a file browser so you can navigate to where you have the image saved. At the bottom of the import window will be a drop down list, select “Use as image” from the menu. There is an option for “photo match” in SketchUp that lets you adjust the perspective and axes orientation in the model to align with the photo. I think that takes longer than using the photo as a reference for obtaining dimensions as I show here.
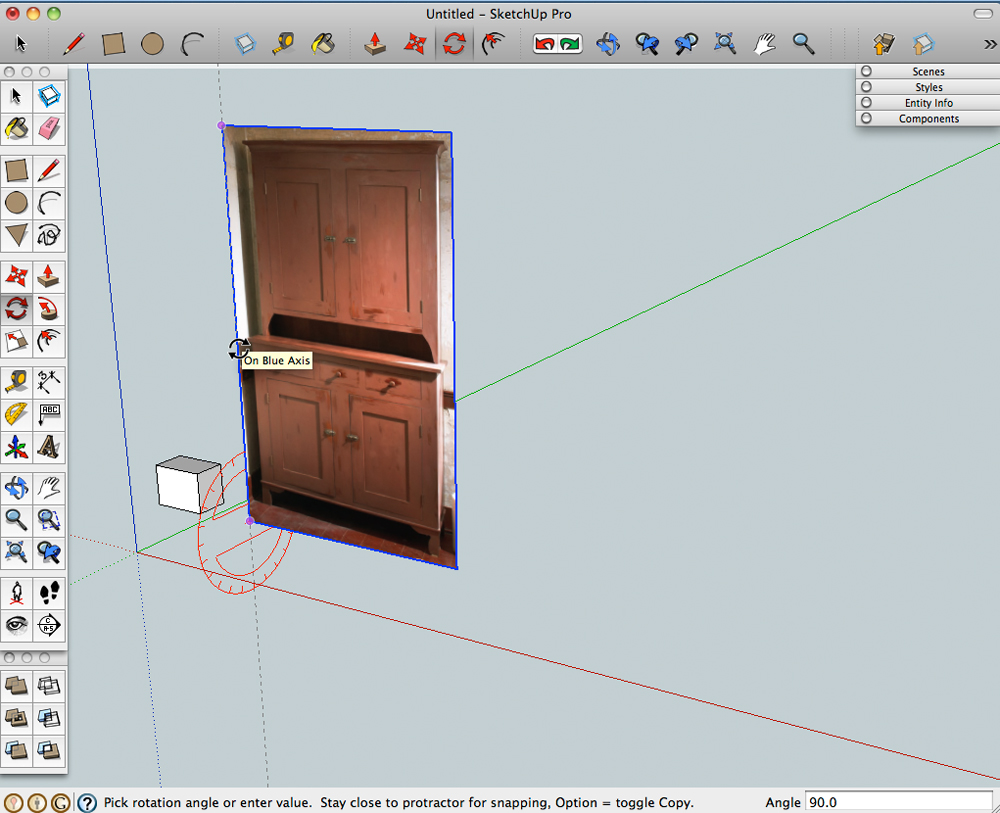 The image will come in attached to the Move tool. I park it close to the origin. After clicking to locate it, SketchUp will scale the image as you drag the mouse. At this point I make a guess as to size, then I rotate the image so it is in a vertical plane. The rotate tool can be tricky to orient, so I usually draw a box near the photo, hover the Rotate cursor over the box and hold down the shift key to keep it on the axis I want. Then I set the rotation point near the bottom of the photo and stand it up.
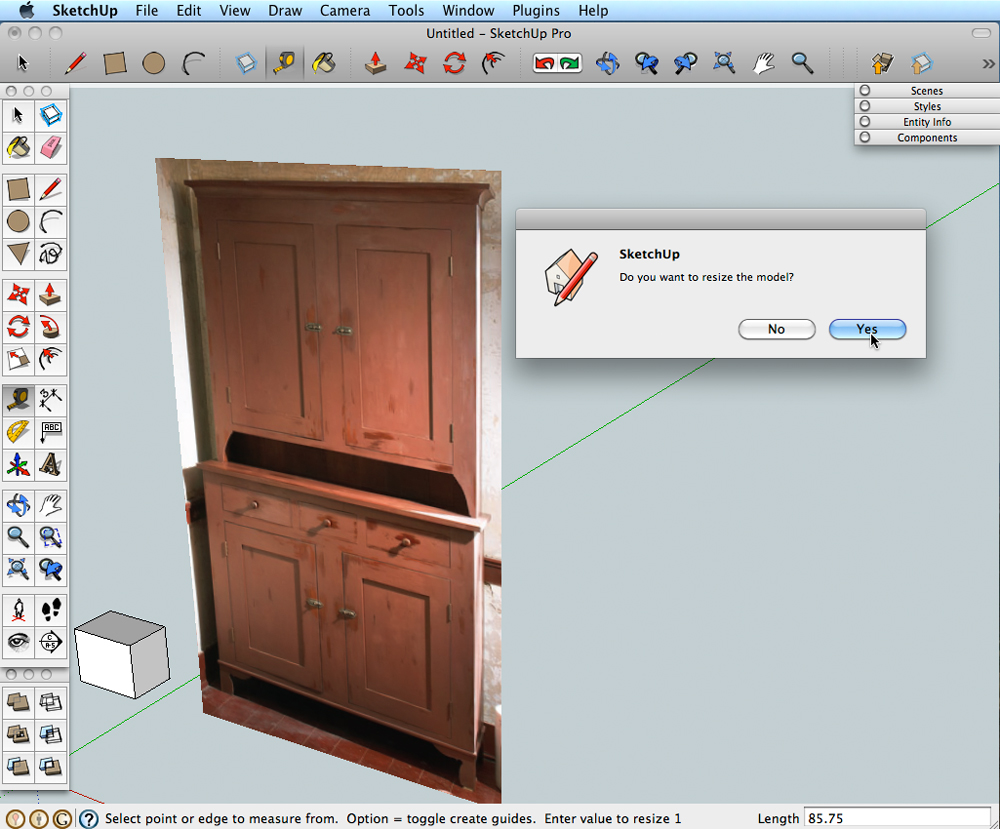 Now I want to scale the photo to a known dimension. I usually start with the height, which I know to be 85 3/4″. I select the Tape Measure tool from the tool bar, and tap the CTRL key (Option on a Mac). That makes the little plus (+) sign on the cursor disappear and puts the Tape Measure into “resize” mode. I zoom in and click once on the bottom of the foot, let go of the mouse button and zoom out to see the entire photo. Then I zoom in on the very top and click on the top of the crown in the photo. Then I type in the dimension of 85 3/4 and hit “Enter”. A little box pops up asking me if I want to resize the model. Click “yes” and the program will change the size of everything to make the distance between the points you clicked match the dimension you typed.
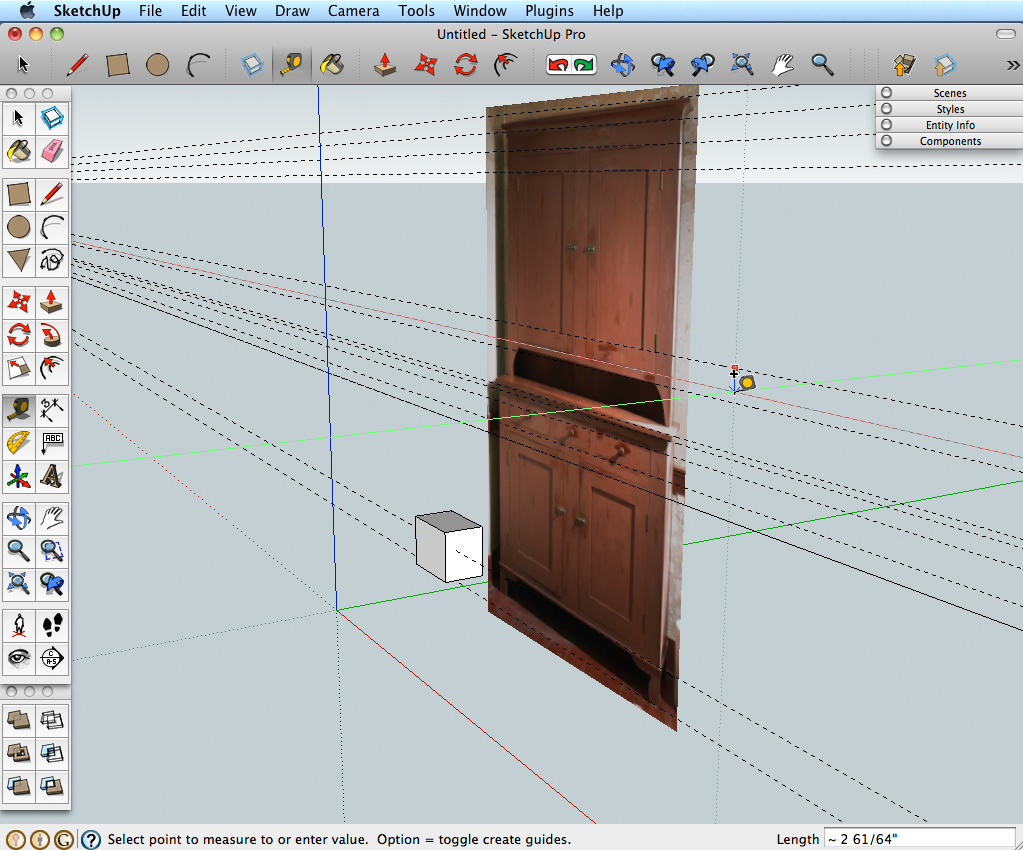 Now I use the Tape Measure tool to create guidelines on the important vertical points in the picture. I drag the first one from a horizontal axis and make sure that it touches the image. I’ll move the image up or down as needed so that the bottom of the foot is on the ground plane. If the photo is at an angle, the distances between parts of the piece won’t be the same on both sides. When I scale the image initially, I do it at the intersection of the side and front views, and place the guidelines at that location. That will keep the intervals close to actual size.
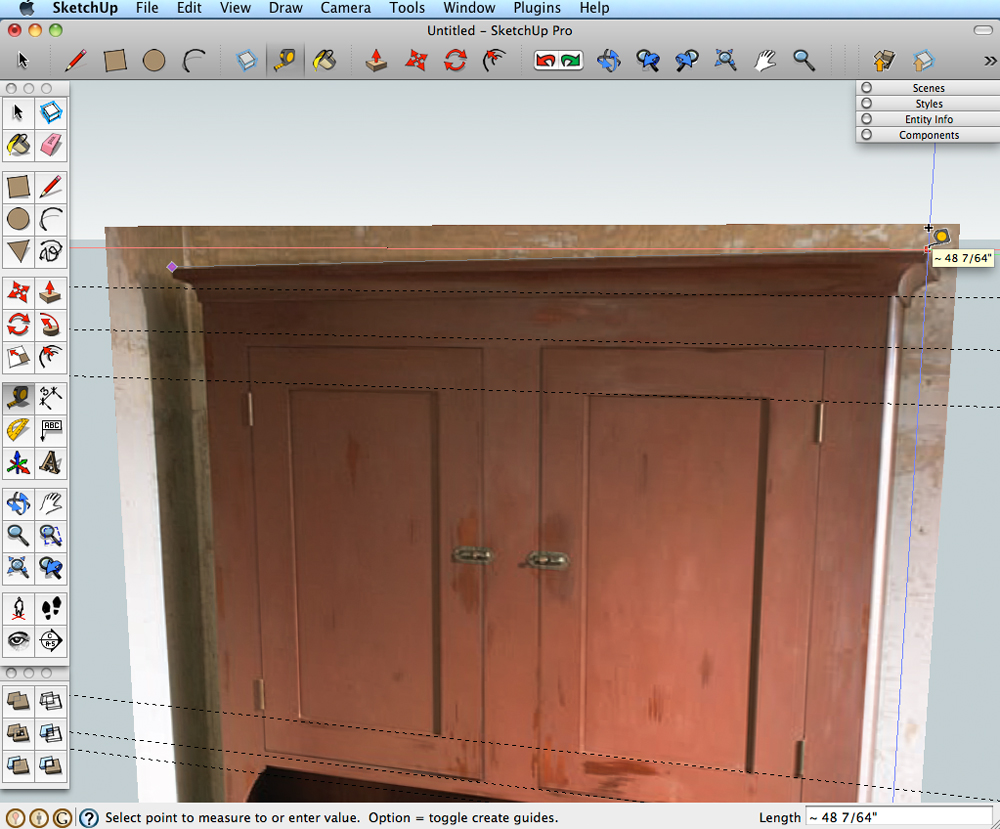 Due to foreshortening in the image, the horizontal distances will be shorter than in real life. I measure the widest point in the photo to determine the difference between the real width (52 1/8″) and what it measures in the photo. If I use the trick I used at the beginning to resize with the Tape Measure, that will change everything in the entire model. I don’t want to do that, so I select the image then pick up the Scale tool. The Scale tool will put grips on the image so that it can be resized vertically, horizontally, or in both directions at once. I divide the known dimension by the measured dimension to obtain the ratio between what it is and what it ought to be. In this case the scale factor is 1.08 so I grab a horizontal grip with the cursor, start it moving and type in 1.08 and hit enter.
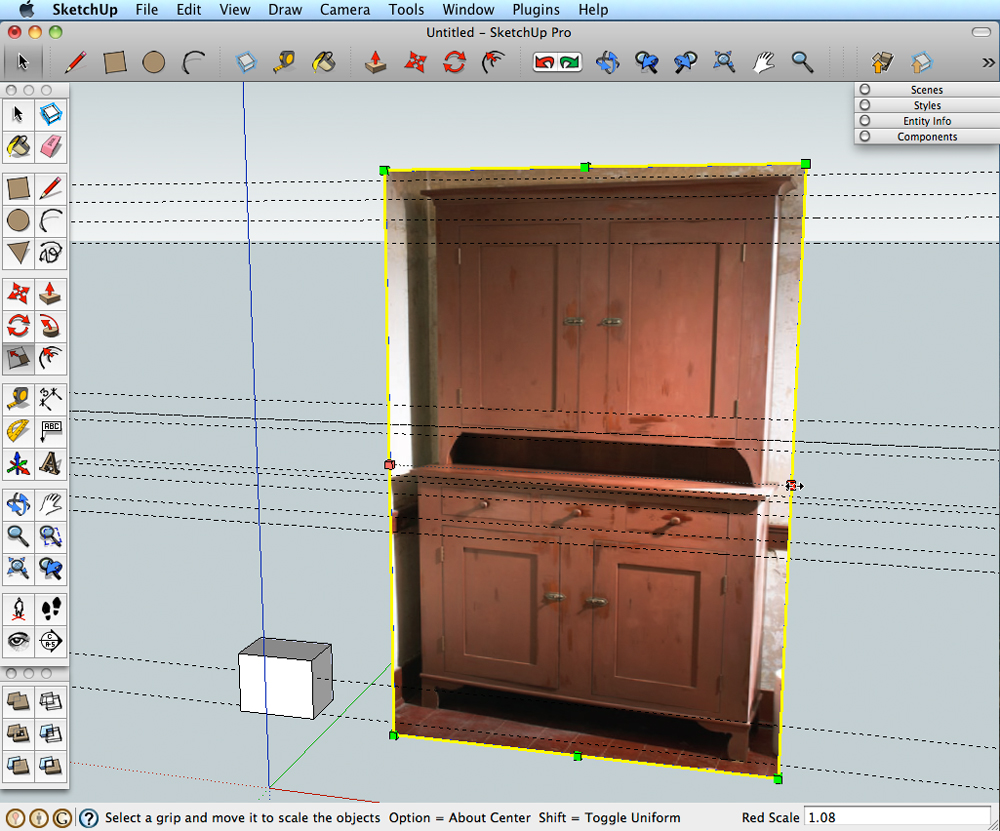 Now I have actual widths, or an approximation of actual widths to get dimensions. I still have to deal with the perspective of the photo, the stile on the far right will be wider than the stile on the far left in the photo, but in real life they are equal. I’ve found that measuring both and averaging them works pretty well most of the time. I use that technique and work my way across the photo to place vertical guidelines at the horizontal divisions.
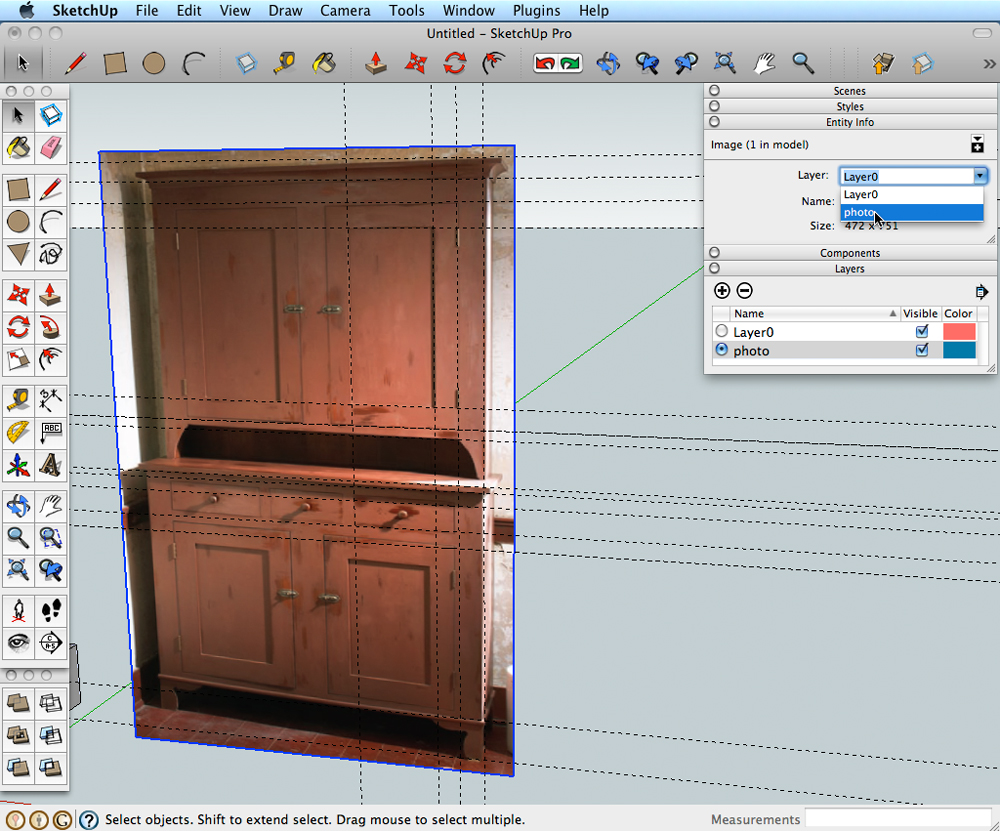 These guidelines establish a grid, and I can build the model on top of the grid or beside the photo. I think it’s easier to keep the parts separated by working beside the photo. If I can, I will use more than one photo and I’ll orient side views at 90 degrees to the front view and establish points for depth. To keep the photos out of the way, I control them by putting them on their own layer. I open the Layers window, hit the Plus sign to create a new layer and rename the layer “photo”. Then I select the photo, open the Entity Info window and move the image to the photo layer by selecting that layer from the drop down list.
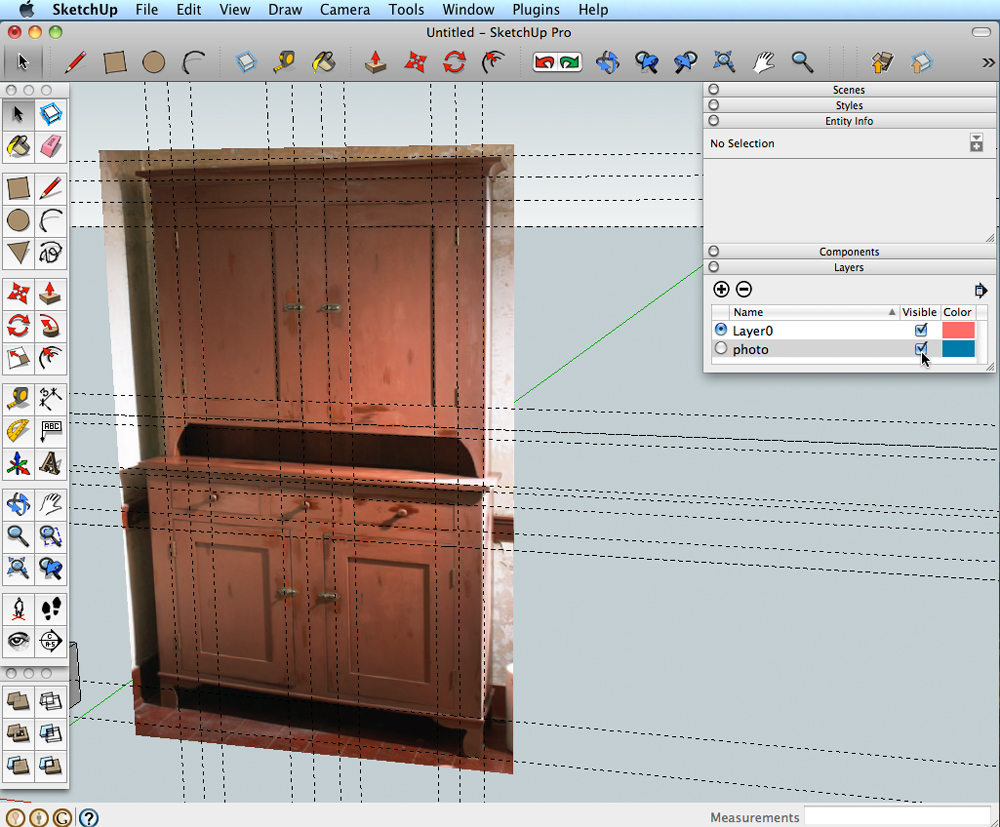 As I continue to work on the model, I’ll turn the visibility of the photo layer on and off through the layers window.
Four resources for learning SketchUp:
Learning SketchUp Posts on the Popular Woodworking Editor’s Blog
SketchUp Videos in our store
Bob Lang’s digital book with embedded video, “Woodworker’s Guide to SketchUp”
Bob Lang will be teaching a SketchUp class in August 2012 at Marc Adams School of Woodworking
Here are some supplies and tools we find essential in our everyday work around the shop. We may receive a commission from sales referred by our links; however, we have carefully selected these products for their usefulness and quality.


Hey Bob,
Great approach to the problem! When I faced similar problems while developing illustrations for PopWood, I would always start with the vertical centerline of the image figuring that this was the only true elevation. I would then scale this centerline to the known dimension. My horizontals were created by projecting work lines over the distorted horizontals. I knew that these perspective lines would be true elevations where they passed through that line. I’d then use your average method to set the length of my horizontals. Seems like we’re doing the same thing. Just starting at a different place.
John
Bob, this exercise is great if you’re trying to do everything exclusively within SketchUp. I have found that squaring an image before before importing it into SketchUp greatly simplifies things. There are a lot of good photo editing software products out there but my favorite is GIMP – which is free use software (www.gimp.org) and it runs on Linux, Windows and Mac. It may not do a lot of the exotic things you can do to photo images but it will do virtually 100% of what most people will commonly use photo editing for. I import the image into GIMP and use the perspective tool to square it front and side. Using these squared images makes it much easier to build a SketchUp model.
Very clever use of the tool, Bob. Have you heard of the SketchUcation Community newsletter (it’s called Catchup now)? It comes out once a month and is loaded with things people have done using Sketchup. Yeah, there are people selling plugins (no different than buying a book, to me), but there are references to free plugins as well. The latest issue has an evaluation of a cabinet buiding tool, plus there are articles on making dynamic components, and info on materials. If nothing else it can kick start your noggin on how you might go further with Sketchup.