We may receive a commission when you use our affiliate links. However, this does not impact our recommendations.

Stop measuring and simply learn how to saw straight.
The dovetail is an ancient joint widely used in cathedrals, barns and Egyptian furniture. It is the right joint for many items including fine furniture, carcases, drawers and jewelry boxes. They are all dovetailed together.
I was only 27 years old when I came to this country in 1968 from my native Hungary. Although I had a piece of paper that said “master cabinetmaker,” I was still very eager to learn more about my trade.
Where I came from I was happy if I could carry a white-haired master’s tool chest to the job site because I knew I would learn a thing or two that day working with him. Now I am that white-haired master with over 45 years of experience in the trade.
In the early 1970s I went to a lot of seminars. Some were on dovetailing with well-known teachers in the woodworking world. Some cut the tails first; others cut the pins first. They used tools that I didn’t own, such as a dovetail marker. They measured the size of the pins and tails, which is completely different from my method. The more I studied, the more confused I became. I decided to find the best way to cut tight dovetails quickly.
A Search for the Best Method
I owned an antique restoration shop. I had a chance to study a lot of antiques from around the world. Each time a piece of furniture came to the shop, the first thing I looked at was the dovetails. I studied hundreds of them and made tracings of dozens of unusual pieces. I tried to find an answer for my methods. I learned in Hungary, I worked in Vienna, and I was looking for someone from a different part of the world than Eastern Europe to do dovetails. I found Hector, from Guatemala, a master cabinetmaker.
“This is great, Central America!” I said. I asked him to make me dovetails. He said, “You cabinetmaker, you make dovetail.” We had a language problem. I had a hard time explaining to him my intentions. I replied, “I know how to cut dovetails, I want to see how you do it.” “OK,” he said. He grabbed some chisels, a dovetail saw, a marking gauge, some scrap wood, set up the marking gauge to the thickness of the wood, marked the wood, clamped it into a vise and started cutting. He cut the pins, chiseled the pins; from the pins he marked the tails, chiseled the tails and put it together. “How is that?” he asked. I was as happy as can be! “That is exactly the way I do it,” I replied.
After my experience with Hector, and my 10 years of researching dovetail techniques, I came to the conclusion that Grandpa wasn’t a bad craftsman at all and my father taught me well.
Later on, I wrote some articles for different magazines and I made some videos – one of them is “Dovetail a Drawer with Frank Klausz.” Before I knew it, I was teaching the craft throughout America. I taught hundreds of people how to dovetail. A lesson took plus or minus one hour with a 99 percent student success rate (let’s face it, some of us are born with two left hands).
Anyone Can Do It
If you already know how to do dovetails, and are happy with your method, I am happy for you and don’t mean to change your ways. If you are a beginner or learning about new methods, you can do it my way. I know you can do it!
How do you know how to write? You learned in school. You made a whole row of a’s. You made a whole row of b’s. Before you knew it, you were writing words and sentences. That’s how I learned to do dovetails. In school, I cut a whole row of straight cuts without marking, checked it often with a square, and improved the next row. In the next lesson, I cut angles approximately 10° to 15°, all to the left, the next row all to the right, and before I knew it, I was cutting dovetails.
Companies sell router bits from 7° to 18°, so the angle you use is a personal choice. The strongest dovetails have equal-sized pins and tails, like machine-made drawers. Pope John Paul II’s coffin had approximately 3″ pins and 3″ tails. The choices are endless.
Cutting Dovetails My Way
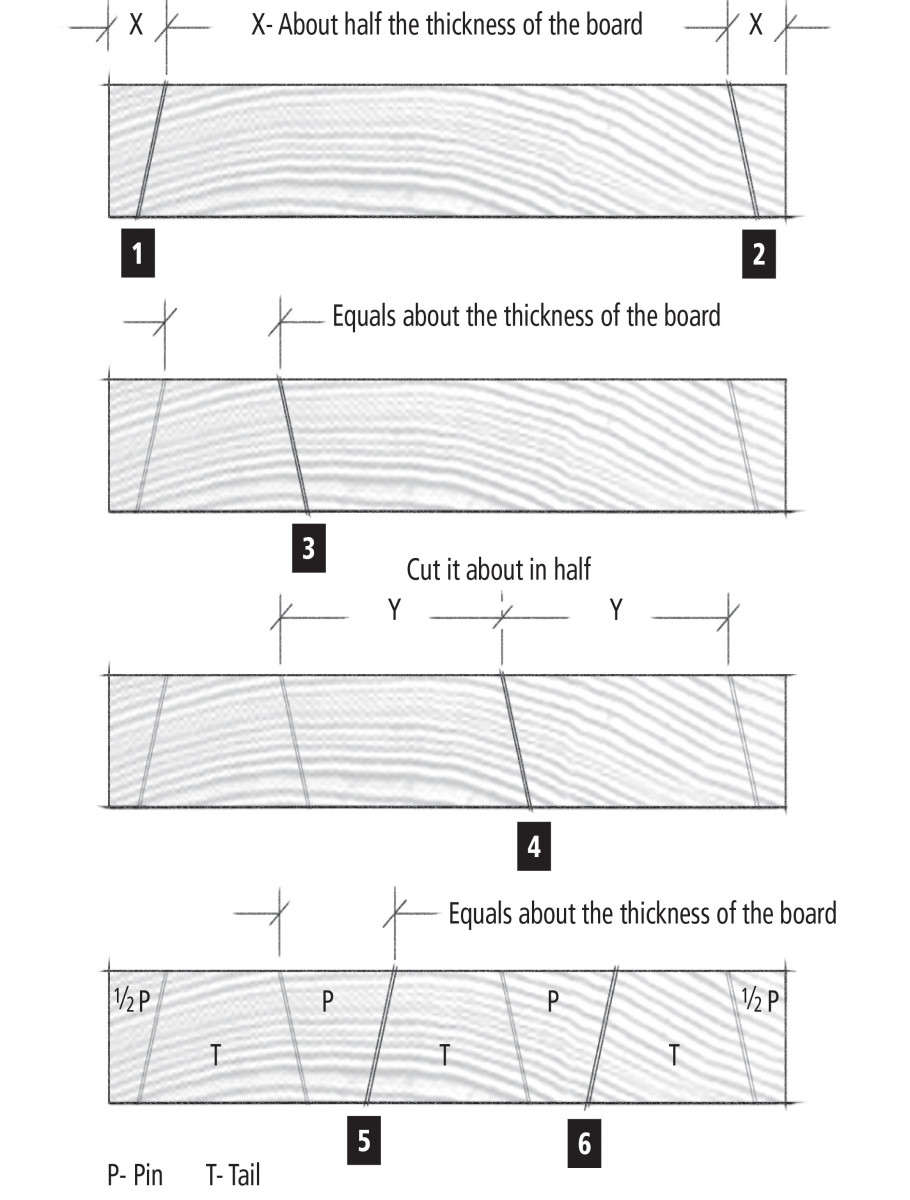
So how do you make dovetails my way? Make yourself a cheat sheet (see the drawing above) or look at some dovetails to copy. Get some scrap wood. Mill them to the same size: 3-1⁄2” to 4″ wide, 1⁄2” thick and cut them 5″ to 6″ long. Mill five, 10 pieces, whatever it takes. Set up your marking gauge exactly to the thickness of the wood. Mark the face of the wood. Clamp it into your bench vise, and start cutting with your dovetail saw. (I hope you already practiced your rows of straight and angled cuts.)
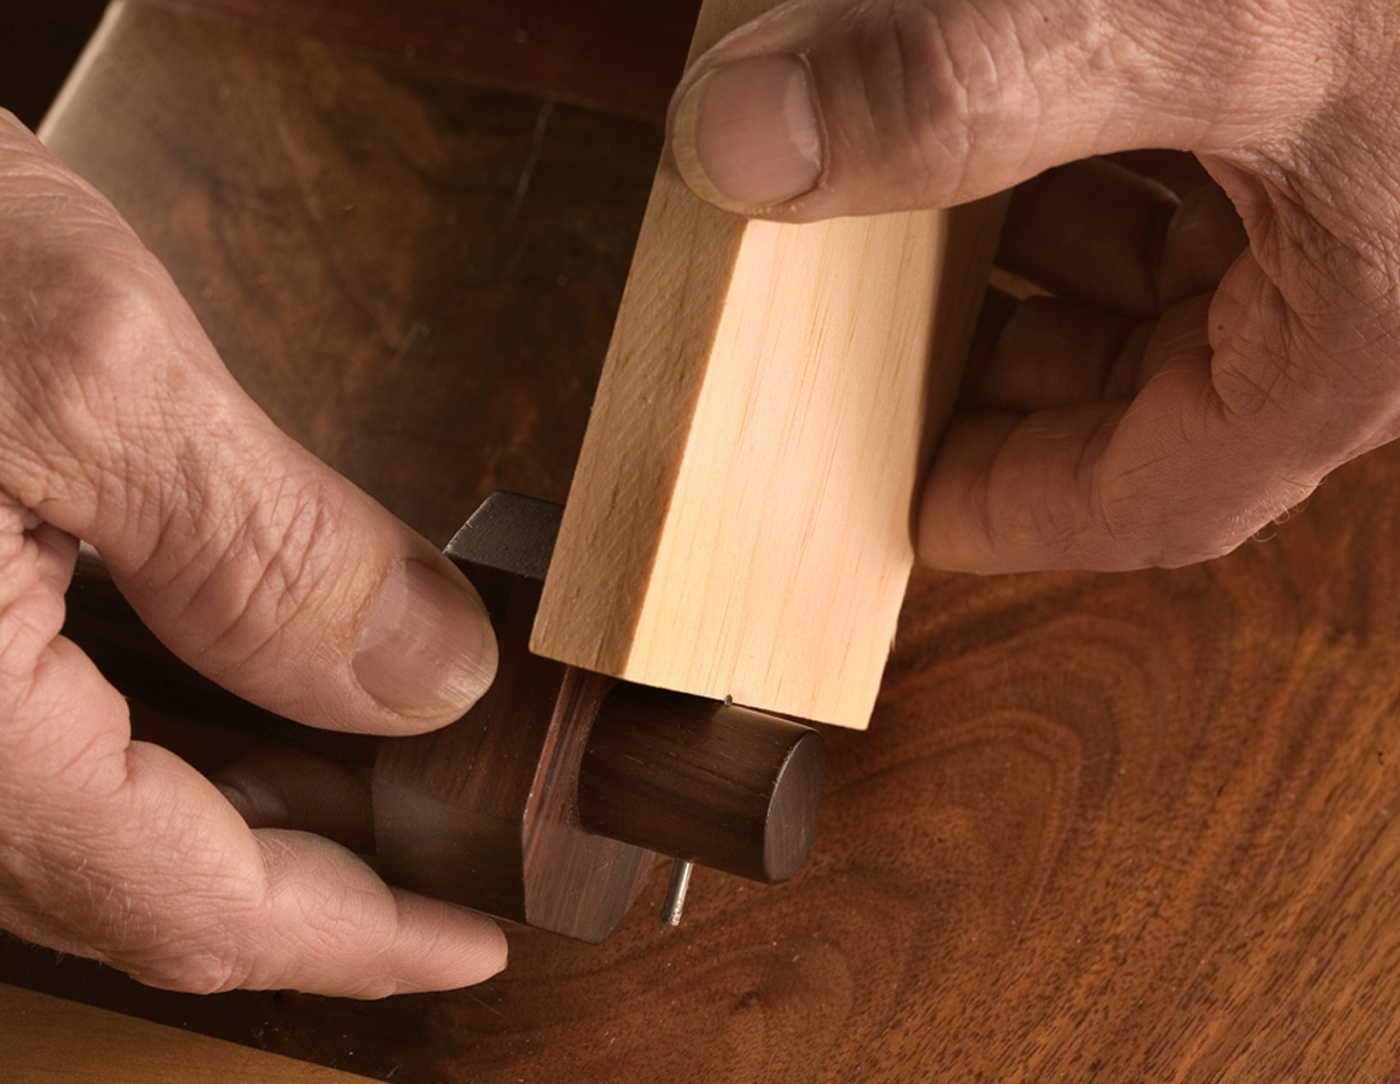
1. Set up the marking gauge exactly to the thickness of the wood.
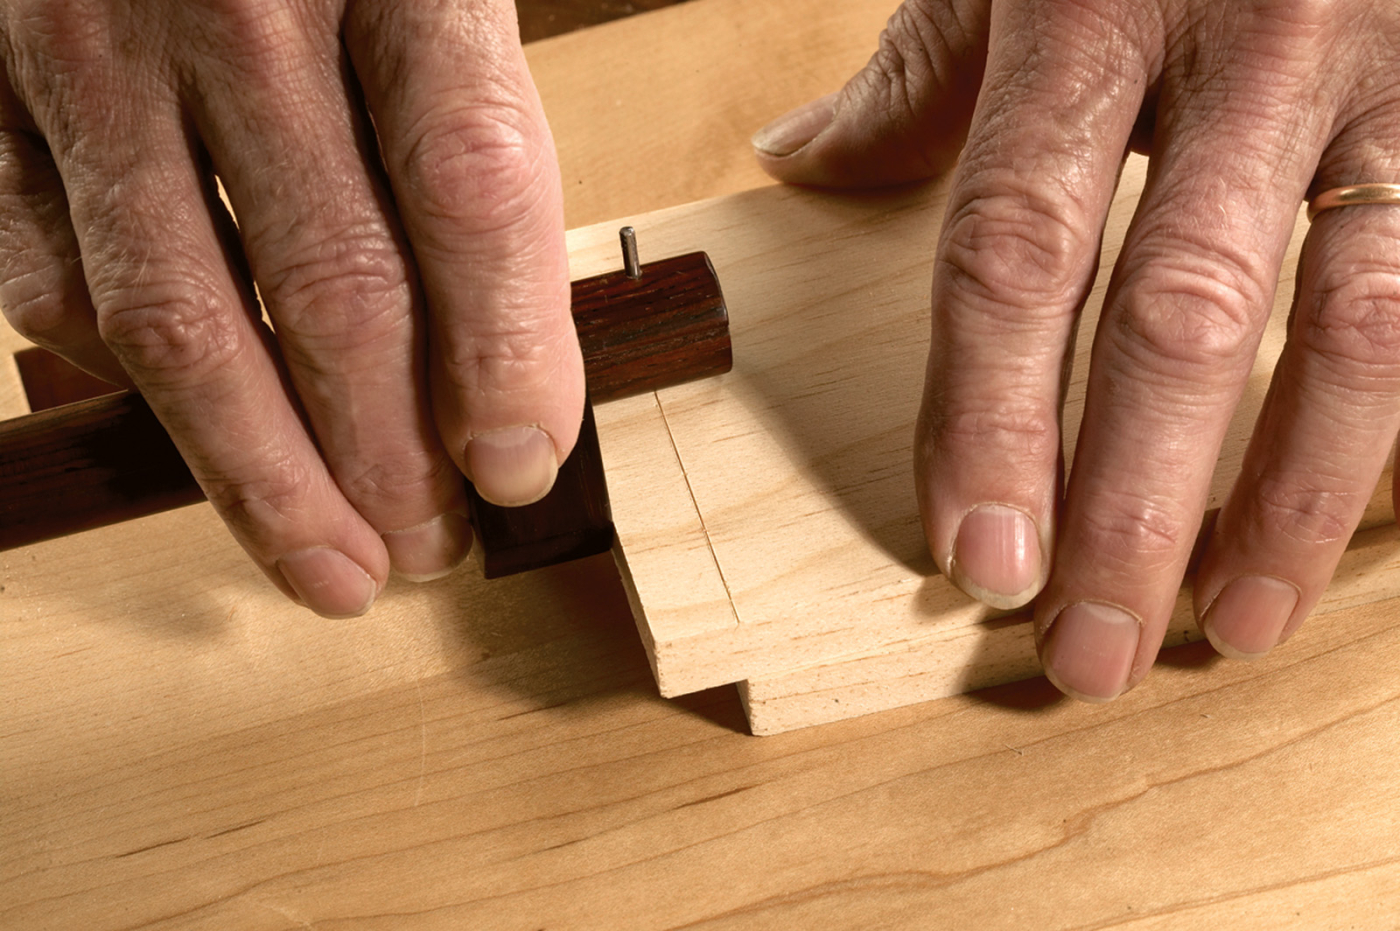
2. Next, mark the wood.
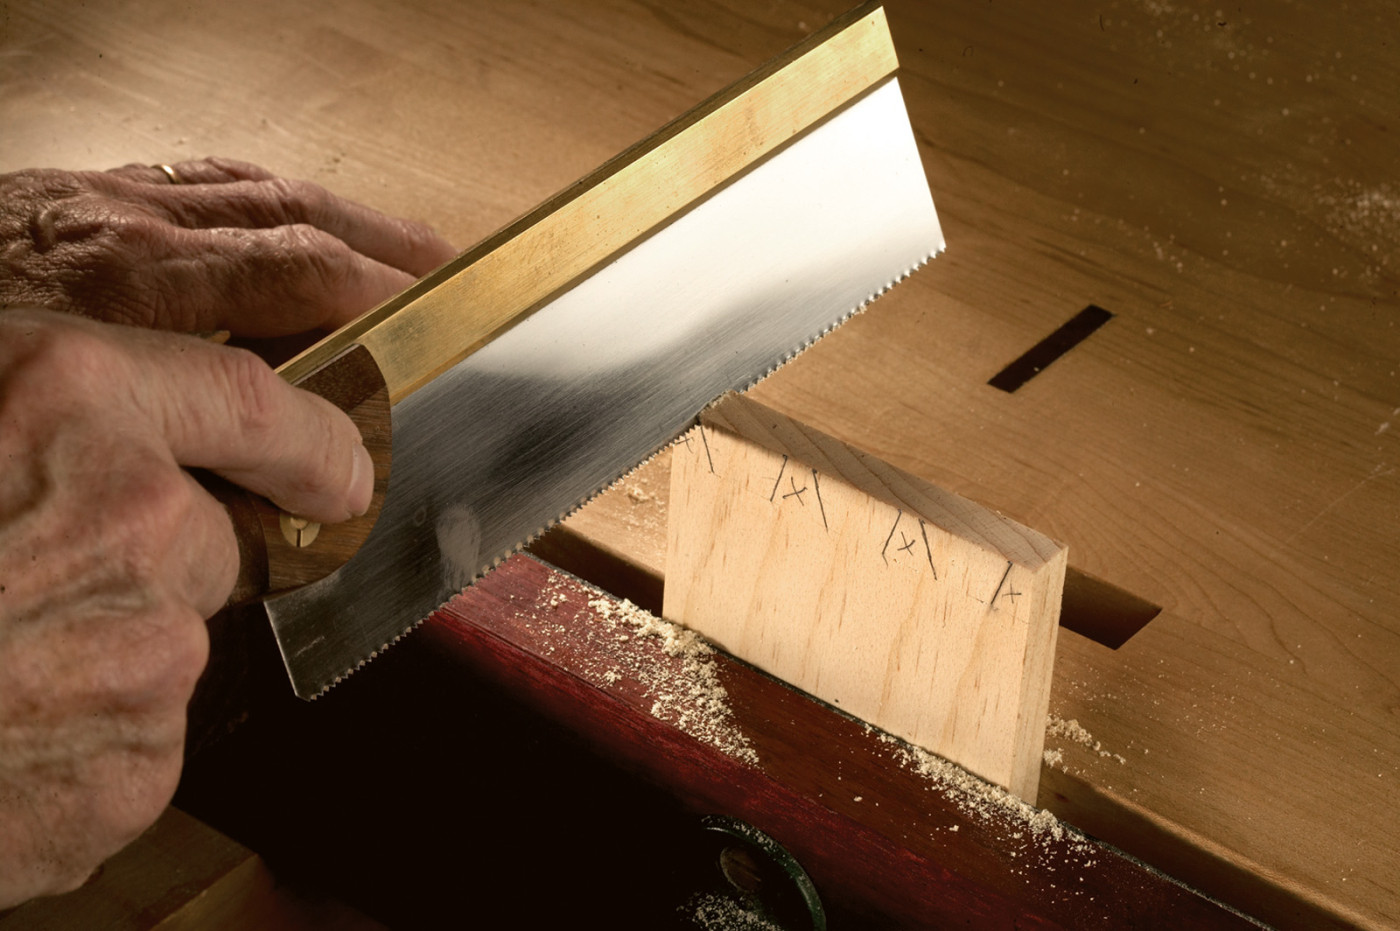
Every dovetail starts with a half pin. On the other side is another half pin. Cut them. Next to the half pin you need a full tail. Cut it. Cut the remaining distance in half with the same angle, turn it around, make two more cuts and you’re done. Cut only pins, and cut as many as you need until you are pleased.
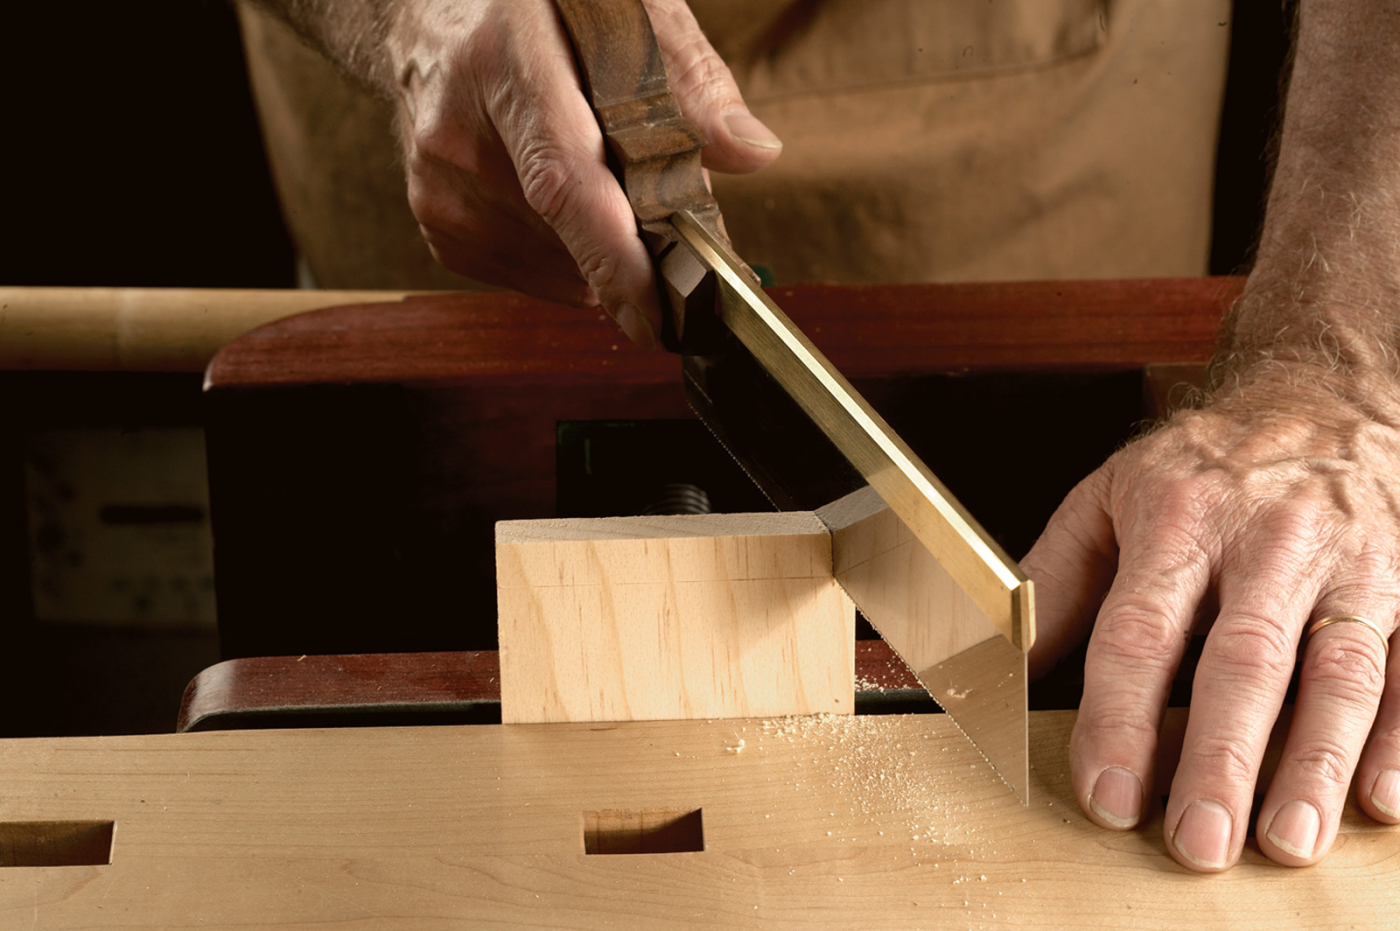
3. Cut a half pin.
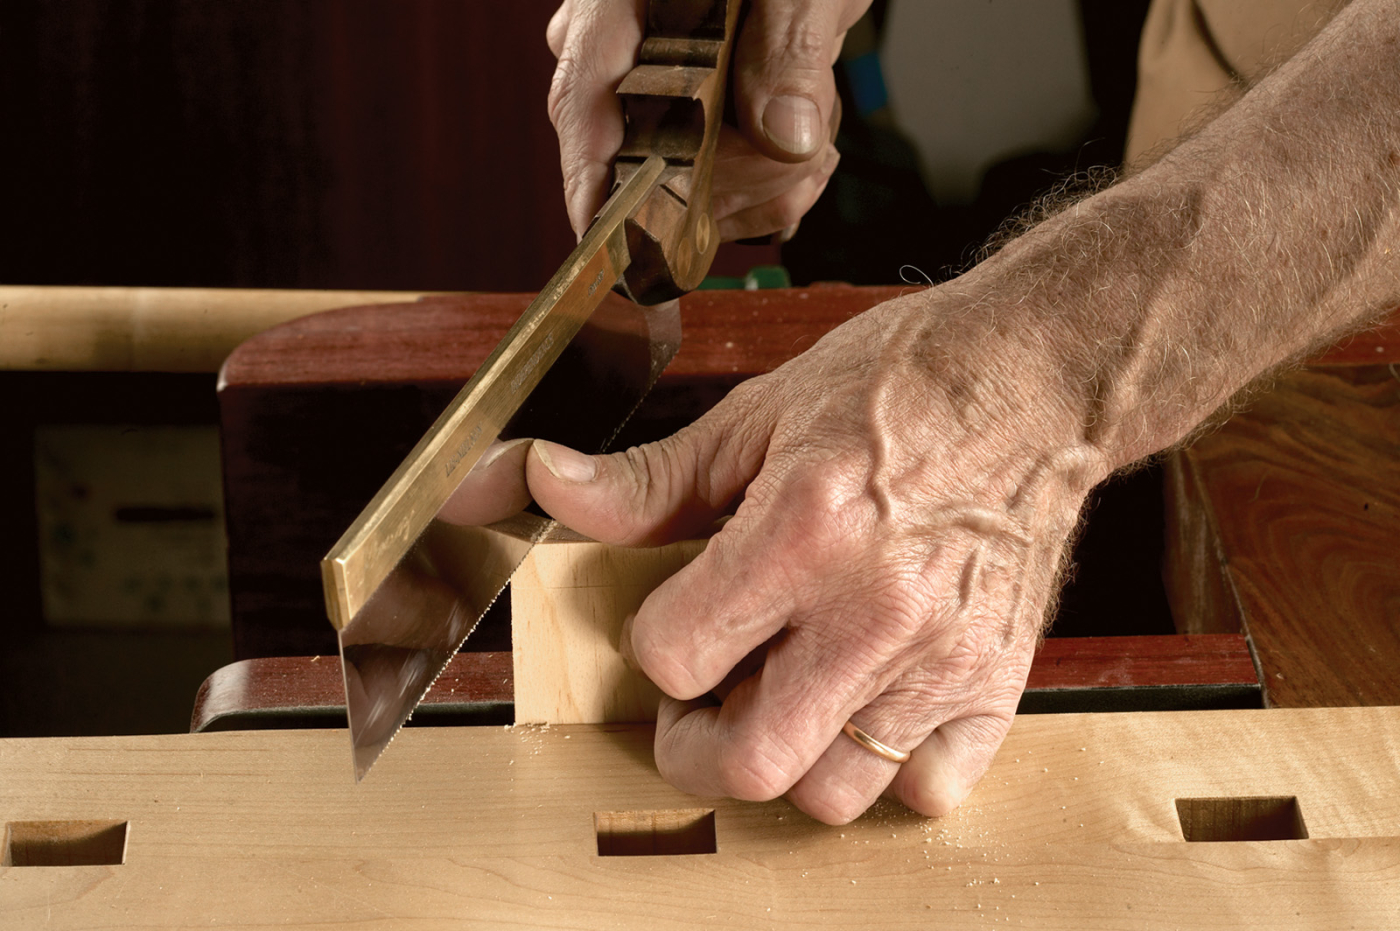
4. Cut another half pin.
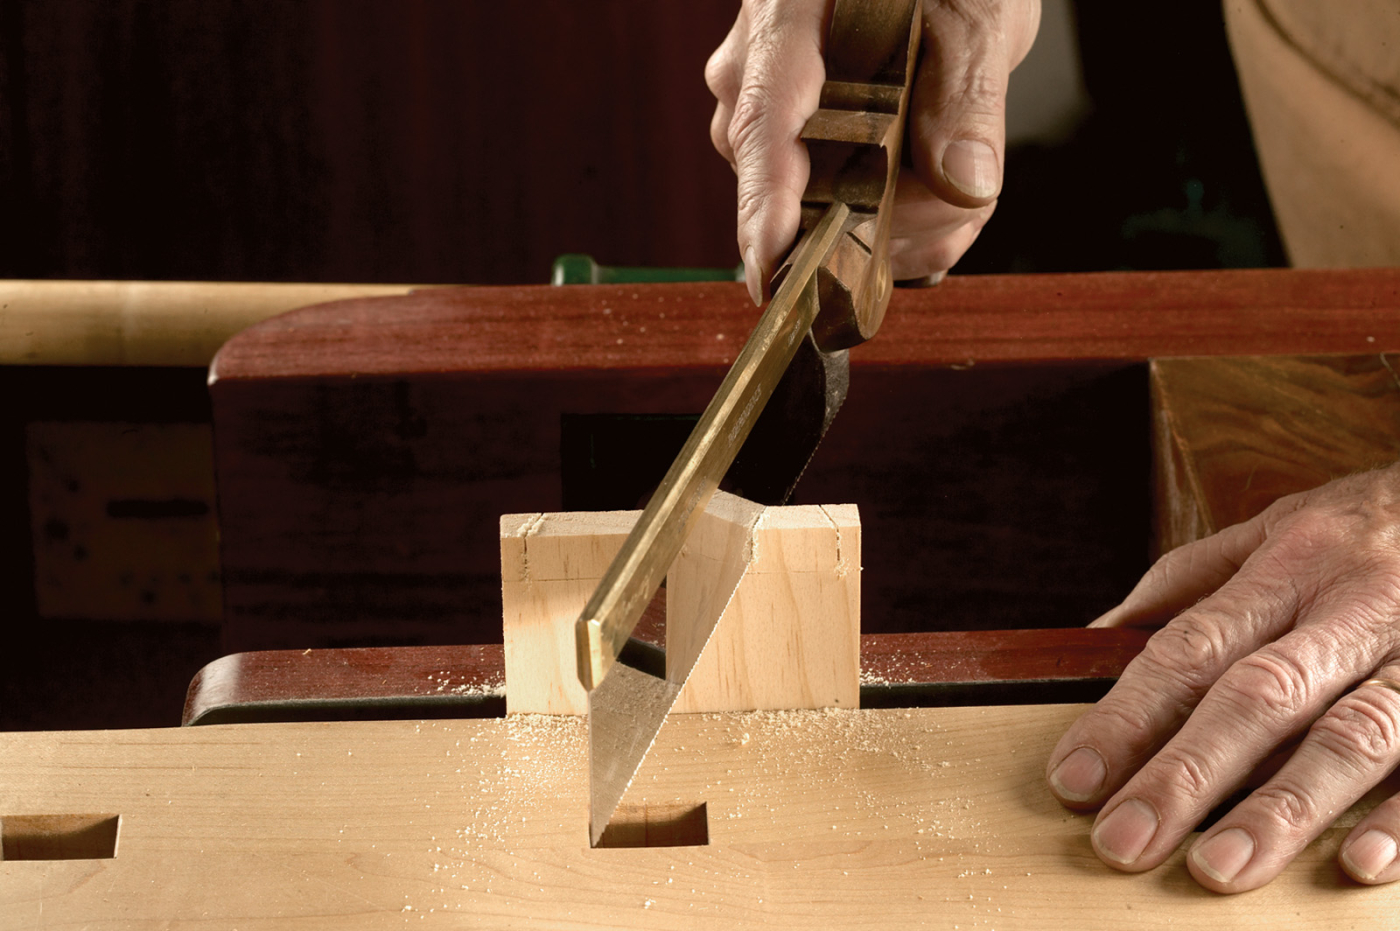
5. Cut a tail.
6. Divide the distance in half between the two saw kerfs and cut it.
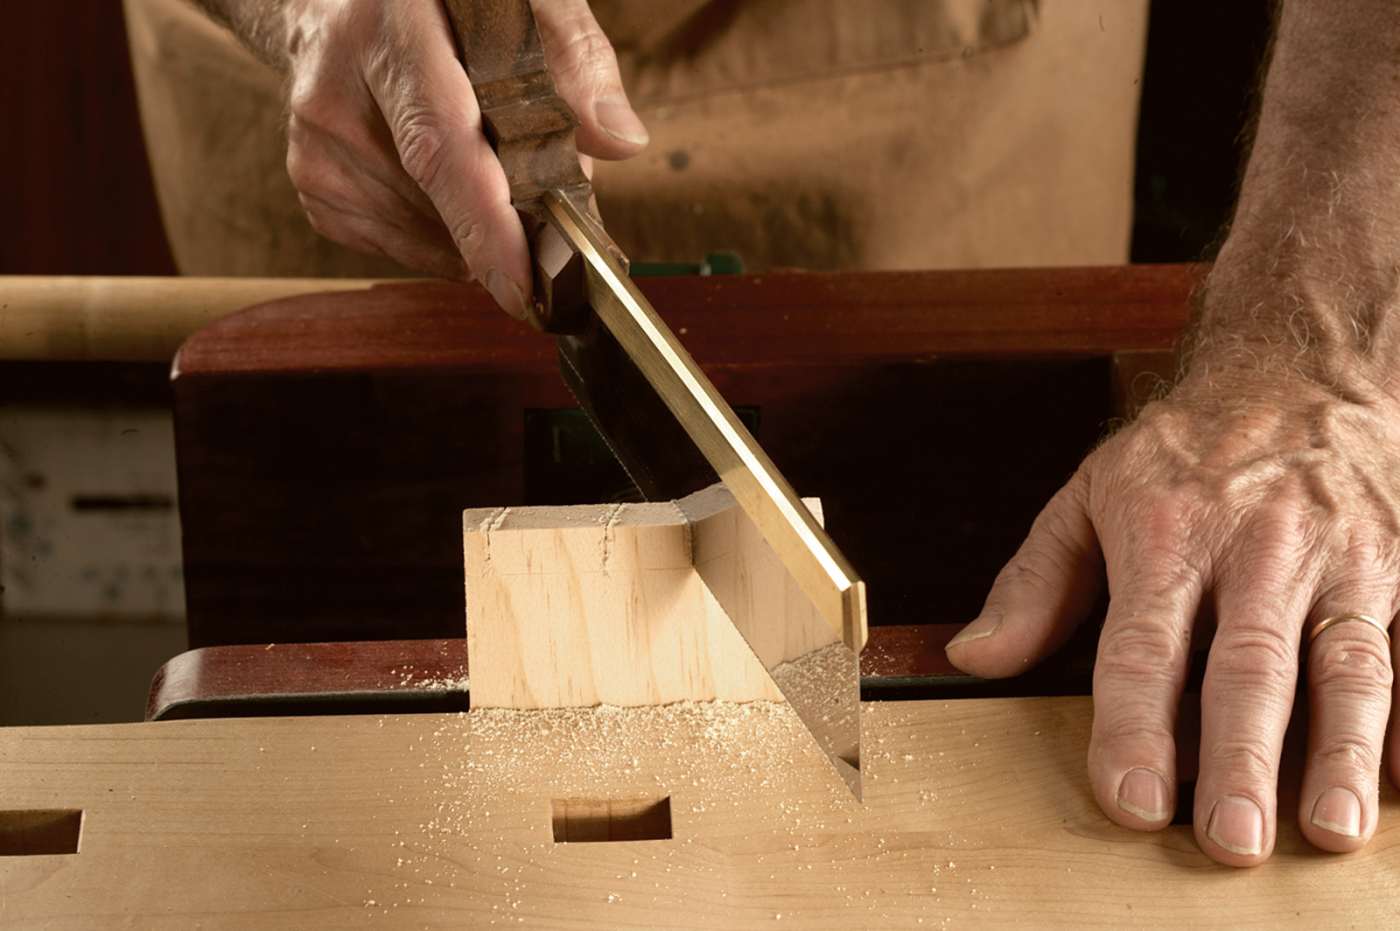
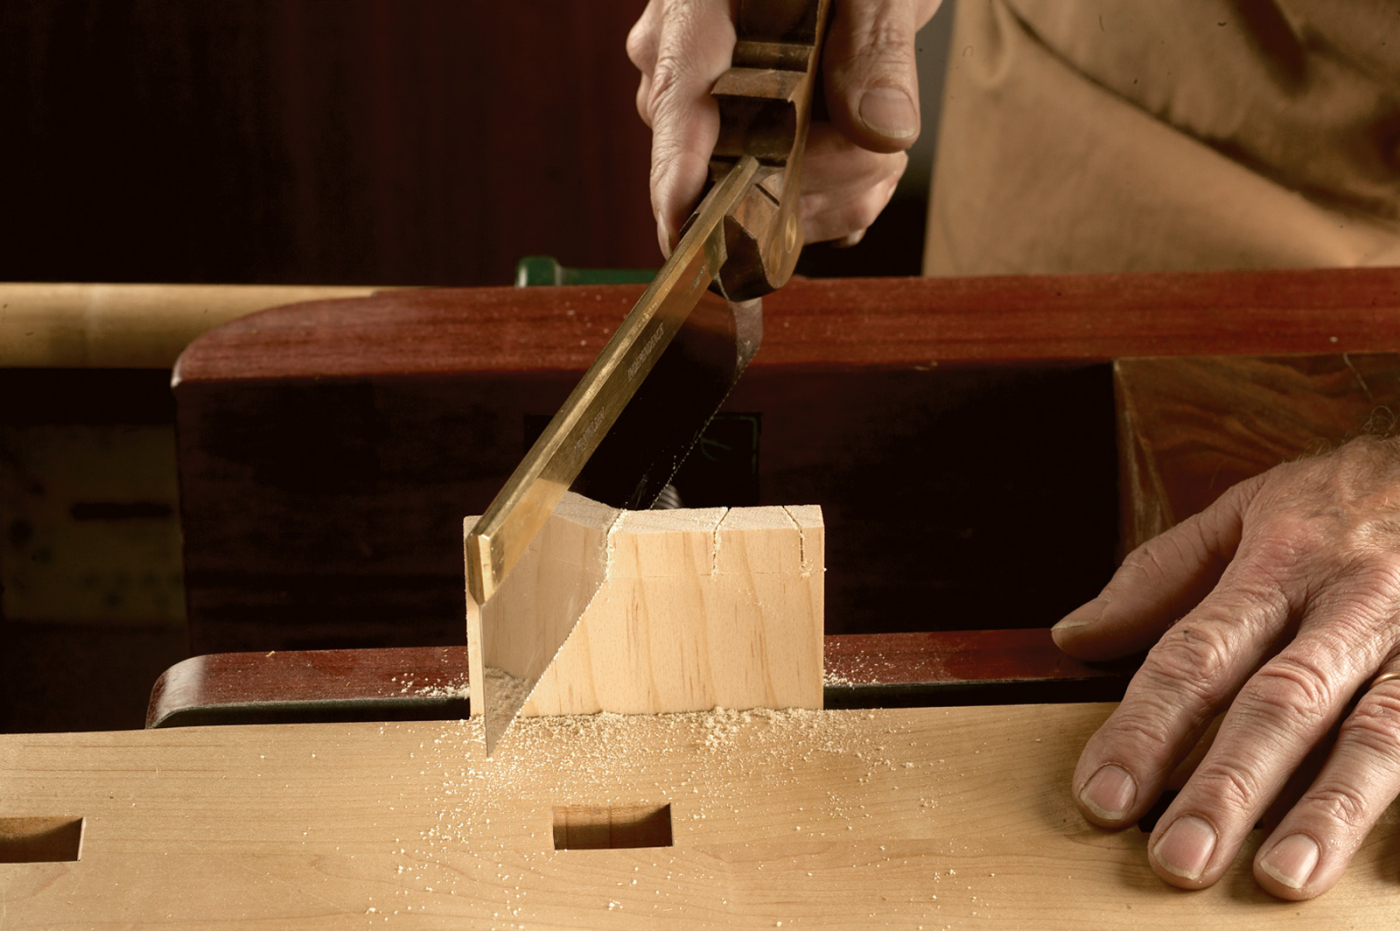
7. Go back to your first angle and cut another pin.
8. Cut one more pin. You’re done cutting pins.
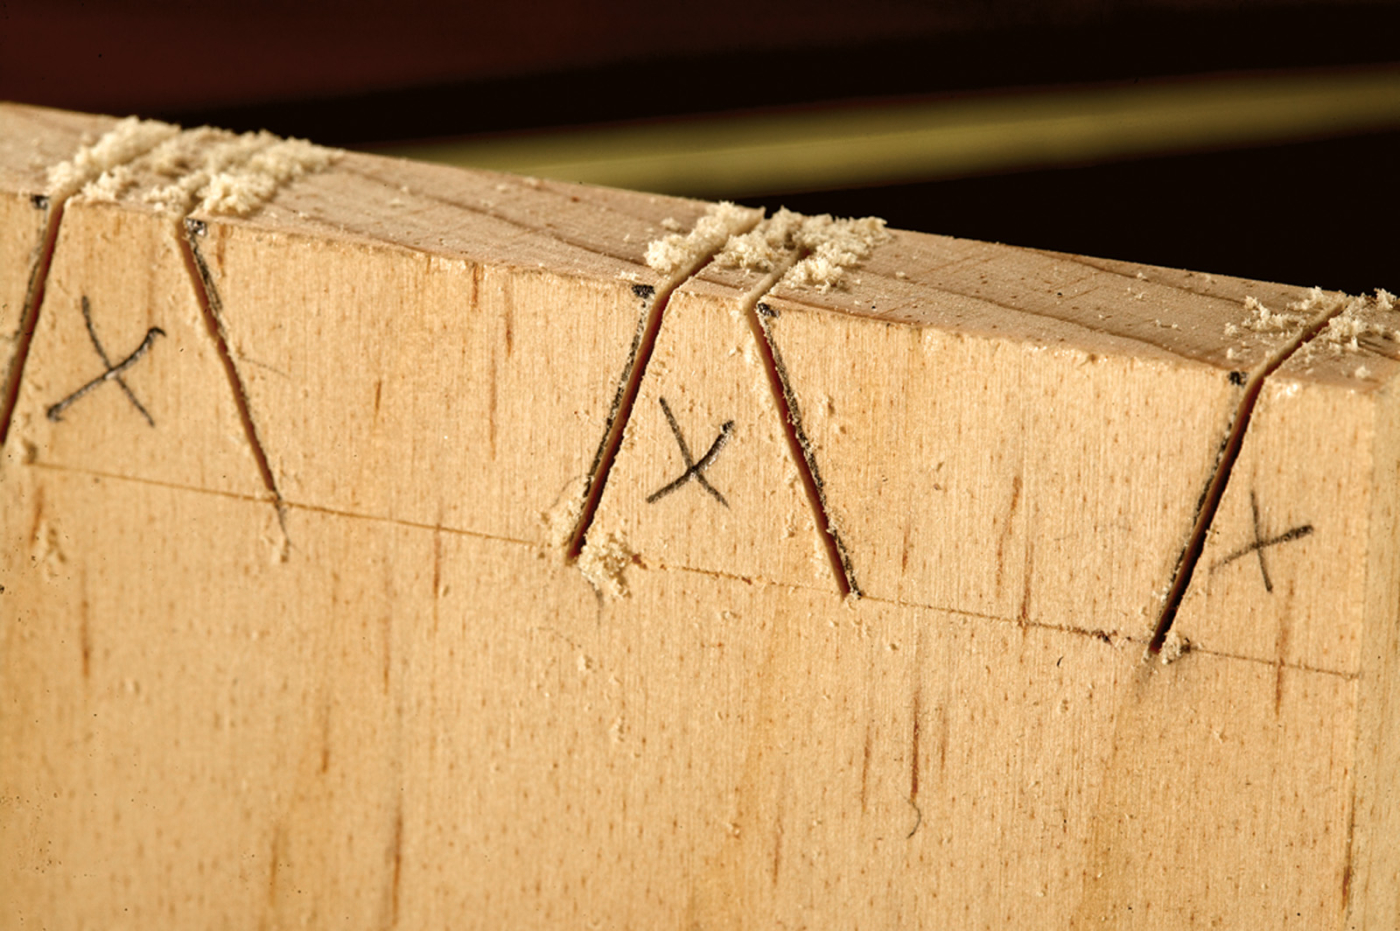
There’s no marking involved – use your eyesight and judgment, and use the thickness of the wood for the width of the tails by judging distances. Make them to your liking. My pins are a little smaller than the tails. That’s the way I like them. You may make them the same way or you may make small pins such as ones found in English furniture. They are all good. You are cutting hand-cut dovetails; there should be some variation. Hand-cut dovetails have character and Mrs. Jones likes that.
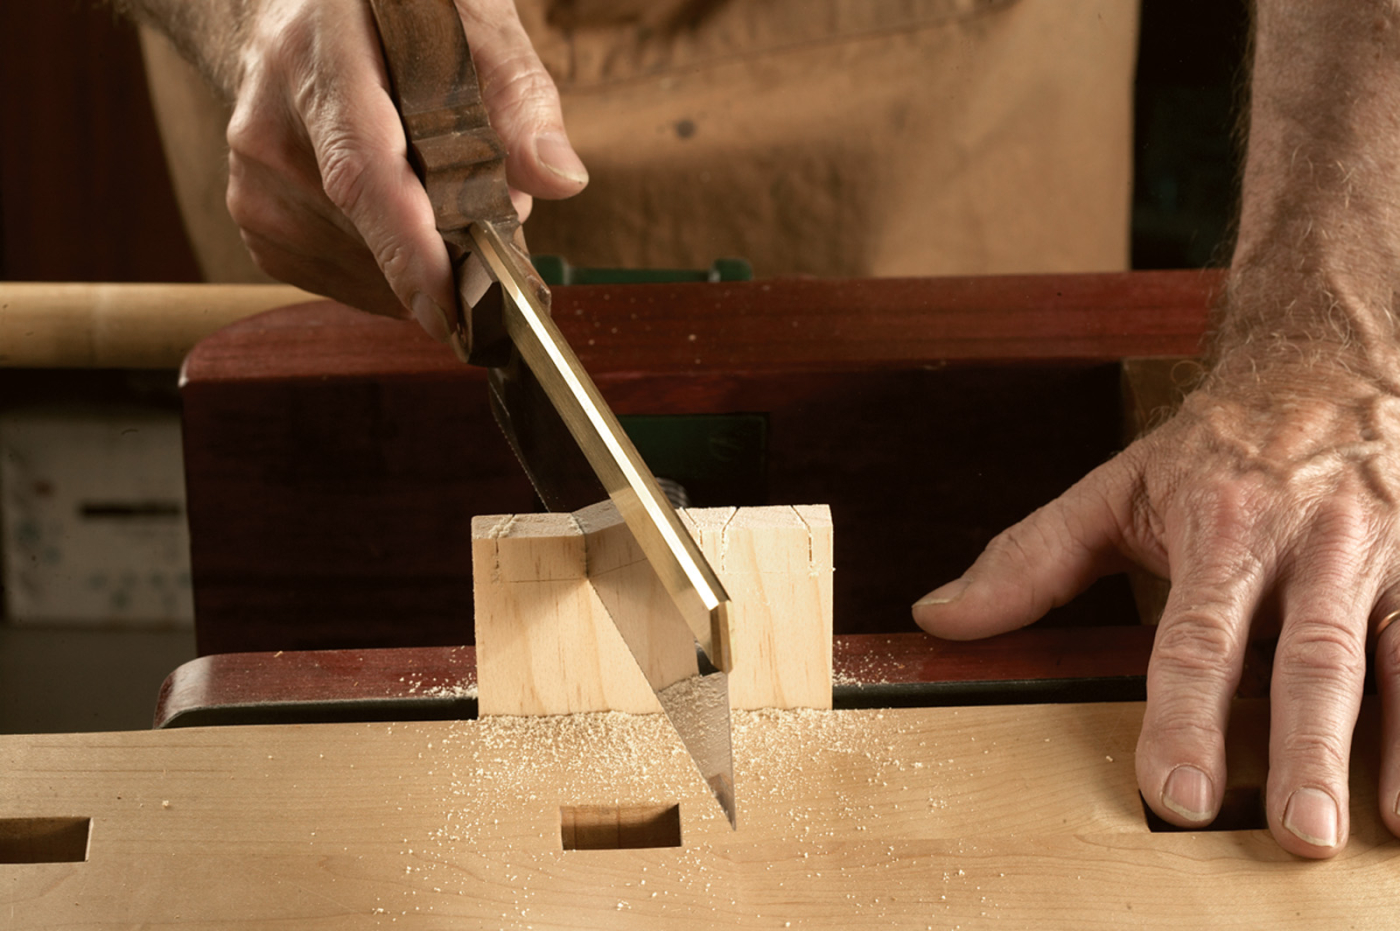
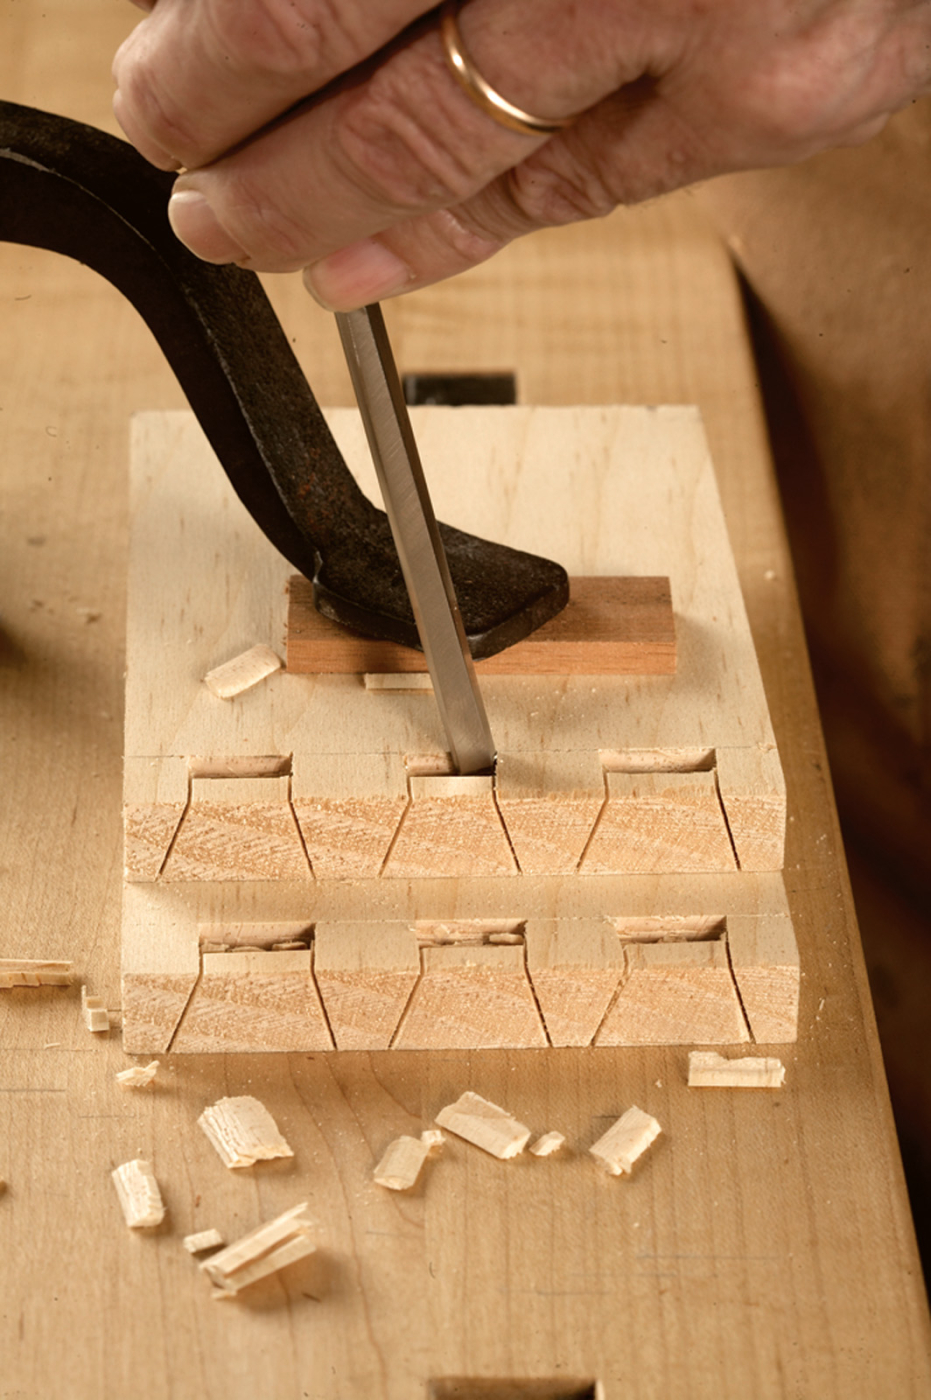
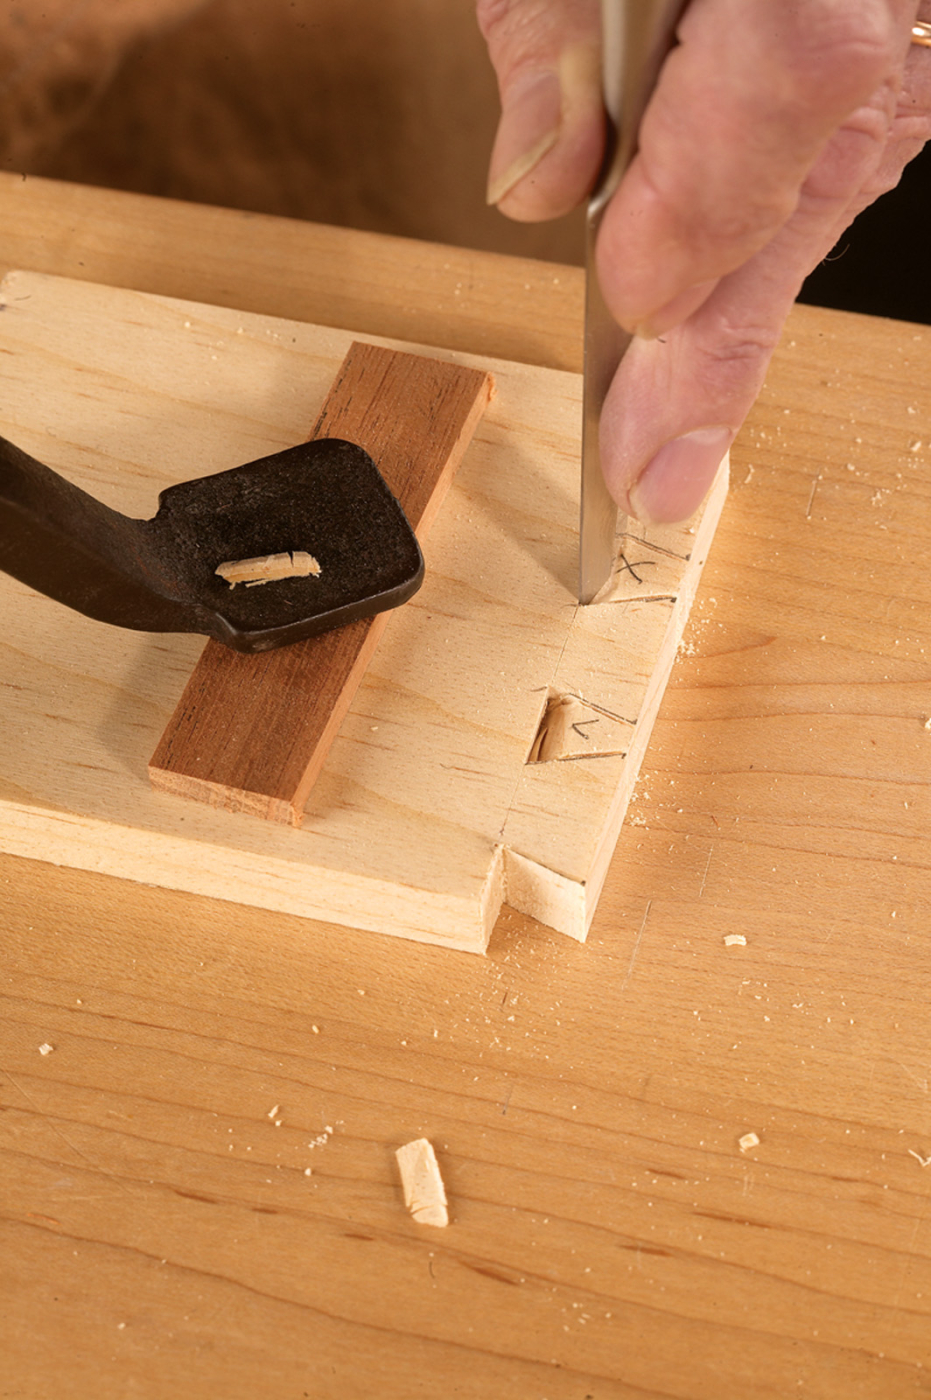
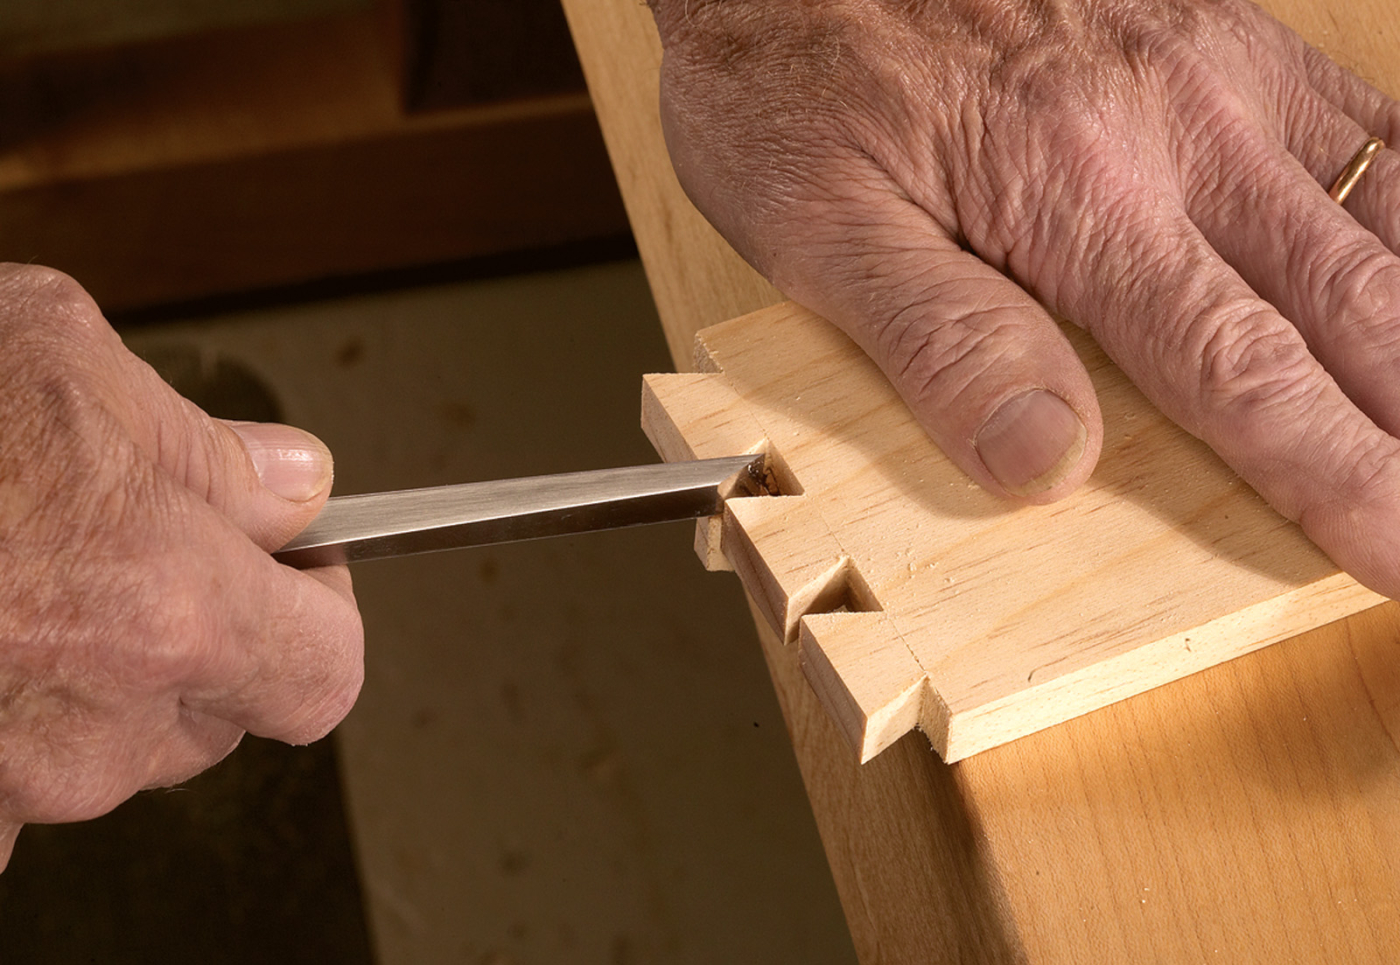
Once you’re happy with your pins, chisel the pins. Put the chisel on the marking gauge line and tap it. Take out a little “V” cut. Now chisel deeper, taking out chips. Undercut just a very little. Flip the piece over and do the same on the other side.
9. Put the chisel into the marking gauge line and tap it.
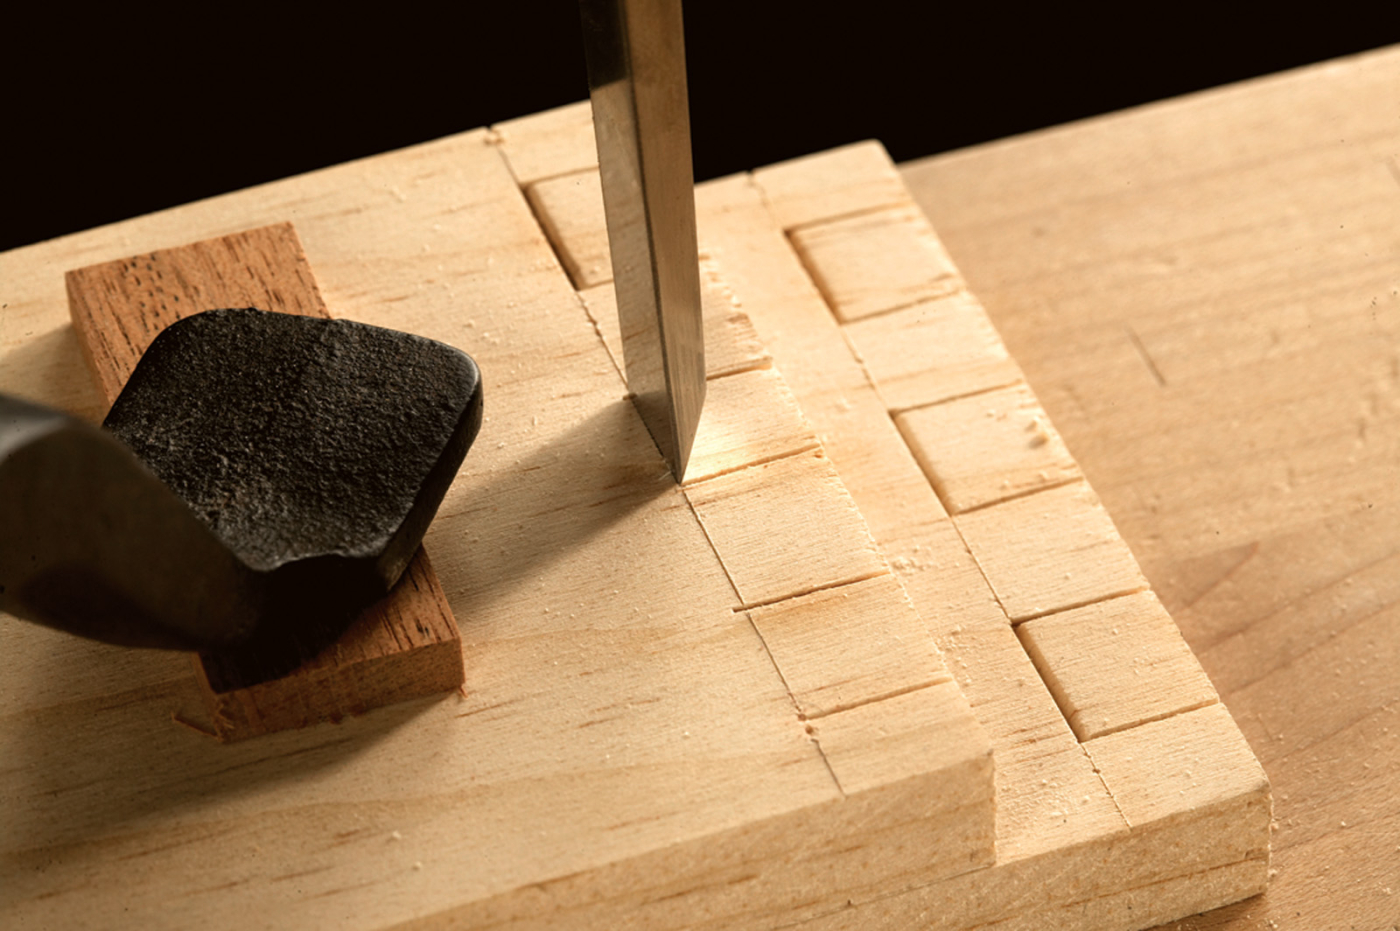
10. Do the same on all the tails.
11. Tilt the chisel forward to take out a little piece.

12. Put the chisel back up and tap it more. Undercut a little bit, approximately 2°.
13. With a smaller chisel, chisel into the corners. Chisel about halfway.
14. Flip your stock and chisel from the other side.
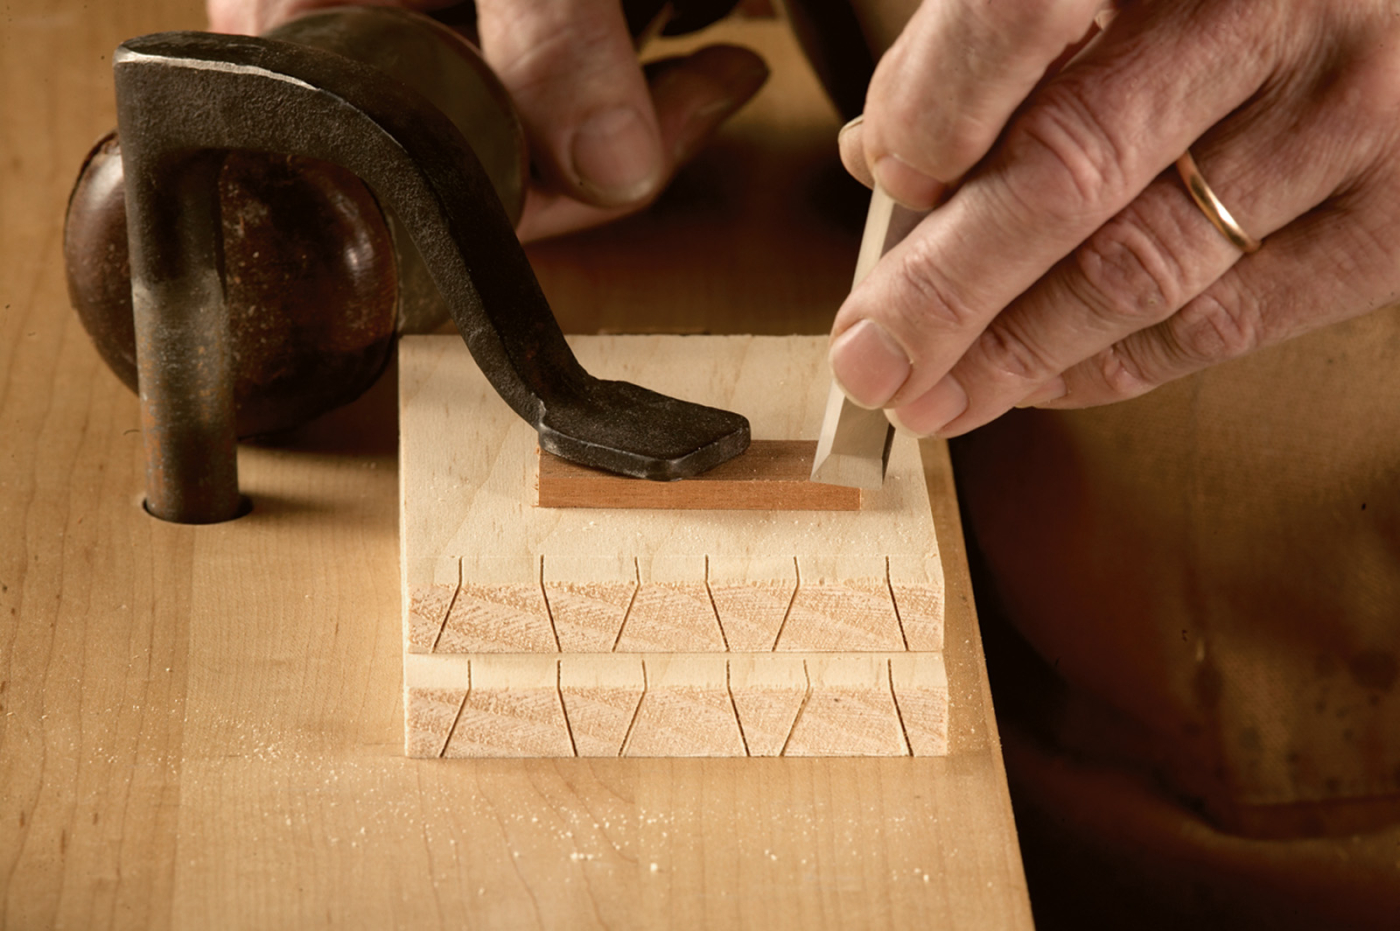
Next, use your pins to make the tails. Hold all three sides even with the edge and the end. With a sharp pencil, mark it from the inside. Here is the hard part: When you cut the pins a little this way or a little that way, it doesn’t matter because you’re making a template. But when you cut the tails, you have to be accurate and cut that pencil line in half. To understand which side of the pencil line you are cutting, you have to mark the half pins and pins with an “X.” That will be your waste. When you chisel out your waste, the “X” will become sawdust and chips. Cut off your half pins; chisel your tails (you are chiseling out the space for the pins).
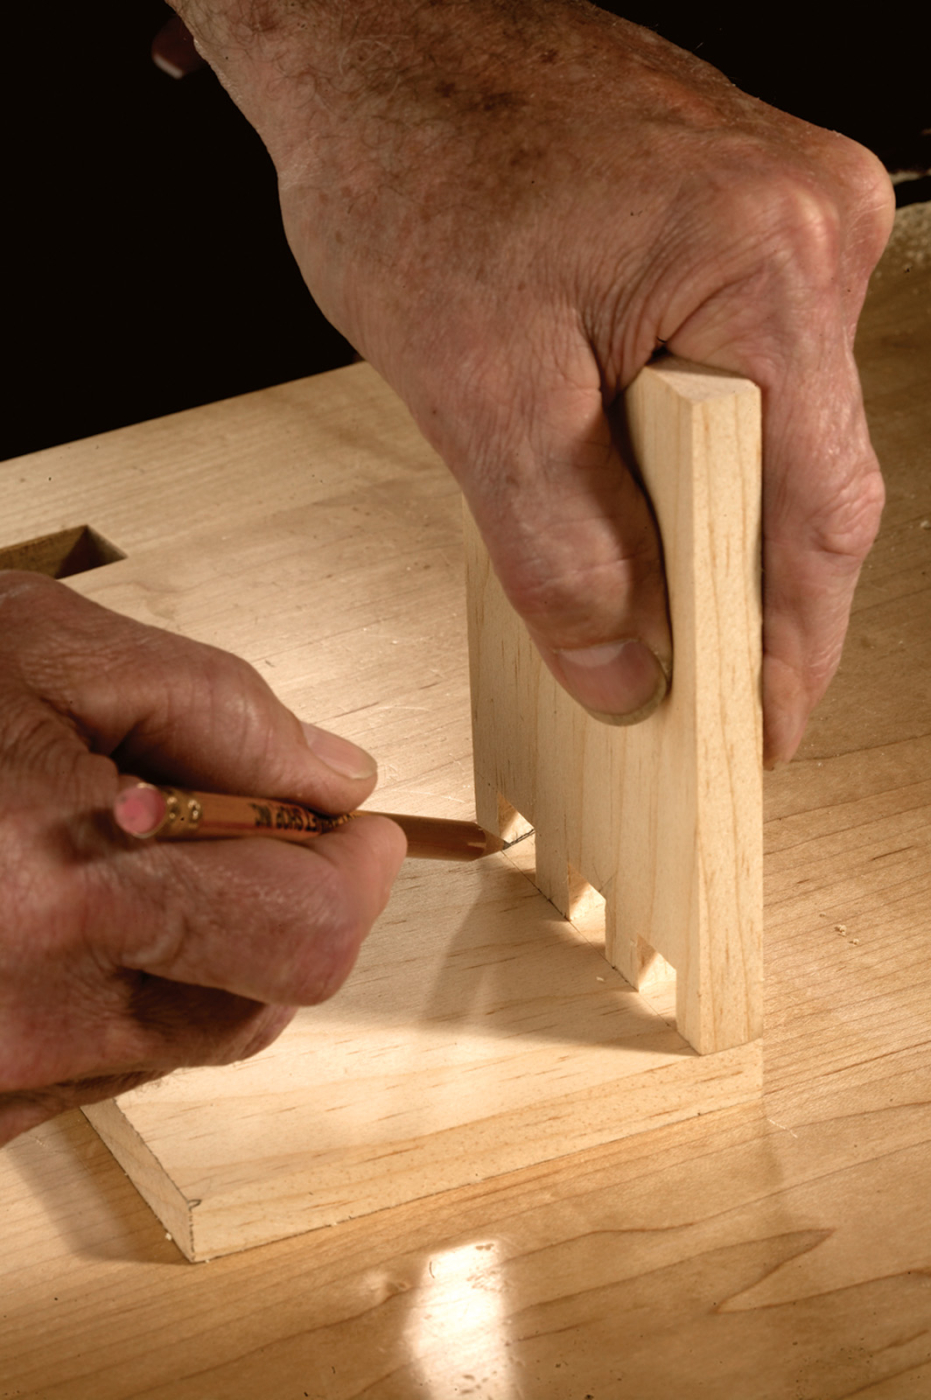
15. From the pins, mark the tails. Hold the pin board flush on the outside and on the edges.
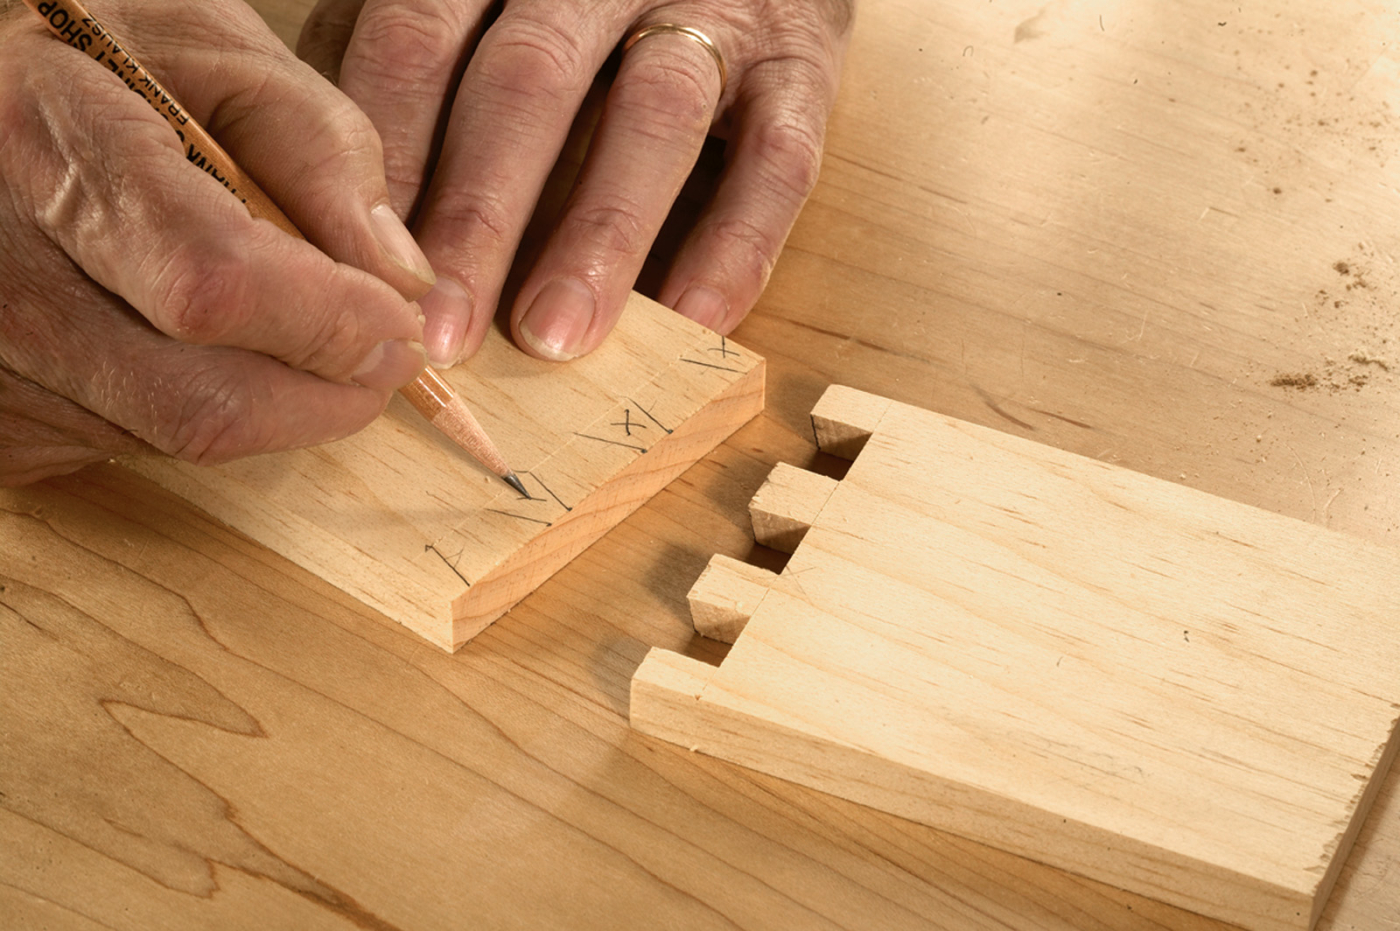
16. Mark your waste (the bits of wood you will be cutting out) with an “X.”
17. Line up your saw with the pencil line. Use your thumb for a guide and cut on the “X” side
18. Here you can see what it looks like to leave the lines on the tails.
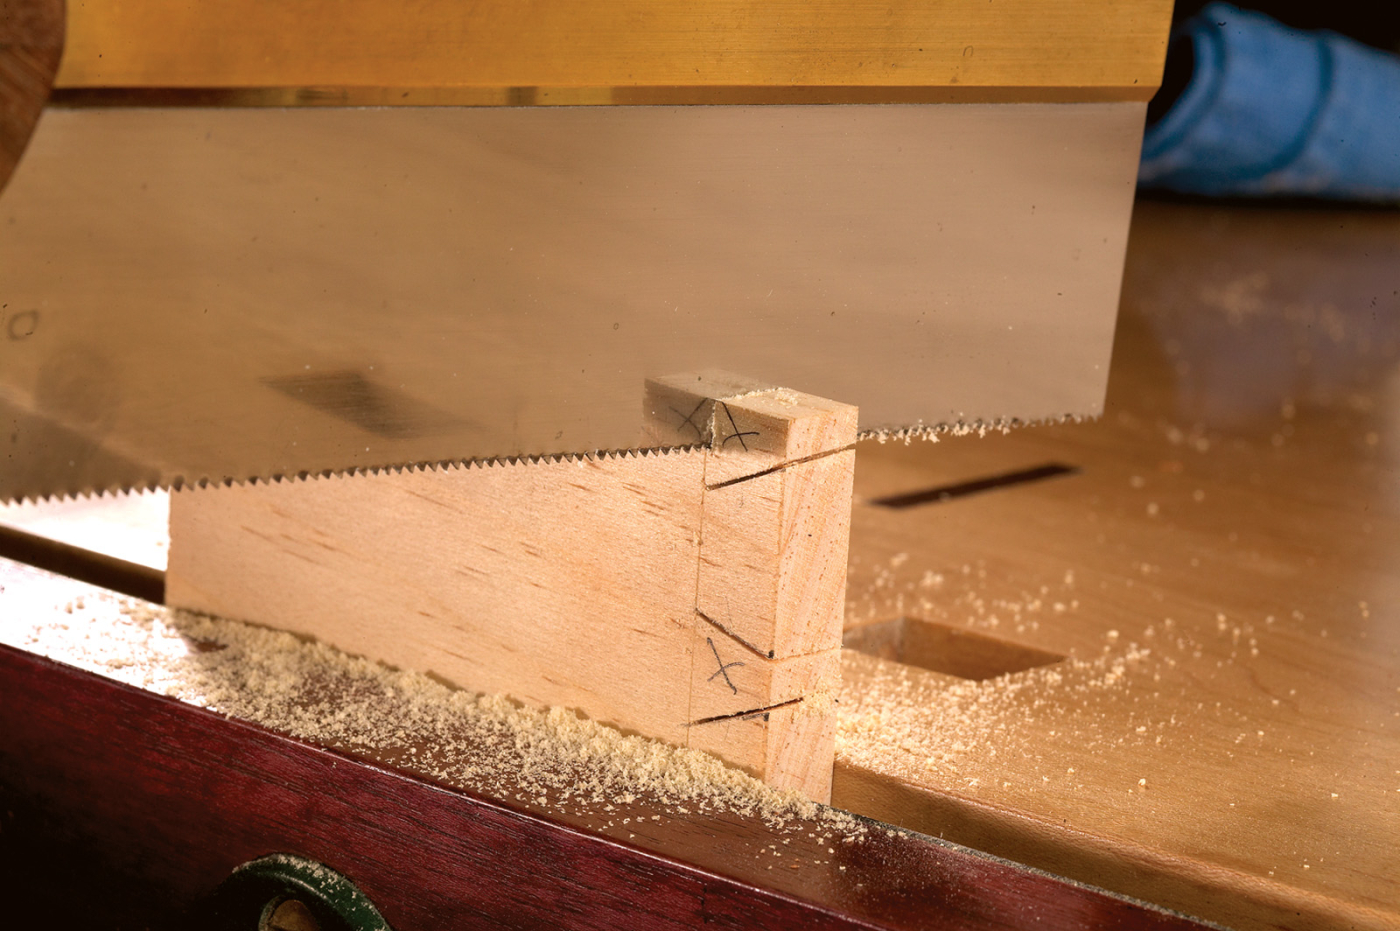
19. Cut off the half pin. The saw kerf should be outside of the marking gauge line.
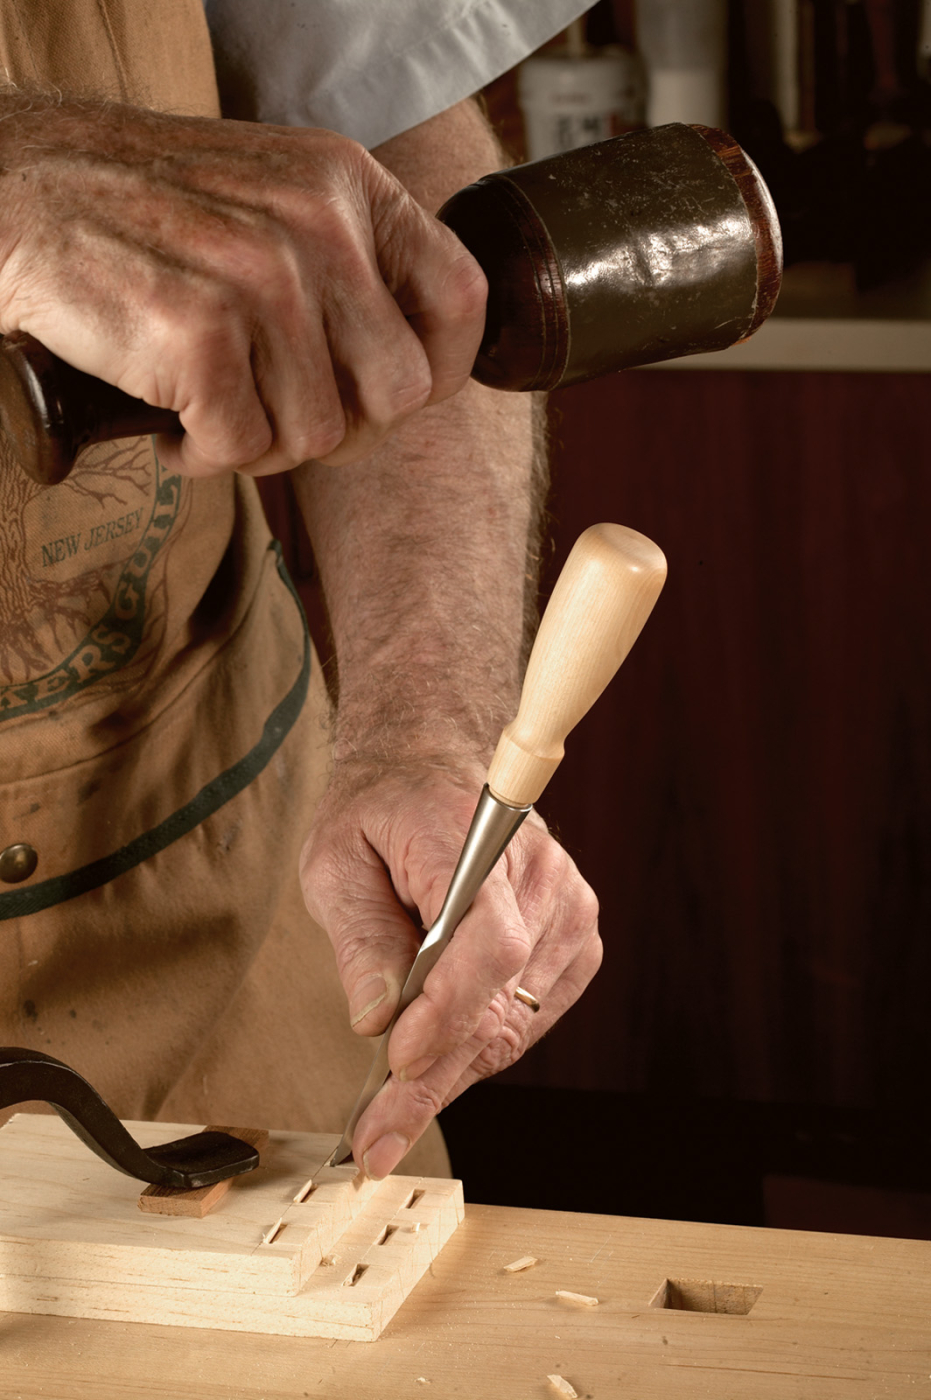
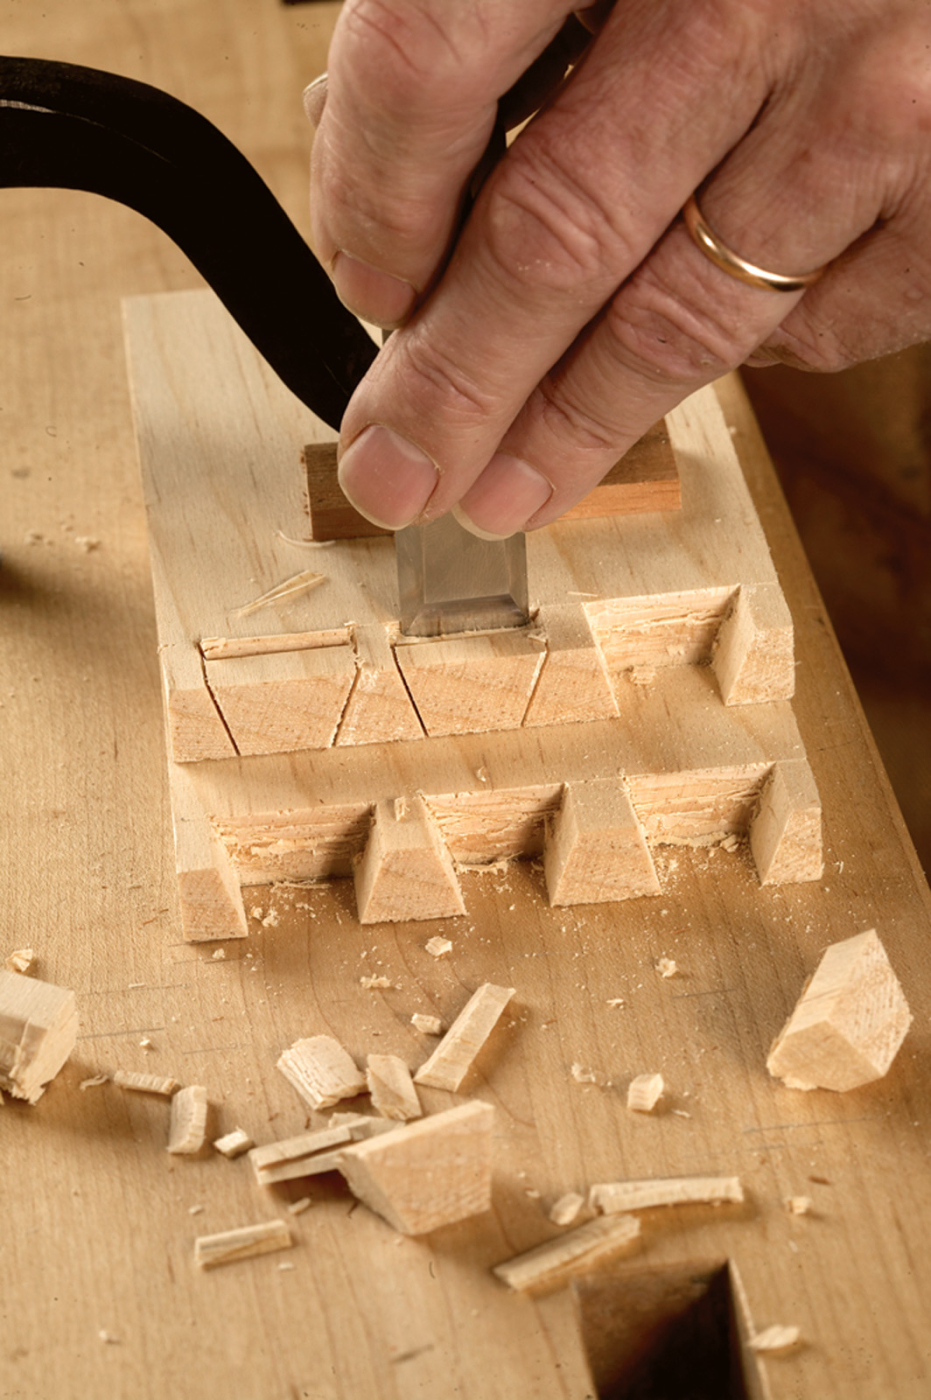
20. Chisel the tails the same way you chiseled the pins.
21. With the edge of your chisel, push out your waste.
Here comes the fun part: Try fitting it together. If it doesn’t fit, try to find out why, but don’t fix it. Cut your next piece. You may have to go closer to the line if it is too tight or leave more of the line on to make it tighter. Make a new one using the same pins until you are happy with a snug fit.
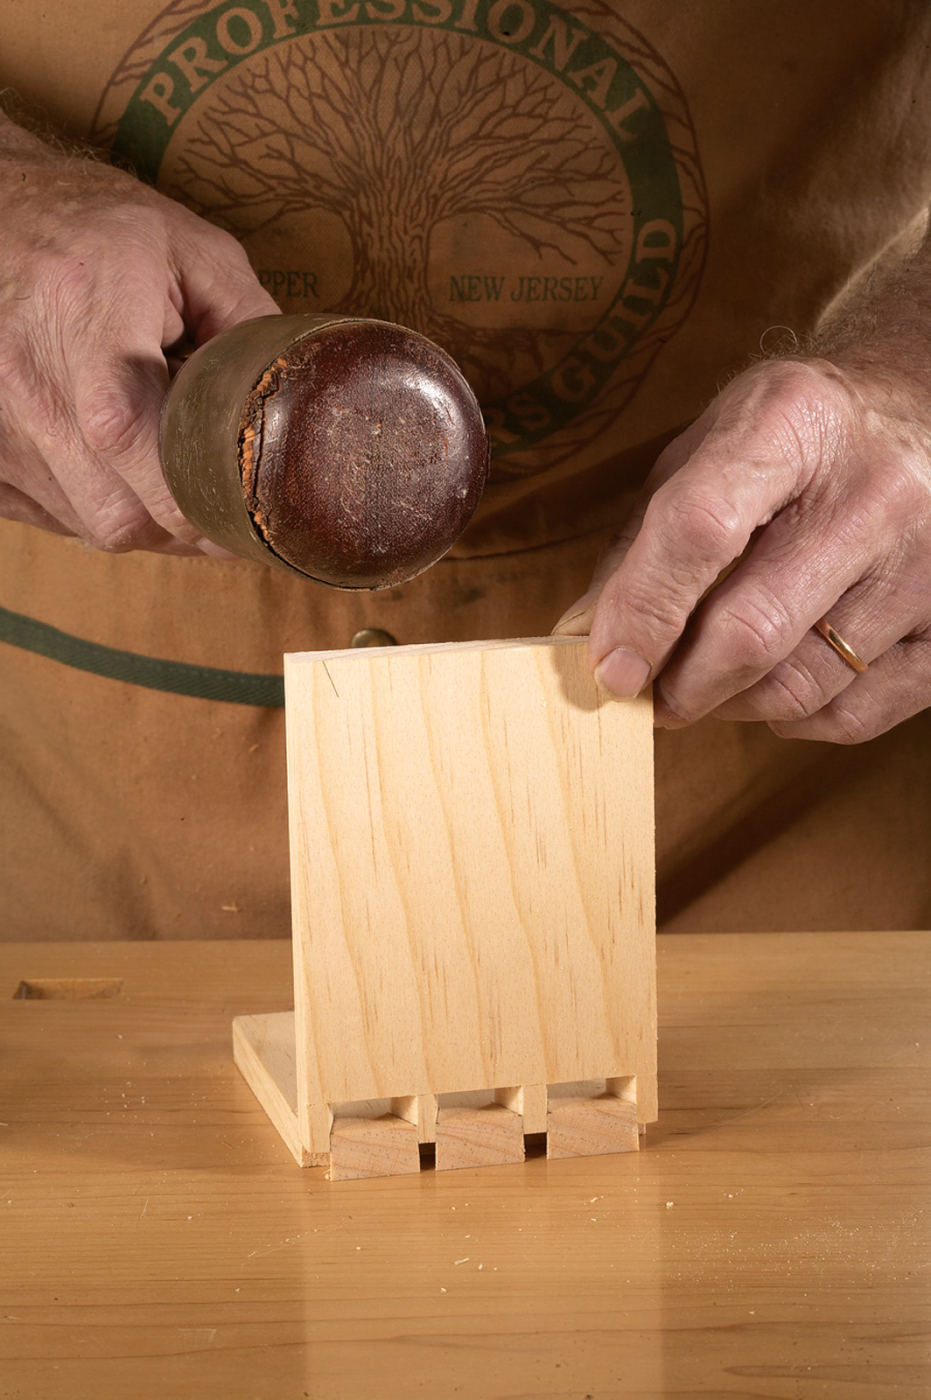
22. If you did everything right, it should easily tap together.
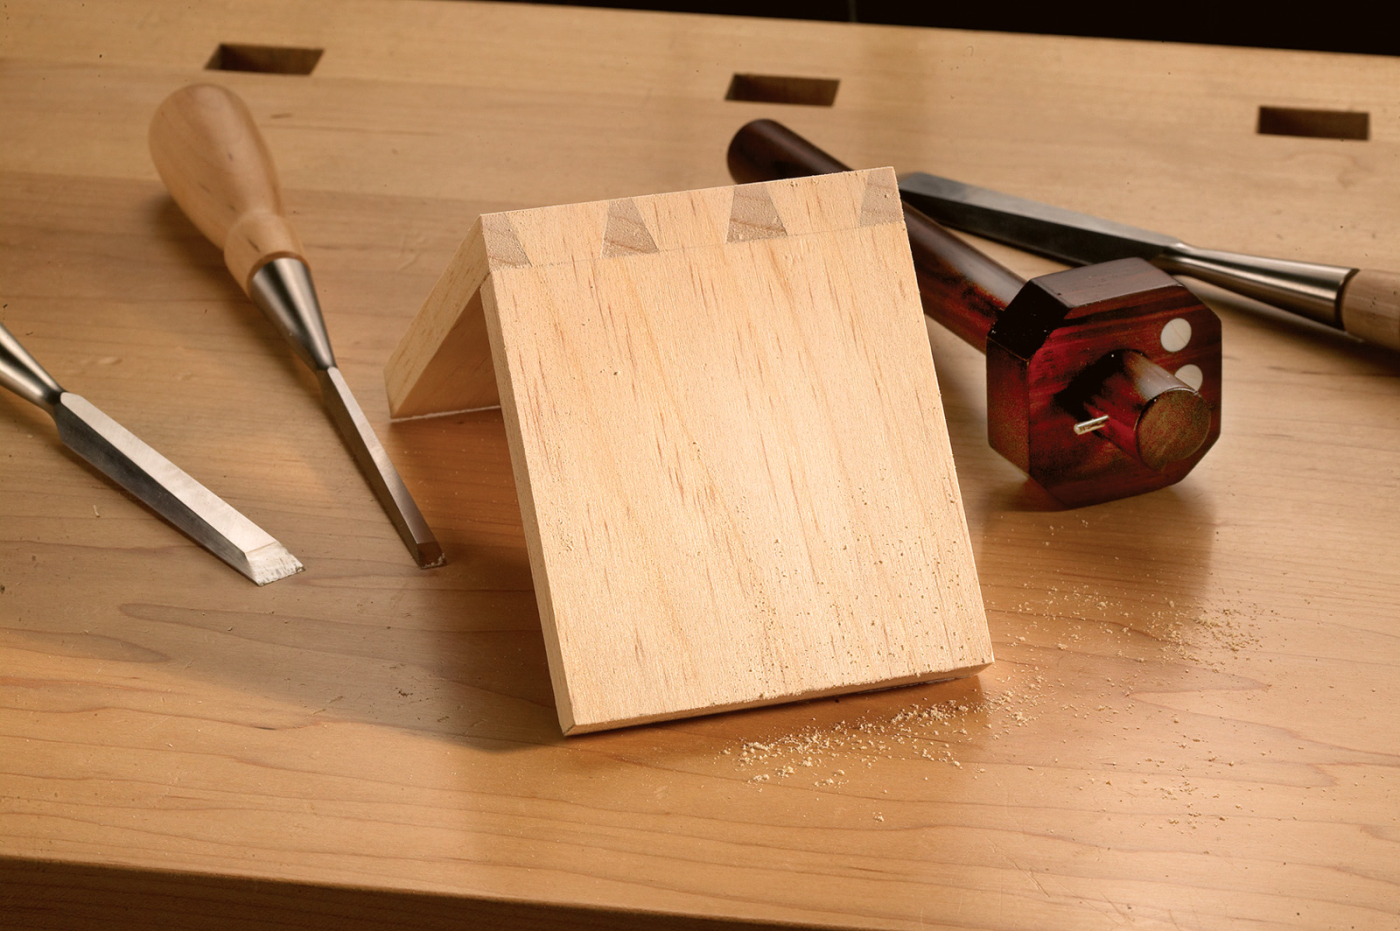
23. Here you can see the finished practice piece.
You are ready to make a jewelry box for your mother-in-law. Good luck trying, I am sure you can do it! Happy woodworking.
Note: Cut Dovetails Easily on Bigger Boards
When cutting dovetails on a wider board, use the same method as I describe in this article. You have to divide the remaining space after your third cut in half and half again, or 1⁄3. With practice it will come naturally. The thicker the wood, the bigger the pins and tails. For example, a 1″-thick board for a blanket chest should have 1″ to 1-1⁄2” tails. It both looks good and is very strong. When I was an apprentice watching my father work, I asked him, “How can you do this so fast?” He replied, “Don’t worry, after 10 to 15 years you will be a good beginner yourself.”
Editor’s note: This article originally appeared in the October 2005 issue of Popular Woodworking Magazine.
Here are some supplies and tools we find essential in our everyday work around the shop. We may receive a commission from sales referred by our links; however, we have carefully selected these products for their usefulness and quality.