


We may receive a commission when you use our affiliate links. However, this does not impact our recommendations.
 Recently I needed to install two thumb screws into a makeshift fence that was intended for my petite table saw. By threading a hole in the wooden fence I was able to provide my hardware of choice (thumb screws) sufficient purchase to attach the new fence to the one supplied by the manufacturer. This method also allowed me to loosen and tighten the fence as needed, and even dismantle it occasionally with ease. How to succeed in taping wood is the subject of this post.
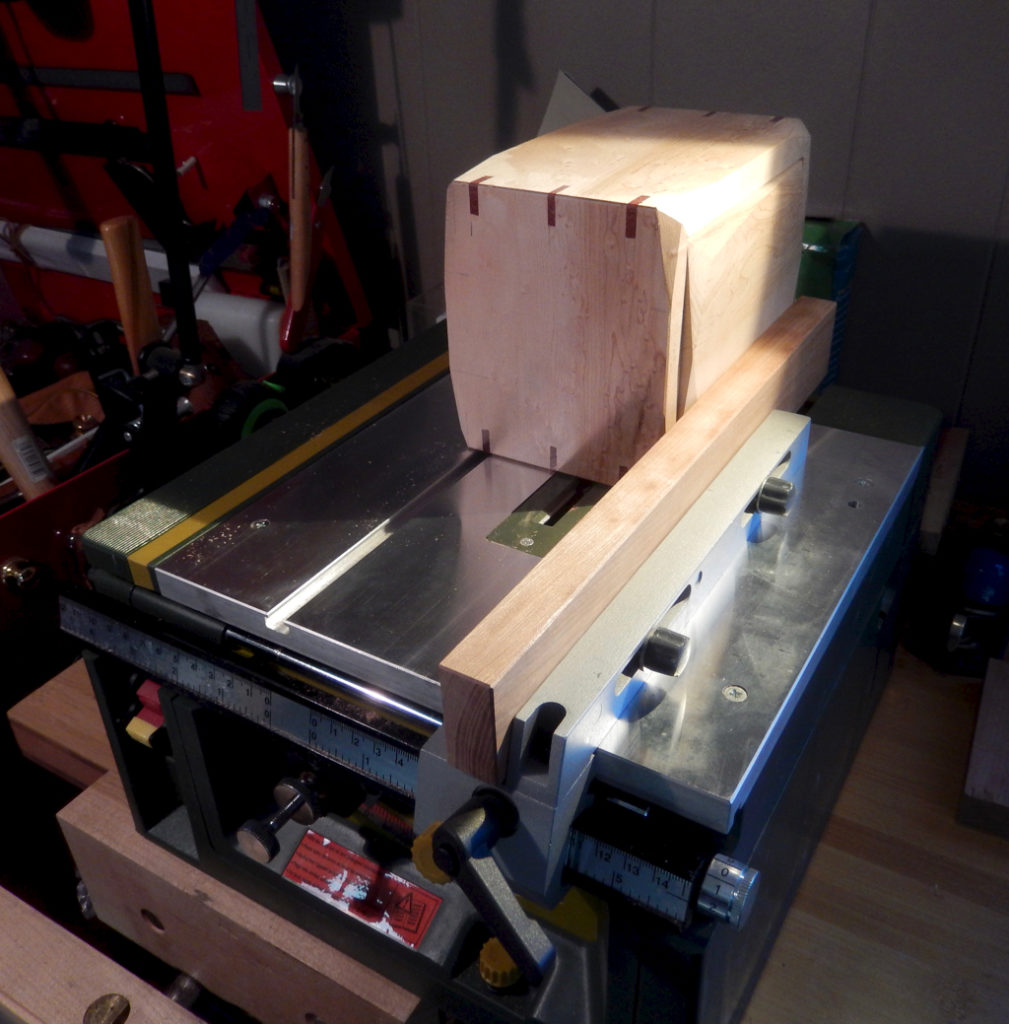
When I recently needed to attach an improved auxiliary fence to the short aluminum fence of my Proxxon table saw, I had two options: To use wood screws and washers, or to deploy thumb screws. Using a common wood screw would require me to grab a screwdriver every time I want to reposition or disconnect the auxiliary fence. But with a thumb screw, this process would be much easier. With just half a twist to the left, the thumbscrew would be loose enough so I can slide the wooden fence up or down the aluminum fence. And a complete dismantling of the fence could be done faster by just unthreading the thumb screw out — again, no tool needed. The disadvantage of installing thumb screws into wooden elements, such as in jig building, is that you have to embed in the wood some sort of insert that matches the machine thread on the bolt, the thumbscrew or any other like-minded hardware.
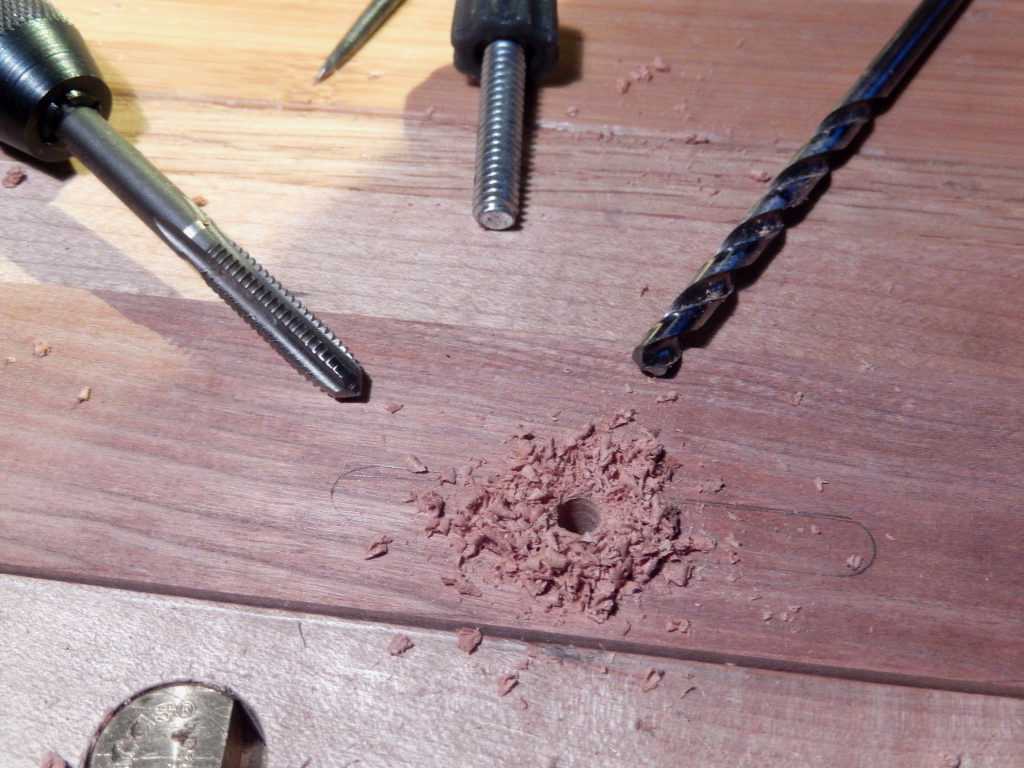
Embedding a threaded insert, a prong T-nut, or gluing-in a common nut is surely an option, but a cheaper and faster to install technique is at hand. Just thread a pre-drilled hole in the wood to accept the machine thread of the tightening fastener, and reinforced the wooden threads with super glue. The super glue additive keeps the fragile short grain portion of the threads together, and prevent them from being stripped out by excessive tightening of the fastener.
A few words about Taps:
Taps are primarily designed to thread metals and are made in a few configurations and tiers of quality. Inexpensive taps are made of hardened carbon steel and are adequate for milling threads in mild steel, cast iron, brass, plastics and wood. For more demanding tapping jobs, High-Speed Steel, Cobalt steel and other state of the art alloy steel taps are available. But for our purposes, carbon steel taps will suffice.

TPI – what you need to know
Bolts and nuts are generally identified by their external diameter, or major dia, and the number of threads per unit length (thread count). The higher the number of Threads Per Inch (in the imperial system) the finer the thread. A ¼-20 bolt means a bolt of ¼” dia and 20 Threads Per Inch. In some metal to metal fastening applications a higher number of threads per inch is required. But for our purposes, that is anchoring a fastener into threads tapped in wood, we should favor the lower number of TPI.
Thus we should prefer ¼-20 upon ¼-28 and #12-24 upon #12-28. Note that below ¼” diameter, the identification standard of the external diameter is denoted in numbers. For instance #12 correlates to 7/32” diameter and #10 matches 3/16” diameter. Contrary to our Imperial system the metric system it is quite consistent and simple.
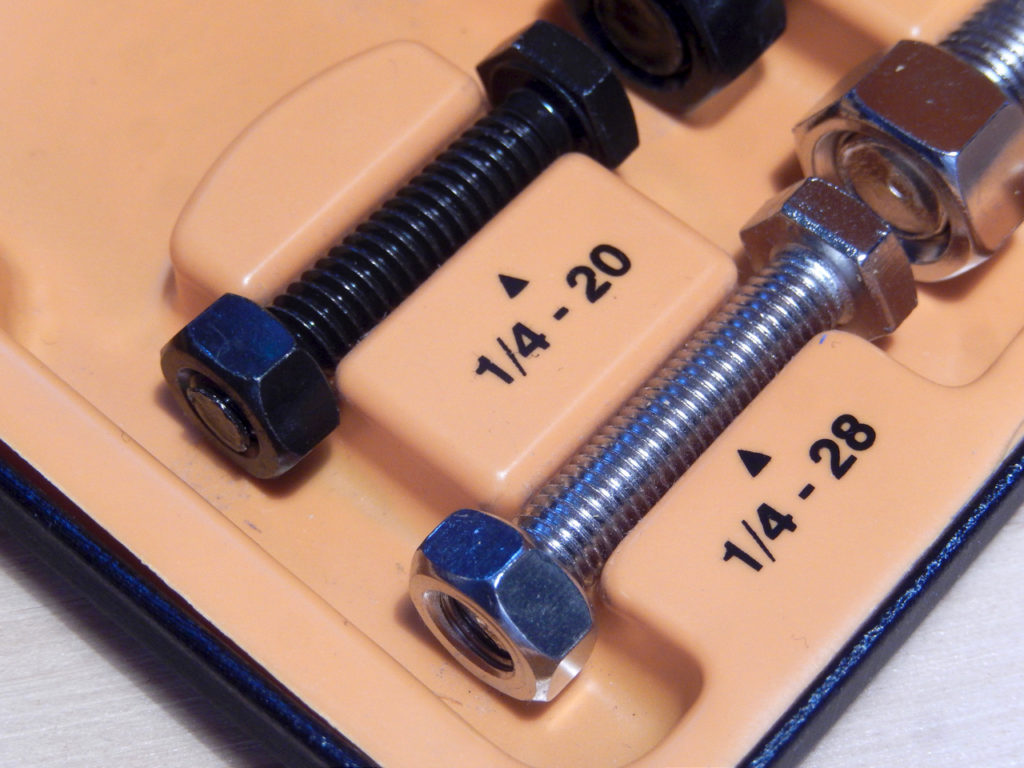
A 1/4-20 fastener has the same diameter as a 1/4-28 one. The only difference is the threads per inch count.
Determining what tap to use: To start the preparations for tapping in wood I begin by determining my hardware’s diameter and thread type using a thread checker. I thread my fastener into the thread checker to indicate its Major diameter and the thread count (TPI). There are a few kinds of thread checkers available in the marker. Some will only indicate the diameter + the TPI count while others (the plate type) will recommend the diameter of the appropriate drill bit that need to be deployed in order to create a through hole for the tap to mill into. Those thread checker plates are intended for machinists, so they indicate a very specific system of drill bits for tapping metal. These bits are indicated with the symbol “#” followed by a Number. Sounds confusing.. Well don’t get me started…
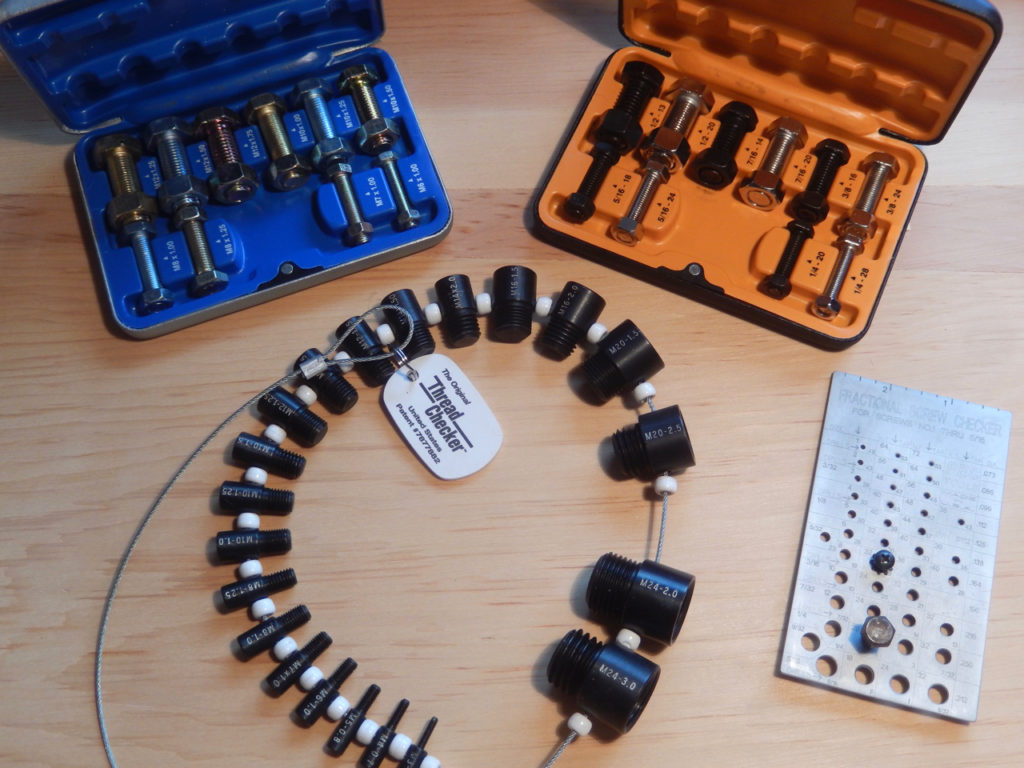
There are a few types of thread checkers on the market. From a simple bolt and nut, paired together in a box, to a checker in the shape of spinal cord whose vertebras are nut/bolt units.
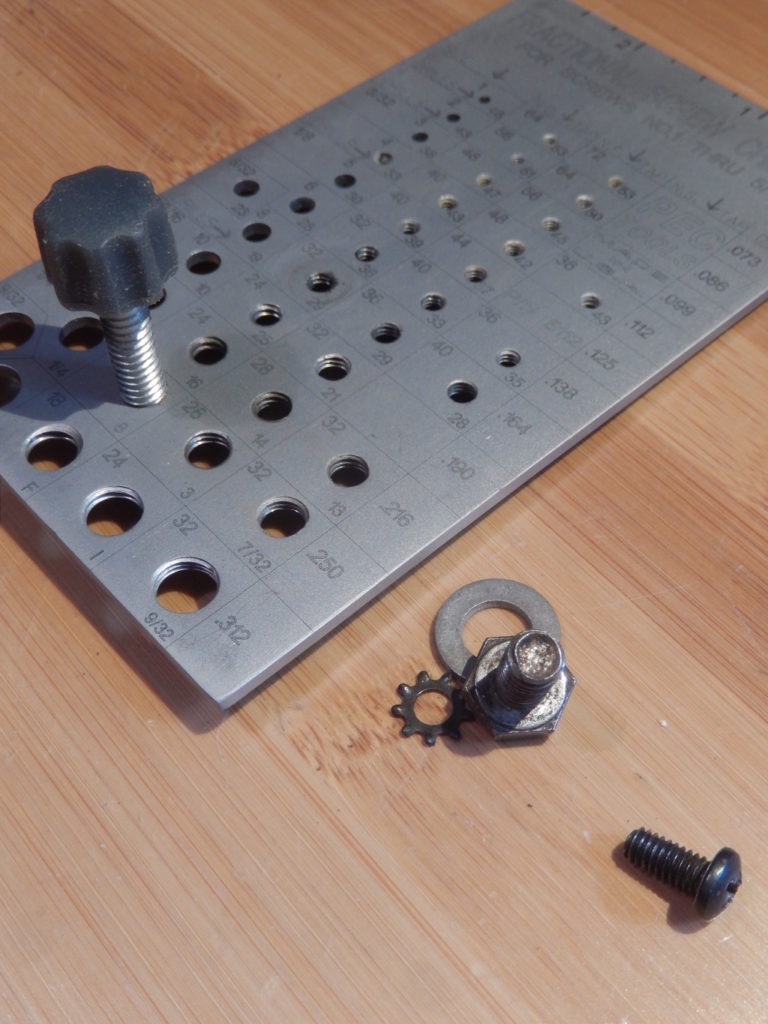
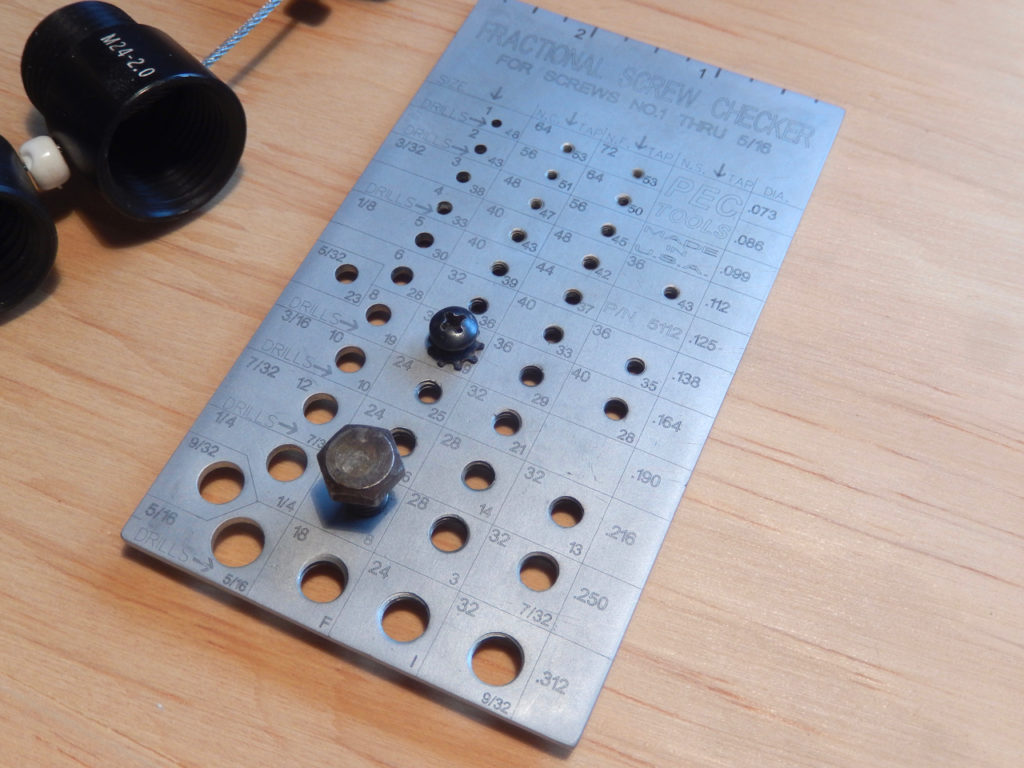
A plate thread checker will tel you the recommended diameter of the drill bit you need to use when preparing a metal object for tapping.
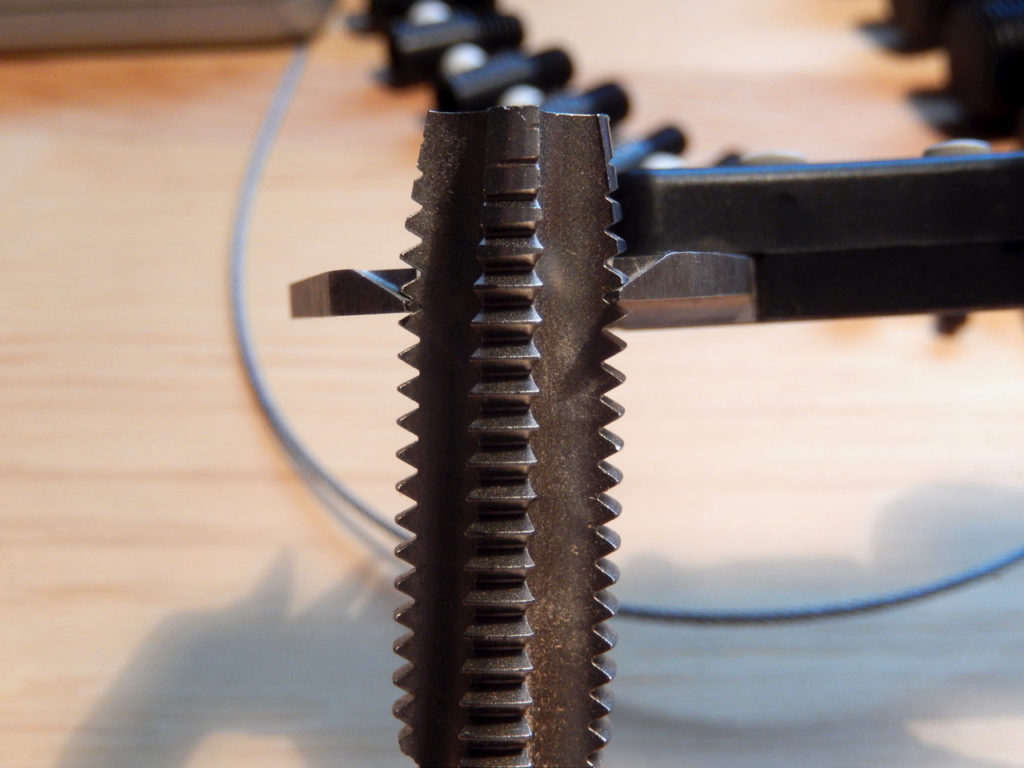
To make it easier I recommend that you use a vernier caliper in addition to the thread checker and do the following:
- Identify the type of thread and find its complementary tap. For example, if the thread checker say that you have a 1/4-20 fastener, I look for a tap that the numbers 1/4-20 are etched on it.

- With a vernier caliper check the tap’s Minor diameter. If the vernier caliper jaws can’t probe in between the threads, make an educated guess, google it, or check the diameter close to the tip of the tap.

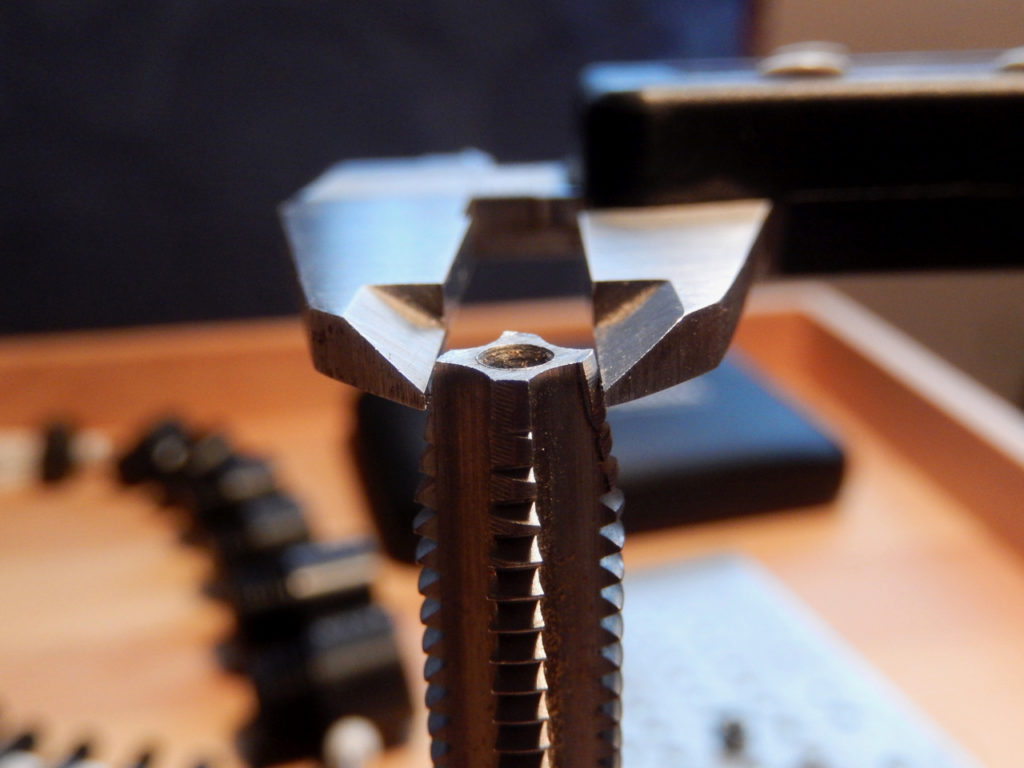
- Find the correct drill bit that matches the minor diameter.
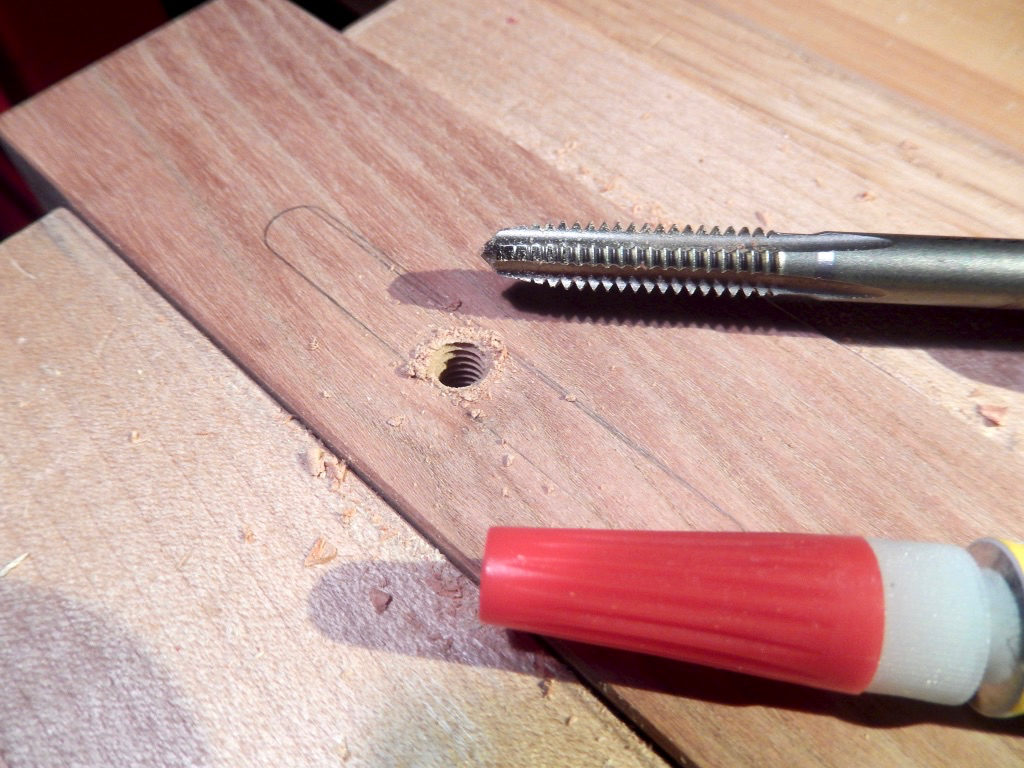
- Drill the hole.
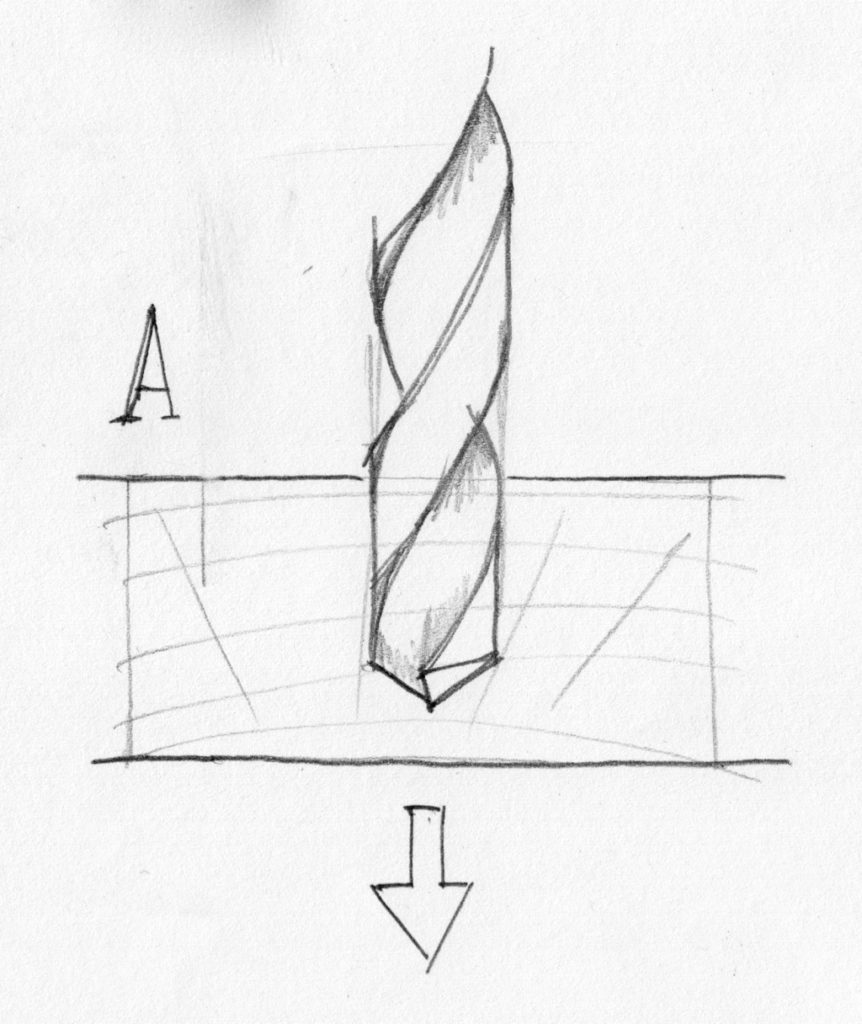
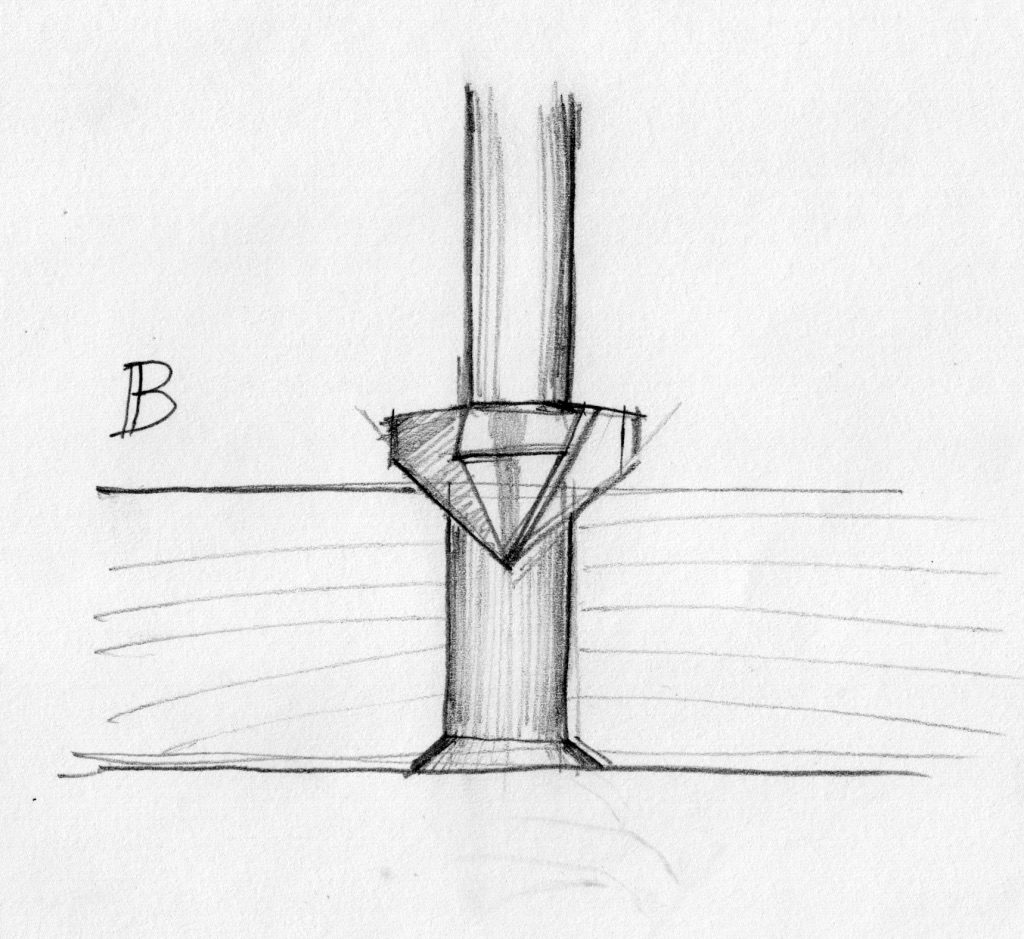
- Countersink the hole openings.
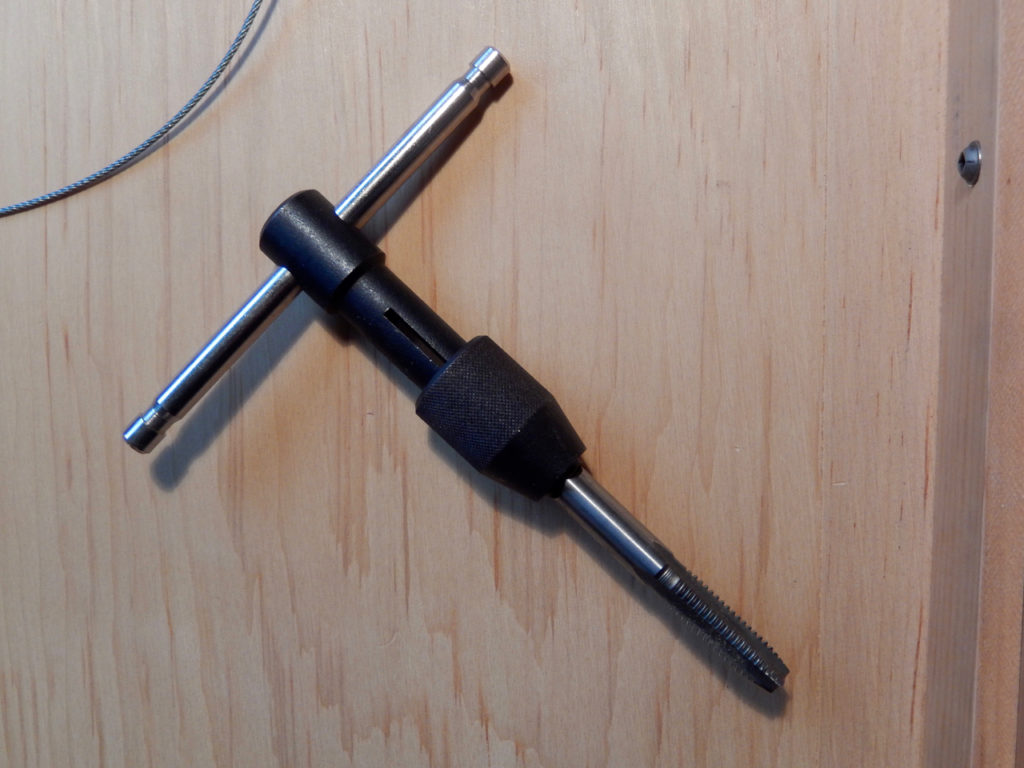
- Tap the hole. Threading wood is very easy but you need to make sure that your thread is perpendicular to the surface of the hole. Unlike threading metal, here we do not want to use oil — as it will prevent the super glue from adhering to the wood fibers.
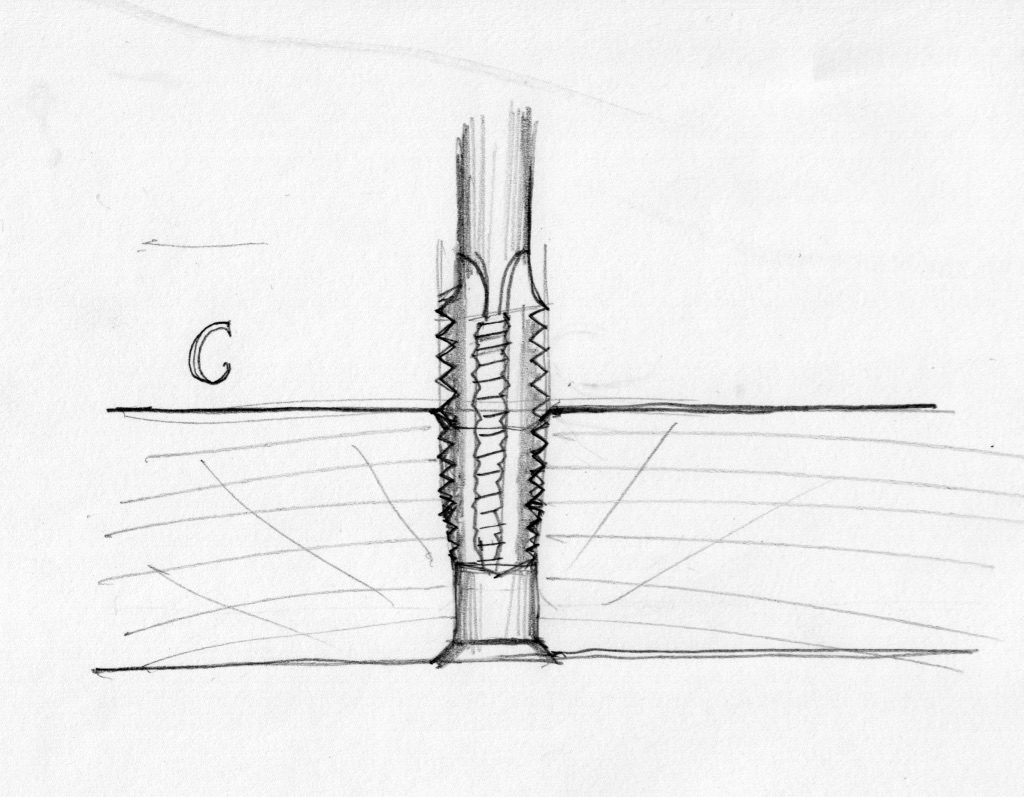
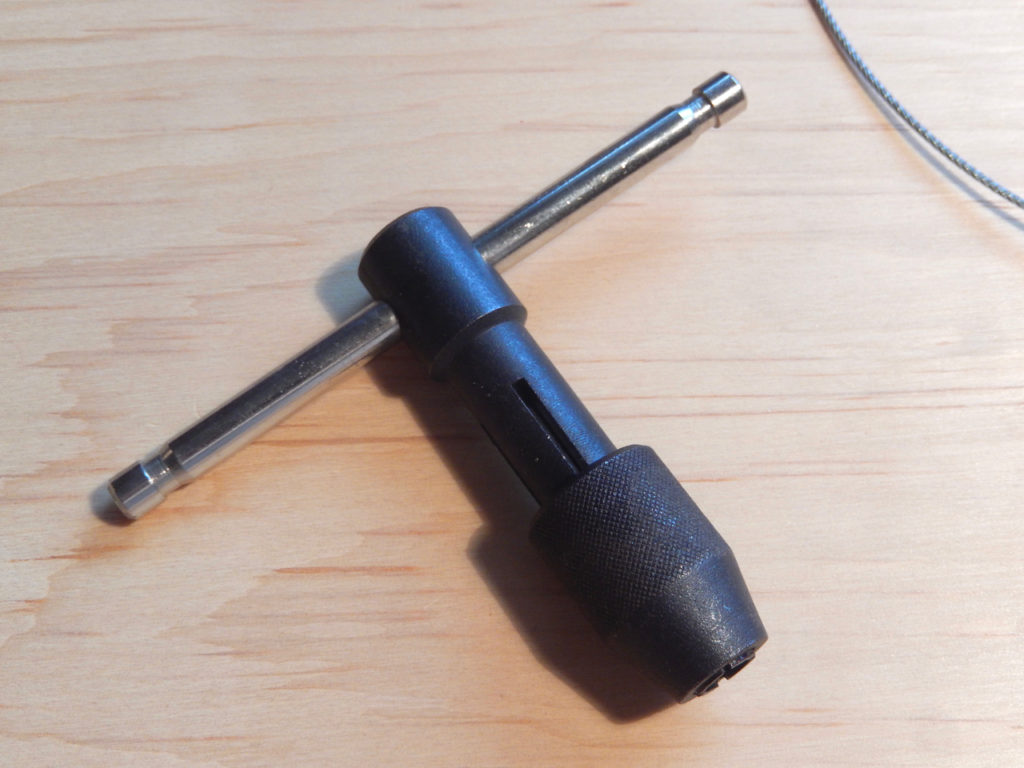
Using an inexpensive tap handle to hold the tap will ensure consistent results.

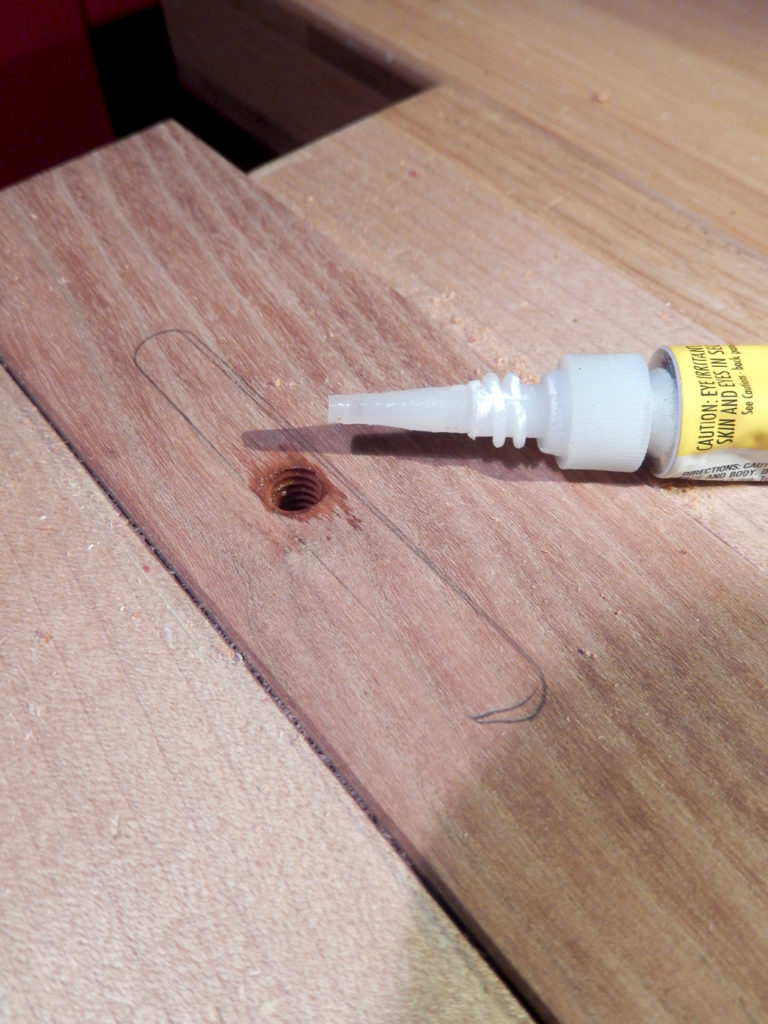
Once I thread the hole, I blow off any wood dust from the threads, and pour in thin Super Glue. I try to make sure that the thin Super Glue will cover all, or most of the threads in the hall, if needed I tilt and rotate the wooden element to allow the liquid to percolate deeper into the hale. Now I wait an hour or so to guarantee that the super glue is completely dry, then I introduce the fastener to the threads and give it a try. You will be surprised how reliable and easy to make is this wood threaded “insert”.


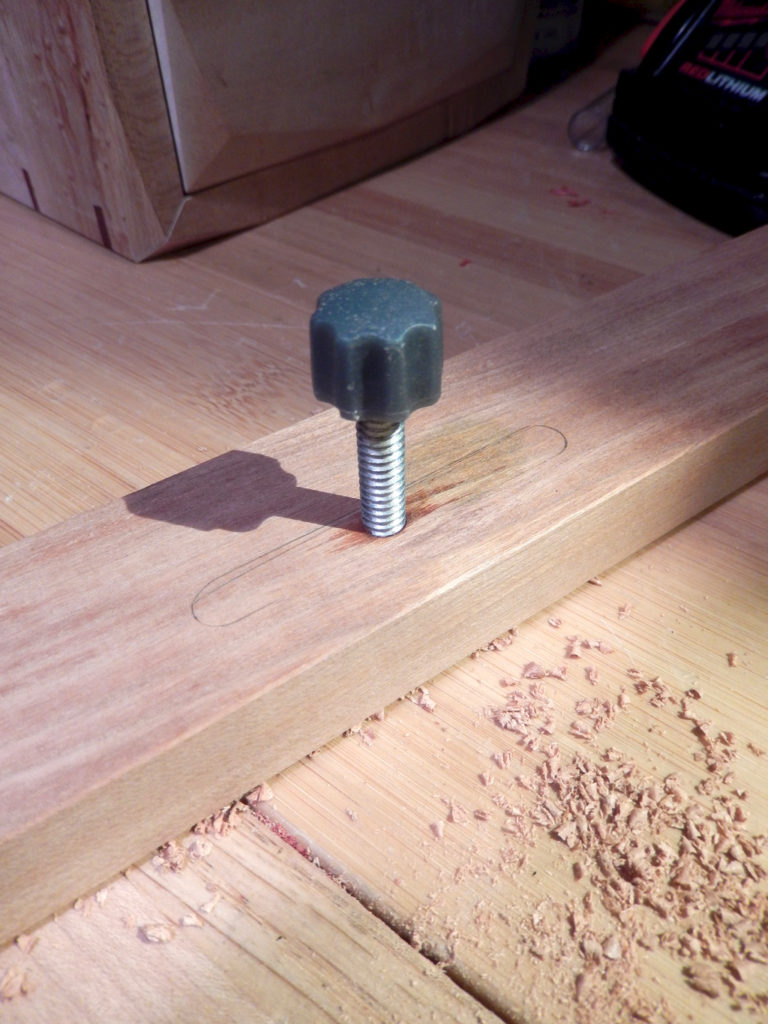
If you’re thinking about it, the reinforced wooden threaded hole behave much like a composite material. Not only that wood itself is a composite, but with the addition of the strengthening agent (aka- super glue) it could be used repeatedly thorough many cycles of tightening and loosening.
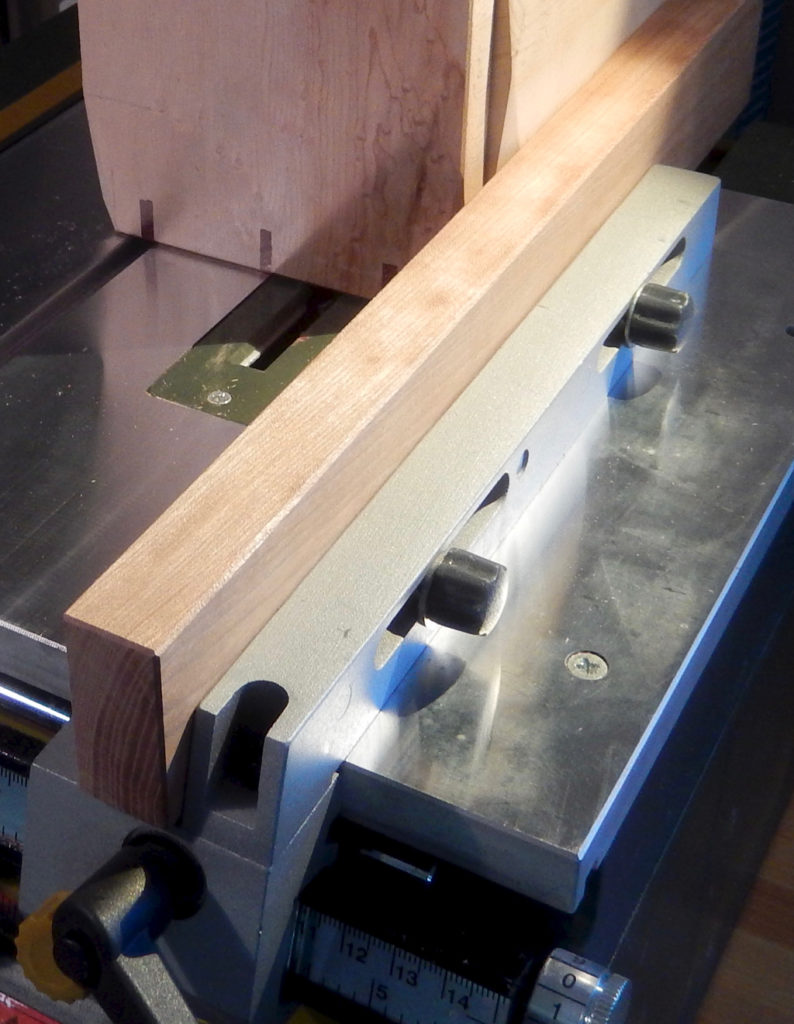
My saw’s aluminum fence was just too short and low and couldn’t provide the proper support for secured ripping operations on the saw. Luckily the fence include slots to allow for fasteners to go through it and into an auxiliary fence that the user can make.
Watch this comprehensive video by Matthias Wandel if you don’t want to spend money on a dedicated tap and wish to learn how to make your own tap, for either threading machine bolts or lag screws.
– Yoav Liberman
Here are some supplies and tools we find essential in our everyday work around the shop. We may receive a commission from sales referred by our links; however, we have carefully selected these products for their usefulness and quality.


