We may receive a commission when you use our affiliate links. However, this does not impact our recommendations.

Destroying 10 joints taught us surprising lessons about joint design, wood failure and the tenacity of modern glue.
Editor’s note: This article originally appeared in the December 2005 issue of Popular Woodworking, when Robert W Lang decided he really felt like smashing things with an anvil.
It has been said that we learn more from failure than from success. One of the first pieces of furniture I made was a coffee table with rails tenoned into the legs. I didn’t know that the tenons were too large in proportion to the size of the legs until several years after the table was finished.
On the way to the bathroom one night, I accidently kicked one leg. The wood surrounding the tenon gave way, and the leg went flying. Up to that point, my work was successful; yet in an instant, a nice table was reduced to kindling. This was a joint-design lesson learned the hard way.
Much of what we know about woodworking is someone else’s experience, or the embellished retelling of someone else’s experience. When we find a method that works, we hang on to it and then we recommend it to others – never sure if it really is a good way or if we just got lucky.
If you want to start an argument, or at least a lively discussion among woodworkers, the relative strength of joints will almost always get one going. Like most good arguments, this one can’t be settled conclusively.

We don’t recommend dropping anvils on your furniture, but studying how and why joints fail can improve your woodworking.
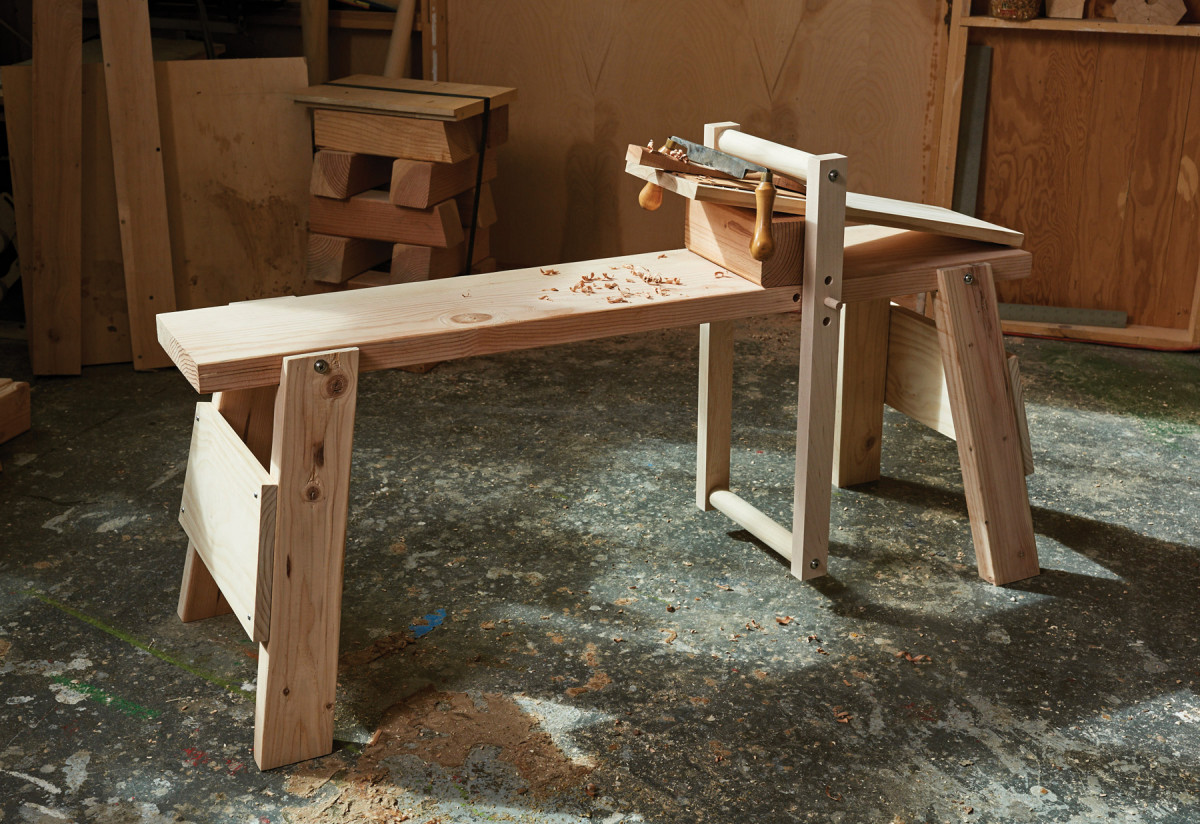
In order to add a little fuel to the fire, we decided to test 10 common joints by dropping an anvil on them. We used two sizes of anvils: 26 pounds and 54 lbs. All our joints were carefully prepared using poplar, and they were glued together with Titebond Xtend glue, which was allowed at least 24 hours to cure. The anvils were dropped from about 18″ above the joint using the contraption shown above.
We picked an extreme example not to crown a king of woodworking joints, but to examine how and why joints fail. After deliberately destroying these joints, we found ways to improve our joinery methods and produce better work.
Weaker Carcase Joints
The first joints we examined were simple butt joints, and some typical ways of reinforcing them. All of these broke beneath the 26 lb. anvil, a result we expected. What we didn’t expect was how well the polyvinyl acetate glue held.
Glue doesn’t hold well to end-grain or short-grain surfaces, as in this miter joint. When the anvil hit, the glue line failed.
Most of us have been taught that glue will not hold on end grain, and in the mitered joint, the glue did indeed fail. The grain in a miter joint is mainly short-grain to short-grain.
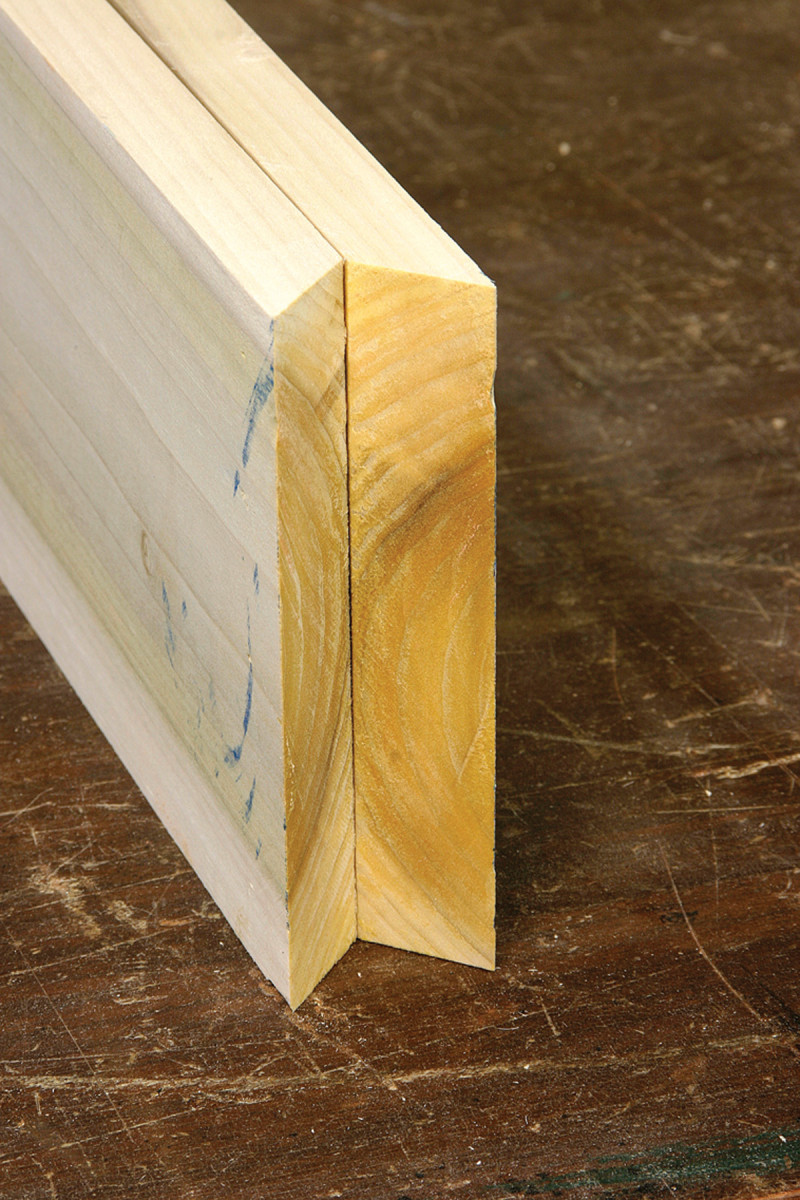
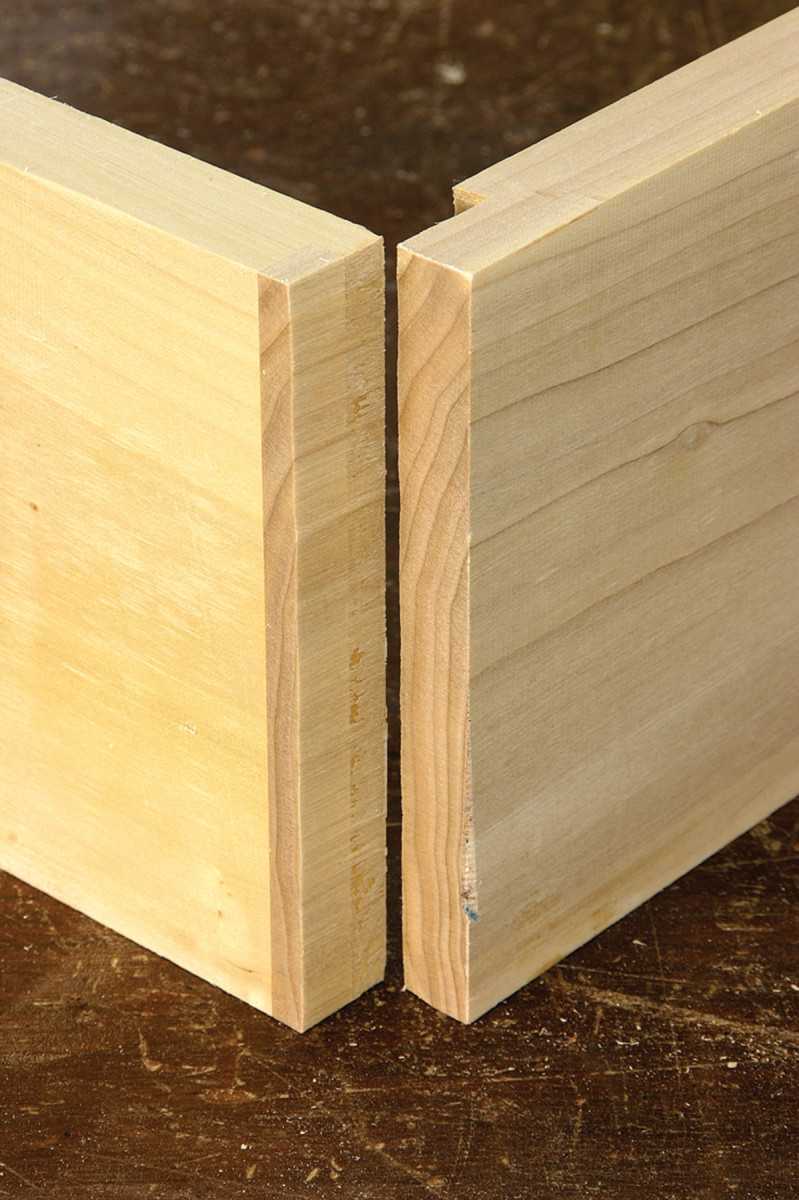
The presence of long grain in the joint increases its strength, even if the other component is end grain. Here, the glue line held and the wood failed next to the joint.
In the rabbet joint, however, the bond is long-grain to end-grain. Does the presence of long grain improve the strength of the joint? As you can see, the wood fibers failed beside the glue line. If you look closely at the photo, the end grain of both pieces isn’t seen. Long grain from the adjacent piece is.
This was true with all of the joints we tested. From a simple butt joint to through-dovetail joints, the glue typically held to the long-grain wood fibers, even when the other component of the joint was end grain.
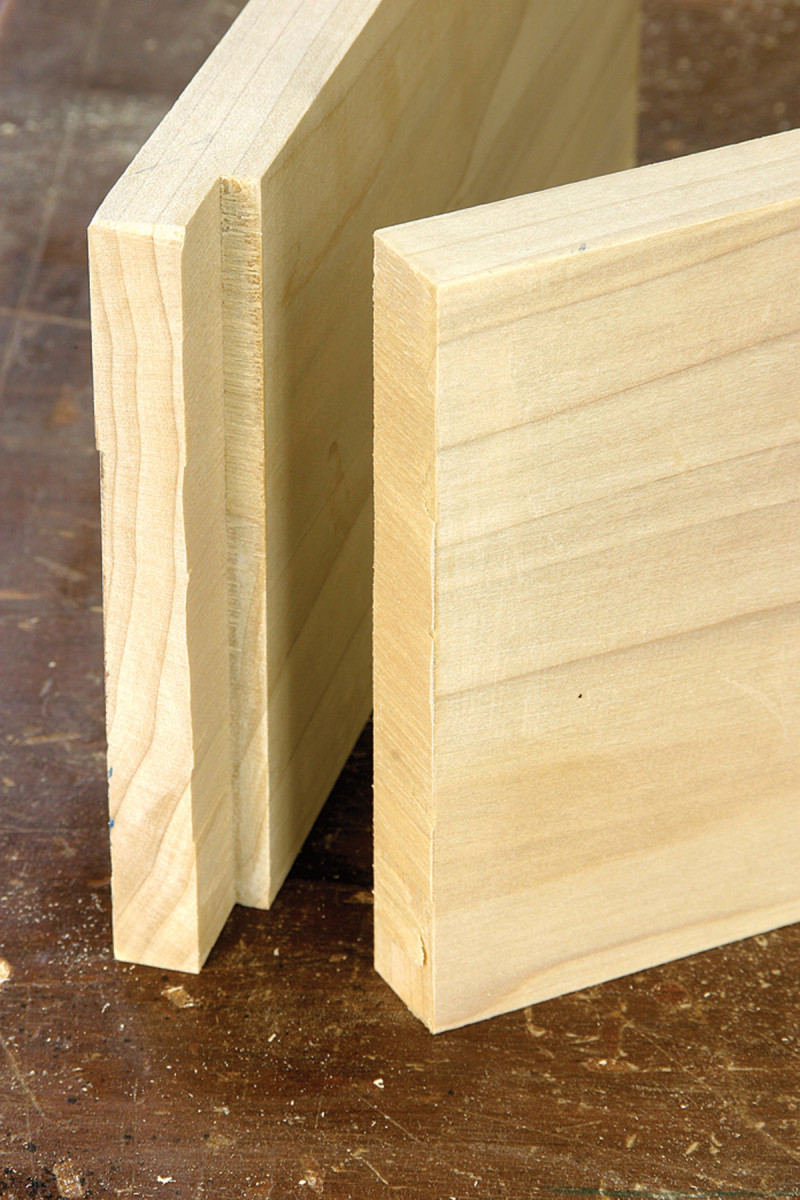
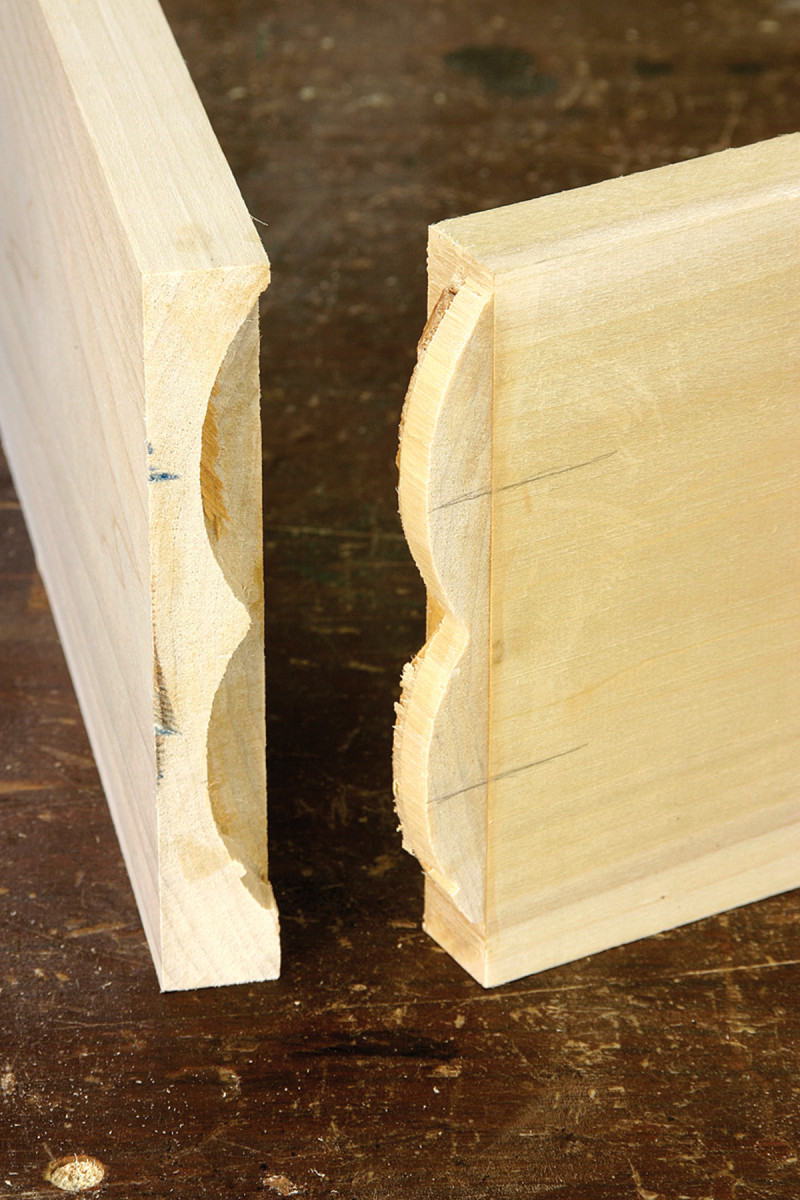
Although the tongue added to the rabbet joint made it stronger mechanically, it left a weak point in the wood that broke on the joint line.
In the housed rabbet joint the wood broke neatly across the joint line, leaving a thin layer of long grain intact. The break continued across the short tongue that held firmly to the end grain of the two adjacent surfaces. This joint was theoretically stronger mechanically, but it reveals our second important discovery: The wood will break at the weakest point within or near the joint.
This is important when designing joints. The sizes of the components of the joint are important, but so is the amount of wood next to the joint. The mortises and tenons on my coffee table weren’t bad, but there wasn’t enough wood left beyond them for the joint to stay together under stress.
A joint will fail at the weakest point, even if it is in the surrounding wood, as seen in this biscuit joint.
The biscuit joint above held together where the biscuit was in contact with the wood, but the wood itself broke out at the short grain at the edge of the biscuit. The weakest point wasn’t at the joint; it was just beyond it.
Stronger Carcase Joints
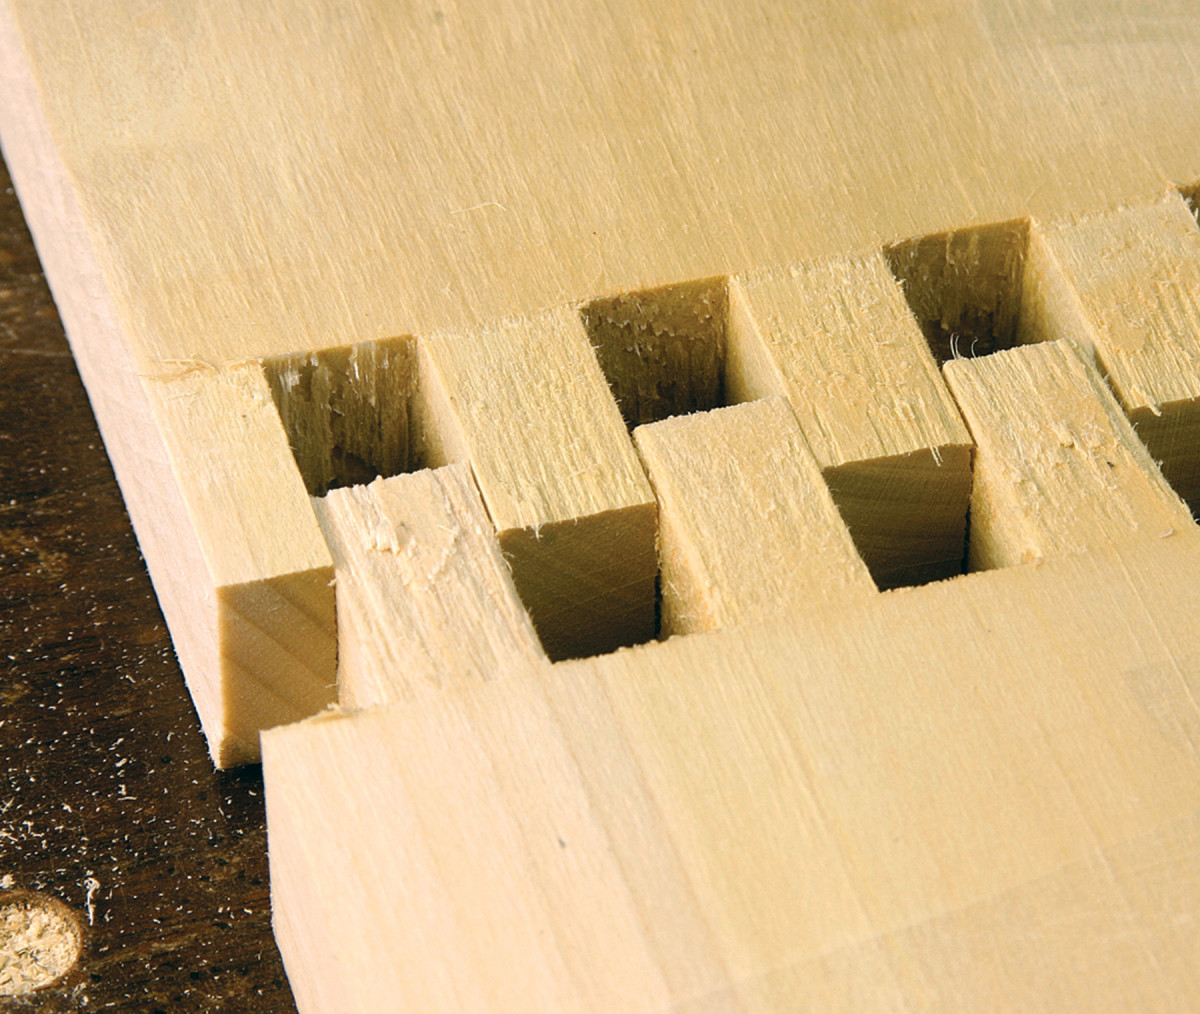
As we expected, box joints and dovetail joints were significantly stronger than the first group of joints. They each survived the impact from the smaller anvil with minimal damage. With the larger anvil, the dovetail at top gave way but the two pieces did not completely separate (top). Notice that the glue held on to the end-grain surfaces, and that the wood fractured on the short grain of the tails. The joint opened up about halfway, where the tails and pins wedged against each other.

Notice that the wood failed at the short grain on the tails, and that the glue held on the end grain between the pins.
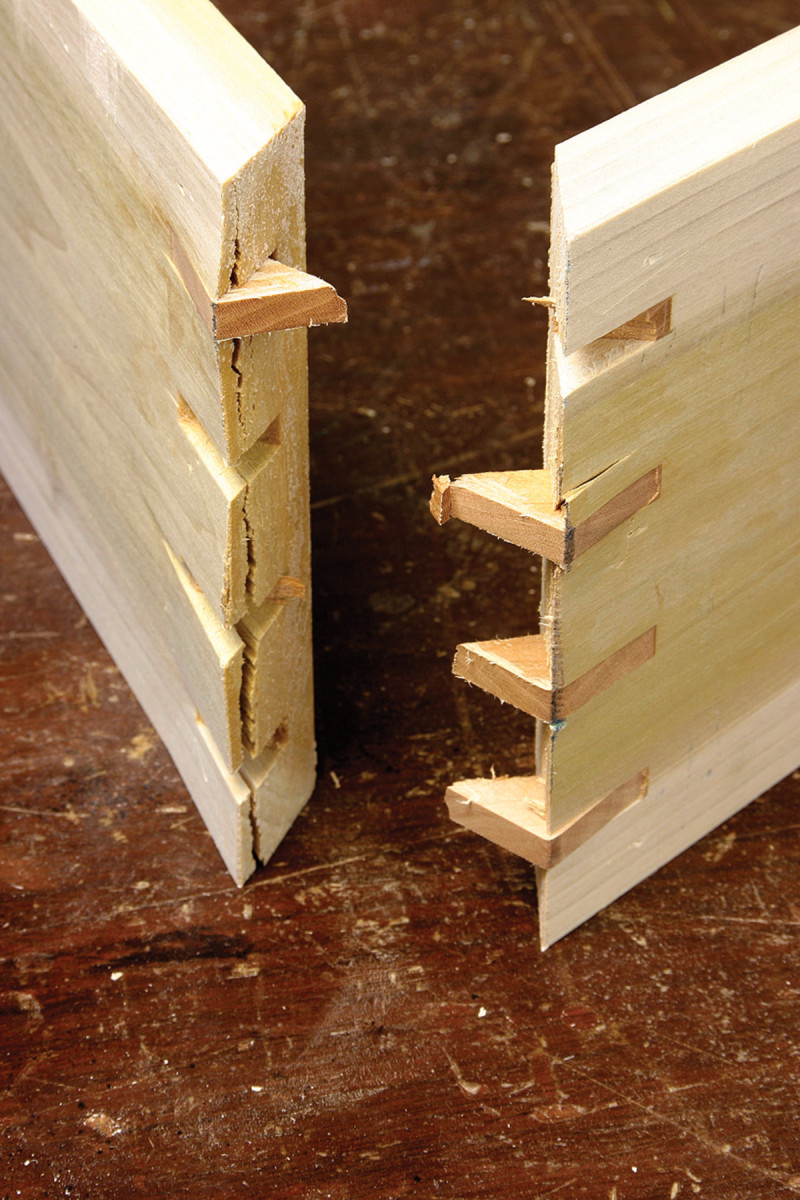
The box joint doesn’t have the wedge strength of the dovetail, and folds like a hinge. Again, notice that the glue line held where long grain meets end grain.
The parallel surfaces of the box joint above, without the benefit of the dovetail’s wedging action, unfolded like a hinge. Once again, failure occurred from the wood fibers at the glue line, not the glue itself.
The small anvil bounced, but the large one caused the wood to fail and the glue lines to fracture in this splined miter joint.
The last box-type joint we tested was a miter, reinforced with cross-grain splines. This held as well as the dovetail under the 26 lb. anvil, but it broke when the heavier anvil fell.
Stout Frame Joinery
We then turned our attention to joints commonly seen in tables and chairs as opposed to boxes and cases. In particular: mortise-and-tenon joints, and some of the methods that have been developed as alternatives such as dowels and pocket screws.
The small anvil bounced, but the large one caused the wood to fail and the glue lines to fracture in this splined miter joint.
 One of the big questions we had was how pocket screws would compare to mortise-and-tenon joints. In this test, the pocket screws did well under both anvils.
While this was impressive, I would be reluctant to use pocket screws instead of mortises and tenons in all applications. As the traditional joint fails, the tenon pulls away from the mortise gradually before letting go completely.
With pocket screws, when the joint is stressed, the screw holds on to the wood until the wood breaks, leaving something that likely can’t be repaired. The long-term performance is also a concern. In many antiques with screwed joints, annual shrinking and swelling crushes the wood surrounding the screw, defeating the screw’s ability to hold.
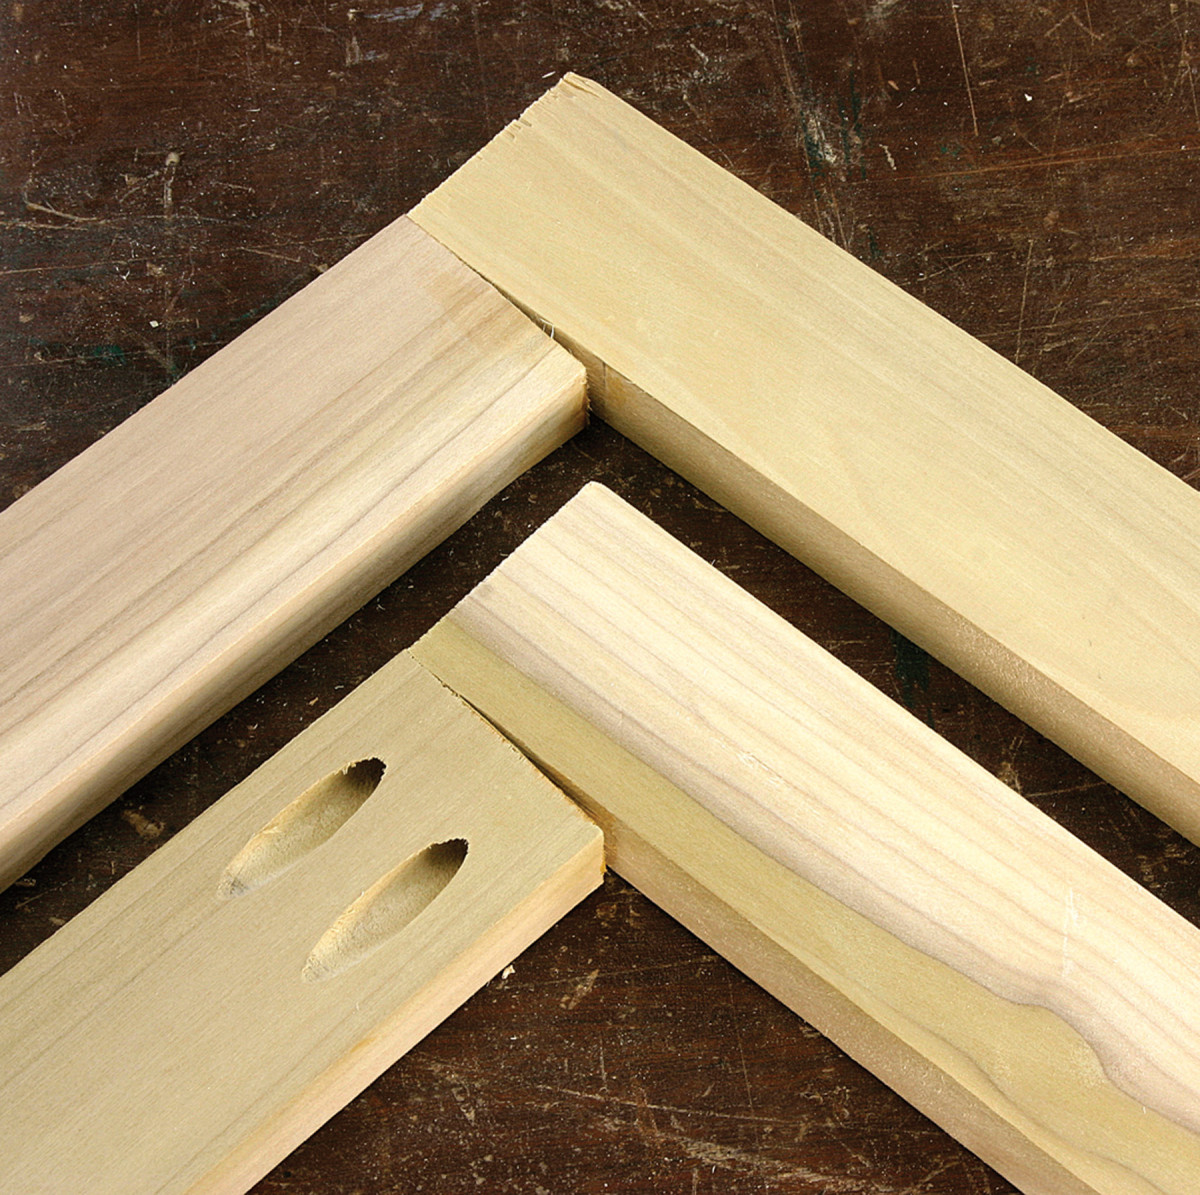
Not much material was left between the mortise and the edge of the wood in the thinner material.
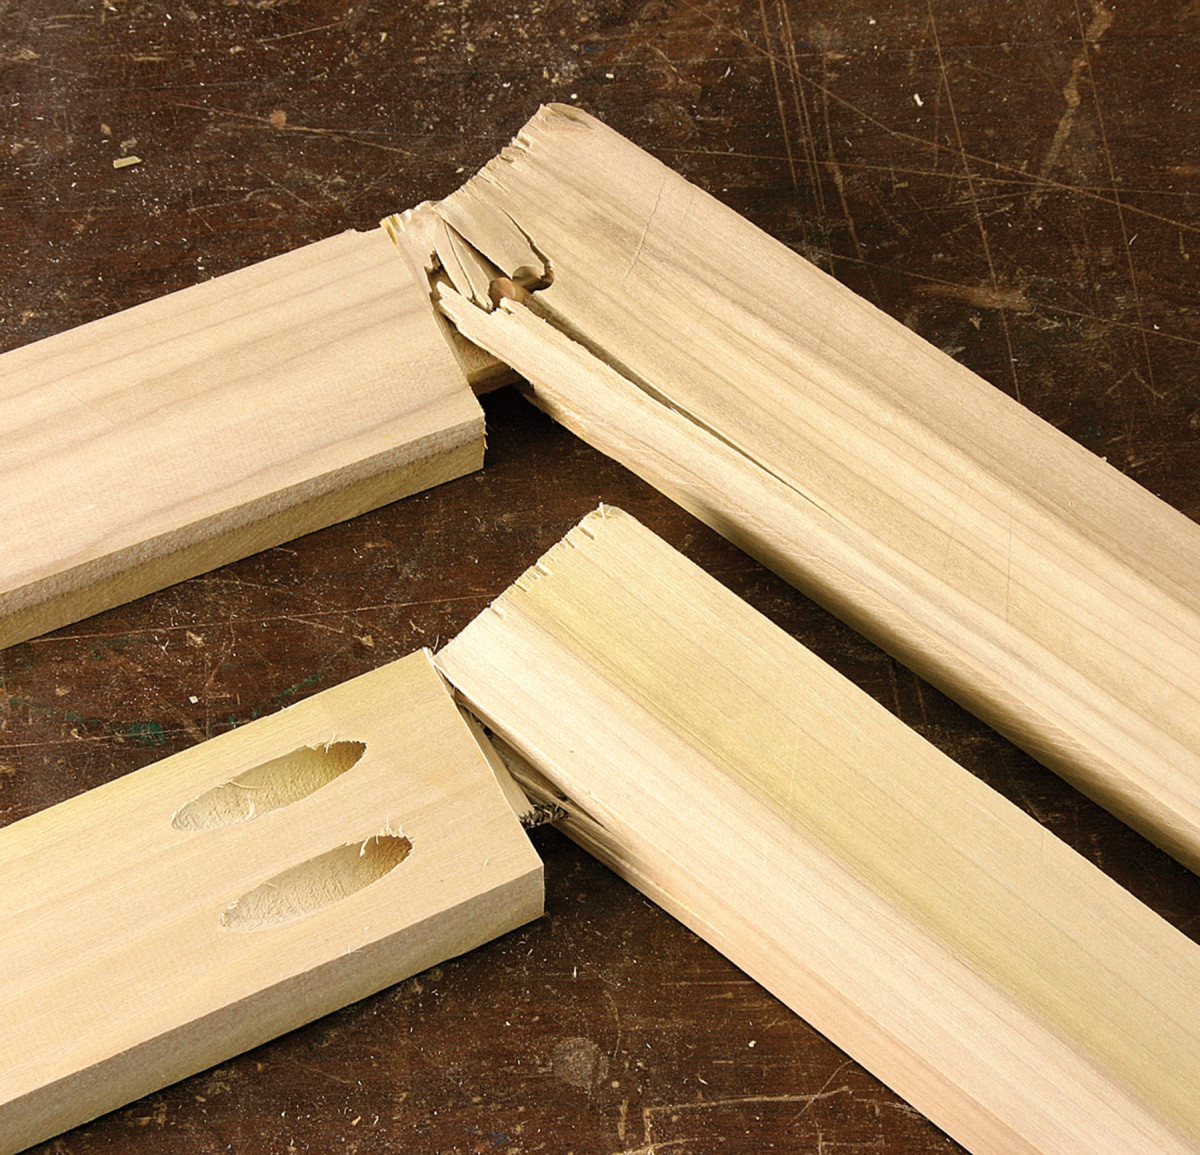
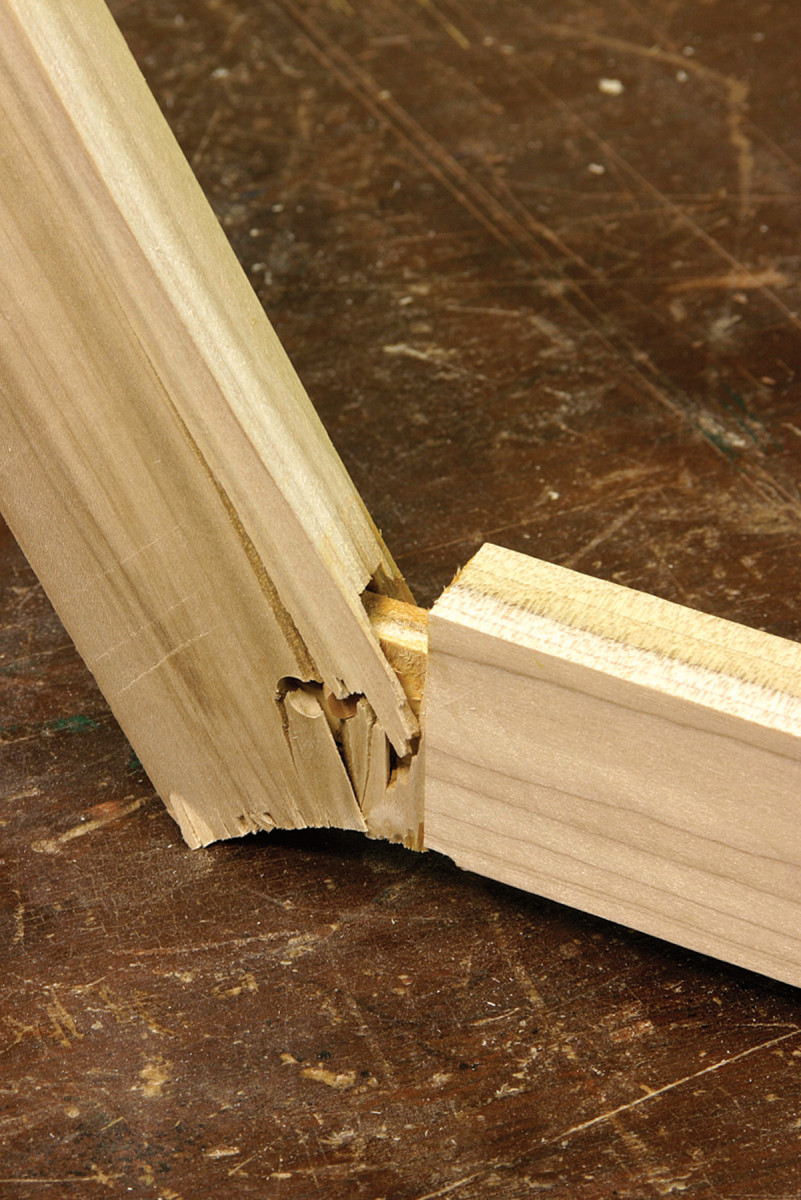
In testing our drawbored mortise-and-tenon joint, the 3⁄8“-thick tenon was almost half the thickness of the 7⁄8“-thick pieces being joined. The amount of wood remaining next to the mortise was thin enough to be fractured on impact.
n this mortise-and-tenon joint, more material beside the mortise made the difference between minor damage and complete destruction.
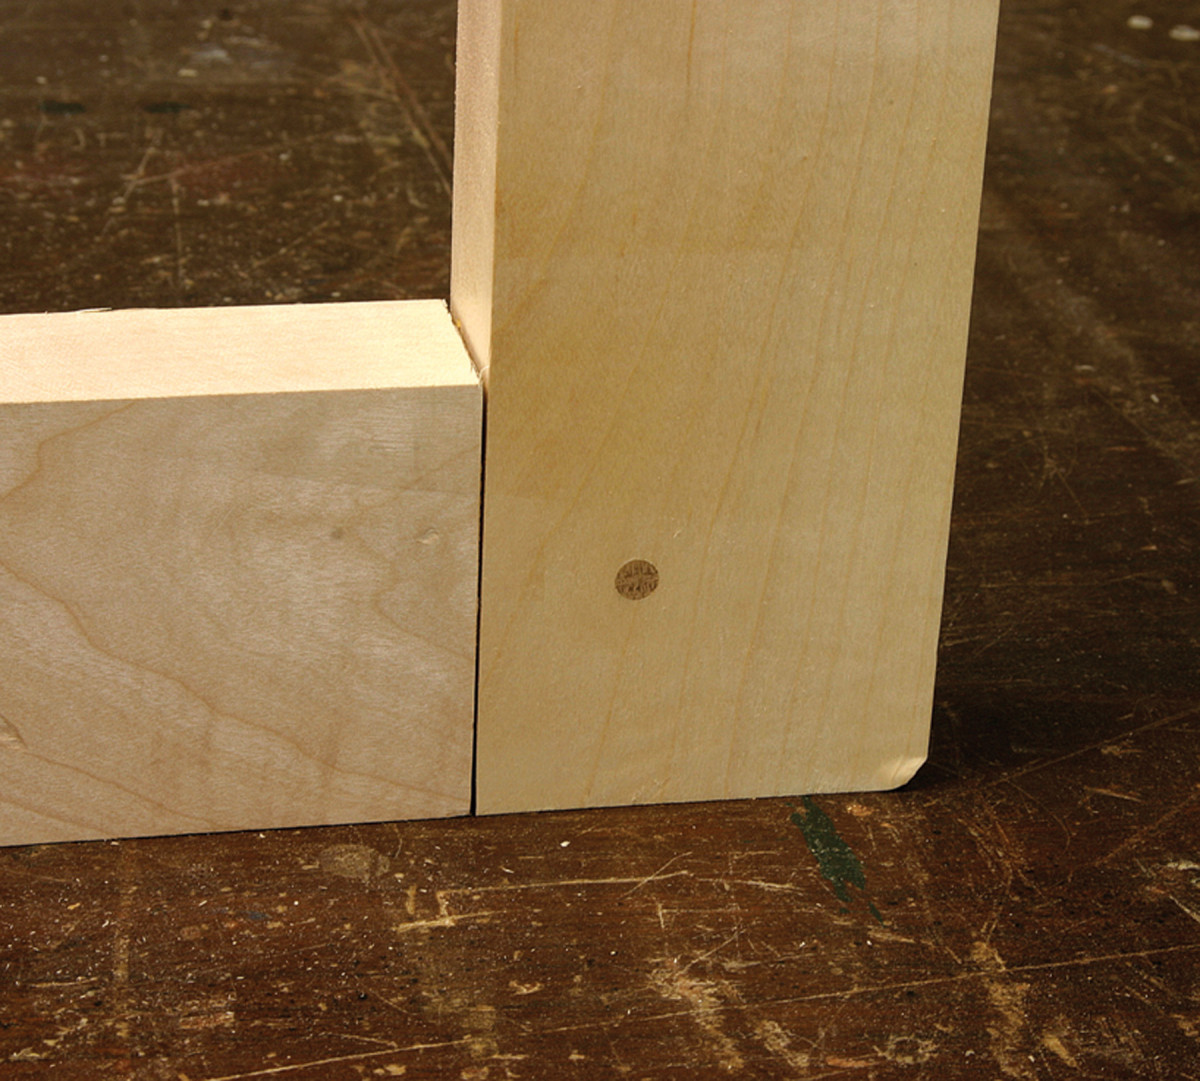
A larger joint was then tested, with a 1⁄2“-thick tenon in 13⁄4“-thick material. The tenon was pulled tightly together with a 1⁄4“-diameter oak dowel. The thicker components, along with a tenon less than one-third the thickness of the stock, produced a joint of great strength.
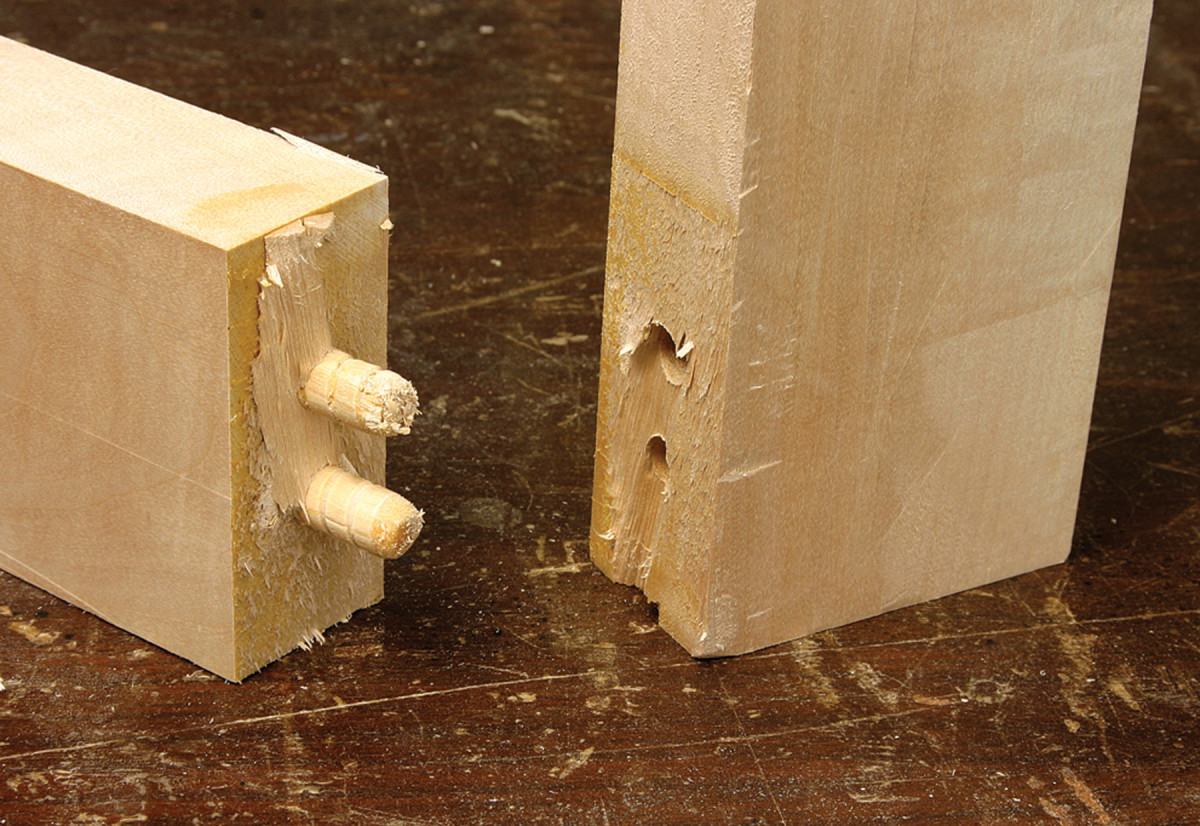
In this dowel joint, the only strength is the long grain of the dowel to the long grain of the piece on the left. At every other point, the joint is weak.
A dowel joint of the same-size components, however, did not hold together. The dowels held when the grain in the dowel was parallel to the grain of the wood (below right). In the other direction, where the grain of the dowel was 90˚ to the grain of the wood, the glue joint failed and the dowels popped out of their holes.
Seasonal wood movement is also a long-term issue with dowel joints. As the wood and the dowel expand and contract, the dowel and the hole change shape from round to oval. Over time, only a tiny area of contact between the dowel and the wood remains.
Designing for Time
Nearly any joint can work short-term, but if your sights are set higher than that, consider not only how you will join your components, but also the sizes and scale of the components.
In preparing these joints for testing, I used sizes and proportions that I would normally use. Most of these joints I would still make the same way. If a biscuit or rabbet location was changed in location or proportion, the failure would likely still occur, but on the other side of the joint. But I don’t think I will ever again make a mortise that is more than a third of a piece’s thickness.
Understanding what the wood will likely do, and what to expect from a glue in any given situation is a lesson well worth going to a few extremes to learn, though you can do this without an anvil.
When you try a new method, make some practice joints and see how well they hold together. Sam Maloof once tossed one of his early chairs from the roof of his garage just to see how strong it was. He learned something about his joinery methods that day. And that’s the same lesson here: Our successes emerge from the splinters of our failures.
Here are some supplies and tools we find essential in our everyday work around the shop. We may receive a commission from sales referred by our links; however, we have carefully selected these products for their usefulness and quality.