We may receive a commission when you use our affiliate links. However, this does not impact our recommendations.
Master this most basic turning tool.
When I introduce someone to woodturning, I choose the spindle roughing gouge. When I work with kids, it’s the first tool I place in their hands. Why? Because, used correctly, the spindle roughing gouge is the safest, most user-friendly turning tool of them all. And don’t be fooled by its name. The spindle roughing gouge can leave a very clean surface. Master this tool, and you’ll learn basic techniques that apply to using virtually all cutting-type turning tools. However, the spindle roughing gouge must be shaped and sharpened correctly and used in the appropriate applications—or its friendliness can quickly disappear.
Designed for spindle work
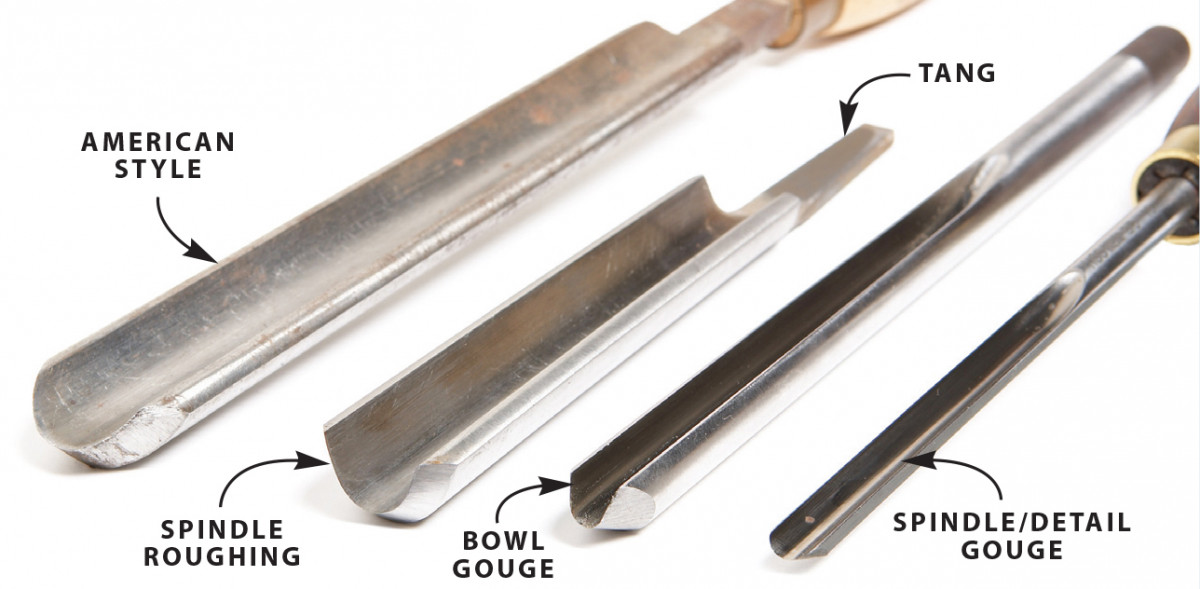
Photo 1. The spindle roughing gouge is one of four gouges commonly used for turning. It is instantly recognizable by its deeply fluted semi-circular shape, vertically ground edge, and tang-style end.
A spindle roughing gouge is designed to quickly shape square wooden blanks that are mounted on the lathe so the grain runs parallel to the bed. It’s a great tool for removing the blank’s corners, creating cylinders and straight tapers. It can also shape convex and concave tapers, if the curves are gradual.
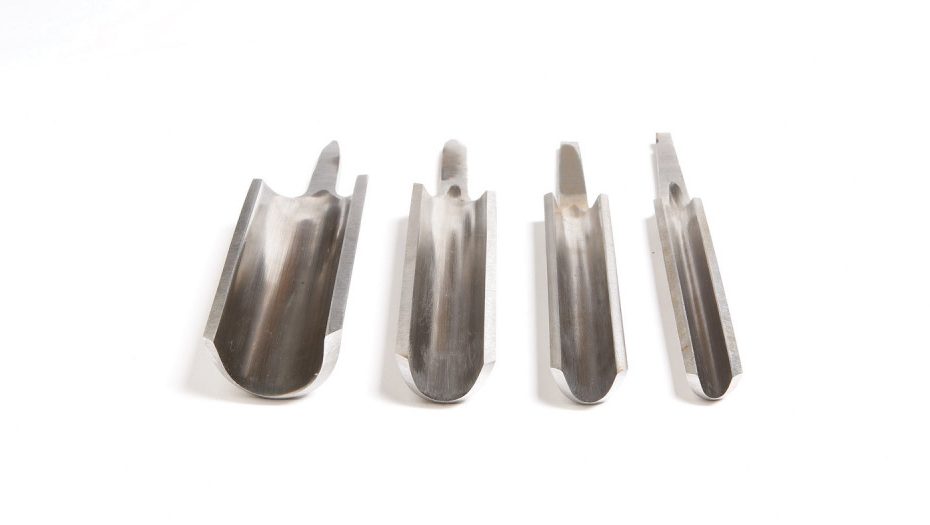
Photo 2. Spindle roughing gouges come in several different sizes. Widths are measured across the inside of the flute. Buy the largest size you can find.
Borrowed from, and primarily made in England, this tool is deeply fluted (curved), and its cutting edge is straight (Photo 1). In the U.S., most turning sets come with a completely different roughing tool, a large, shallow gouge with a domed or fingernail shape.
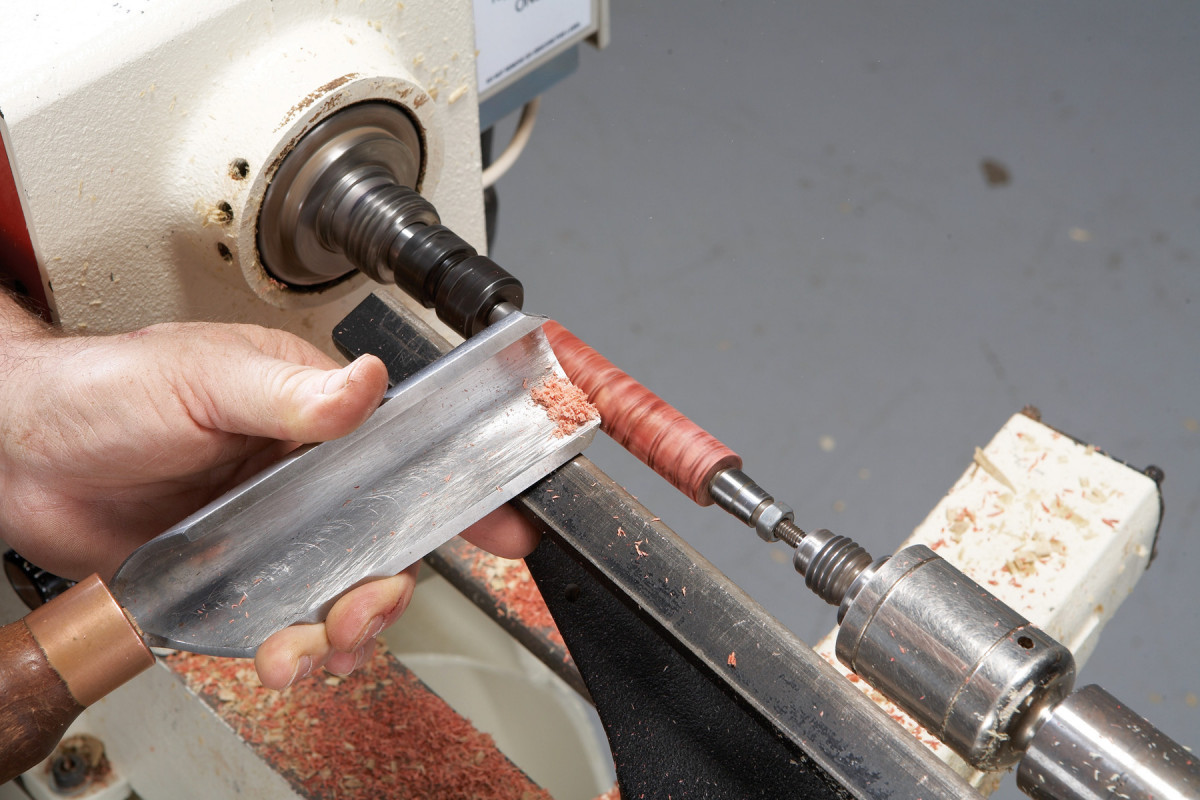
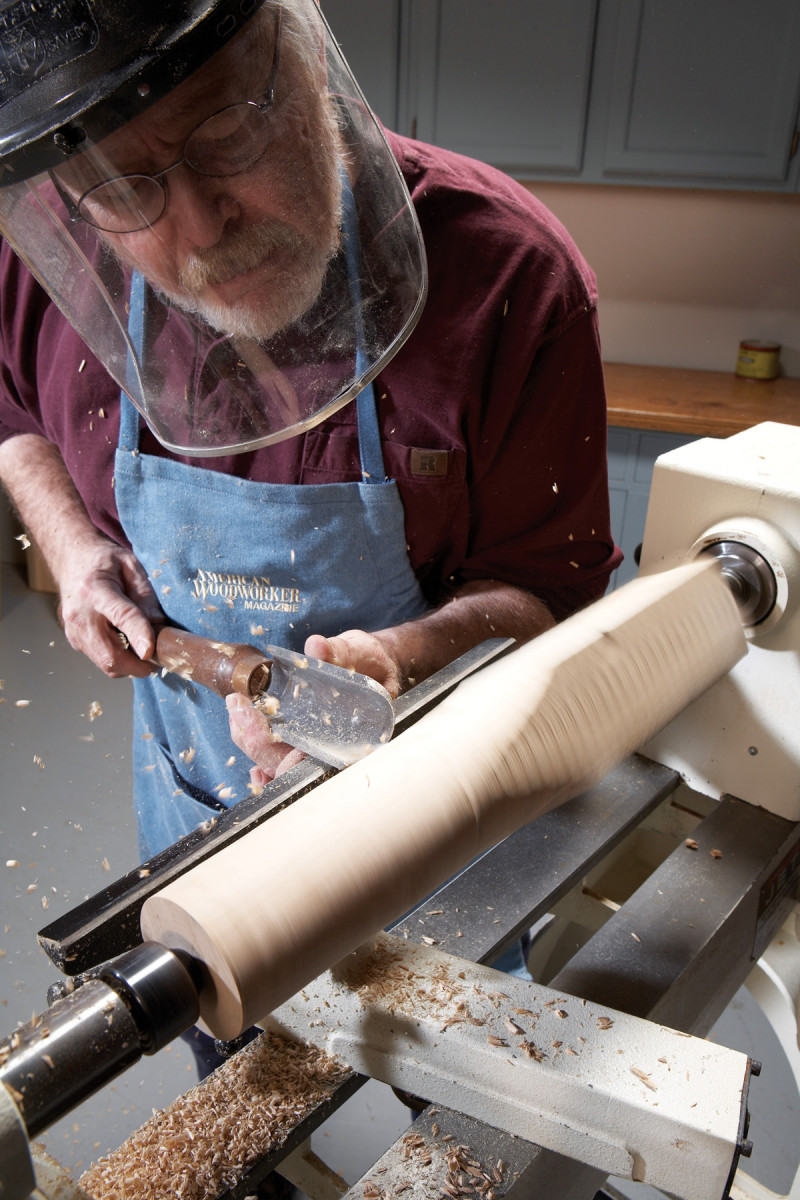
Photo 3. Use the spindle roughing gouge on any surface that is cylindrical or gently tapered. The size of the stock doesn’t matter: A large tool will always do a better job of leveling the surface than a small one.
This tool looks a bit like a spindle detail gouge on steroids. Users of “American style” roughing gouges are usually instructed not to attempt removing a blank’s square corners on the lathe; instead, they’re directed to saw off the corners before mounting the blank.
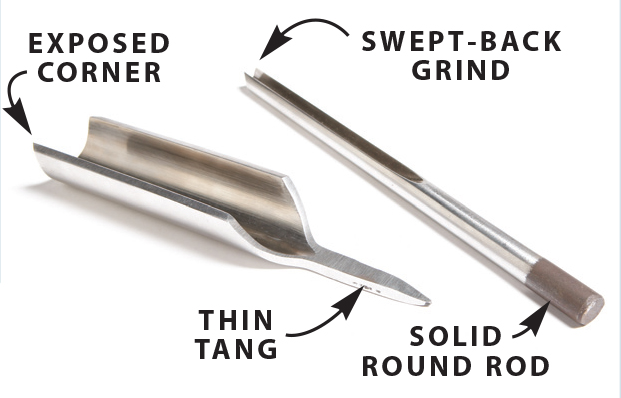
Photo 4. Never use a spindle roughing gouge—which is specifically designed for surface work—for bowl turning. A bowl gouge is designed to reach deep inside a bowl. It’s machined from solid rod, so it can extend far beyond the tool rest, and it has a swept-back grind, so the corners won’t catch.
Spindle roughing gouges are available in several sizes. My advice is to buy the largest size (Photos 2 and 3). The spindle roughing gouge is not the best choice for detail work or for making quick turns. And don’t even think of using it to rough out a bowl or vessel blank (Photo 4). Its large surface area makes it awkward to maneuver in a confined space, its straight-edge grind leaves exposed corners that will easily catch, and its tang is not strong enough to engage the cutting edge far beyond the tool rest. Using a spindle roughing gouge for bowl turning is dangerous; use a bowl gouge instead.
Strengths
The spindle roughing gouge is a great choice for creating cylinders the best tool for removing the corners on any square stock measuring up to 5″ by 5″. It’s much faster than tilting the tablesaw blade and running the stock through numerous times, and safer, too. The spindle roughing gouge is also a great choice for creating cylinders (such as on ink pens, rolling pins, columns, etc.) and straight tapers (Photo 4). If the cuts are gradual concave or convex (as on a table leg or tool handle) the spindle roughing gouge performs well (Photos 5 and 6). Don’t ask the tool to turn quickly or detail—is simply does not do it with a lot of control.
Using the spindle roughing gouge
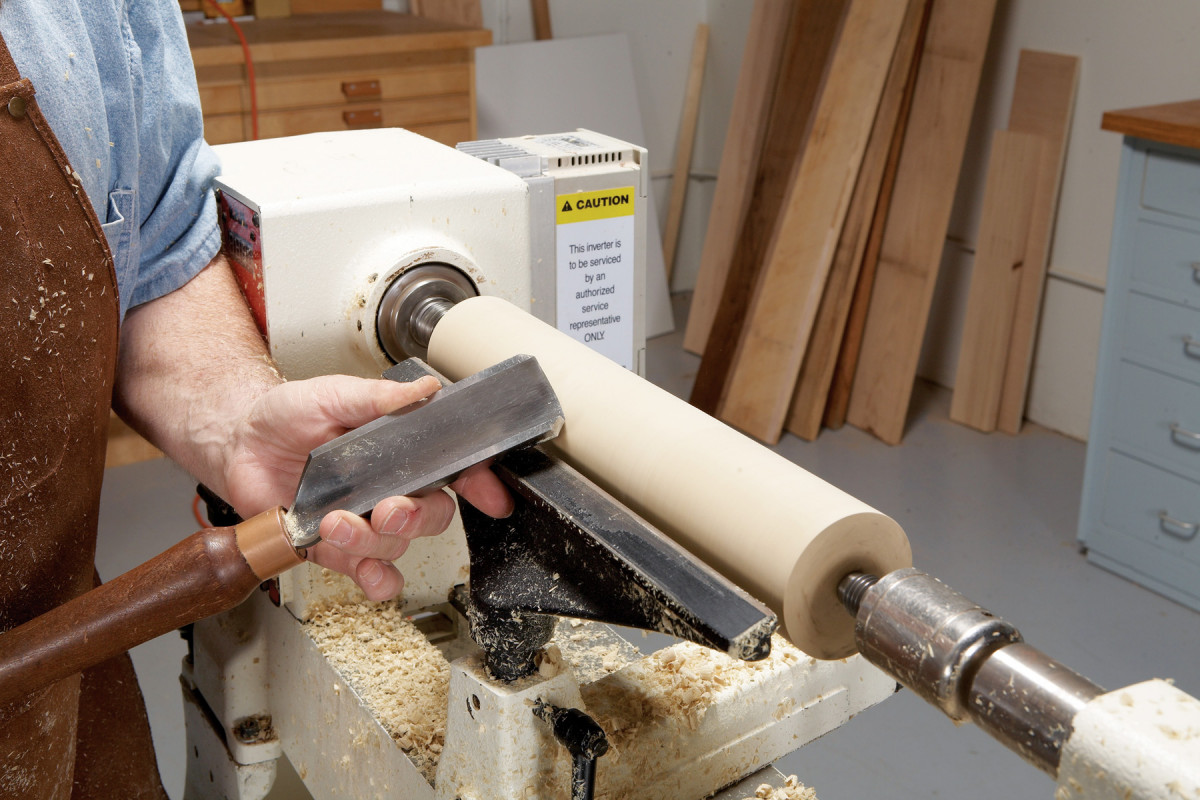
Photo 5. To use the spindle roughing gouge, point the flute in the direction of travel and the handle held low. Move the tool forward so its bevel contacts the wood. Raise the handle slightly, until the edge starts to cut. Hold the tool steady and move in the intended direction.
The spindle roughing gouge is a cutting tool (some turning tools are designed for scraping), so the edge requires support from the bevel during use (Photo 5). Start with the flute on the tool rest and the handle held low. Point the flute in the direction of travel. Move the tool forward so its bevel contacts the wood (no wood chips or dust should fly when the bevel touches). Raise the handle slightly, to engage the wood. Make sure the cutting occurs on the lower half of the flute. Then move the tool in the intended direction. When you change directions, the opposite half of the flute does the cutting.

Photo 6. To remove the corners from a square blank, start in the middle. Point the flute in the intended direction and keep the handle low. Engage the wood and move toward the end. Reverse directions to finish the job.
If you raise the handle too far, the tool will stop cutting and begin to scrape. Scraping dulls the tool, tears the wood surface and takes more energy to make the cut—this usually results in some loss of control.
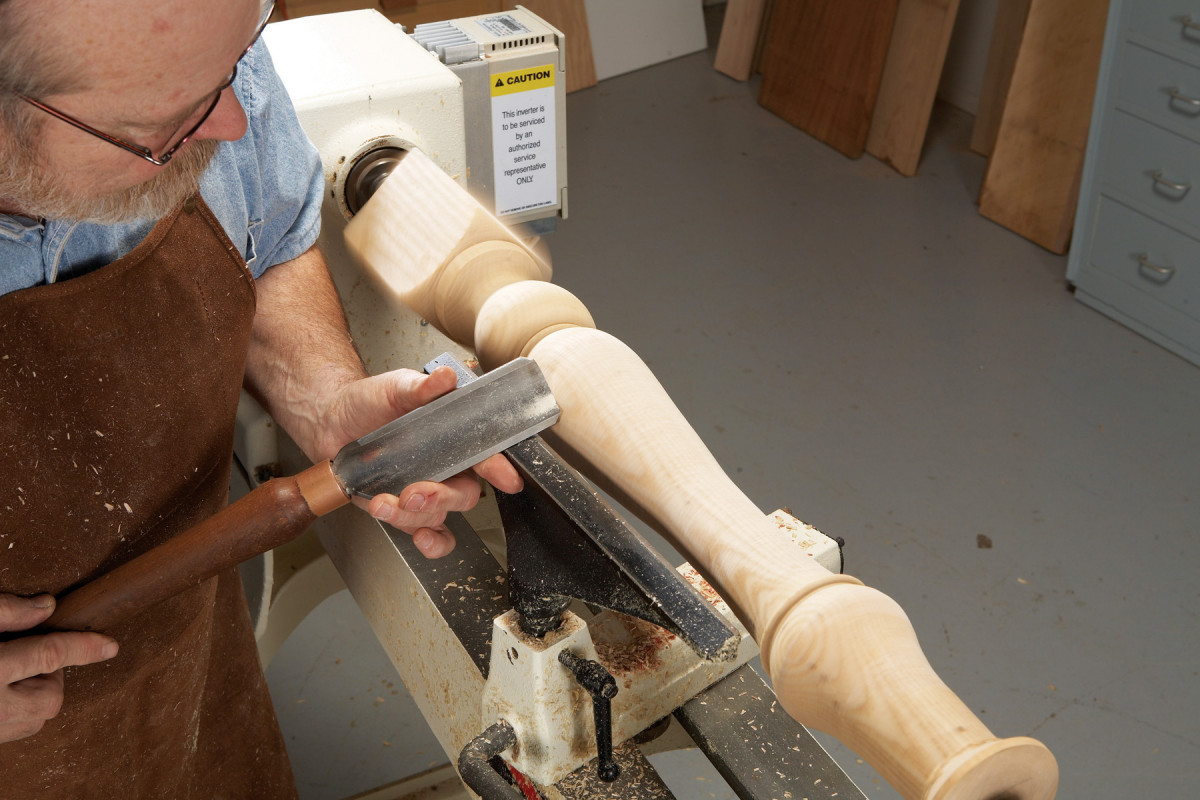
Photo 7. This taper swells at the bottom, so it requires working from both directions. The spindle roughing gouge can create long tapers and shallow concave or convex shapes. It can complete this leg’s taper, but it can only rough out the remaining shapes.
As a general rule, keep the tool’s leading (lower) corner away from the wood. But if you do happen to run it into the wood, it won’t catch; when you use the proper technique, this tool is very safe.

Photo 8. Virtually all of the shapes on this handle can be completed with the spindle roughing gouge. Rolling the ends and cutting the flat area for the ferrule are the exceptions.
To rough (remove the corners from) a square blank, start in the middle (Photo 6). When working difficult woods that are quite hard or “chippy,” it’s best to nibble off the corners in several light passes rather than with a few heavy cuts.
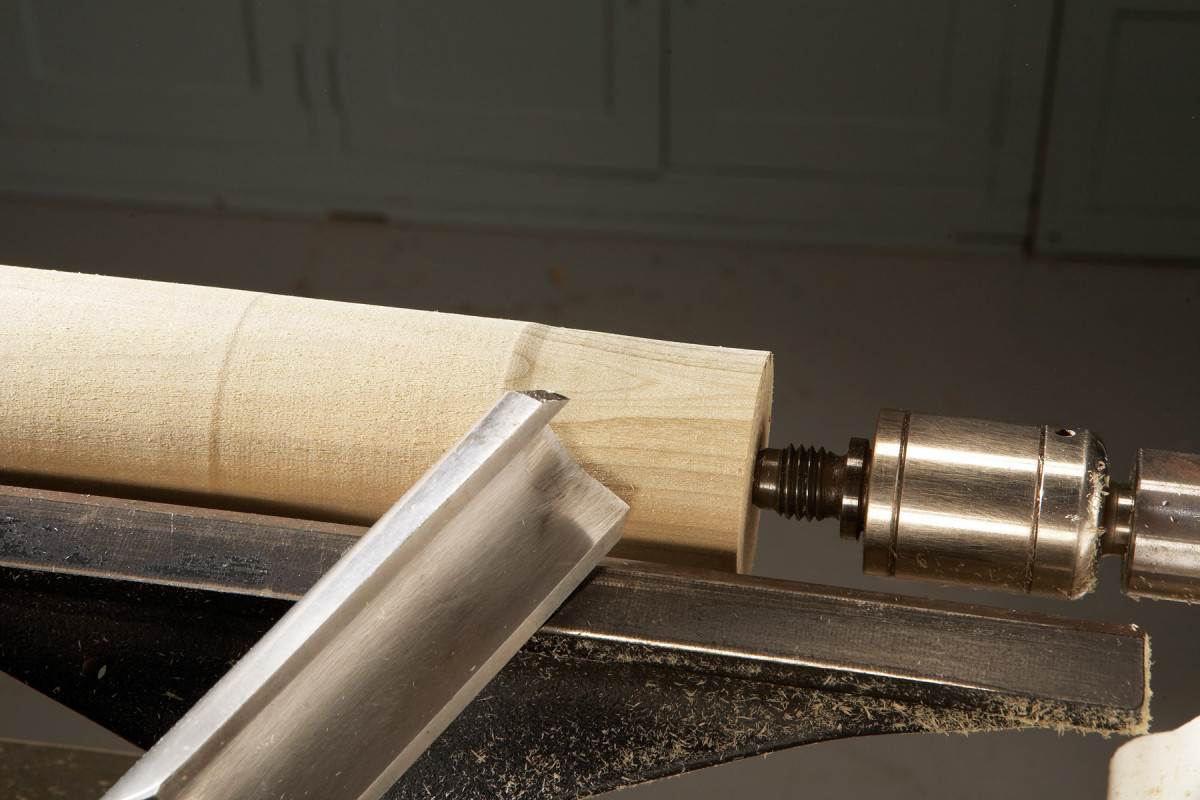
Photo 9. This “roughing” gouge can leave a very clean surface. Simply angle the flute more steeply, about 45˚ to the lathe’s axis, and make light passes.
To make a uniform cut while creating a cylinder or straight taper, bear lightly against the tool rest with your index finger and maintain consistent pressure as you go. For concave and convex shapes, work from larger to smaller diameters (Photos 7 and 8). To make smooth finishing cuts, angle the tool to about 45 degrees to the axis of the lathe and make light cuts (Photo 9).
Shaping and sharpening

Photo 10/11. The edge of this spindle roughing gouge is properly shaped. When viewed from above, the edge runs straight across. When viewed from the side, the edge appears vertical. It can also cant slightly back. The edge should never extend forward at the top.
Preparing any turning tool for use includes these three steps: Shaping the profile, putting an edge on that shape by grinding and completing the edge by honing. From above, the spindle roughing gouge’s edge should run straight across (Photo 10).
From the side, the edge should appear vertical or canted back at the top, no more than 5 degrees (Photo 11). The bevel angle should be approximately 45˚. If your gouge does not have this profile, regrind it so it does. Set your grinder’s tool rest so it is perpendicular to the face of the wheel.
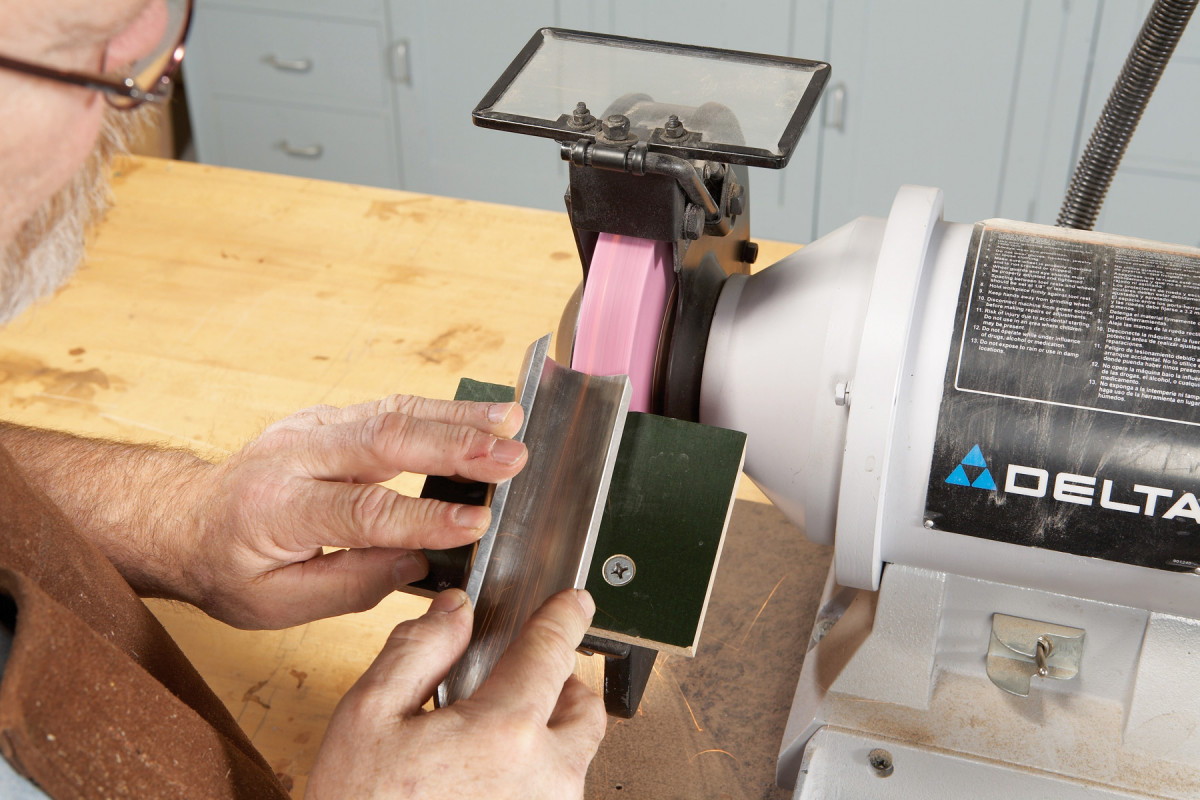
Photo 12. To sharpen the edge, grind a 45˚ bevel on the back. Hold the tool parallel with the wheel’s edge and flat on the tool rest. Then roll it slowly from corner to corner. Stop grinding when the sparks appear evenly along the edge.
Once you’ve shaped the edge profile, set your grinder’s tool rest to create the 45˚ bevel angle that will sharpen the profile’s edge. Hold the tool flat on the rest, with the tool’s edge parallel with the grinding wheel. Start at one corner and slowly roll the tool to the other corner (Photo 12). Grind with control—slowly and deliberately. Be sure the grinding wheel’s first contacts are at the bevel’s bottom edge—never just below the cutting edge. Stop grinding when the sparks are gently coming over the top of the tool and appear evenly along the edge. Here’s a bench test for sharpness: If the edge appears black under a light, the tool is sharp. If you see white along the edge, it isn’t. (The edge of a sharp tool is ground to a point. Flat—non-sharp—areas appear white, because they reflect the light.)
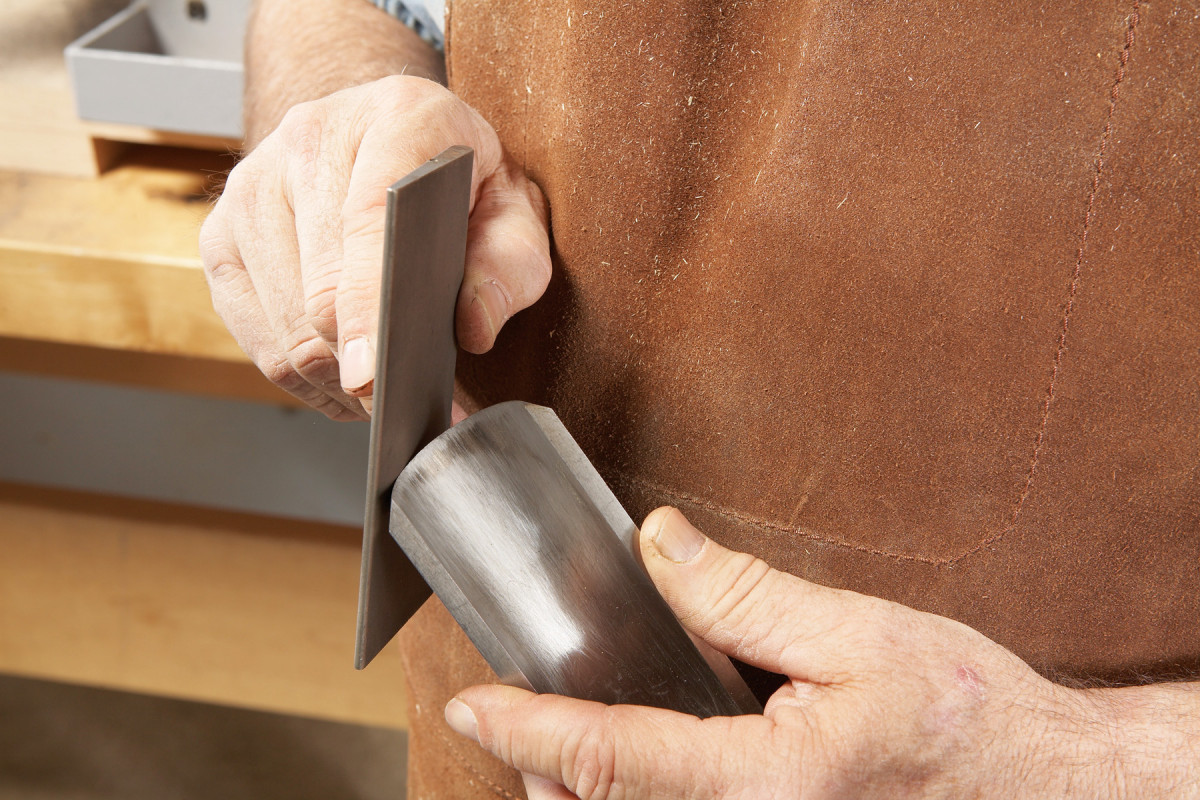
Photo 13. Honing completes the sharpening process. Hone the outside edge first. With the hone touching only the back of the bevel, start an up and down motion. Then—without coming off of the back—touch the area just below the cutting edge. Maintain this two-point contact to hone effectively.
To achieve (and maintain) a fine edge, you must hone the tool. For the best results with today’s woodturning tool steels, plan to use diamond plated honing materials. Hone the outside of the edge first (Photo 13). As you hone, be sure to maintain two points of contact on the bevel. The hone can bridge the bevel because the bevel is slightly concave, thanks to the radius of the grinding wheel. If you lift off the back of the bevel while honing, you will get a dubbed or rolled edge—this will actually have a dulling effect.
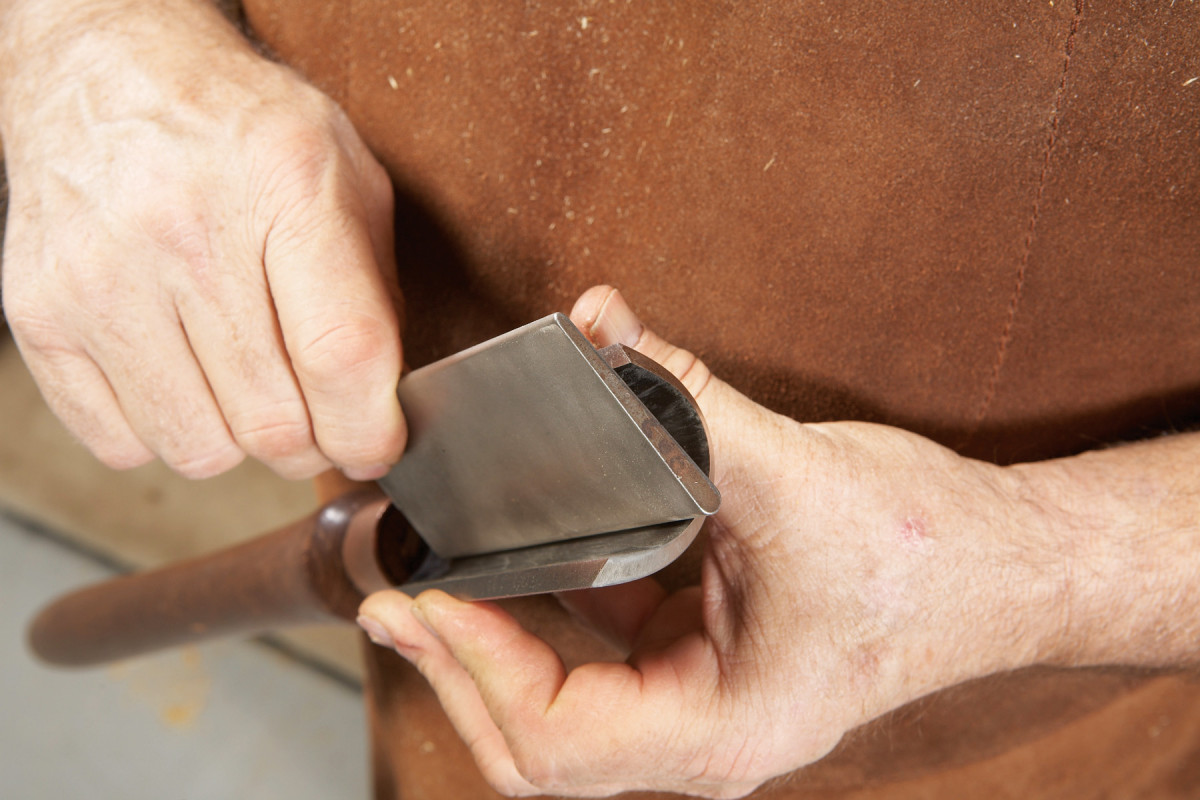
Photo 14. Use a slipstone (a hone with a rounded edge) to hone the inside edge. Hold its curved edge flat in the flute and move in an out without tipping forward, over the edge.
To hone the inside you’ll need a slipstone or a tapered cone. Hold the slip or cone flat in the flute of the tool and follow the shape of the edge (Photo 14). If you tip over the outside of the edge you will dull it.
While using the tool, hone it at the first signs of dullness (more pressure required to cut, torn fibers, short chips or dust, a flat or dull sound when cutting). Return to the grinder if honing requires removing too much steel (because the concave area of the bevel has disappeared), if you let the tool get too dull for just honing, or if the edge was somehow damaged.
Here are some supplies and tools we find essential in our everyday work around the shop. We may receive a commission from sales referred by our links; however, we have carefully selected these products for their usefulness and quality.


![How To Sharpen A Gouge [Video]](https://www.popularwoodworking.com/wp-content/uploads/bfi_thumb/dummy-transparent-olcy6s63it1p9yp7uhusjas7c8kahafrhg9su7q9i0.png)