We may receive a commission when you use our affiliate links. However, this does not impact our recommendations.
Simple to advanced methods for precisely duplicating parts.
No other method for shaping is as fast or efficient as template routing. It works like this: the part to be shaped is fastened to the template; the router follows the template as it is guided around the template perimeter (Photo 1).
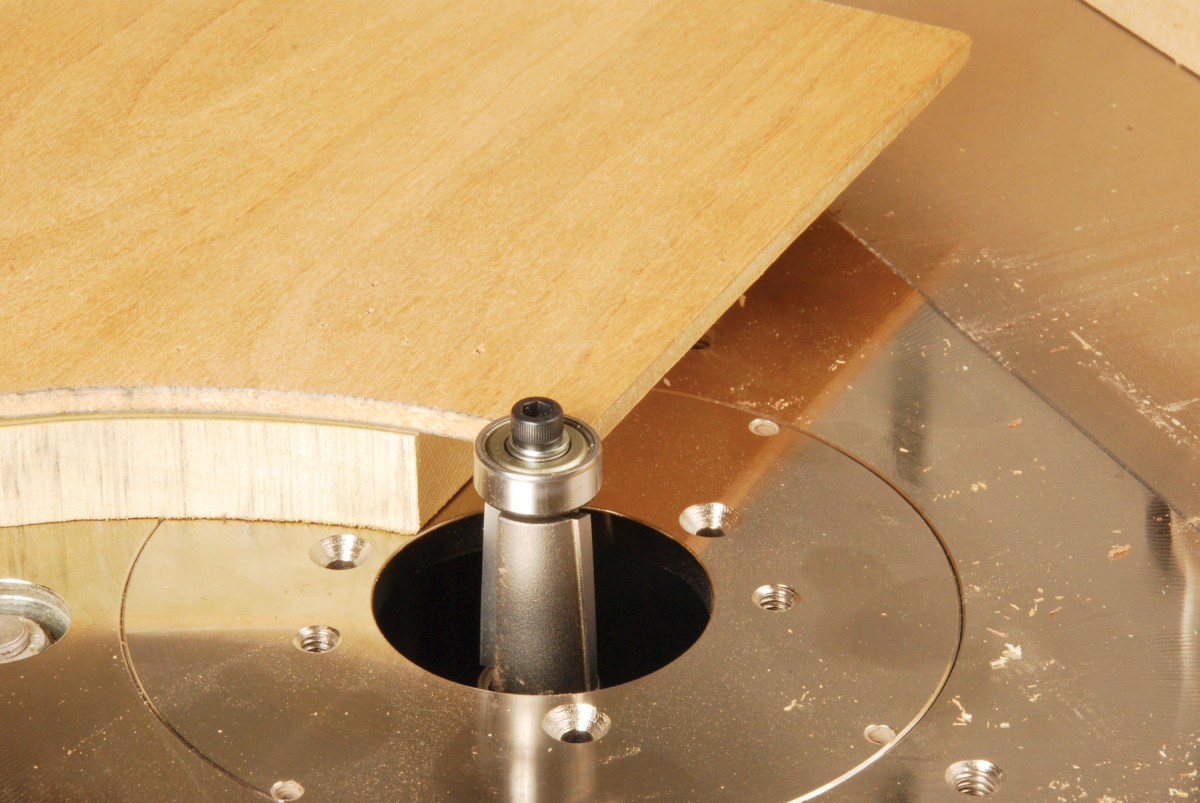
1. Template routing is a method of guiding a router bit with a shop-made pattern, or template. Here, the bearing on a flush-trim bit follows a plywood template.
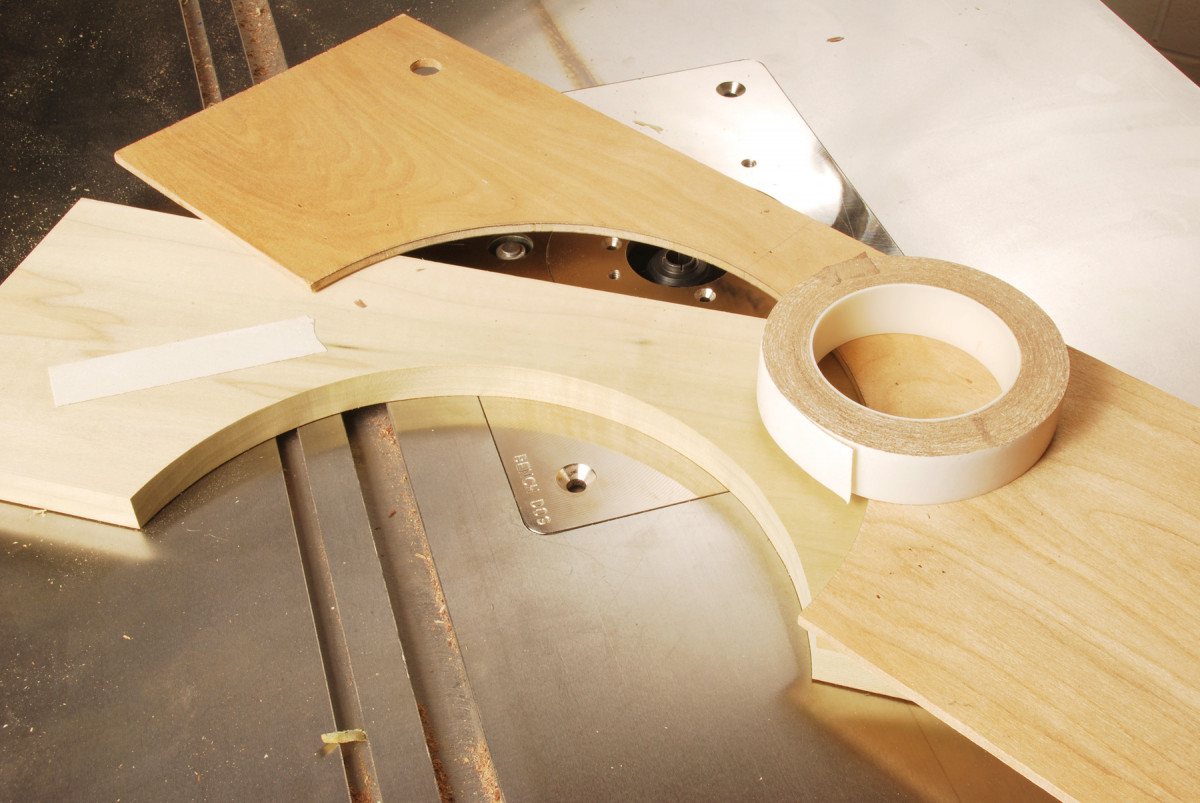
Template routing ensures that each part is identical; whether you’re shaping six parts or sixty, each one matches the template (Photo 2).
2. Template routing is ideal for making identical parts with smooth, uniform surfaces.
Template routing is versatile, too. You can use this method for shaping almost any part, large or small. It works for making straight cuts, curved cuts, and even for moldings. The part can be as ordinary as a straight-sided shelf for a corner cabinet or as complicated as a serpentine drawer front, which has a convex section between two concave ones.
There are many methods of template routing, which I’ll explain below. They range from simple techniques, such as routing that shelf, to advanced setups, such as shaping a complex S-curve molding for a tall clock (see Routing A Gooseneck Molding, further down).
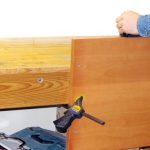
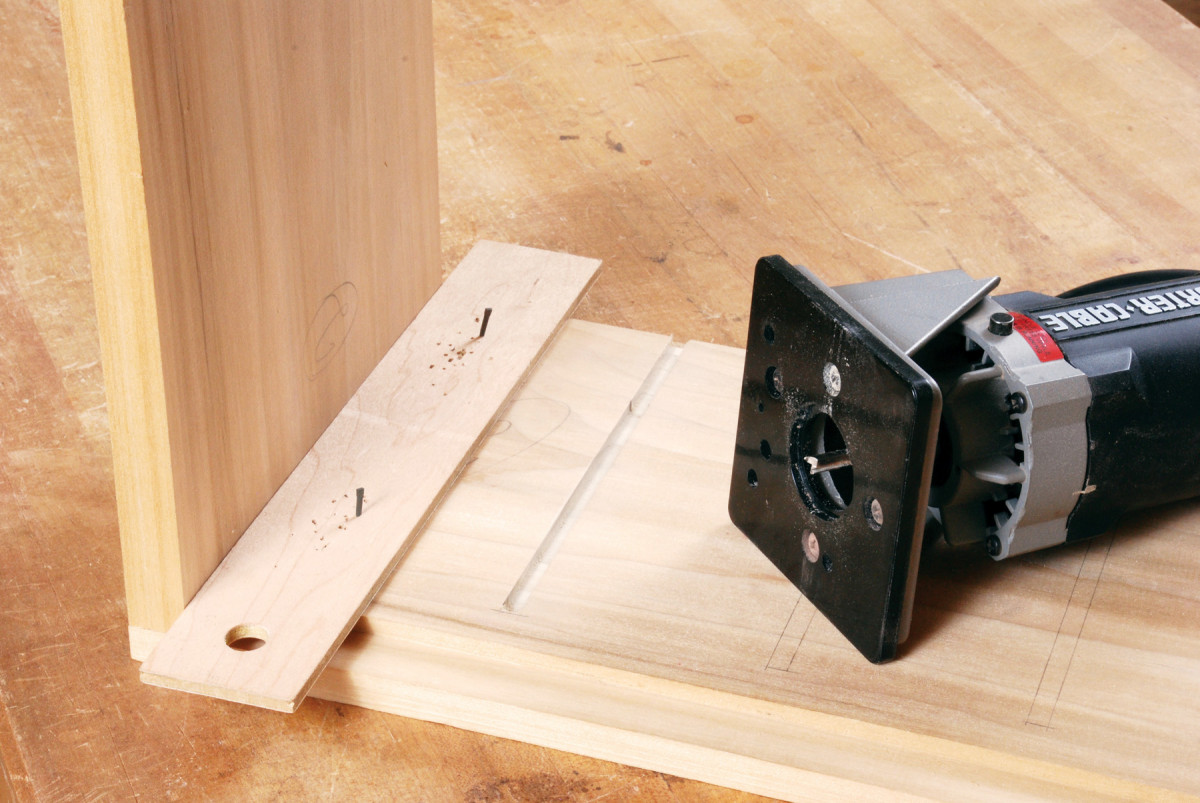
3. Template routing also works well for making precision joints. I designed this template for routing half-blind dovetails in a drawer front.
Template routing is not just for production work. In fact, there are some cuts, such as shaping the entire edge of a curved tabletop or cutting a curved groove, that cannot be routed any other way. Once you understand this technique and use it a few times you’ll begin to imagine other possibilities for its use. I even use a template for routing some joints (Photo 3).
Straight-sided parts

4. A straight cut that’s not parallel to another side is hard to set up on a tablesaw, so it’s an ideal candidate for template routing. This is a diamond-shaped shelf for a corner cupboard.
Even though most straight-sided work is crosscut or ripped on a tablesaw, there are times when the tablesaw is not as practical as using the router and a template. For example, the diamond shaped shelves of a corner cabinet have straight sides, but most of them are not parallel. Odd shapes such as these are quickly and easily shaped with a router, a template and a flush-trim bit (Photo 4).
Curved parts
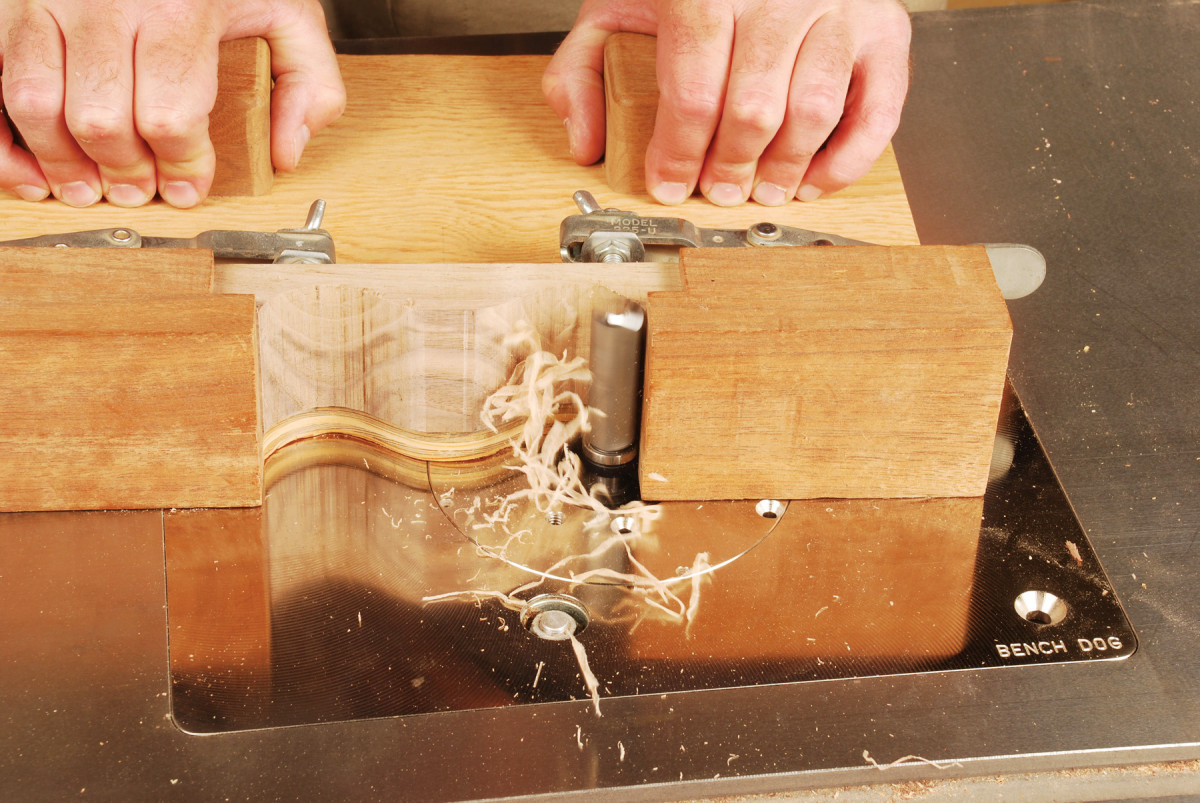
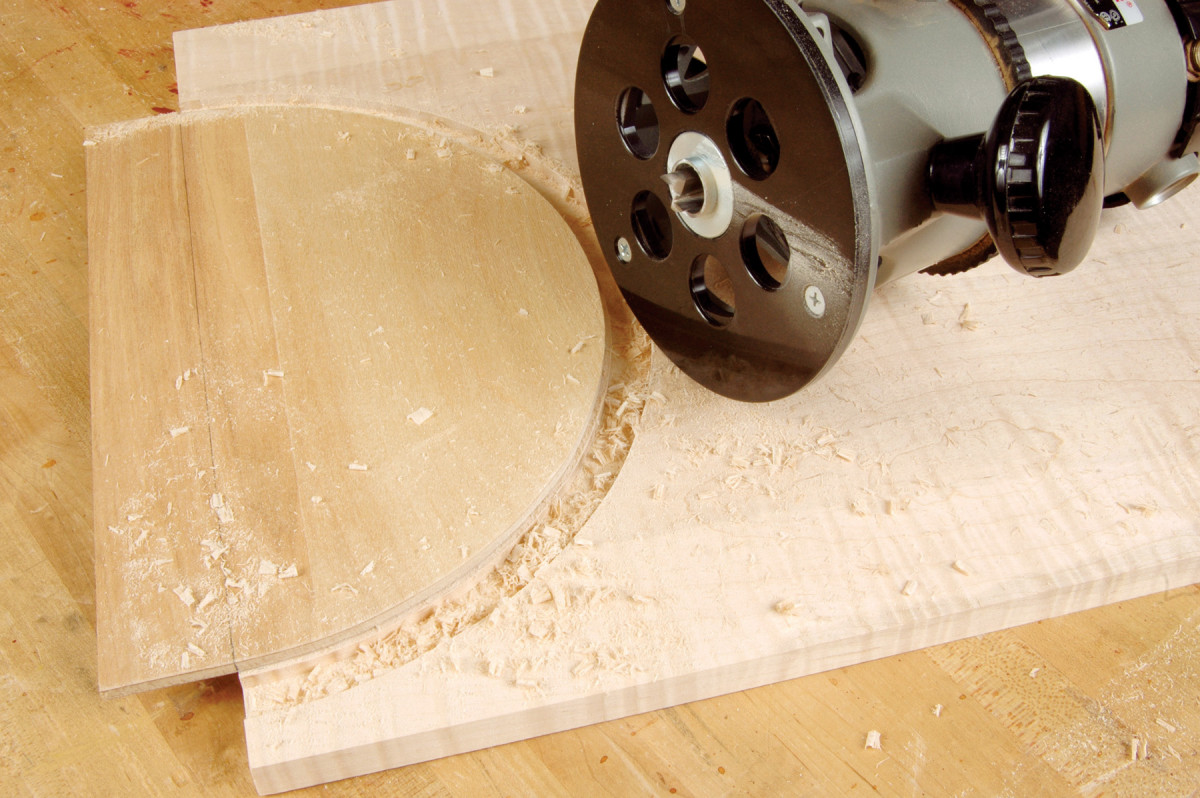
5. Curved parts are easy to duplicate by template routing. Here, I’m using a tall flush-trim bit to shape a small serpentine drawer front.
Curves can add a lot of interest to a piece of furniture; and many furniture styles, even Shaker, have curves. Curved legs and drawer fronts, for example, are easy to duplicate by template routing (Photo 5). All you have to do is to make one perfectly shaped template, and the router bit will do the rest of the work for you.
Seemingly difficult curves, such as a gooseneck molding, can be easily shaped with a template. After the rough shape of the molding is created with a bandsaw, a template and a flush-trim bit can be used to smooth away the bandsaw marks and fair the curves. Afterwards, the molding profiles can be shaped using an overarm guide at the router table–more about that later.
Routing grooves and dados
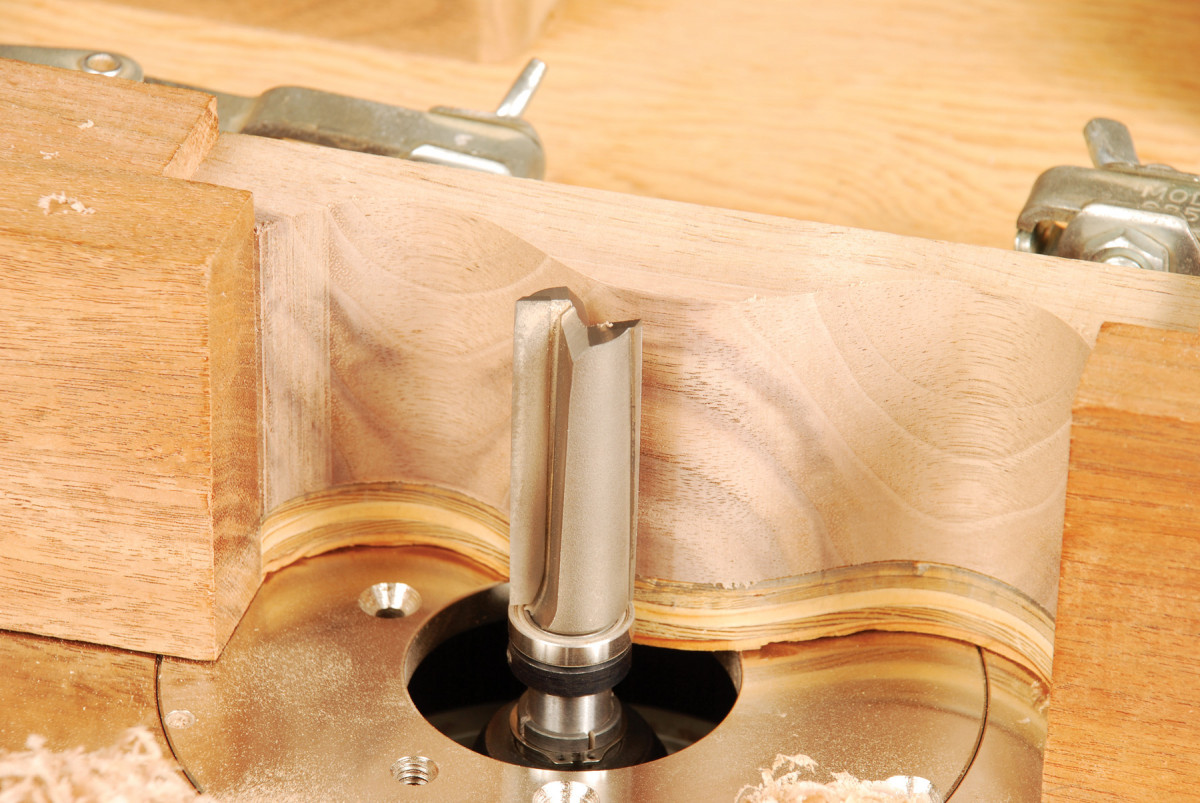
6. Templates are also useful for routing grooves and dadoes, such as this dado for a partition inside a cabinet. The template precisely locates the dado.
Although there are a number of ways to cut grooves and dados with a router, using a template is among the most accurate methods and in some cases the only choice available. When constructing fine casework, a template ensures accurate alignment of dividers and partitions (Photo 6). Instead of measuring and marking the location of dados for corresponding dividers, a graduated set of templates which register to the side of the case provide pinpoint accuracy.
7. Using a curved template is just about the only way to make a curved groove. This groove will receive a tambour door.
Tambours slide in curved grooves and disappear when opened. Routing matching curved tambour grooves, both S-curved and semi-circular, is easy work with a template (Photo 7).
Methods of guiding the router
The key to making various cuts with a template is to guide the router through the intended path. There are essentially four methods of doing this:
- Using the guide bearing on the end of a bit;
- Using a bushing attached to the router’s sub-base;
- Using the sub-base of the router;
- Using an overarm guide attached to the top of a router table.
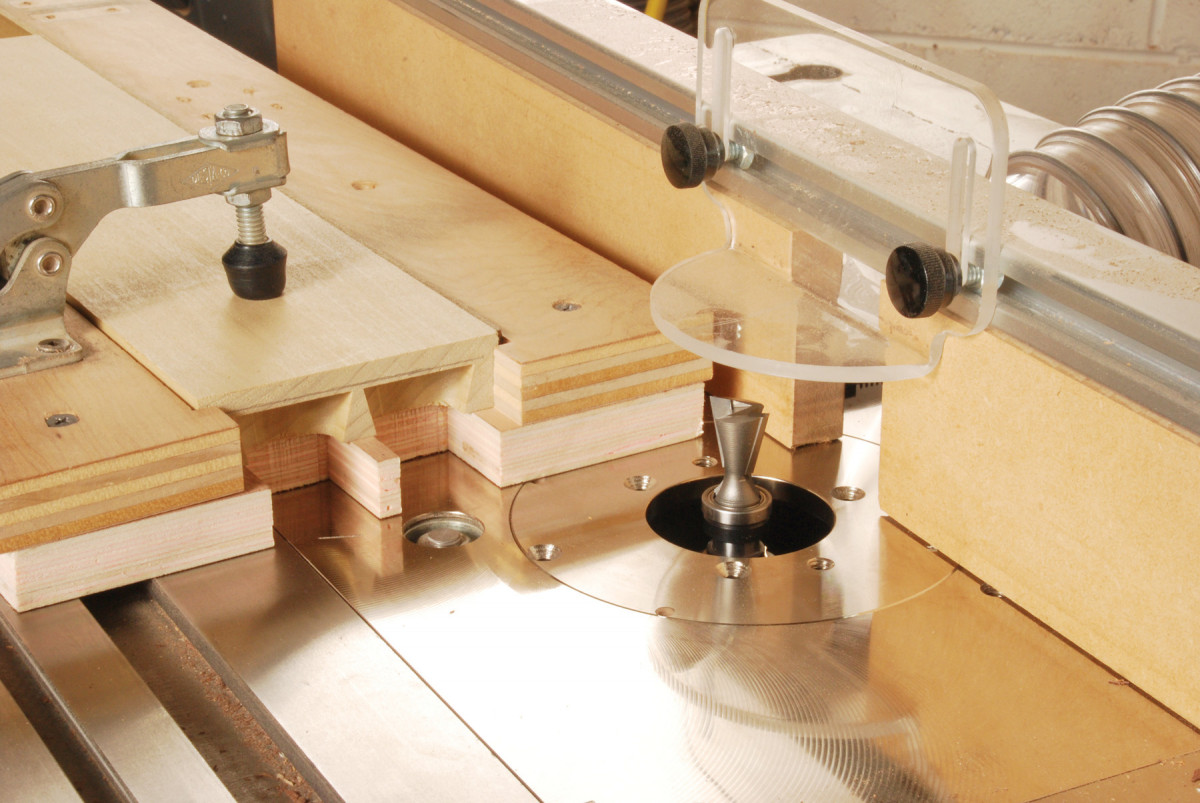
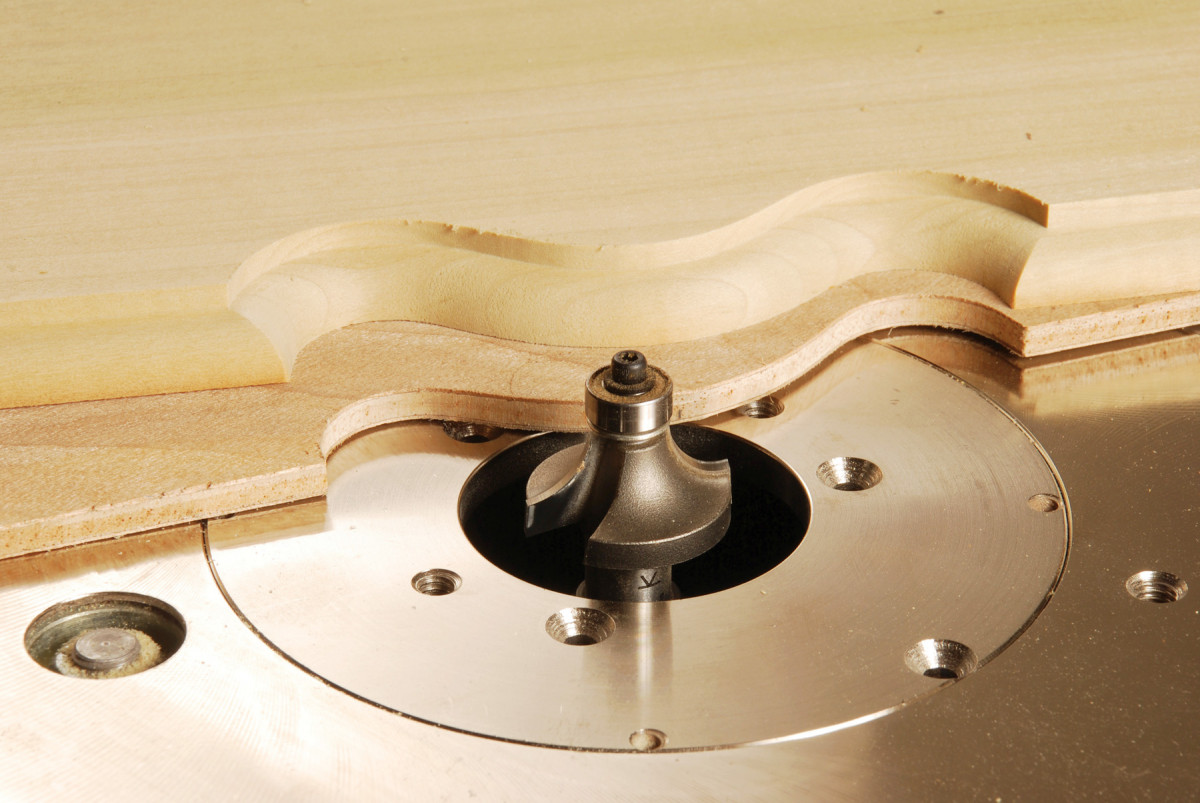
- The guide bearing method. The most convenient method for guiding the router is with the bearing on the end of the bit. Most profile bits have a guide bearing which can be used to shape the edge of a curved surface such as a tabletop. Router bit guide bearings are precisely machined and mounted concentric to the bit’s profile. This ensures that the profile’s depth remains consistent along the entire edge that’s being shaped. The small diameter of most guide bearings allows the bits to be used to shape tight contours (Photo 8).

8. There are many ways to guide a router bit around a template. The simplest method is to use a bit with a guide bearing. Here, the template was fastened to the top of the workpiece.
Flush trim bits also use a guide bearing. These bits are ideal for smoothing irregular shapes, such as the sloped edge on the sides of a slant-front desk, as well as smoothing tight bandsawn curves.
Most flush-trim bits have a bearing below the bit, but others have a bearing above the bit, on the shank. These bits are often called “pattern bits” and are quite handy when it’s more convenient to mount a template on the top of a workpiece, rather than on the bottom.
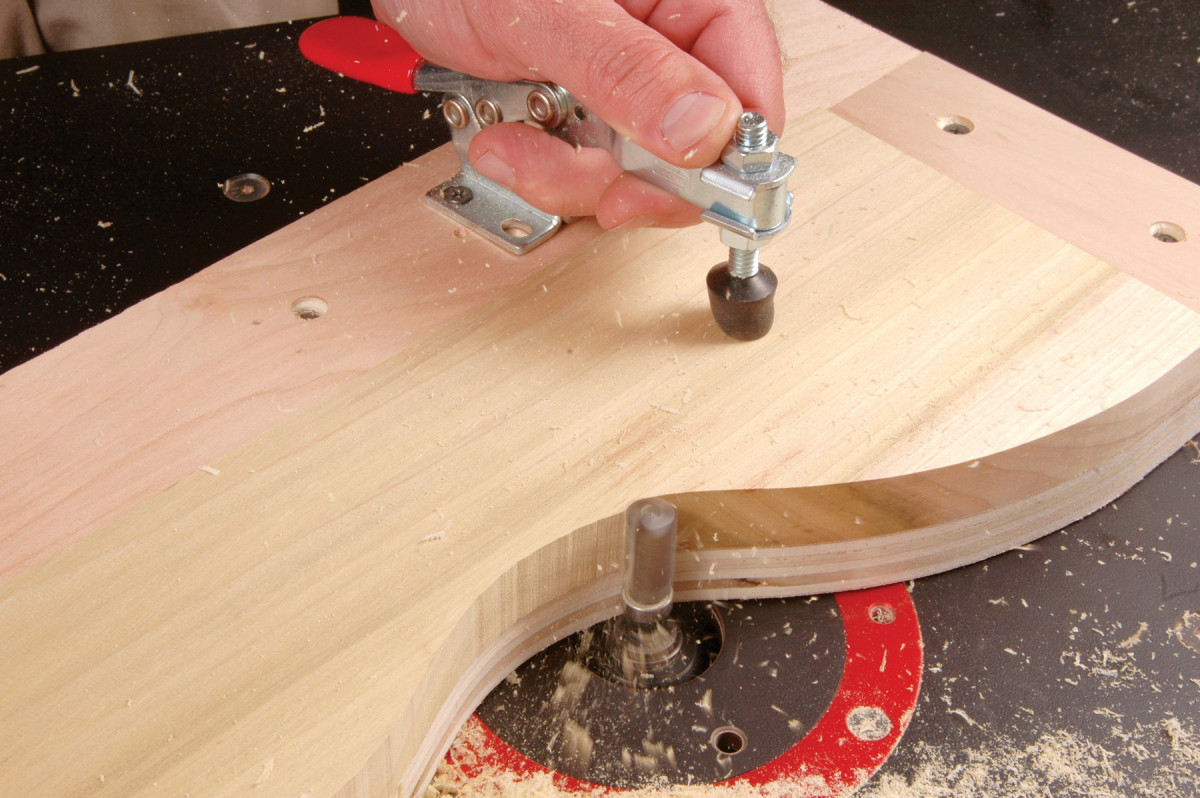
9. Some flush-trim bits have two bearings, one on top and one on bottom. These bits are ideal for avoiding tearout when routing curves. By flipping the template and workpiece, you can always rout downhill, with the grain.
Some flush-trim bits have two guide bearings, one on the end of the bit and a second bearing on the bit’s shank (Photo 9). This design allows you to always cut “downhill” with the grain and avoid tearout. When routing the semicircle in the photograph, for example, you’d rout one half of the circle with the template below the workpiece, riding on the bearing on the bit’s shaft. To rout the other half, you’d flip over the workpiece and template, so the template is above the workpiece. Then you readjust the bit’s height and ride on the bearing at the end of the bit. This bit is very useful for any S-shaped curve, where the grain of the workpiece is likely to change direction.
Designing a template to use with the guide bearing method is quite simple. Just make the template the exact size and shape as the pattern you wish to duplicate.
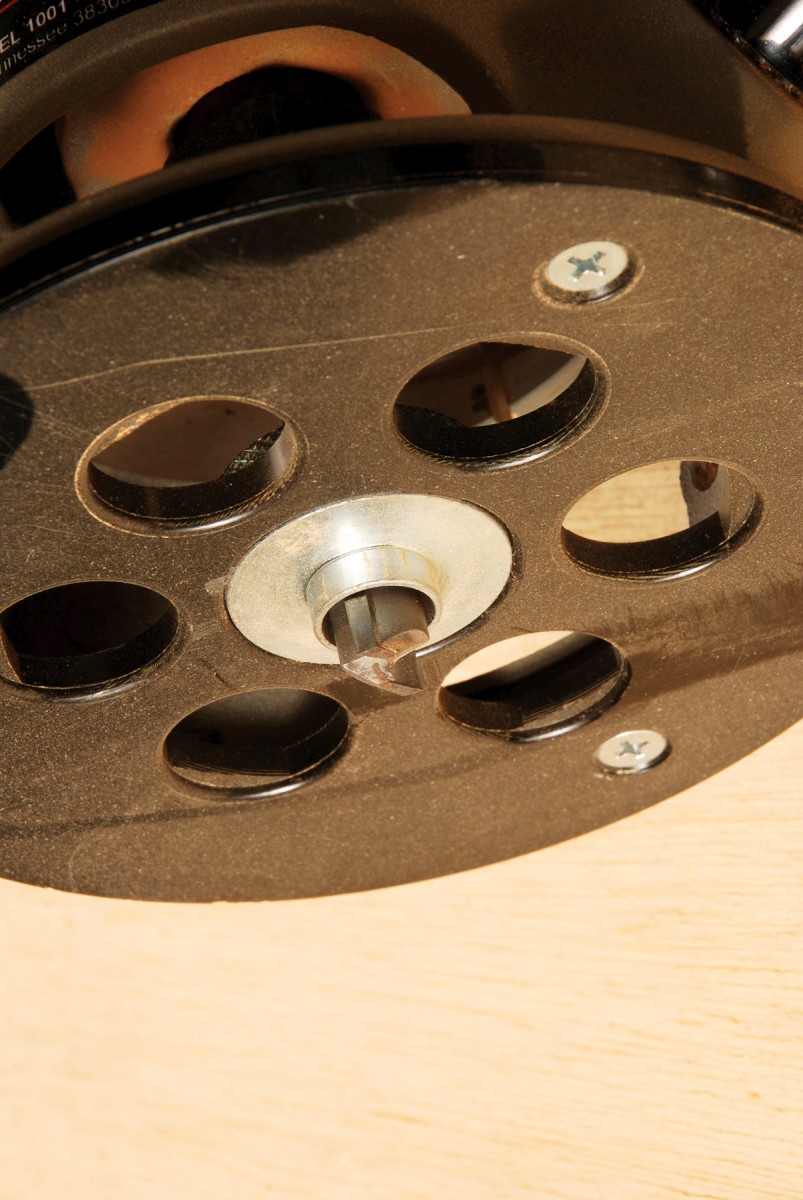
- The guide bushing method. When cutting on the end of the bit, such as when routing a curved groove, I use a guide bushing. (Guide bushings are also called “template guides” in tool catalogs.) The guide bushing is just a metal ring which fastens to the base of the router (Photo 10). These rings come in a variety of diameters and lengths for use with different diameter bits. When selecting a guide bushing, keep in mind that there must be at least a 1/64” gap between the bit and the bushing, so the bit doesn’t cut into the bushing. The inside diameter of many bushings are 1/32” larger than the diameters of commonly used straight bits.

10. A bushing mounted in a router’s sub-base is also a common method of guiding a bit around a template. This method is well suited for cutting grooves of any width.
Unfortunately, guide bushings are usually not perfectly concentric to the router collet, because the router’s sub-base isn’t perfectly centered on the base. This means that the gap between the bit and bushing may be different on one side of the bushing than on another side. The practical result is that the distance between the bit and template may vary, depending on how you orient the router to the template. However, most of the time the slight amount of eccentricity is not an issue. When it can be an issue, I mark a spot on the base and am careful to always guide the router from that point. This ensures that the distance from the cut to the template remains constant.

Fig. 01. Calculating the Template Offset When using a guide bushing, there’s always a small gap between the bit and the template. You’ll need to know this offset when designing your template. To calculate the offset, measure the diameter of the bit, subtract it from the outside diameter of the guide bushing, and divide the result by two.
When you’re designing a template to use with the guide bushing method, first select the bushing and bit and install them in your router. Next, measure the diameter of the bushing and subtract the diameter of the bit (Fig. 01). Divide the result in half to give you the distance between the template and the cutting edge of the bit.
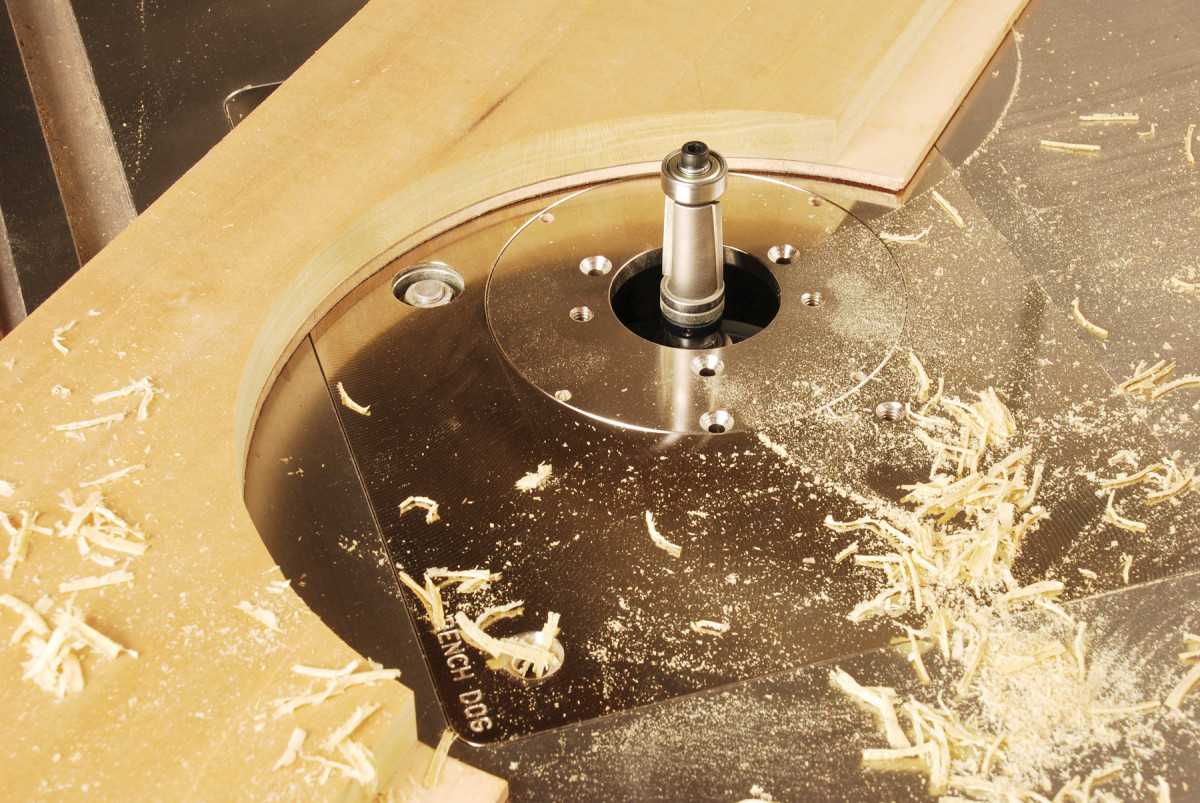
- The sub-base method. Using a router’s sub-base to guide a cut is straightforward and convenient, especially when routing certain joints (Photo 11). When using this method, I prefer a square or rectangular sub-base as opposed to a round one. Guiding each cut from the same side of a square sub-base ensures that the spacing is consistent. Most plunge router sub-bases have one straight side, for example, and I prefer to reference from that side when template routing. I have also made or bought square or rectangular sub-bases for some of my routers to use when accuracy is critical. However, you can also achieve consistent results by guiding off of a round sub-base. Just mark a spot on the sub-base with bright red paint or fingernail polish and keep that spot against the template.

11. A router’s sub-base is also a good guide for following a template. Here, I’m routing mortises inside a carcase. Setup is straightforward and convenient
When designing a template to use with the sub-base method, you must also factor in an offset, similar to the guide bushing offset above. If you’re using a square or round base, measure the diameter or width of the base, subtract the diameter of the bit, and divide the result in half. This will give you the distance from the template to the cutting edge of the bit.
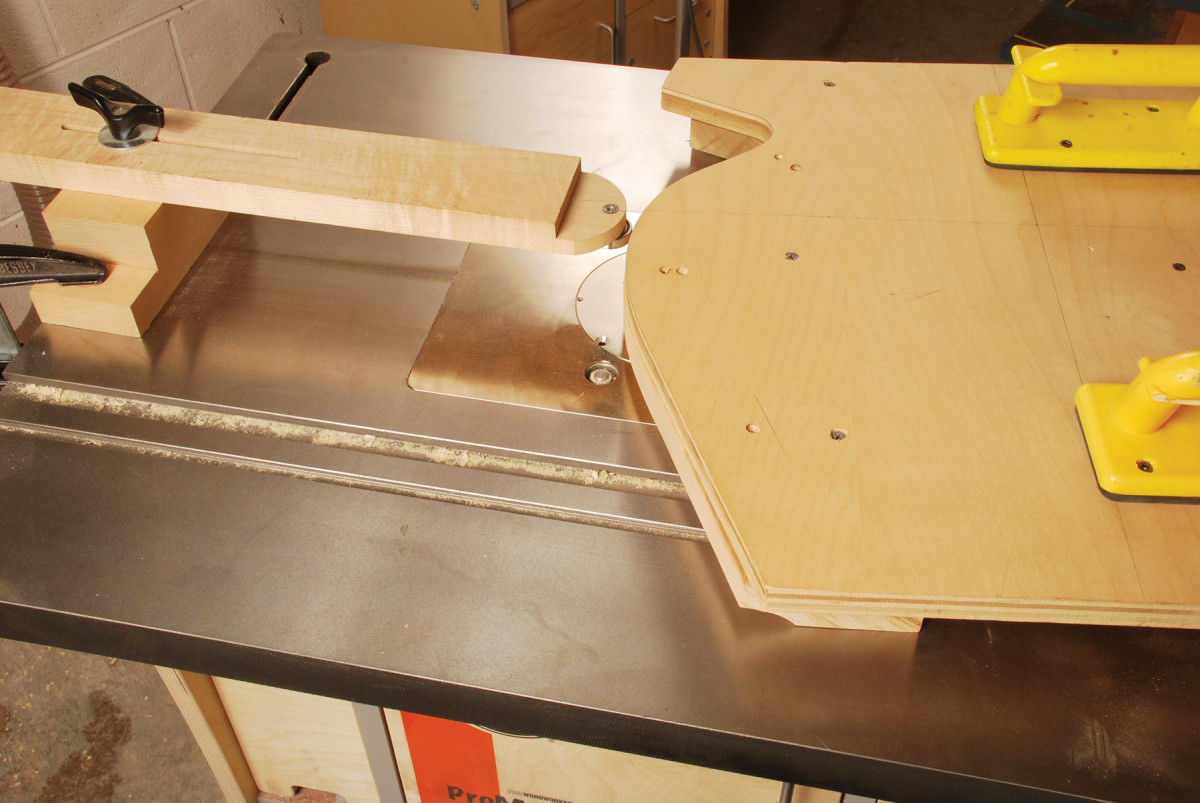
- The overarm guide method. An overarm guide is a shop-built device that mounts on top of a router table (Photo 12). It consists of a support, a long arm whose end is curved to match the smallest radius on the template, and a bearing securely fastened to the arm. You may either purchase a bearing at an auto supply shop or borrow a bearing from a router bit.
12. An overarm guide is a fairly sophisticated device for following a template, but it allows you to use router bits that don’t have a bearing, or make cuts where a bearing would get in the way. It’s mounted on a router table.
This method is similar to using a guide bearing, but unlike a guide bearing, the overarm guide can be positioned eccentric to the bit profile. This allows for shaping into the interior of the stock where a bearing-guided bit cannot reach. I use this technique when shaping large molding profiles on curved surfaces. The arm is positioned above the bit and follows the curve of the template. After each cut the arm is backed away from the bit to increase the depth of subsequent cuts.
Designing a template for use with an overarm guide is usually pretty straightforward. Make it the same size as the shape you’d like to duplicate, as when using a bearing-guided bit. The offset is created by moving the arm, rather than by adjusting the size of the template.
Template material
One of the most important elements in template shaping is the material of the template itself. Although I’ve used a number of materials through the years, I prefer cabinet grade plywood, which is solid and stable.
All plywood isn’t created equal, though: cabinet grade plywood is free of voids, which can catch the guide bearing and spoil the cut. Less expensive plywood may have voids, which you won’t be able to see until you cut into it. Cabinet-grade plywood is easy to cut and shape, and it is readily available at hardwood lumberyards.
After many uses, the edge of a plywood template can begin to show signs of wear. I usually make a new template from the old one with a flush trim bit before any problems develop.
Making the template
When making a template, I take the time to make it perfect; any irregularity in the template will be duplicated in the workpiece, or dozens of workpieces. On a straight template, I make sure that the edges are truly straight, and angles are correct. This is not a good time to take anything for granted.
I use a number of methods to draw curves on a template. I may use a compass, a French curve or draw freehand. Often I draw the shape on the computer with AutoCAD, print the drawing and glue it to the template with contact cement.
After bandsawing the profile, I carefully smooth the curves with files and sandpaper. This is the fussy part. I carefully inspect the template to make sure the curves are fair, checking by eye and by feel. If there’s a hump or flat spot, it’s back to the file or sanding block.
13. I prefer cabinet grade plywood for making templates. I design them to extend an inch or so beyond the workpiece, which ensures a smooth entry when starting the cut.
When making a template, I extend the template ends beyond the length of the workpiece by at least an inch or two (Photo 13). By extending the template ends, the guide bearing makes contact with the template before the bit makes contact with the workpiece. This ensures a smooth entry and exit when making the cut.
The template jig
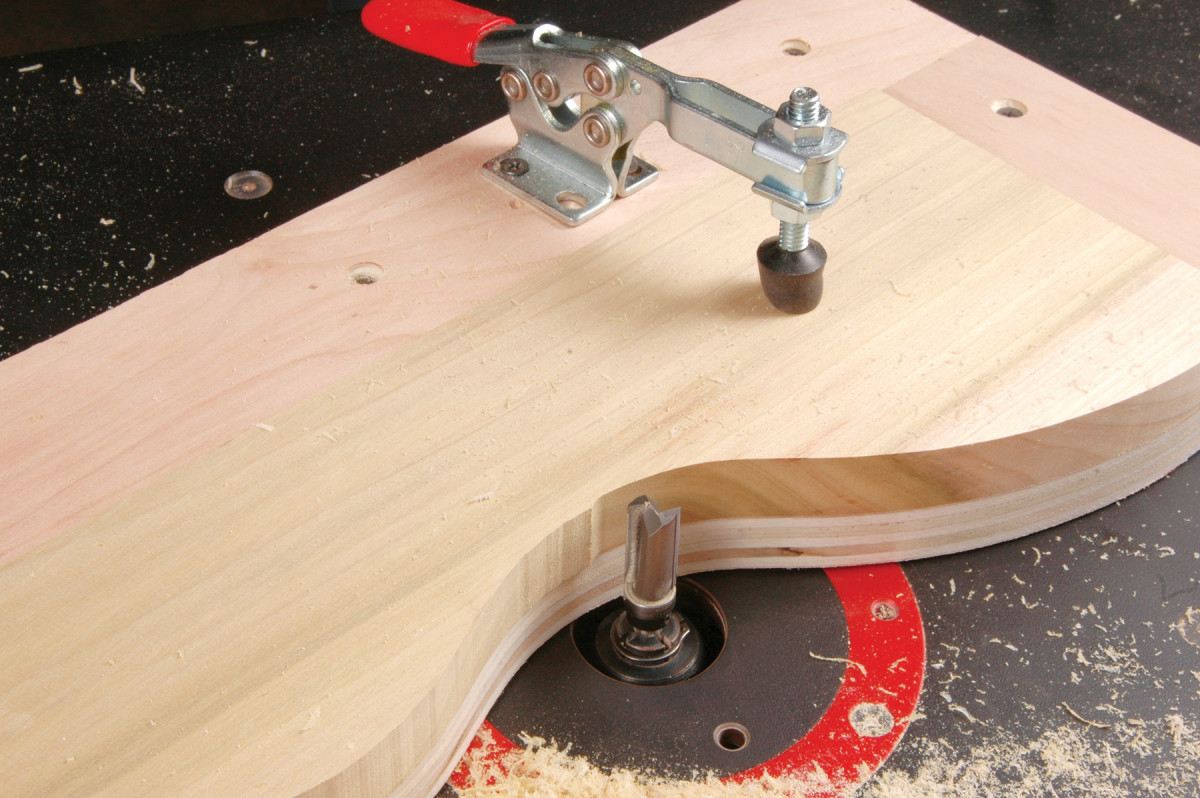
14. When making a heavy cut or shaping small parts, I build a template jig to securely hold the workpiece. The jig usually has stop blocks to position the workpiece.
I often use a template jig for heavy cuts or for securing small work that would otherwise be unsafe to shape with a router (Photo 14). Template jigs require a little more work than just cutting and shaping a piece of plywood. The purpose of the jig is to fix the workpiece securely in place as it is routed. This requires adding stop blocks on the jig to position the workpiece and to counteract the forces of the spinning bit. I begin by making the template profile, then glue the stop blocks in position and fasten them with screws.
Sawing the workpiece
Once the template or jig is complete, I use it as a pattern for laying out curves on the workpiece. After tracing the template, I use a bandsaw to cut just outside the layout line. I aim for a 1/16” margin. If it’s less than 1/16”, I run the risk of cutting within the template’s boundary. A margin greater than 1/16” creates a heavy cut, which can cause tearout or pull the workpiece loose from the template.
Fastening a template
I use brads, screws, double-faced woodturner’s tape or toggle clamps to fasten the template to the workpiece. The easiest method is just to attach the template with a few brads. This method works well for small work and light cuts; it’s fast and the nails grip well. For larger and heavier cuts, I opt for screws.
With either method it’s critical that you position the fasteners out of the path of the bit. Although nails and screws both leave holes in the finished work, that’s not necessarily a problem. Usually, the holes will be hidden from view in the completed workpiece.
15. I use brads or screws to attach most templates to a workpiece, but where holes will mar a finished piece, I use woodturner’s double-faced tape.
When holes from a metal fastener will not be acceptable I use double-sided woodturner’s tape (Photo 15). The tape is made of cloth and has tremendous holding power. Because the tape is pressure sensitive, I apply clamp pressure to the work prior to routing.
16. Toggle clamps are ideal for holding a workpiece in a template jig, particularly when you have a lot of duplicate parts to make. Mounting a new part in the jig is quick and easy.
Toggle clamps are ideal for template work, especially when there are a large number of parts to be routed (Photo 16). They open and close quickly and have good holding power. I use toggle clamps on most of my template jigs. Usually, I have to add a block to the jig to bring the toggle clamp approximately level with the workpiece.
Once your template and stock are prepared you’re ready to make the cut. Remember to adjust the bit’s height. If you’re using a bearing-guided bit, position the bit so that the bearing makes full contact with the template.
The router table is best
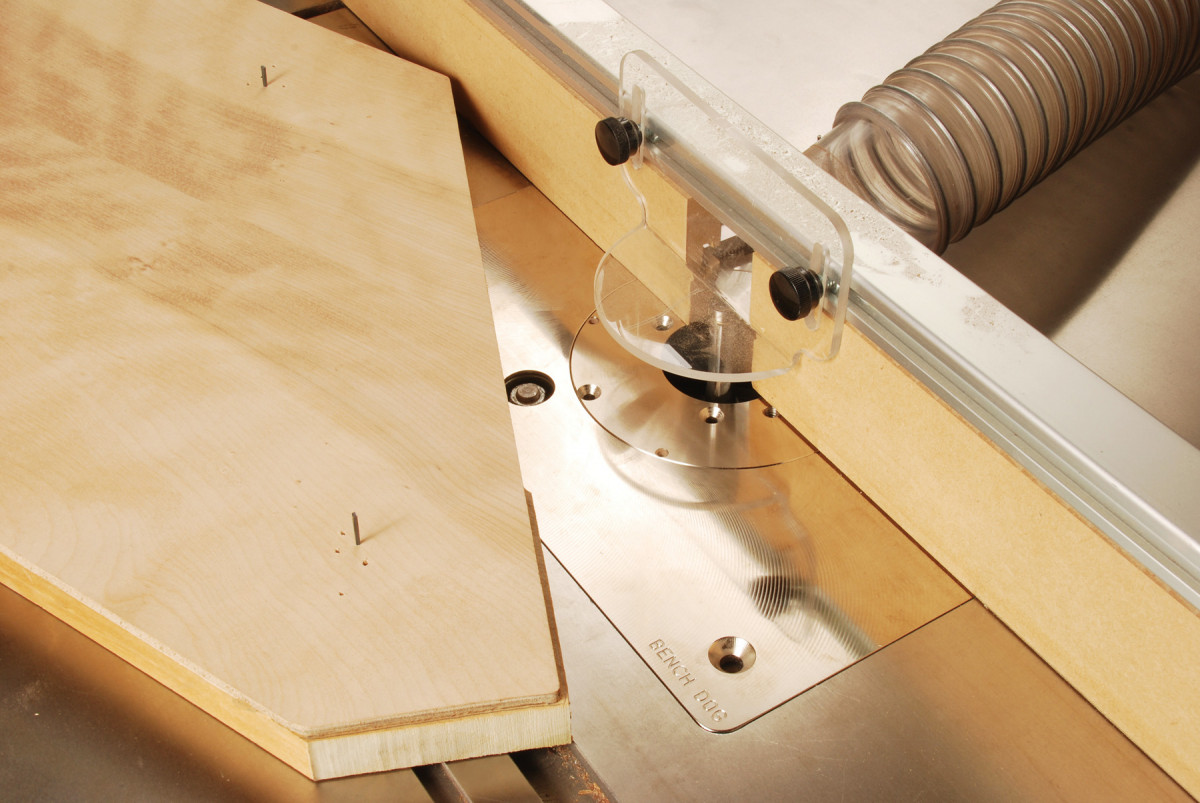
17. I prefer to use a router table for template routing whenever possible. Even though I’m not using the fence to guide the work, the fence provides dust collection and a guard.
Whenever I have a choice between using a hand-held router or a router table, I always opt for the table. This also holds true when template routing. Even though I’m not using the router table’s fence to guide the workpiece and limit the cutting depth, the fence provides dust collection and a mounting point for a guard (Photo 17). Using the router table is cleaner and, depending upon the cut being performed, safer than pushing a router across the work.
Template Safety
I teach woodworking to new students each year, and of course I’m particularly concerned that they learn to work safely. I always use the guard on my tablesaw whenever feasible, wear safety glasses and avoid long-sleeved shirts, for example. We often use templates for routing, and before we get started, I cover these safety guidelines:
- The template should be large enough to safely distance your hands from the bit.
- The template should be securely fastened to the workpiece.
- Steel screws, nails and clamps should be positioned out of the bit’s path.
- The template should extend beyond the workpiece, on both ends. This way, the guide bearing or bushing will make contact with the template before the bit comes in contact with the workpiece.
- Avoid heavy cuts. A light cut is safer, and also creates a smoother surface.
- When using a router table, install or make a guard.
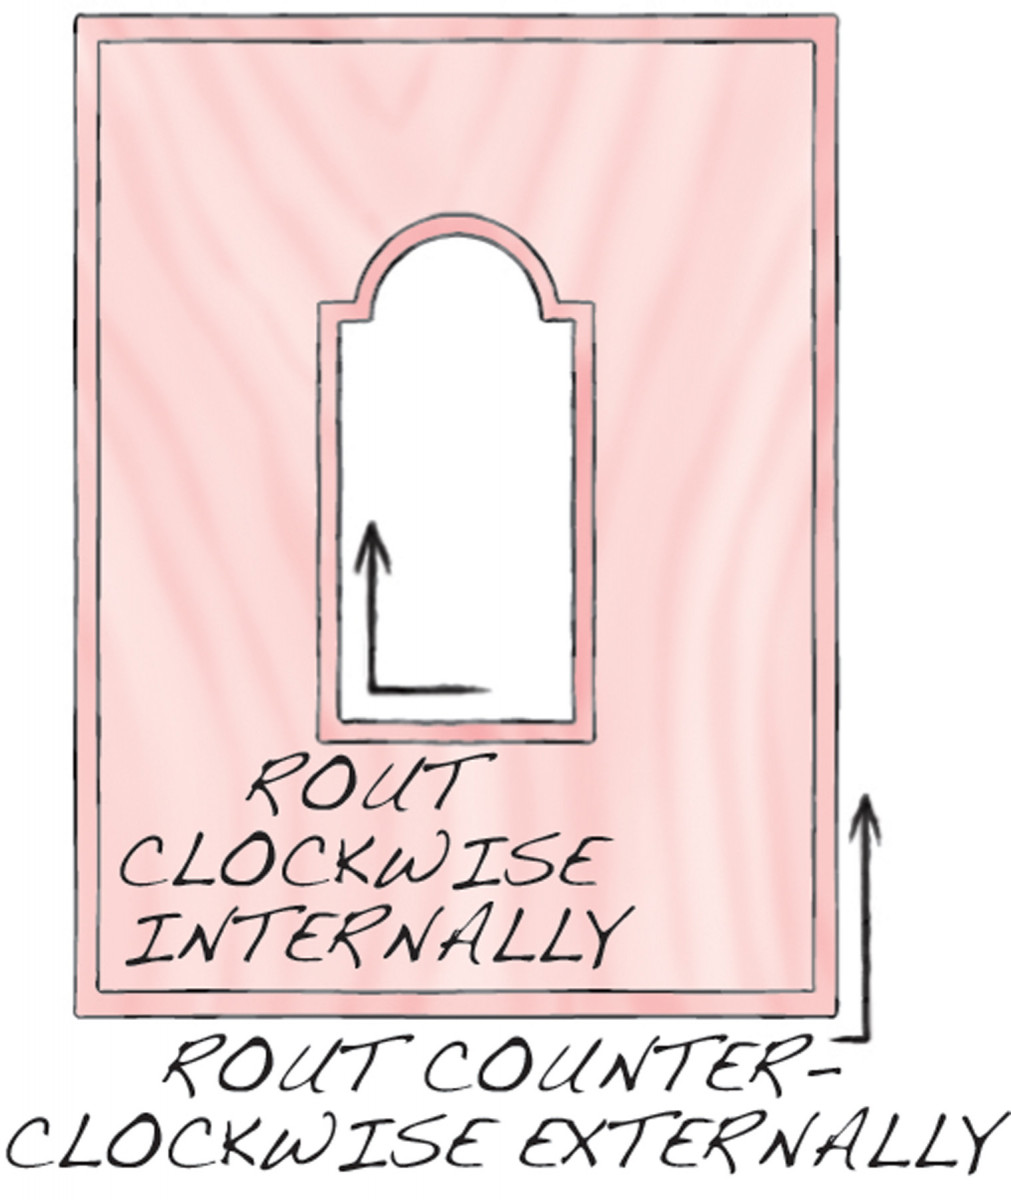
- Never climb cut. (Climb cutting is routing in the same direction as the bit rotates.) Climb cutting can be dangerous because the router bit can grab the workpiece and draw your hands into the bit. Always cut against the rotation of the bit. When routing by hand, the router should be pushed in a counter-clockwise direction for external cuts. When the cut is internal, the router should be pushed in a clockwise direction. When the cut is made at a router table the work should be fed from right to left. An internal cut at the table should be made in a counter-clockwise direction.

[Fig. 03]
Making the gooseneck molding on this clock required an unusual method of template routing: using an overarm guide. The overarm guide is attached to the top of a router table, and is really just a long arm with a bearing screwed to its end. The bearing rides against the template, and can follow inside or outside curves and straight sections.
The overarm guide allows you to shape a profile that wouldn’t be possible to make with standard bearing-guided bits. Let me walk you through the steps of making this molding, and I’ll show you how the guide works.
I made the gooseneck molding of this clock using a shop-made overarm guide. The end of the guide has a bearing mounted on it, which rides against the template.
Carving the Corners
About the only limitation to template routing is that a router bit will not create a crisp, 90° internal corner. Of course, you can avoid the issue by eliminating inside corners from your design, or by accepting a rounded look. I prefer a different approach. Instead, I carve inside corners after routing. It’s easy—you just follow the profile created by the router. Where the two profiles meet in the corner, I carve a miter. All I needed for carving this roundover and fillet was a skew chisel.
Extra: Routing a Gooseneck Molding
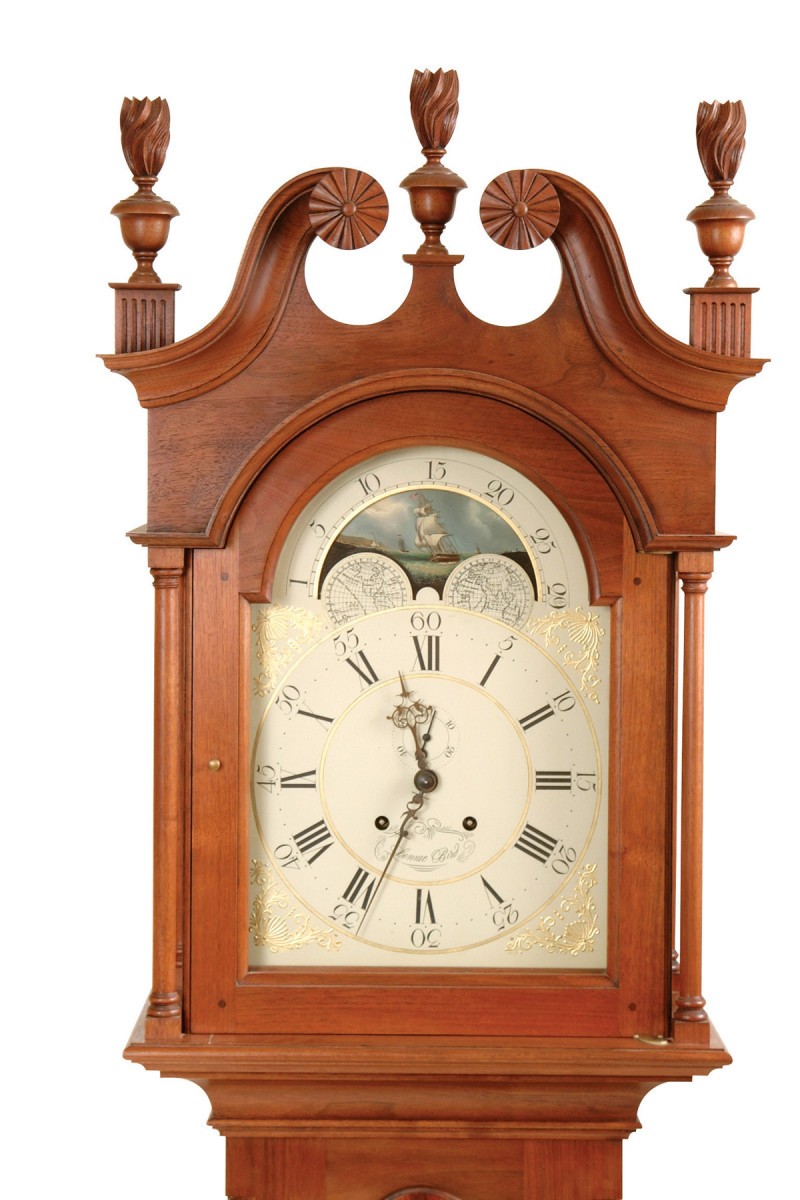
Making the gooseneck molding on this clock required an unusual method of template routing: using an overarm guide (see photo at right). The overarm guide is attached to the top of a router table, and is really just a long arm with a bearing screwed to its end. The bearing rides against the template, and can follow inside or outside curves and straight sections.
The overarm guide allows you to shape a profile that wouldn’t be possible to make with standard bearing-guided bits. Let me walk you through the steps of making this molding, and I’ll show you how the guide works.
I made the gooseneck molding of this clock using a shop-made overarm guide. The end of the guide has a bearing mounted on it, which rides against the template.

[parts of Fig. 02]
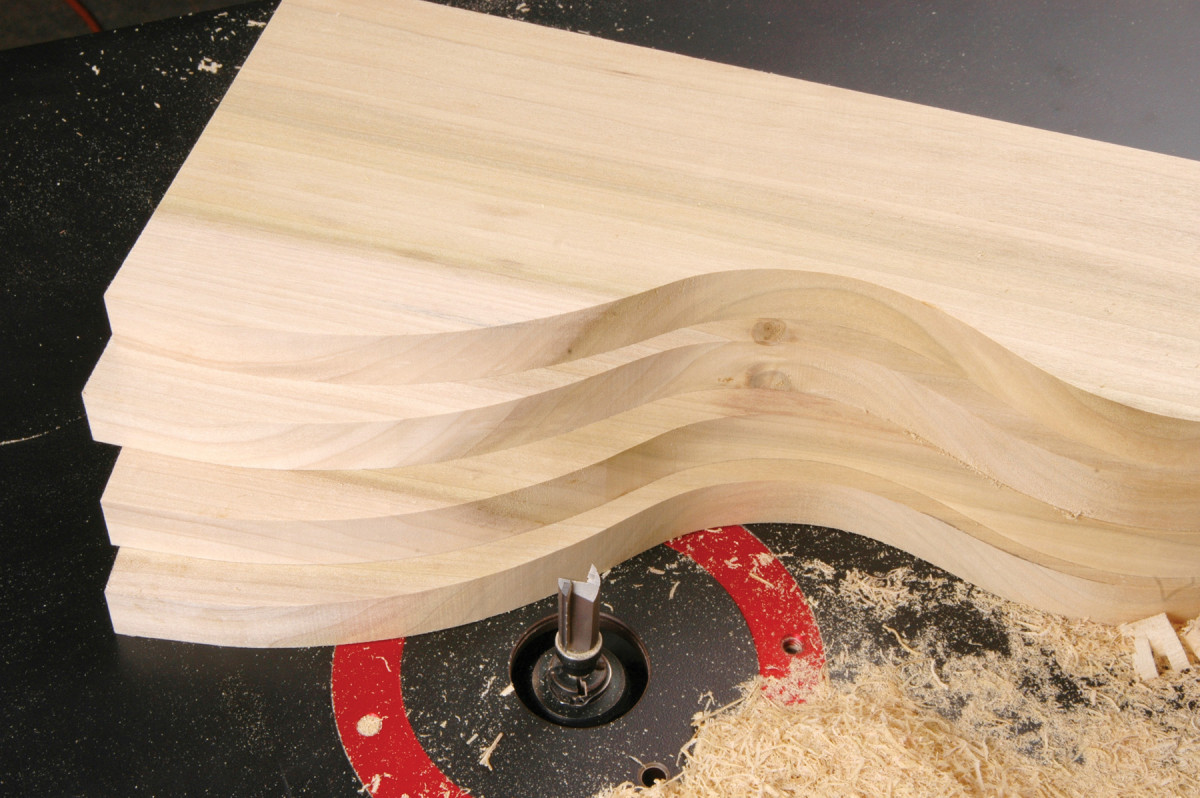
- First, I made a template the shape of the gooseneck’s inside curve. I traced the template onto the workpiece, which at this point is extra-wide, and bandsawed the curve, staying 1/16″ away from the line. Next, I fastened the template to the back of the workpiece, installed a flush-trim bit in the router table, and shaped the workpiece to match the template.
- Next, I shaped a large cove using the overarm guide to bear against the template. This required a number of light cuts, which I accomplished by moving the overarm guide slightly farther back from the cove bit each time. In the final cut, you can see that the center of the bit is offset from the edge of the template. This cut would not have been possible with a bearing-guided bit (unless, of course, it had a custom-made profile).
- In this step, I cut a small roundover next to the cove, making a broken-ogee shape (an ogee with a fillet where the curve reverses direction). I use a standard roundover bit with the bearing removed. Once more, the overarm guide follows the template. As with the cove bit, this cut would not have been possible with a bearing-guided bit, because the bearing would not have fit within the cove.
- To complete the profile, I removed the template, flipped over the workpiece, and used another roundover bit. This one has a bottom bearing which rides directly on the workpiece.
- I completed the molding by bandsawing the outside curve, and smoothed the curve with an oscillating spindle sander.
Here are some supplies and tools we find essential in our everyday work around the shop. We may receive a commission from sales referred by our links; however, we have carefully selected these products for their usefulness and quality.