We may receive a commission when you use our affiliate links. However, this does not impact our recommendations.
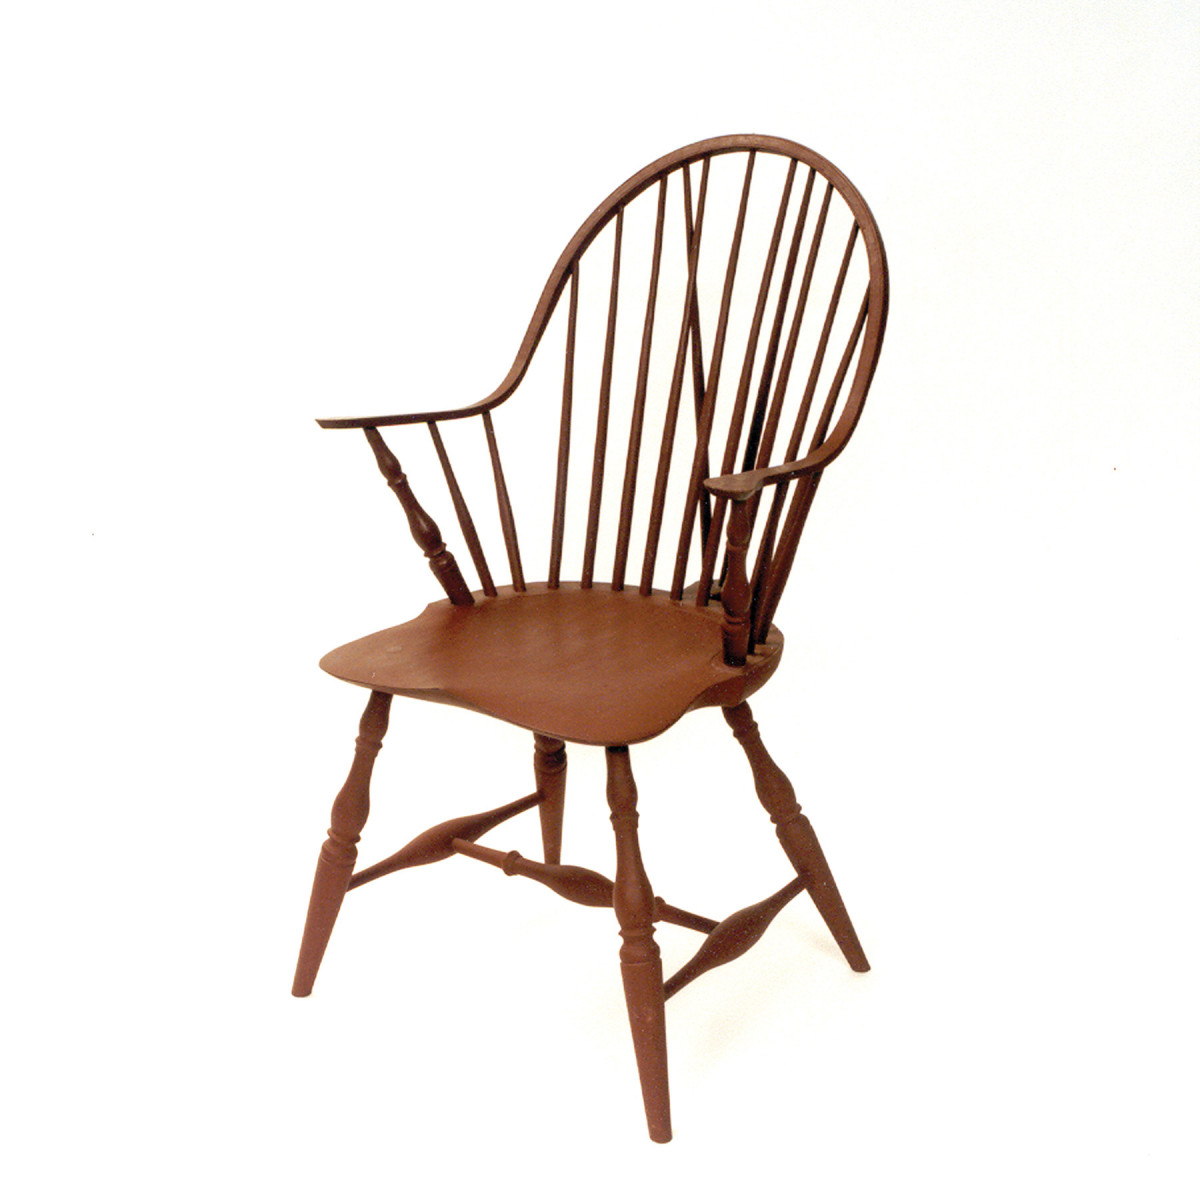
Successful wood bending with heat and water is more art than science.
Long ago, some caveman made a curious discovery: Wood becomes pliable when it is both hot and wet, allowing it to be bent to a desired shape that it retains when dry. Ever since, woodworkers have been bending the stuff.
Bending, like carving and turning furniture parts, does not usually create a finished object. It is a technique you incorporate into your work, and is a skill worth developing because it makes you much more versatile. As you are about to learn, bending wood is more of an art than a science.
Bending is used by lots of woodworking trades, including boatbuilding and cooperage. It is most closely associated, however, with common chairs – ladderbacks, “Fancies” and Windsors – because every one of these forms incorporates bent parts. But I’ve used bent parts for all sorts of other projects, too, ranging from a coat rack to a steering wheel for an antique car.
Wood is capable of being bent – a state known as plasticized – when it is both hot and wet. Those conditions are reached at 180° Fahrenheit and 25-percent moisture content.
The old guys boiled their parts in a metal trough called a chairmaker’s copper. Boiling water in a long container is awkward, and fishing out the parts is risky. That is why I prefer steaming, and rely on an efficient and easy-to-build steam box.
Tension & Compression
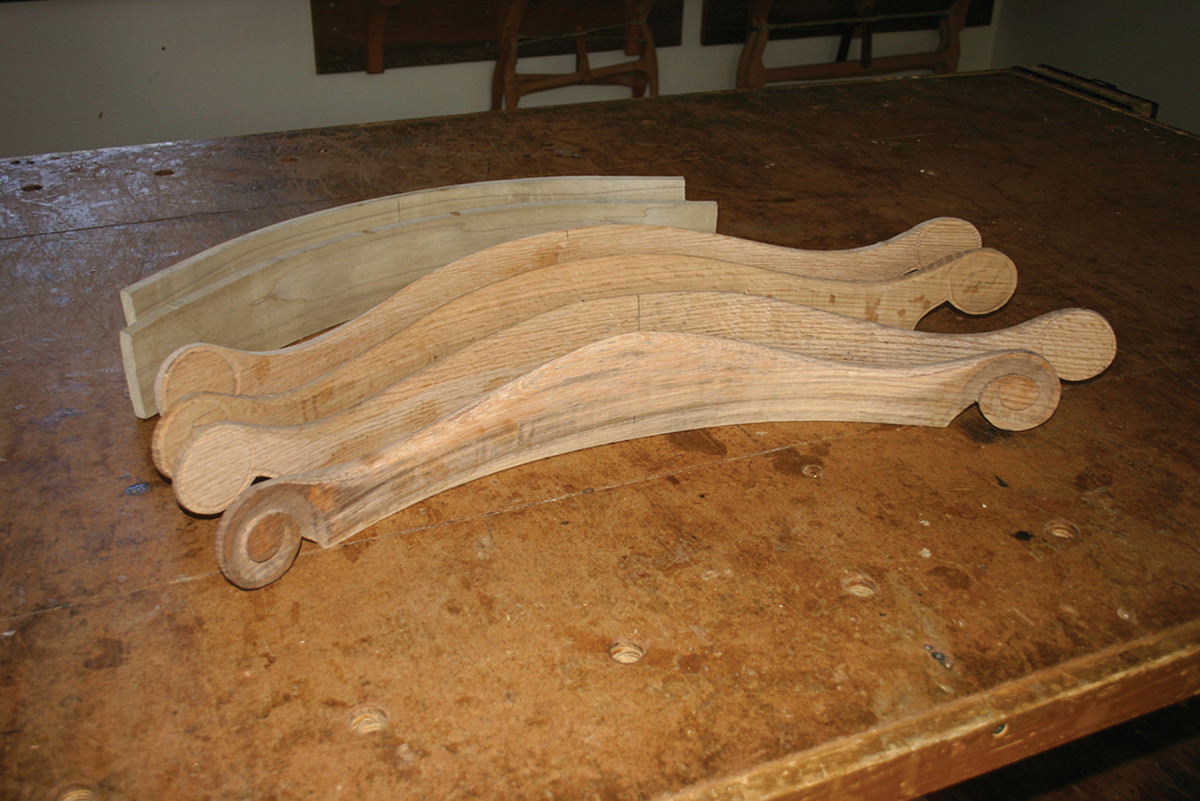
Partial bends. Crest rails, such as the various designs shown above, are partial bends, which are likely to be successful in a range of species. (Note: It’s easier to do any carving or shaping while the wood is flat, then bend it.)
You will better understand bending if you are aware of what happens during the process. Look at wood under magnification and you will notice its similarity to a sponge. If you wet a sponge, you can squeeze it a lot. However, it does not stretch nearly as much.
When plasticized, wood is also capable of being squeezed, but like the sponge, it does not stretch well. As wood bends, its thickness contains a neutral line. The wood inside that line is in compression (being squeezed); the wood outside the line is in tension (being stretched).
This is why bendings most commonly fail on the outside surface. Whenever possible, I use a bending strap, a metal strip as long as the part with stop blocks on each end. In use, the bending strap becomes the neutral line, so all the wood is in compression.
Unfortunately, a bending strap is not always practical and I am forced to bend some parts without support.
If getting wood hot and wet was all that mattered, bending it would be a lot easier and far less complicated. However, you do face a number of constraints. Accept the hard reality that bending is an art; failure is sometimes unavoidable. The best you can do is to achieve a sustainable success rate. The following will help you avoid failure as much as possible.
Species & Sources
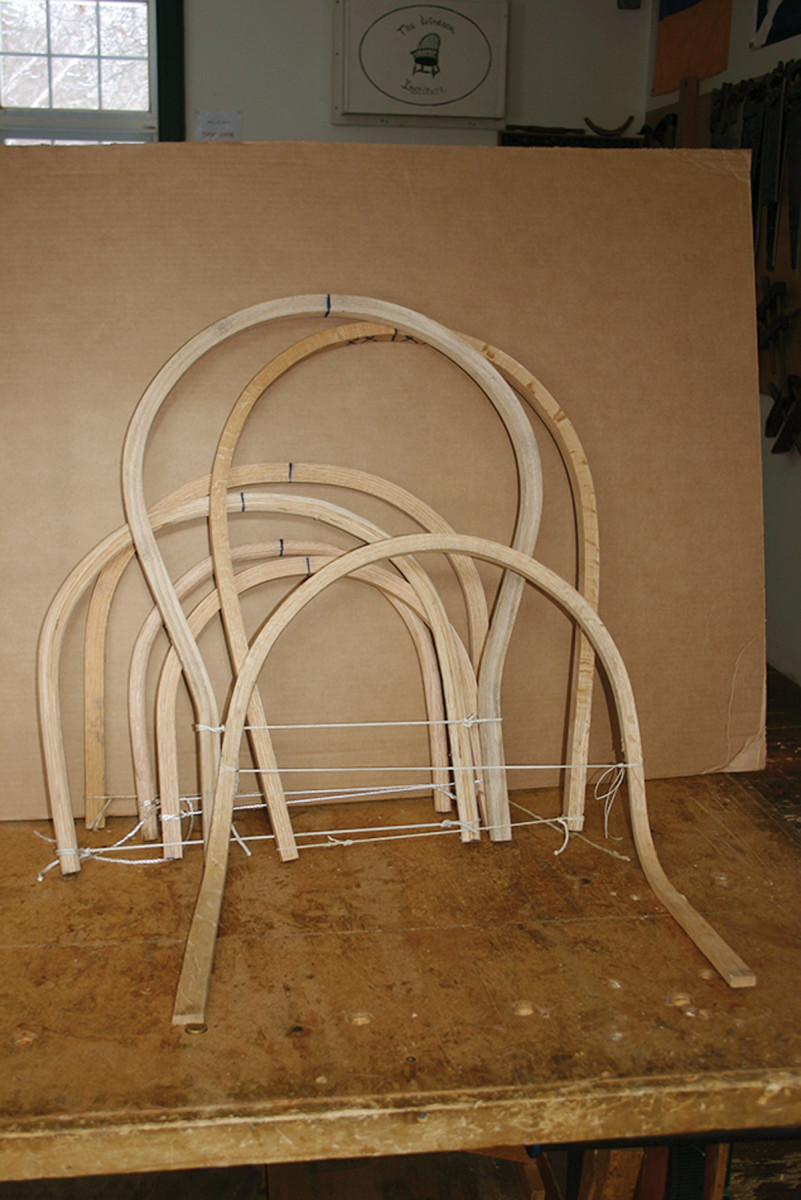
Complete bends. When attempting more severe bends, such as these back bows for various types of Windsor chairs, choose a species such as oak or ash that, ideally, is split and air-dried, and has no grain runout.
Wood selection is paramount. Some species bend better than others and choosing the wrong wood for the job is an invitation to disappointment. A species suitable for one shape of bend will not work for another. So, the shape of the bend and suitable species are linked.
I divide shapes into two categories: partial bend (crest or slat) and complete bend (a sack back’s U-shaped arms and bows, and two-plane continuous arms). Many species will yield a successful partial bend. Complete bends are far more demanding and require the best bending woods, such as oak or ash.
Your wood source is as important as the species – you want material with uniform strength along the entire bend.
That’s unlikely to be found at the typical lumberyard, where the wood is almost always sawn, and thus weakened by grain runout. (Avoid runout by using wood where the same layers of annual growth run from end to end.)
Plus, lumberyards most often offer only kiln-dried stock; the drying process drops the moisture level in the wood below 15 percent, which sets the lignum so it will not soften and allow the wood to compress.
I have made partial bends from kiln-dried wood by soaking the part until it is waterlogged. I will attempt this, however, only if I have no alternative, and I select my material carefully, only using straight-grained wood.
Logs, Riving & Storage
I rive the wood my students and I use in chairmaking. Riving is a process of controlled splitting. It begins with a visit to the log yard where I select my logs based on their straightness and absence of defects.
When asked what I look for in a log, I respond “telephone poles.” However, it is far more involved. Decades of experience has taught me which logs will most likely split open into straight bolts – yet I still receive the occasional unpleasant surprise.
Once a log has been opened, I split the halves into quarters, then eighths. Finally, I cleave off the pith. The end of an eighth of a log is pie-shaped, so this means I remove the pointy piece of the pie. This is the oldest part of the tree, laid down when it was a sapling. The pith usually contains small branches that broke off long ago.
An eighth-log minus its pith is light enough to carry to my resaw band saw with its 3″ blade. Following the grain, I rip the eighth into bending stock – pieces with the grain running from one end to the other.
A delivery of four logs yields me enough stock for a couple of years. However, it must be prepared all at once, because left in the log it will decay. Then I stand the stock upright in an unheated area so air can circulate through it and allow it to air-dry.
Stock stored this way will remain suitable for bending indefinitely. I frequently bend riven-then-ripped air-dried stock that is several years old.
Prep & Forms
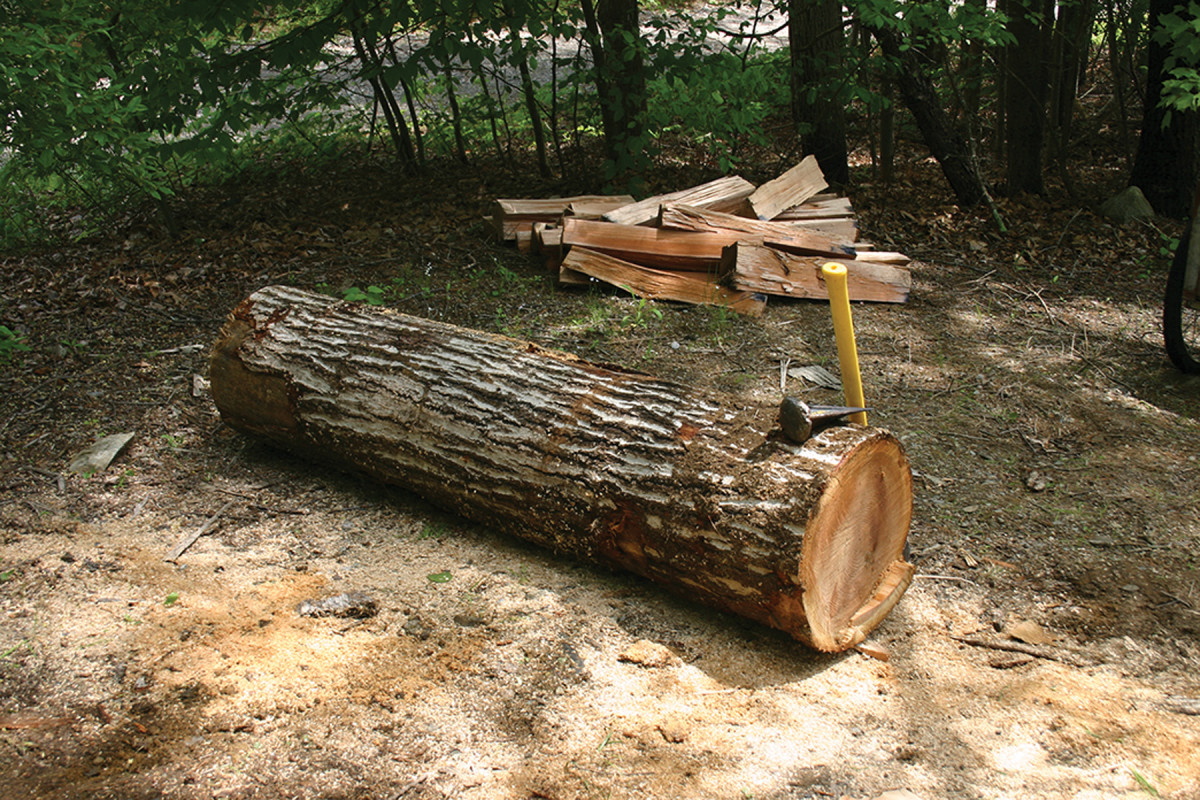
Split pieces. Riven logs (in this case, red oak) yield pieces that are split along the grain line, with no runout.
Before bending, you need to shape the part. There is always a risk of breaking, so when making a complete bend, I invest the minimum amount of effort possible, putting off the finish work until after the part has dried.
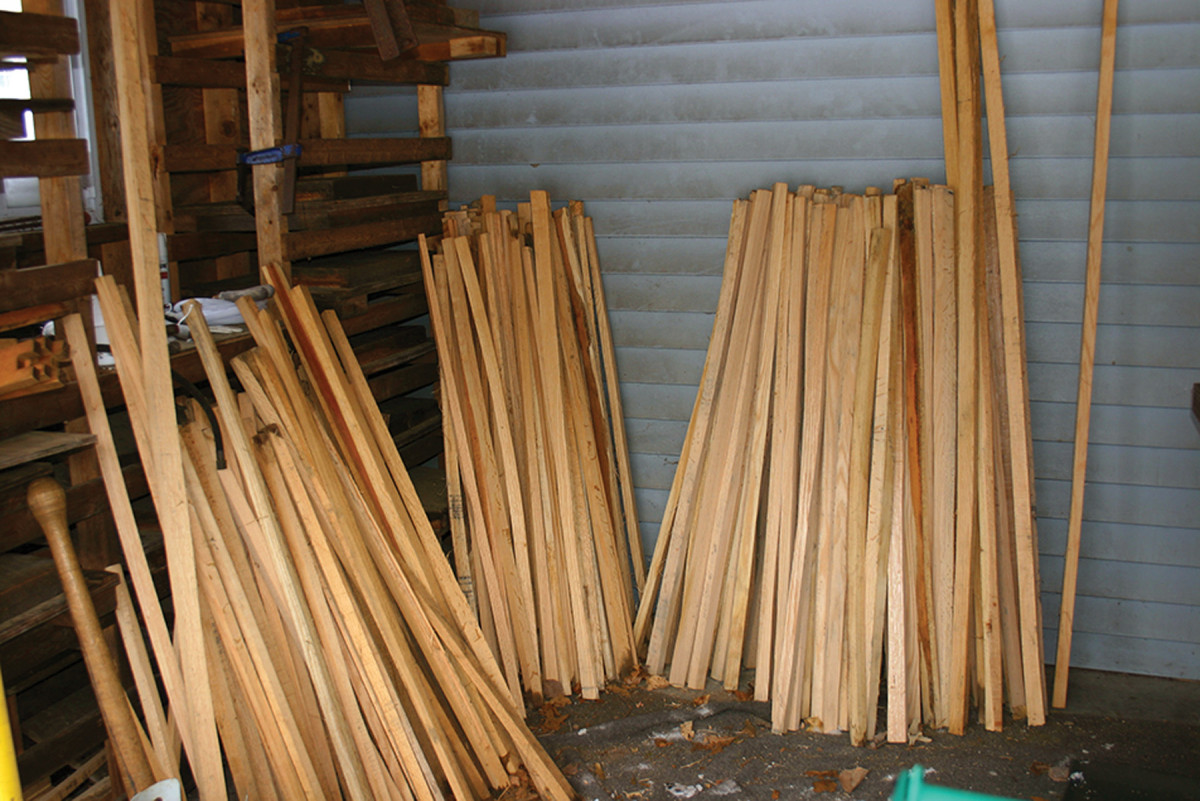
Ripped & ready. After riving the stock into eighths, I use a 3″ resaw blade to follow the grain line and rip the pieces into bending stock, then leave it to air dry.
Partial bends, such as crest rails, are another story – particularly when using riven stock – because they rarely fail in bending.
In Windsors, crest rails often have carved volutes in their projecting ends, called ears. Volutes are easier to carve while the crest is flat because the stock can be clamped securely.
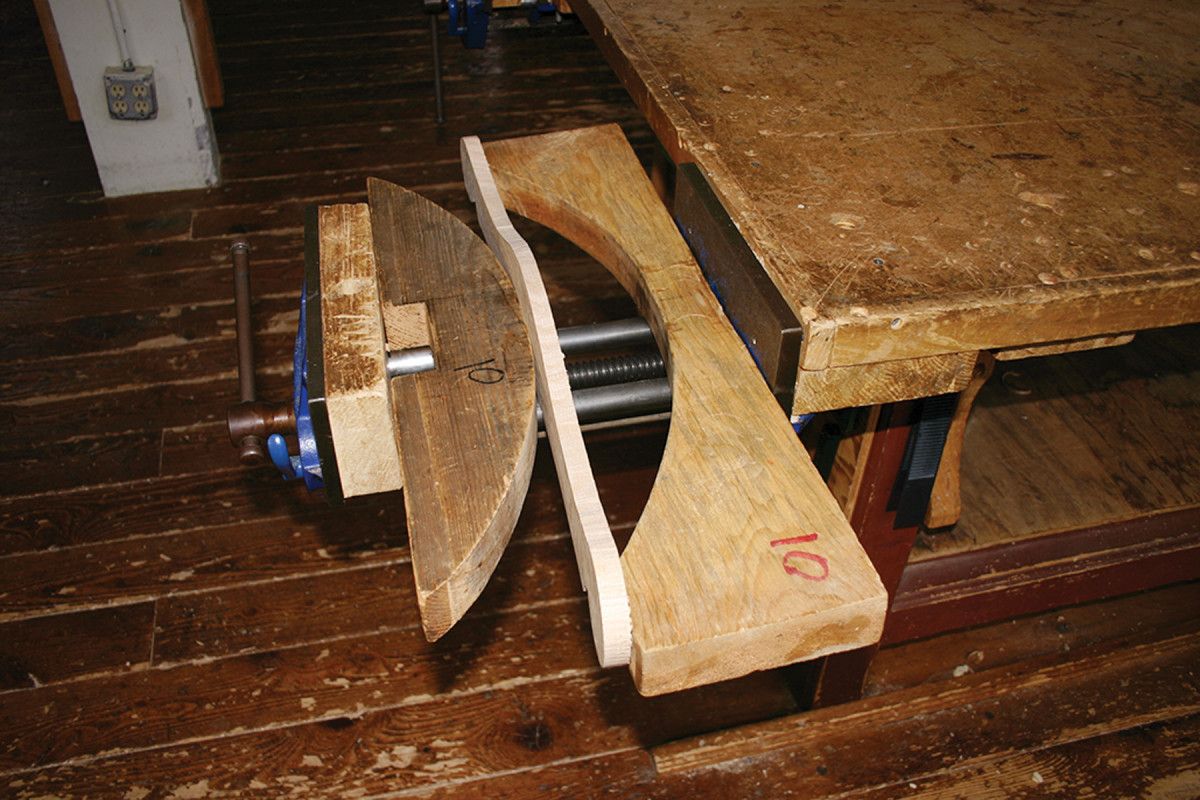
Press. Partial bends are done in a two-part press, with pressure supplied by a vise.
Partial bends are accomplished in a two-part press made to yield the desired curve. I secure the press’s two halves in a vise, so bending is as easy as turning a handle. When done, I secure the press in a clamp so it can be removed to free up the vise for the next bend.
Each chair style has its own form, and they are not usually interchangeable. My bending forms for complete bends all have a center block that allows the piece to be secured at its midpoint with a wedge.
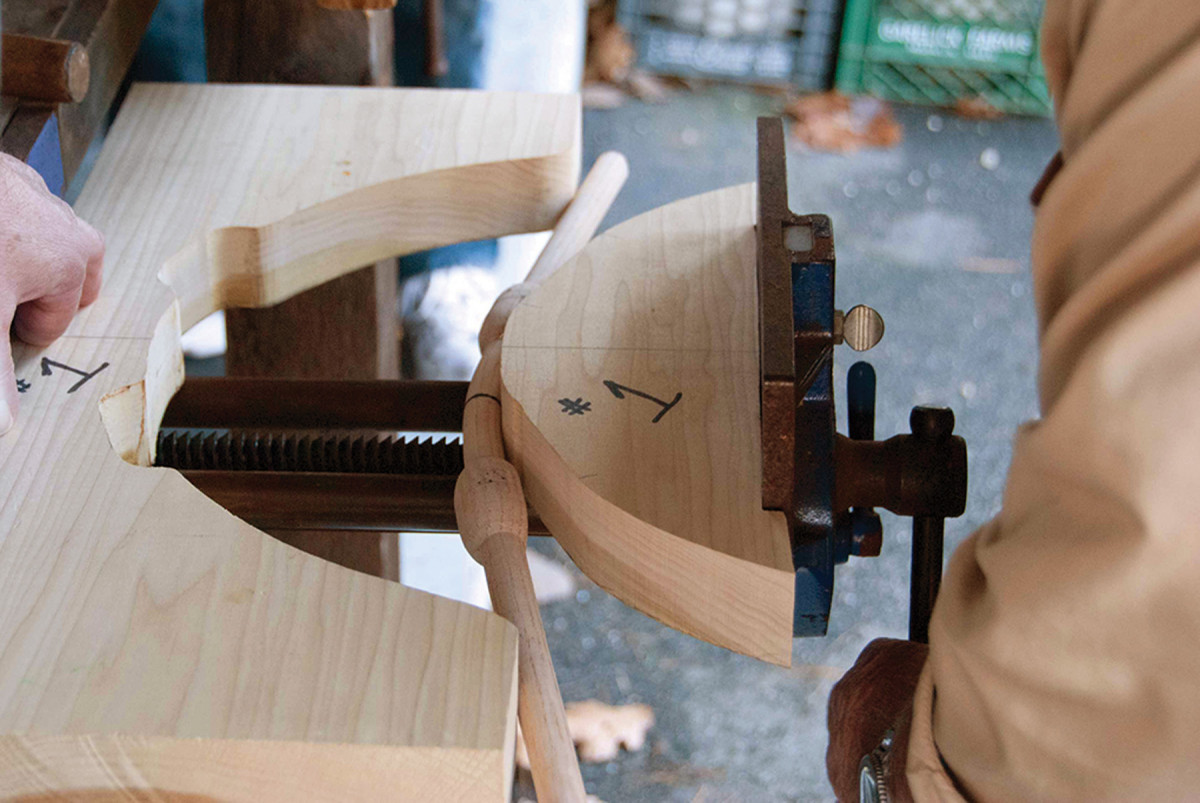
Each half matches the shape I wish to accomplish.
Working alone, I bend each side independently. If I have a helper, we bend both ends at once. Bending is an amazing process to watch. We think of wood as hard and rigid, but right before your eyes it magically changes shape. It is even more exciting to be the person doing the bend.
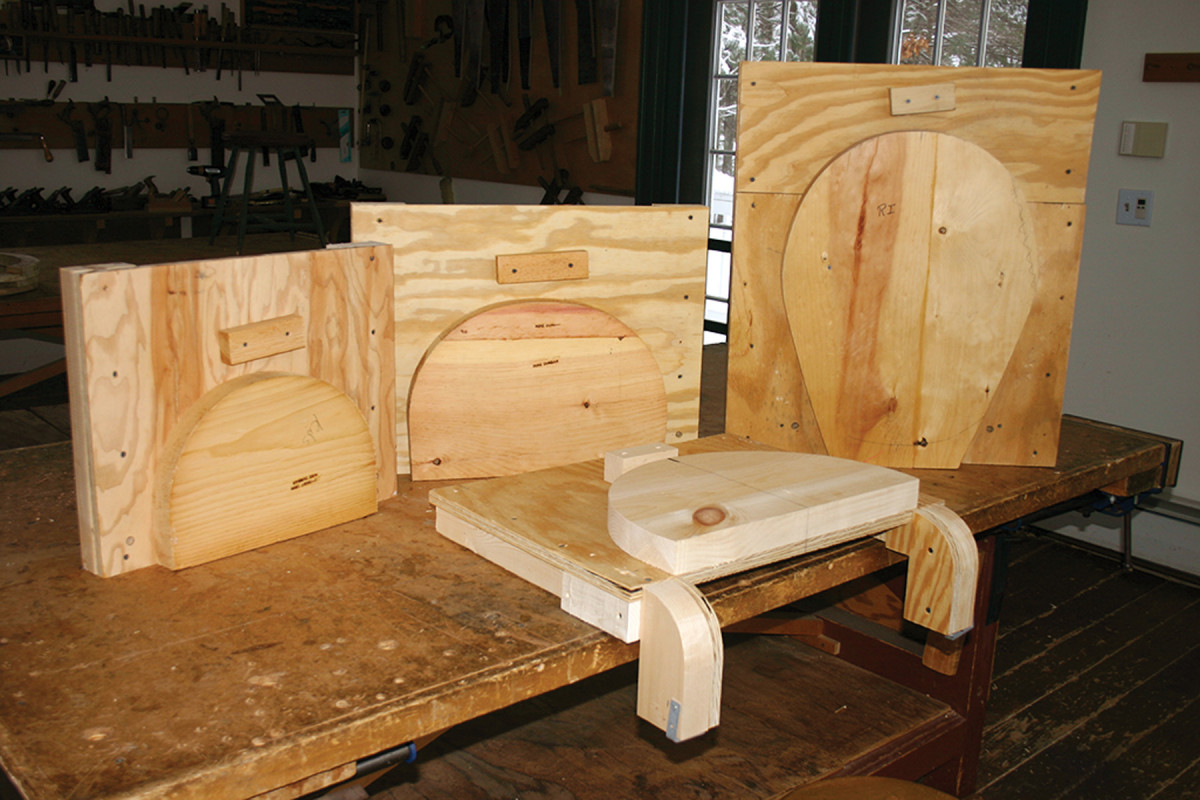
Forms. For complete bends, I use a form that matches the shape I wish to accomplish. The block at the top of each holds a wedge in place.
To overcome that excitement, I advise my students before beginning, “Speed is your enemy.” While they work, I repeatedly warn them to slow down. Bending must be done gradually, because unlike a sponge, wood compresses more slowly. Rushing the job will result in more breakage. A complete bend can take up to 45 seconds (less for a partial bend).
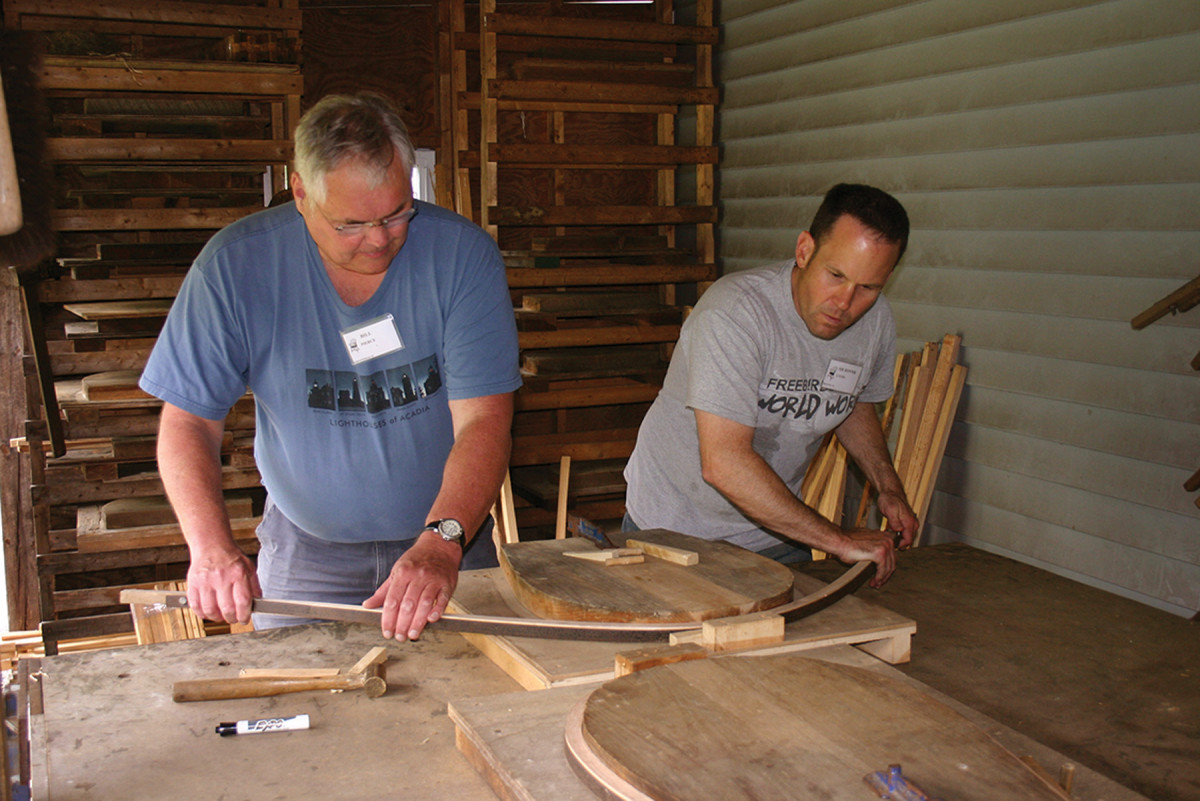
A little help. With two people working, and a strap providing the neutral line to keep all the wood in compression, a steamed piece can be bent around a form all at once.
That said, you don’t want to stop for a cup of coffee on your way from the steam box to the bending form.
PVC Steam Box
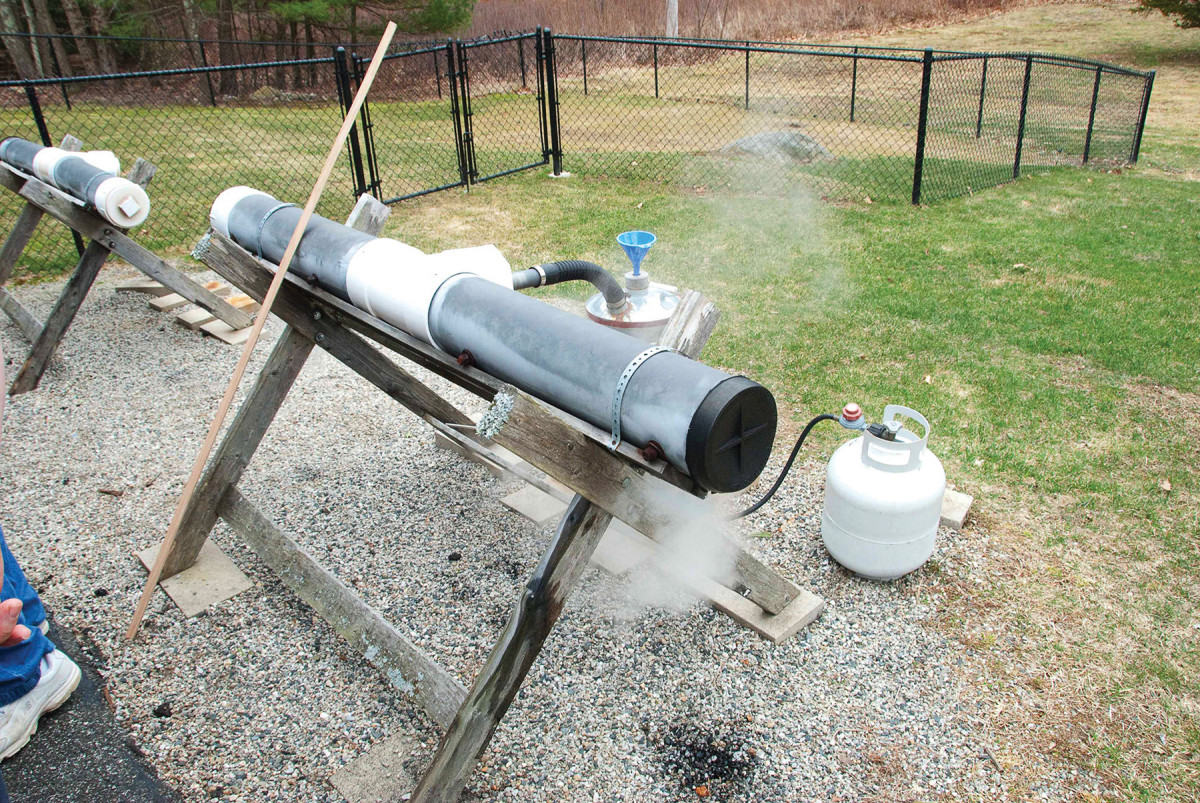
My steam box does such a good job that I have not improved it in years. It is assembled with easy-to-find, off-the-shelf materials.
There are two things I think you want in a steam box: imperviousness and good insulation. If made of wood, the box will have to saturate before it can begin plasticizing your parts. If made of metal, much of the heat radiates into the air rather than doing its intended job. Also, you risk burning yourself if you bump the tube.
I use Schedule 80 PVC Drain-Waste-Vent pipe because it has both of my required properties. Being plastic, it is impervious. Once you have steam, the box goes immediately to work. It is such a good insulator that when the setup is running full tilt, I can comfortably hold my hand on the box, even though live steam is a mere 3⁄8” away on the inside of the pipe.
To hold the large number of parts a class bends in an afternoon, I have two steam boxes made of 6″ pipe. Most of you will likely find 4″ pipe ample – and a lot cheaper. My boxes are 6′ long, which is a length sufficient to accommodate continuous-arm and settee parts.
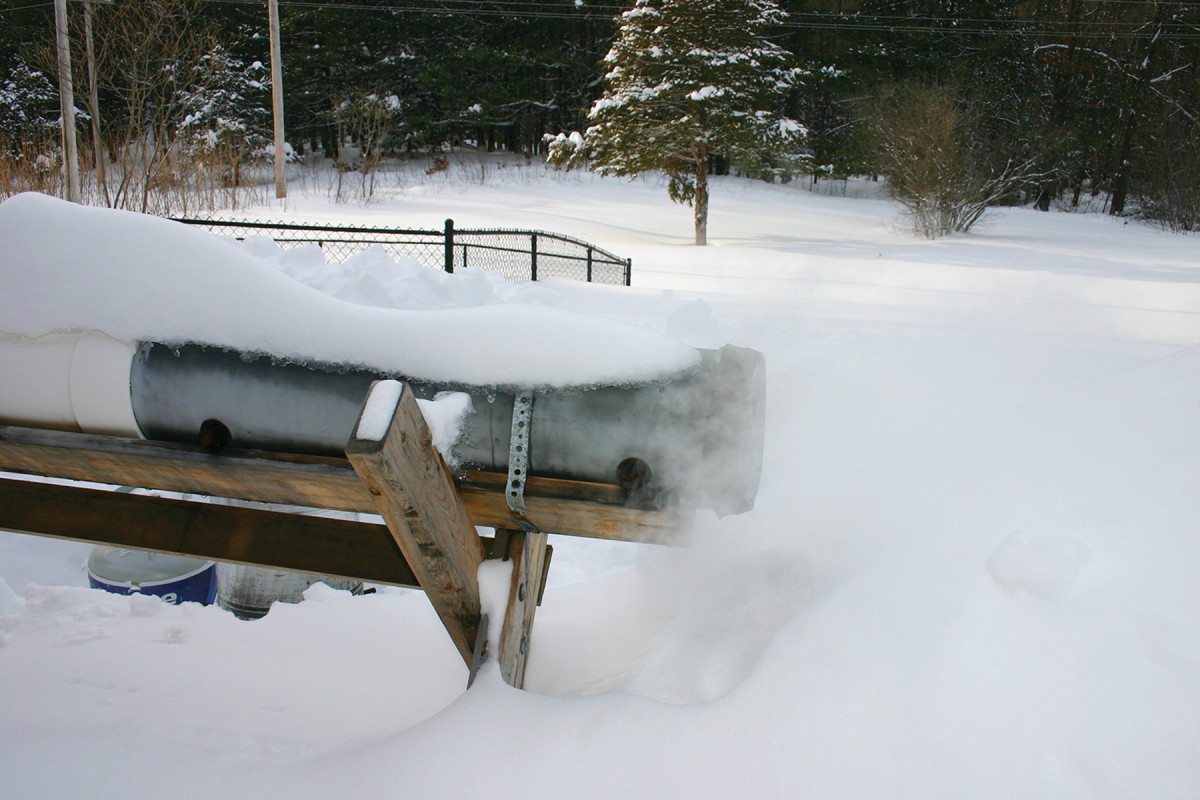
Excellent insulator. The PVC pipe provides such good insulation that snow remains on top in the winter even when the steam setup is going at full power.
I cut the PVC into two 3′ sections and joined them with a T fitting. With this configuration, the steam is introduced in the middle and flows evenly in both directions. I connect the boiler spout to the fitting with a radiator hose and seal one end of the box with a test cap and the other with a threaded cleanout. If you use your box only occasionally, test caps are fine on both ends.
The steam is generated in a boiler (I use a galvanized steel utility can) sitting on a propane burner – the kind used for cooking crawdads or deep-frying turkeys. I do not use an electric heater, because these will not produce a vigorous, roiling boil. Steaming wood is a case where bigger is better and less is not more.
The PVC tube is pierced by four evenly spaced stainless steel bolts. The bolts serve as a rack and hold the parts in the top half of the tube, up in live steam. If you don’t use stainless, cover the bolts with flexible plastic tubing. This will prevent them from marking the wood.
I drilled two 1⁄2” vent holes on the bottom of the tube a short distance from the ends, but far enough in to avoid being covered by the test caps. With copious steam and somewhat tight fittings, the tube will develop a bit of pressure, causing plumes of water vapor to shoot downward from these vents. These plumes tell me at a glance when the box is operating at full tilt.
When explaining the box to students, I liken it to a table saw. Both are very effective, but both are dangerous – and you must shut off both before making any fixes.
In operation, the tube is full of steam that will scald as fast as a table saw will take off a finger. Remember, steam rises. So when you open the tube, “up” is the direction the steam is instantly heading. To avoid burns, pull the cap straight off. Then use tongs to remove parts and approach with your hand from below the opening, never above. Do not try to fish out a part that is beyond easy reach of the tongs.
Close the tube by putting the cap’s bottom edge in place, then the top.
— MD
The Bad News: Failures
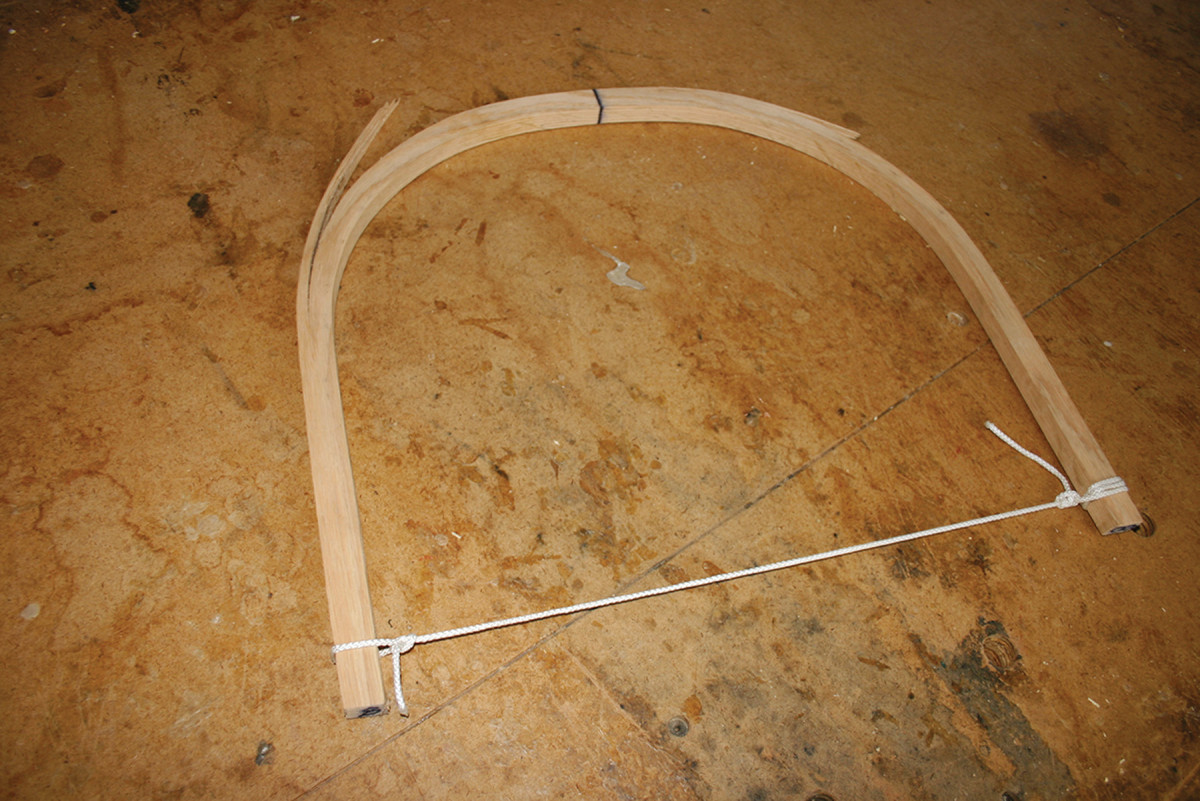
Delamination & roll up. A delamination failure – where the part separates along the grain – is common.
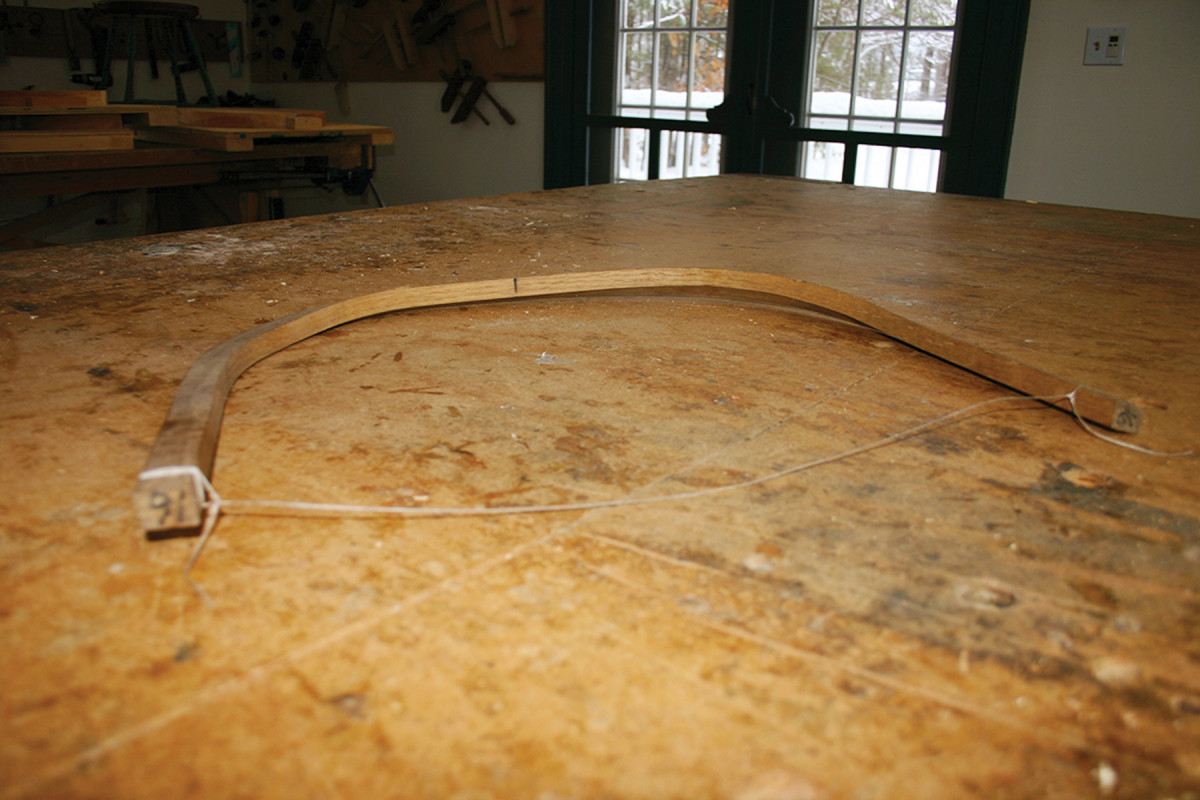
A roll up failure refers to the piece not remaining flat in the proper plane as it dries. Notice how it lifts off the surface at the top right.
If a bend is going to fail, it will happen in one of four ways. The most common is a delamination; the part separates along the grain.
Second most-common is roll up, where the piece bends as desired, but doesn’t remain flat in the proper plane. This occurs when bending a part against its narrow dimension. (It happens in classes most often in sack-back arm rails.)
Tension shear is the third-most common. Here, the wood fibers tear like a piece of cloth.
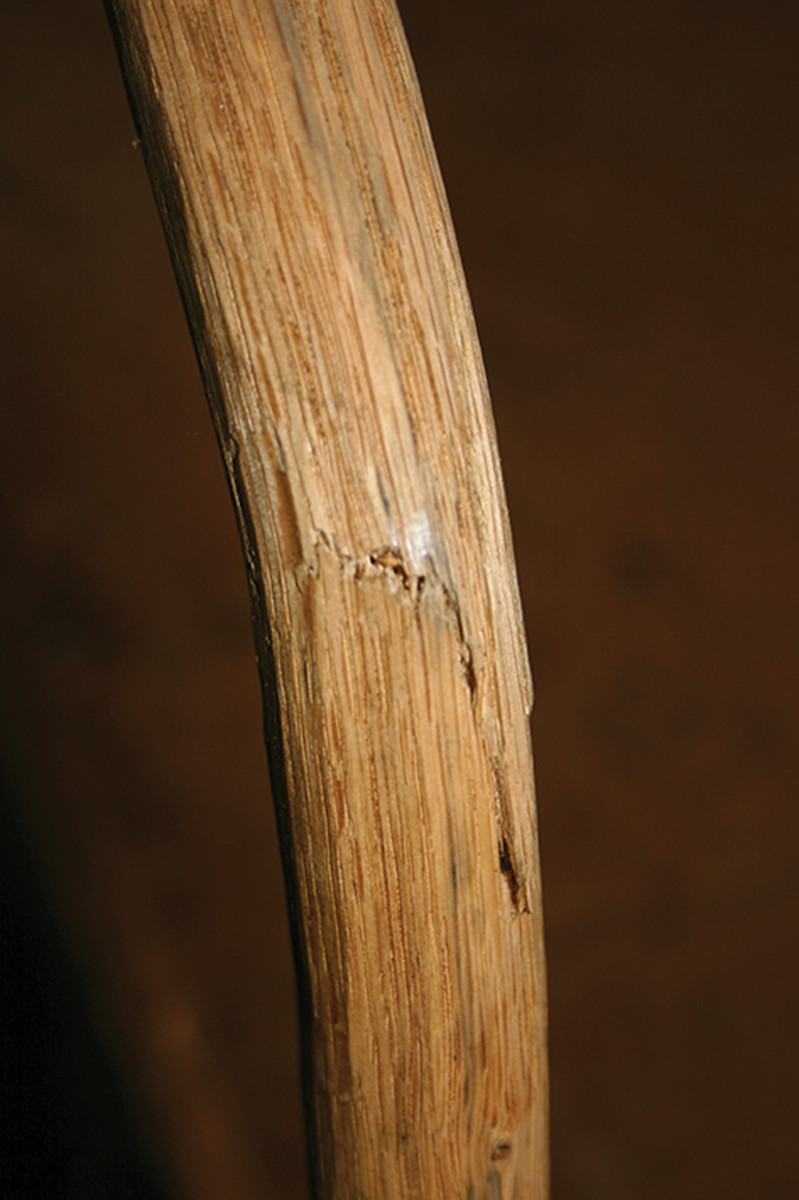
Tension shear & compression. In tension shear, the fibers simply tear during bending.
Finally, instead of compressing, wood will sometimes collapse in a compression failure. The result is reminiscent of ribbon candy.
I seldom have the luxury of choosing the day I will bend. We do it Monday of every class, because the wood has to be dry so we can use it later in the week. I am forced to ignore the reality of good bending days vs. bad. There is a marked difference, and when blessed with a favorable day, we have far fewer problems.
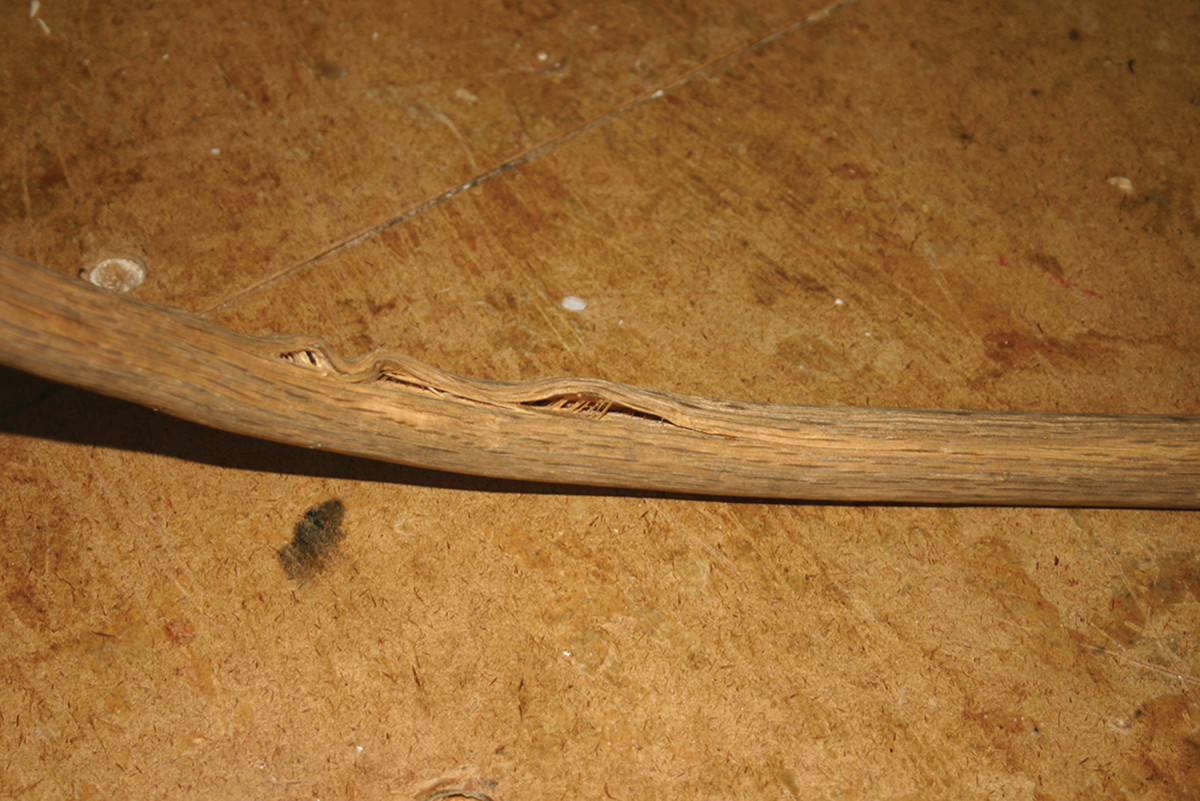
A compression failure – where fibers wrinkle instead of bend – typically occurs on an inside curve.
On a bad day we can lose 15 percent, while good days frequently achieve 100-percent success. The good-versus-bad-day phenomenon is counter-intuitive. To bend, wood has to be wet, but days that are gray and drizzly are the bad ones. Crystal-clear, dry, low-humidity days are best.
Drying Time
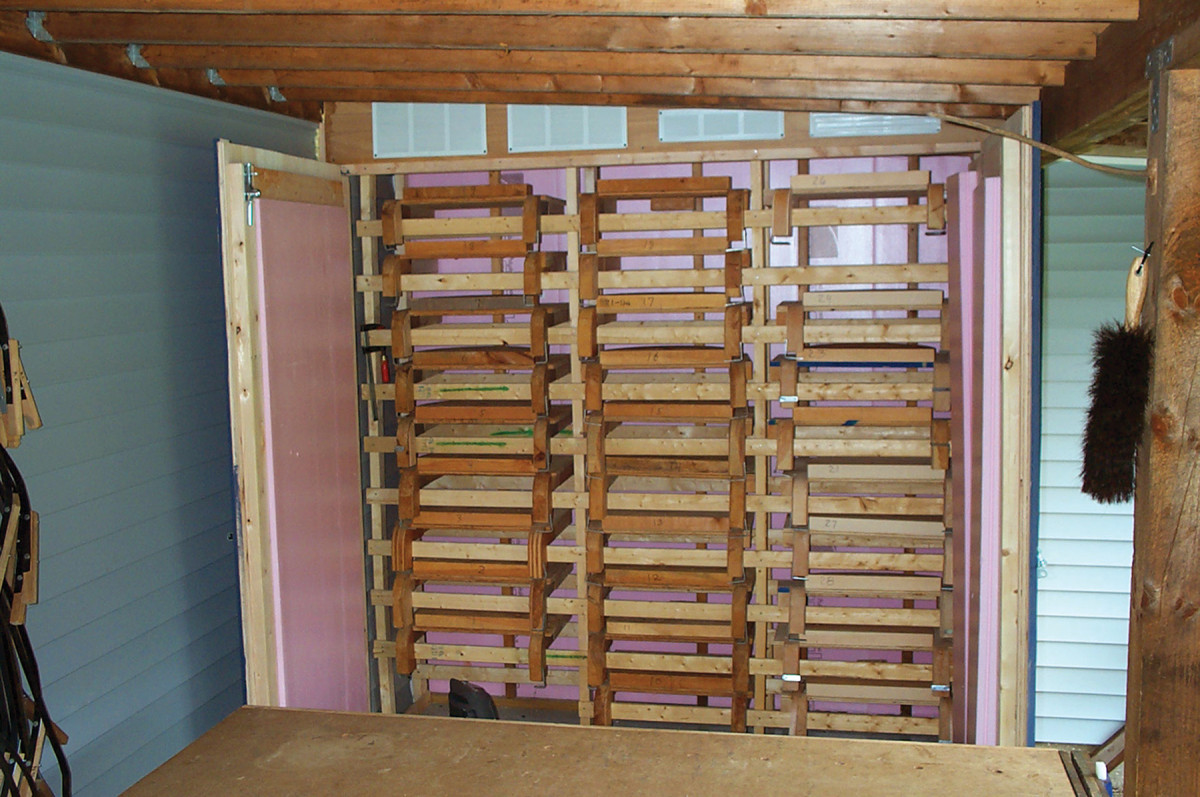
Stacks of arms. A continuous-arm chair back (bent in two planes) needs to stay on the bending form for three days, so the forms are stacked in a drying room equipped with a heater.
A successful bend has to dry before it can be used. Once cool to the touch, a complete bend in a single plane can be removed from the form and its ends tied with string. A double-plane bend (a continuous arm) has to dry on its form, and a partial bend remains in its press.
I have a special kiln for continuous-arm forms because they are awkward to stack. We use our furnace room for drying our other bends. The space stays at 90° year-round, making it an effective kiln. During the summer, we increase the room’s “oomph” by adding a dehumidifier and a heat lamp. Our bent parts are ready to use in two to three days.
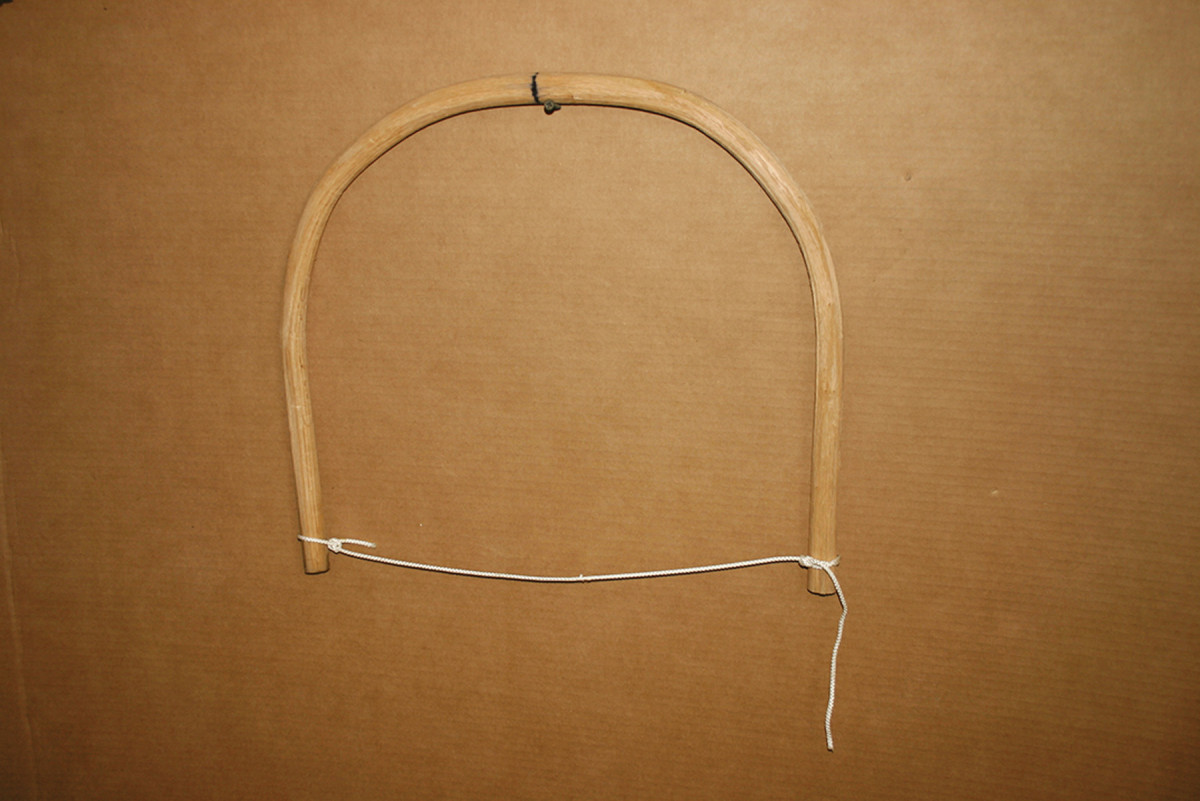
Strung up. Once a piece is cool to the touch, a single-plane bend can be tied in place with a string and removed from the form. Notice that the string shown here is loose; the wood continued to compress after it was removed from the form.
You can determine on sight when a bent part is completely dry because it takes a compression set. Rather than springing back, the bend closes slightly. A string that was taut when the part was removed from the form will droop. A continuous-arm bend that was tightly secured to its form will loosen; the clamp will fall off a press.
So, with all that in mind, how long does it take to go from dry stock to bent pieces? Wood is plasticized by making it both hot and wet. In steam, it gets hot fast. And if it is already wet – that is, it has a high moisture content as does our riven bending stock – it is ready to come out of the box in about 20 minutes and put to use on a form or press.
While you don’t need to worry about over-steaming, you can under-steam.
And with steam-bending in your woodworking arsenal, you’ll never again have to worry about getting past flat. PWM
Mike is the founder of The Windsor Institute, a school in Hampton, N.H. He’s been teaching folks how to make Windsor chairs since 1980.
Here are some supplies and tools we find essential in our everyday work around the shop. We may receive a commission from sales referred by our links; however, we have carefully selected these products for their usefulness and quality.


