We may receive a commission when you use our affiliate links. However, this does not impact our recommendations.
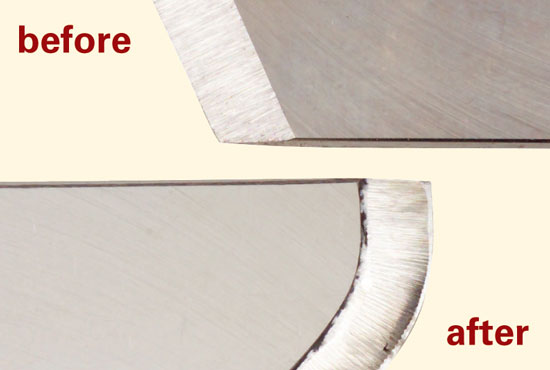
An alternate shape minimizes dig-ins.
by Alan Lacer
Years ago, an old professional spindle turner showed me a different way to sharpen a skew. When I tried it, I was sold. This modified grind is more versatile, friendlier and more responsive than a traditional grind. Used correctly, a modified skew is difficult to catch and dig into the wood, unlike a conventional skew. In the years since, I’ve found that many early 20th-century turners from Maine to Indiana adopted the same alternate shape. They were all on to something good.
It’s easy to learn how to sharpen a modified skew. I’ll show you how to take a regular skew chisel with a flat cross section and turn it into a far superior tool in an hour or so.
Shape the Sides
Begin modifying a conventional skew by reshaping its sides (Photo 1). I prefer to do this on a belt sander mounted in a stand and equipped with a belt designed to cut metal (see Sources, page 44). Be sure to remove all the dust from the sander and set aside its bag to avoid starting a fire. Start with a 60-grit belt; finish with a 120-grit belt. I round the short point side to glide with a smooth motion when planing and to easily rotate and pivot the tool when rolling beads.
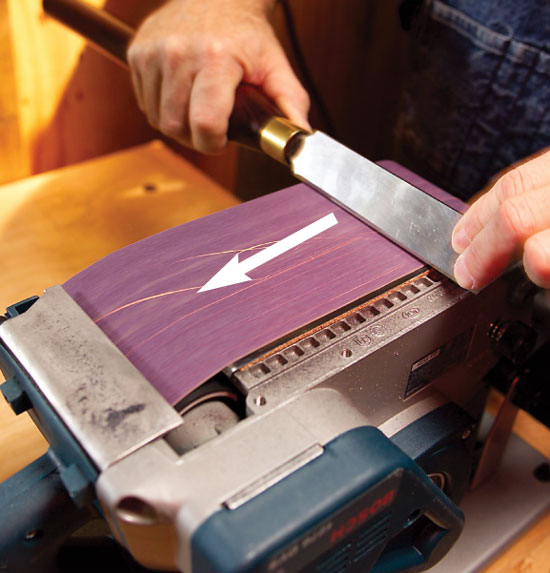
Photo 1: Begin modifying a standard skew on a belt sander. Hold the tool so the belt always travels away from you. Completely round the short point side up to the ferrule; chamfer the sharp edges of the long point side.
Grind the tool’s profile on a 36- or 46-grit wheel (see “The Modified Profile,” above, and Photo 2). I use a coarse wheel because this step removes a lot of material.
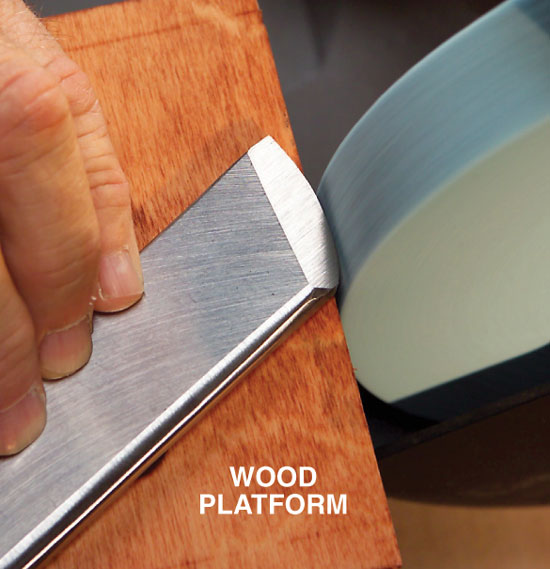
Photo 2: Grind the straight and curved profiles. Position the tool rest about 90 degrees to the wheel. I’ve mounted a wood platform on my tool rest to have a broader area of support, which is critical for modifying and resharpening a skew.
Sharpen the Edge
Switch to a 60- or 80-grit wheel. Adjust the tool rest to grind the same angle as on a conventional skew. I prefer to set this angle by measuring distances. The length of the bevel should be approximately 1-1/2 times the tool’s thickness. The angle between both bevels will then be 35 to 40 degrees. As you grind, you’ll probably have to tweak the tool rest’s angle to get it right.
Begin sharpening the straight section (Photo 3). Flip the tool as you go to remove the same amount of material from each side (Photo 4).
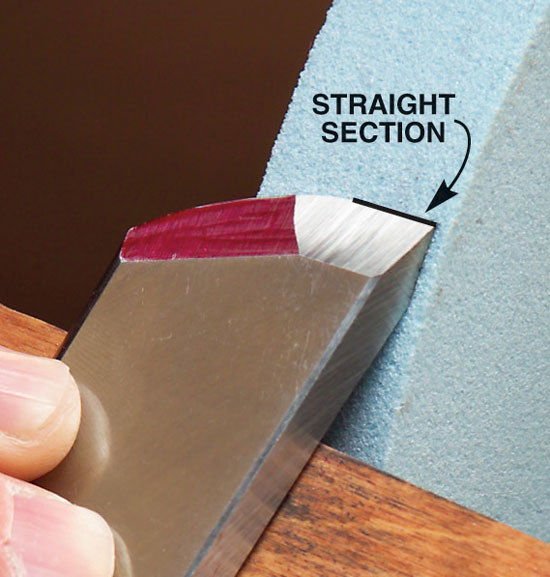
Photo 3: Begin grinding the profile’s straight section. Color the old bevel with a felt-tip marker to identify where the wheel cuts.
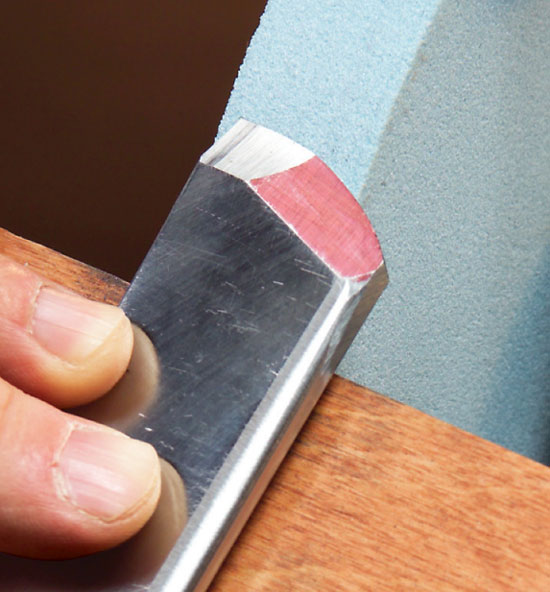
Photo 4: Flip the tool now and then as you continue grinding. It’s important to keep the bevels on both sides of the tool equally long to center the cutting edge.
Now for the curved section. You’ll grind and sharpen this in one long sweeping motion, using your fingers as a pivot point (Photo 5). Start next to the straight section, then rotate the long point off of the wheel. Continue in one fluid motion down to the short point. Stop when the area around the short point is square to the wheel (Photo 6). Then, without changing your hand position, rotate the tool in the opposite direction, back toward the straight section. The idea is to fan the tool back and forth without lifting it from the tool rest. Make three or four passes on one side of the tool. Then flip the tool and make an equal number of passes on the other side. Continue sharpening and flipping until the bevels meet at the cutting edge.

Photo 5: Grind the curved section by using your fingers as a pivot point. Keep the spot you’re grinding square to the wheel.
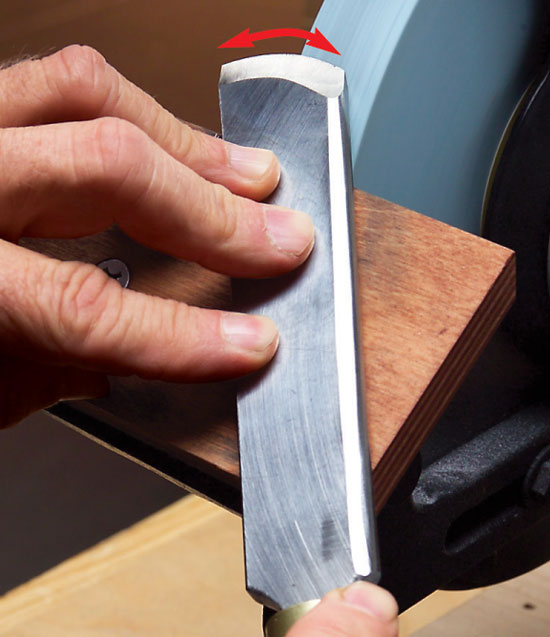
Photo 6: Continue grinding with a fanning motion. When you reach the short point, as shown here, reverse the direction without lifting the skew from the tool rest.
As with any turning tool, you’ll know when to stop sharpening by watching the sparks. When they fly off evenly both above and below the bevel, the cutting edge is sharp. To confirm that it’s sharp, lift the tool and look down at the edge under a bright light. A dull area reflects light; a sharp edge disappears into a black line.
Hone and Test the Edge
I’m a big believer in honing. An extra-sharp skew is safer and performs better. I use a diamond slipstone on high-speed steel tools because it cuts fast (see Sources, below). To get the angle right, hold the slipstone so it only rubs on the bevel’s heel (Photo 7). As you move the slipstone up and down, incline it until it touches the cutting edge as well; then maintain this two-point contact. Repeat on the other side. Hone the tool’s sides near the short and long points, too. Test your tool by making a light planing cut (Photo 8).
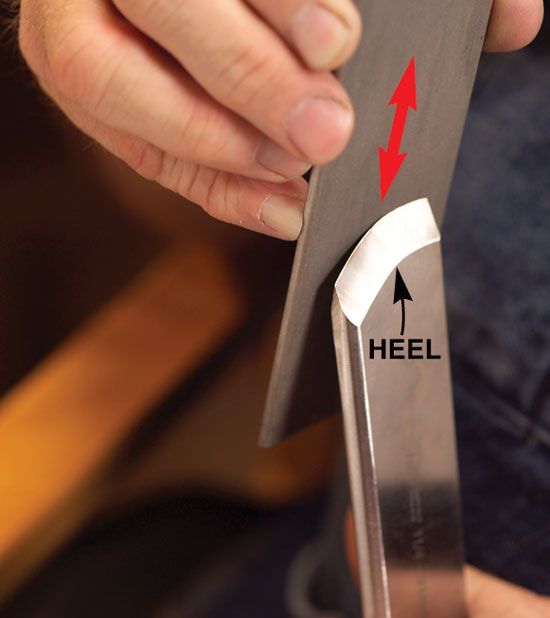
Photo 7: Hone the cutting edge with a diamond slipstone. It’s easy to find the correct angle by feel. Hold the slipstone so it contacts two points on the bevel’s concave surface: the heel and the cutting edge.
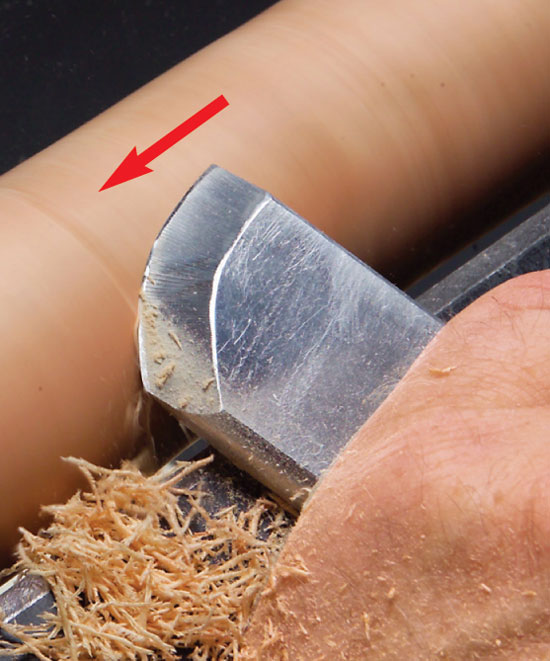
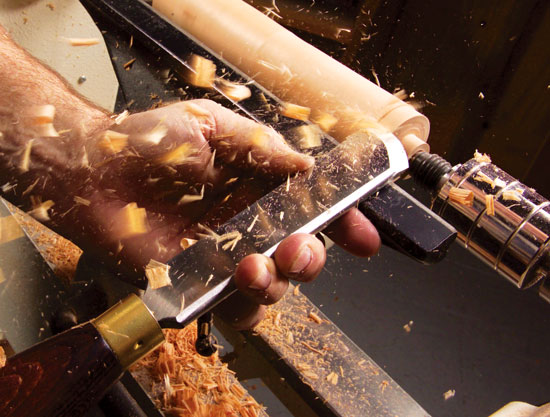
Photo 8: Check the tool’s sharpness by putting it to work. Make a planing cut on a cylinder. A sharp tool will require little effort to push, produce lots of shavings and leave a very smooth surface.
Two Tools in One
With both straight and curved sections, a modified skew is quite versatile.The curved area is great for these tasks:
- – Planing and rolling cuts. If you lead with the short point side and cut with the tool’s curved section, you cannot dig in. Digging in is a real problem with a conventional skew and a bane to all novice turners.
- – Planing chip-prone woods, such as red oak or figured maple.
- – Forming the concave and convex sections of a spindle.The straight section is great for these tasks:
- – Peeling away wood, like a large parting tool.
- – Slicing rounded pommels (with the long point down).
- – Scraping end grain and knots.
- – Working in tight areas. The curve creates a small clearance.
This story originally appeared in American Woodworker Feb/Mar 2007, issue #127.
Source information may have changed since the original publication date.
Sources
Alan Lacer, (715) 426-9451, www.alanlacer.com
-Diamond slipstone plated on two flat sides and two round sides, $88.
MSC Industrial Supply Co., (800) 645-7270, www.mscdirect.com
-Diamond whetstone plated on one flat side only, #01054931, $58.
-Sanding belts for metal, Norzon, Three-M-Ite or MetaLite brands, many sizes and grits available.

Here are some supplies and tools we find essential in our everyday work around the shop. We may receive a commission from sales referred by our links; however, we have carefully selected these products for their usefulness and quality.