We may receive a commission when you use our affiliate links. However, this does not impact our recommendations.
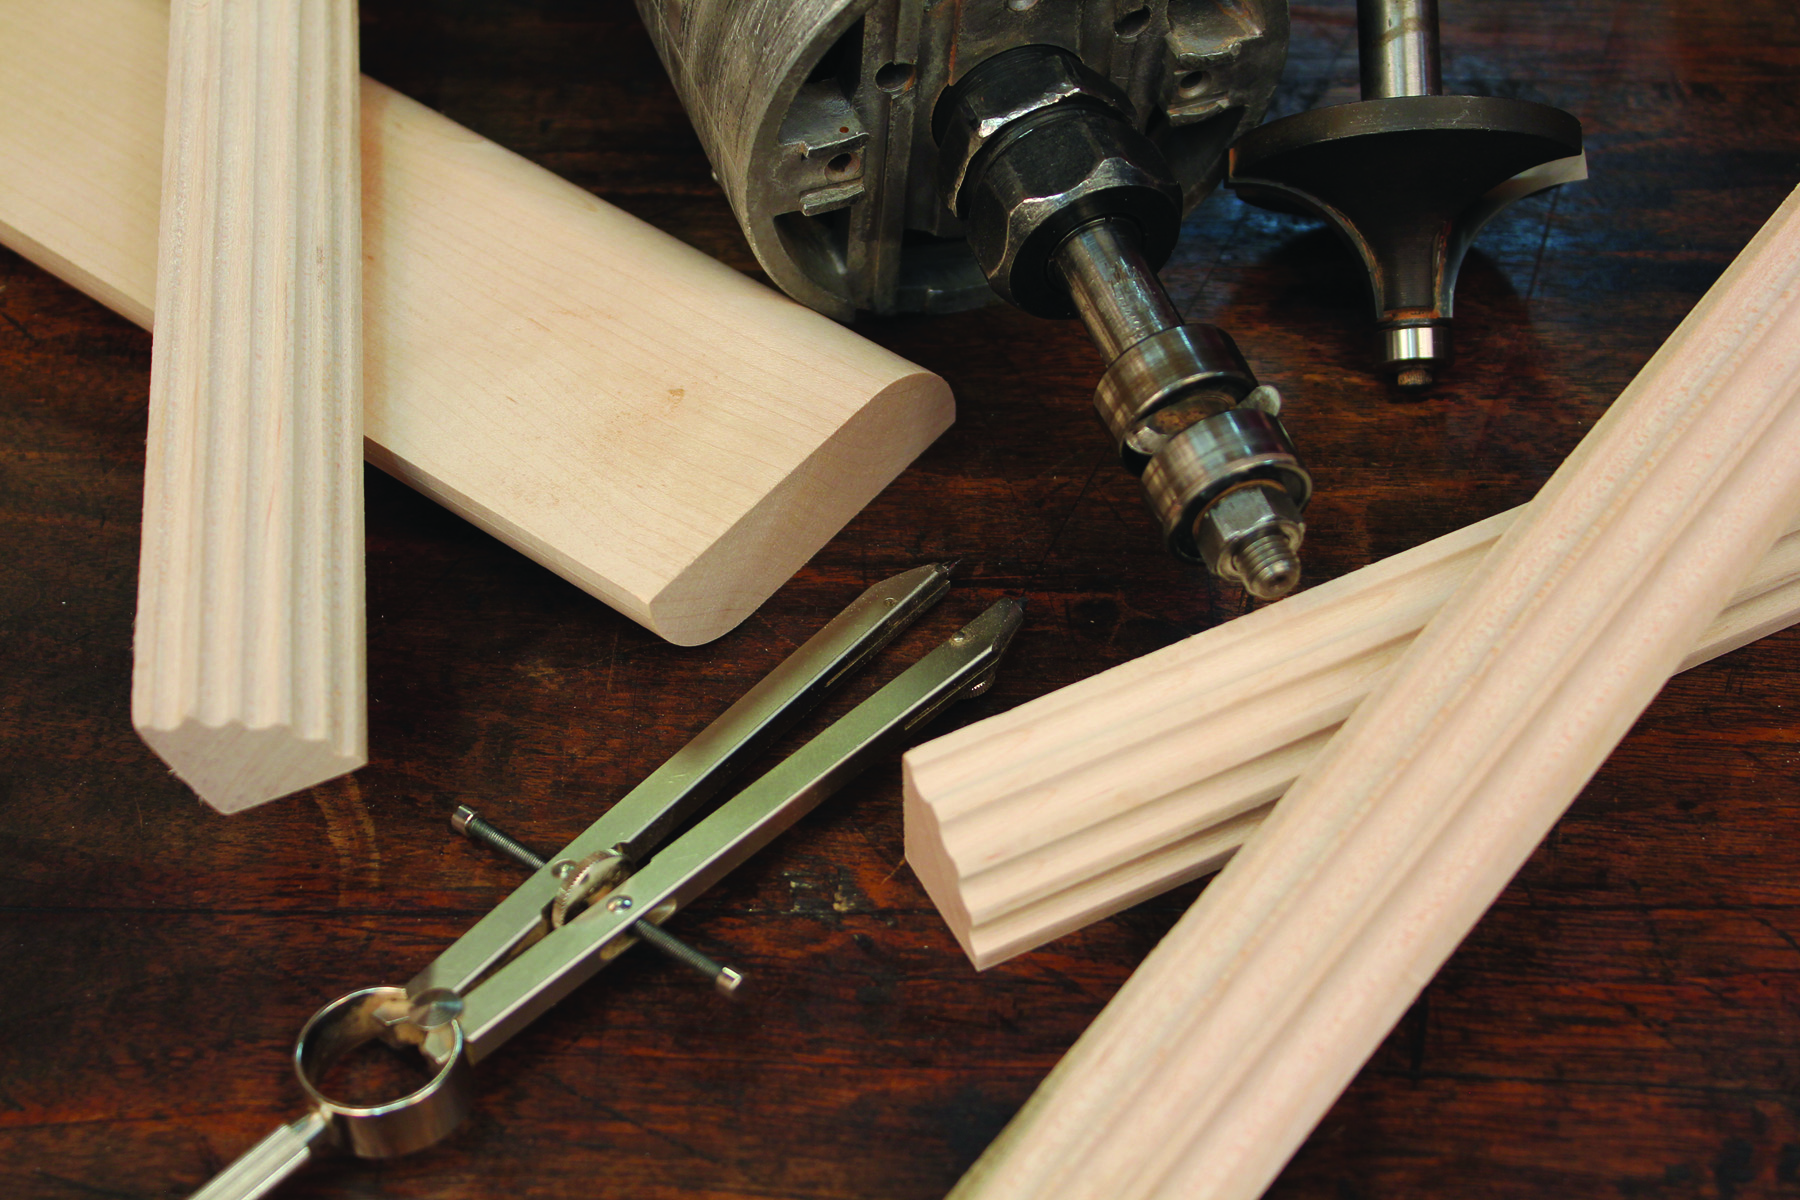
Quarter columns the easy way. All you need to make quarter columns is a router in a router table, a roundover bit, a fluting cutter, some layout tools and wood. This method can turn circles around the traditional lathe method.
Forget the lathe; a router table setup makes quick work of these striking architectural features.
If you want to add a little punch to your next traditional furniture project, try adding quarter columns. They help narrow the look of any piece by drawing your eye inward. This usually gives the piece the appearance of being more compact and vertical, and gives it a more powerful stance.
 So you’d like to give quarter columns a try but you only have a benchtop mini lathe? In 35 years of making furniture, I’ve only turned quarter columns once – and I’ll never do it again. I make my quarter columns at the router table.
Why? Well, the time-honored method for making quarter columns on the lathe has many drawbacks: You need to mill and accurately glue pieces together with paper between so you can easily separate them once you’ve turned the columns. And if you don’t get them precisely lined up in the gluing process, you need to start over or you won’t end up with four equal columns.
Once you get the columns turned, you need an indexing head for your lathe to make the flutes. And once you’ve got that handled, you need to either make a scratch stock with a guide box or a router jig in order to cut the flutes into the freshly turned column. All of this can take from several hours to a couple of days. The process is time-consuming, messy and prone to errors.
With just a few simple setups on the router table, you can make fluted quarter columns in no time – without all the fuss. The best part is, if you don’t like the layout or you make a mistake, it’s easy to start over and get exactly what you want with very little time invested.
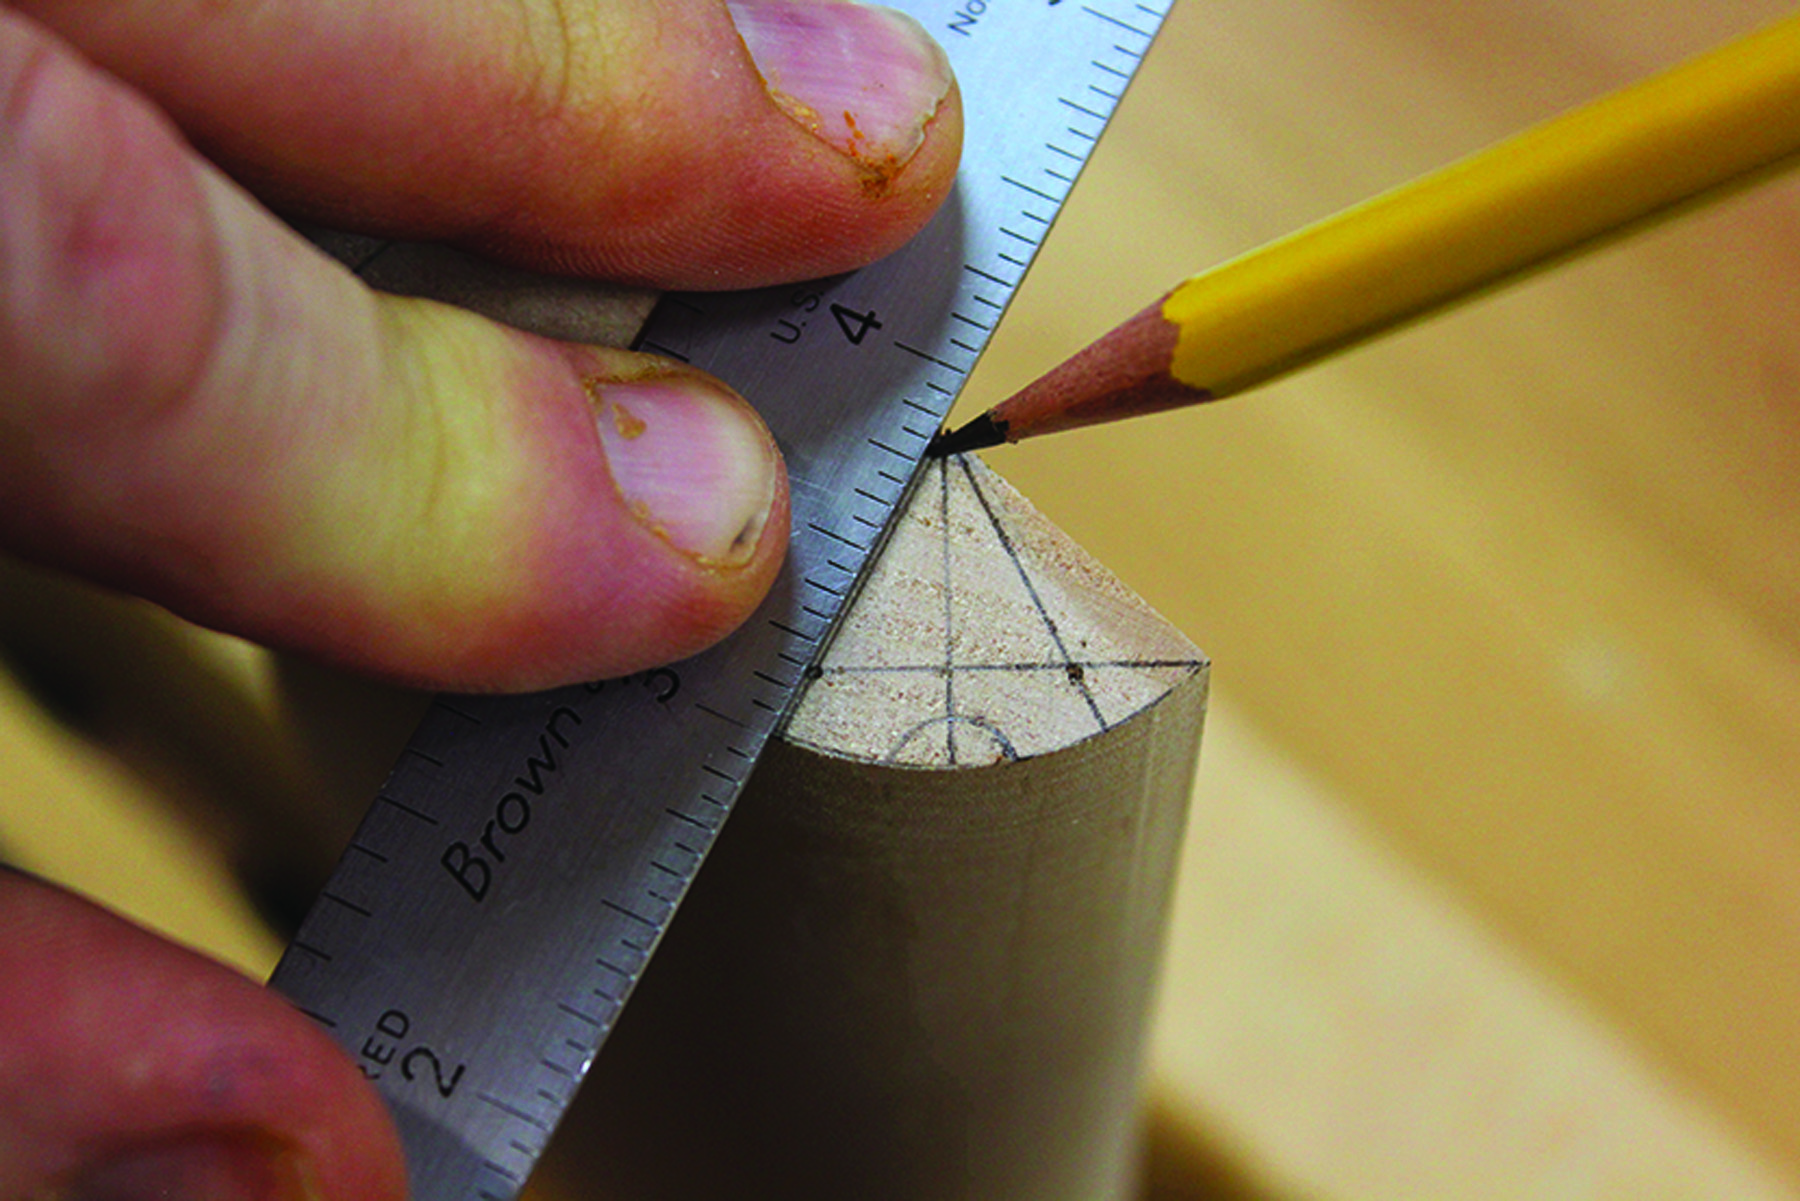
Column Layout
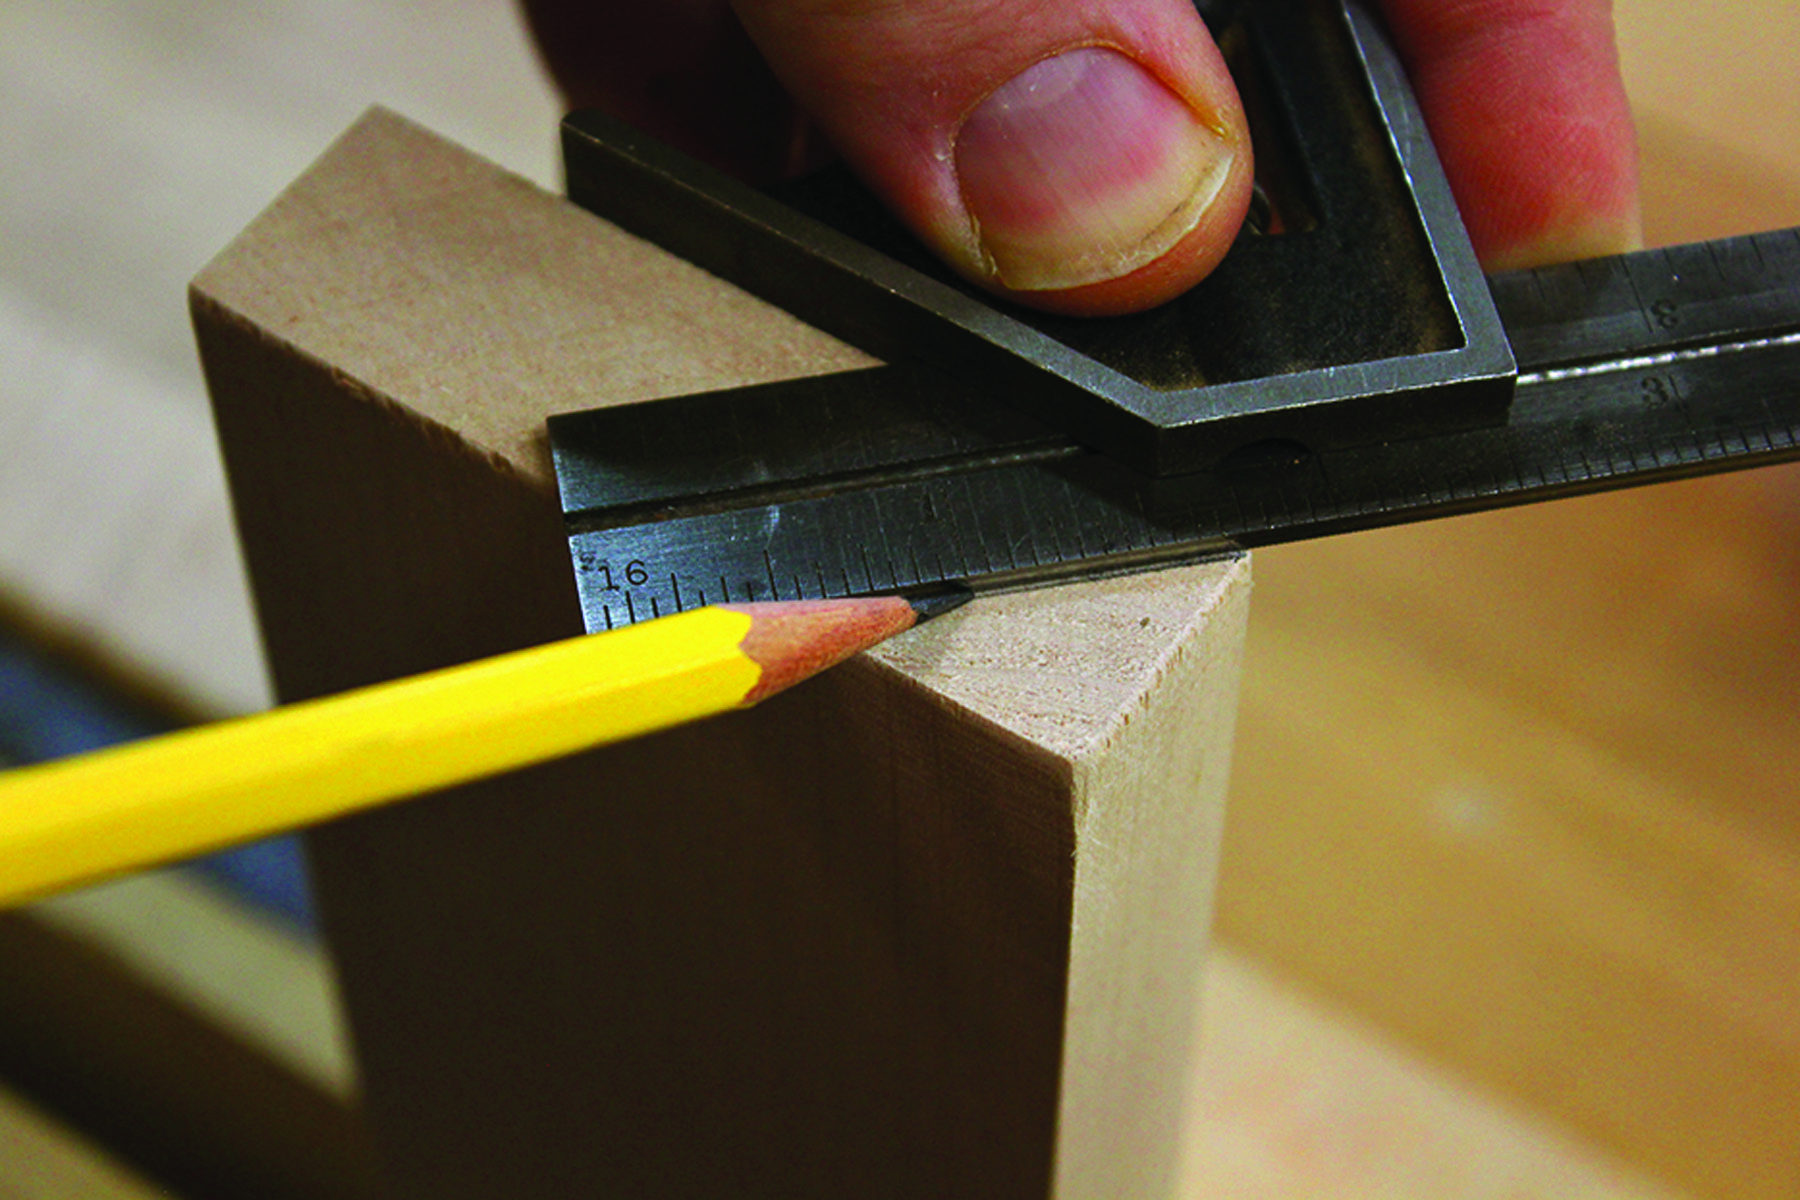
Lay out the column. On the end of the quarter-column stock, mark off a 45° angle to begin the layout process.
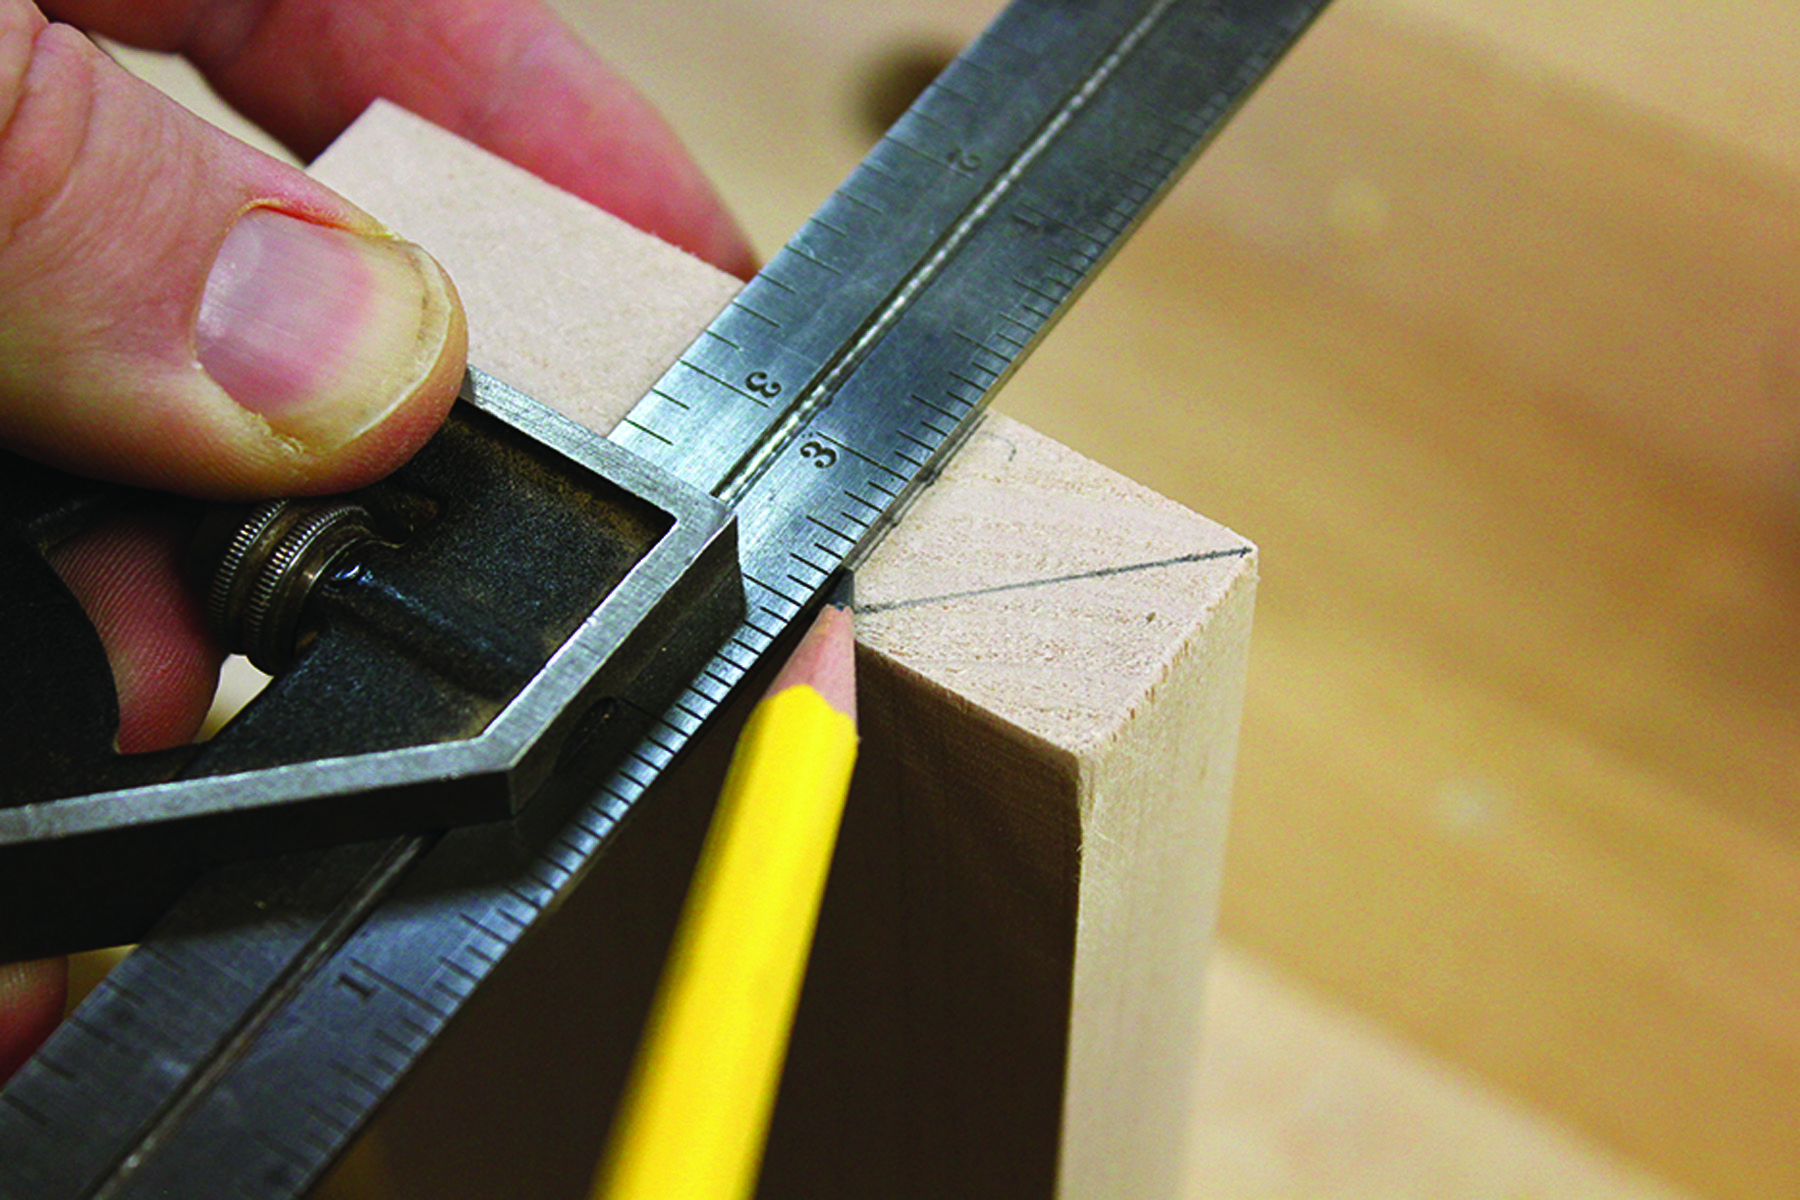
Find the extremity. At the point where the 45° line meets the face of the board, square a line across the thickness to define the largest point of the column.
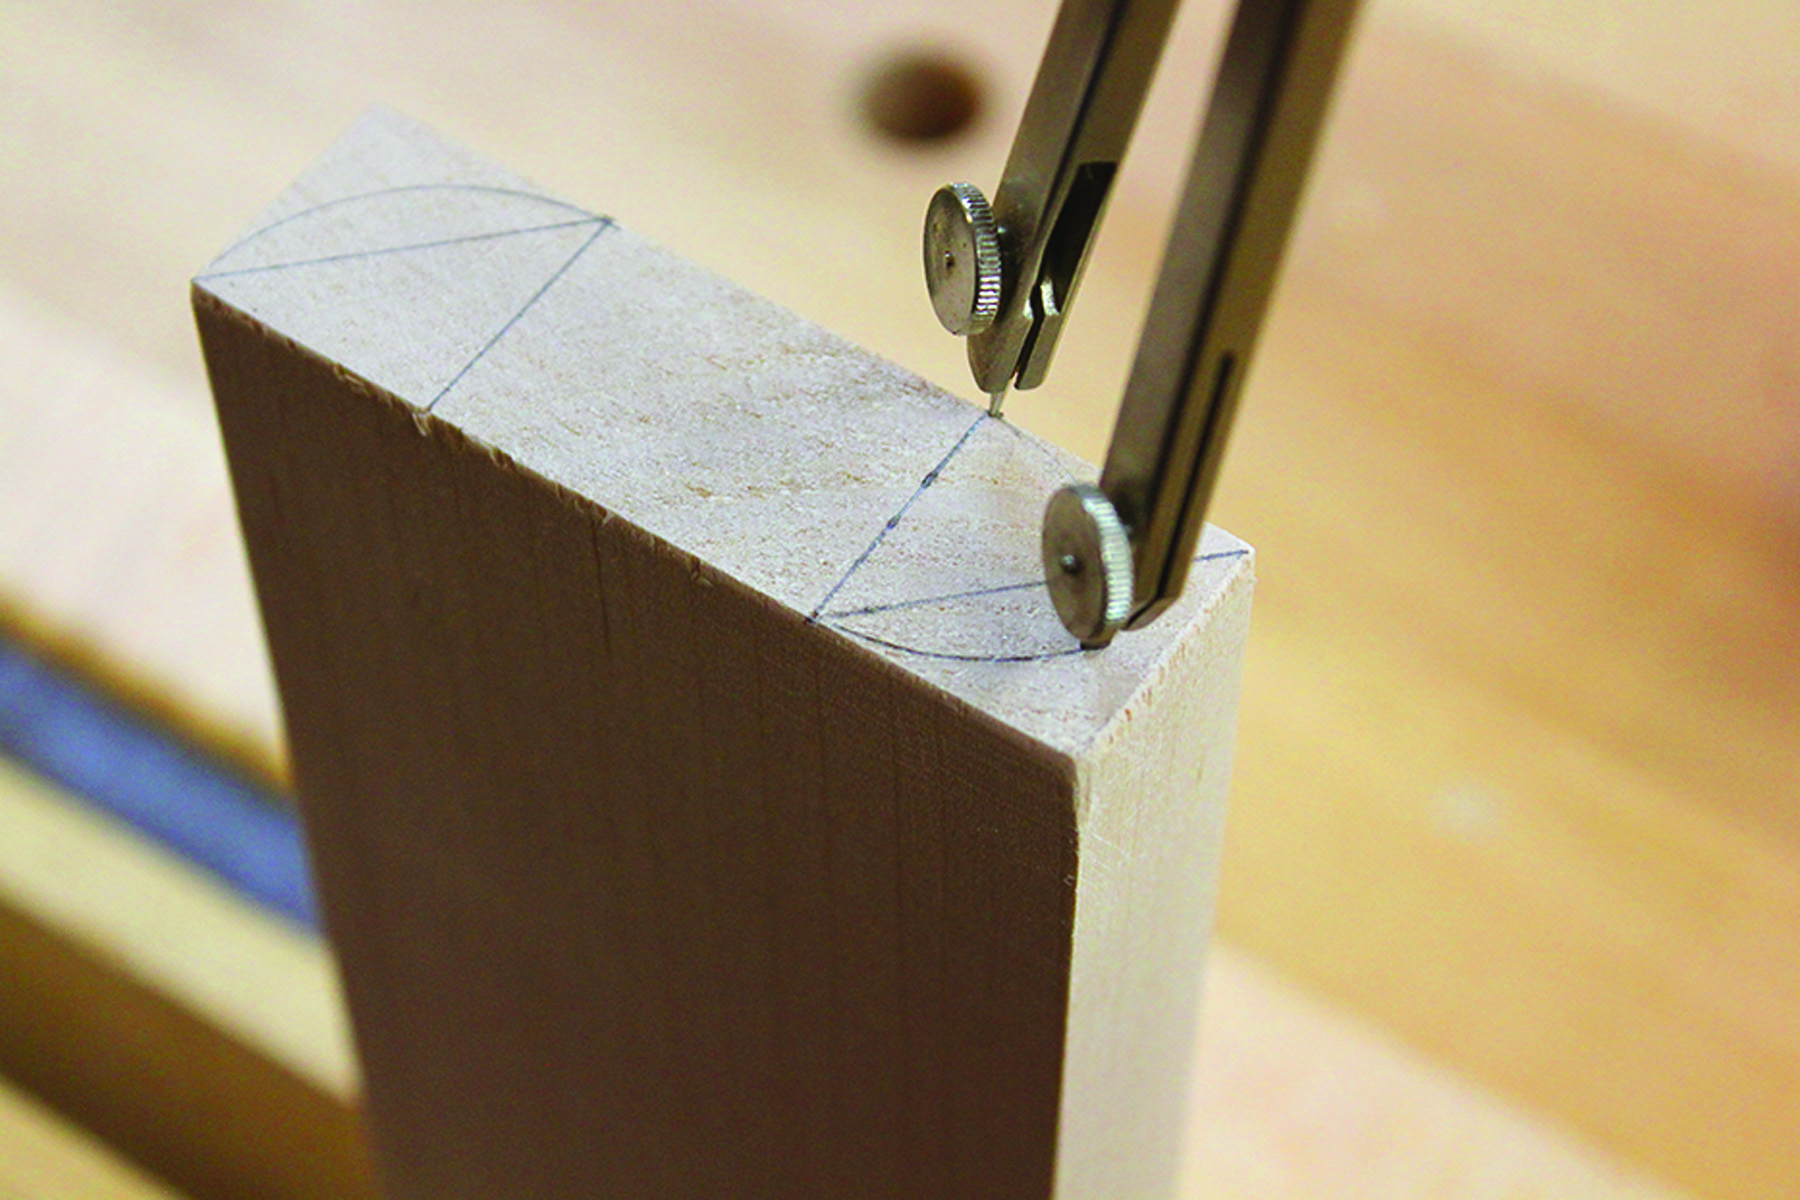
Draw the face. Using a compass, set the point at the extremity then carefully strike the arc of the column face.
Time to Buy Some Tools
To make quarter columns on the router table you’ll need only a few tools, some of which you probably already own. You’ll need a router and a router table, neither of which needs to be very big or expensive. A 1-horsepower (hp) router and a shop-made table should do the trick. I have only 11⁄2-hp routers in my shop.
The next things you’ll need are some flute-cutting router bits. I have sizes from 1⁄8” through about 3⁄8” in my collection. The bits can be with or without ball-bearing guides. Bits without ball-bearing guides give you a little more flexibility as to the depth of cut, but if you already own ones with bearings they’ll work fine. If you’re looking to buy only one bit, I’d go with a 1⁄4” flute cutter.
You’ll also need some roundover bits. I try to make my quarter columns 1⁄8” smaller than the opening in which they’ll be placed. So, for a 1″-square opening, you’ll need a 7⁄8“-radius roundover bit for the column itself. I have sizes ranging from 3⁄4” through 11⁄2” in my collection, but the 7⁄8” and 1″ roundover bits see the most use.
And that’s about all the tooling you’ll need to make quarter columns at your router table. Of course you’ll also need some stock for the columns and a few pieces of scrap to help position the stock on the router table, as well as some basic layout tools, but not much more.
Rout the Column Blank
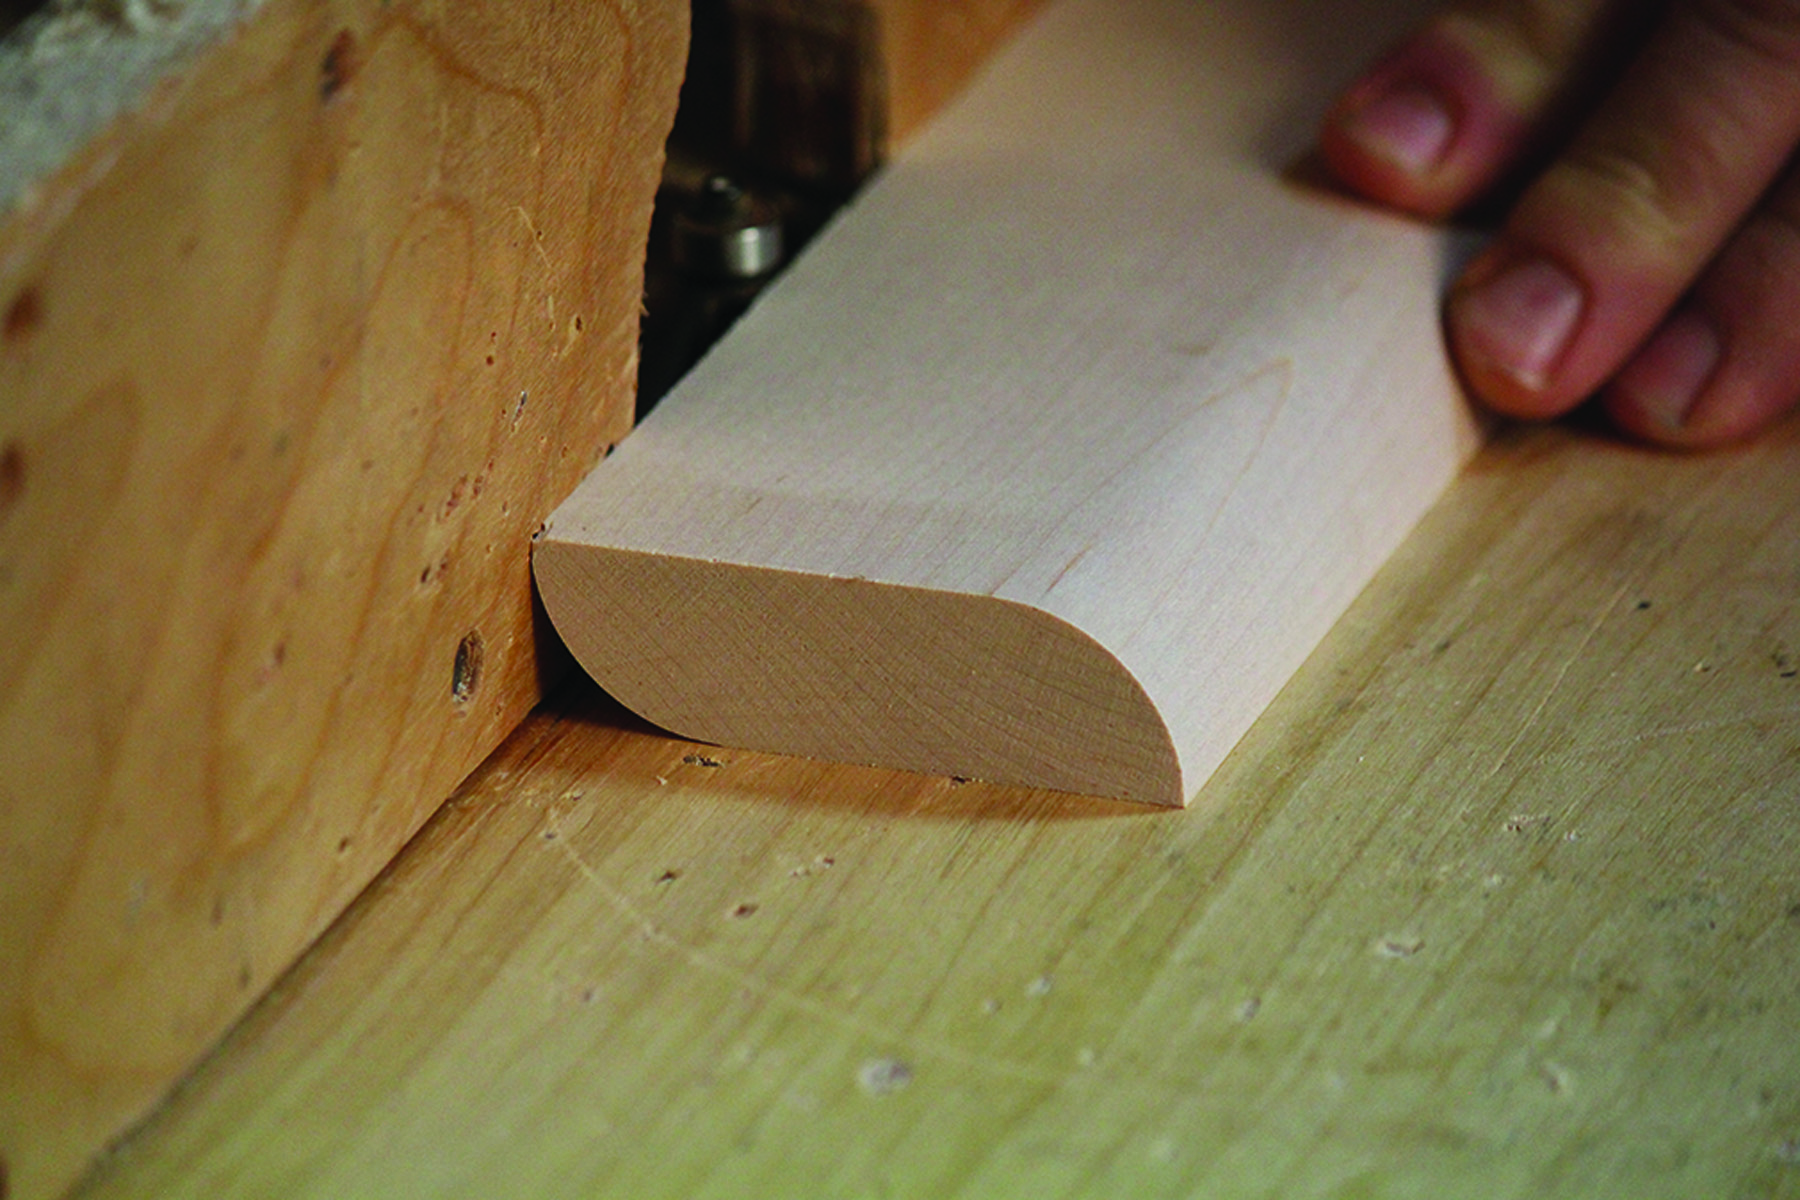
Play it safe. For added stability round over opposite corners of the quarter column blank.
Materials Prep
Let’s begin by making a 1″ quarter column that fits into a 11⁄8” opening. This means you need to mill a board to 1″ thick. In order to get two quarter columns for a piece of furniture, mill the blank to approximately 3″ wide. This allows for one quarter column along each long edge of the blank with some space between for a saw kerf to separate the columns from the blank. It also allows a little extra space in case the layout isn’t perfect or you make a mistake in routing and need to trim back the edge and start over.
Install a 1″-radius roundover bit in the router table so it will round the edge of the blank without leaving a fillet behind on the edge or the face. You want a smooth curve from the corner of the blank to the theoretical corner of the column. It’s good practice to lay out the 1″ square of the quarter column on the blank to help set up the router table.
Now run the roundovers on the edges of the blank. I usually run the roundovers on opposite corners to give the blank more stability when running the flutes and when cutting off the columns on the table saw.
Flute Layout
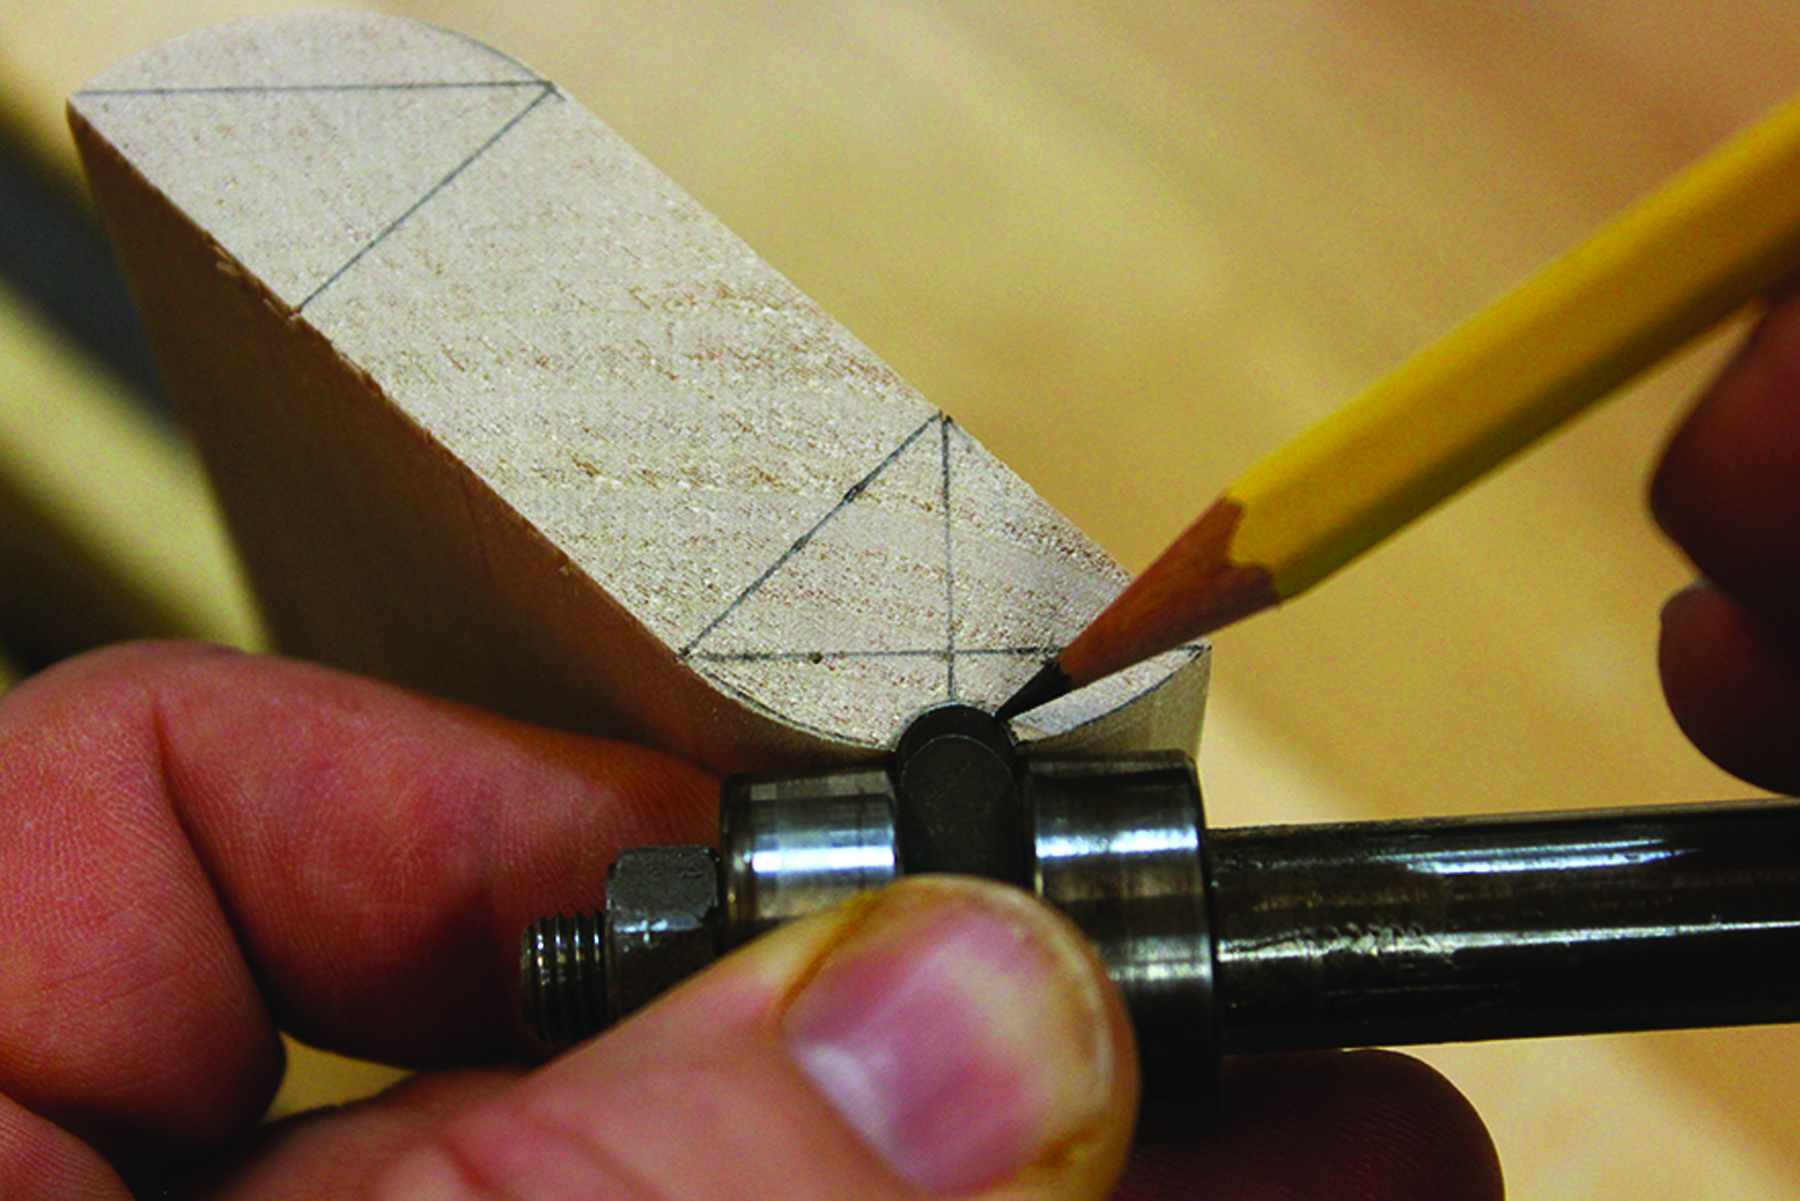
Center flute. Once the flute face is divided in half, use the fluting cutter to mark the center flute location.
Divide again. Once you have the rounded shape of the center flute drawn in, lay out the remaining flutes.
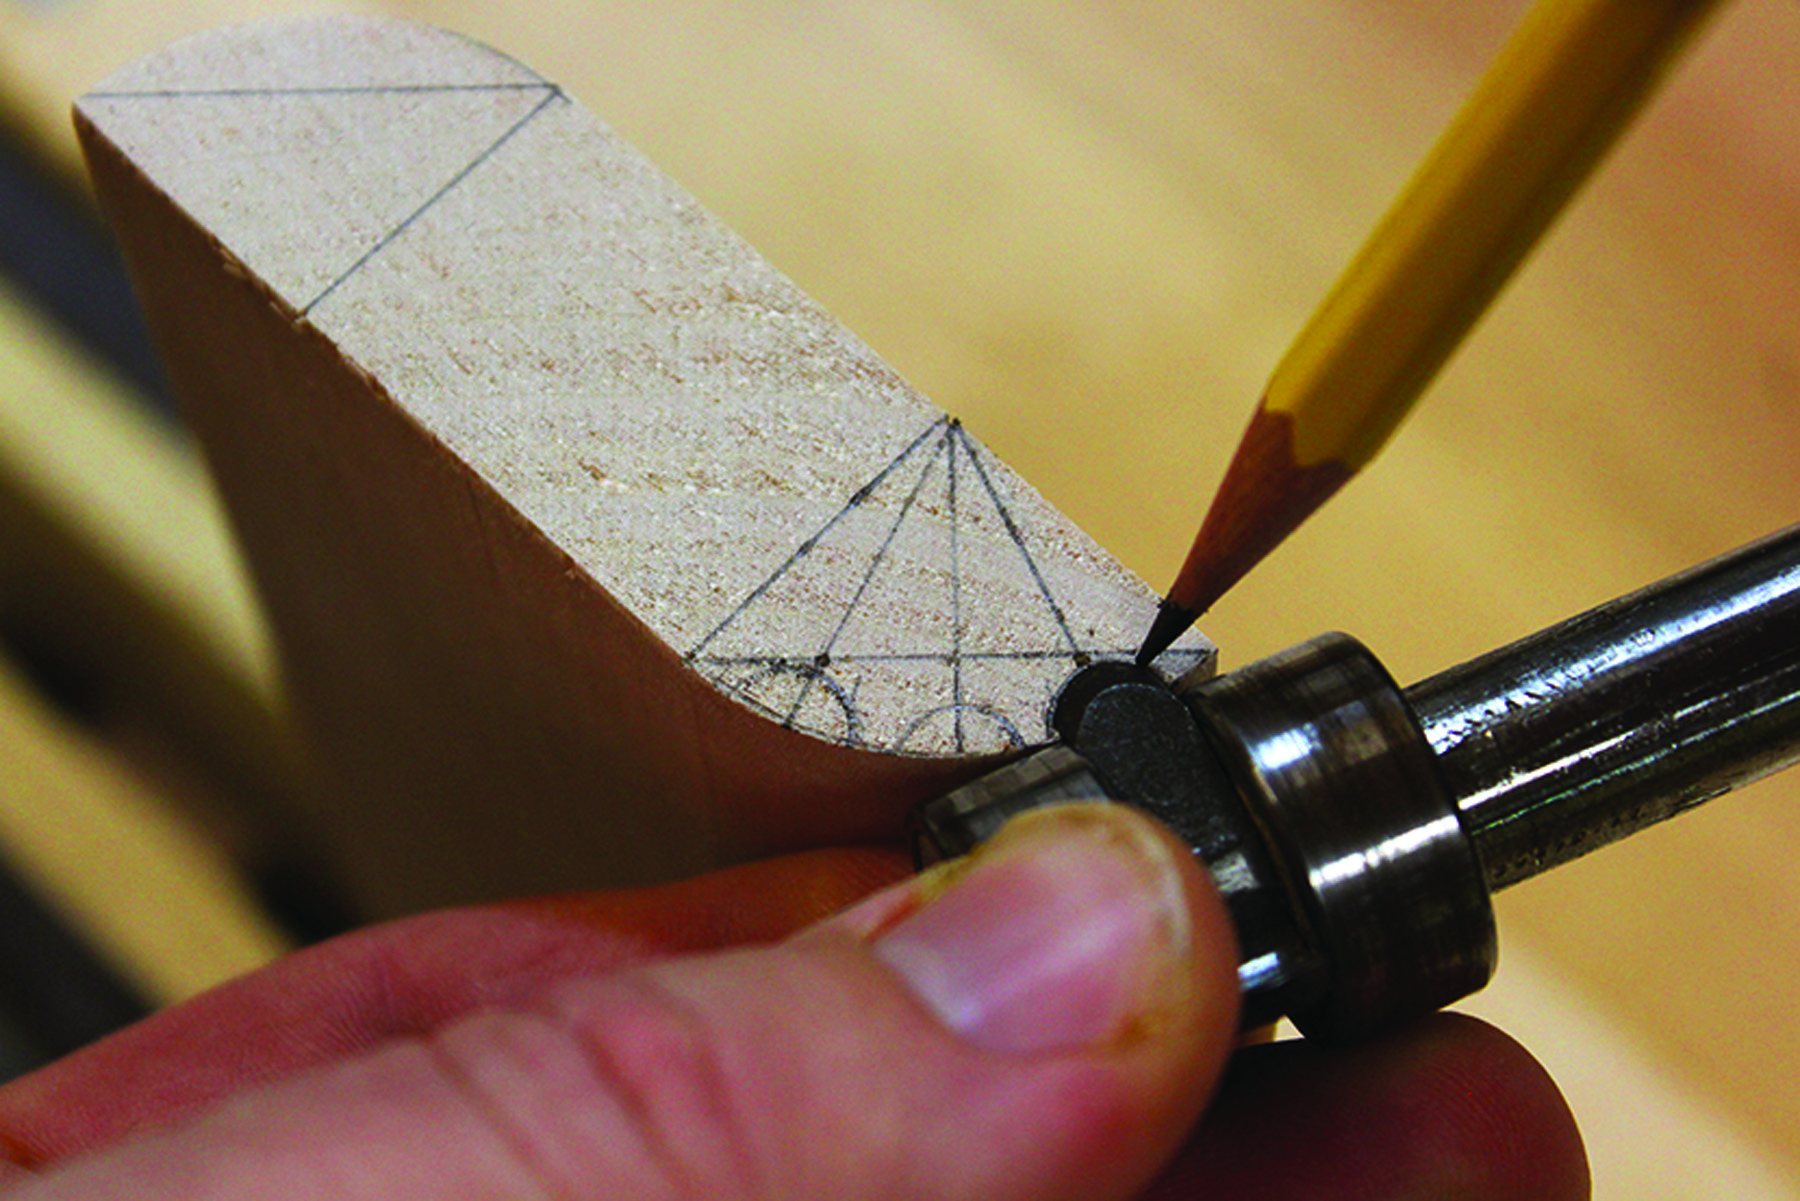
Outer flutes. Using the fluting cutter again as a template, draw in the outer flutes, adjusting as necessary to keep the fillets between even.
Layout & Setup
Now that the blanks are rounded over, it’s time to decide how many flutes you want and the spacing between them. Using the layout line from the 1″ square, begin by drawing a 45° angle from corner to corner of the column. Depending on how many flutes you want in the column, you’ll need this line to help divide the rounded surface properly. (Adjustments can be made by eye if the mathematical results don’t look quite right.)
For three flutes, the layout is simple. Begin by drawing a 45° angle from the corner of the quarter column through to the curved face of the column creating two quadrants. Then draw a 221⁄2° angle from the corner of the column to divide each of the two quadrants into two additional quadrants that are equally divided. At this point you should have three lines that intersect the curved face of the column approximating the centers of the flutes.
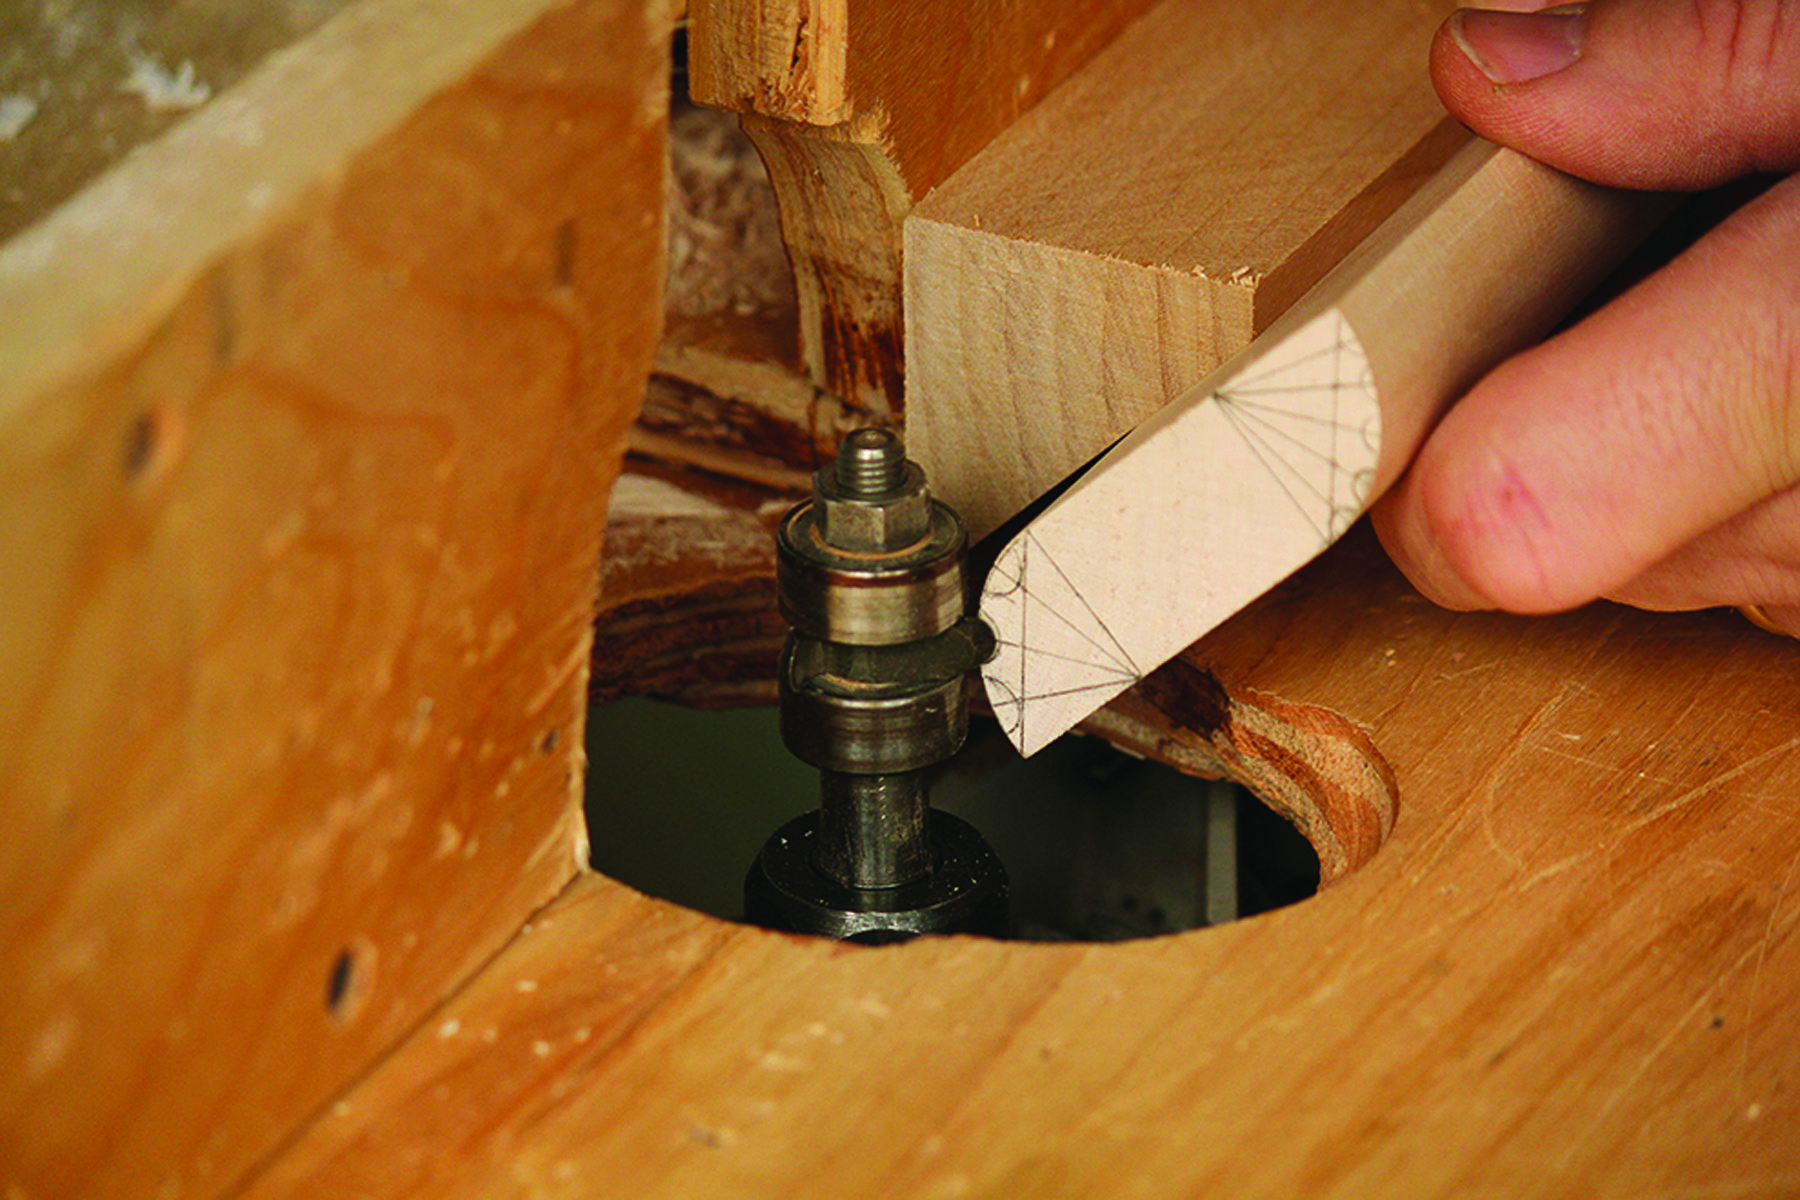
Take the fluting bit you’ll be using and trace the flute’s shape by holding the bit at a tangent to the arc of the column face. This is where you’ll place the flutes when you set up the router table.
For four flutes, the division becomes a little trickier. Because you’re creating four flutes, there will be five spaces created (two along the outside edge of the column and three between the flutes). Divide 90° by five, and each flute is 18° apart. Set a bevel gauge at 18° and mark the two outermost flutes on the columns, then reset to 36° and mark the two innermost flutes.
If you are having trouble setting bevels to those degree marks, divide the curved face into five equal segments with dividers. You’ve just divided the column for four flutes. Trace the flute shape from the bit as before.
Five flutes function the same way as four, except the degree multiple is 15. So, each flute is 15° apart – one flute at 15°, one at 30°, one at 45°, one at 60° and one at 75°. You can divide the column using the alternative method above but you’ll need to divide the curved face into six equal segments (two spaces along the edge of the column and four divisions between the flutes).
The degree angles are important to know because you’ll need to make angled wedges on the table saw in order to flute the column blank. This means for three flutes you’ll need a pair of 221⁄2° wedges and one 45° wedge. For four flutes you’ll need a pair of 18° and a pair of 36° wedges, and for five flutes you’ll need a pair of 15° and 30° wedges and a single 45° wedge.
Time to Rout
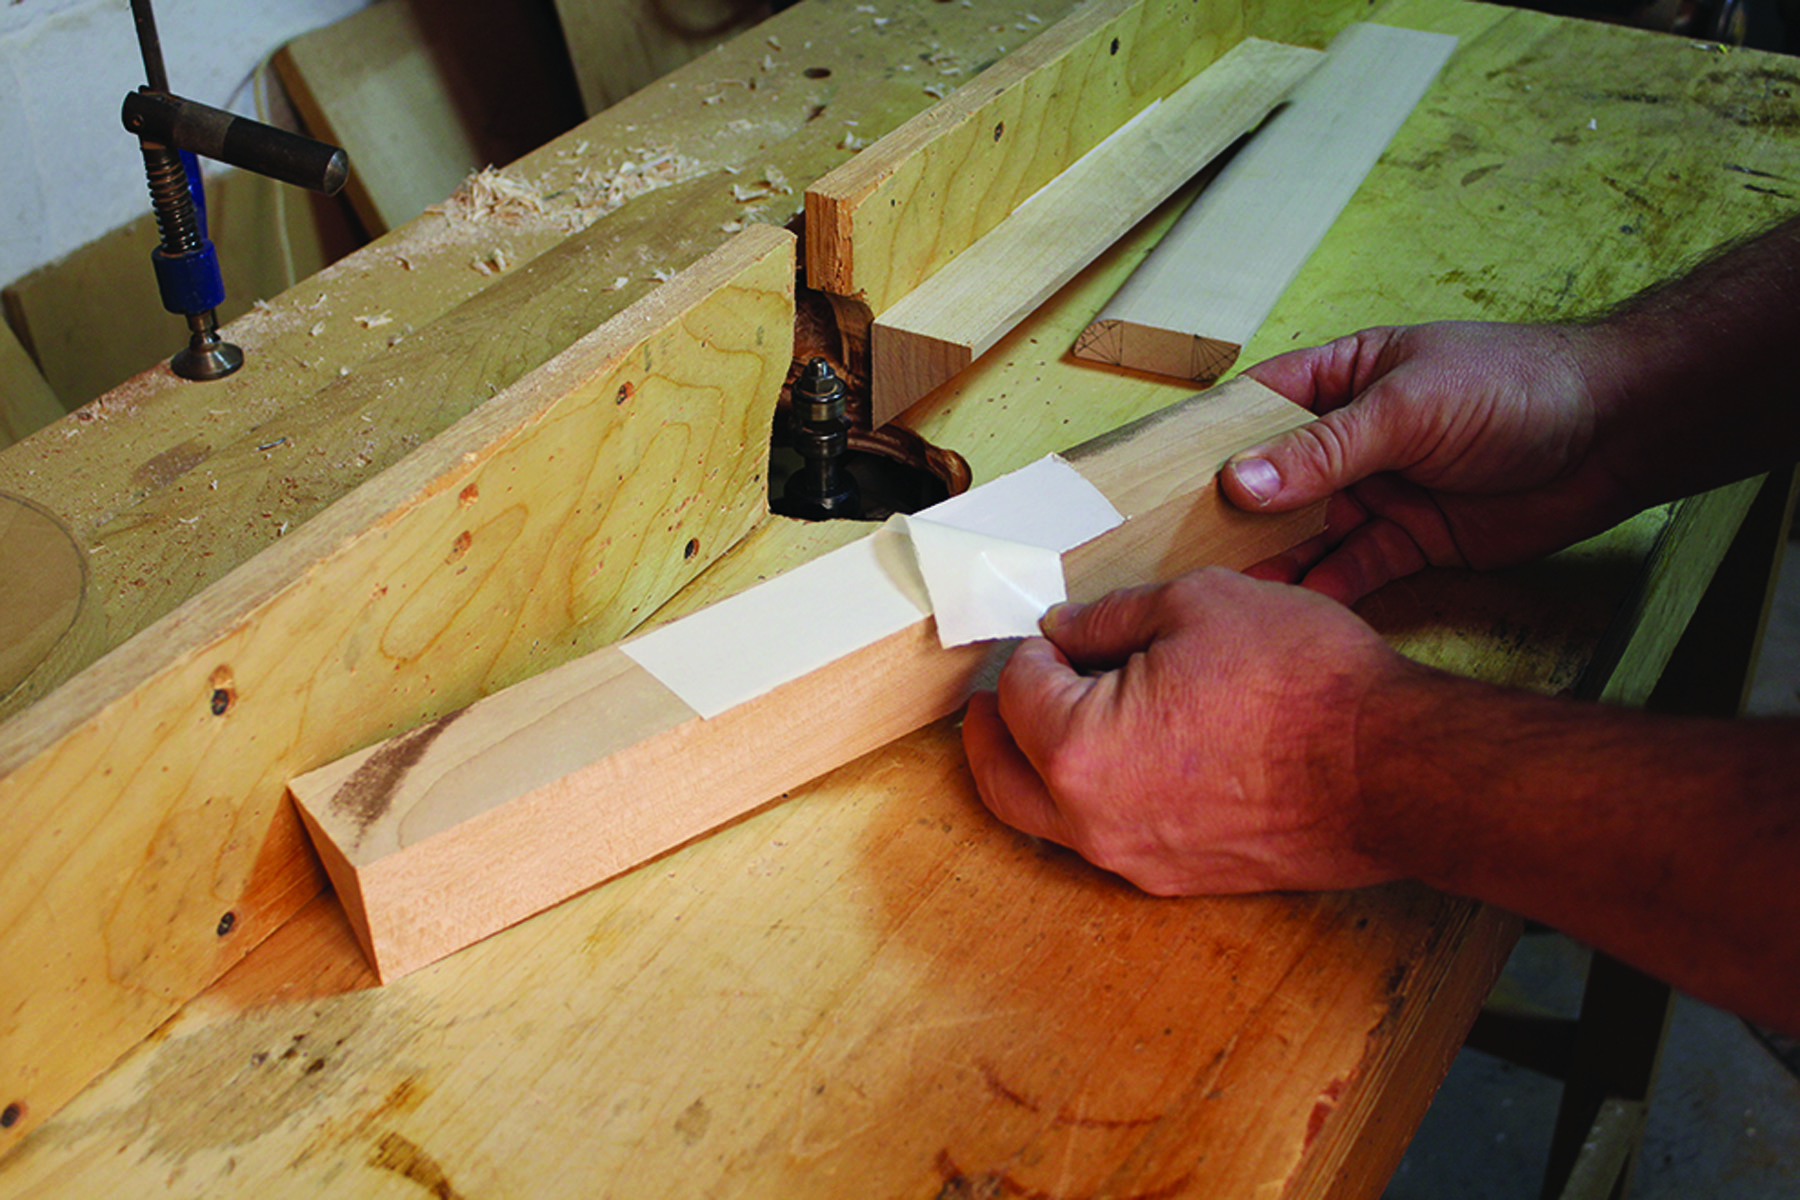
Stick ’em down. With the layout complete, use double-sided tape to attach the wedges to the router table and fence.
With the end of the column blank marked out and the wedges made, it’s time to set up for and run the flutes. The first thing to do is grab some double-sided tape and the appropriate wedges. Tape one wedge to the router table fence making sure to leave enough space for the router bit. Put the fluting bit into the router and, with the column blank held against the wedge and down to the table, adjust the bit to the proper flute. On a column where you’ll be using a 45° wedge (for a flute in the middle of the column – that is, for a three-flute or five-flute column) line up the bit so it is centered on the column. On a four-flute column you’ll line the bit up with the top-most outside flute. For the four- flute column, you’ll then tape down the second wedge to the table. This way, you will run the two outside flutes first – one with the board raised along its long edge against the fence and the second pass with the board lying down flat on top of the wedge on the table.
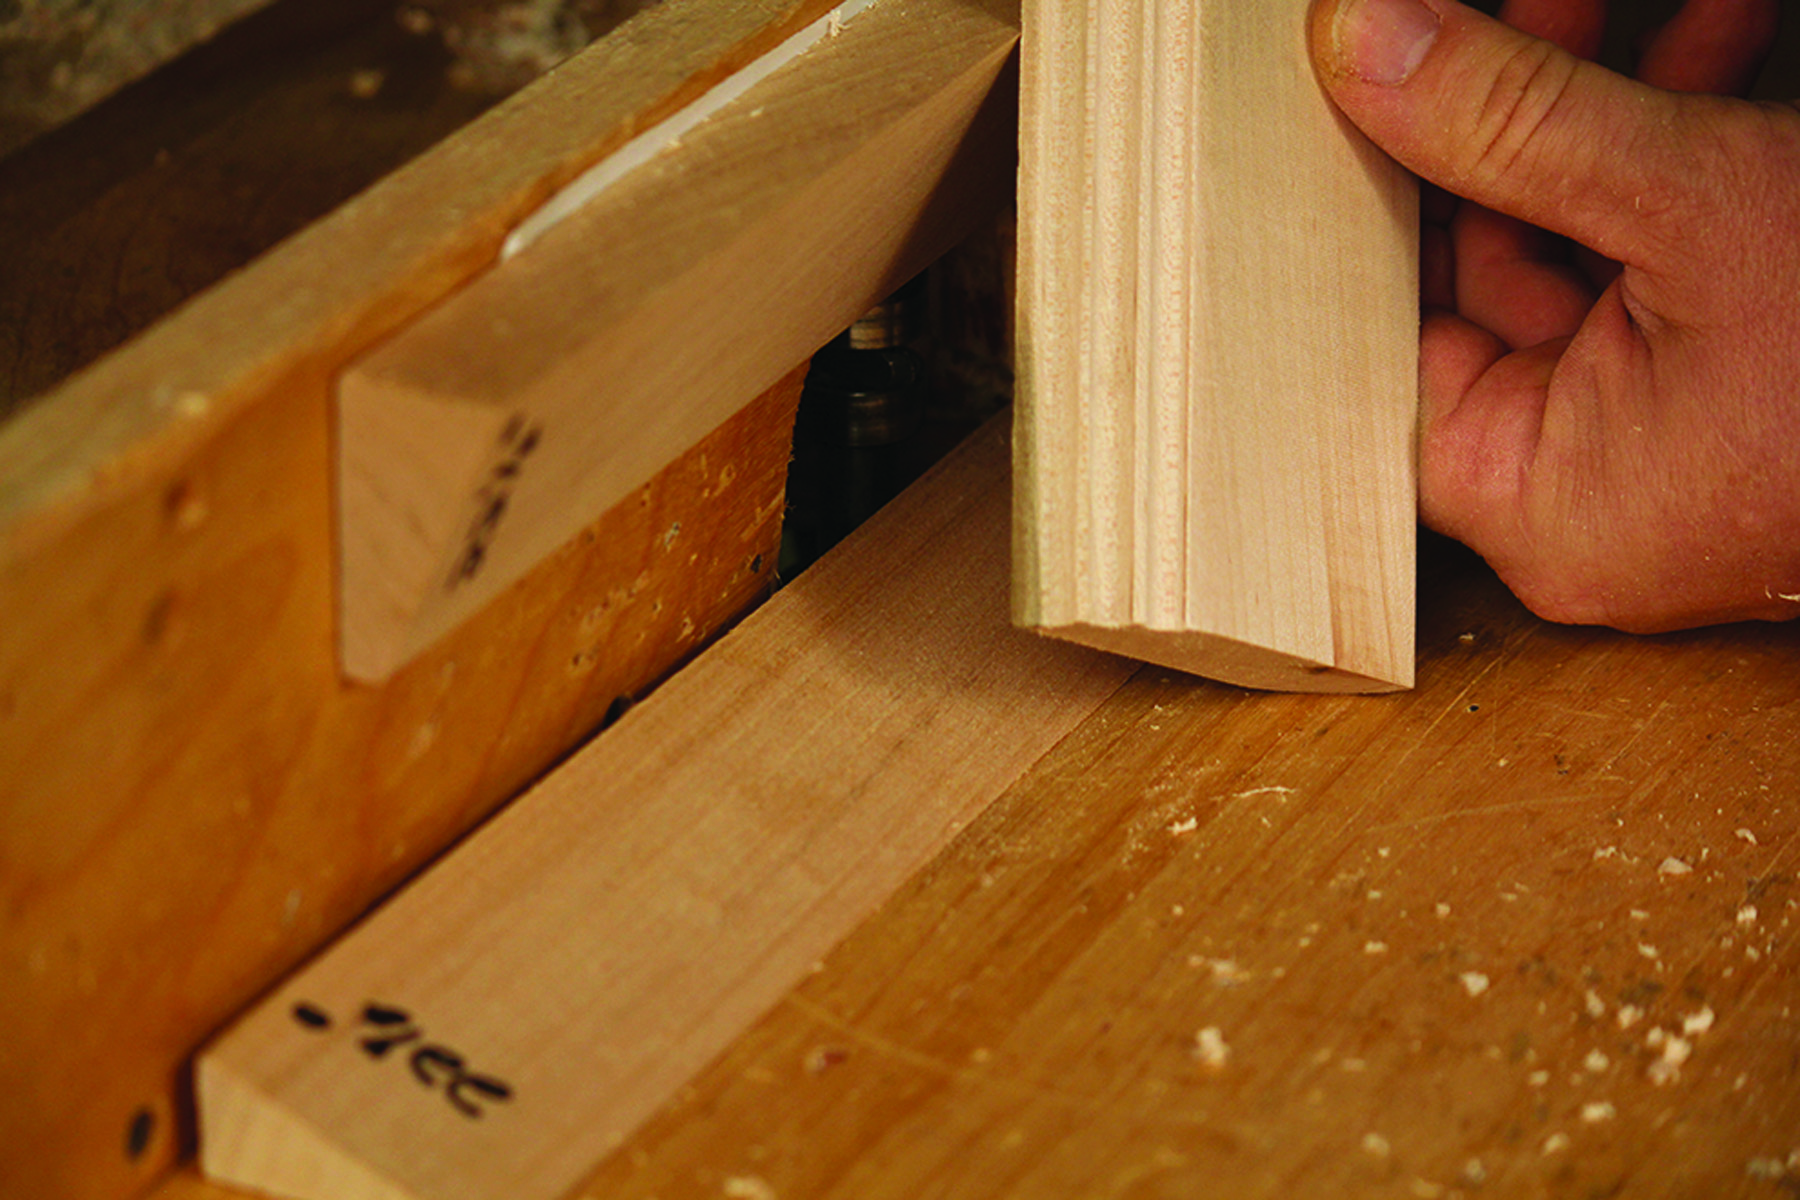
Two flutes, one setup. Run the first pass with the blank vertical against the wedge then run the second pass with the column blank horizontal to rout the other outermost flute.
Once you have the first round of flutes cut, remove the wedges from the table and the fence, then set the next set of wedges in place with the tape as you did with the first set. Adjust your router bit height and run one pass with the board on edge then another with the board laying flat.

Choose your wedges. On three- and five-flute columns, use the 45°-angle wedge and set up to rout the centermost flute first. On four-flute columns, use the 18° wedges and run the outermost flutes first.
It’s always easiest to run the center flute on an oddly numbered column followed by the outermost flutes, then divide up the flutes in between evenly. On evenly divided columns, run the outside flutes first then the inner flutes. This way, if you have any variation of the spaces between the flats of the inner and outer flutes, it won’t be as noticeable.
Fine-tuning. You may need to juggle the placement of the wedges, the height of the cutter and the fence placement, but you should end up with equal-sized flutes and fillets.
Most quarter columns in period furniture are separate from the capitals at the top and bottom of the column. You’ll still have to glue up and turn the capitals, but running the fluted quarter columns on the router table is one way to speed up the process and achieve accuracy while keeping the process safe and simple. If you’ve ever tried to rig up a scratch box or router jig on the lathe, try this method. I’m sure you, like me, will never again go back to the “traditional” method of creating quarter columns.
Here are some supplies and tools we find essential in our everyday work around the shop. We may receive a commission from sales referred by our links; however, we have carefully selected these products for their usefulness and quality.