Q:
How do you set up
a lock miter bit?
A:
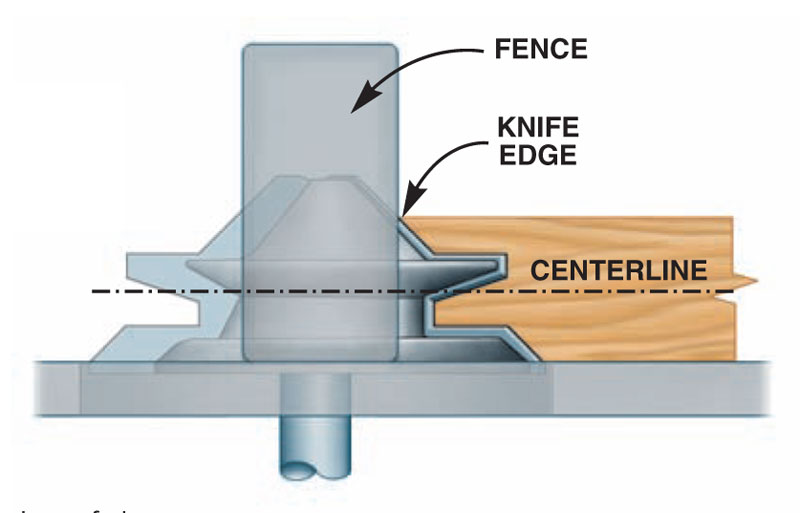
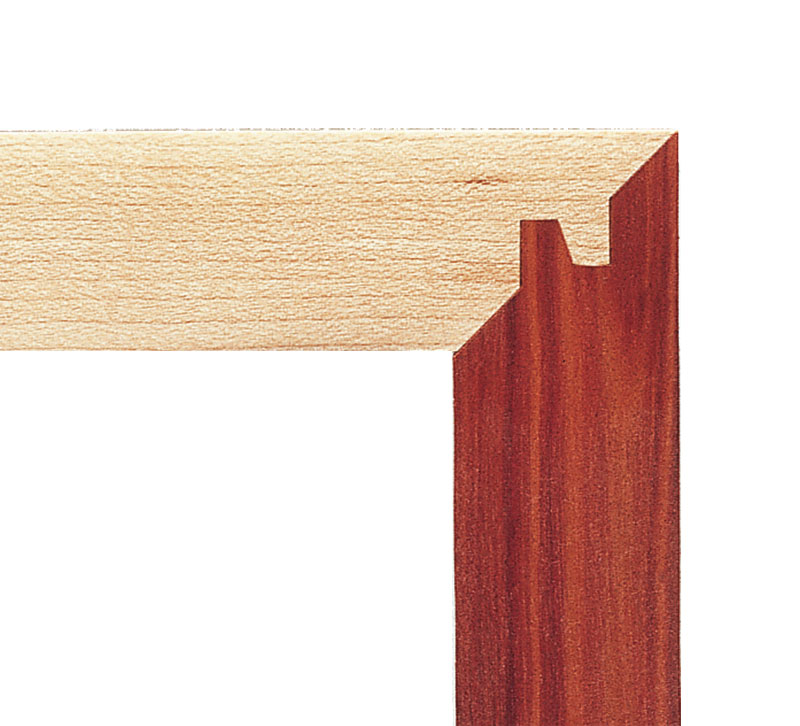
There are two critical adjustments
(Fig. A). First, you set
the bit’s height; second, you position
the fence. Once that’s done, you can
rout both sides of a lock miter joint
without changing anything.
To get started, you must use a variablespeed
router set at 10,000 rpm to slow down
this large-diameter bit to a safe speed. Make
some test pieces that are exactly the same
thickness as the parts you’ll join together.
Then adjust the bit’s height by eye until it
looks like it’s centered on the workpiece.
Position the fence by eye, too.
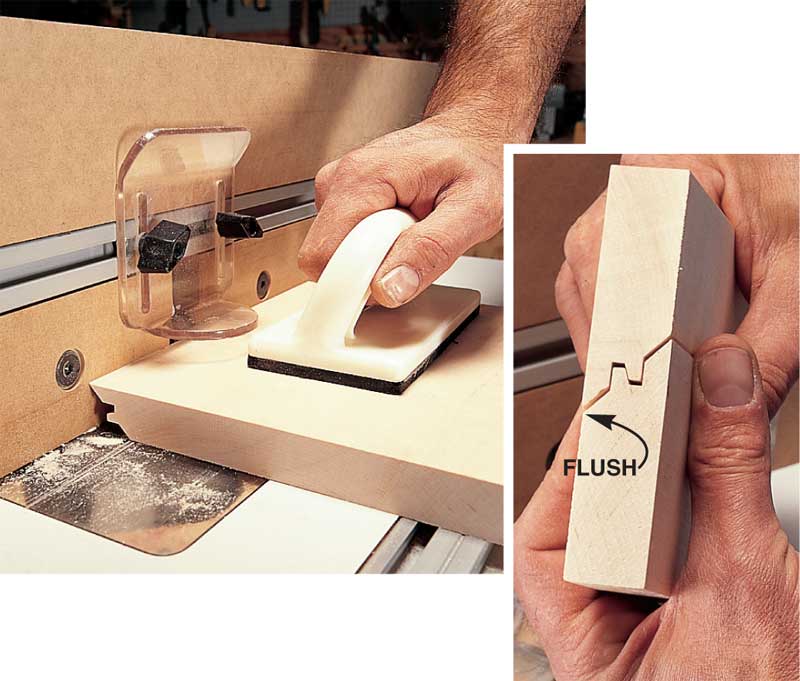
Make test cuts on two pieces (Photo 1).
Put the pieces together and see whether
their outside edges are flush. Raise or
lower the bit as needed, without moving
the fence, and make more test cuts until
you’ve got the bit exactly centered on the
thickness of your material.
Next, tweak the fence’s position in or
out and make some more test cuts. Your
goal is to make a sharp edge on top of the workpiece, leaving
just a whisker of its original edge. If the fence is too far
out, you’ll make a blunt edge on the workpiece, and the
joint won’t have a sharp outside corner. If the fence is too
far in, you’ll get a jog along the workpiece’s edge, and the
board will snipe at the end of the cut.
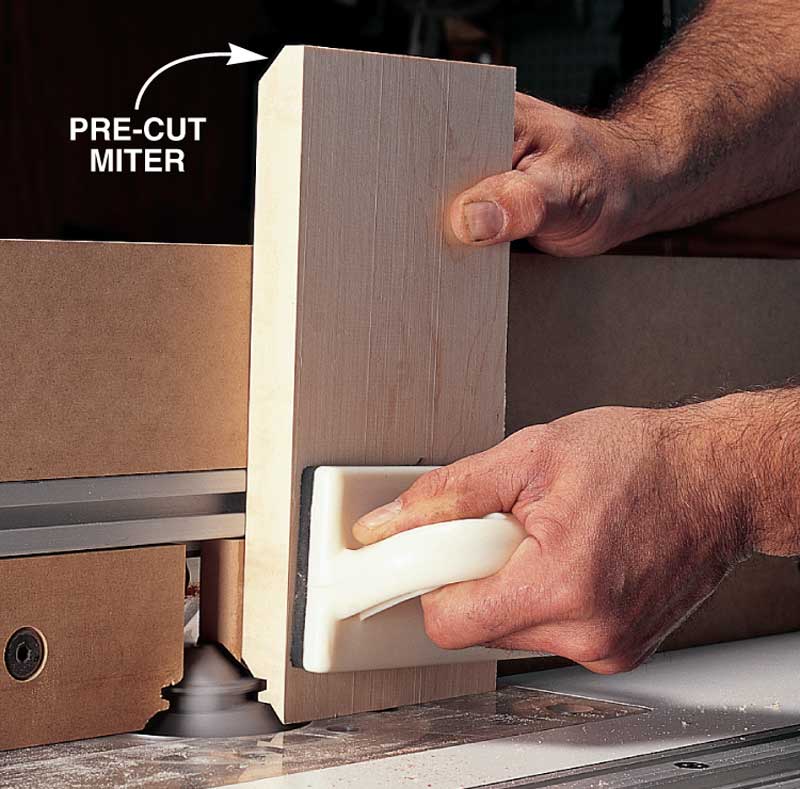
Once you’ve set the fence,
machine half of your pieces flat on
the table. Cut the other half by
holding them vertically against
the fence (Photo 2).
Source
Note: Product availability and prices are subject to change.
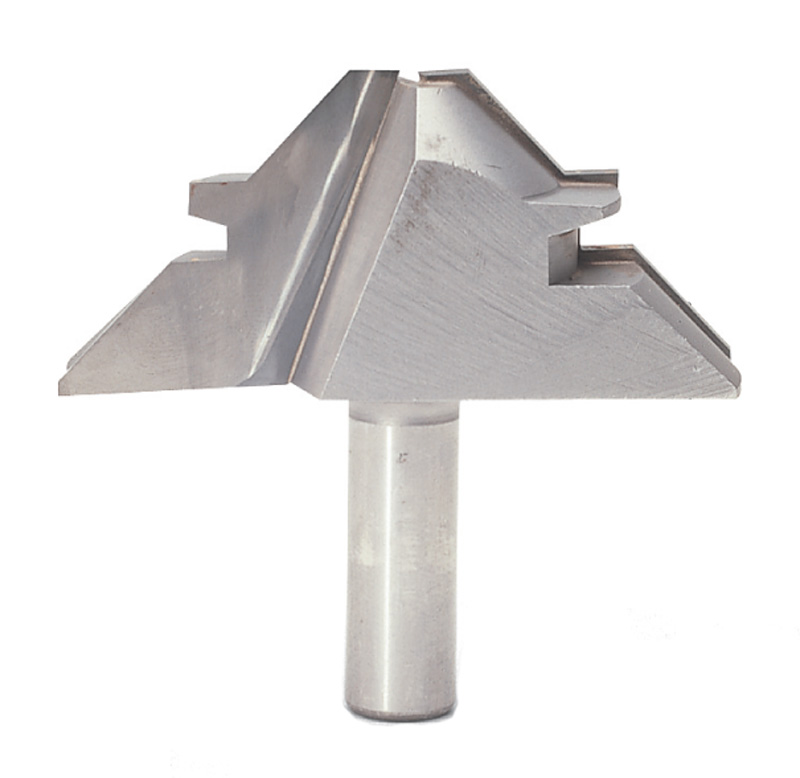
Woodcraft, woodcraft.com, 800-225-1153, Whiteside Lock
Miter Bit, 2” Dia. for
1/2”- to 3/4”-thick
stock, 812508.
This story originally appeared in American Woodworker March 2008, issue #134.

Purchase this back issue. |
|
Click any image to view a larger version.
Fig. A:
To make a lock miter joint, align the center of
the bit with the center of your material. Then,
position the fence to produce a knife edge.
1. To check the bit’s height, rout two
test pieces and fit them together
(see inset). If their outside edges are
flush, you’re good to go.
2. Rout the mating piece of a lock miter joint by
standing it upright. Pre-cut the ends of all
your pieces on a tablesaw to make the job easier.
|