We may receive a commission when you use our affiliate links. However, this does not impact our recommendations.

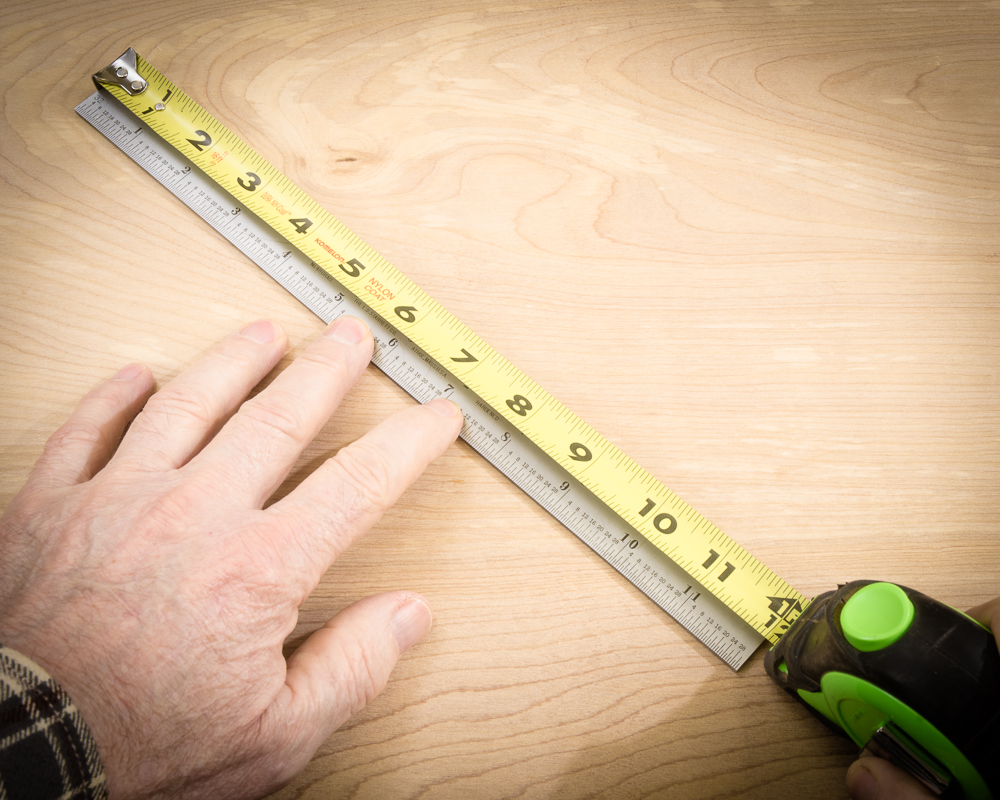
Precision is about setting and sticking to measurable standards for your work. Start by using measuring tools that are precise and agree with one another.
Part One: Precision
There are two sides to this story. The first is obvious. The other not so much. First, digital woodworking is all about numbers. Very small numbers. That makes it simple, direct and precise. Your drawings, your setups, the instructions you give to digital tools and the machining itself, have to be accurate. Being numbers based, that makes it easy —if you’re paying attention. Like a movie script, it all starts with your drawings. Your drawings have to be right. You can’t cheat, here. When something is supposed to be 4” long, you can’t draw it “kinda sorta” 4” long. It has to be 4” long. Exactly. Precise drawings, like a good script, is the beginning and your path to precise results.
The next step is converting drawings into instructions that a CNC, laser cutter, 3D printer or other digital tools use. Again, instructions are numbers based and have to be just as precise as your drawings. If you tell a CNC to cut .250” deep along a specified path, that’s exactly what it will do. Even if you didn’t know that you told it to cut .250” deep.
Along with instructions, digital tools, like CNCs, need precision tooling. For example, if you specified in your instructions you were cutting with a .250” bit and you loaded up one that was really .245” in diameter, then you might be in for an unpleasant surprise if you thought you were cutting exact .500” wide mortises with it. Mills and bits not being accurate is the norm and unfortunately this is a detail that many digital woodworkers miss. The obvious lesson: measure your mills and bits and plug in the information when programming your digital tools
By now, the pattern is obvious. In the digital woodworking world, start with precise drawings, feed your digital tools precision instructions, know your tools and keep applying that precision all the way through. To some degree digital woodworkers have it easy. We just have to make good drawings and stick to the numbers. By the way: don’t cheat on the numbers. Except…. well, more about this in a later column.
Precision for Traditional Woodworking
The other side of the story is how precision works in traditional woodworking. For now, let’s stick to hybrid woodworkers. Woodworkers that like hand tools but use power tools where they do the most good. Jointers to flatten and square stock. Planers to thickness stock to size. Table saws to make parallel cuts. Routers to shape, add details and cut mortises. And, jigs to extend and optimize the use of power tools, etc.
When setting up and using these tools, precision is just as critical as it is with digital woodworking. For example, if your jointer’s cutters are not parallel to the bed, you have a problem. Or, if the jointer fence isn’t exactly perpendicular to the infeed and outfeed beds, you’re going to have big problems later on. Another example: if you use a jig or a fixture for cutting mortises and tenons and your blank parts are not exactly the same size and square, you’ll pay a big price at assembly time. Don’t ask me how I know this.
I take great care in setting up my woodworking machines and keep them tuned up. But, every once in a while, I miss a small detail or skip an important step in my set-ups. An un-square jointer fence? Done that. Dining chair tenons that were off by a tiny fraction of a degree causing a lot of grief on final glue-ups? Done that, too. What these mistakes have in common is that each and every time, I’ve paid a dear price to fix the issue that I created. Not fun. The lesson: just like in digital woodworking, you can not cheat at traditional/hybrid woodworking precision, either. Though these two forms of woodworking are different in some ways, ultimately they’re both a numbers game. You can measure tolerances, mistakes, and setups. Though digital precision is to three or more decimal places, even though hybrid woodworking is analog, it still needs to be at least two digits accurate, if you want consistent results.
How precise is precise enough?
It’s been said that precision in carpentry is to 1/8”, general woodworking is 1/16” and furniture and cabinet making is to 1/32”. I can’t speak to carpentry standards as I rarely do it, but I can say that the two excellent carpenters that built my shop would be insulted if I mentioned an 1/8” as a standard. As to general woodworking, you might be able to get away with 1/16” some of the time, but for example, if you measure and cut four legs for a bar stool one at a time, rather then all at once, you’re going to have problems. Marking one part at a time makes it very easy to be off a 1/16”.
For cabinet making, I’ve found that 1/32” seems to work most of the time as long as you’re consistent. You still can’t have one part out of several 1/32” off. For furniture making, in my experience, you need to be aiming for 1/64” (.016”) or better accuracy. Two easy examples: thicknessing stock on a planer. You’ll really notice the difference between two boards that are 1/64” off. Hands can easily detect .001” differences between surfaces. Joinery? A tight joint is between .001-.003″ and a loose joint is .005″. Or, making table saw cuts for parts that don’t agree that ultimately go to joint making machine or special jig setup for further work. If any part is off now, you’ll pay the price later.
Precision is more than just numbers, it’s also the quality standards you work with. For some of us, it’s a kind of a philosophy to live by. A way of woodworking that comes with extra benefits. Check my next post to see how to put precision to work in your own shop.
Additional Resources
- Precision Tools. A Five-Part Popular Woodworking series.
- Digital Woodworking on Instagram
- Digital Woodworking YouTube Channel
- Personal Work on Instagram
Here are some supplies and tools we find essential in our everyday work around the shop. We may receive a commission from sales referred by our links; however, we have carefully selected these products for their usefulness and quality.


