


We may receive a commission when you use our affiliate links. However, this does not impact our recommendations.
This much-maligned fastener has a place in the finest furniture. Here’s why.
Among furniture makers, the reputation of the simple nail is somewhere south of expired glue and tacos made from weasel knees.
The following statement is one you hear all the time: The best furniture is built using wood-to-wood joinery alone – just like our forefathers and foremothers did. The only problem with that statement is that it’s completely wrong.
Nails have been an important part of furniture making since the Egyptians, at least. And not just for rough work. The finest 18th-century pieces use lots of nails. Roman, Gothic, Shaker, Queen Anne, Victorian and Arts & Crafts pieces all use nails for important parts of their construction.
So why do modern woodworkers despise nails? My guess is this: They’re using (and hating) the wrong nail.
Good nails designed for making furniture can be hard to find, though the supply seems to be improving. So what most woodworkers have experience with are modern wire nails. Wire nails are OK for carpentry, but they simply don’t hold well enough for furniture.
In this article you’ll learn about all the different types and shapes of nails that are important for making furniture and how to apply them to your projects so the nails might actually outlast the wood surrounding them. Let’s start by learning about the four different ways nails are made.
Wrought, or Roman
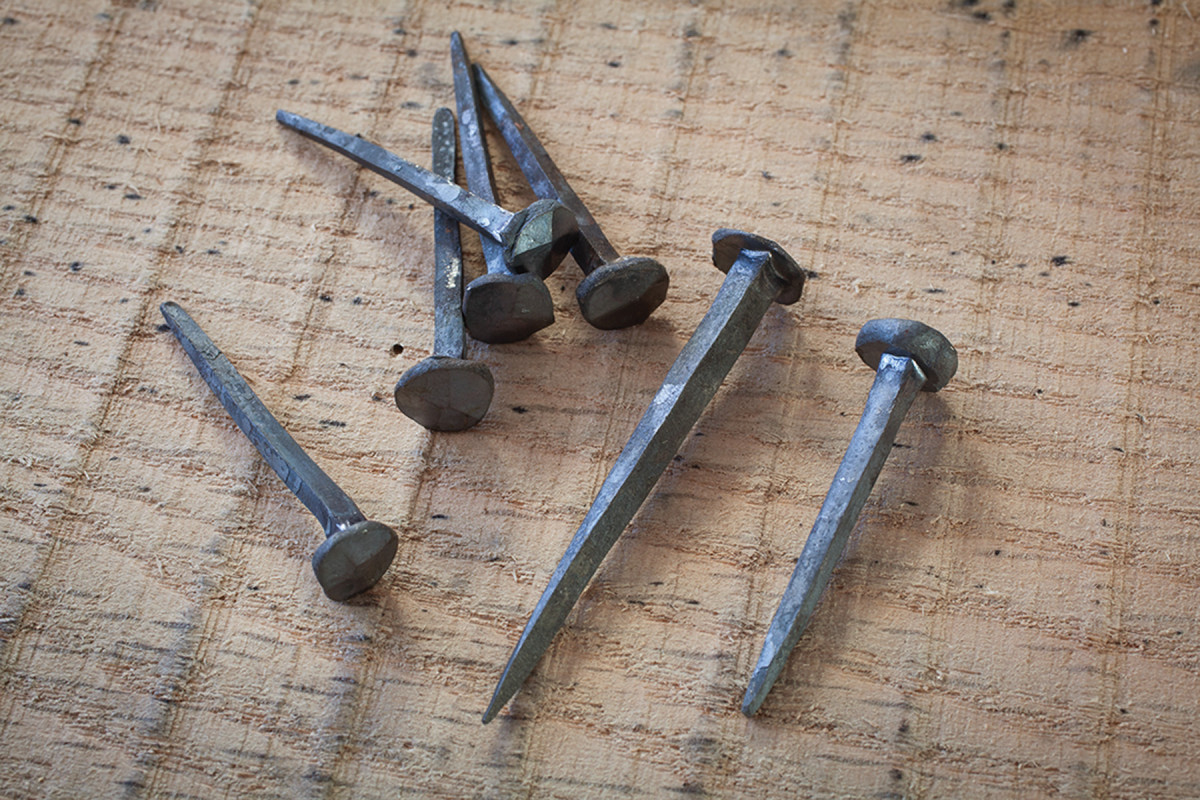
Rough & ready. Blacksmith-made wrought nails are gorgeous and hold incredibly well. Their prominent heads might not be suitable for all applications, however.
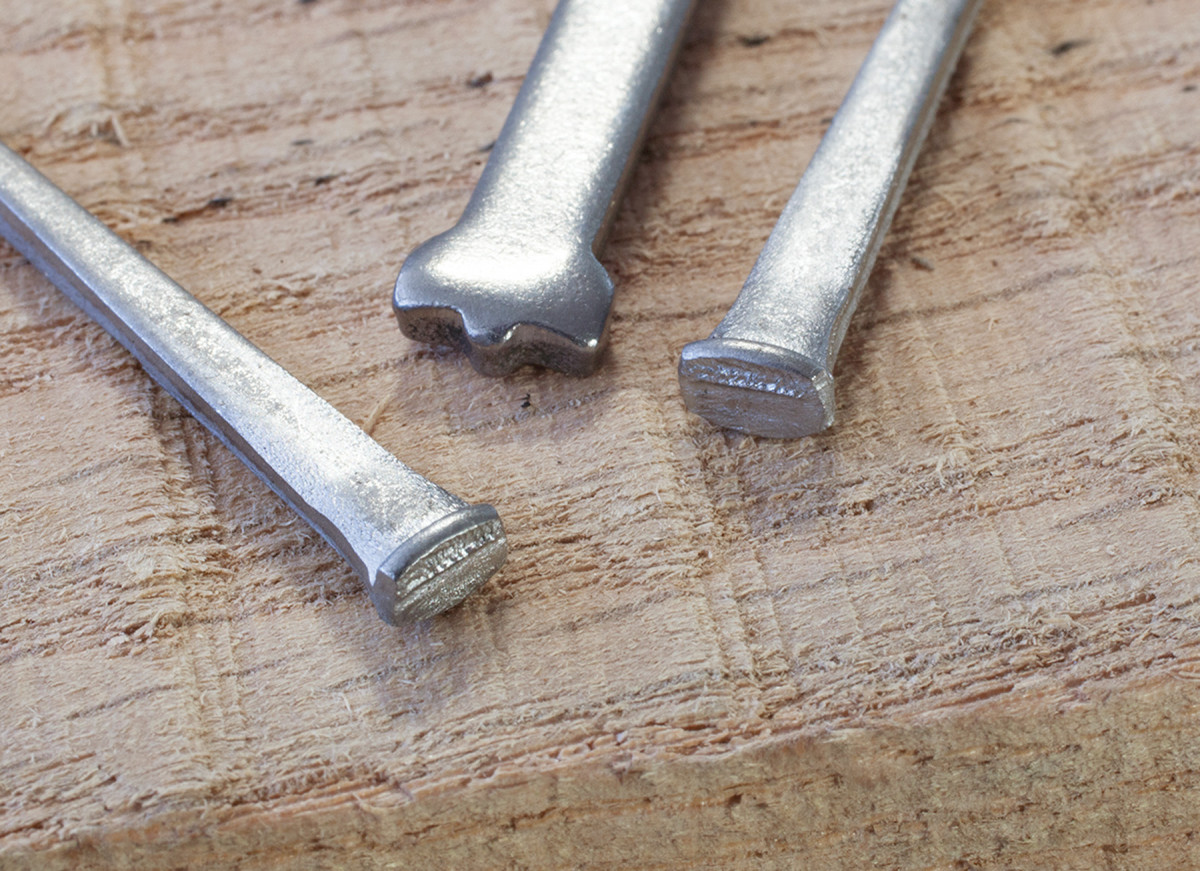
Perhaps the earliest nail is what we now call a wrought nail or a Roman nail (because the Romans made so many of them). These nails are blacksmith-made and have a particular shape: The nail’s shaft is roughly square in section and tapers to a point on all four of its edges. The head is formed with hammer blows and typically has three or four facets.
Of all the nails I’ve used, I think these hold the best (at least so far in my experience). They taper on all four sides, which makes them a remarkable wedge. Also, their rough surface – a natural by-product of the blacksmithing process – makes them even more stubborn.
What’s the downside? Like any nail with a tapered shaft, you need to drill a pilot hole, except in the softest woods. And they are expensive and time-consuming to make. A typical blacksmith-made nail can cost you anywhere from $1.25 to $3 apiece.
When I can afford these nails I am happy to pay that much – not only because of their holding power but because they look wonderful. And I think using cheap-looking nails is like using cheap-looking drawer pulls on a nice piece of furniture.
Machine-made & Die-forged
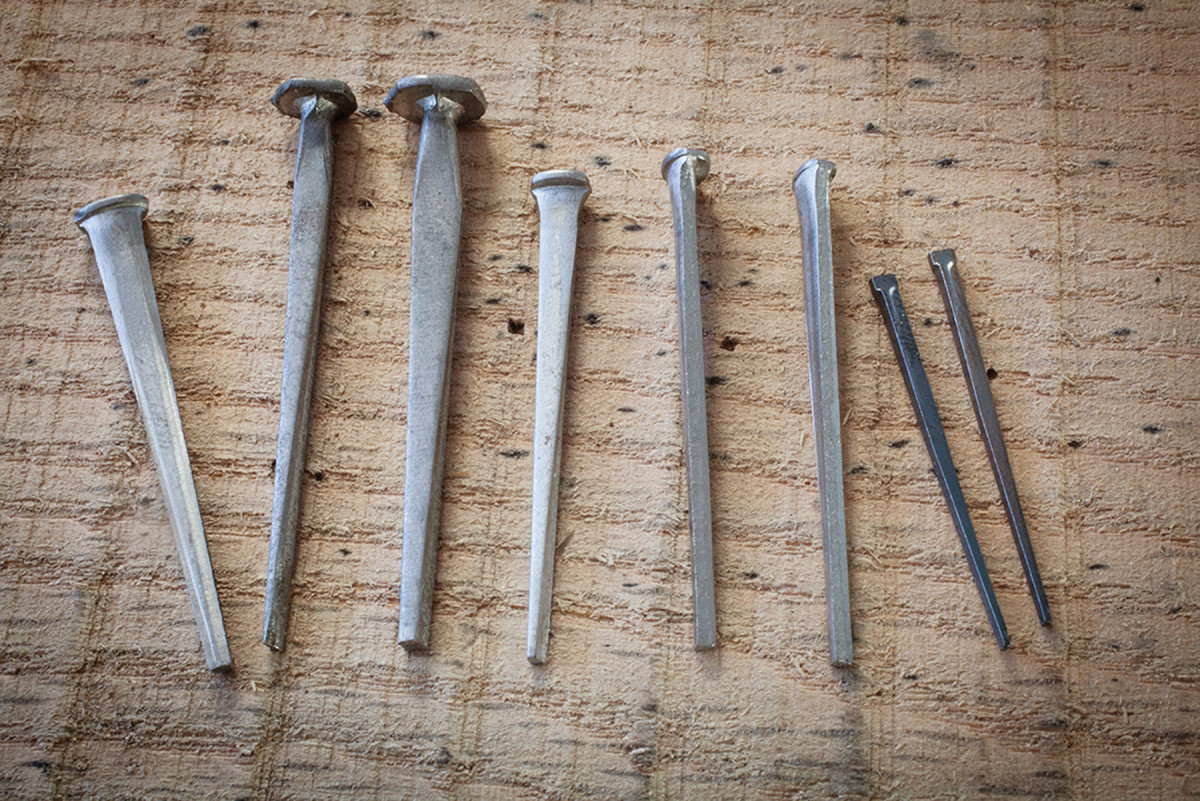
Nails of the 19th century. Cut nails are machine-made and taper on only two of their four edges. They hold well – far better than a wire nail.
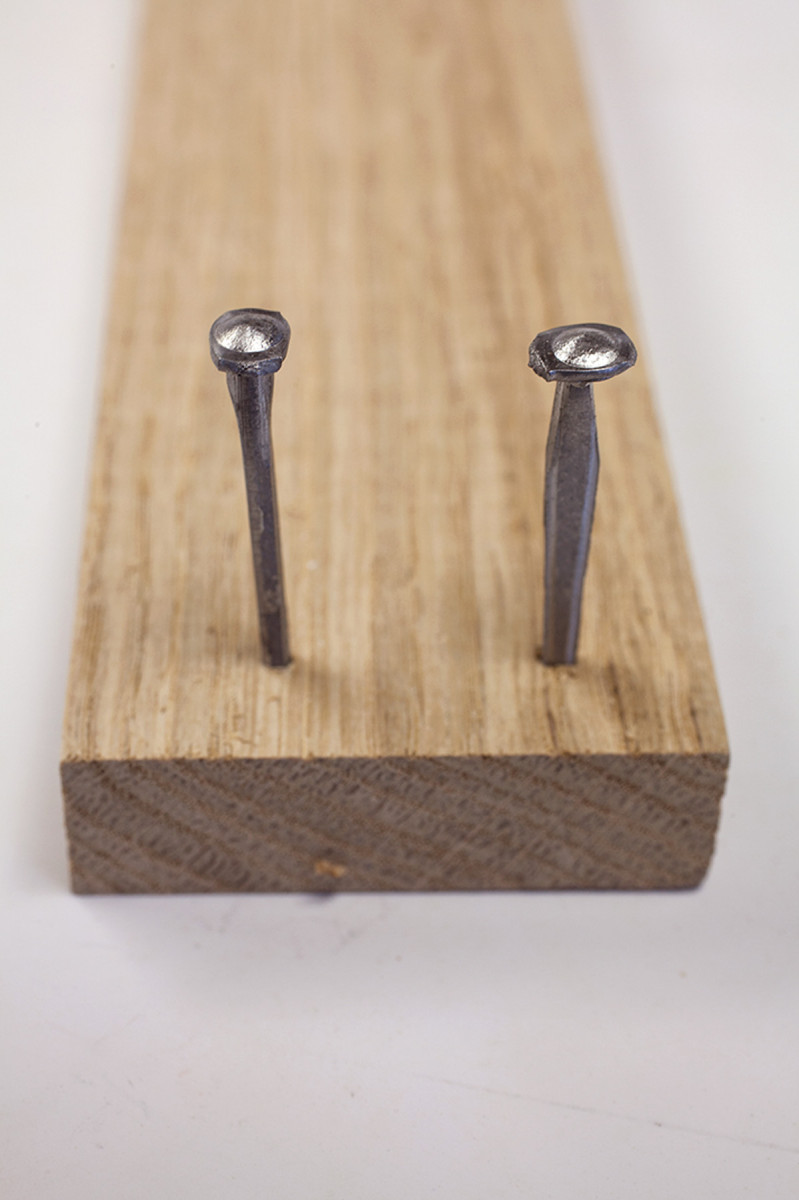
My second-favorite nail is shaped like a Roman nail (the shaft is tapered on four sides) but is made with modern die-forging. These nails are inexpensive compared to the wrought nails and hold extremely well, perhaps as well as blacksmith-made nails. They look a lot like a blacksmith-made wrought nail, but they have a smooth surface finish and all look identical. And just like a wrought nail, these usually require a pilot hole.
Modern miracle. These French die-forged nails look similar to a blacksmith-made nail but cost a fraction of a handmade fastener.
Because they are machine-made they don’t have the handmade quality of a blacksmith-made nail, but for the price they can’t be beat.
As far as I know, there is only one manufacturer of these nails, Rivierre Nail Factory in France. But they are now available in the United States and all through Europe.
Cut Nails
Wedge the end grain. The tapered edges of a cut nail should push against the end grain of the pilot hole. Otherwise, they’ll split your work like firewood.
In the late 18th century, ingenious mechanics developed machines that could shear out a ton of nails in a short period of time. All that was required was a flat bar of metal and a machine that could “cut” it like a guillotine.
Cut nails are typically rectangular in section. In one view, the nail has parallel sides. In the other view, the shaft tapers. And it usually has a head, though there are headless varieties.
Because of the shape of its shaft, a cut nail needs a pilot hole (except in some soft woods) and the shaft usually has to be oriented a certain way to avoid splitting the work. Think of the nail as a wedge. Apply the wedge so it is parallel to the grain of the top board you are nailing down. Otherwise you are splitting mini firewood with your nail.
If this confuses you, don’t worry. You will do it wrong only once. As of now, the only maker of cut nails for furniture and flooring, as far as I know, is Tremont Nail in Mansfield, Mass. Lots of places sell cut nails under other brand names (or no brand name at all), but since the closing of a cut-nail factory in West Virginia, Tremont is the only maker of cut nails for furniture.
A side note: Masonry nails look a lot like cut nails. Some masonry nails can actually be used in wood. But many of them have such a pronounced taper that they will always split the work, no matter what sort of pilot hole you drill. Also, masonry nails are extremely hard, so they won’t bend when the wood moves seasonally. They’ll split your work.
Wire Nails
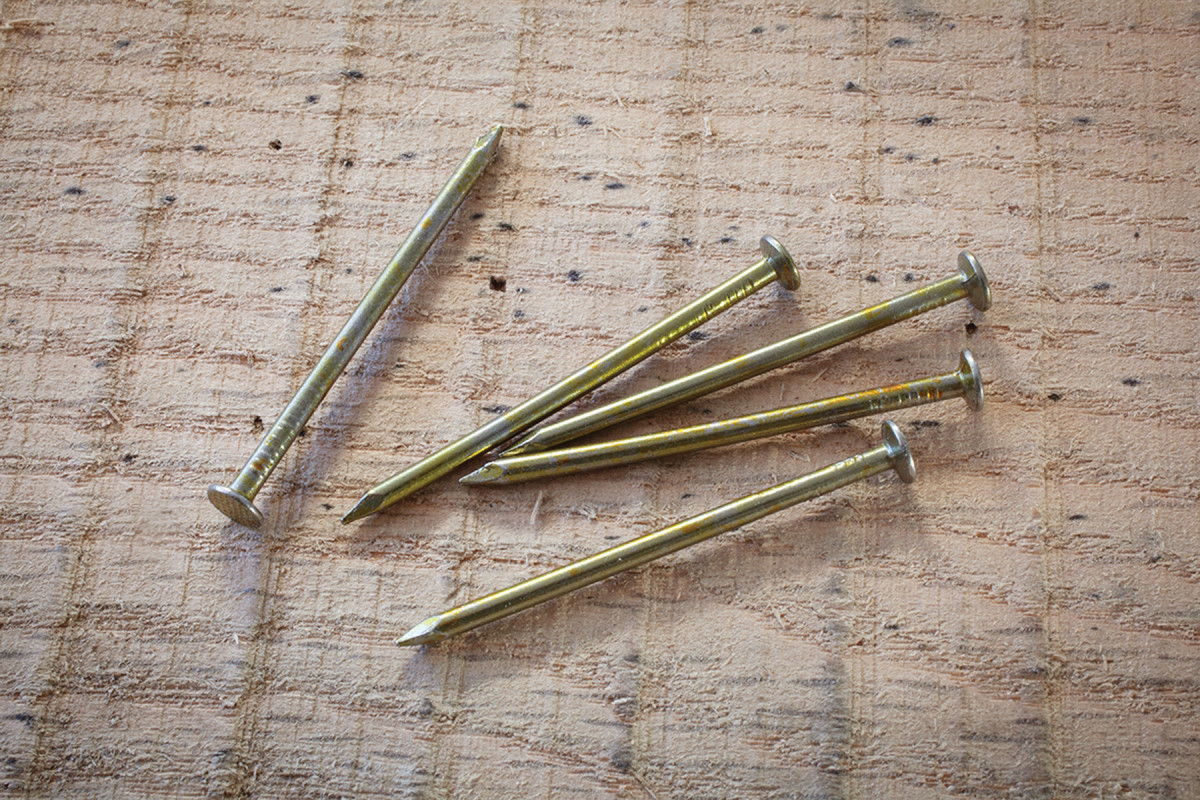
Not my favorite. Wire nails are inexpensive – that’s the nicest thing I can say about them. I don’t use them in carcase construction.
Fasteners made from round wire have been around for a long time. Archaeological evidence shows that even the earliest civilizations made wire that could be used for holding things together. Wire was once difficult to make (you had to force metal through a small hole in a stone). Now it is easy.
As a result, since the late 19th century nails made from wire have become the dominant kind of fastener. They are incredibly inexpensive, don’t require a pilot hole and hold decently (I’m being kind here).
They don’t wedge themselves into the work the way that other nails do. So when I use them, I use the longest ones I can get away with.
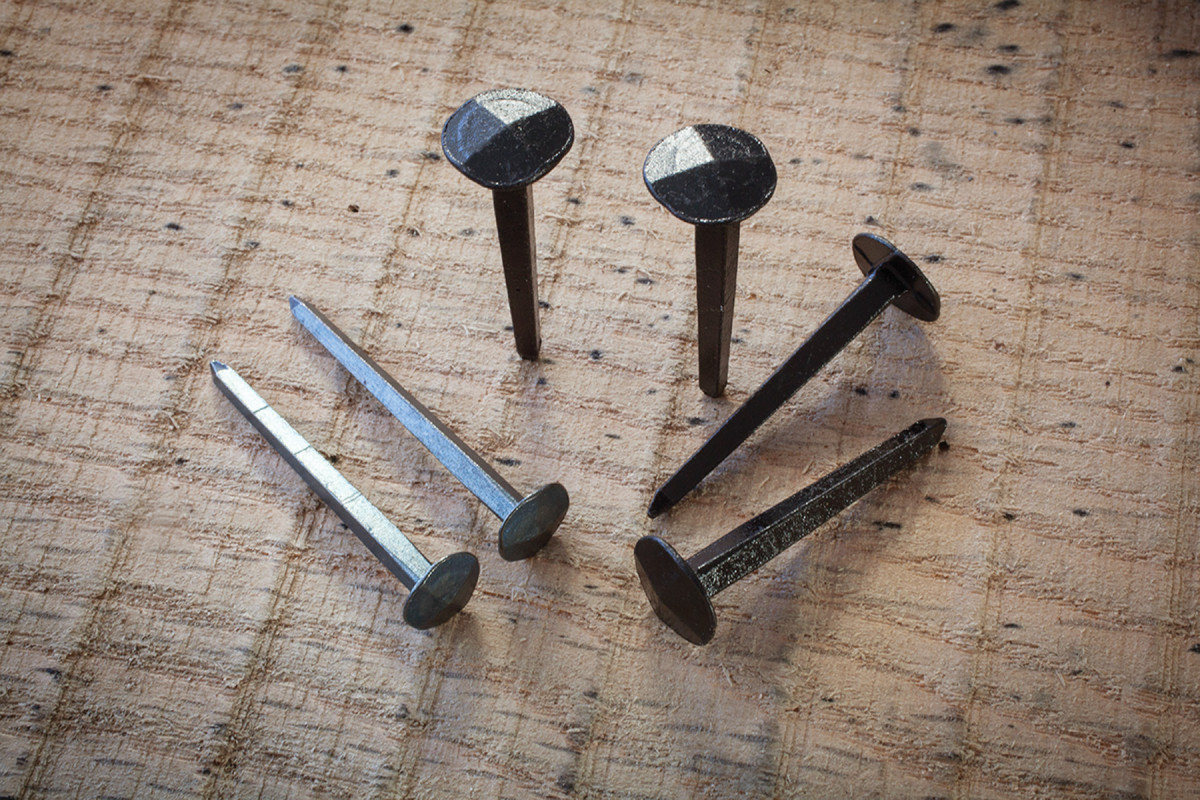
The Names of Nails
Small head. The head helps hold the two parts of the joint together, but there’s only so much a small head can do. Don’t ask too much of brads and you’ll get along fine with them.
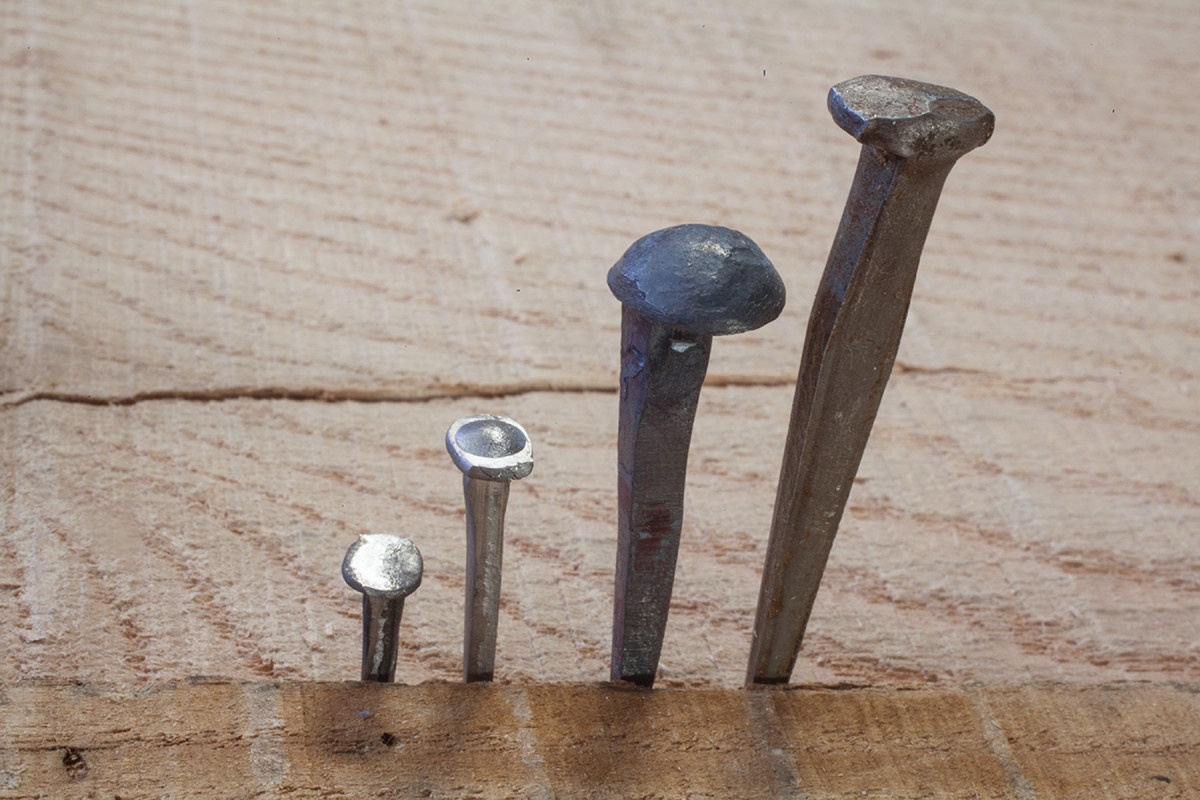
Nails have a ridiculous number of confusing names – there are hundreds of varieties for the crafts. For the most part, I suggest you ignore the names at first and focus on how they look. That will usually tell you what they are good for. For furniture work, we usually use four shapes of nails.
1. Brads. This generic name refers to a nail with a small head. The brad can lock shelves into dados with what is called a “toenail joint.” Or it can fasten one piece of wood to another when the head needs to be inconspicuous. Because the head is small, the brad’s holding power is in its shank. So it’s not ideal for attaching a cabinet back or bottom boards.
A swelled head. If you need holding power, look for a big head on your nail. The head can prevent a cabinet back or bottom from being pulled off the carcase.
2. Clouts, Wroughts or Roseheads. Nails that have a prominent head have the most fastening power. They can keep a cabinet back or chest bottom from being pulled off a carcase. Think of the head like the washer on a bolted joint. The price of this holding power is that the nail’s head is quite visible, for better or worse.
Many times this form of nail is also used for “clenching,” which is when an extra long nail is driven through two pieces and its too-long tip is driven back into the work.
Tiny daggers. Headless brads offer only enough holding power to keep the work in place while the glue dries. Their biggest virtue is that the head is almost invisible.
3. Headless Nails. These thin nails have little or no head. They are used mostly for attaching mouldings and can hold work in place while the glue dries.
Lightweights. Pins are useful when you need the holding power of finger pressure. Keeping veneer, stringing and inlay in place as the glue sets is an ideal application for these thin fasteners.
4. Pins. These are usually wire nails with a small domed head that are used for attaching lightweight pieces of hardware, such as an escutcheon for a lock, or for temporarily holding pieces of veneer in place.
On the ‘Penny Size’ of Nails
Decode the penny system. Here I’m nailing a 1⁄2″-thick board to a carcase. I convert the 1⁄2″ fraction to eighths, or 4⁄8″. The numerator is the penny size I need (usually).
The origin of the so-called “penny system” of sizing nails is murky. I think the reason we still use the penny system is because it is brilliant, once you understand it.
How long is a 5d nail? (The “d” stands for “penny.”) I’d probably have to look it up first to be sure. The point is that it doesn’t matter how long a 5d nail is, as long as I know the trick to the system.
Here’s how it works: When you nail things together you have a top board and a bottom board. The nail enters the top board first then passes into the bottom board.
So how thick is your top board? Let’s say it is 1⁄2” thick. Now convert that fraction, 1⁄2“, to eighths – 4⁄8“. The top number, 4, is the penny size you probably need: or 4d.
There are exceptions. When working in soft pine, you should increase the nail size by one penny, to 5d in our example. And the second exception is this: Use your brain. Is the bottom board thin? Is this particular species easy to split? Are you clenching the nail? Do you need extra holding power? Adapt and adjust.
But what about woodworkers who use the metric system? One of my students in England figured out how to calculate the penny size required when using metric.
Here’s the rule: Take the size of the top board in millimeters and divide it by three, rounding up or down as is usual in math.
So if you are nailing down 19mm work, you should use a 6d nail (19 divided by 3 is 6.33). If you nail down 13mm material, use a 4d nail (14 divided by 3 is 4.33).
You also can use the handy chart below as you get familiar with the system. After a while you will look at a nail and know what it’s for.
Common Nail Sizes
Penny size Length (in.)- Length (mm) – Thickness of work it fastens*
2d 1″ – 25 – 1⁄4” (6mm)
3d 1 1⁄4″ – 32 – 3⁄8” (9mm)
4d 1 1⁄2″ – 38 – 1⁄2” (13mm)
5d 1 3⁄4″ – 44 – 5⁄8” (15mm)
6d 2″ – 51 – 3⁄4” (19mm)
7d 2 1⁄4″ – 57 – 7⁄8” (21mm)
8d 2 1⁄2″ – 64 – 1″ (24mm)
*Note: These are approximate metric sizes. You might not find a 38mm nail for sale. But a 40mm nail will do just fine.
Clenching Nails

Together forever. A clenched nail is difficult to remove without destroying the wood entirely. Many early doors are made with this technique.
Clenching nails is one of the most effective nail-based joints I know. You can build a boat with this technology. Or a door that will last 600 years, easy.
There is not much to clenching nails. Use a headed nail. The head acts like the head of a bolt on one side of the joint. The shaft of the nail passes through both parts of the work and its tip emerges.
The part that is too long is then directed back into the wood and diverted across the grain. It acts like a staple or a hook, holding the two pieces together.
Cast iron is helpful. The nail heads are resting on the table saw’s surface. Hammer the nail tips to bend them back into the work.
Nails for clenching are soft, which makes them easy to bend back into the work. If you don’t have clench nails handy, you can soften and point any headed nail by holding it with pliers and shaping it on a belt sander. The heat from the belt sander will soften the nail in no time.
How do you bend the tip of the nail back into the wood? Some people first drive the entire nail through with the tip poking out 1⁄2” to 2″. Then they back up the head of the nail with a steel plate, and hammer the tip of the nail until it bends back into the work.
You also can divert the tip by backing up the work with a plate of iron or steel. The nail tip hits the plate and bends back into the work automatically. (Angle the pilot hole to steer the bending action across the grain of your work.)
Practice clenching in test pieces before you dive into clenching nails in a finished workpiece. Clenching can go bad quickly if you aren’t familiar with the particular nails, the pilot hole and the work at hand.
— CS
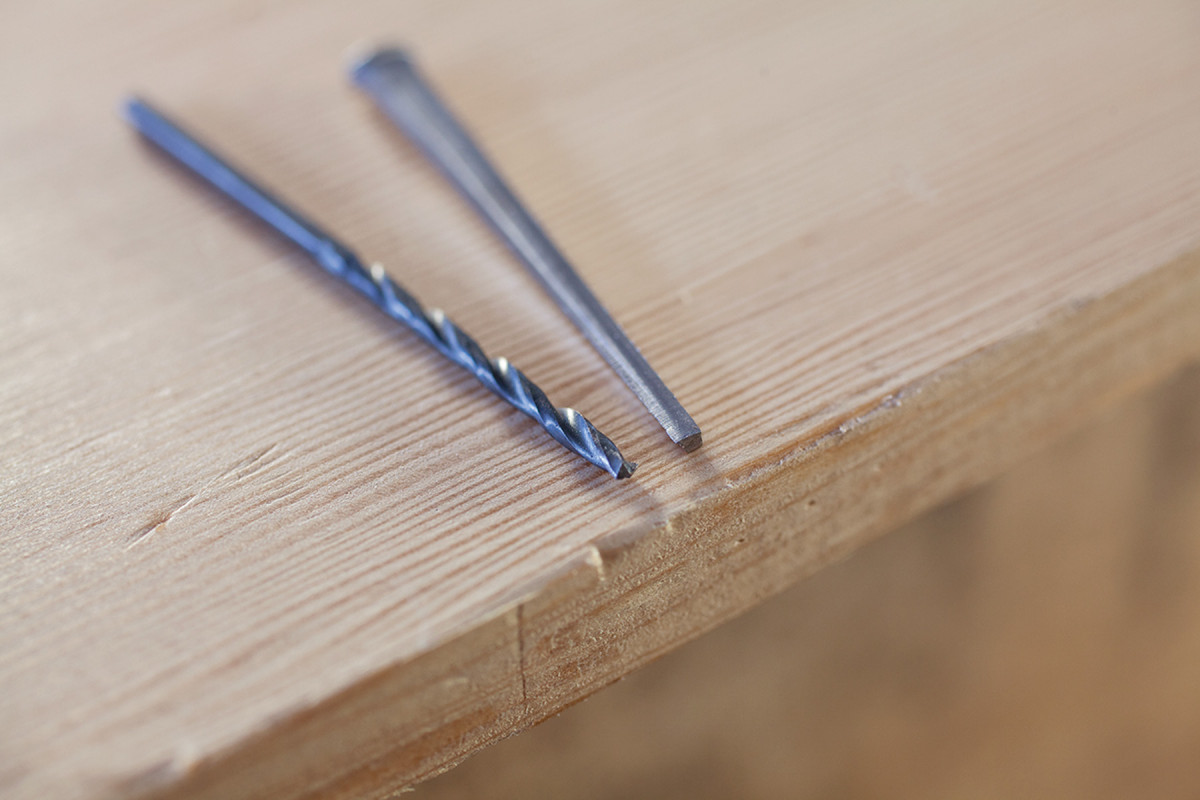
On the Pilot Hole

When will it split? When nailing near the end of a board in an unfamiliar species (or with a new kind of nail), make a test joint to see when it will split.
Wrought nails, die-forged and cut nails usually need a pilot hole, otherwise you might split the top board, especially when you are nailing near the end of a board. The size of the pilot depends on many factors, mostly how close your nail is to the end of your board and the species being nailed.
My best advice is this: If you are unsure if you will split the work, make a test joint that is identical in every way to the real joint. Start with a pilot hole that is the same size as the tip of your nail. For example, my 4d clout nails have a tip that is about 3⁄32“, so that’s where I begin.
Tip to tip. When looking for a place to start when using cut nails, I try a pilot hole that is the same diameter as the tip of the nail.
Drill the pilot to a depth that is only one-half to two-thirds the length of the nail’s shaft, otherwise the joint will be weak. If the top board splits, move up a size in bit diameter. Repeat until the joint holds and does not split.
One caveat: With wrought and die-forged nails, I like to use a drill bit that tapers along its length. This greatly reduces splitting.
What size? That’s a tough one when using a tapered drill bit. I use tapered drill bits that are intended to drill pilots for wood screws, setting the bit so the widest part of its pilot hole is the same diameter as the nail’s shaft right below its head. And just like with cut nails, the pilot hole’s depth should be one-half to two-thirds the length of the nail.
Driving & Setting Nails
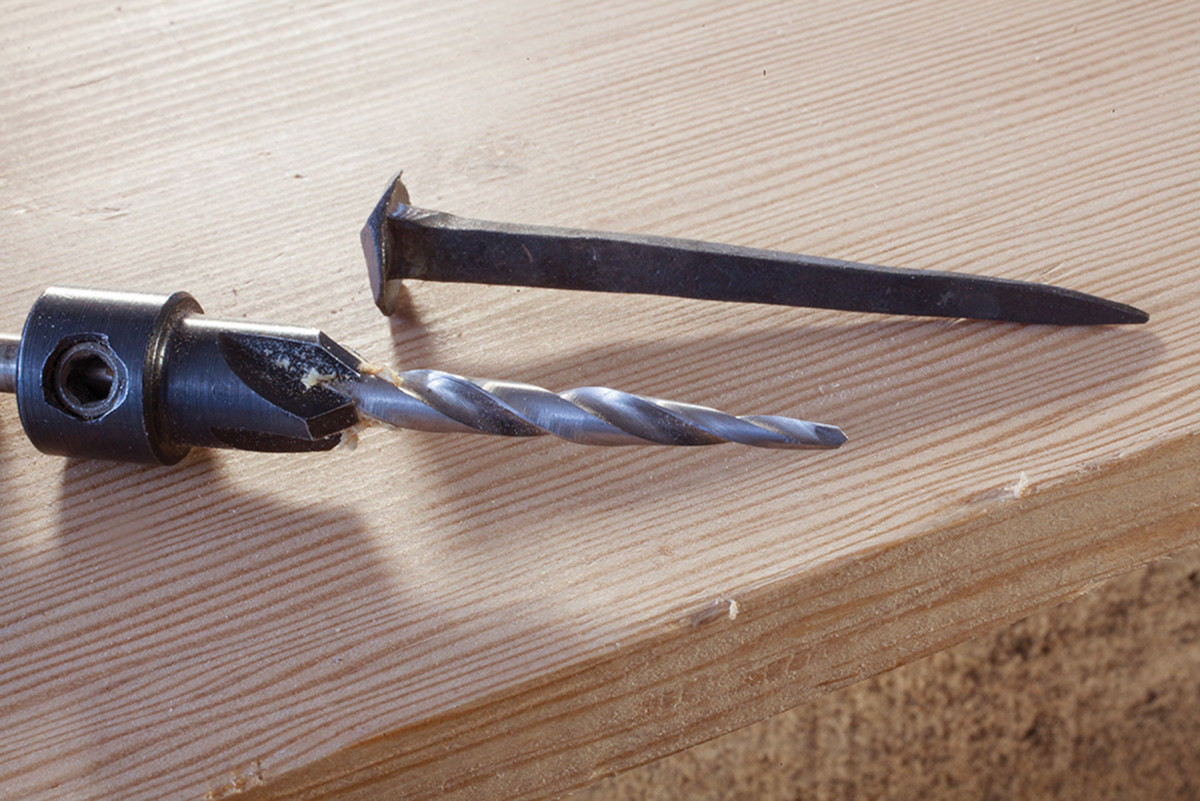
Tricky tapers. When using tapered drill bits, match the largest diameter of the bit to the diameter of the shaft under the nail’s head. That’s a good place to start.
If you’ve done your homework, driving the nail is easy. I like a hammer with a 16-ounce head for most work. For pins and headless nails, an 8-ounce cross-peen hammer is nice. The cross-peen, sometimes spelled “pein” or “pane,” is ideal for starting the nail without whacking your fingers – the peen sneaks between your fingers.
If your hammer has a slightly domed striking face, you should be able to set the nail flush to the wood without denting it (called “Frenching” by the English).
Setting the nail below the surface of the work is done with a nail set, also called a nail punch. You usually don’t set clouts or roseheads because the head will splinter the work badly if forced below the surface of your work. For brads and headless nails, set the nail 1⁄32” below the surface – no more than 1⁄16“. Setting the nail deeper will make the hole difficult to putty or more apparent if you don’t putty the nail.
Nail sets/punches for furniture making usually come in three sizes. Use the one that most closely matches the size of the head.
The Result

Enough hammers. Two hammers should be enough for most tasks. The 16 oz. hammer at right is ideal for nailing 4d nails and larger. The 8 oz. cross-peen handles the smaller nails.
Nails are not a substitute for good wood-to-wood joinery. They exist to make a tricky situation easier. Holding on a cabinet back or bottom is one example. If you capture the back or bottom in a groove, you won’t be able to repair it. Screwing it in place can be complicated because you need to accommodate wood movement – so the screws need slotted clearance holes.
Nails make it easy. They can be pulled out for repairs and they bend to allow wood movement.
Nails can add holding power when glue is not enough. For example, shelves glued into a dado have little strength because of all the end grain in the joint. But a handful of toenailed brads are invisible and can last centuries.
Like many things in traditional joinery, traditional furniture nails were designed by smart people who knew wood intimately. We just have to be intelligent enough and willing to learn to pick the right nail, use it in the right place and drive it with confidence that it will outlast us all.
Here are some supplies and tools we find essential in our everyday work around the shop. We may receive a commission from sales referred by our links; however, we have carefully selected these products for their usefulness and quality.


