We may receive a commission when you use our affiliate links. However, this does not impact our recommendations.
Here are four profiles that will change your woodworking life.
Every woodworking shop has a few vital tools that are absolute necessities. And whether you have a strict power-only tool policy or you take a blended approach, I would argue that a router is one of the tools essential to nearly any powered shop.
The problem many beginning (and some advanced) woodworkers have is that they don’t know which bits they need. This leads to buying too many, or not enough.
First, look at what you intend to make to determine the bits you really need. Cutting large mortises into heavy, hard material obviously requires different bits than making a delicate line-and-berry inlay.
That said, I have a core set of bits I’ve been recommending for years. These are the workhorses that get you through the vast majority of all the operations you’ll ever do.
I’ve broken down my core bits into four categories based on use and profile, and I suggest you buy multiple sizes of each. (You don’t need to buy them all at once, but having them all on hand gives you the most flexibility.)
The categories are: grooving, edging and plowing bits; moulding and profile bits; joinery bits; and trimming bits. There’s lots of crossover in each category, so don’t get hung up on why a bit that could be used for joinery happens to be in the grooving category. I divided the bits by the way I primarily use them.
Bit Basics
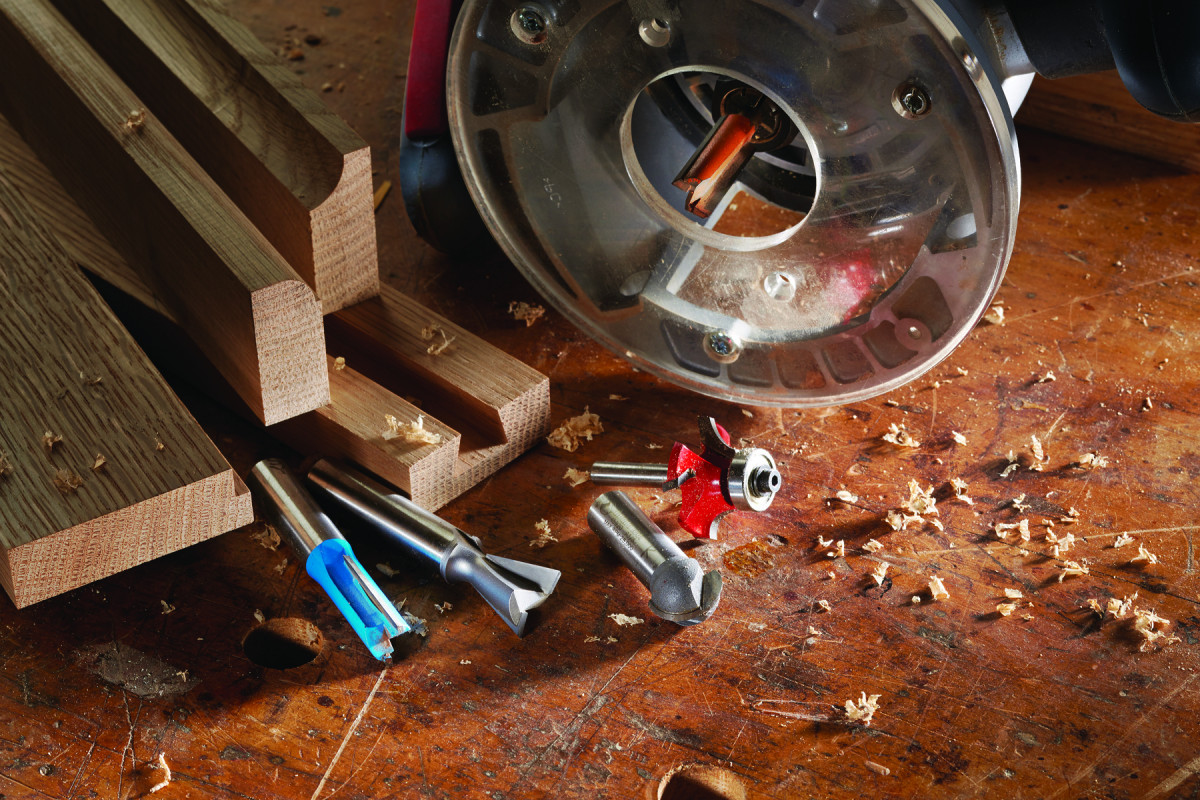
Carbide vs. steel. Carbide bits cost more than high-speed steel bits, but last longer. Also, guide bearings are better than fixed pilots; the fixed end of the bit on the right isn’t colored that way intentionally, it’s burnt.
Before we get too far, let’s talk about carbide cutting edges versus high-speed steel (HSS) cutters. Unless you want to sharpen your router bits frequently, go for carbide.
What is carbide? It’s an alloy made up of tungsten, carbon and usually cobalt or other metal. The result is a bit that stays sharp longer and doesn’t cost a great deal more.
Router bits most commonly come in two shank sizes: 1⁄4” and 1⁄2” diameter. The shank is the part of the bit that inserts into the router collet. While there are bits made with 1⁄8” and 3⁄8” shanks, they tend to be special-use cutters and are not part of my core list.
Flutes are slots machined into the bit that cut the wood. If you’re using carbide bits, the flutes are the slots into which the carbide tips are brazed.
The number of flutes has a direct effect on how a bit cuts. Single-flute cutters tend to grab more, but you can usually take a bigger cut. Double-fluted bits take a smaller bite, but tend to grab less when you hit a squirrely spot on a board. You’ll get a cleaner, smoother cut from a double-fluted bit than from one with a single flute.
Single or double? If a bit has a single slot milled into its body, it’s called a single-flute bit; two slots is a double-fluted bit. Double-flute bits cut more cleanly than single flute bits; single-flute bits can take a bigger cut.
Grooving Bits
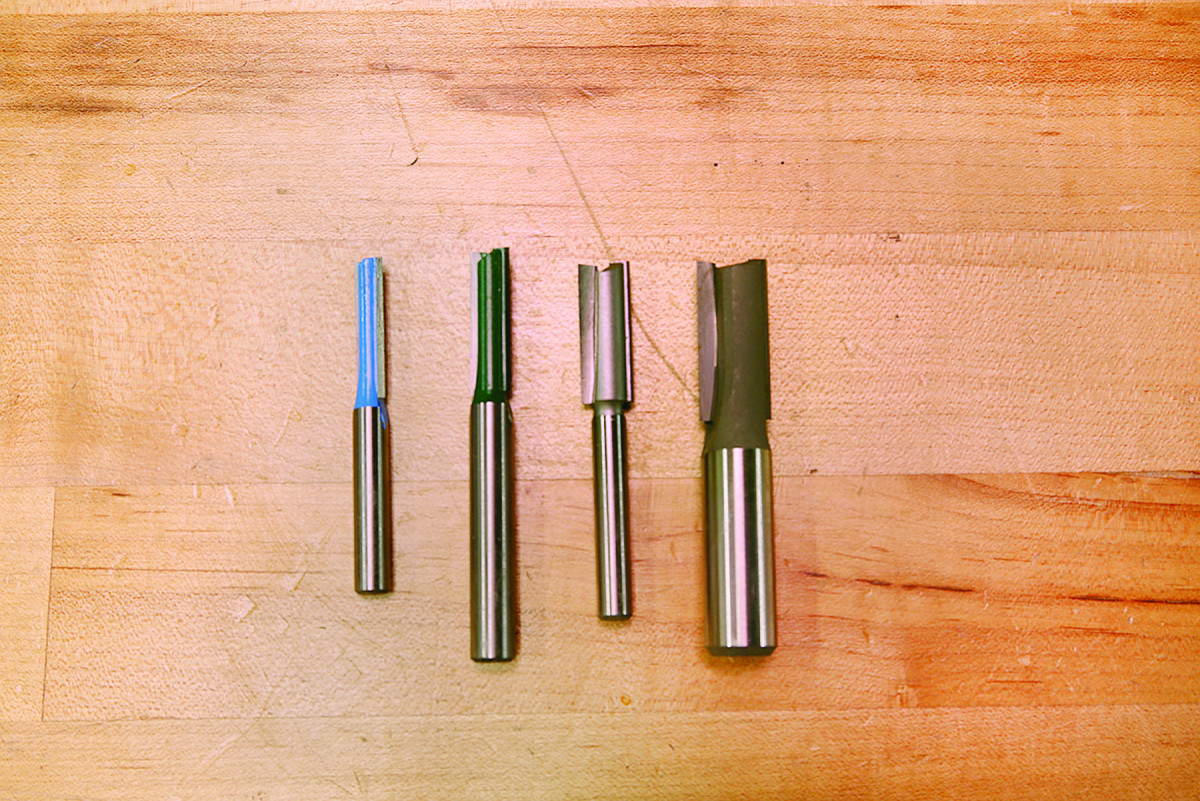
Walking the straight & narrow. Straight bits are the workhorses in the shop. A variety of diameters and shank sizes give you plenty of flexibility.
This first group is composed of straight bits because they can be used to make rabbets, grooves and dados. They can also, with the addition of a few shop-made jigs, be used to trim boards to length and cut mortises and tenons. For me, straight bits are the center of the core group around which all other router bits revolve: They can be used to create relief cuts for mouldings, dish out a tabletop or cut a hinge gain.
With that in mind, think about what you’ll do the most and buy the appropriate sizes first. I recommend having at least one each of the following diameters: 1⁄4“, 5⁄16“, 3⁄8“, 1⁄2“, 5⁄8” and 3⁄4“.
I don’t much care what shank size you use except on larger bits – I like 1⁄2” shanks on bits 1⁄2” diameter and larger.
A couple of specialized straight cutters I suggest you include in your core set are a flush-trim bit and a pattern bit. Both look like standard straight cutters, but have guide bearings above or below the cutting edges. Both bits allow the use of templates and patterns for making parts in multiples. The two different bearing locations give flexibility for operations that might be unsafe if limited to a single orientation.
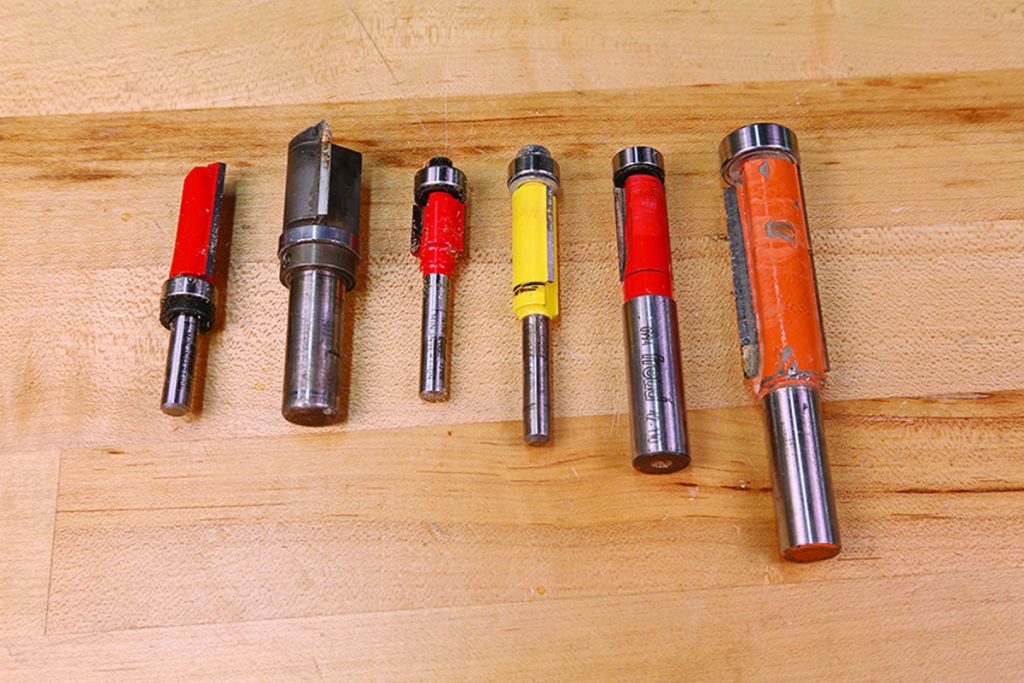
Top or bottom. Pattern bits have bearings on the shank side of the carbide, which means your pattern sits on top of your work when using the bits freehand in a router. Conversely, trim bits have bearings on the cutting end of the router bit, requiring you to put the work on top of the pattern.
Round it Out
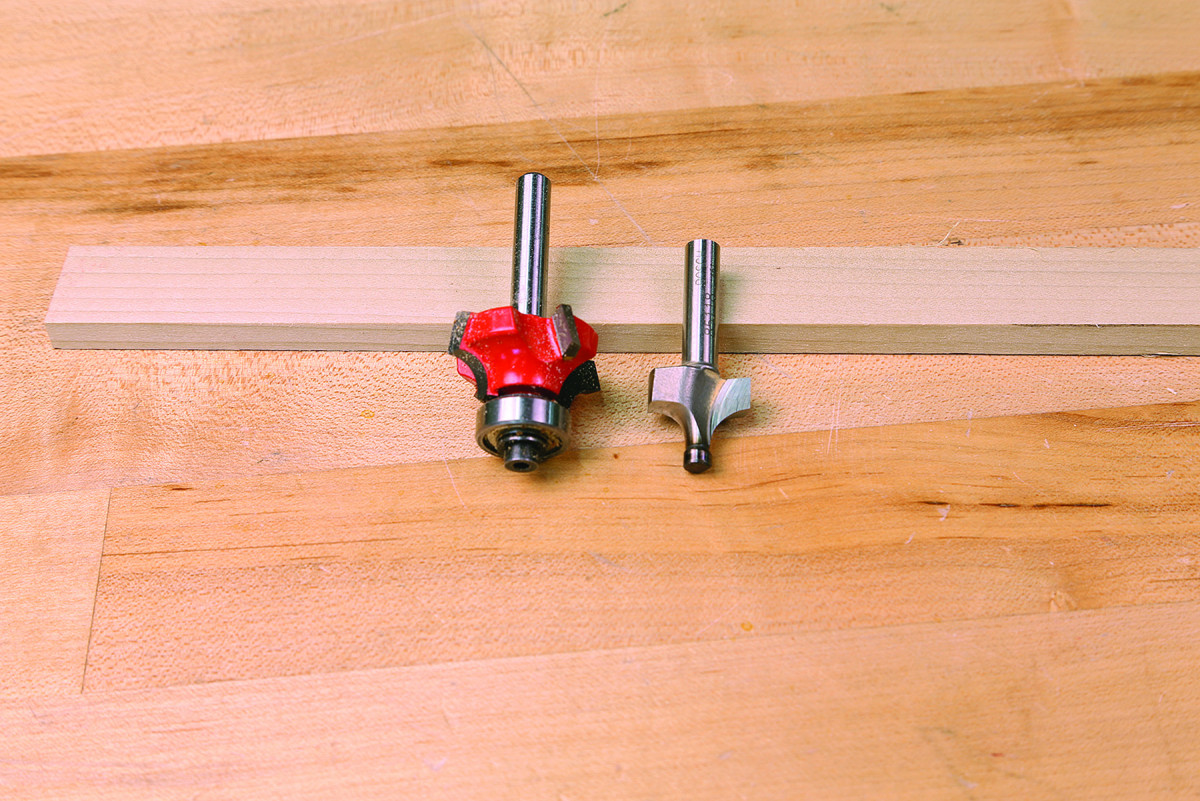
If you think of a router and bits in relation to a set of hollow and round moulding planes, the roundover bits would be the hollows.
Roundover bits do exactly what the name implies – put a radius on the edge of a board, thus rounding it over. They can also cut fillets along one or both edges of the quarter-round, creating either a thumbnail or a bead (ovolo).
I tend to buy roundover bits that have bearings flush with the carbide tips; this way if I only need a quarter-round profile, the bit can be used straight out of the box. (If a bearing has a diameter smaller than the tip, it would create a fillet every time I used the bit.) If I need to make a bead (a quarter-round with two fillets) I can simply remove the bearing and run my stock using a fence.
I’ve even been known to remove the bearing (and the bearing post if there is one) from a bit and use it as a bottom cutter. So, if I needed a dished area on a board with a quarter-round, I can achieve it with a bit that is already part of my core set. (If you’re going to grind away bearing posts from your roundover bits, I suggest buying multiples of the same profile to keep the option of using the bearing open.)
For the core set, I suggest 1⁄4“, 5⁄16“, 3⁄8” and 1⁄2” roundover bits. Those four sizes cover most of your regular needs. If you do lots of quarter columns using the method I described in the April 2013 issue of Popular Woodworking Magazine , you might want a few larger sizes.
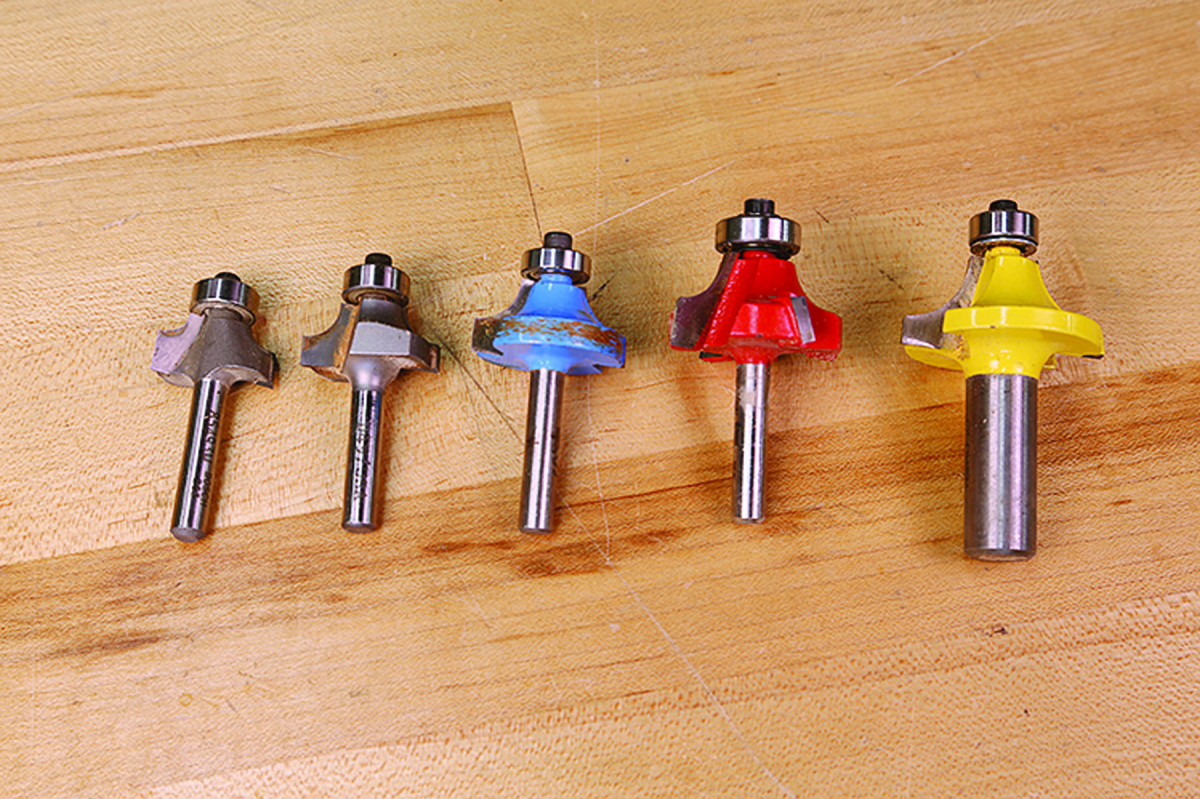
Roundover roundup. Most every moulding you make will contain a combination of convex and concave shapes. Round-over bits are essential for making the convex portions of the mouldings.
In the Cove
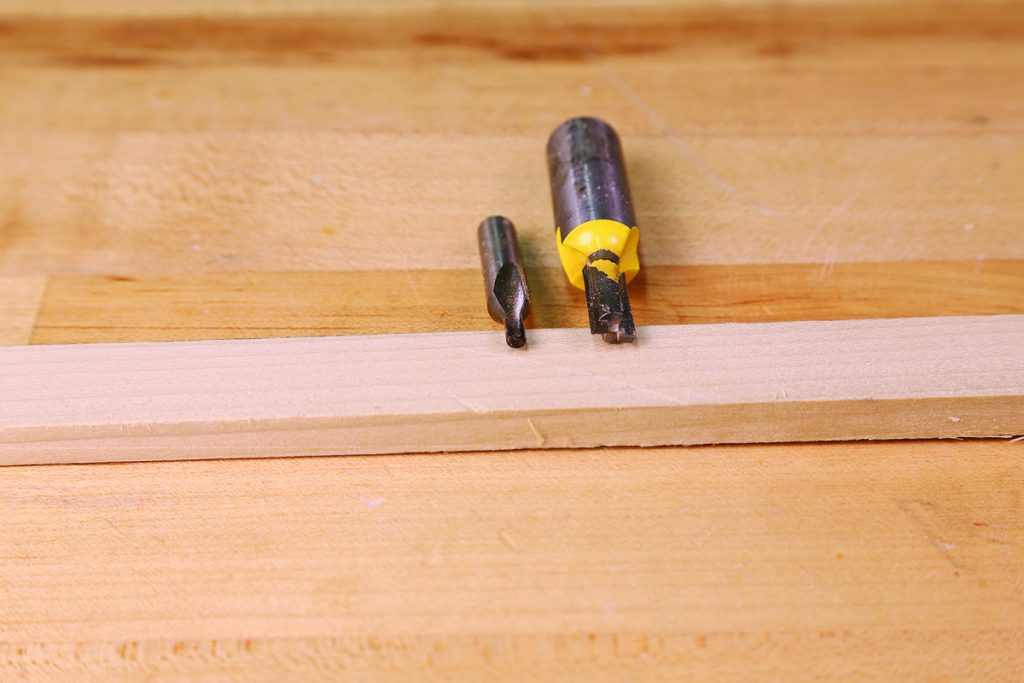
Core-box, or round-nose, bits make coves and hollows. This group relates to the rounds in a set of hollow and round moulding planes. Use them to make any portion of the concave part of a circle, short of a complete circle (for that I suggest a drill bit).
The reason I choose core-box cutters over coving bits is one of versatility. Not limiting the cut of the router bit to one-quarter of a circle means far more can be accomplished with a single bit. When in doubt, go with bearingless bits; they’ll provide greater flexibility.
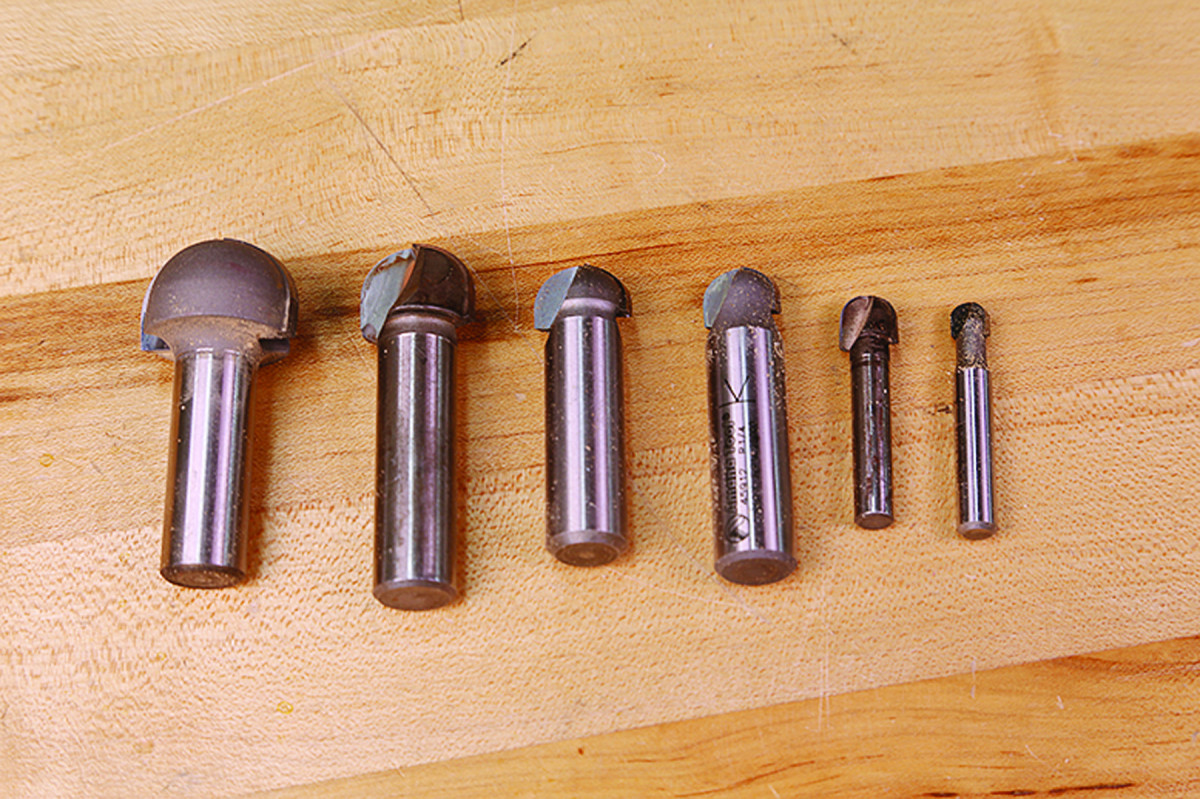
Hollow it out. Core-box bits are versatile and can make everything from a slight cove to just short of a complete hole. A variety of sizes gives you nearly unlimited potential.
The number of core-box bits I suggest is greater than the number of roundover bits. The reason is simple: You’ll likely need a greater variety of coves than beads. You can combine smaller coves and larger beads to create more variety in your mouldings, and you can use coves as stand-alone decoration. So variety is a good thing.
I suggest six core-box radii: 1⁄8“, 3⁄16“, 1⁄4“, 5⁄16“, 3⁄8” and 1⁄2“. (These sizes are the radius of the curve, which makes the bit double that in size.) To run a 1⁄4” plate groove in a shelf, grab your 1⁄8” radius core-box bit and have at it.
Yes, I Said Dovetails
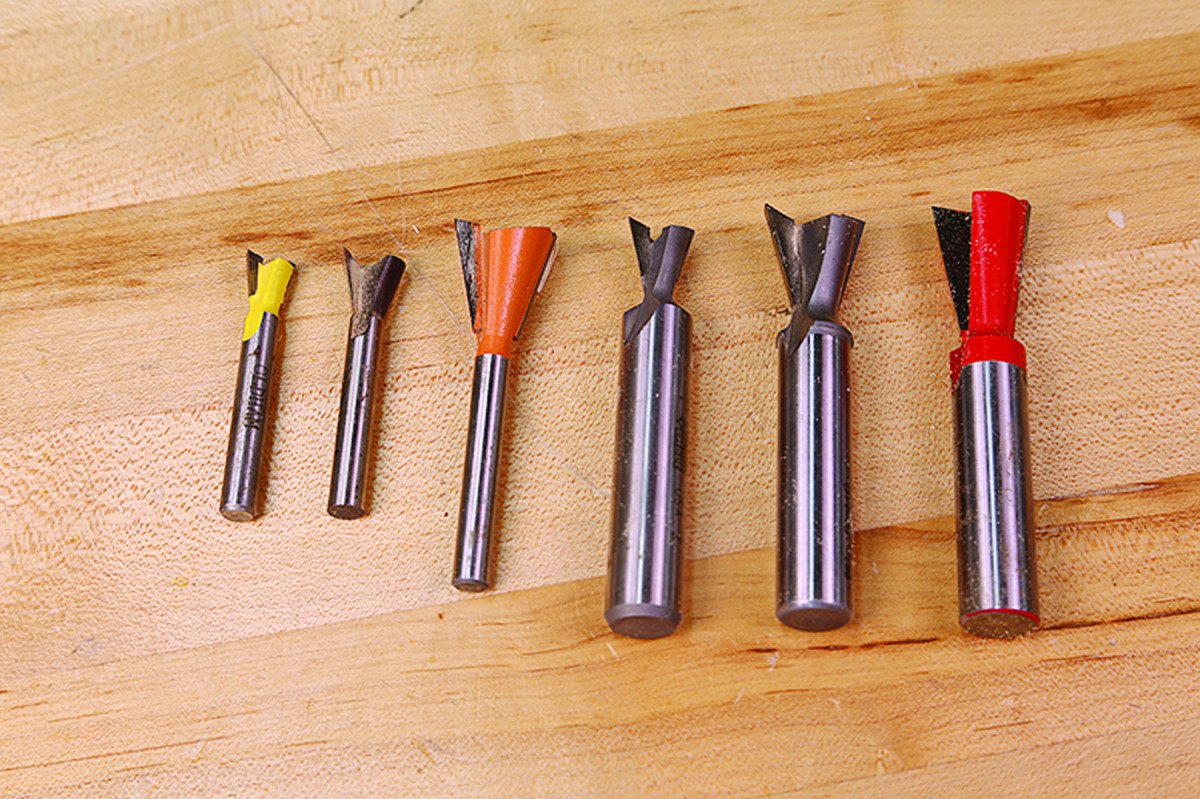
Tails first. A couple of sizes of dovetail bits, with a couple of different degree angles, gives you options for cleaning out and making joints.
The final profile group in my core set are the dovetail bits. Before you have a fit that I’m suggesting you start cutting dovetails with a router and jig, hear me out.
While I don’t use a router and jig to dovetail carcases, I don’t condemn the practice. I do, however, use dovetail bits to make sliding dovetail joints, as well as to help clean out the waste material on my pin boards when I cut half-blind dovetails.
Having (at least) two sizes of dovetail bits in your set gives you options. I have one larger and one smaller dovetail bit in my set (1⁄2” and 11⁄16” diameters at any angle you like). This way, if I need a small sliding dovetail in a piece, I have it. Conversely, if I am chopping out some huge half-blind dovetails for a workbench, I have a large bit to help hog out the waste.
Buy For Your Needs
Even though I’ve broken my core set of bits down to four profiles, I’ve given you a list of 20 potential bits for inclusion – but you truly don’t need all of them.
If you’re doing lots of period furniture, you might get away with several of the smaller straight bits, a 1⁄4” roundover and core-box bit and a couple of dovetail bits for years before you need to expand your set.
The roundover bit can be used to make the thumbnails for drawer lips and be used in combination with the core-box bit to make ogee mouldings. Throw in the straight bits and you’ve got the makings of some pretty complex traditional mouldings.
If you have all 20, however, you’ll be able to motor through most any task with ease. Adapt and adjust your set to the type of work you do and don’t be afraid to add the occasional specialty bit as needed.
Keep your options open and you’ll have more fun. Plus, you’ll be able to make a wider variety of projects.
Here are some supplies and tools we find essential in our everyday work around the shop. We may receive a commission from sales referred by our links; however, we have carefully selected these products for their usefulness and quality.