We may receive a commission when you use our affiliate links. However, this does not impact our recommendations.
 When it comes to milling lumber, chainsaw mills offer a low cost of entry, with some big capacities.
 When it comes to milling lumber, chainsaw mills offer a low cost of entry, with some big capacities.
The more and more I get wrapped up in the milling, logging, and lumber industry, the more and more questions I seem to get about chainsaw mills. What are my thoughts on them? Are they worth the cost? Will they produce good, usable material? So, out with the chainsaw, fuel cans, and some long johns to answer these questions.
Chainsaw Mill Basics
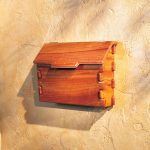
A chainsaw mill, obviously, utilizes a chainsaw powerhead and bar to rip logs into usable pieces. One of the most common setups, designed and sold by Granberg, is shown below. Commonly referred to as an “Alaskan mill” (which is a trademark name owned by Granberg), it’s a fixture that captures the chainsaw bar under a pair of guide rails. The guide rails can be adjusted to make different sized cuts when milling a log.
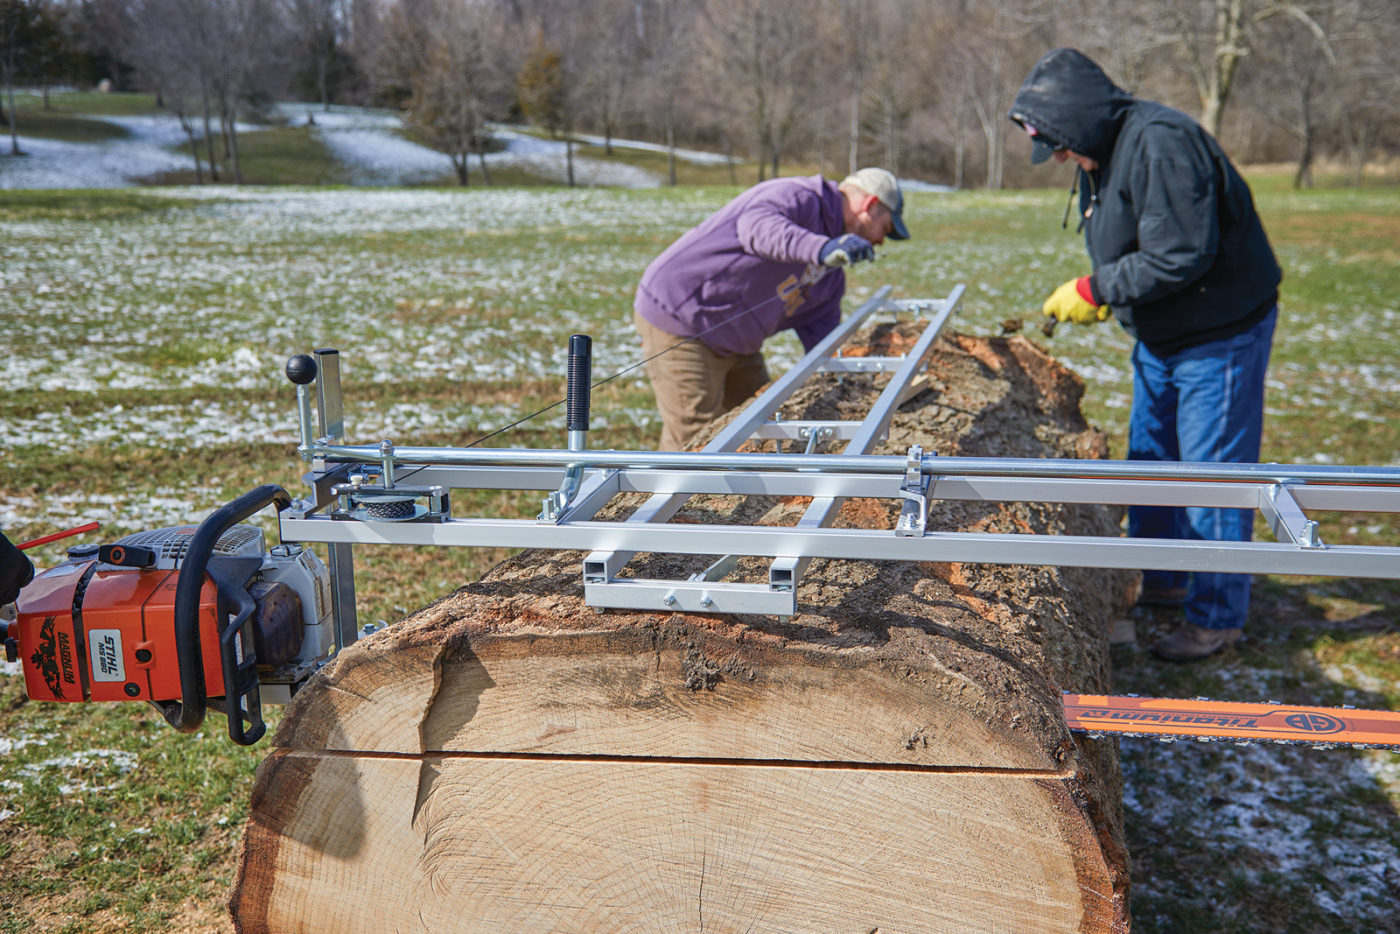
1. A chainsaw milling setup consists of the mill frame, a special bar and chain, a power-head, and something to get the first cut started off flat.
One of the most common questions when it comes to chainsaw mills is “will my current saw work?”. And the answer is… maybe. For chainsaw milling operations, you need a saw with a minimum of about 70cc. At 70cc, you’re starting to get into the professional saw category, and that’s a good thing, as professional saws are generally built better than “homeowner” saws. And, I want to be clear: milling can be hard on saws. In fact, most saw manufacturers don’t recommend milling with their saws. But, when it comes to milling, the bigger the powerhead, the better. Here, we’re using a Stihl MS880, which is the biggest saw they currently make. If more power is needed, then you start to get into the realm of double-headed bars (yes, two saw heads on a bar is a thing). However, that only makes sense if you’re cutting logs over 60“-wide.
The second half of the chainsaw question has to do with the bar. Standard chainsaw bars are made from aluminum or steel. They work well for most operations and probably milling as well, as long as you’re sticking under 36“ or so. Once you start to get to long bars (such as the 68“-long bar you see here), the bars will start to sag. To fix that, companies like Granberg produce titanium bars that are stiffer than other types of bars. This leads to minimal sag for flat lumber.
Finally, you need to look at the chain. Standard chainsaw chains will cut. But it will be painful. Instead, a specially designed ripping chain helps more efficiently remove the waste as you make these long, wide cuts. If you’re planning on doing any milling, it’s worth investing in a handful of loops of ripping chain.
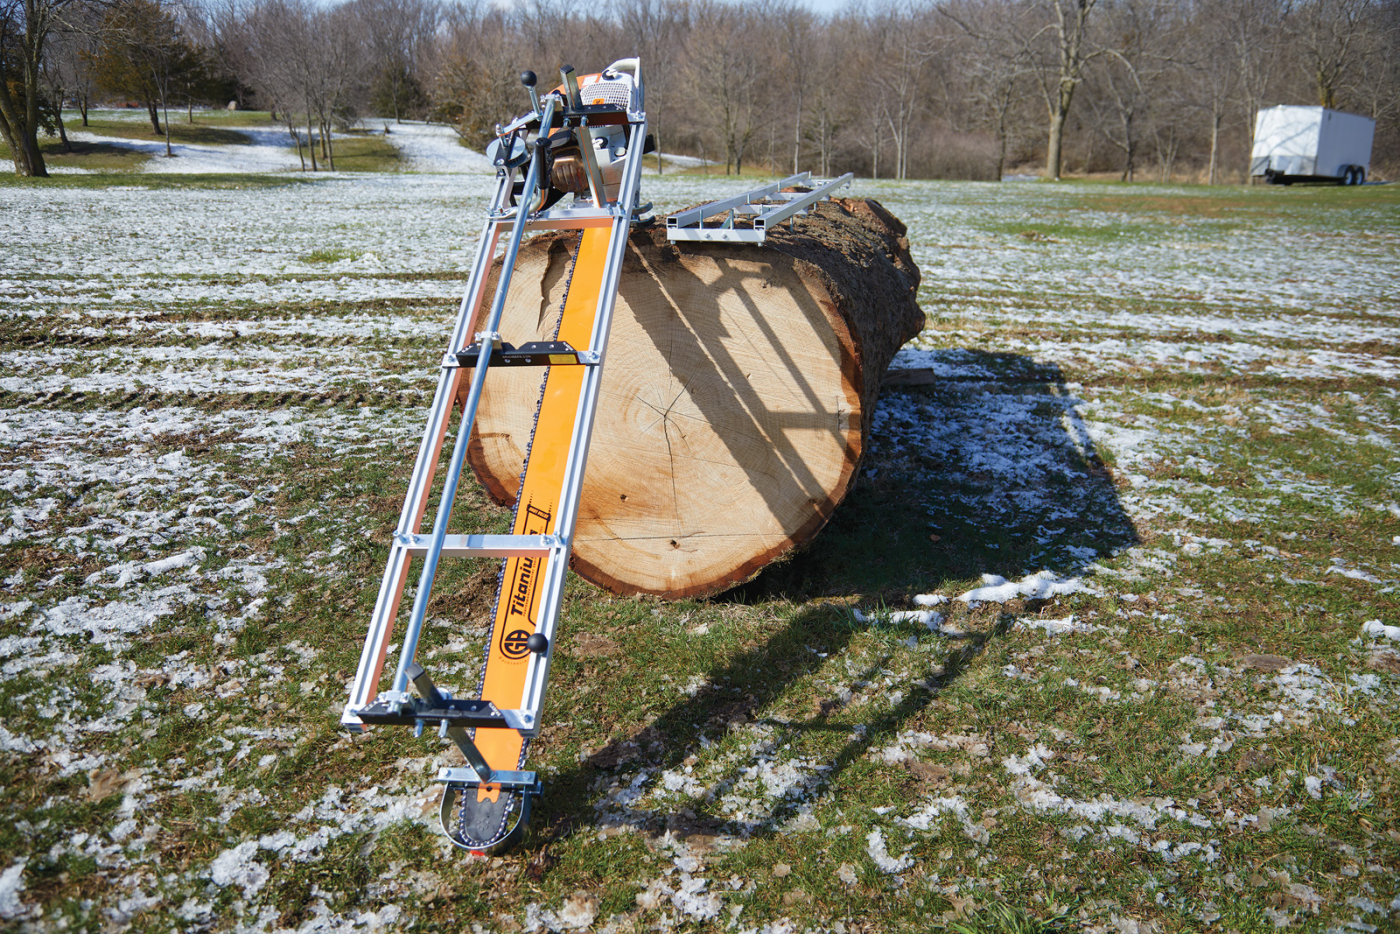
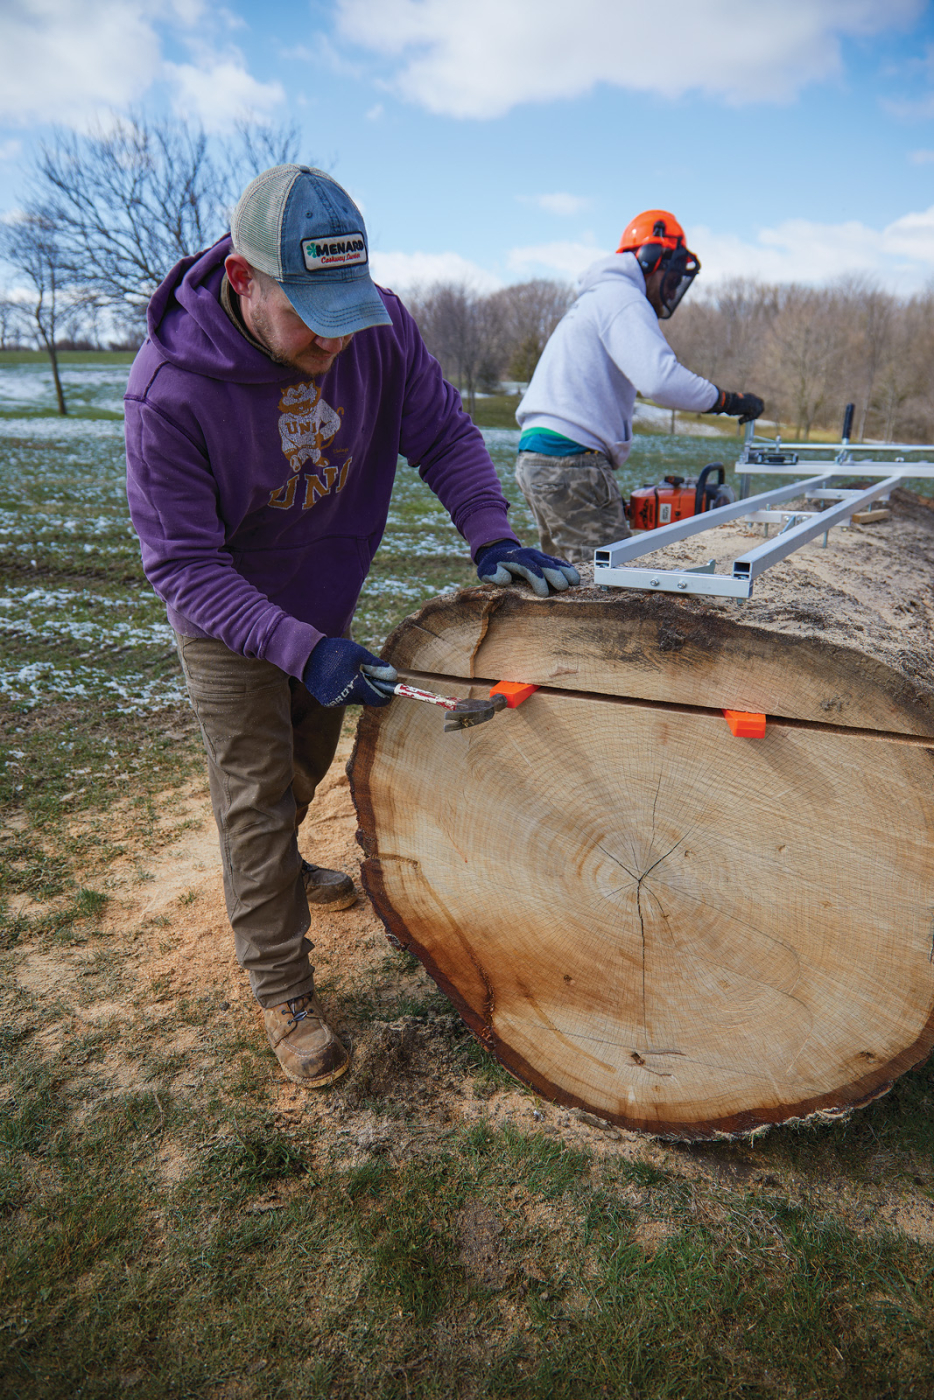
2 Before gassing up the saw, some work is done on the log, such as blocking it to keep it from rolling and installing a winch bracket for the winch on the Granberg mill.
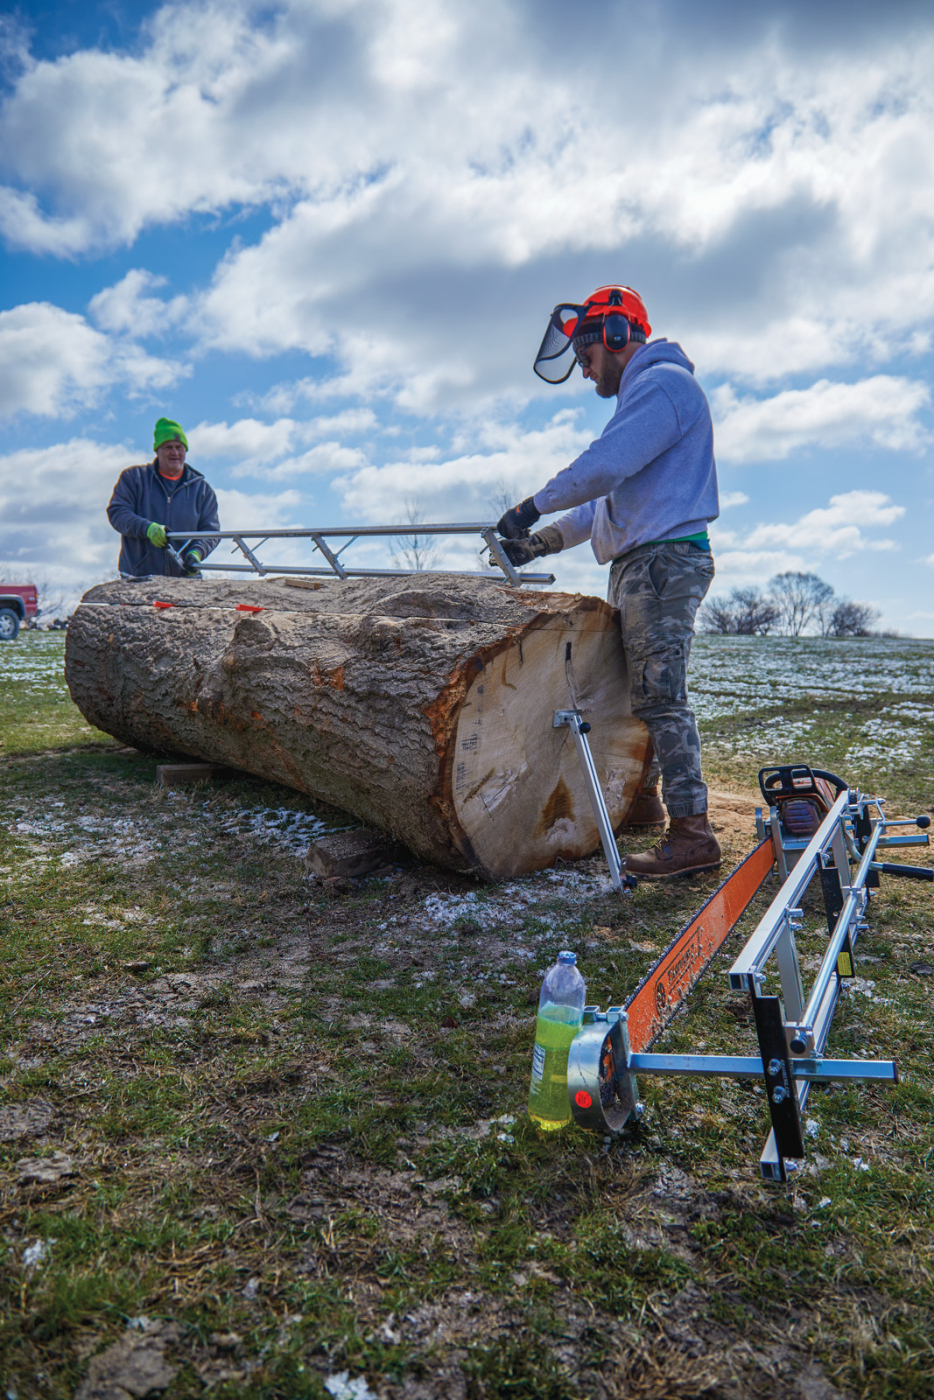
Now, before firing up a saw, I’m going to dive into my safety speech real quick. Safety glasses are a must, but a full-face shield is better. In my opinion, chainsaw chaps aren’t as critical when running a chainsaw mill, but they’re still important. The bar is held in a fixture, and the bar is buried in the log. Plus, you’re not cutting with the tip, which is where most kickback occurs. My buddy Bojan is wearing a set of high-end Dyneema reinforced climbing pants. If you don’t have a super fancy set of professional arborist pants, I would highly suggest wearing chainsaw chaps when operating any chainsaw.
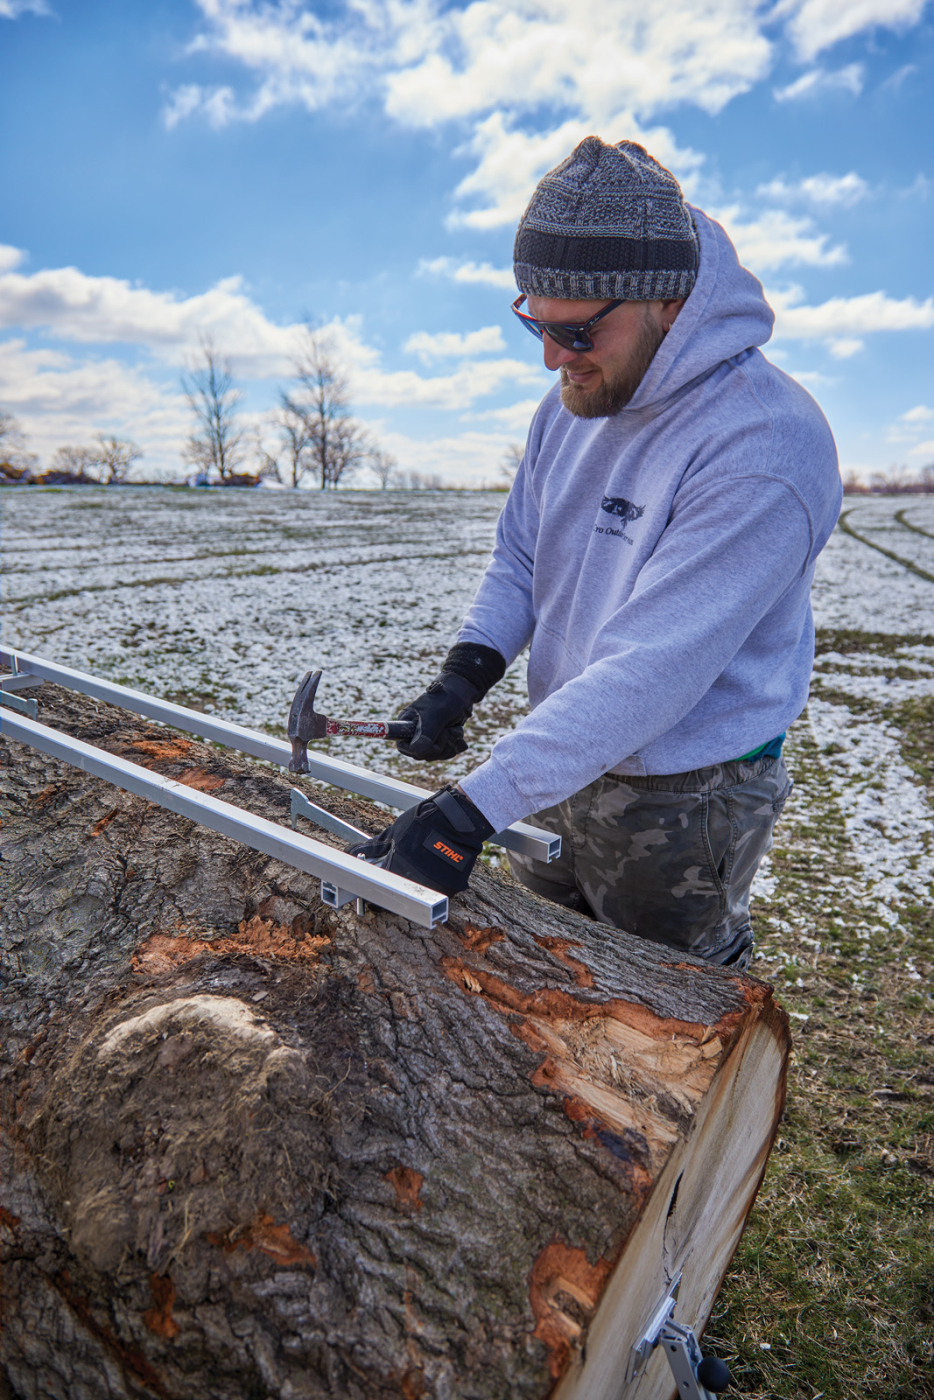
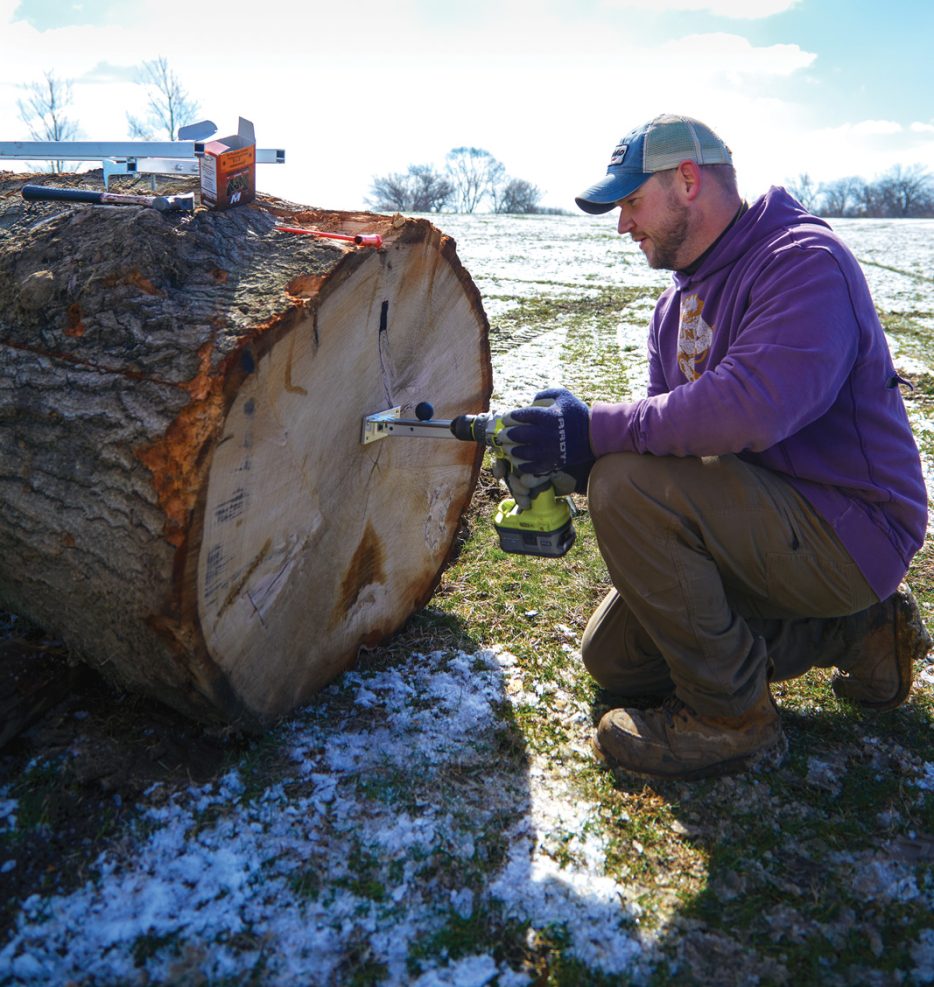
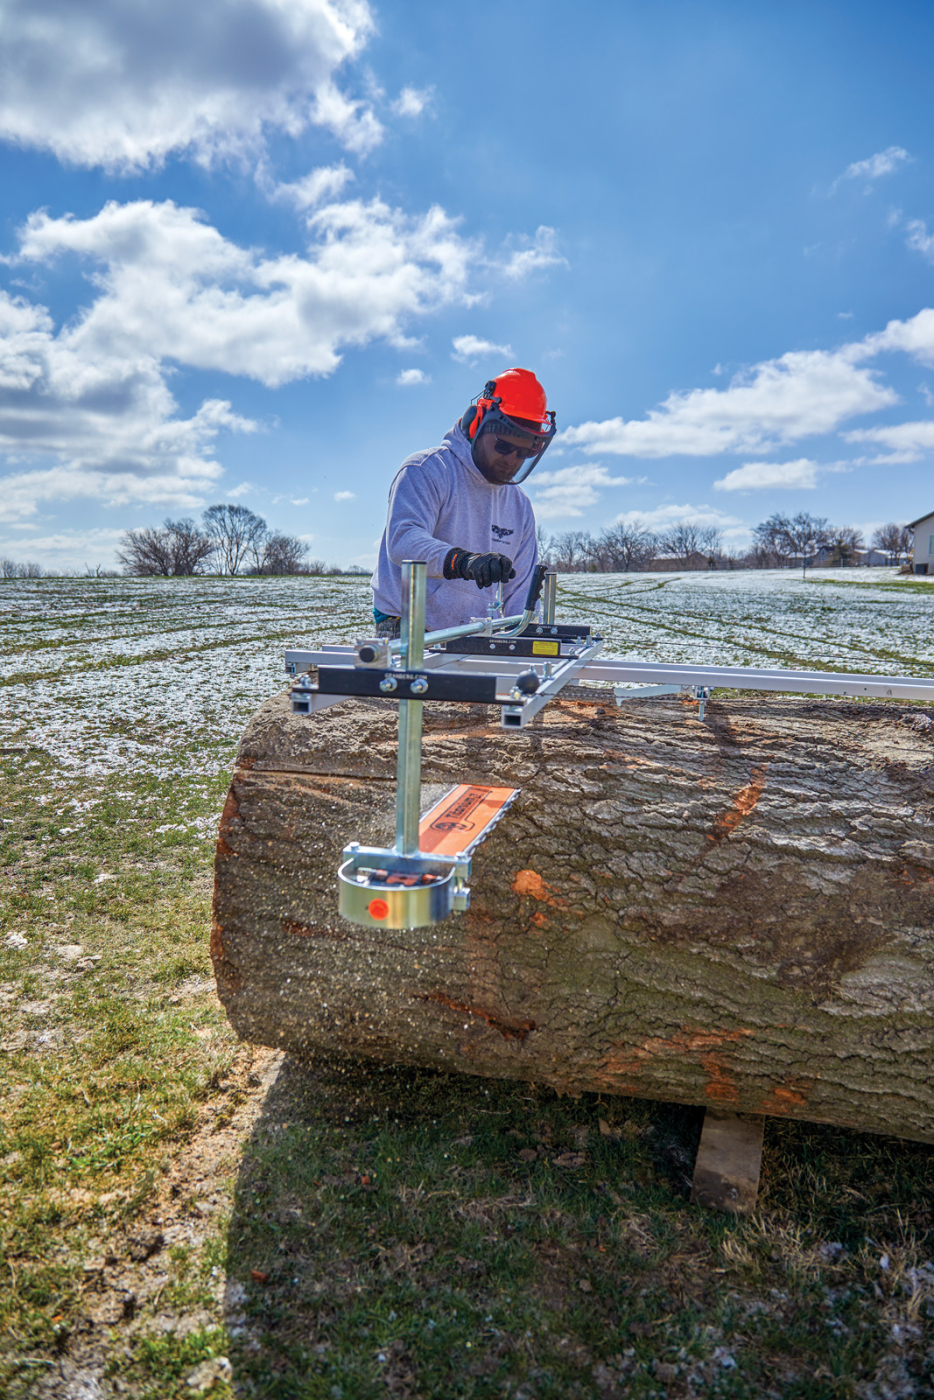
3. The Granberg system includes a set of guide rails for making the first cut. Hooks hammered into the log hold it in place.
Getting Started
The cool thing, in my opinion, about any chainsaw mill is that there isn’t much to them. The guide rail references off the last cut to produce the desired thickness of lumber. To get the first cut flat, however, you need some form of a jig. Simple 2×4’s screwed the log works, as does an aluminum extension ladder. However, Granberg sells a guide rail specifically for this first cut. It rests on the top of the log and is held in place by a couple of hooks that are driven into the log (Photo 3, above). A series of leveling screws along the length of the rail allows you to adjust the rails, so it’s perfectly flat along the length of the log, without any twists, dips, or humps. In my experience, it’s best if your rails extend past the end of the logs by several inches, especially if you’re milling by yourself. However, if the rails are a little shorter than the log, you’ll just need a helping hand as you’re starting and ending the cut.
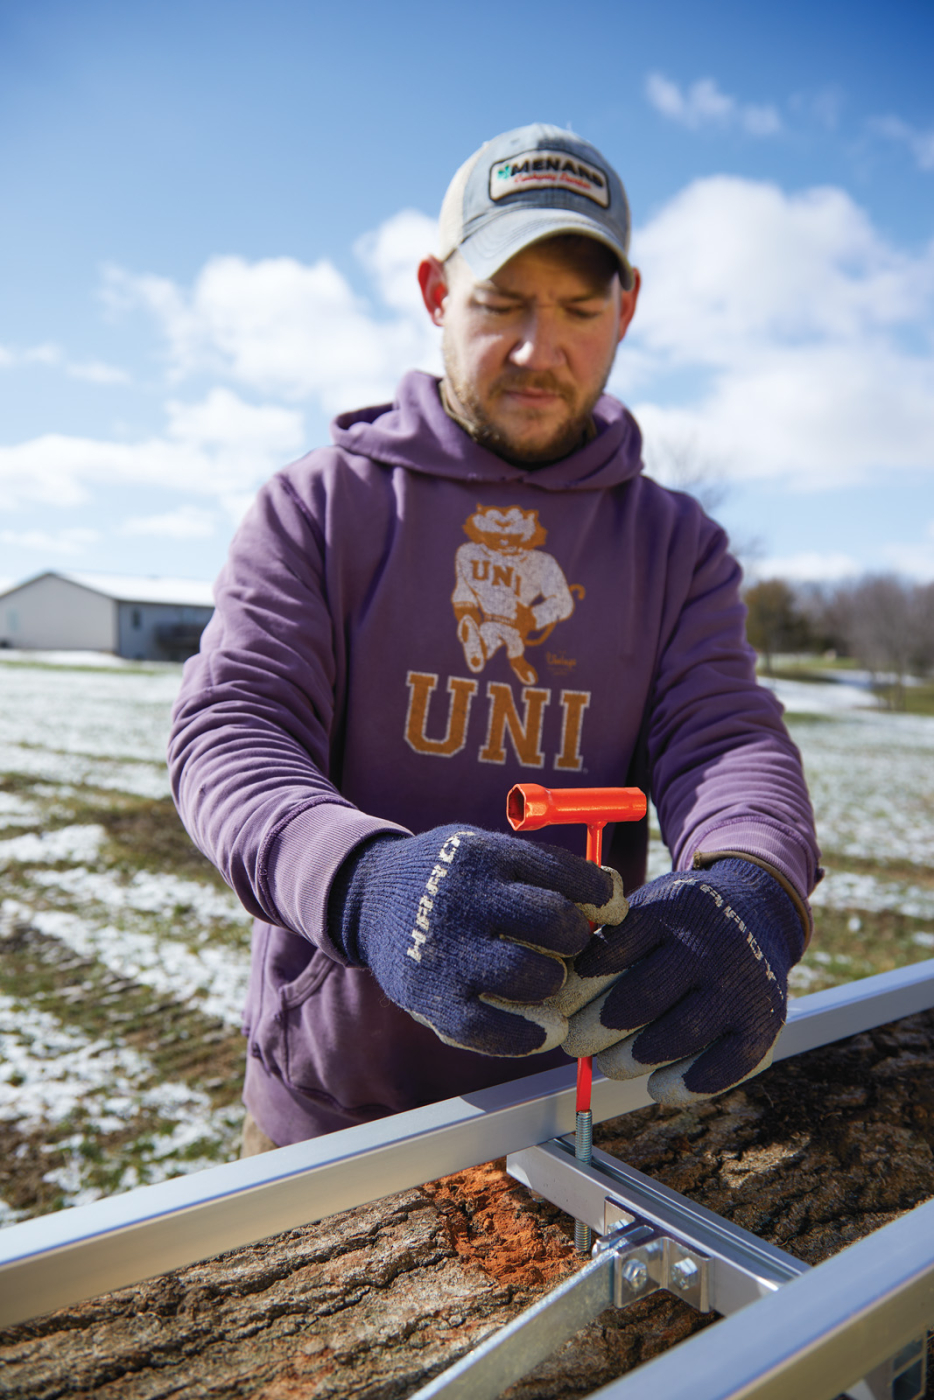
4. Two leveling screws on each cross member allow you to level the rail and compensate for any twist in the log.
With this big pin oak, the rails were a little short on both ends. So, this is what I consider a two-person starter. One person is on the powerhead, holding the throttle. The second person is supporting the mill on the opposite end of the log, helping get the mill riding on the rails. After the saw is in the log and the mill is fully riding on the rails, you can connect up the winch for one-person operation. You can see this in the two photos below.
5. After starting the cut, you can pull the winch cable to the winch bracket.
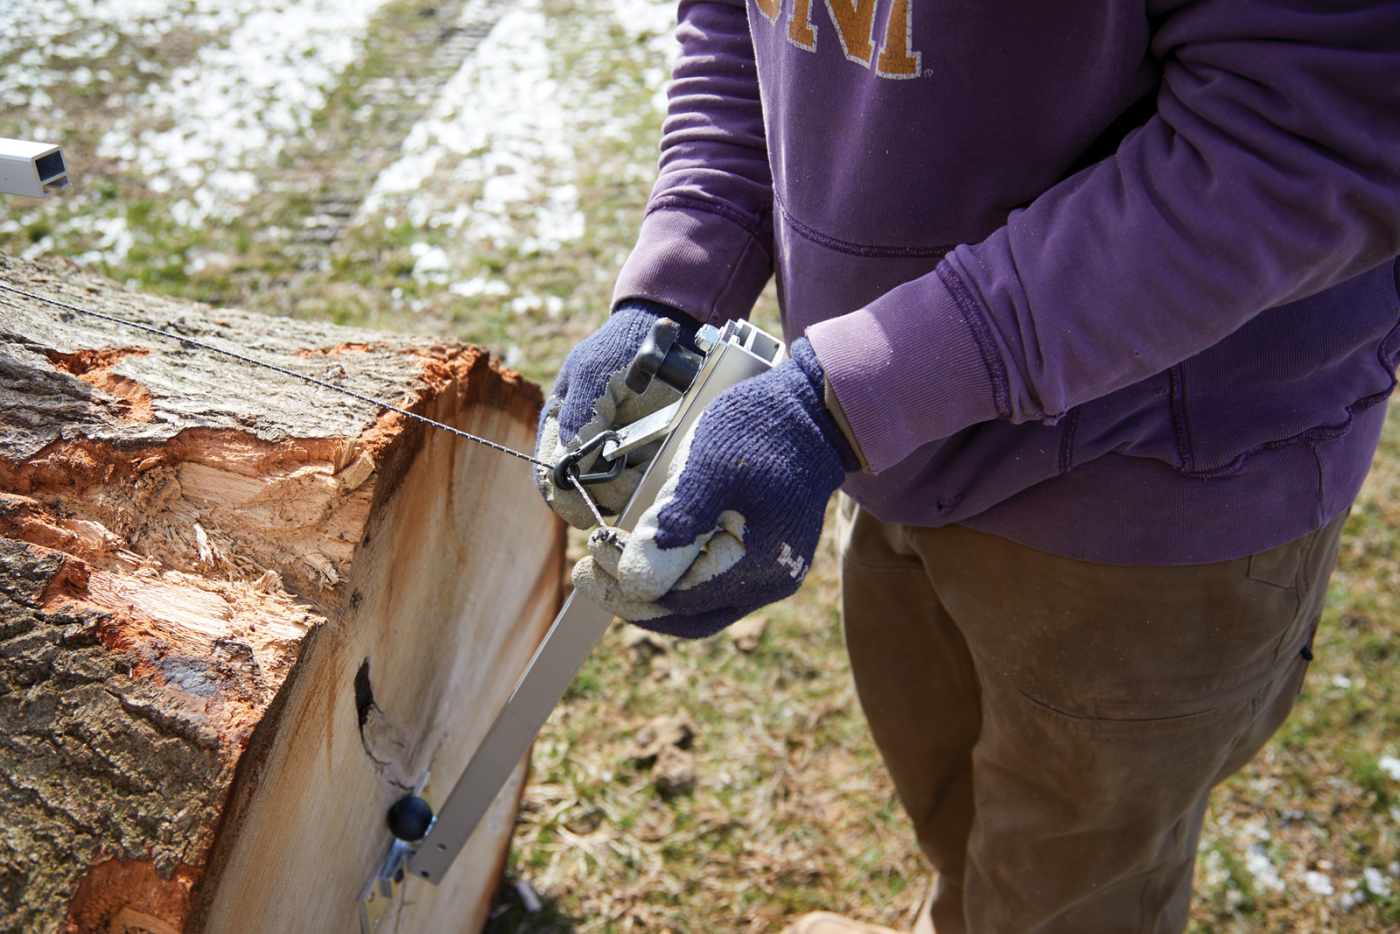
6. The cable runs through an eyelet on the bracket and runs back to the opposite end of the chainsaw mill fixture for an even pulling force.
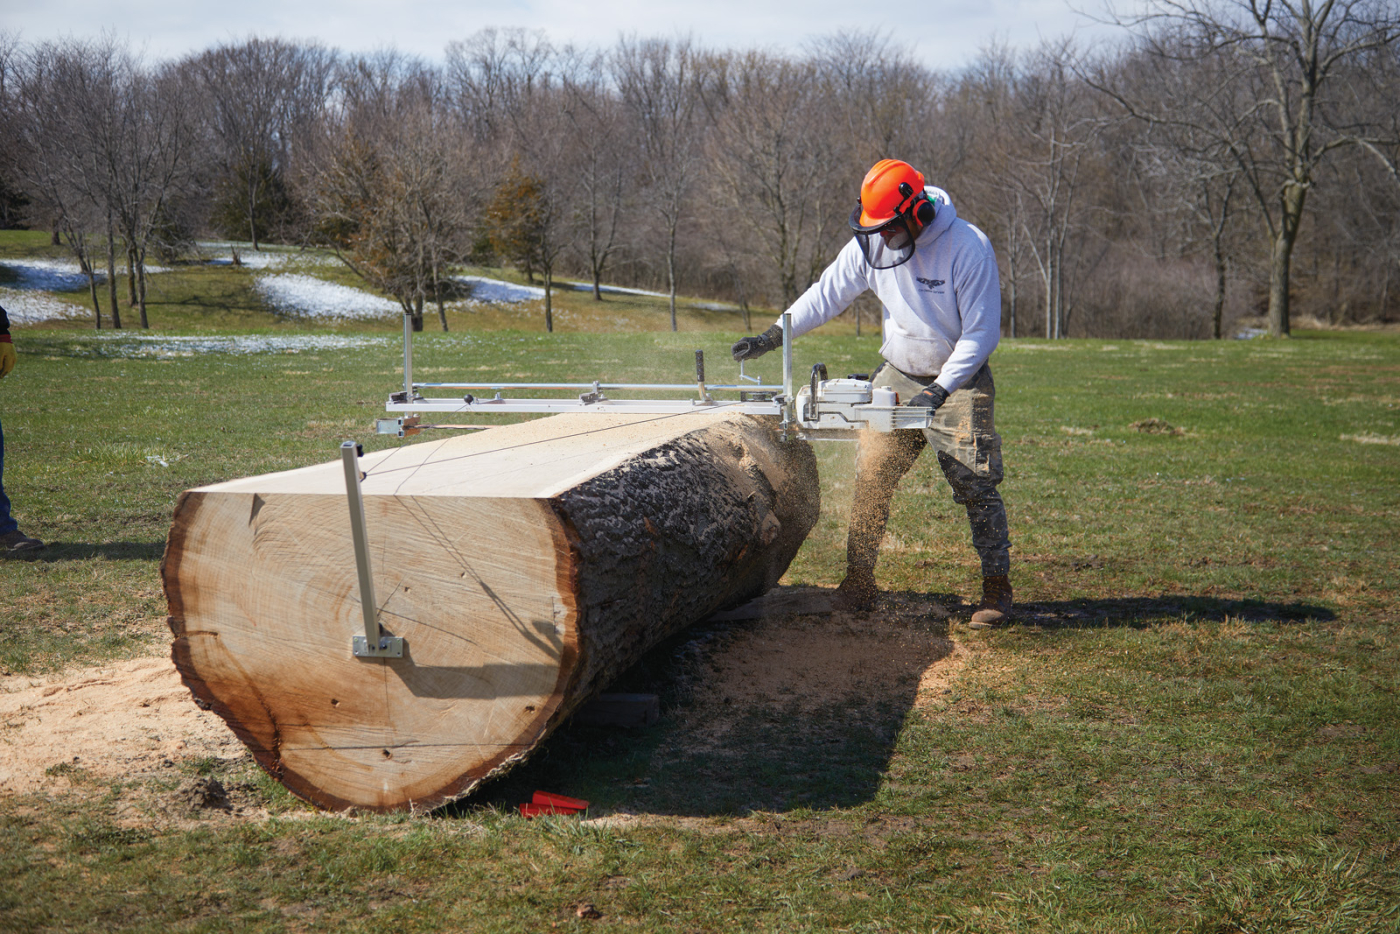
During the cut, once the winch is hooked up, it’s a simple matter of keeping the sawhead running full-throttle and feeding the saw with the winch. If you crank too hard on the winch, the saw will bog down, and the RPMs will fall out of the ideal range. You want to cut slow enough that the saw doesn’t bog down and has enough time to clear out the chips from the kerf. This pin oak is about 44“ in diameter. The wider the cut, the more time the chain needs to clear the kerf of chips (and the slower the cut). Because the bar on a large mill like is this so long, it needs a little additional lubrication at the tip of the bar. As you can see in the lower photo below, we do this with a simple water bottle with a hole poked in the top. Every few seconds, a squirt of bar oil on the sprocket adds a little extra lubrication. Granberg, offers an auxiliary oiler for the mill that would take care of this step.
7. With the saw engaged, it’s a simple matter of keeping on the throttle and slowly cranking the feed winch.
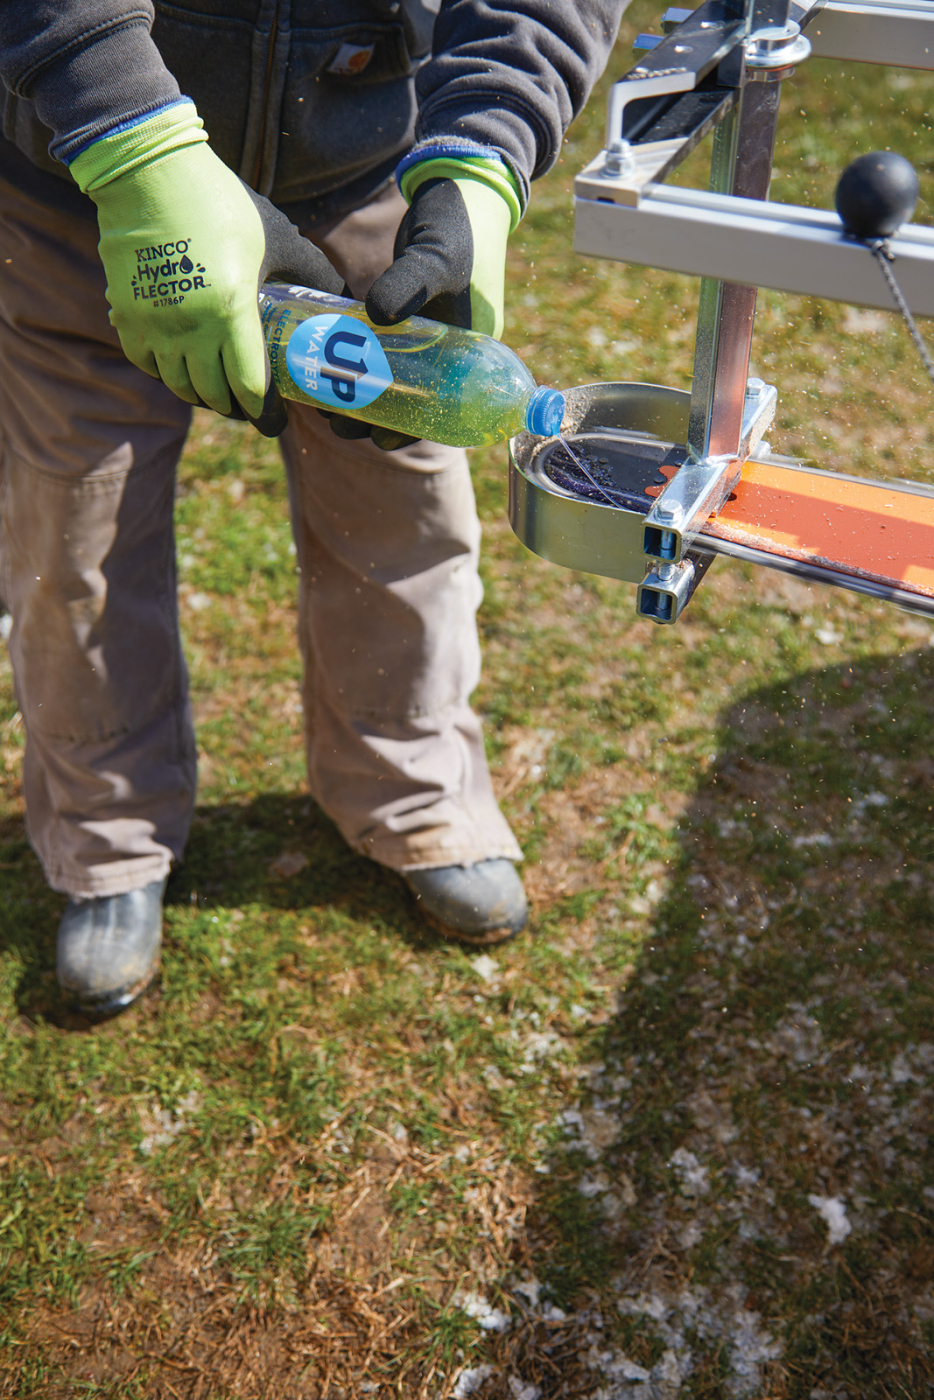
8. A set of helping hands adds extra lubrication the sprocket end of the bar, however it’s up for debate on whether dripping oil on the chain is providing additional lubrication (versus the oiler which internally oils the sprocket and chain groove).
One of the most obvious differences with a chainsaw mill is the much wider kerf that’s created as you’re cutting. Unlike my bandsaw mill, the weight of the workpiece will cause the bar and chain to become pinched. So, as you’re making a cut, it’s important to add wedges every couple of feet to keep the kerf open as you cut. This is where a second person is very handy—they can be adding lubrication and wedges as the operator is cutting.
9. As the cut is made, a helper should be applying wedges every few feet to keep the kerf open.
As you reach the end of the first cut, I usually try and slow down, especially if my rails are a little short. I’ll have my helper (or I will, if I’m the helper) step back in, get a hold of the end of the mill, and help guide it out of the log. Then, the saw is set off to the side to be refueled, reoiled, and cooled down. (Yes, it takes almost an entire tank of gas in an 880 to make this cut).
10. After the first cut, the guide rail is no longer necessary, and it can be removed.
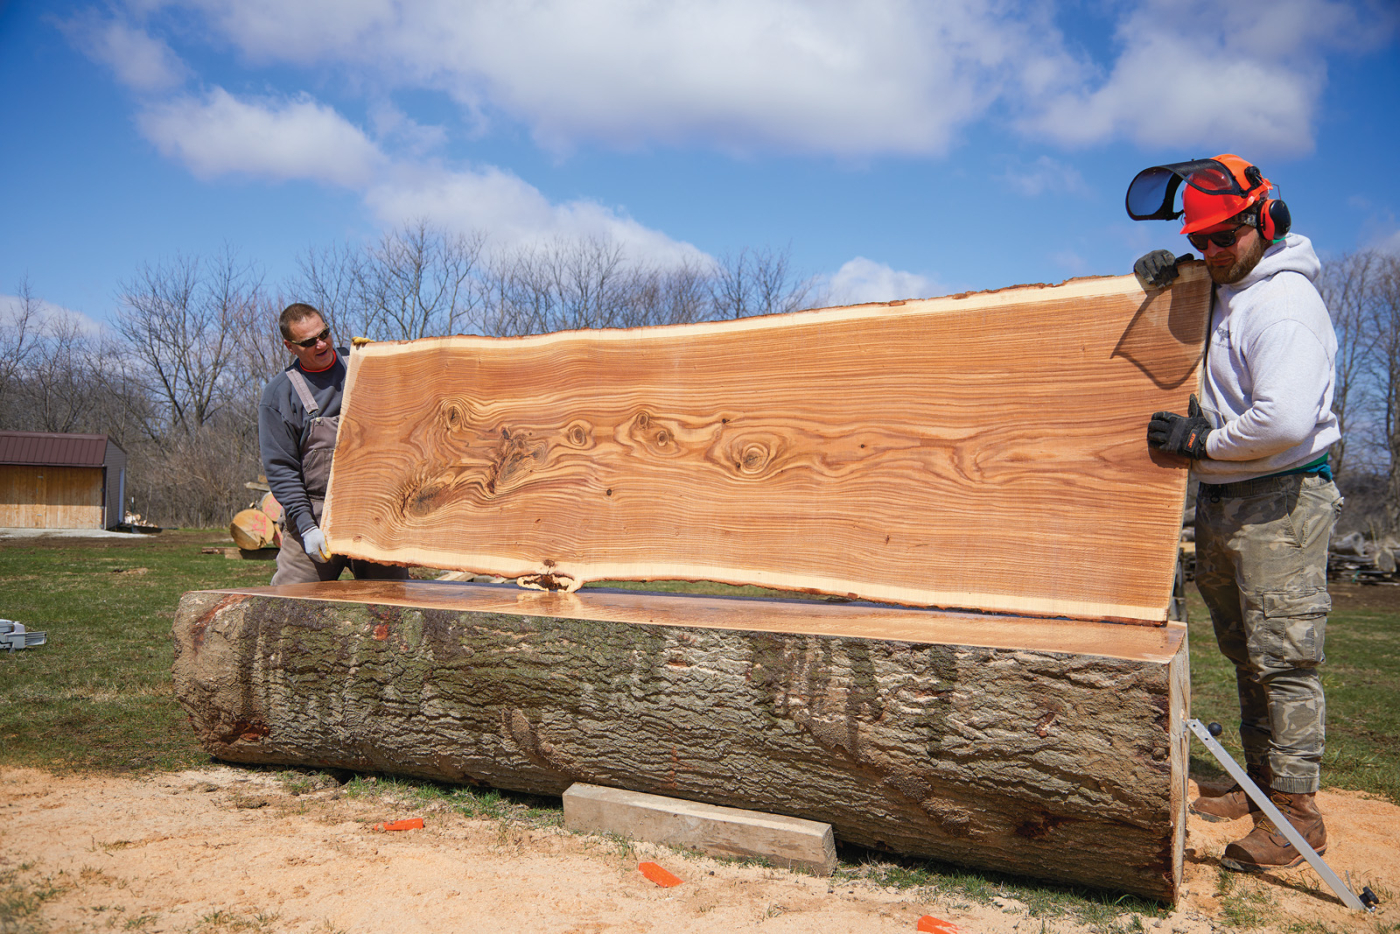
This, in my opinion, is the most exciting part of milling… pulling off the first slab and seeing what this log will yield. After this point, the guide rail isn’t needed, so it can be removed and put back in the truck. Depending on how you’re planning on stacking this log will depend on if you want to keep this first bark cap or not. In this instance, this cap went into the firewood pile. If it won’t make lumber, it will make heat at least.
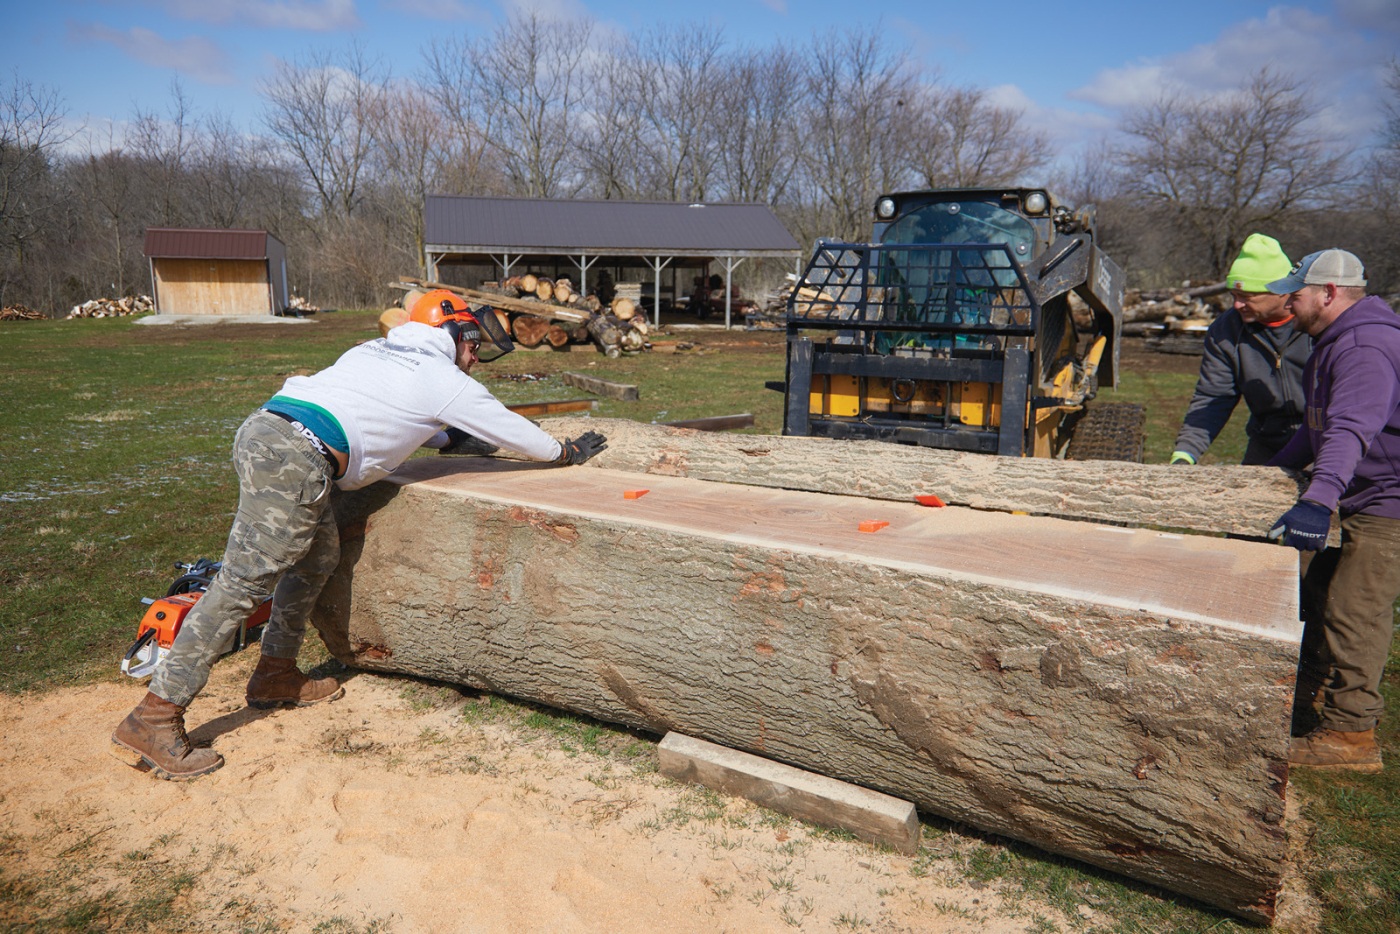
11. The first cut produces a large slab of waste. Depending on the shape and taper of a log, it may be thicker on one end versus the other. This first cut determines how each successive cut is laid out, so measure carefully. Ideally, the pith (center) of the tree will end up within one piece of wood, as it will likely split.
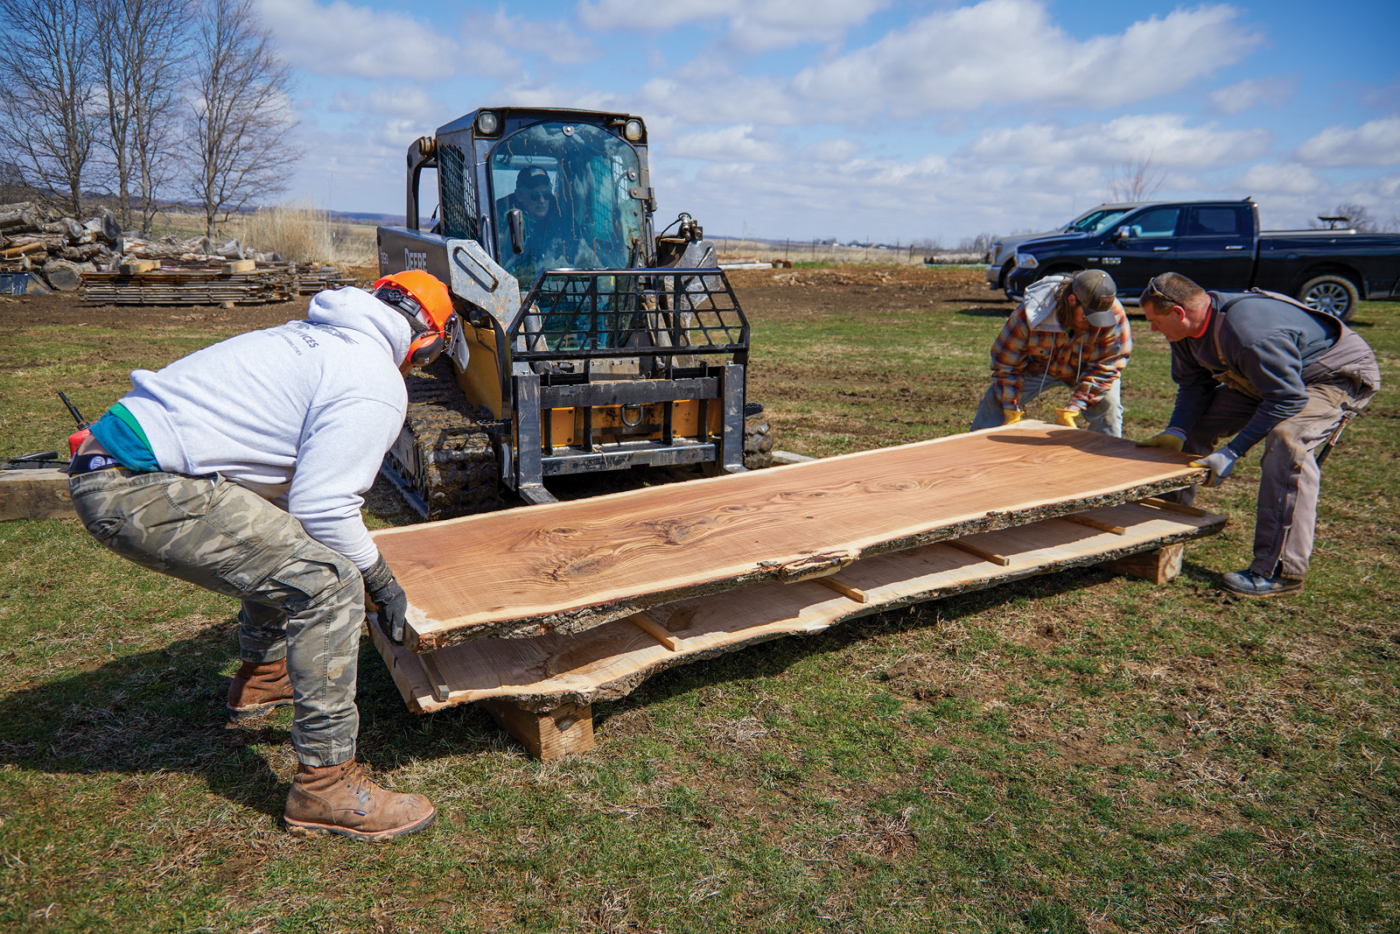
As much as this is the most exciting part for me, it’s also one of the hardest. That’s because you need to use your head as you move these big pieces of wood. It’s very easy to decide that you want to try and muscle a large piece of wood with one or two guys when in reality, they may weigh several hundred pounds each. Get some helpers, and if there’s a skid loader or tractor handy, all the better.
12. After establishing a flat reference surface, it’s a simple matter of rinsing and repeating. Continue to work down the log, adjusting the winch arm lower and lower until the entire winch bracket can be removed. At that point, it’s best to bring in a helping hand to help guide the mill without the winch.
Rinse and Repeat
Once the top back cap is removed, it’s time to start making lumber. First, as you can see below, you need to decide how thick you want to cut the pieces. For most things chainsaw mill-sized, I cut at 21/2“-thick. This allows enough thickness to surface it after it’s dry and still end up with a 2“-thick tabletop. The Granberg mill has a built-in scale, so you can simply align the top of the member with the thickness you want. Now, it’s on to business. The process is exactly the same as before, except without the guide rail. The mill now will ride on the top side of the just-cut log, which is why it’s imperative that the first cut be flat and true.
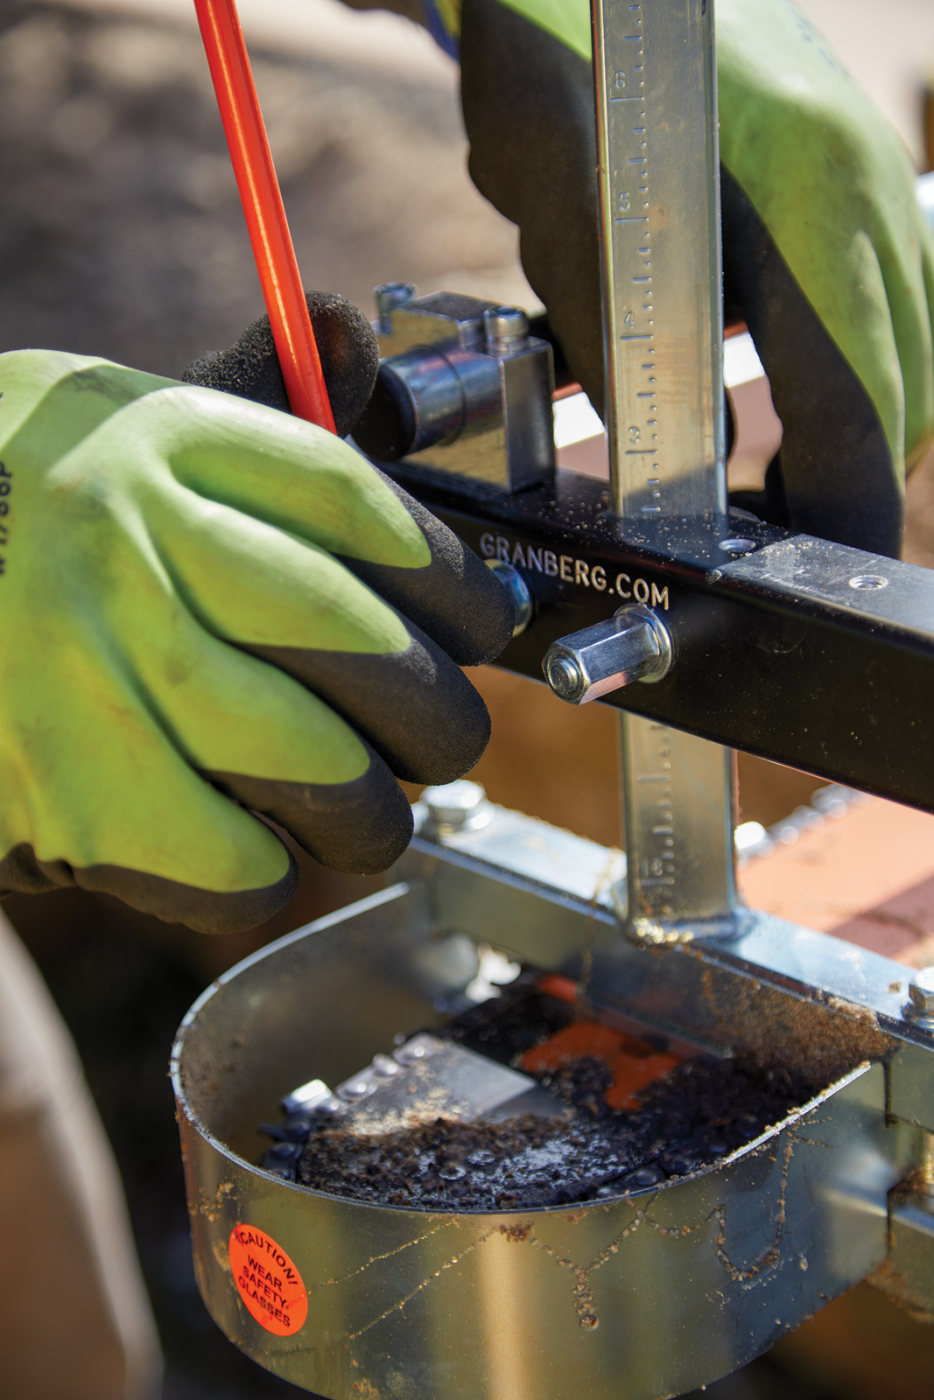
13. As you’re milling, you can change thickness by adjusting the mill with the build-in gauge. We cut these 21/2″ thick.
As you mill down the log, the winch clip can be slid down the bracket, keeping the winch pulling perfectly flat, not up or down. At a certain point, you’ll need to unscrew the winch bracket (and hope you used good screws that don’t break off in the log). Once you do this, it becomes a two-person job to push the mill through the remaining few slabs that are left. Technically, you could probably do it yourself, but you’ll probably have extra helping hands there already, so you might as well use them. As you saw down the log, you’ll notice the look of the boards change. This is because you’re producing different grain patterns based on where you’re at in the log. The closer to the center you are, the more quarter-sawn your boards will be. The nearer the top or the bottom, and they’ll be more plain-sawn or flat-sawn.
14. A quick splash of water will show you what you’ve been working for. As you remove pieces form the log, make sure you have a drying site prepared to stack them for final drying.
Now the Hard Part
If you thought that picking up a log, moving it around, and even milling it was hard, you’re in for a treat. The hardest part comes after you mill the log. And that’s drying it. Each end every tree species out there dries at a different rate, and each one is fairly easy to screw up. So, let me give you my best advice when it comes to drying.
First thing’s first, is you have to understand how wood holds moisture. There are two types of moisture in the wood fibers. The first is unbound (free) water. This is the water that sits between the wood cells. This is the moisture that will quickly come out of the wood, but it’s also the moisture that will cause mold and mildew if it’s not allowed to evaporate. The second type of moisture is bound moisture. This is water that is locked inside the cells of the wood. This is the stuff that takes years to get out (or needs to be forced out with a kiln). The goal of drying the wood is to reduce the moisture content to a point that the wood will no longer lose enough moisture to adversely affect the project. For air-dried stock, here in Iowa, that’s about 12-14% for air dried lumber. If something is kiln-dried, that’s usually around 7%. Can you build projects out of air-dried lumber? Certainly—it’s been done for hundreds of years. Even today, in the age of central air, those air-dried projects are still going strong.
So, how do we manage to get the moisture out of the wood at an appropriate rate without causing any issues? To start, before you even think about cutting a log, you should give some consideration as to where you’ll stack it. You want it to be away from buildings and brush so it gets good airflow. But you don’t want it out in the middle of a field baking, either. The ideal location would be somewhere that’s fairly shaded but gets good cross-ventilation. No, your basement with fans is not a good idea. There is such a thing as drying wood too fast. With certain species, such as oaks, low and slow is the key. I will cover my piles of oak lumber with sun tarps — tarps that allow air to flow through while blocking out the sun’s UV rays. This will keep surface checking down and reduce the chance they’ll case-harden (the outside drying too fast and locking moisture inside the wood).
15. Stacking lumber to dry, regardless of how it’s sawn, can make or break it. Start with a good location with a nice cross-breeze and solid base. Then, stack it with stickers (spacers) between each layer and either band, weight, or strap it down. Then, sit back and let it rest for several years until its ready to use.
Next is an even, level base. As this wood dries, it’s essentially steam bending. If the base is twisted or uneven, you’ll end up with lumber that reflects that. I’ve found either big 6-by material works well, or my favorite is to use cinder blocks (they’re cheap and easy to level).
With an even base and a good, breezy location, you need to make sure each layer of lumber gets good airflow. This means spacing each layer out with a series of spacers called stickers. I use stickers that are about 1“ square and ideally wider than my log or lumber stack. I always place stickers as close to the end of the stack as possible and spread them out every 18“. And, as you add each additional layer, make sure to keep the stickers placed in rows—the next layer of stickers goes directly over where the previous layers of stickers are. Doing this keeps the weight of the stack in line and directly over your base. This is all in an effort to keep the stack as flat as possible during the drying process. Some species, such as elm and sycamore, are notorious for twisting as they dry. In these cases, I will ratchet strap or band the bundles together, and even stack other logs on top of them. This extra weight works like a linen press to keep them flat. Now, it’s a waiting game. The thicker your material, the longer you’ll need to wait. The rule of thumb is one year per inch of thickness. This is a good ballpark, but a quality moisture meter will let you know when you’re there. Of course, your other option is to let it air dry for a year or so (let that free moisture come out) and then to have it kiln-dried. Kiln drying costs vary based on where you’re located and what type of kiln it is but expect to pay somewhere in the 50¢ – $1.00 per board foot for kiln drying.

16. For final air drying, I like to use the European method of drying. This involves re-assembling the log with stickers in between. This way, the log’s bark and shape protect it from rain and snow as it sits outside to dry.
So, What’s the Verdict?
Is chainsaw milling worth the effort? I think it can absolutely be, depending on what your end goal is. First off, chainsaw milling has a lower cost of entry than a portable sawmill. A powerhead (chainsaw) will set you back between $1,000-$2,000, depending on what you get. You can actually get one much cheaper if you buy an imported “clone” saw (a knock-off of brand-name saws). I don’t know how the quality is on them, so I won’t offer an opinion other than they’re out there. The mill and a bar from Granberg will run another $500-$1,100. So, all-in you can be operating between $1,500 and $3,200. That’s a pretty good deal if you ask me. Especially when you start considering the crazy amount that live-edge “slabs” sell for in some areas. It will quickly pay for itself if you’re in an area with large trees and are willing to put in a little work. And no, don’t ask me how much you can sell your slabs for. I don’t know what your market’s like. But, for some context, these pieces above are about 75 board feet each. Once dried and flattened, it wouldn’t surprise me to see them sell for over $10/board foot.
Another benefit of chainsaw mills is their capacity. The price per inch of capacity (I just made that standard up), is much lower than a bandsaw mill. You can get an 84“ bar and mill for a chainsaw. You’d be hard-pressed to find many bandsaw mills that size, especially commercially available. (Yes, I see you over there Mr. Cremona). And, let’s not ignore the portability factor. If a giant log falls in the woods, as they tend to do, it’s easy to carry a chainsaw mill into the timber. However, getting a mill or heavy equipment back there might not be as easy.
Like everything, chainsaw mills come with some drawbacks, so I want to make sure that I paint a fair and accurate picture. Chainsaw mills are not fast. With my Norwood, I can make an entire cut in under a minute. I haven’t timed the chainsaw mill, but most cuts are over 10 minutes. The smaller the log and the fresher the chain, the faster. But, they’re not fast.
Chainsaw mills do really well at making live-edge slabs. Personally, I don’t care for the look of most live-edge projects. Instead, I prefer to saw my logs into boards, which is what I do on my HD36. However, there are size limits on my HD36, and the chainsaw mill is a great compliment to the bandsaw mill. If I don’t want to produce live-edge slabs, I can always use the chainsaw mill for whittling down oversized logs until they fit on the mill. It’s a win-win.
Because a chainsaw mill uses a saw chain instead of a blade, there is a much larger kerf on the chainsaw mill than the bandsaw mill. When you’re talking about a log this size, I don’t think that matters a whole lot. But the chainsaw kerf is a whole lot thicker than my little bitty bandsaw mill blade. About four times the kerf, actually. You need to be able to effectively sharpen the chain, or have it sharpened. Likewise, if you hit metal, it’s a bigger deal with the chainsaw mill than if I ruin a $25 blade on my band saw. The largest chainsaw mill chains can be over $100 each.
And finally, I think to really, truly be efficient with the chainsaw mill, you need at least two, if not three, people working at the same time. Now, this isn’t bad at all. In fact, I have a blast when we get a group of people together to saw logs. Especially when everyone has the same enthusiasm about sawing lumber that I do.
Here are some supplies and tools we find essential in our everyday work around the shop. We may receive a commission from sales referred by our links; however, we have carefully selected these products for their usefulness and quality.