


We may receive a commission when you use our affiliate links. However, this does not impact our recommendations.
When it comes time to make mouldings with SketchUp, many woodworkers struggle. They get the hang of making each piece a component, and figure out that a moulding is simply an extruded face. Where things go south is when it comes time to turn a corner; how can that be accomplished with as little blood, sweat and tears as possible? The answer is “Follow Me,” a tool that isn’t used often. Follow Me does what Push/Pull does; it turns a two-dimensional face into a three-dimensional object. Push/Pull is limited to extruding at a right angle to the original face. Follow Me can take that same face and extrude it around a 90° corner or along a curve. Here is a typical scenario for applying a moulding to a cabinet.
Click on the images to see a larger version
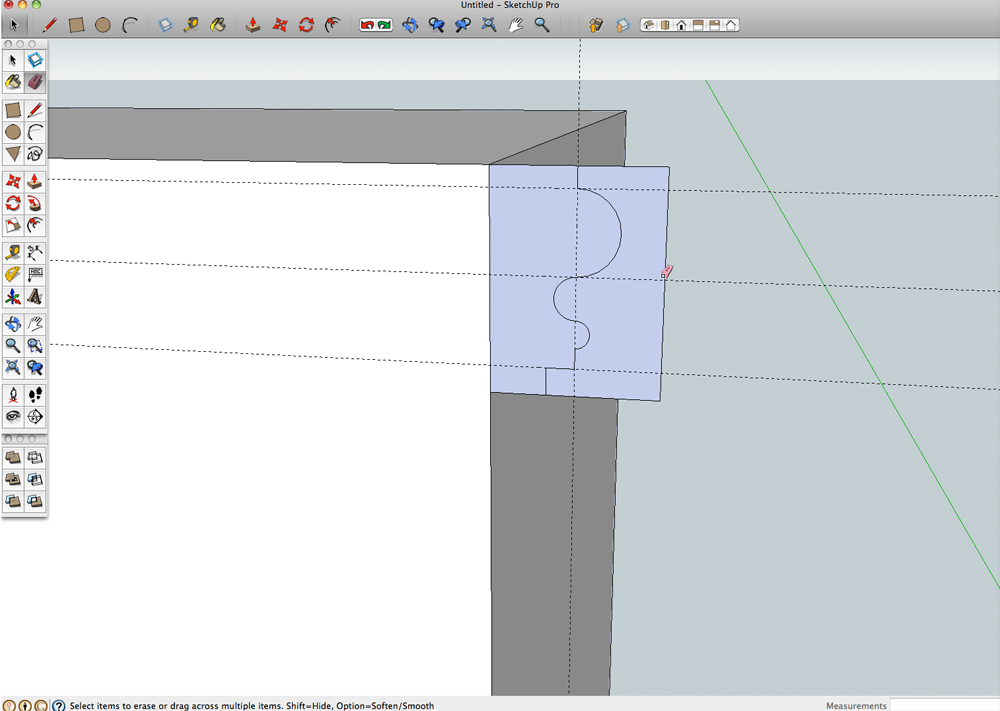
Before you start, make sure that the object you want to apply the moulding to is a group or a component. If you run a moulding on loose geometry, you’ll end up with a sticky, stretchy mess; you won’t be able to move or change anything. It also helps to draw a rectangle attached to a corner of the object as a base to draw the profile on. Here I’m putting a moulding around front and both sides of the top of a cabinet. I’ve drawn a rectangular face attached to one of the back corners and added some guidelines to make the profile. When the profile is complete, use the eraser to get rid of everything but the moulding profile.
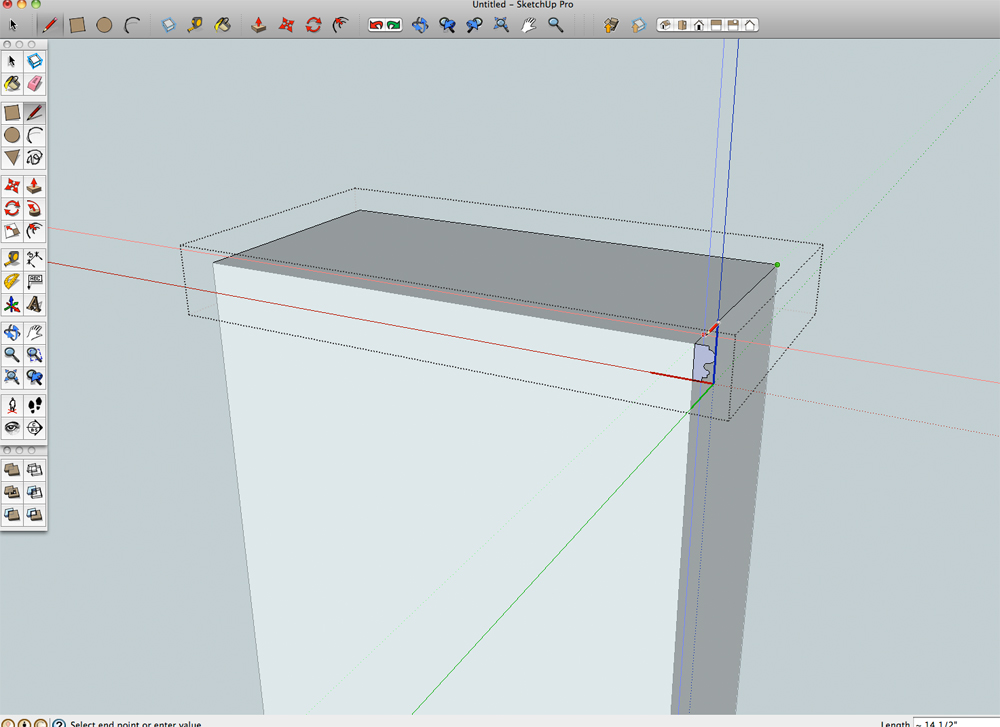 At this point, I usually go ahead and make the face of the moulding a component. I click twice on the face to select it and the edges surrounding it, right-click and pick “Make Component” from the menu. Then I double-click to “open” it for editing. Follow Me needs a path to extrude the face on, so I use the line tool and draw along the far edge, the front and back to the face.
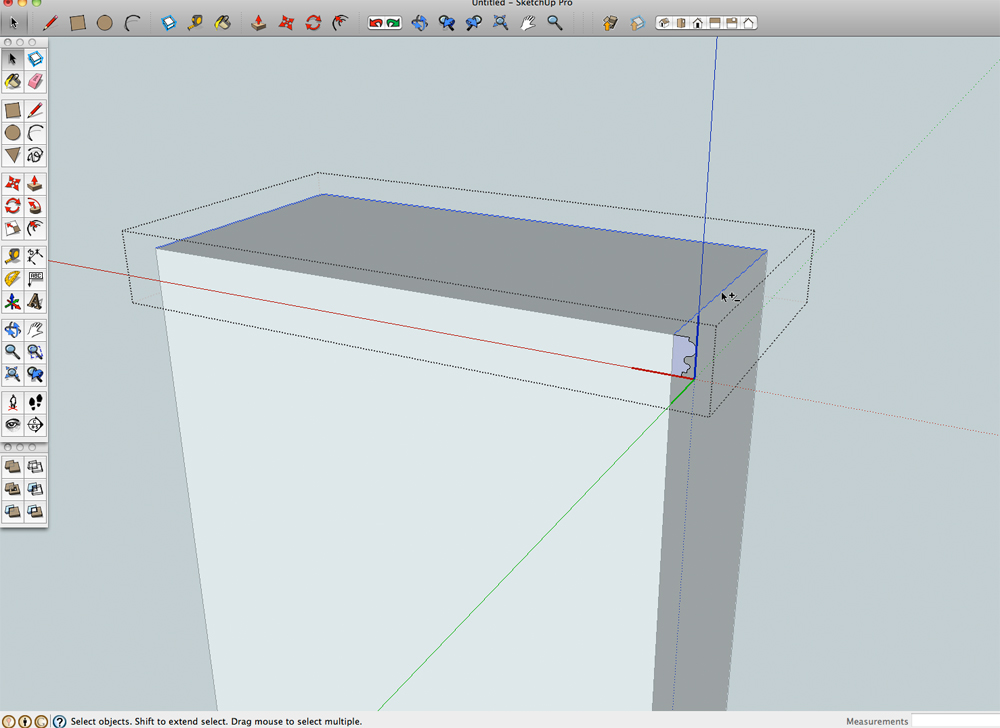
I tap the space bar to let go of the line tool and invoke the select arrow. Then I hold down the shift key and select the three lines I’ve just drawn. Those three lines will become the back edges of the moulding, the path that Follow Me will use.
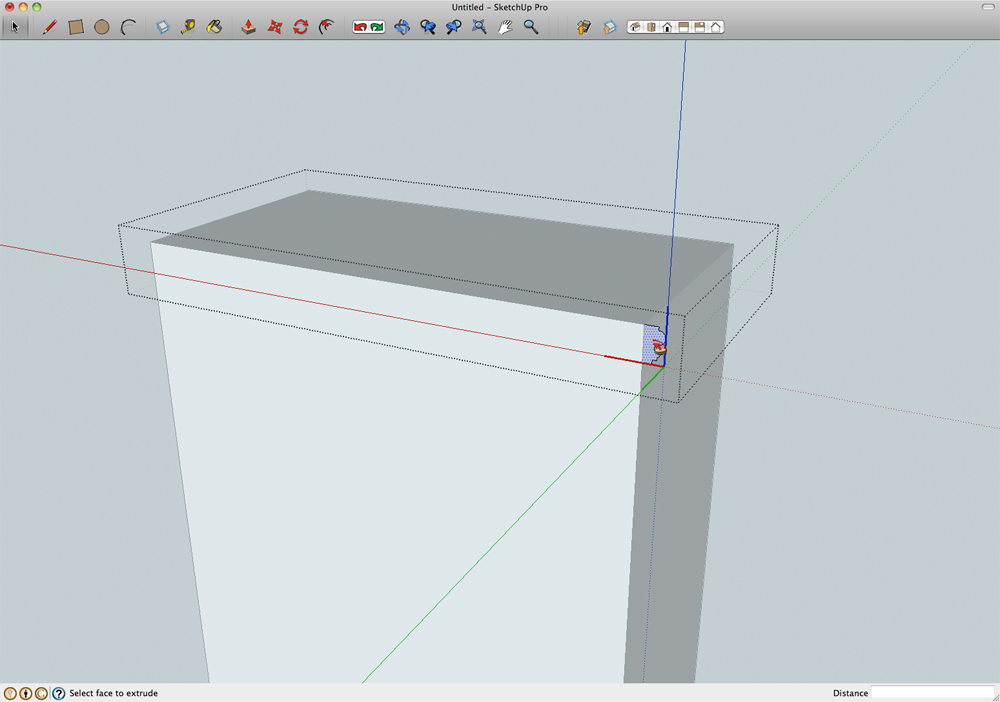
Now it’s time to click on the Follow Me icon, then the face at the back corner of the cabinet. In the blink of an eye, Follow Me works its magic and the moulding appears around the three edges that were selected.
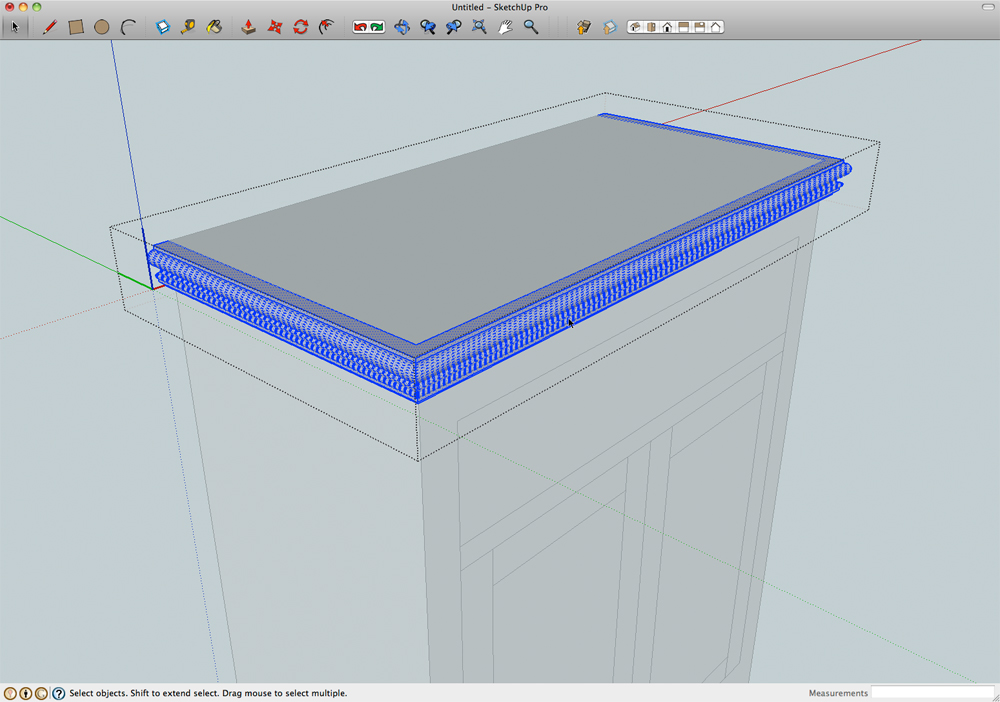
Depending on the orientation of the face when you started, the moulding may appear “inside out,” with darker faces than the rest of the model. If that happens, click three times anywhere on the moulding. That selects all of the loose geometry of the moulding. Then right-click (with the cursor over the selection) and select “Reverse Faces” from the menu.
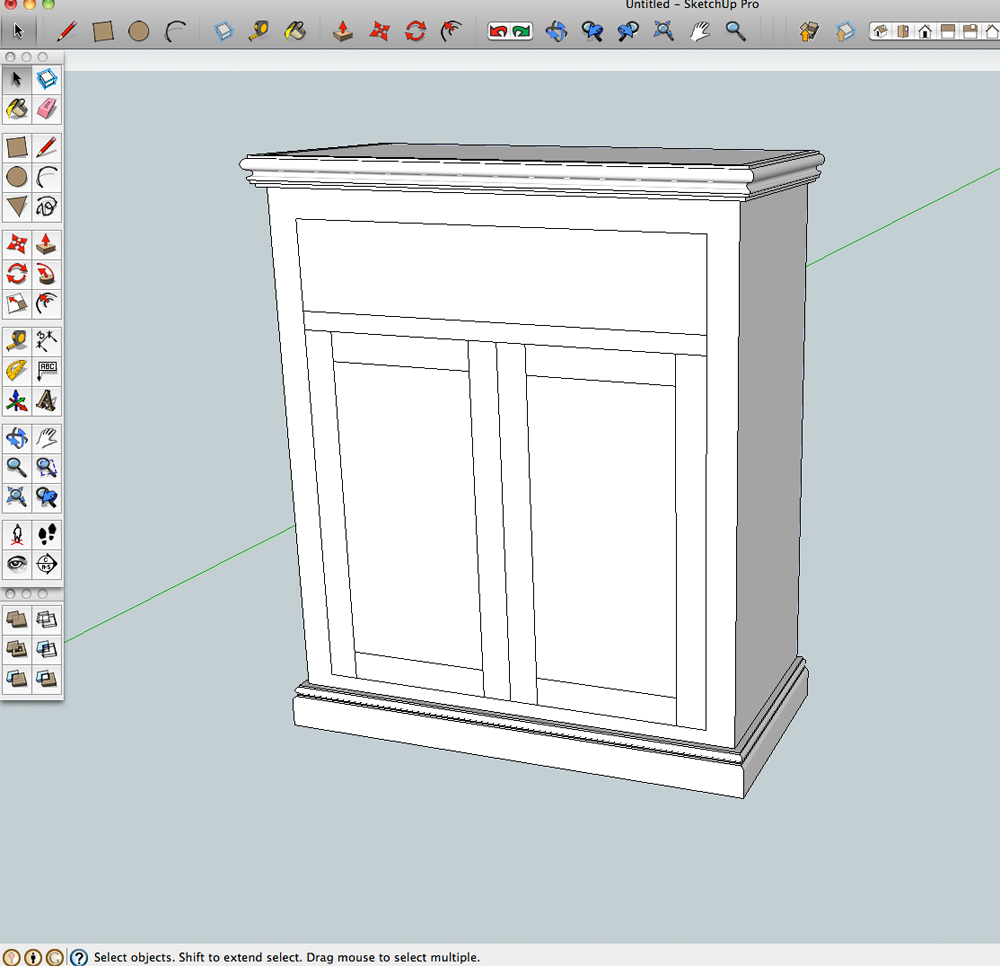
There are a few different ways to use Follow Me to create a moulding, but making a component at the start, defining and selecting the path before selecting the Follow Me tool is the quick and easy way to make moulding with SketchUp. It also ensures that the moulding and the cabinet are two distinct entities when you’re done.
Woodworking is better when you know how to use SketchUp. There are a bunch of tutorials here on our web site, and my digital book, “Woodworker’s Guide to SketchUp,” is a comprehensive reference that combines video lessons along with illustrated text.
Here are some supplies and tools we find essential in our everyday work around the shop. We may receive a commission from sales referred by our links; however, we have carefully selected these products for their usefulness and quality.


Great writeup on this tricky bit of sketchup. For those who need a video demonstration, http://sketchupforwoodworkers.com has a bunch of videos on how to do this. I was pretty frustrated with sketchup until I watched these. The guy who runs is takes donations, so no pay wall to view the tutorials.