We may receive a commission when you use our affiliate links. However, this does not impact our recommendations.
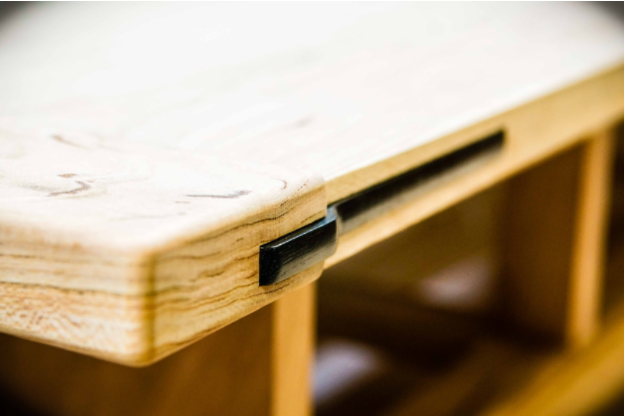
Greene & Greene (G&G) breadboard ends are never flush with the edge or top of a table top. This proud look is then capped with a polished Ebony spline embedded in a mortise between the breadboard end and the table top infield. The spline profile is lifted (often called a cloud lift) to accentuate the proud look of the breadboard end relative to the infield. Furthermore, the spline is pillowed to soften the edges of the spline. This look can easily be achieved by using a clamping jig with a profile that a top bearing bit can follow.
Construction:
The clamping jig is made of common hardware store parts.
You’ll need:
(1) Aluminum bar stock 15” x ⅝” x ⅛”,
(2) 3” long ¼” x 20 tpi bolts
(2) ¼” x 20 tpi female threaded knobs
(2) ¼” fender washers
(2) ½” compression springs
(1) 7-½” x 15” piece of 1” plywood (you can laminate two pieces of ½” plywood together)
(1) 7-½” x 15” piece of ½” plywood
(1) 3-⅜” x 7-½” piece of ¼” MDF
(1) 6-⅞” x 11-⅝” piece of ¼” MDF
Epoxy
Wood glue
½” pin nails
 The clamping jig is made of common hardware store parts.
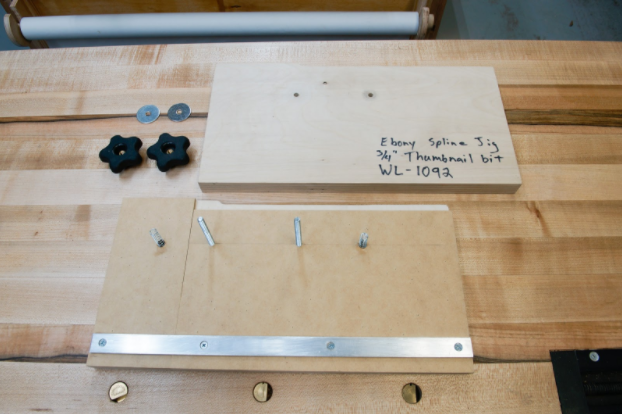
I first made the base for the jig. The 3-⅜” x 7-½” x ¼” MDF was glued and pin nailed flush along the left side of the 7-½” x 15” piece of ½” plywood. The 6-⅞” x 11-⅝” x ¼” MDF was glued and pin nailed flush along the bottom. This creates a pocket for the Ebony blanks to sit in while routing the profile. The aluminum bar is screwed into the base approximately ½” from the bottom of the base. The aluminum bar is a pivot point for the top of the jig which serves as a clamping mechanism to hold the Ebony blanks in place. The ¼” x 20 tpi bolts are drilled, countersunk and epoxied through the bottom of the base approximately 1-½” from the top of the MDF. The placement of the bolts is arbitrary but while you’re at it, go ahead and drill the through holes for the top of the jig to make sure they are concentric. Just make sure your threaded knobs don’t cross into the top of the jig where a top bearing router bit may interfere. Finally, ½” stopped holes are drilled along the same line as the bolts to seat compressions springs that help push the top of the jig up and off of the Ebony blanks during removal. These springs are also epoxied into place.

The aluminum bar makes a pivot point for the top of the jig to clamp down on the Ebony blank.
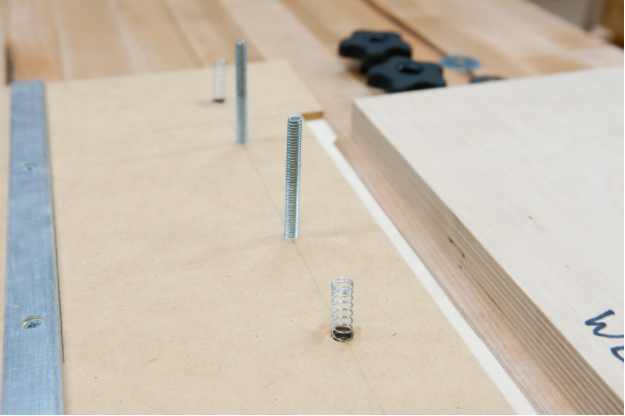
The bolts are epoxied into through holes and the springs are epoxied into stopped holes.
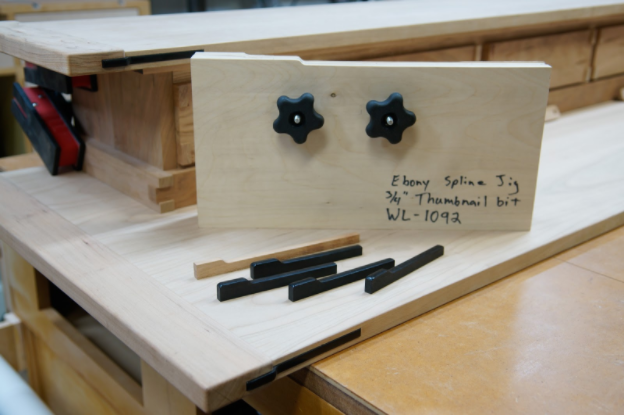
The top of the jig has a profile that’s produced on the router table and spindle sander. A line is drawn 4-½” from the left of the 1” plywood board. This line serves as a stopping point for a ½” diameter straight cutting router bit. A ¼” piece of plywood is clamped on the outfeed side of the router table fence and is flush with the cutting edge of the router bit to support the workpiece as the profile is being routed. Once the concave portion of the profile is routed, the convex portion is sanded down at the spindle sander. To assemble the jig just place the top over the base (and through the bolt holes), add the fender washers, and thread the knobs. You now have a spline jig. The jig is designed to make cloud lifted Ebony splines from 5/16” x 11/16” blanks. It can also be used to make pillowed straight Ebony bars 5/16” thick.
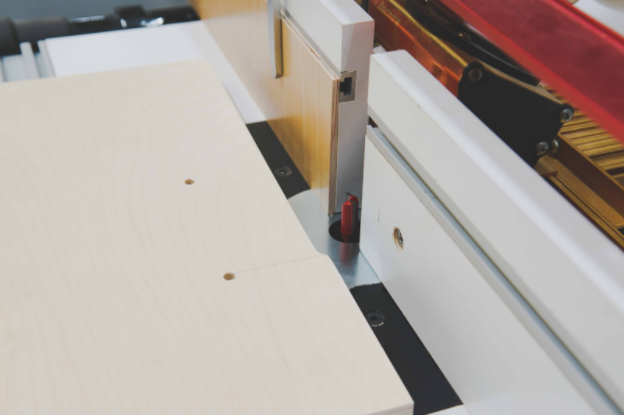
A ½” piece of plywood or MDF is clamped on the outfeed side of the router table fence and is flush with the cutting edge of the router bit to support the workpiece.
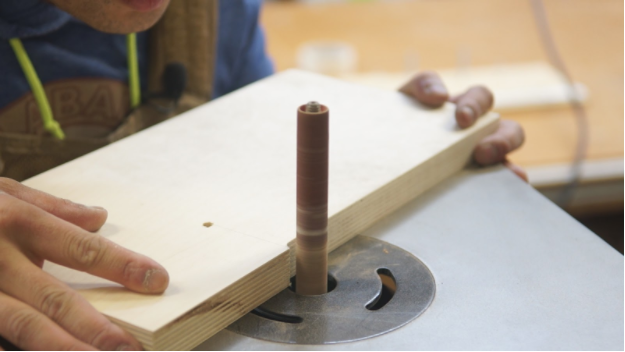
The convex portion of the top of the jig is sanded down at the spindle sander.
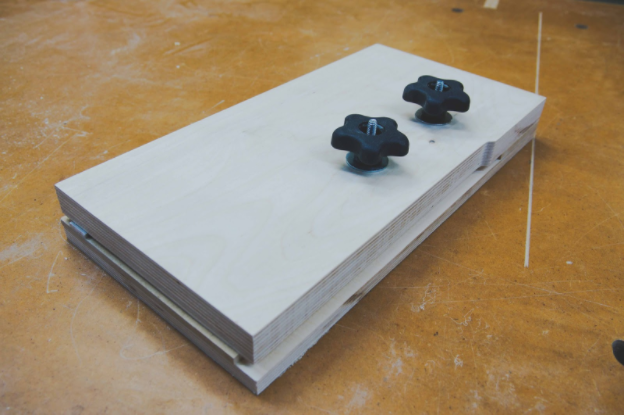
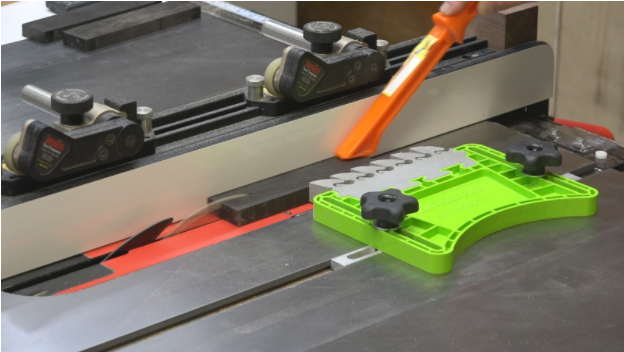
The jig assembled and ready to route.
In Use
To make the cloud lifted Ebony splines, I mill blanks 5/16” x 11/16” x 5”. The length is dependent on how long you want your spines to be. I jointed ½” Ebony stock on my jointer and then cut them to width and thickness on the table saw. Make sure you have feather boards, push blocks, and push sticks to safely machine your stock. I also mill a piece of Cherry to the same width and thickness to be used as a test piece.
A feather board and push stick are used to safely cut Ebony stock to width.
A feather board and shop made thin stock push block are used to safely cut Ebony stock to thickness.
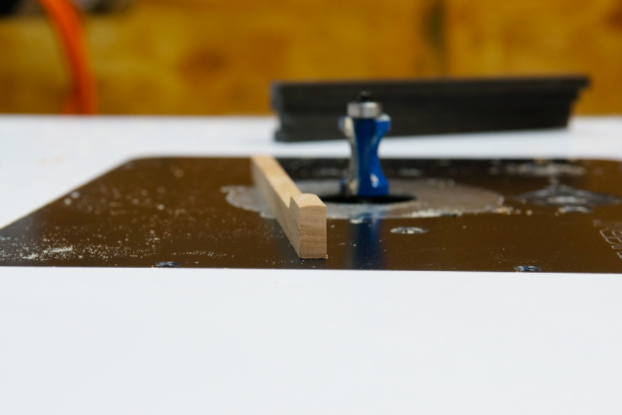
To create the pillowed profile I’m using a ¾” thumbnail router bit (Woodline WL-1092). The router bit has a top bearing which is used to follow the profile of the top of the jig. I clamp the Cherry test piece into the jig and raise the router bit so that the deepest part of the convex section of the bit is approximately centered on the Cherry test piece. After running the jig and test piece through the router bit I check the profile to see if the pillowed cross-section is evenly distributed. I’ll raise or lower the bit until I’m happy with the profile. Once I’m dialed in I’ll then process all of my Ebony blanks through the router table.
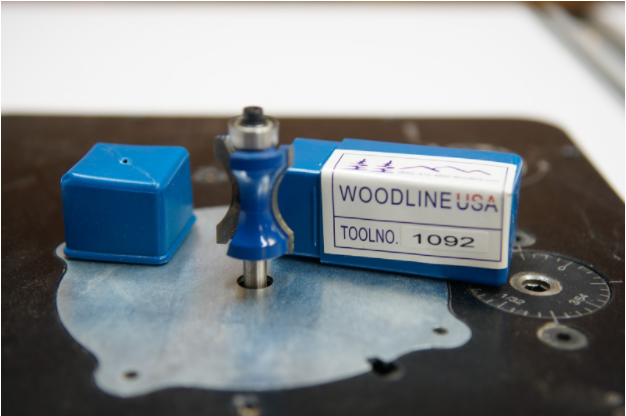
A ¾” thumbnail router bit (Woodline WL-1092) with a top bearing bit is used to create the cloud lifted and pillowed profile.
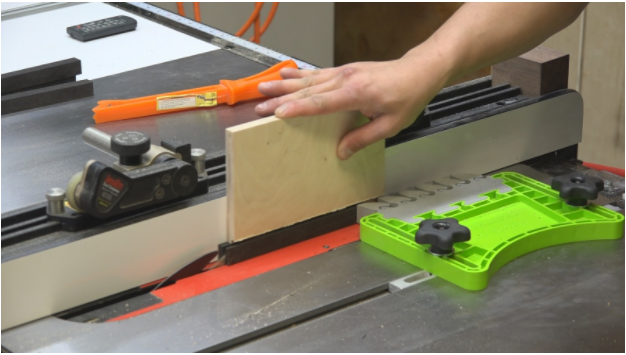
Running the test piece through the router table.
Adjust the height of the router bit until you have an evenly distributed pillowed profile.
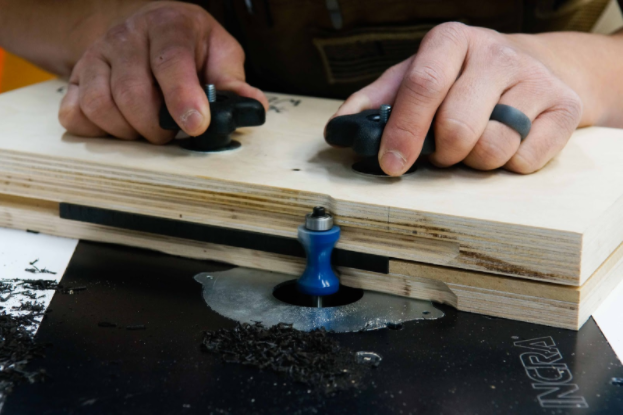
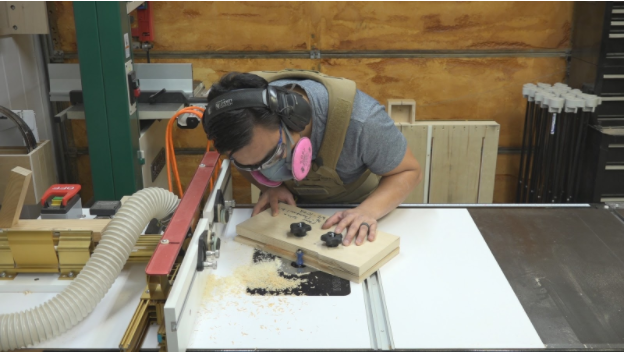
Once I’m happy with the profile I’ll process all of the Ebony blanks through the router table.
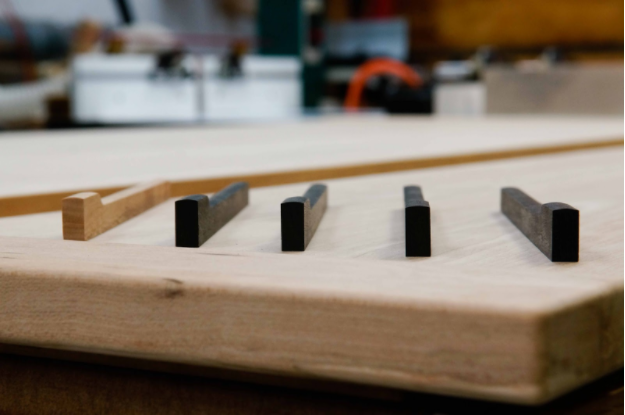
The Ebony splines are cloud lifted and pillowed.
The splines are almost complete. I wanted the splines to look like they were popping out of the breadboard ends rather than terminating at an abrupt 90 degree angle. I rounded over the ends using 500 and 1000 grit sandpaper, and 0000 steel wool. I used shelf liner as a sanding pad to make sure I have a smooth transition. Lastly, I polished the Ebony using a buffing wheel and red rouge.

Using 500 and 1000 grit sandpaper, and 0000 steel wool on top of shelf liner to round the ends of the splines.
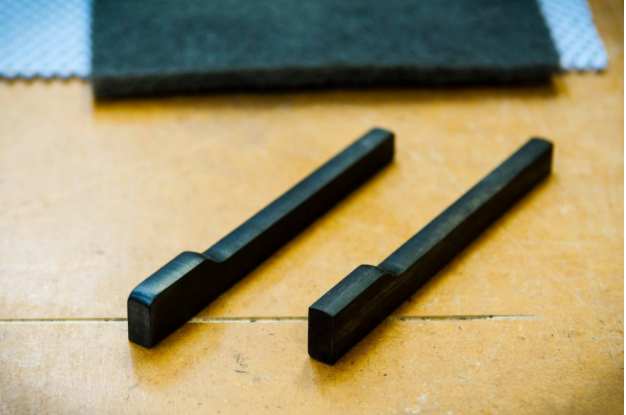
A smooth transition rather than an abrupt 90 degree termination.
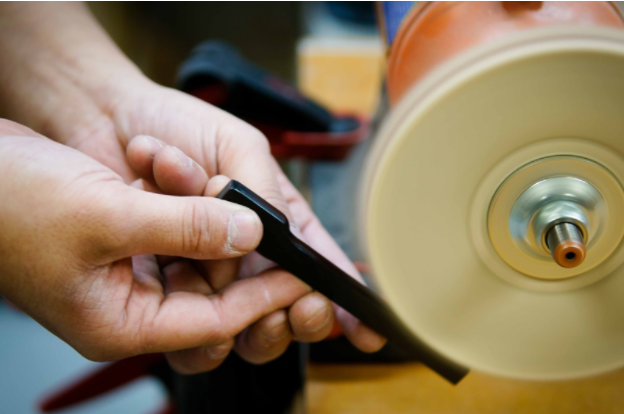
Giving the Ebony a final polish with red rouge on a buffing wheel.
A glassy smooth Ebony spline.
Find Huy on YouTube and on Instagram.
– Huy Huynh
 Greene & Greene Design Elements Video Download
By Darrell Peart
With Greene & Greene, Details Matter!
Carefully crafted details blend and combine for a spectacular appearance that is uniquely Greene & Greene. Darrell Peart shares his expertise and jig designs to recreate these critical details so you can build your own stunning Greene & Greene furniture.
Here are some supplies and tools we find essential in our everyday work around the shop. We may receive a commission from sales referred by our links; however, we have carefully selected these products for their usefulness and quality.