We may receive a commission when you use our affiliate links. However, this does not impact our recommendations.
Make this traditional design with a router and plug cutters.
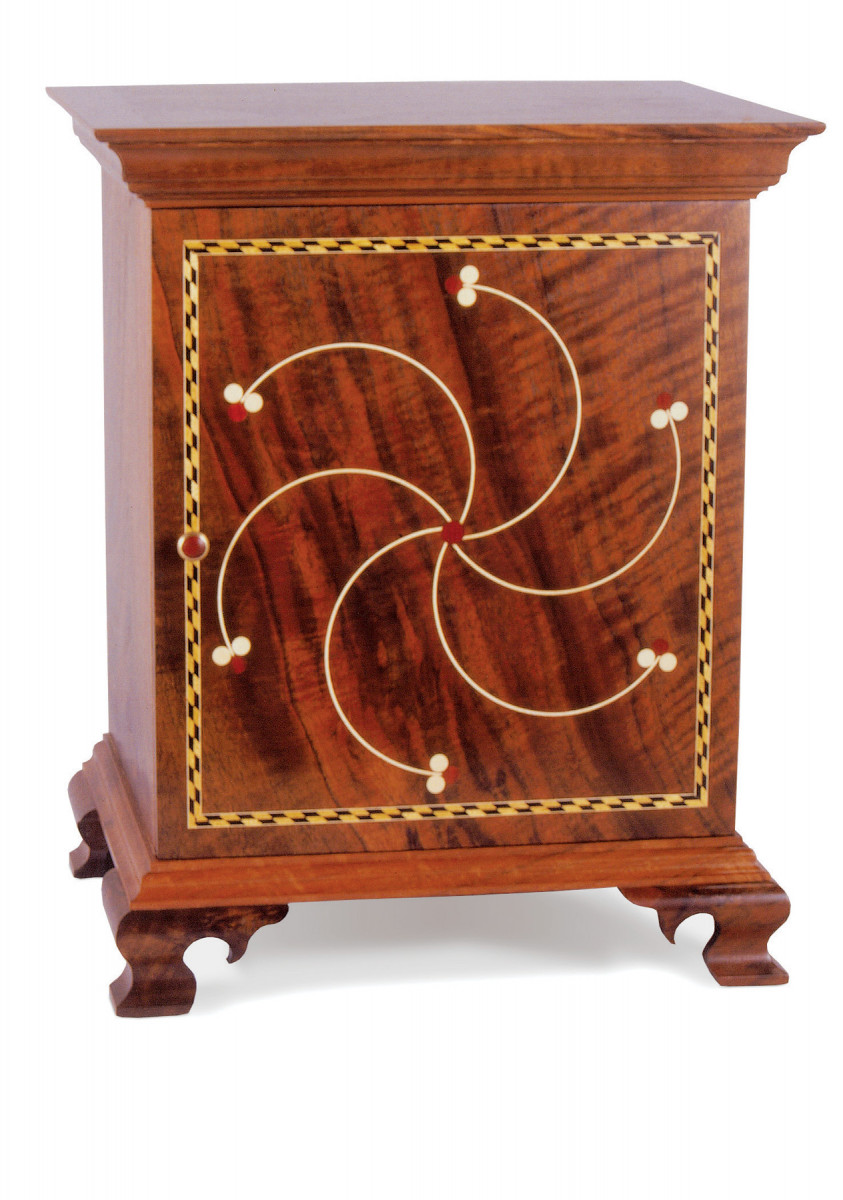
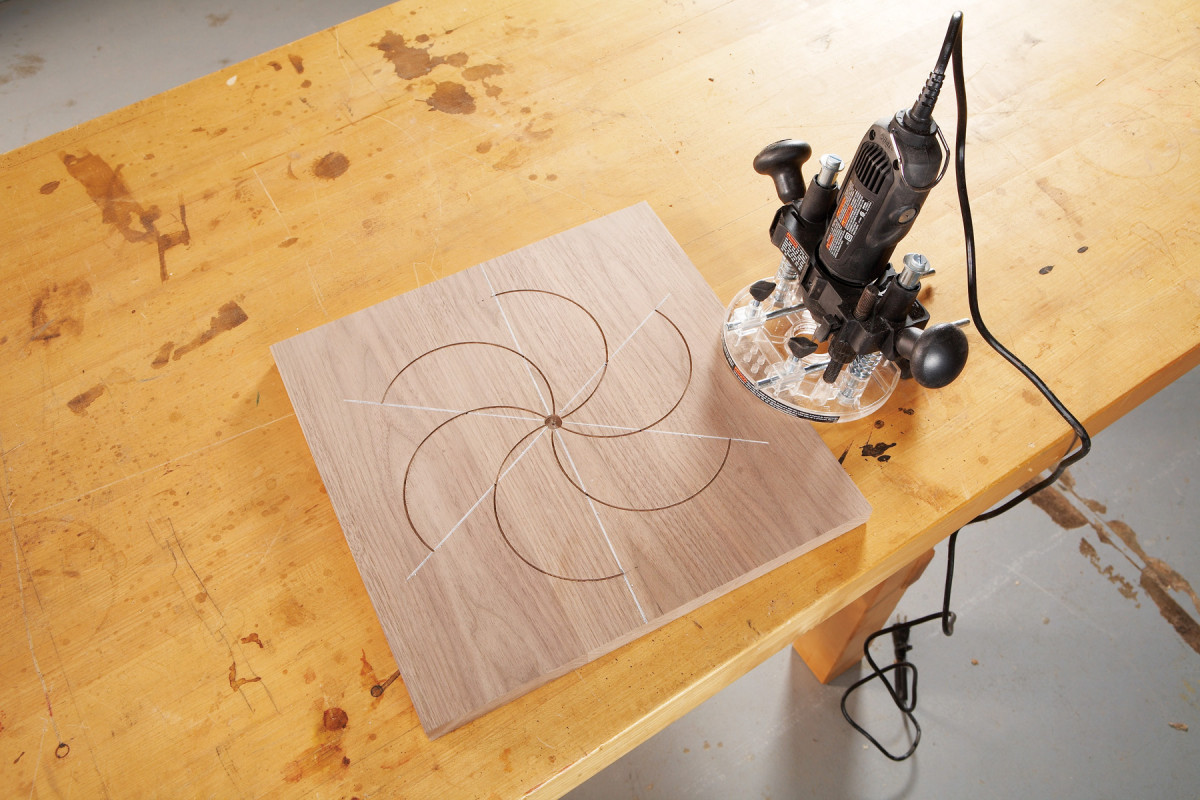
Line and berry inlay is an old American tradition. There are many variations of the design, but all consist of a series of circular arcs made with thin wood, called stringing, which often terminate in round discs, or berries. Back in 18th century Pennsylvania, where the patterns originated among Welsh settlers, the curved grooves for the stringing were made by hand with a modified compass. A router, pivoting on a nail, can do the same job.
I’ll show you how to make a basic line and berry design which Al used to decorate the front of a spice cabinet. This design is a good starting point to learn the technique, but I hope that you’ll go on to try other traditional patterns (see below) or create your own. Old designs are generally symmetrical, but a free-form pattern would work, too.
What you’ll need
You can make your own 1/16″ stringing, but it’s much easier to buy it. Here, the stringing is made from holly, a white wood with no visible grain. To make the berries, you’ll need some 1/8″ thick solid holly and 1/8″ thick pieces of a contrasting wood. The red berries in our examples are made from aromatic eastern redcedar, the wood commonly used to line chests and closets. The background wood is black walnut.
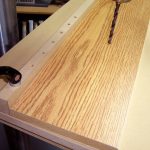
To make the semicircular grooves for the stringing, you’ll need a router and a 1/16″ bit. I used a Dremel rotary tool mounted in a Dremel router base, but a laminate trimmer would work as well. You’ll need 3/8″ and 1/2″ plug cutters to make the berries.
Layout the design
It’s best to make a drawing of the whole design on paper before you begin routing. Just follow the steps below using a compass and pencil. On a drawing, you can experiment with the radius of the semicircles and diameters of the berries to best suit your project. I’m working on a panel that is 13″ square, and the semicircles have a 2-1/2″ radius.
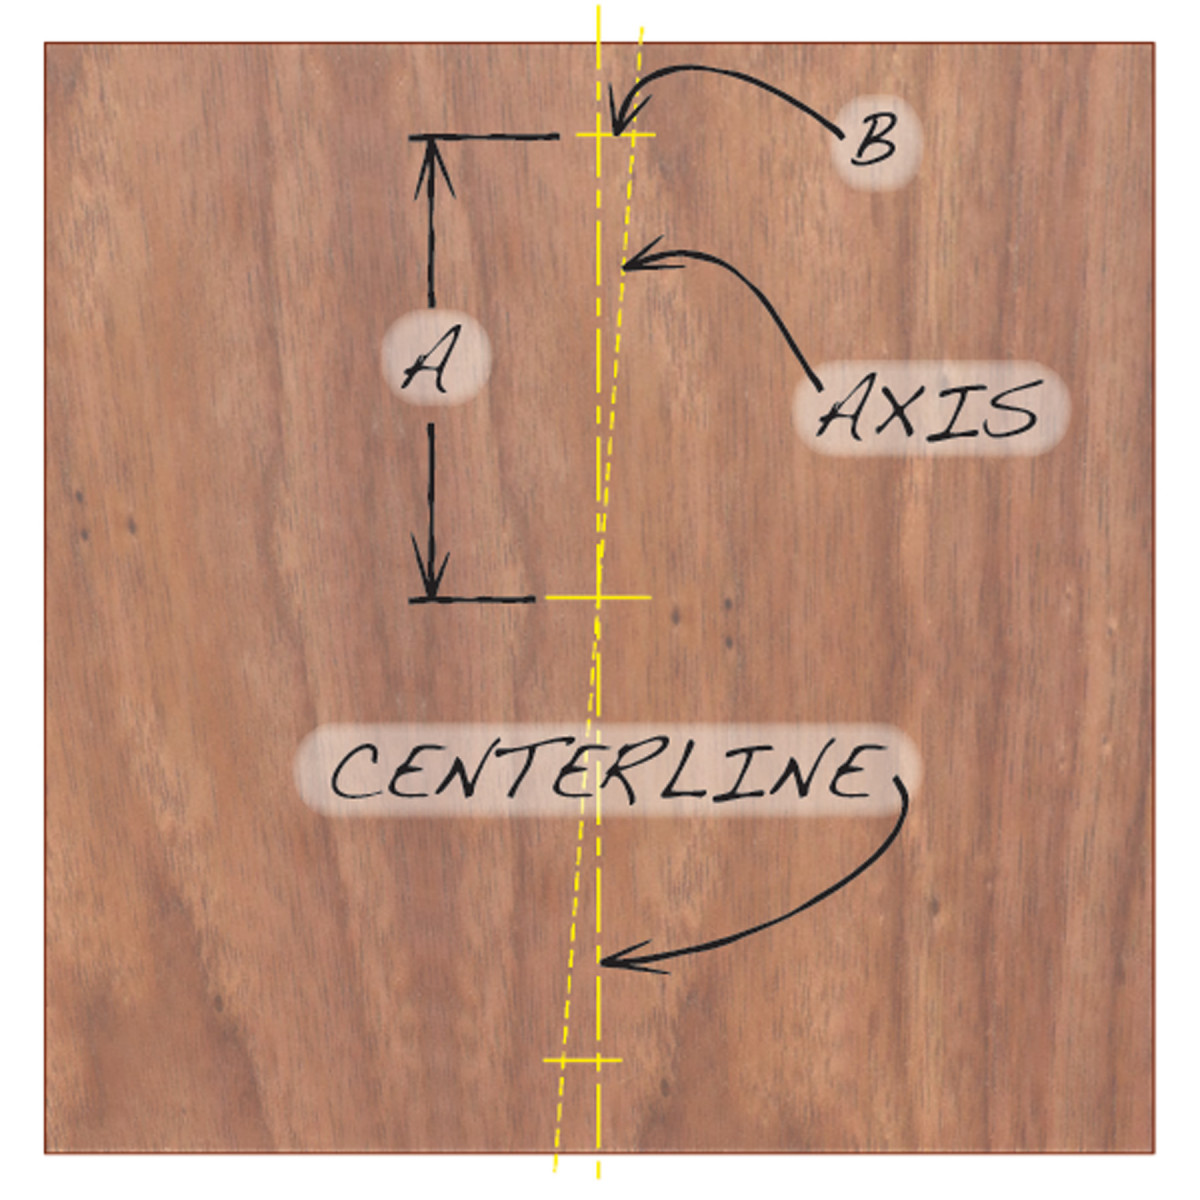
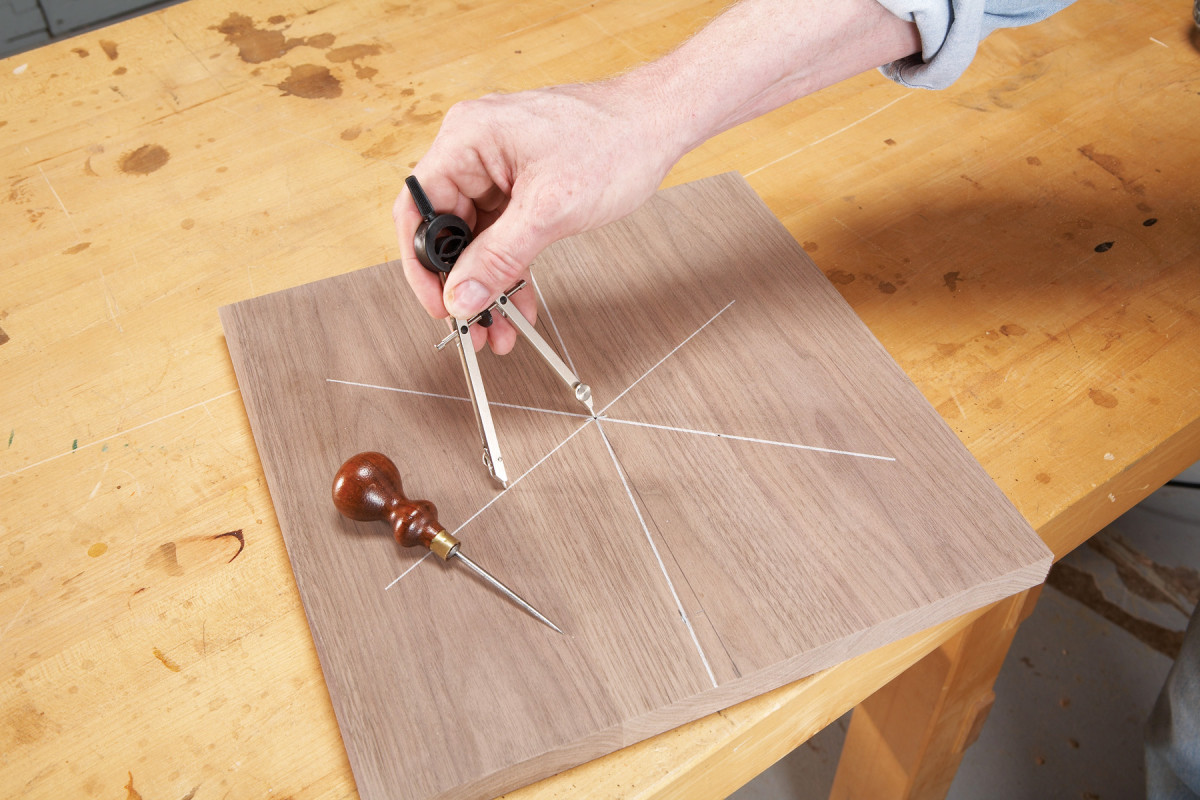
Fig. A) Laying Out the Design’s Axis First, draw a centerline on the workpiece. Next, measure up from the center by the diameter of one semicircle (A). Move over by the diameter of one small berry (B). Make the same measurements at the bottom of the centerline and connect the dots to draw the design’s axis.
Begin laying out the pattern by drawing a vertical line on the workpiece You can use this line as the pattern’s axis, but I’ve found that tilting the axis makes the design more dynamic (Fig. A).
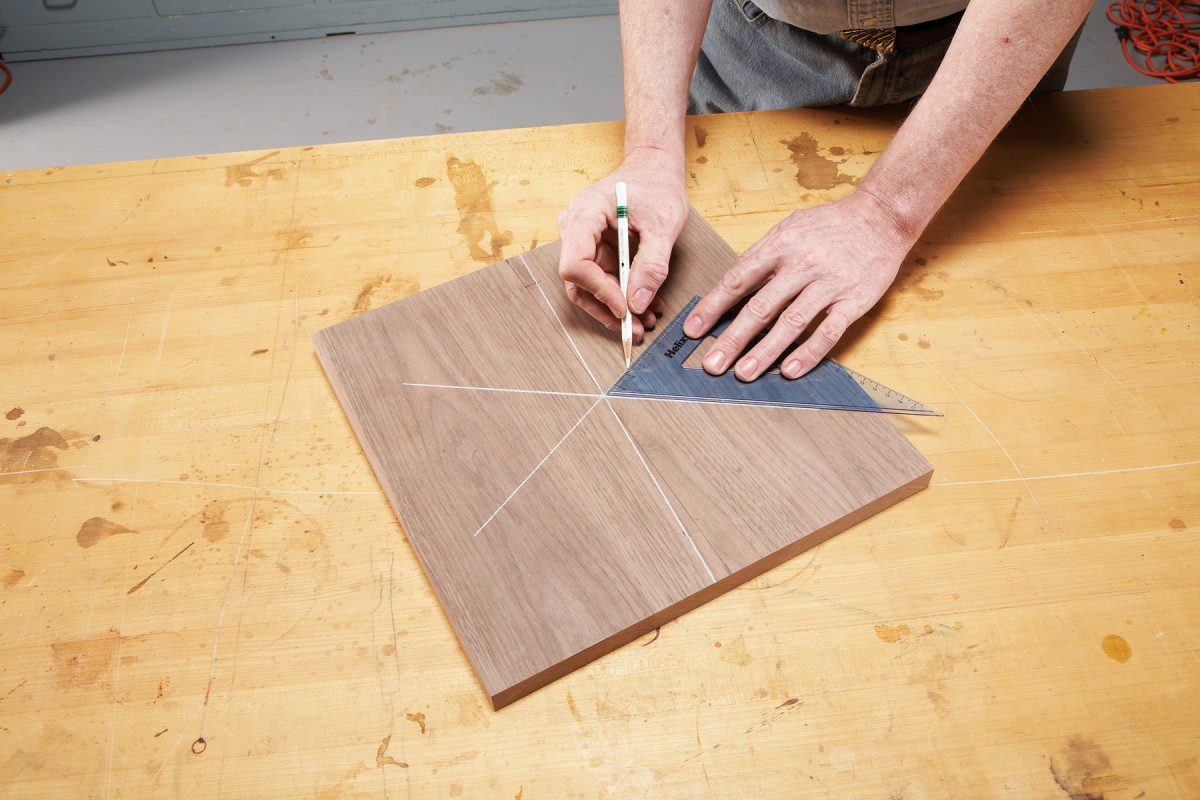
1. Begin by drawing centering lines on your workpiece. First, draw a slightly offset vertical line in the center. Next, draw four lines radiating at 60.
I used a soft white pencil to lay out the centering lines (Photo 1), because white lines are easy to see and photograph on walnut. I recommend that you use a regular pencil, though, because white lead gets into the wood’s pores and can be difficult to remove.
Set up the router
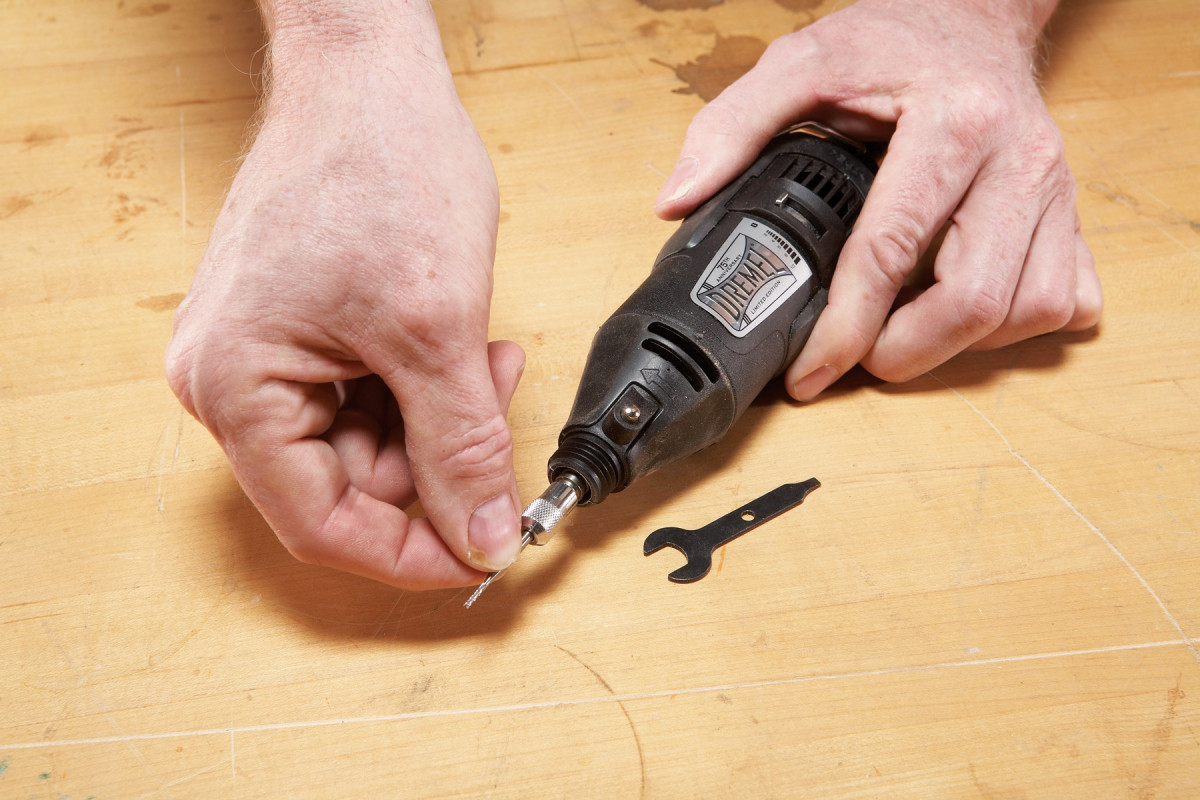
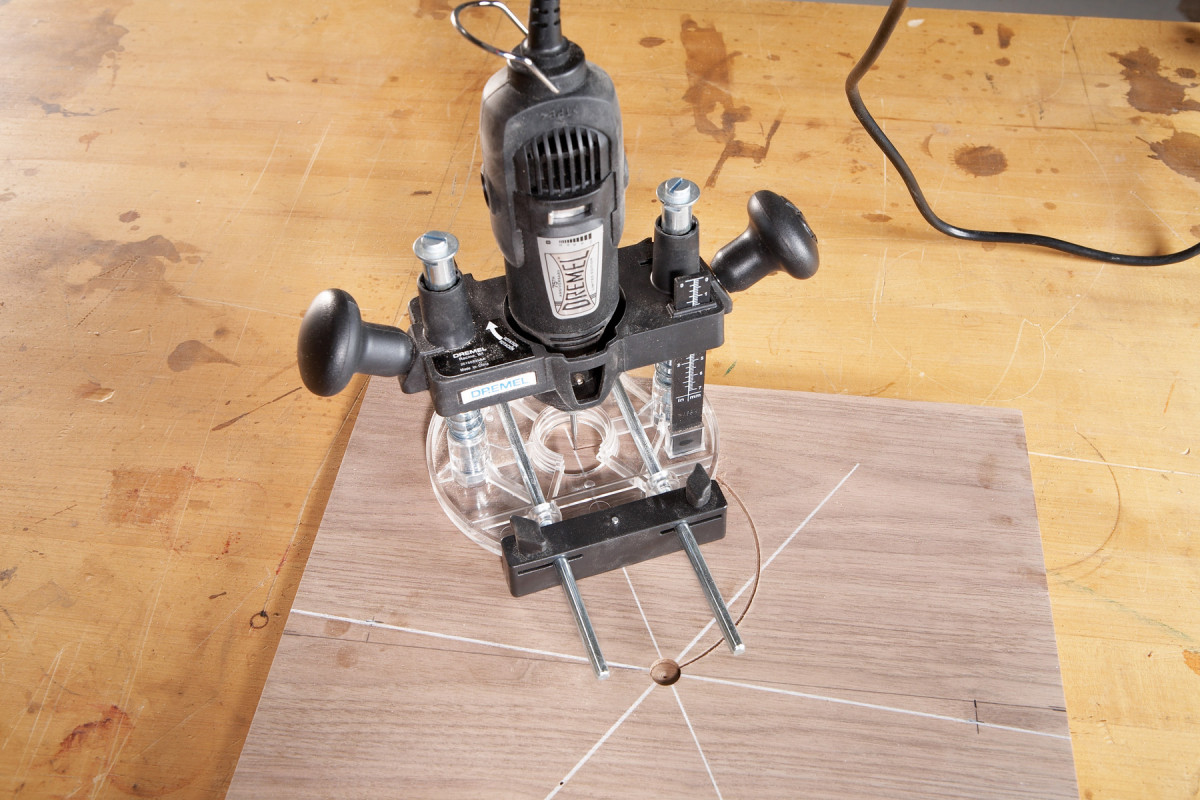
2. Install a 1/16″ bit in a Dremel or small router. If you’re using a Dremel, mount it in a Dremel plunge-router base.
Install a 1/16″ bit in your Dremel or router (Photo 2). Add an adjustable fence to the router that allows you to use a 3d nail as a pivot point (Photo 3). Adjust the distance between the nail and bit to match the radius of the arc in your drawing.
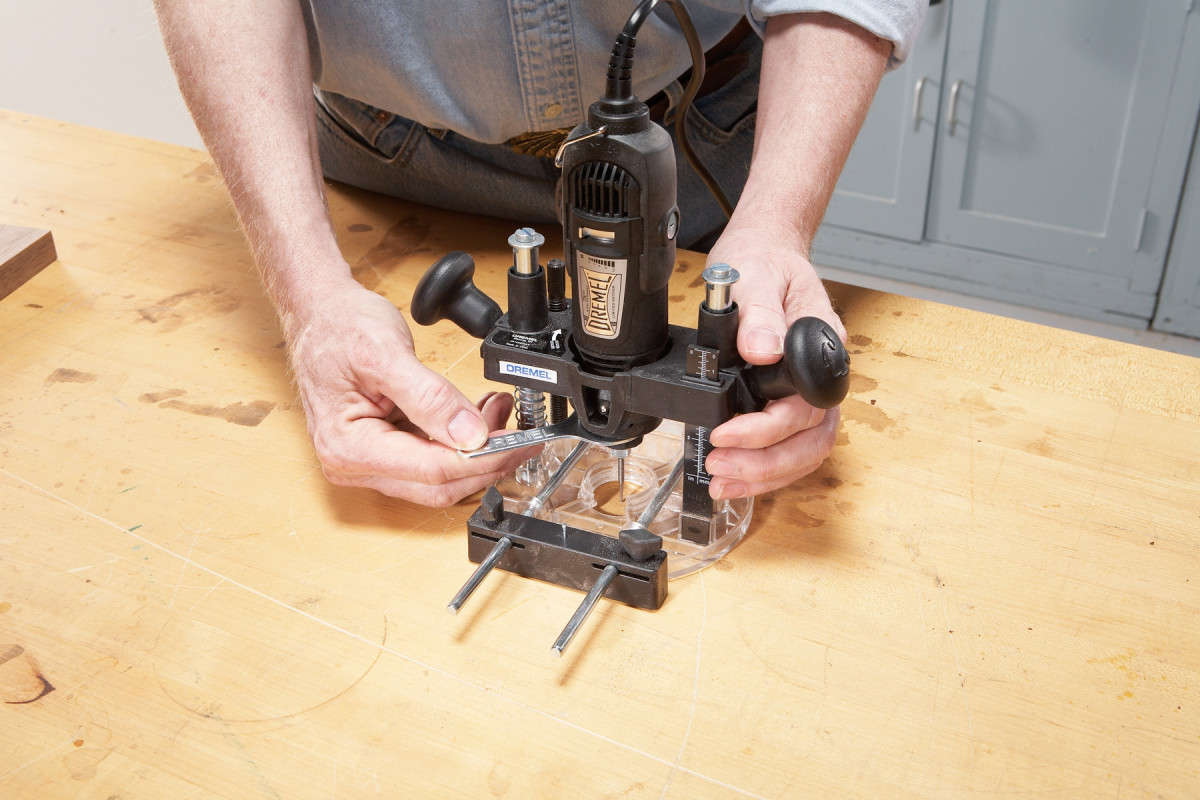
3. Add an adjustable fence to the base, which includes a pivoting point (a 3d nail). Adjust the distance between the bit and point to the radius of the arc that your design requires.
If your laminate trimmer doesn’t have a fence, make a new, oversize subbase and drill a hole through it for the nail.
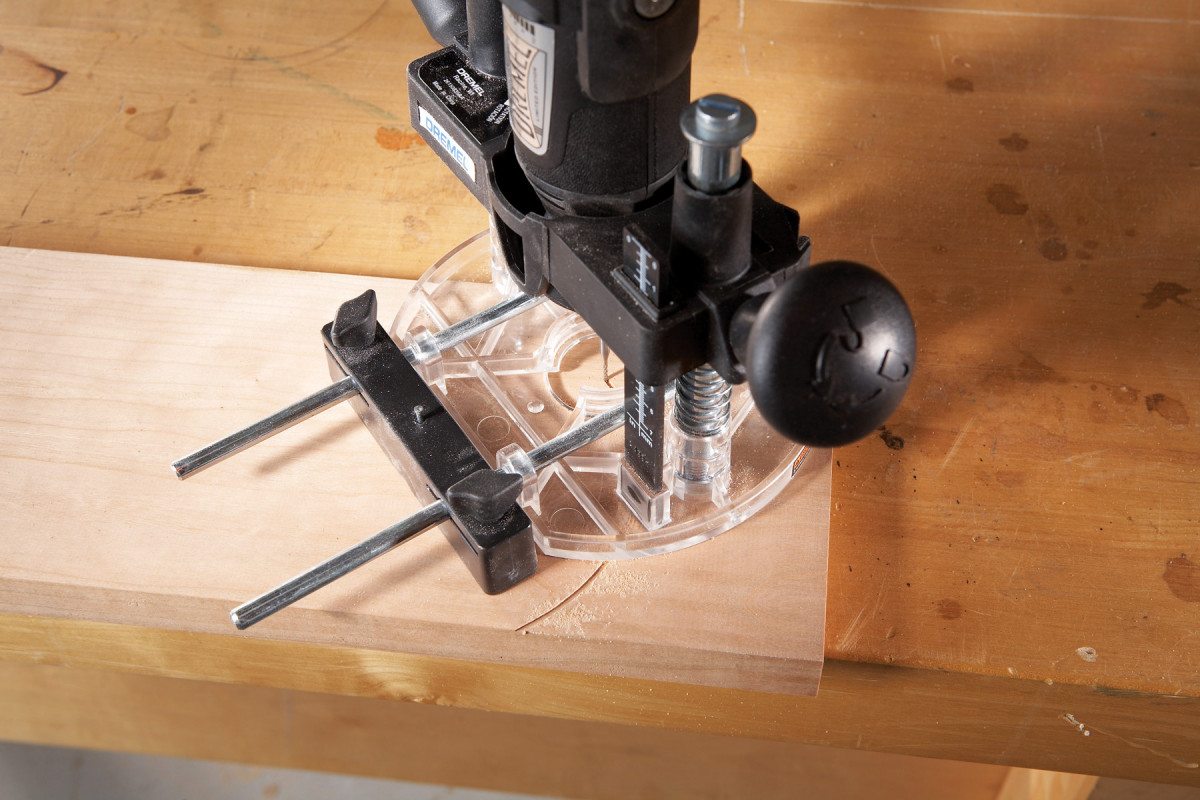
4. Adjust the bit to make a cut 1/32″ deep. Make a shallow hole with an awl, hammer the nail into the hole, and make a test pass.
Make a test pass on a piece of scrap wood (Photo 4). Start with the bit hanging free off the side of the wood, rather than plunging the bit into the wood, which could break it. Place a piece of inlay in the groove–it should be proud by at least the thickness of a piece of paper, although a little bit more is safer.
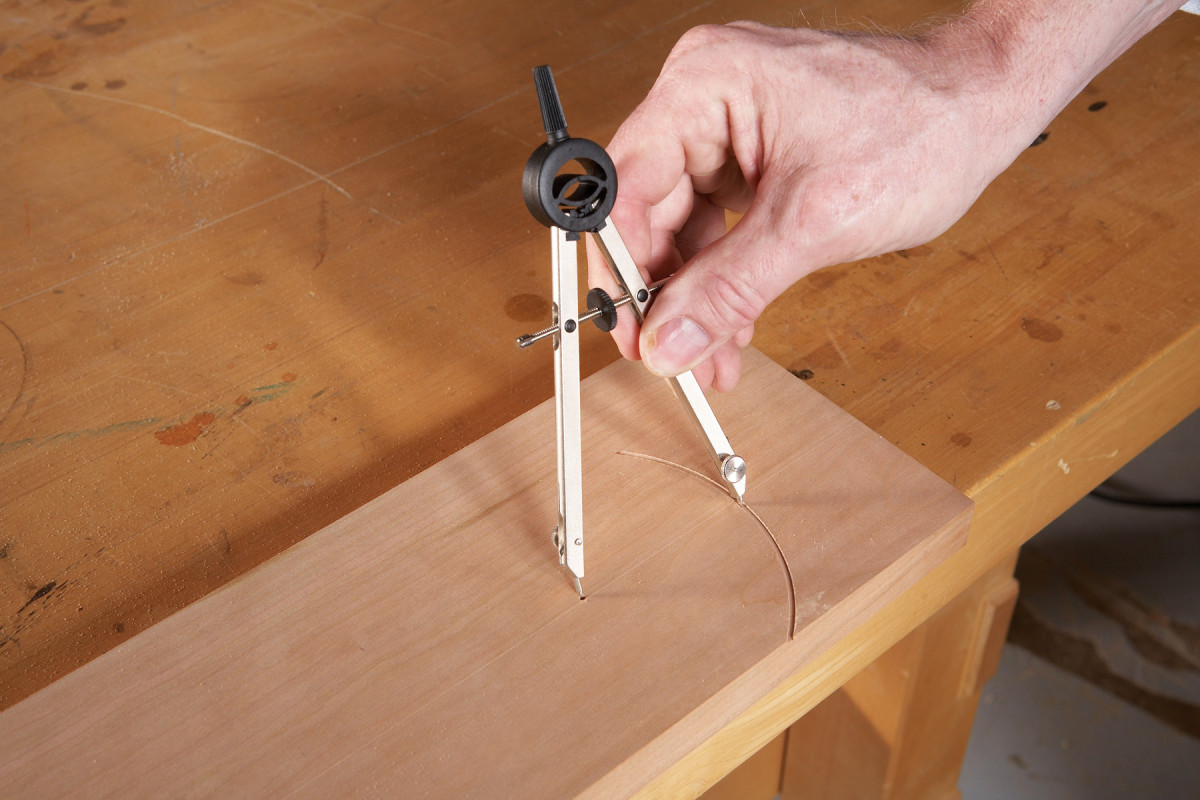
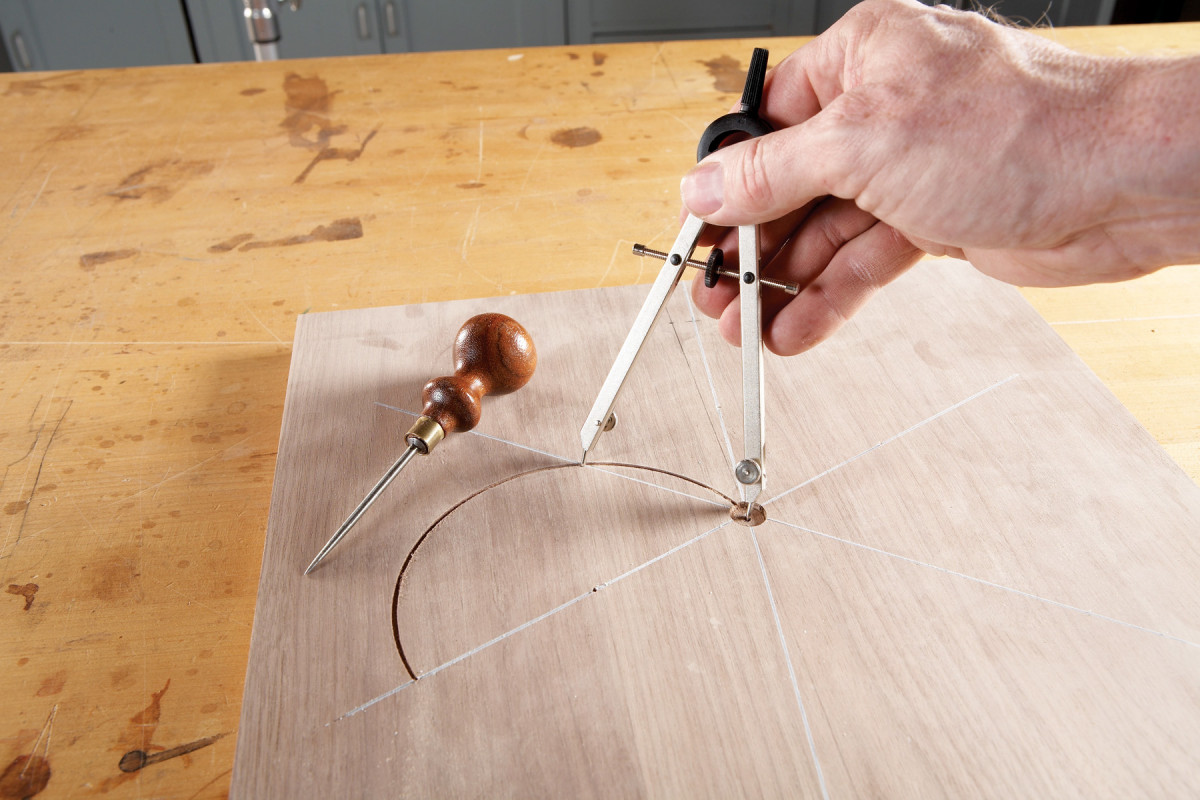
5. Set a compass or divider to the exact distance between the pivot point and the groove’s center.
From this point on, accuracy is essential for all the semicircles to precisely radiate from the pattern’s center. Use a divider rather than a ruler to measure the radius of the semicircle you routed (Photo 5).
6. Mark one of the lines with the divider. Make a small hole at this point with an awl.
Next, step off this distance on one of the centering lines (Photo 6) and make a small hole at this point with an awl.
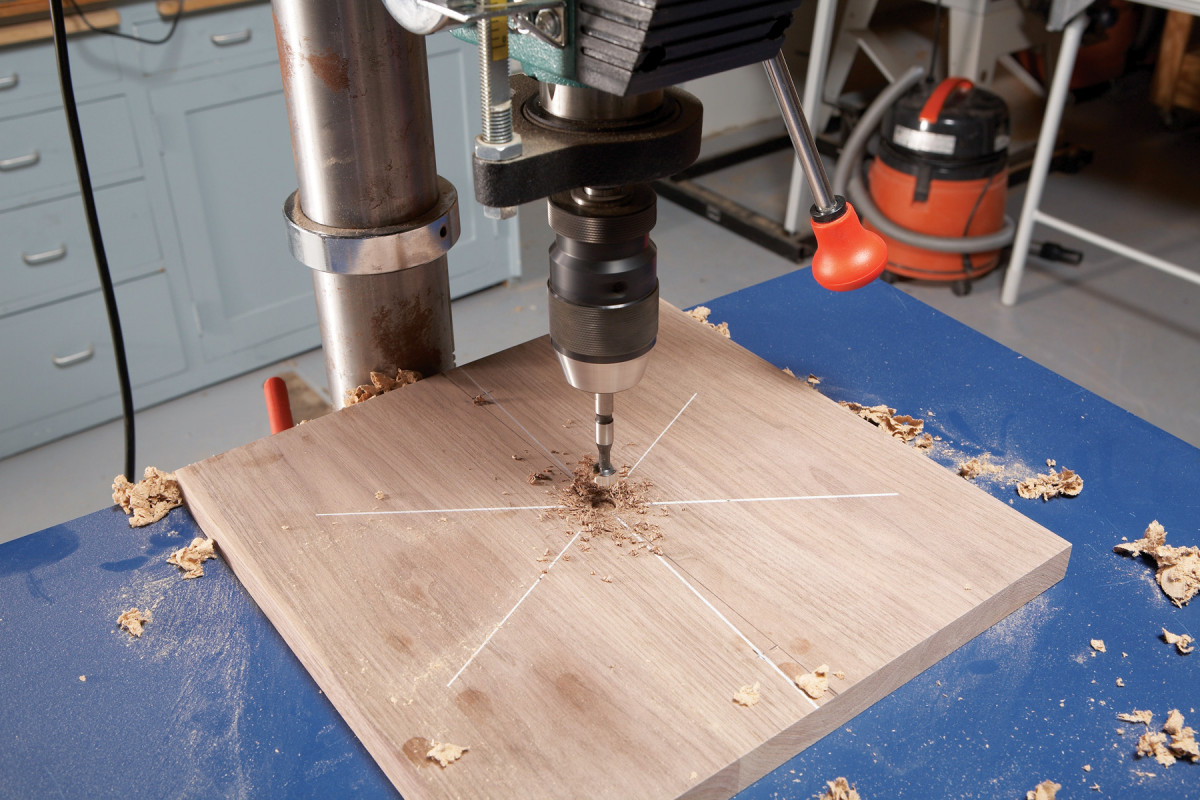
7. Drill a 1/2″ dia. hole at the center of the design to create a convenient starting point for routing. The hole will also receive a large berry.
Make the hole large enough so you can easily find it with the 3d nail. Before routing, drill the hole for the center berry (Photo 7). This hole should be about 1/32″ deeper than the thickness of the berry material.
Rout the semicircles
8. Position the bit in the center hole, then hammer the fence’s nail into the pivot hole–the one you made with the awl. Rout a semicircle.
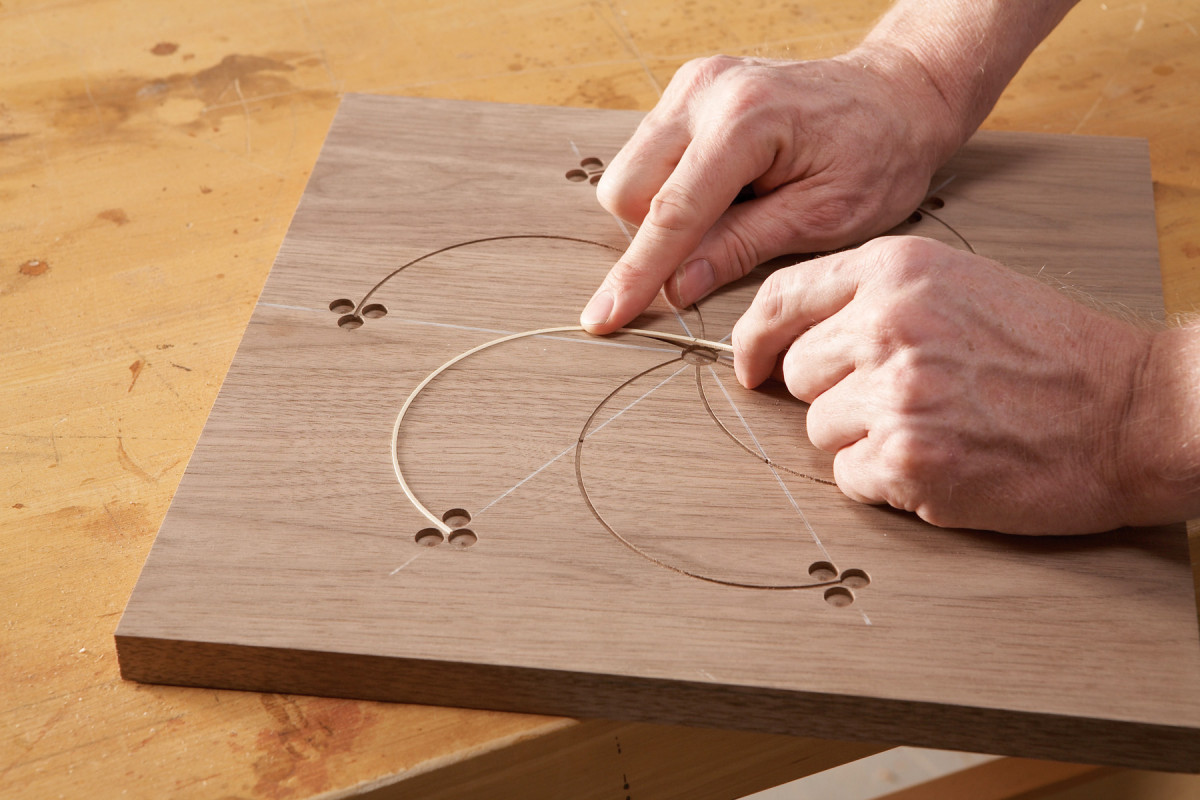
To rout the first semicircle, place the router on the workpiece with the bit sitting free in the center hole. Locate the nail in the hole you made in step 6 and hammer the nail into it. Rout the semicircle, stopping at the point where the bit touches the centering line (Photo 8). Take it easy–a slow, steady pace is best, because the bit is fragile. Turn off the router and pull out the nail–a side cutter works well to pry it up from the fence.
9. Use the dividers to locate the next pivot hole. It should be in the middle of the groove and fall on a centering line.
To locate the pivot point for the next semicircle, use the divider to mark a point in the center of the groove you just routed (Photo 9). This point should fall on one of the centering lines, but if it’s off by just a hair, don’t worry. The line is approximate; the divider is exact. Make another hole for the nail at this point (a 3d nail is slightly less than 1/16″ dia., so the hole it makes won’t mar the groove).
10. Move the router to the new pivot point and rout another arc. Continue your way around the circle, making a total of six arcs.
Rout another semicircle. Lay out the next pivot point in the same manner, and continue around the circle (Photo 10). The last groove should go right through the first nail hole you made. With every nail hole inside a groove, none will be visible when covered with the inlay stringing. Most line and berry inlay was designed using this technique: the pivot points were located inside a groove or berry.
Lay out the berries
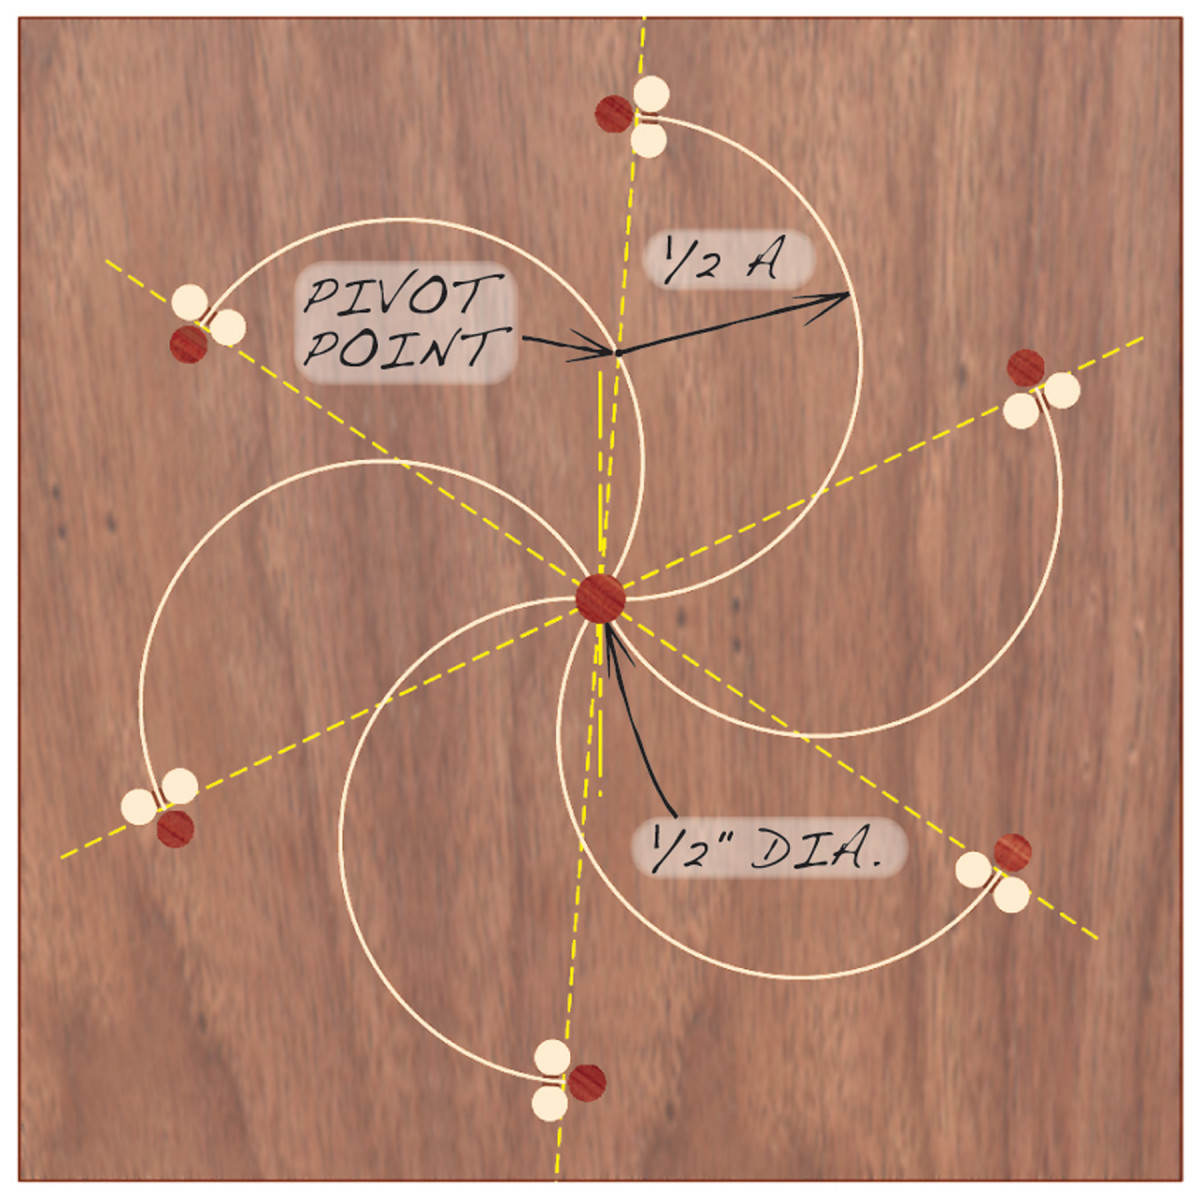
Fig. B) The Design’s Geometry This line and berry design is based on six centering lines spaced 60 apart. The center of each semicircle falls on one of these lines.
Precision is important in laying out and drilling the berries, too. Use a circle template to mark the location of each berry (Fig. B and Photo 11).
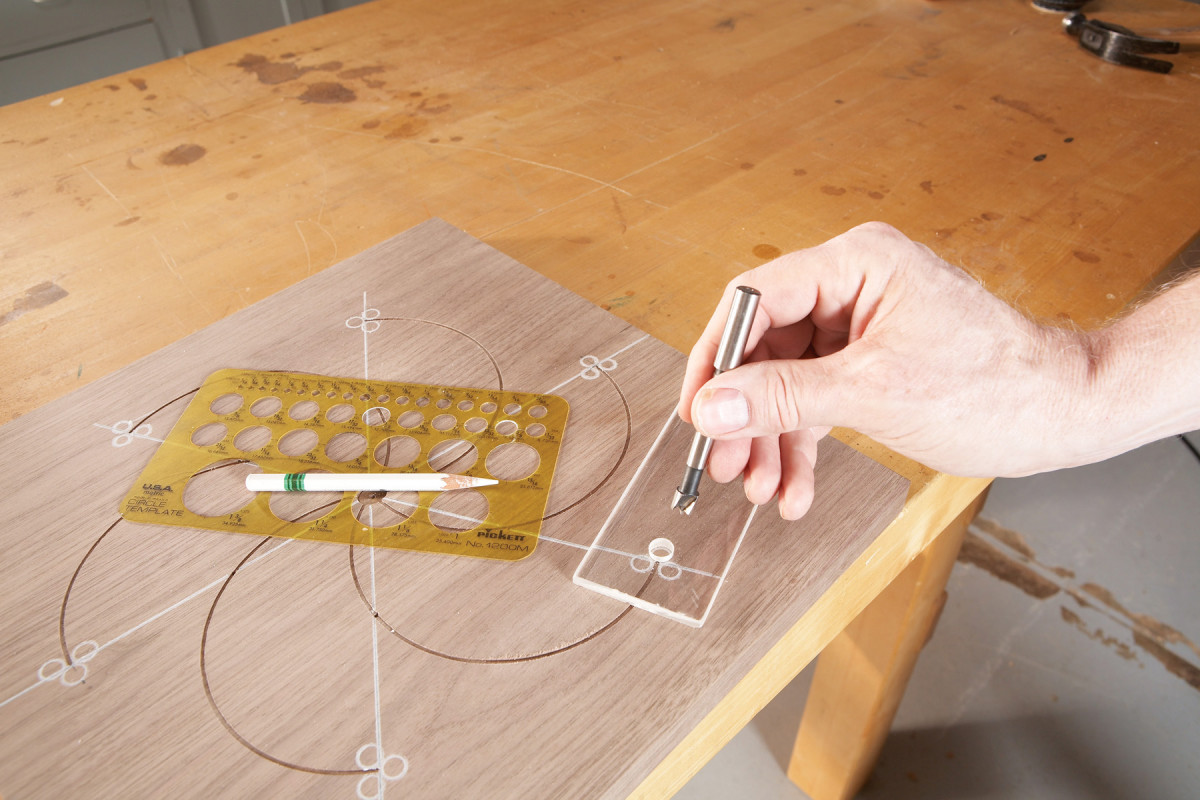
11. Lay out 3/8″ dia. holes for the berry clusters with a circle template. Mark the holes’ centers by tapping on a Forstner bit. Guide the bit using a piece of plexiglass with a hole drilled through it.
To locate the center of each circle, drill a hole through a piece of plexiglass, position the plexiglass over the circle, insert a Forstner bit in the hole, and tap the bit with a hammer. Mark all the holes at the end of each groove first, then drill them.

12. Drill the holes using a Forstner bit. Position the first hole at the end of the groove, then drill the remaining two holes.
Mark the remaining holes, being careful to maintain 1/32″ gaps between the holes and the groove–the plexiglass allows you to perfectly sight this gap. Drill the holes (Photo 12).
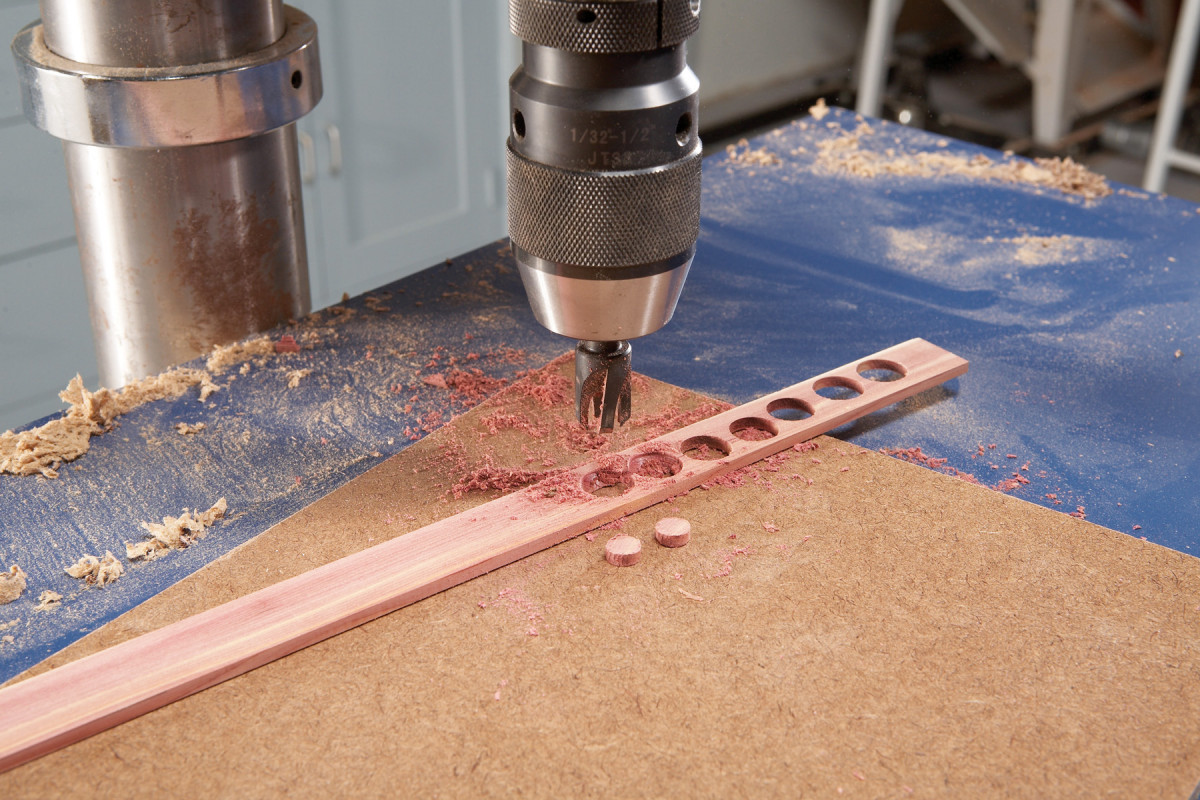
13. Make the berries from holly and a contrasting wood, such as this aromatic redcedar, using a 3/8″ dia. plug cutter.
Make the berries by using a plug cutter (Photo 13).
Gluing and clean up
14. Place a 1/16″ wide piece of holly stringing into an arc and mark its length. Cut the inlay 1/4″ extra-long and glue it in the groove. Trim the ends to exact length using a carving gouge.
Start with the stringing. It’s flexible enough to bend at this radius without breaking. Place a long piece of stringing in the groove (Photo 14) and mark where it crosses the center of the middle circle. Cut the stringing at this point with a chisel.
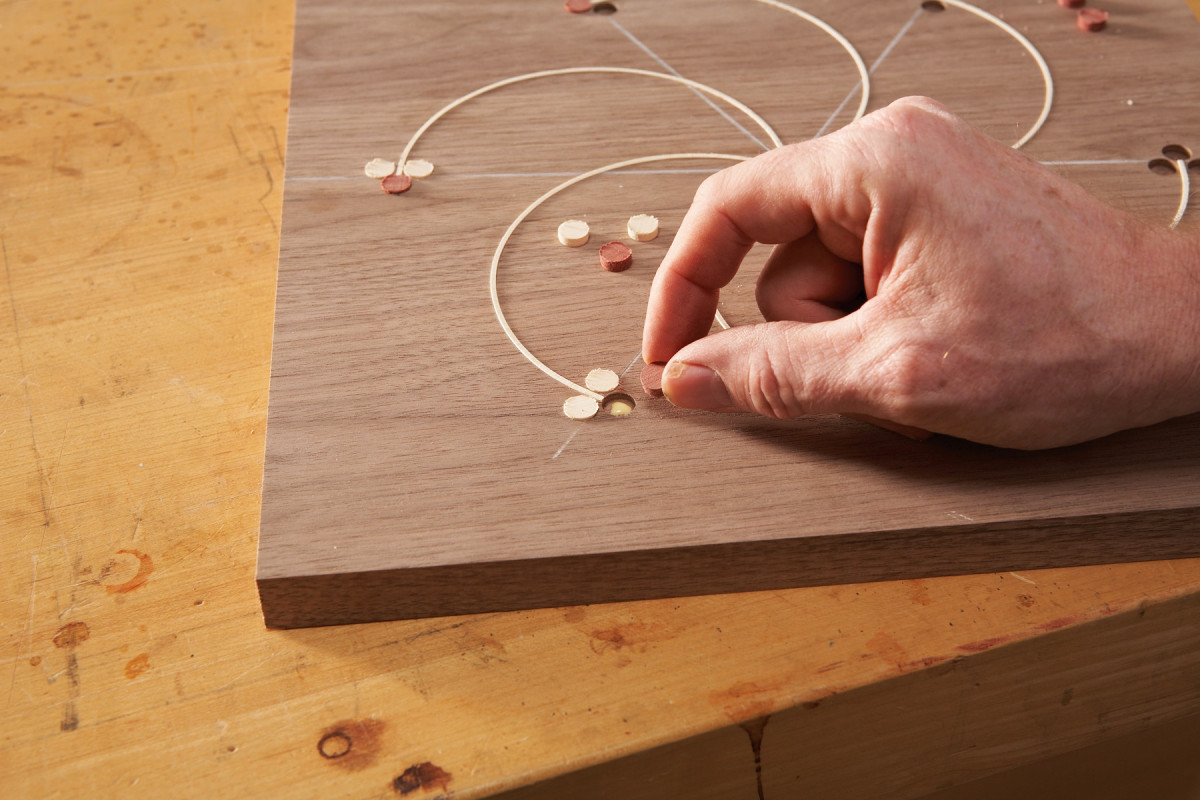
15. Glue the berries into the holes.
Run a thin bead of glue in the groove and insert the stringing, starting at the three-berry end. Push in the stringing along its entire length with your finger, then rub hard on the stringing with a smooth-faced hammer to make sure it’s completely seated. Remove the glue squeeze-out with a putty knife. Trim the end of the inlay in the center of the design with a small carving gouge, making a concave end to match the edge of the circle. Glue all the stringing, then add the berries (Photo 15).
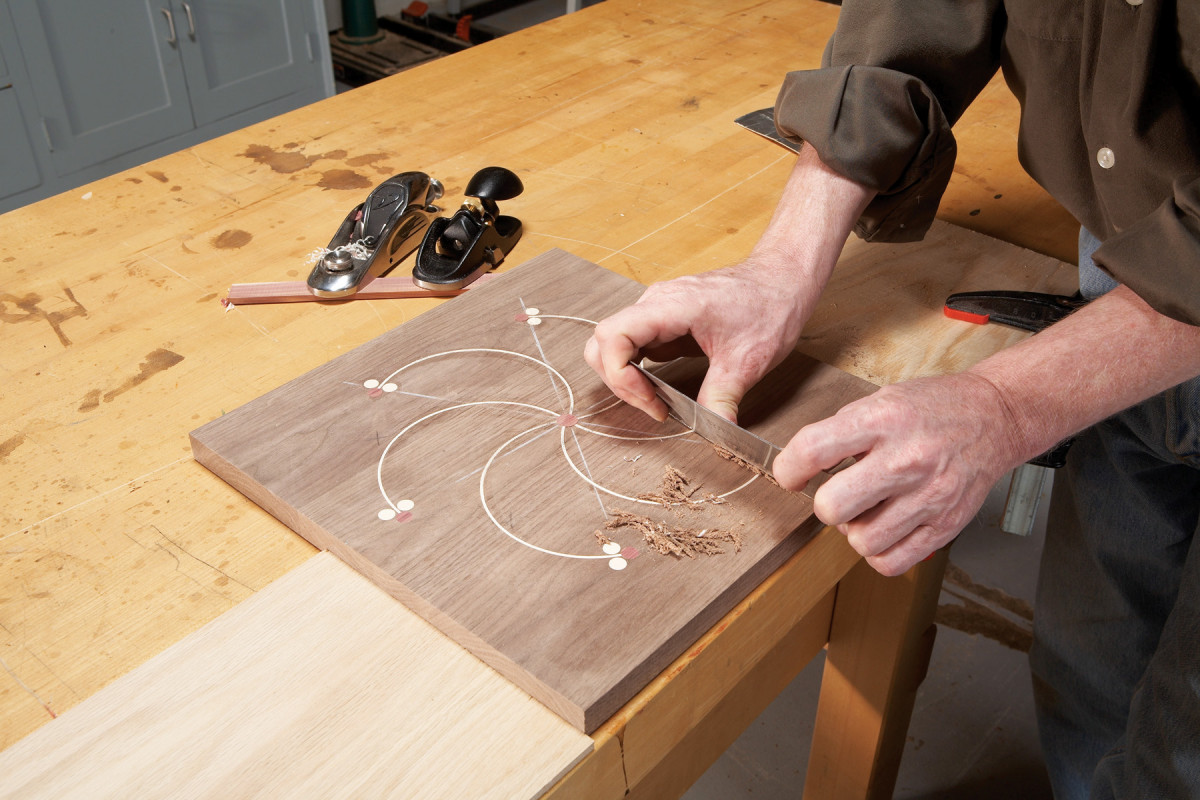
16. Level the stringing and berries with a plane, scraper and sandpaper.
Level the stringing and berries so they’re barely proud of the surface by using a very sharp block plane. Scrape and sand to make everything perfectly flush (Photo 16).
Sources
Inlay Banding, www.inlaybanding.com
Here are some supplies and tools we find essential in our everyday work around the shop. We may receive a commission from sales referred by our links; however, we have carefully selected these products for their usefulness and quality.