We may receive a commission when you use our affiliate links. However, this does not impact our recommendations.
They’re a sure sign of good craftsmanship, but are almost invisible.
Small and discreet, knife hinges lend a tidy, refined look to your project. They’re ideal for a small cabinet if you want the hinge hardware to virtually disappear.
Knife hinges are also a hallmark of good craftsmanship. Precisely laying out their mortises takes patience and a steady hand. You’ll be using some classic hand tools, such as a marking knife, a marking gauge, and a few sharp chisels. There are no short cuts, and practically no room for adjustment once the mortises are cut.
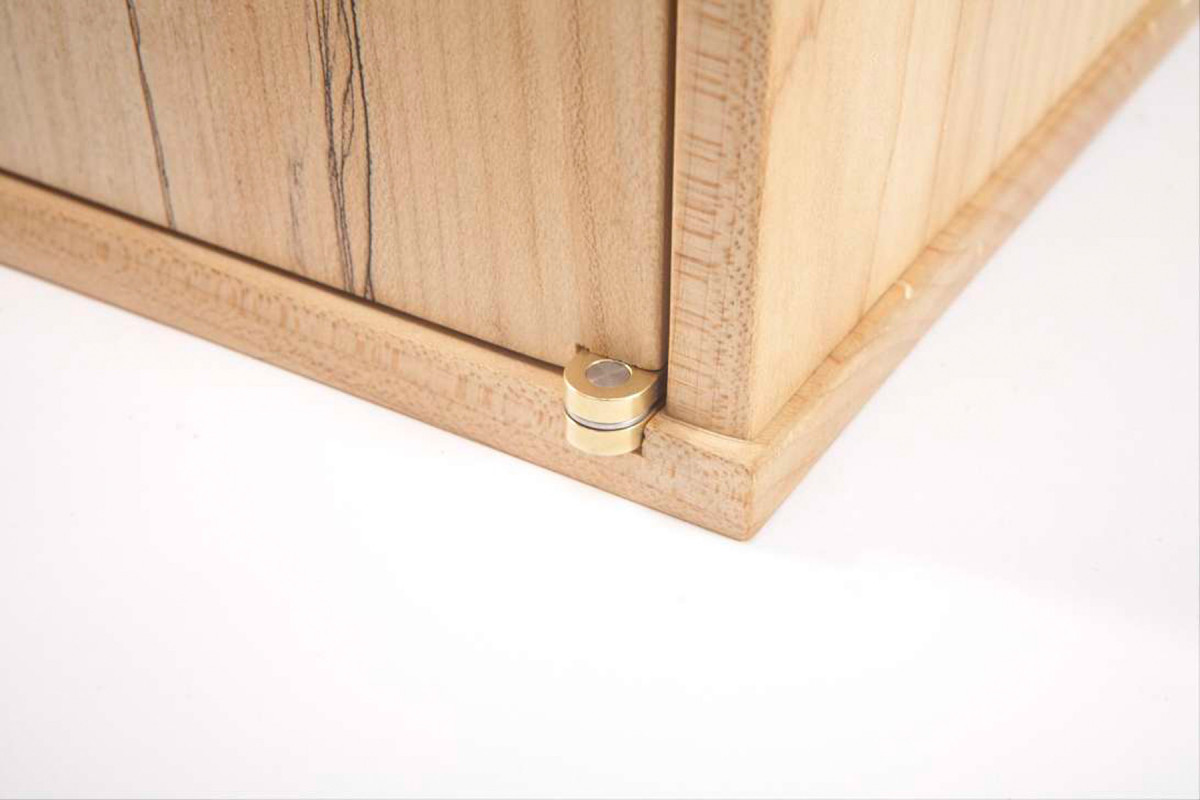
Knife hinges go undercover when installed—you can barely see them. They’re perfect for the type of cabinets whose hardware shouldn’t distract from the piece’s design or the beauty of the wood.
Don’t let me scare you, though. If you follow the steps outlined below, you really can’t go wrong.
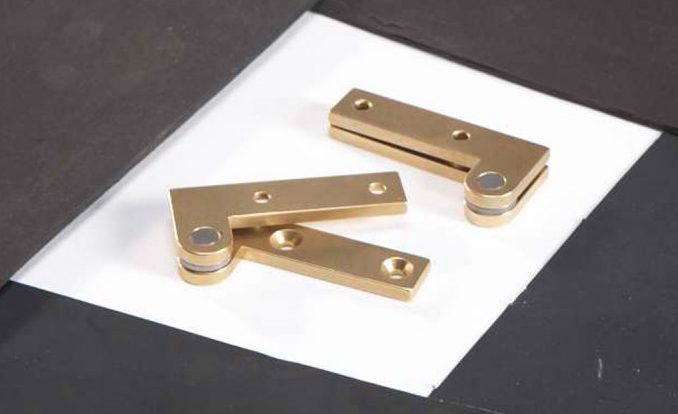
There are two styles of knife hinges: straight and offset. Straight hinges are used for overlay doors. Offset hinges let a door swing out farther than straight hinges, so they’re used for cabinets with inset doors. I’ll be showing you how to install offset hinges.
Before you start
All knife hinges are composed of two parts, or “leaves,” that are easy to separate. One leaf is mortised into the top and bottom edges of the cabinet’s door; the mating leaf is mortised into the cabinet itself. It’s extremely difficult to cut the mortises in the cabinet after the cabinet is assembled. Your best bet is to hold off gluing the cabinet together until you’ve completed all the mortising.
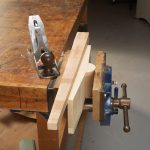
Begin by temporarily clamping the cabinet together. Cut the door so that it’s a snug fit in the opening.
Next, determine the size of the gap you’ll want all around the door. This isn’t an arbitrary measurement: It’s determined by the gap between the two leaves of your hinges, which is the thickness of the washer between the leaves. Make shims that are the same thickness as the washer. (I use a stack of cut-up playing cards. The washers on my hinges were three cards thick.)
Carefully cut the door smaller, ending up with gaps that are the same size on all four sides. I use a hand plane when I get close to final size in order to avoid taking off too much wood.
Door mortises first
The most accurate way to lay out the mortises is with a marking knife and a marking gauge. Making shallow grooves in the wood, these tools allow you to positively register a chisel in a way that a pencil line cannot.
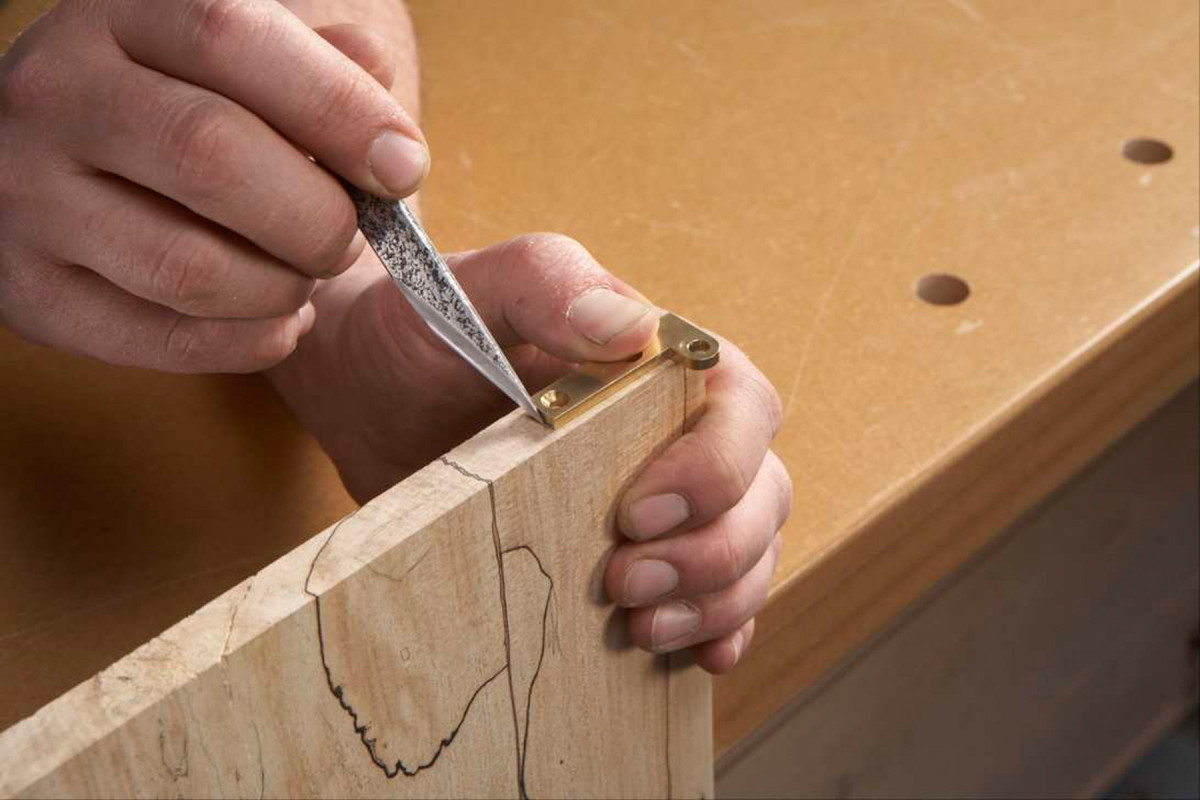
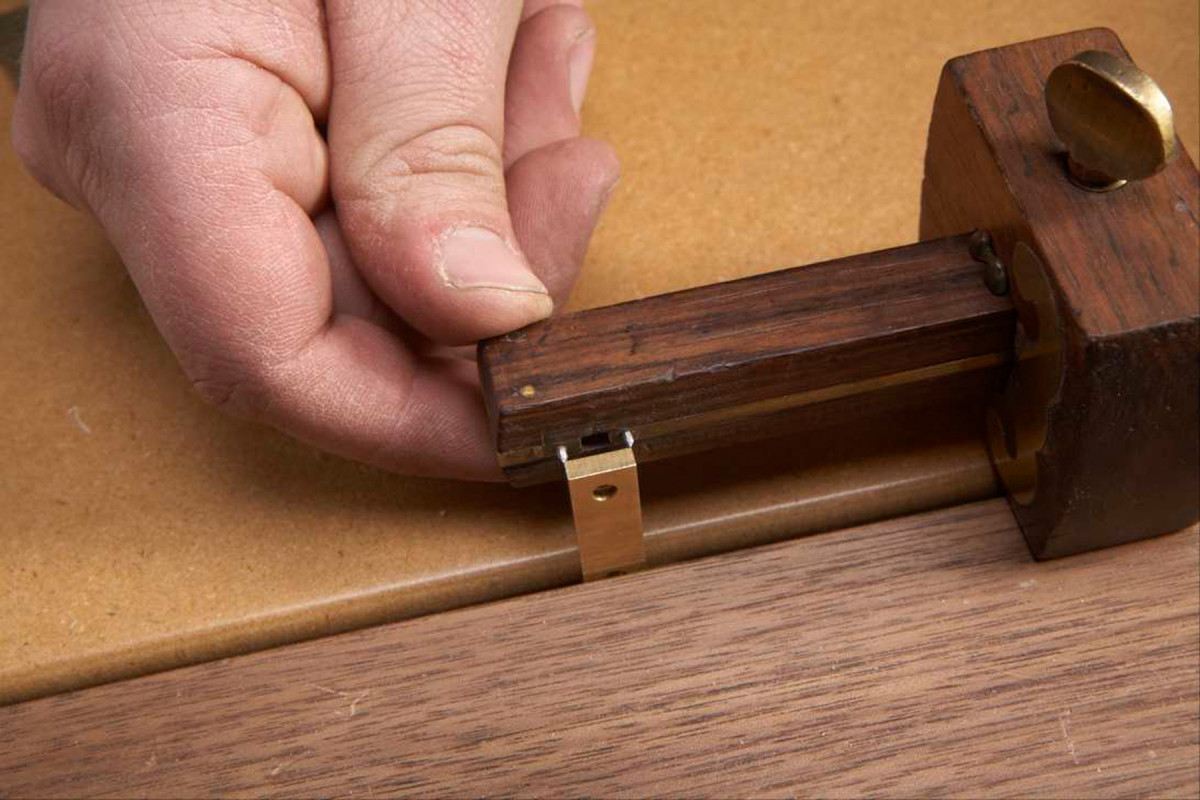
1. Lay out the door mortises first. Position one hinge leaf flush with the door’s edge, then scribe across the end of the hinge.
We’ll start with the door mortises, because the thickness of the door determines the position of the hinge. Clamp the door in a vise at a comfortable working height. Position one leaf of the hinge on the door’s top or bottom edge, so that the hinge is flush with the door’s edge. Using a marking knife, mark the hinge’s end with a short, shallow cut (Photo 1). Locate your knife in the cut, slide a small square against the blade and scribe a line all the way across.
2. Set the pins on a mortising gauge to the width of the leaf.
Adjust a mortising gauge to the width of the hinge (Photo 2; see Sources, page 67). You could also use a marking gauge with a single pin or a single wheel, but you’ll have to re-adjust it for each side of the mortise.
3. Scribe the mortise from the face side of the door.
Adjust the gauge’s head so that the mortise will be centered on the door. Test the setting on a piece of scrap the same thickness as your door. When you’ve got the setting right, scribe the mortise’s long sides (Photo 3).
4. Scribe the hinge’s offset arm, again using the hinge itself as a template.
Hold the hinge in place again and mark its offset arm (Photo 4). As before, make a short cut first, then scribe the line using a square.
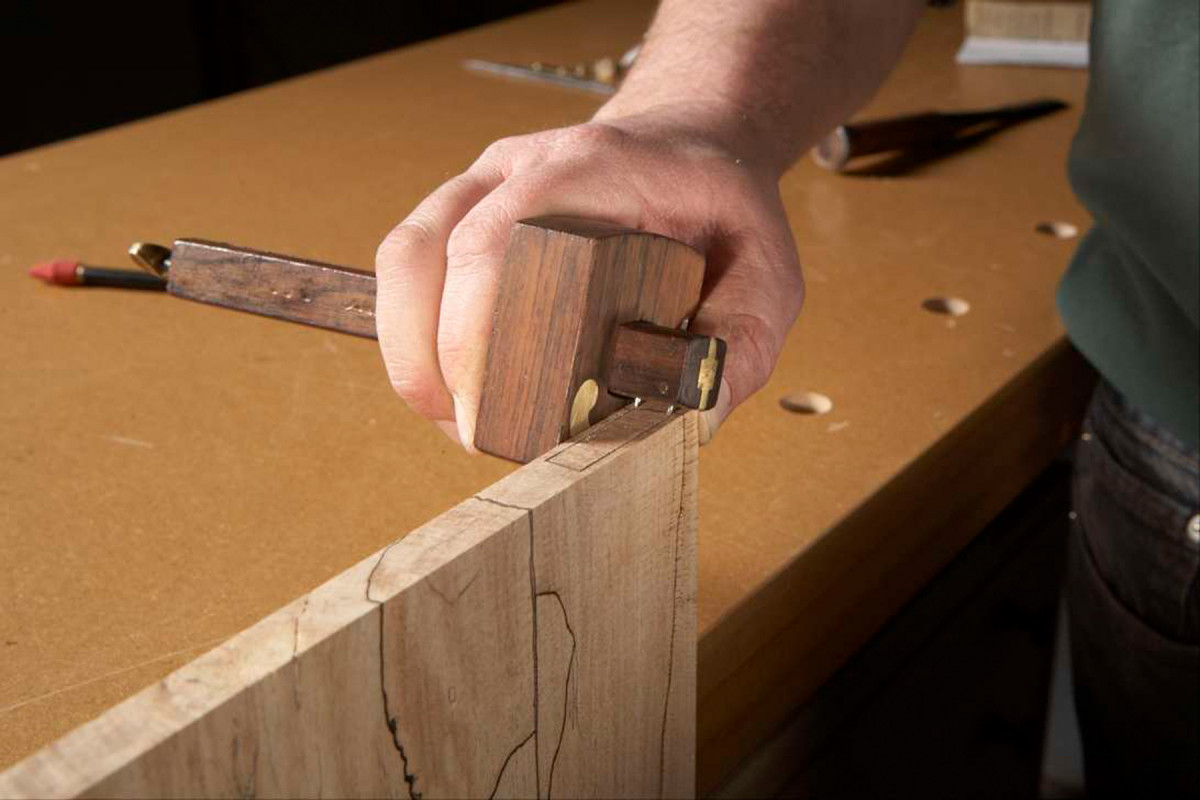
5. Adjust the height of a 1/8” router bit to match the thickness of the leaf.
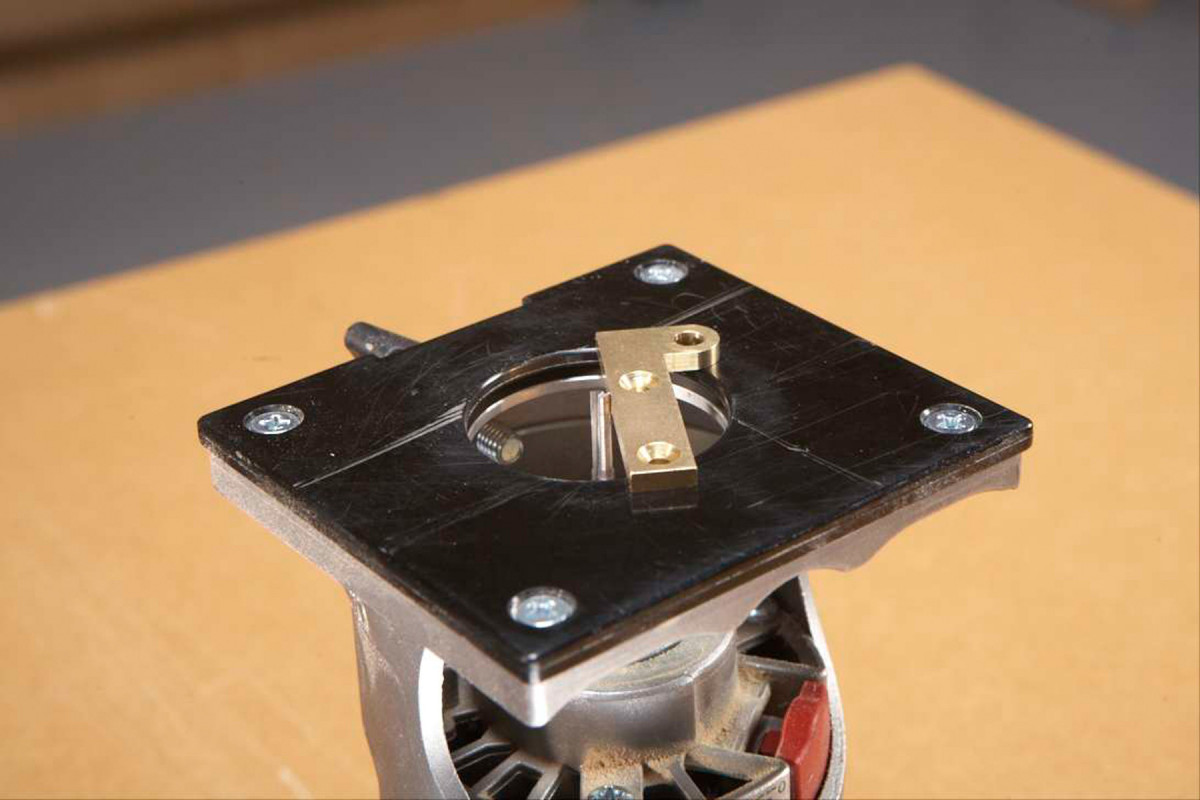
The best way to remove most of the waste inside the mortise is to use a 1/8” bit in a laminate trimmer or other small router (see Sources). You could chop the mortise with a chisel, but it’s risky. The walls of the mortise are usually very thin and could easily split out. The depth of the mortise should exactly match the thickness of one hinge leaf. To set the bit’s depth of cut, turn your router upside down, set a hinge leaf on the router’s base and slide the leaf against the bit (Photo 5).
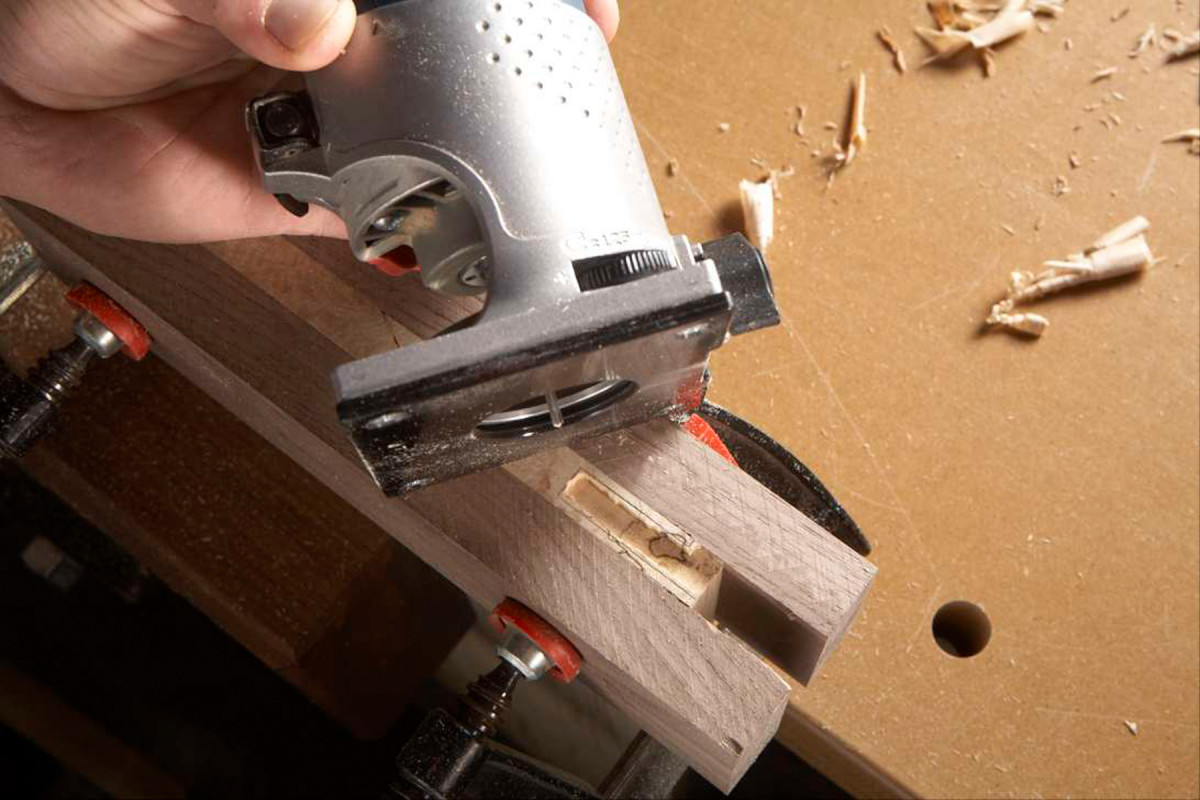
6. Rout about 1/32” shy of the mortise’s layout lines. Clamp two support boards to the door to prevent the router from tipping.
Rout the mortise (Photo 6). Clamp boards on both sides of the door to keep your router from wobbling. Extend the boards about 1” past the edge of the door to ensure that the router is steady before you start cutting. Rout freehand, staying about 1/32” inside the lines. You’ll find that a 1/8” bit is very easy to control. Don’t push too hard, though; this bit is fragile.
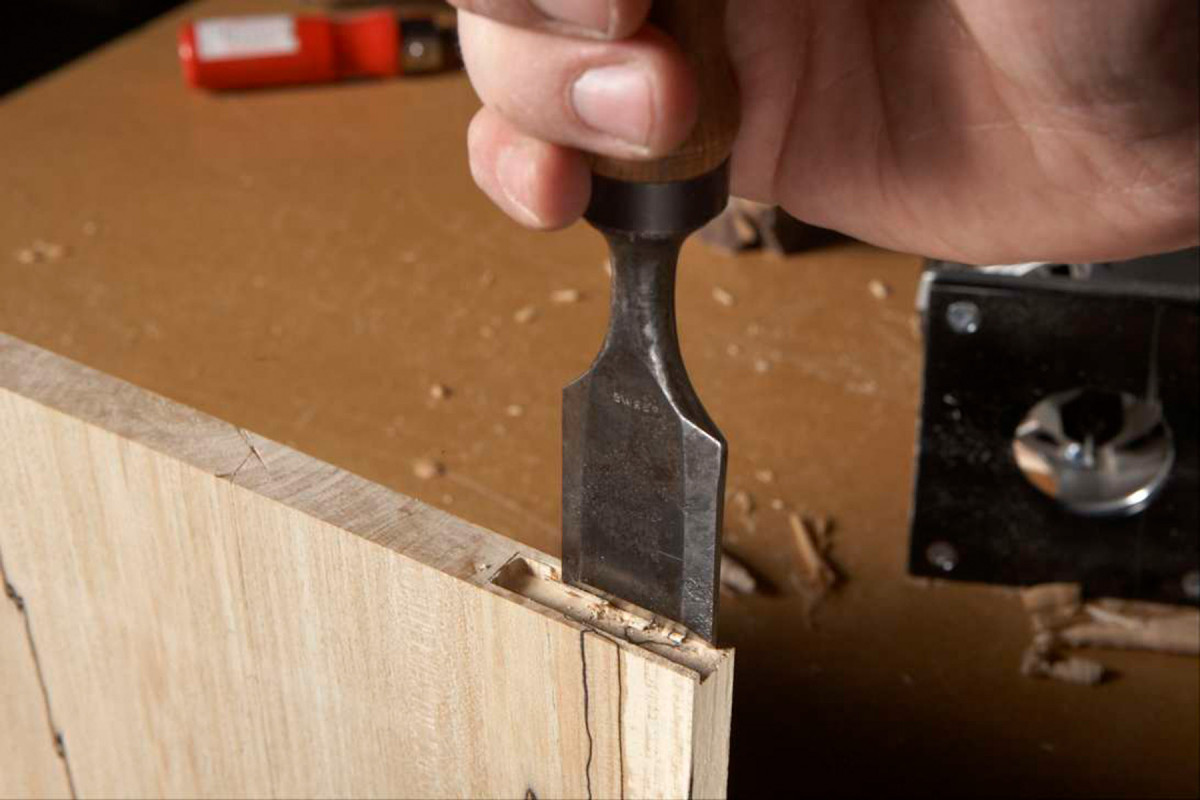
7. Pare to the lines using a wide chisel. Take thin shavings, so you don’t split out the mortise’s thin walls.
Clean up the mortise by gradually paring to the layout lines. Use a wide chisel on the long sides to make straight, crisp edges (Photo 7). I use a 1-1/4” butt chisel.
Cabinet mortises second
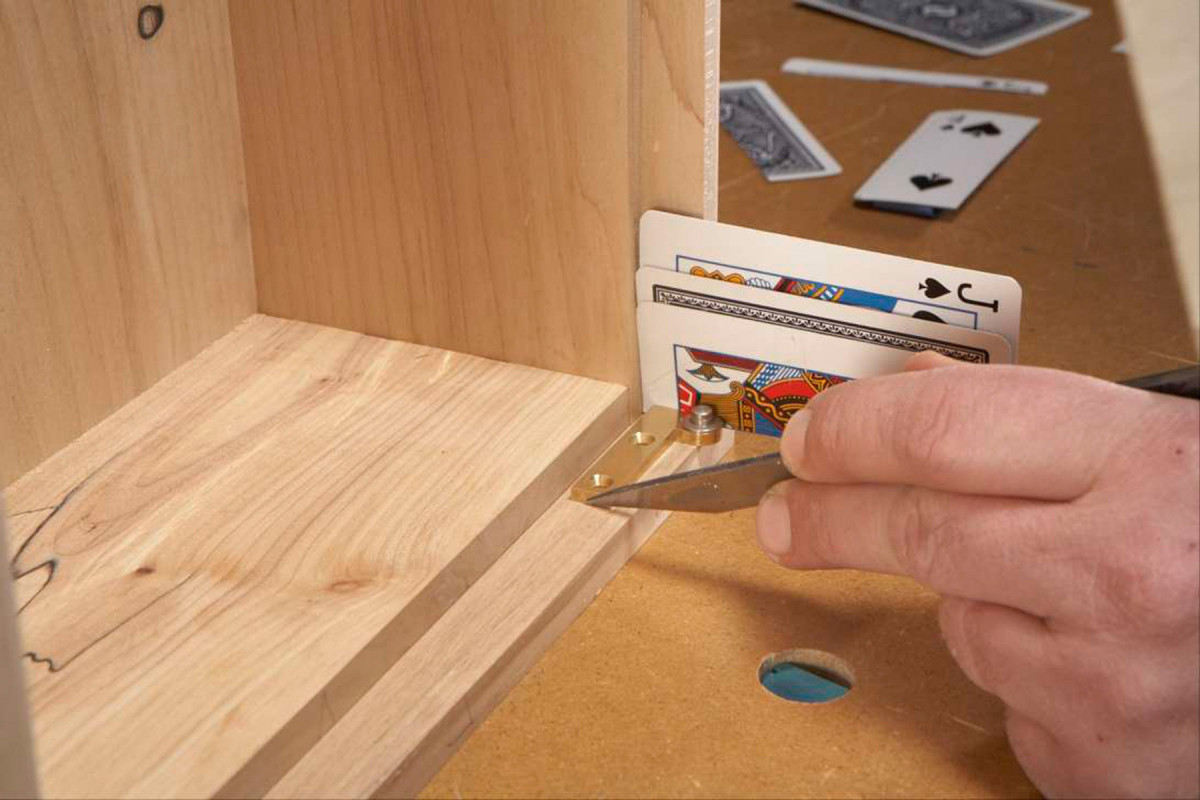
8. Temporarily assemble your cabinet, then lay out its hinge mortises. Place shims next to the hinge to determine the gap between the door and cabinet side.
The cabinet is still clamped together, right? The first step in marking the cabinet mortises is the same as marking the door mortises: Begin with one end of the hinge. Here, though, the hinge won’t be flush with the cabinet’s side, because you have to allow for a gap between the door and the cabinet. On my cabinet, the gap is the thickness of three playing cards (the thickness of the washer between the hinge leaves). Place the cards, or whatever shims you’re using, between the hinge and the side of the cabinet (Photo 8). Then mark the opposite end of the hinge, shallow and short at first, followed by a squared line.

9. If the sides and door of your cabinet are set back, measure this distance. Move the head of the mortising gauge away from the pins by the same amount.
If the door is set back from the cabinet’s top and bottom, use a square to measure this distance (Photo 9). (If your door is flush with cabinet’s top, bottom and sides, skip this step.) Slide your mortising gauge’s head further away from the pins by this distance. Test your new setting on scrap to make sure it’s right.

10. Disassemble the cabinet, then scribe mortises on the pieces above and below the door. Remove most of the waste using your router.
Now you can remove the clamps and disassemble the cabinet. Scribe the mortise’s long sides on the cabinet’s top and bottom (Photo 10). Lay the hinge in place, then mark its opposite end and the offset arm. Scribe these lines, as before, using a square and marking knife. Rout the mortises. Clean them up using a chisel (Photo 11 ).
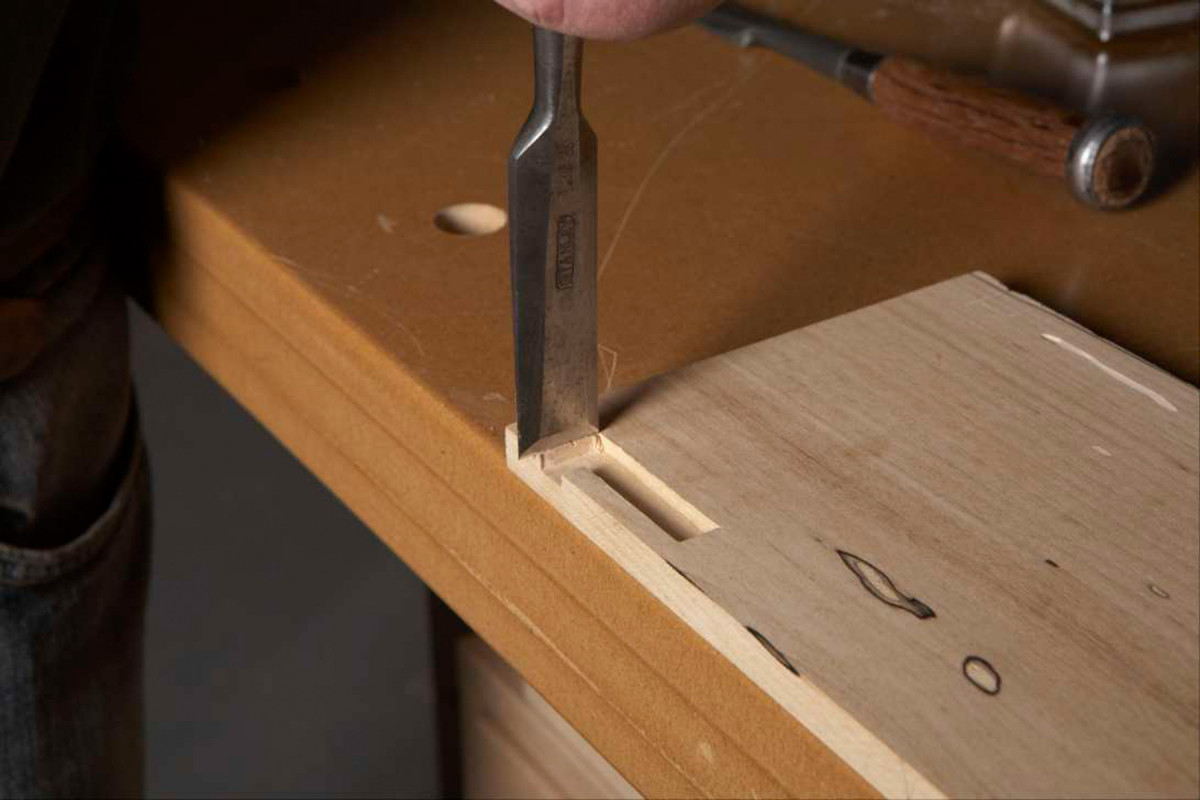
11. Clean up the sides of the mortise with a chisel.
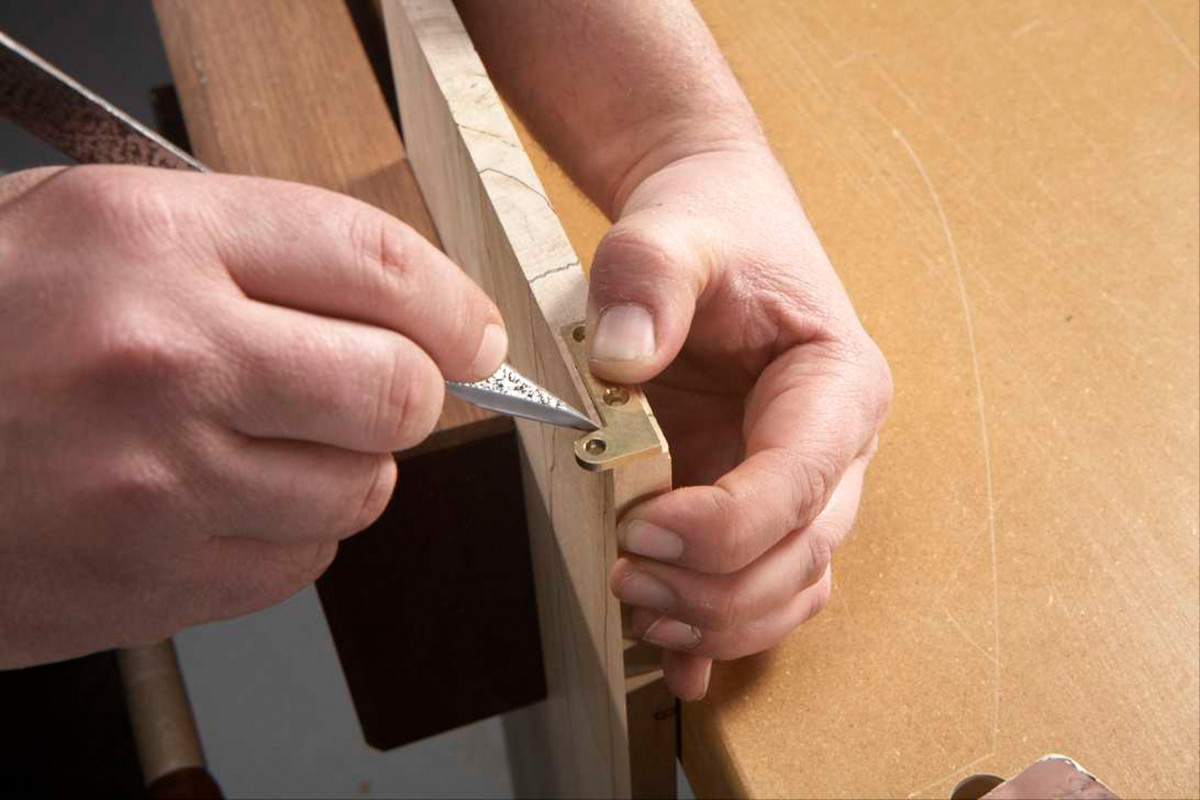
Next, set the hinge leaves in the cabinet mortises and pre-drill pilot holes for the screws (Photo 12). I use a self-centering bit for this operation to ensure that the holes are perfectly aligned. That’s not so critical for the cabinet mortises, because the hinge is trapped, but centered holes are critical for the door mortises, where the hinge could slide.
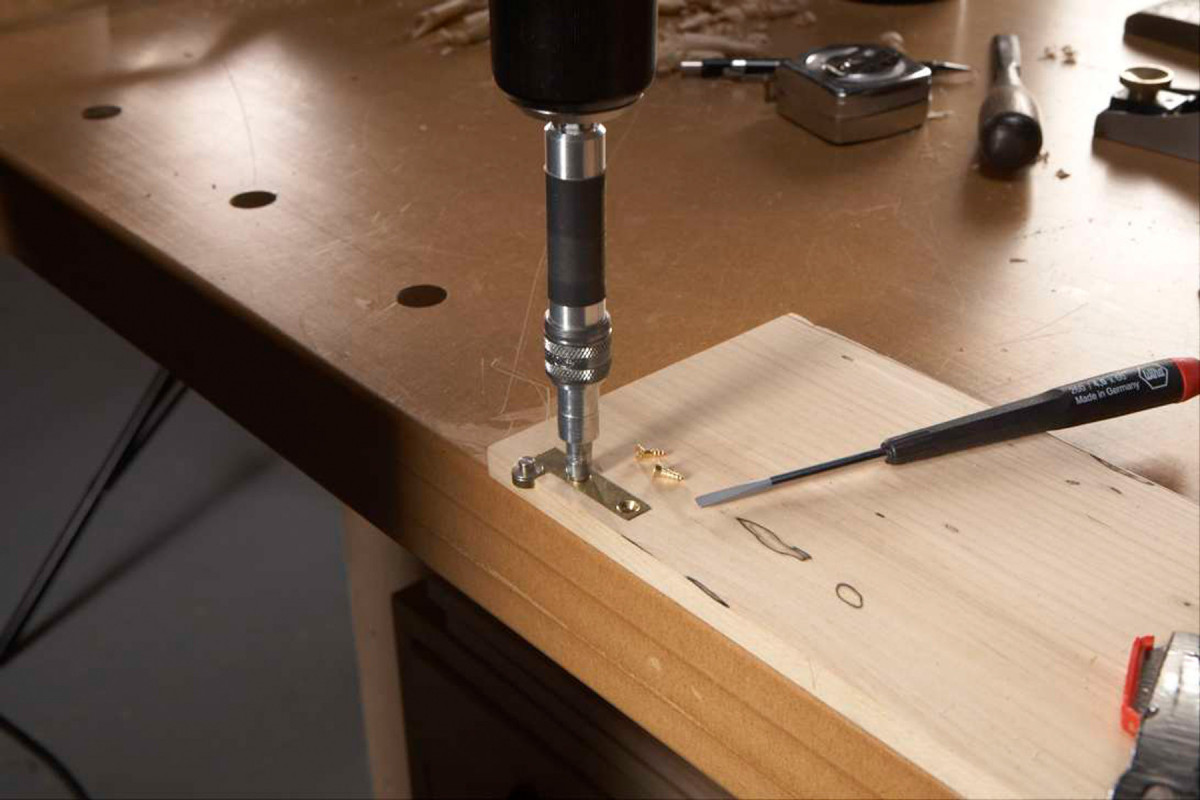
12. Place the leaves that have pins in the cabinet mortises. Pre-drill the screw holes using a self-centering bit. Install the screws by hand.
If you’re using brass screws, “thread” the pilot holes first with steel screws of the same size, then install the brass screws. Use a screwdriver, not a drill/driver, to avoid stripping out or breaking the screws.
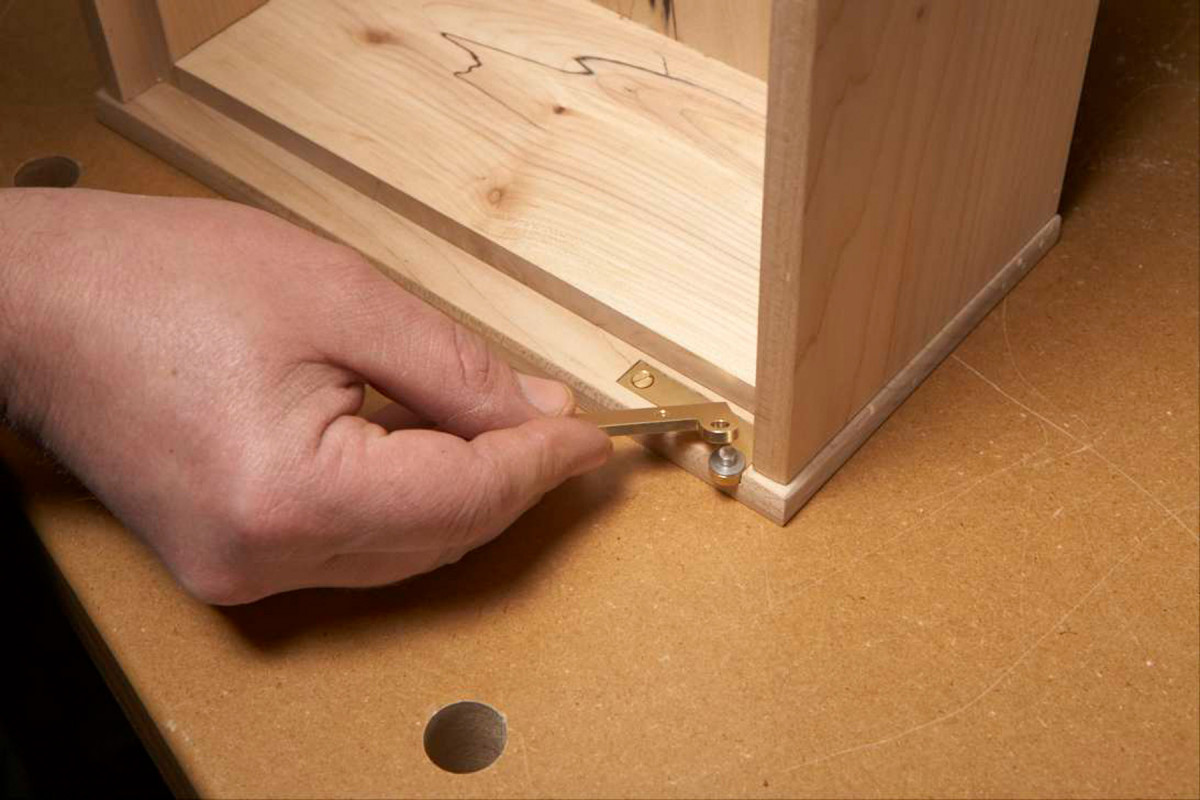
13. Re-assemble the cabinet and add the other hinge leaves.
You may want to re-assemble the cabinet one more time, just with clamps, to make sure the door hangs right. (Or if you’re feeling confident, glue it!) Reassemble the hinges by slipping the door leaves back onto the pins of the cabinet leaves (Photo 13).
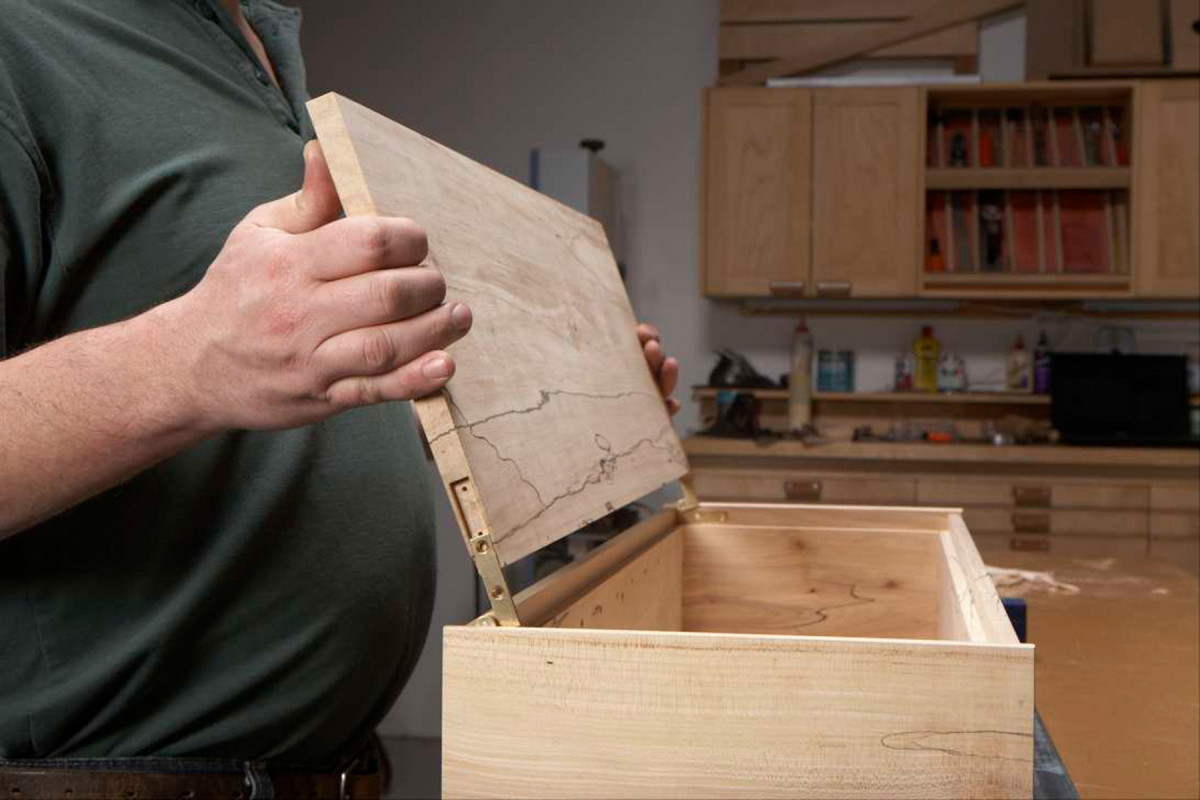
14. Slide the door onto the hinges.
Lay the cabinet on its back and slide the door onto the hinges (Photo 14). You might need some help here, because you can’t see both hinges at the same time. Once the door is in place, pre-drill pilot holes for the screws, then install the screws (Photo 15).
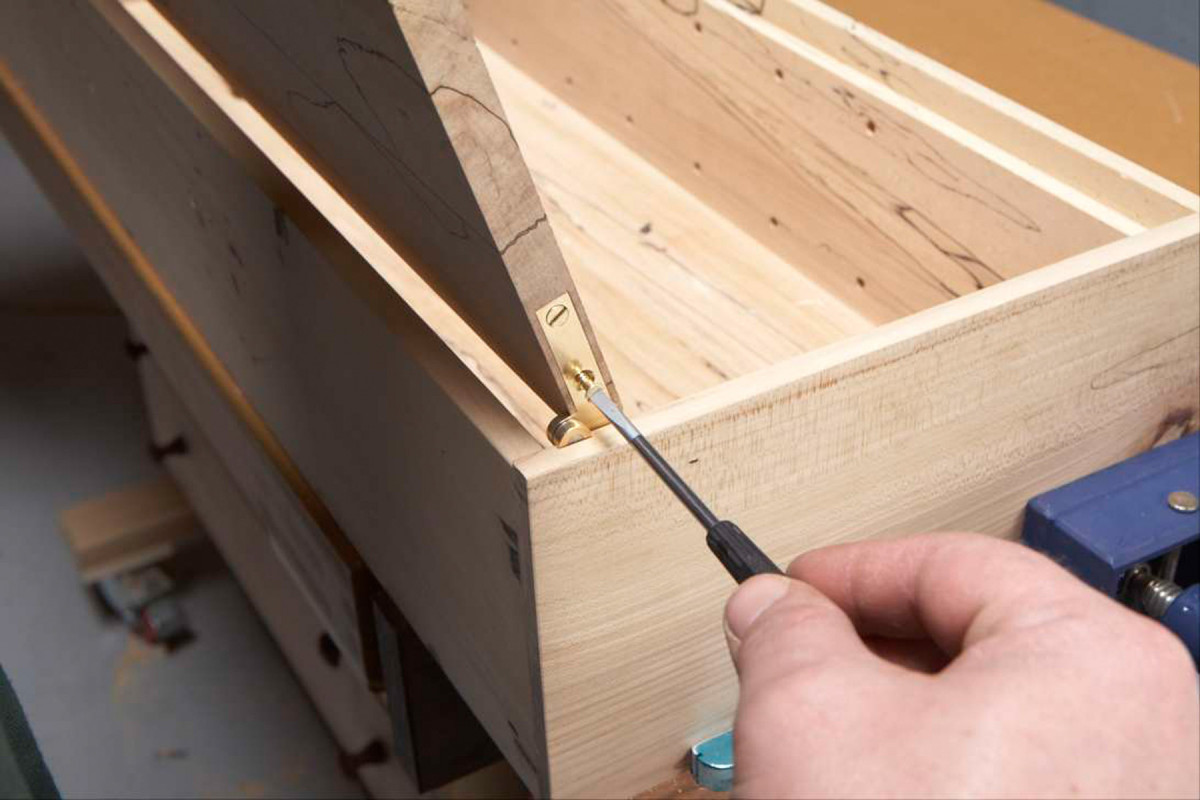
15. Install the screws in the door leaves. If everything fits right, glue the cabinet together.
Stand up the cabinet and check the door’s fit and gaps. Make any necessary adjustments using a hand plane or sanding block.
SOURCES
• Ebony Marking Gauge [Rockler]
• Freud 1/8” dia. Double Flute Straight Bit [Amazon]
Here are some supplies and tools we find essential in our everyday work around the shop. We may receive a commission from sales referred by our links; however, we have carefully selected these products for their usefulness and quality.