We may receive a commission when you use our affiliate links. However, this does not impact our recommendations.
Plus 9 useful tips for making any large-profile molding.
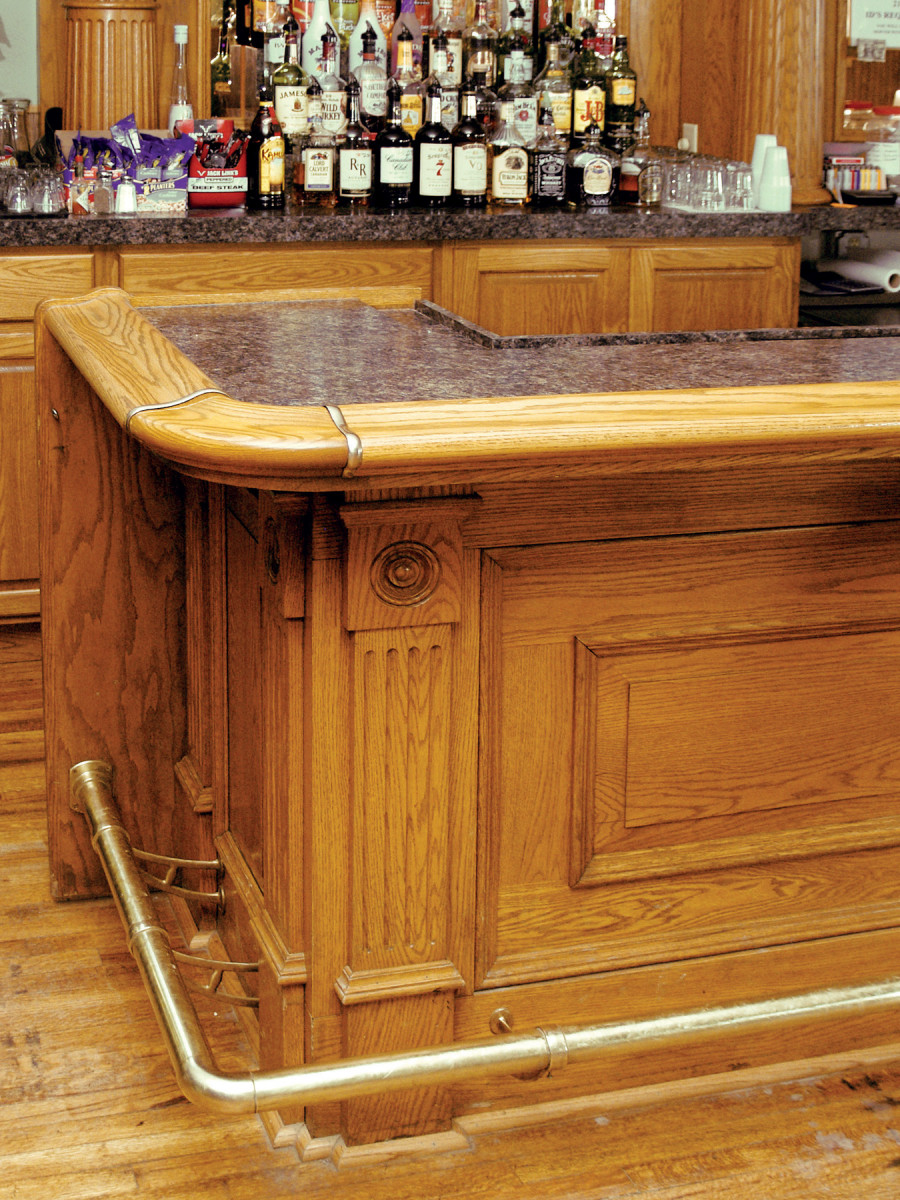
If adding a bar is on your list of home improvements, you know that its large, contoured front rail is an essential element. Commercially available bar rail molding is costly and can be difficult to find in anything but oak. Fortunately, you can make this molding—and lots of other large-profile moldings—in your shop.
Divide and conquer
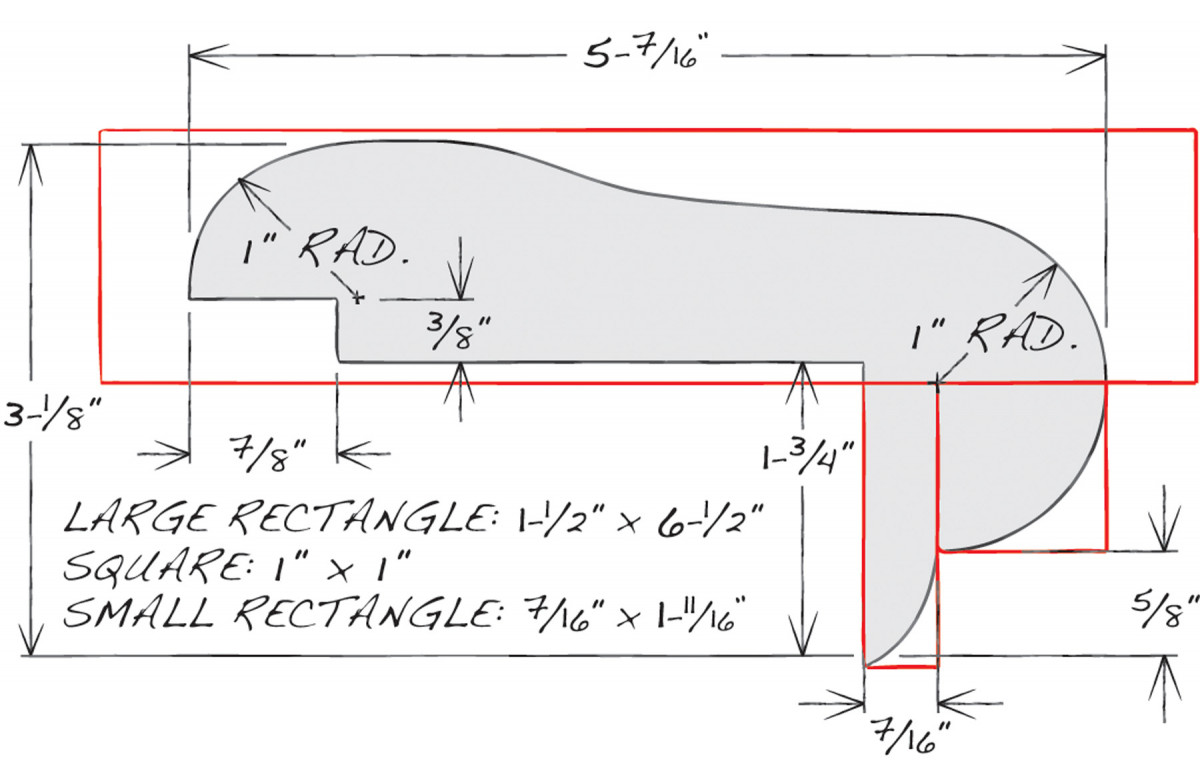
Fig. A) Bar Rail Pattern
Bar rail molding patterns can be found by searching online or in a lumberyard catalog. Another option is to duplicate an existing molding—that’s how I created the pattern shown here (Fig. A). You can download a full-size version of this pattern at AmericanWoodworker.com/WebExtras.
Use the full-size pattern to match router bits with various parts of the profile. You’ll need several copies of the pattern, one for each of the components that you identify in the next step.
Portions that can’t be routed will be cut on the tablesaw. Divide the molding into smaller components that can be made from separate boards. Here, a large rectangular component houses the top of the molding. This component begins halfway down the front curve because each half of that curve can be formed with a 1″ roundover bit. A square component yields a quarter-round molding for the front of the rail and a small rectangular component provides the cap molding that decorates the bottom.
Begin by milling a blank for the rail’s top molding component. Make this blank at least 6″ longer than the bar top’s overall length. Note that this blank is 1″ wider than the finished molding, for stability when you cut its profile in a later step.
Face-gluing two pieces of 4/4 stock to achieve the 1-1/2″ thickness is acceptable, as long as the matching faces have been jointed flat. After the glue is dry, joint, rip and plane the blank to final size.
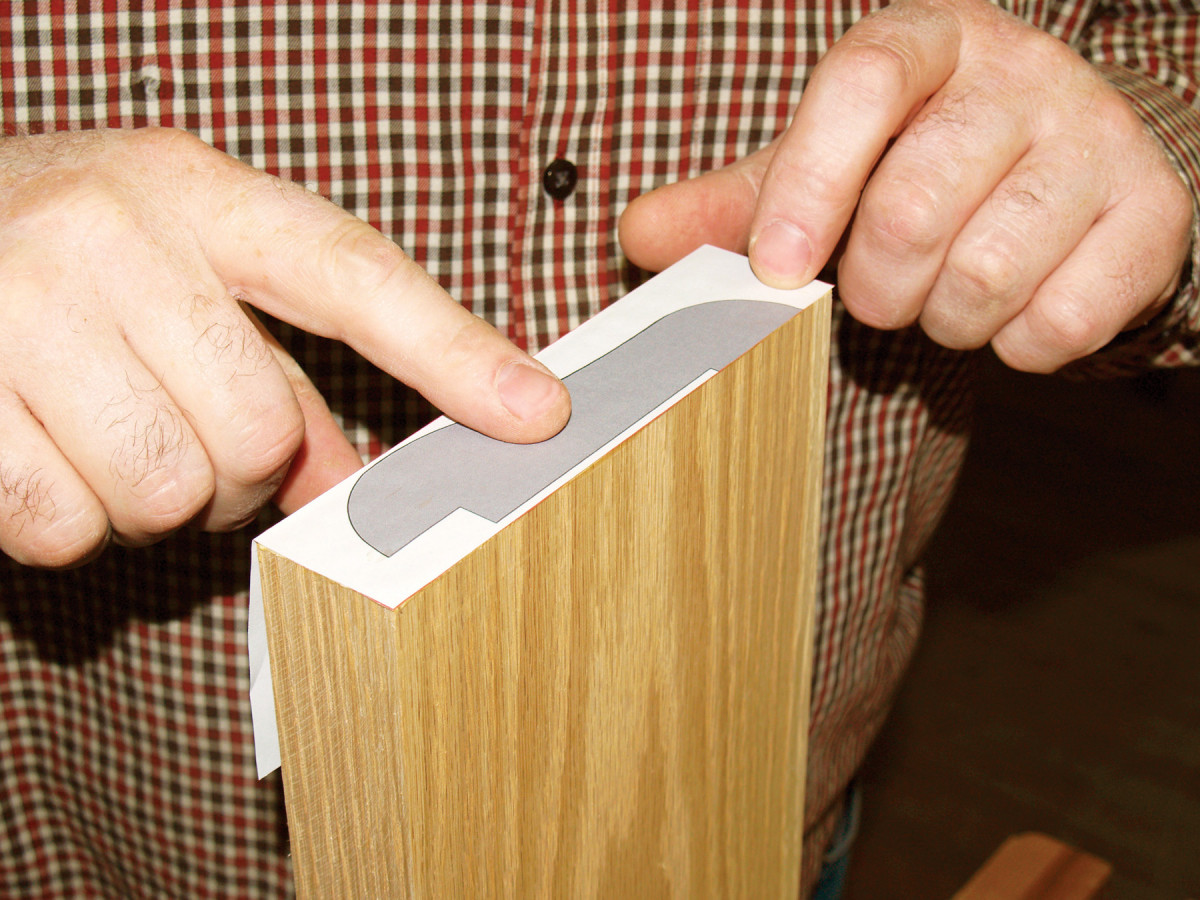
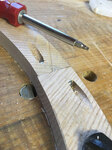
1. Attach the top section of the pattern to a large rectangular blank. Make sure the pattern is parallel with the bottom edge.
Cut out the large rectangle from one copy of the pattern and attach it to one end of the blank (Photo 1). Spray adhesive is ideal, but yellow glue will do the job, too.
Shape the top molding
Create the top molding’s contoured shape on the tablesaw by making a series of overlapping cuts. Adjust the blade and the fence between each cut to follow the profile. A standard-kerf blade makes things go a little faster than a thin-kerf blade.
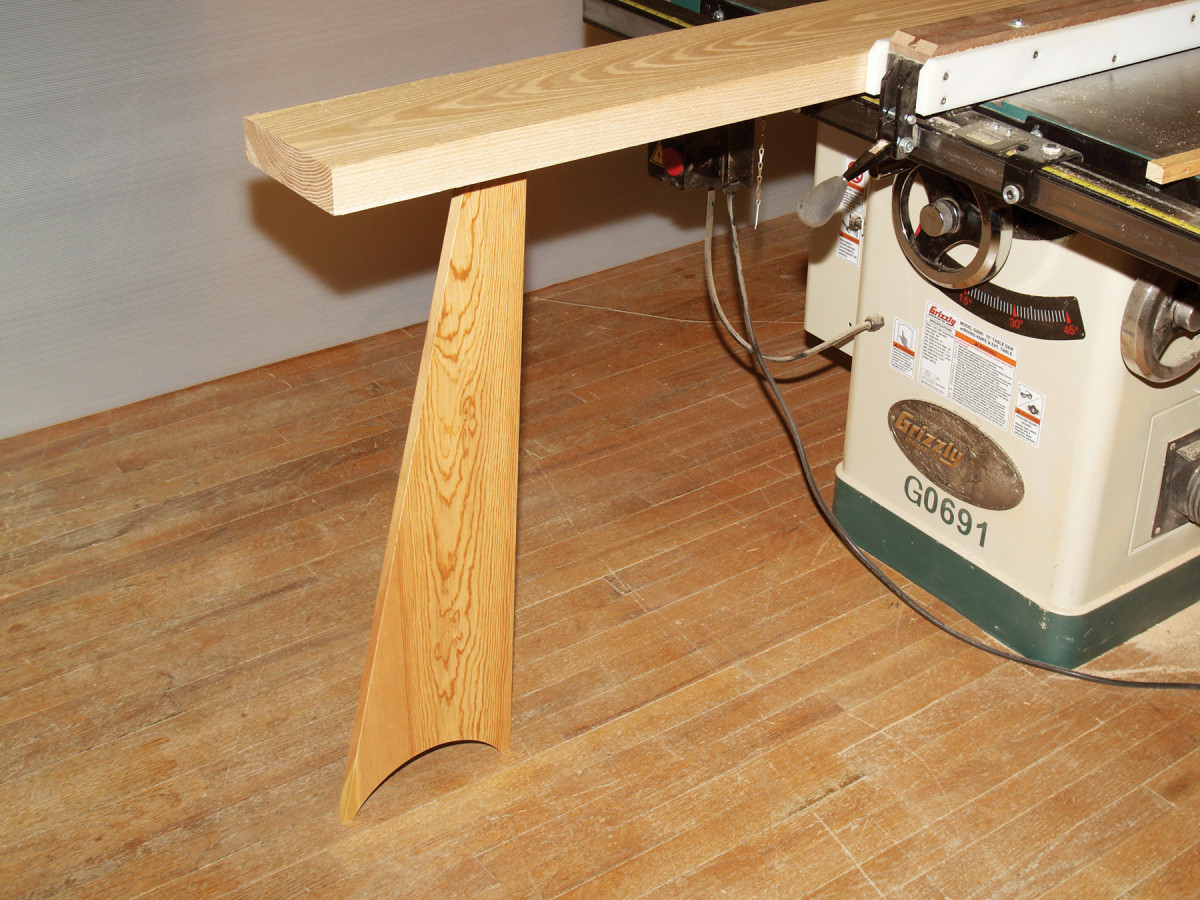
2. Use a support to keep the blank’s leading edge flat on the saw table, so you can precisely position the fence and the blade between cuts as you rough out the profile.
Lay the blank top-face down on the tablesaw with the pattern positioned directly in front of the blade. Support the blank’s cantilevered end so you can walk around behind the saw to eyeball the setup before making each cut (Photo 2).
3. Shape the profile by making a series of overlapping tablesaw cuts. Legs on both sides support the blank and keep it level.
The extra-long blank provides several inches of waste at the leading end, which allows you to check each cut before committing to a full-length pass. Make a short, stopped cut (to the top of the blade). Then retract the blank, examine the kerf and make any necessary adjustments. Alternate between adjusting and cutting to slowly rough out the top’s contoured profile (Photo 3).
4. Rout a shallow dado on the bottom of the blank. Install featherboards to hold the blank against the fence and flat on the table.
Make several passes with a large-dia. straight bit to rout the reveal in the bottom of the blank (Photo 4).
5. Saw off the legs with the blank facing right-side up. Feet created by routing the shallow dado support the blank.
Then use the tablesaw to remove the legs (Photo 5).
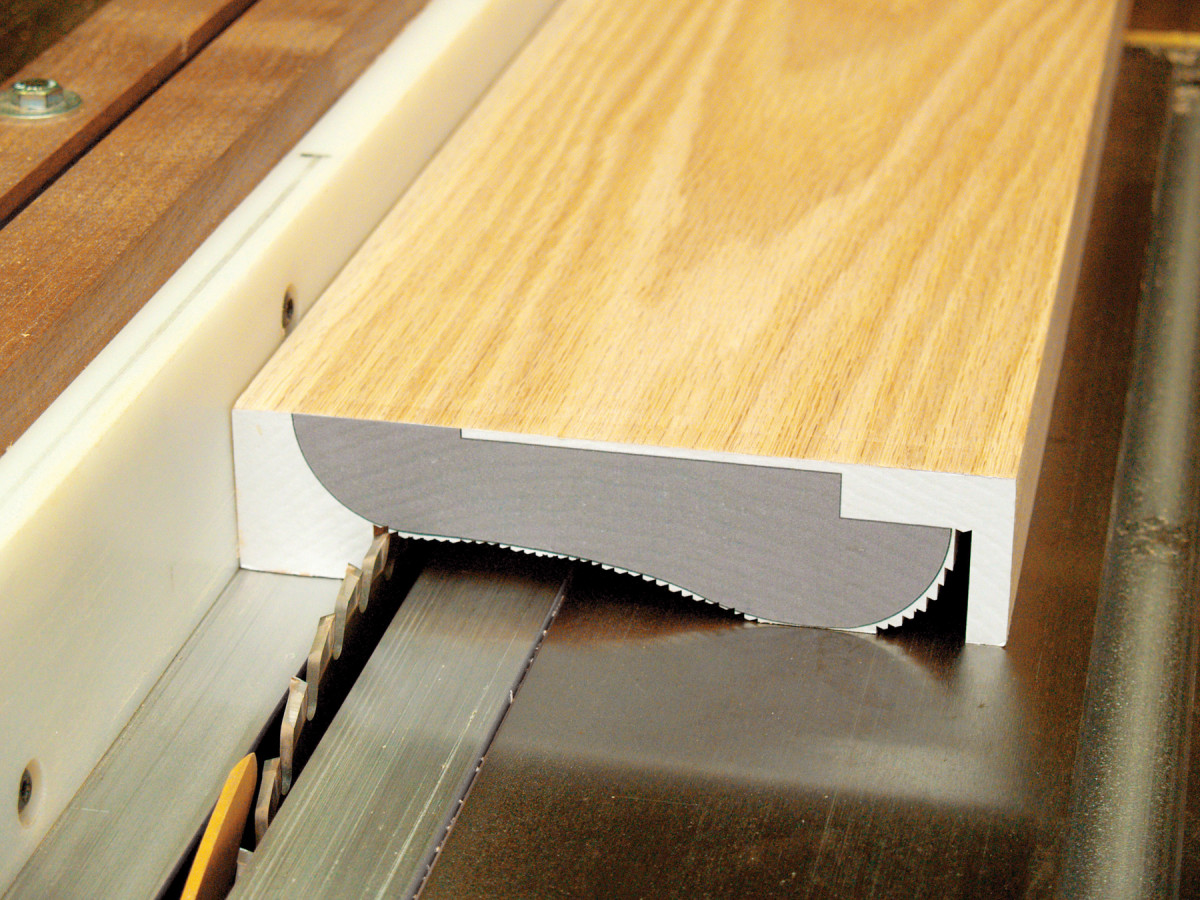
6. Attach a shim to support the blank before routing the rabbet at the back—routing this rabbet removes the back support foot.
Rout the deep rabbet on the blank’s back edge (Photo 6). Before routing, tack on a full-length shim to support the blank. Mill the shim’s thickness to match the depth of the shallow dado.
The deep rabbet houses the bar’s marble top. You may have to adjust the rabbet’s depth to match the marble’s thickness. If your bar doesn’t have a marble (or raised) top, this rabbet isn’t necessary.
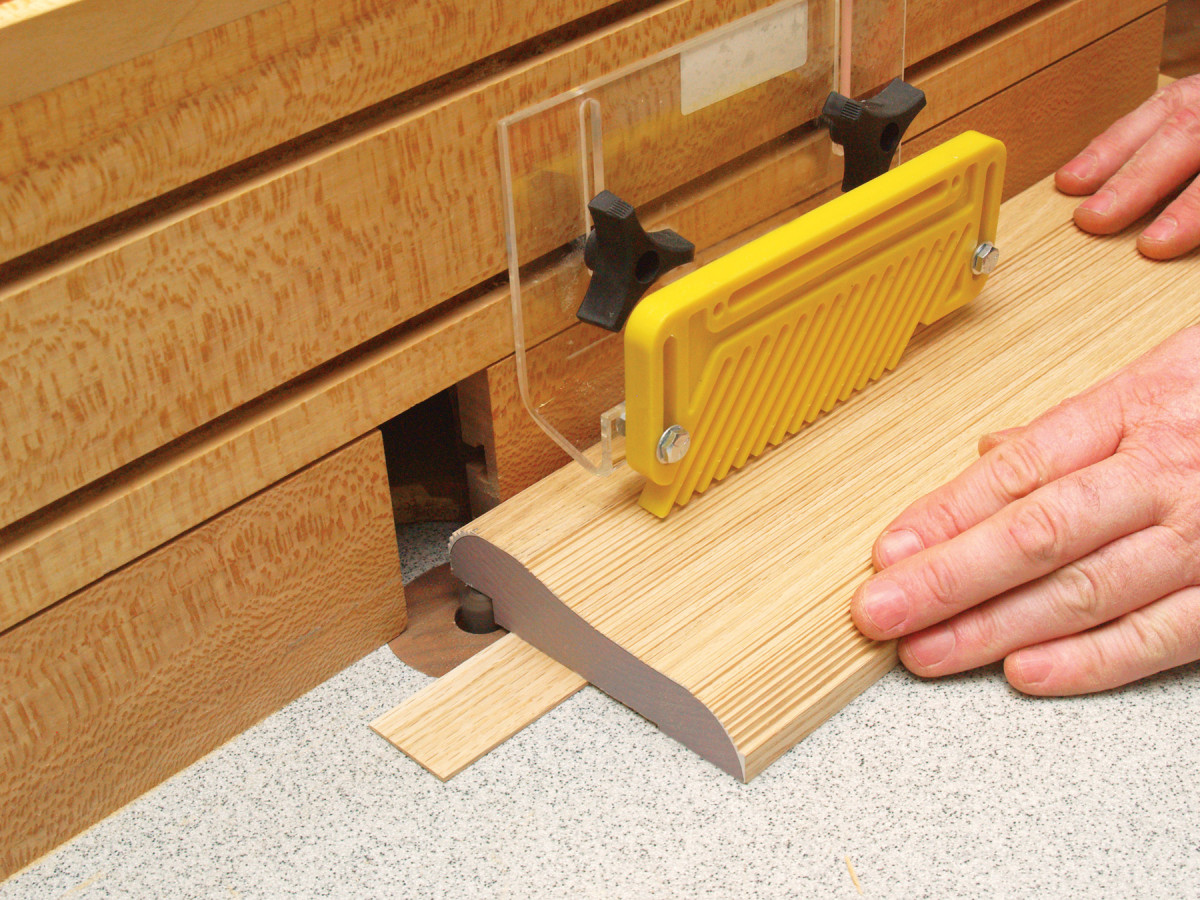
7. To clean the back radius, install a board to raise and support the front edge.
Use the router table to clean up the roughsawn radius on the back edge of the blank (Photo 7). Install the 1″ radius roundover bit and set the fence flush with the bearing. Then clamp a straight flat piece of scrap lumber to the router table to support the blank. The support piece must be parallel to the fence and the bottom of the blank must rest at 90° to the fence. Move the support toward or away from the fence to adjust the setting—you may also have to run the support through the planer to reduce its thickness.
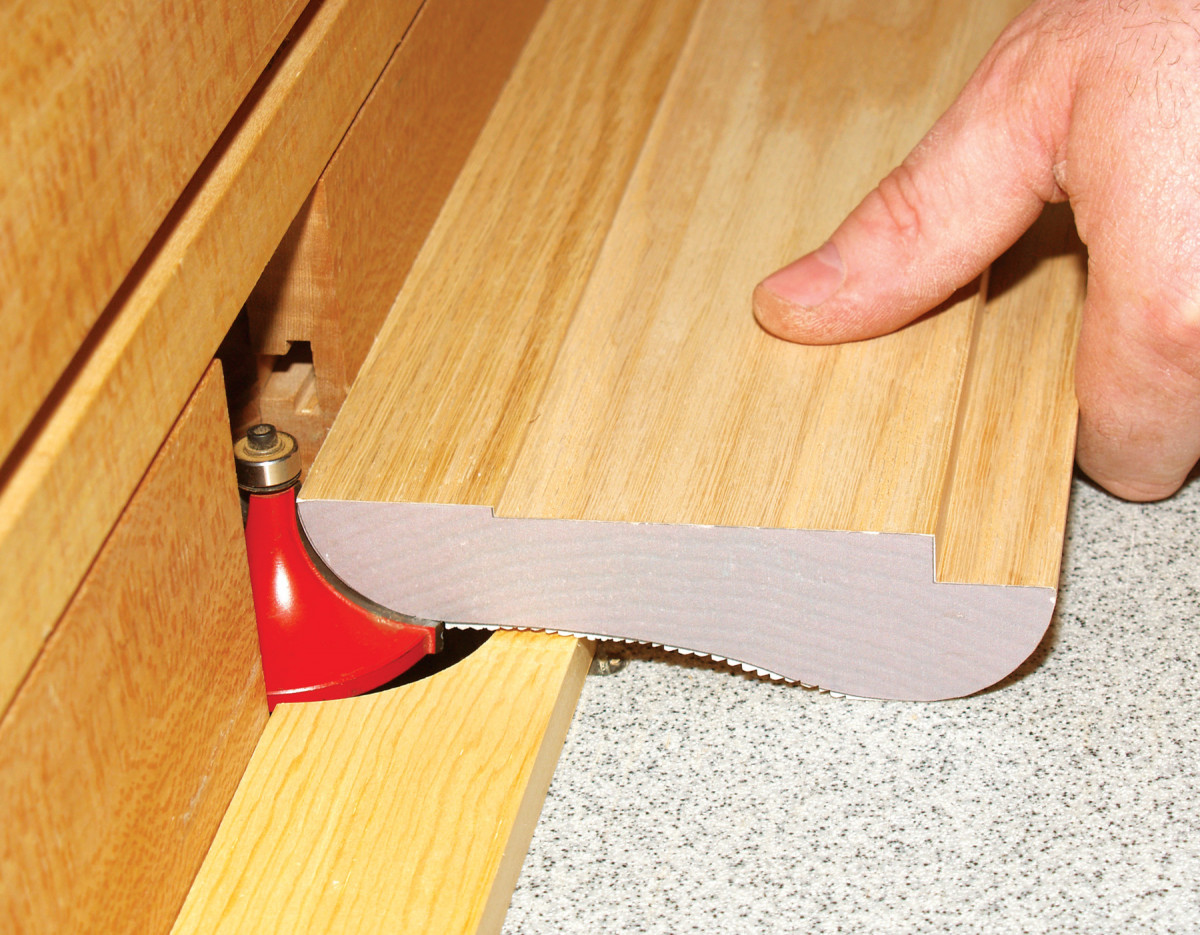
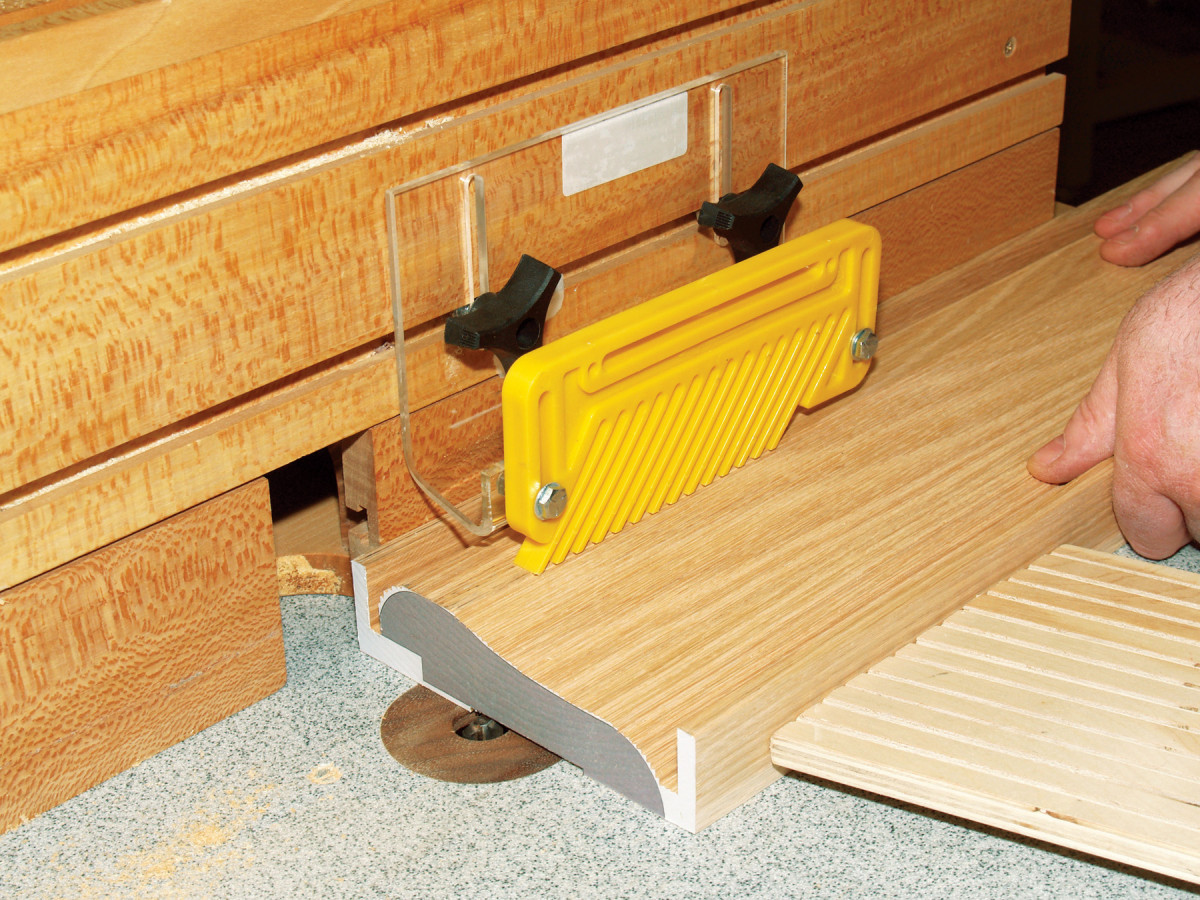
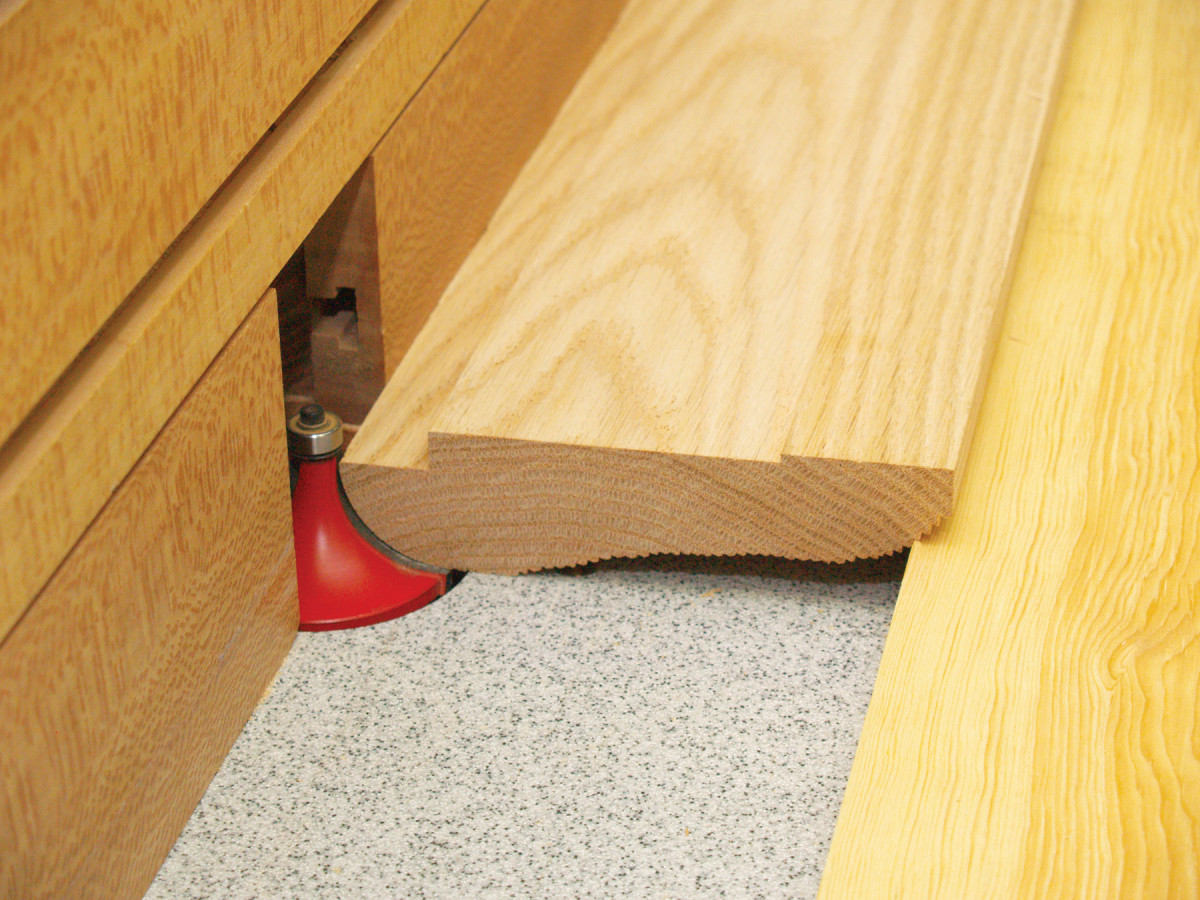
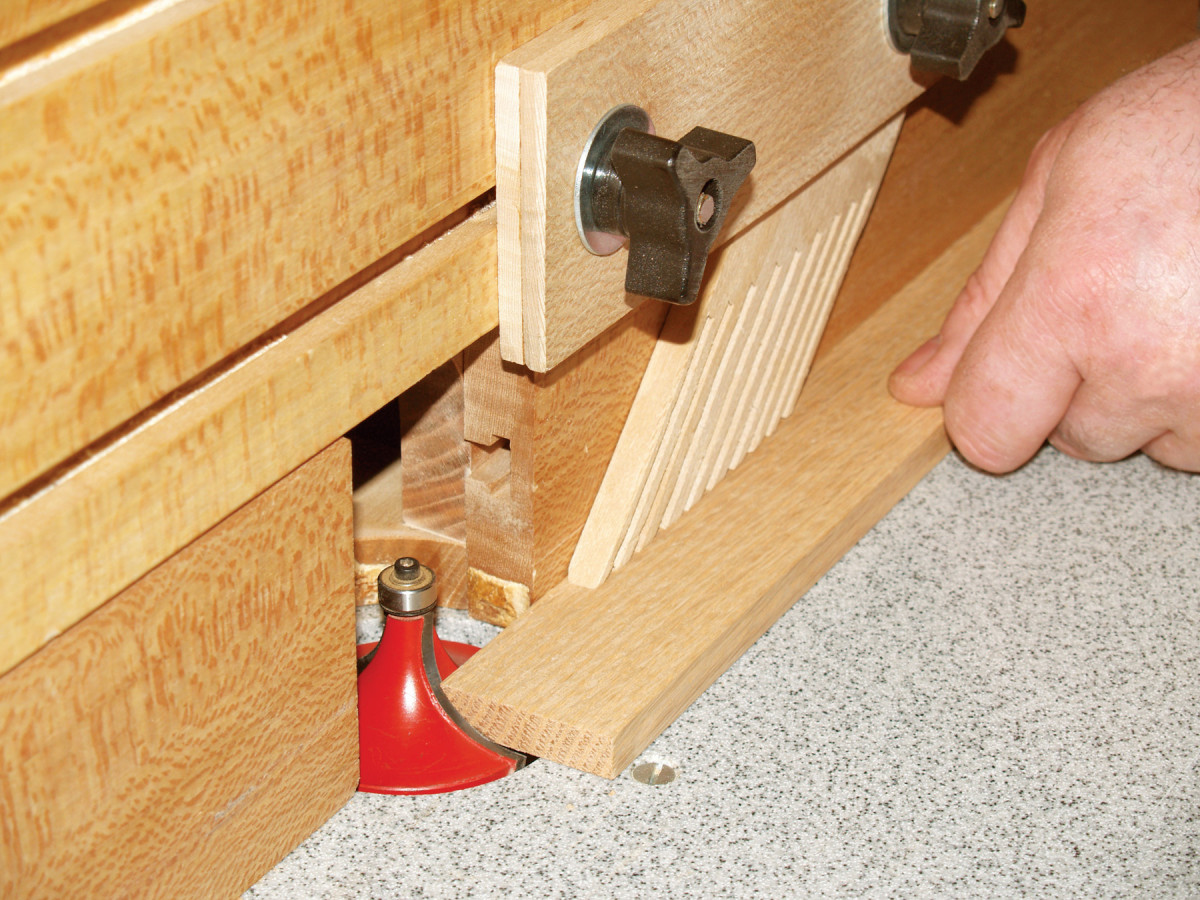
8. To clean the front radius, install a support board against the fence.
Install a thin, narrow support to clean the radius on the blank’s front edge (Photo 8). This support has a cutout for the bit, so that it can be positioned against the fence. Adjust the support’s width and thickness until the blank’s bottom face rests at 90° to the fence. Use duct tape to affix this support to the router table—taper the last few inches of the support’s top face at both ends (or cut shallow rabbets in it), so the tape doesn’t interfere with the blank.
Shape the small moldings
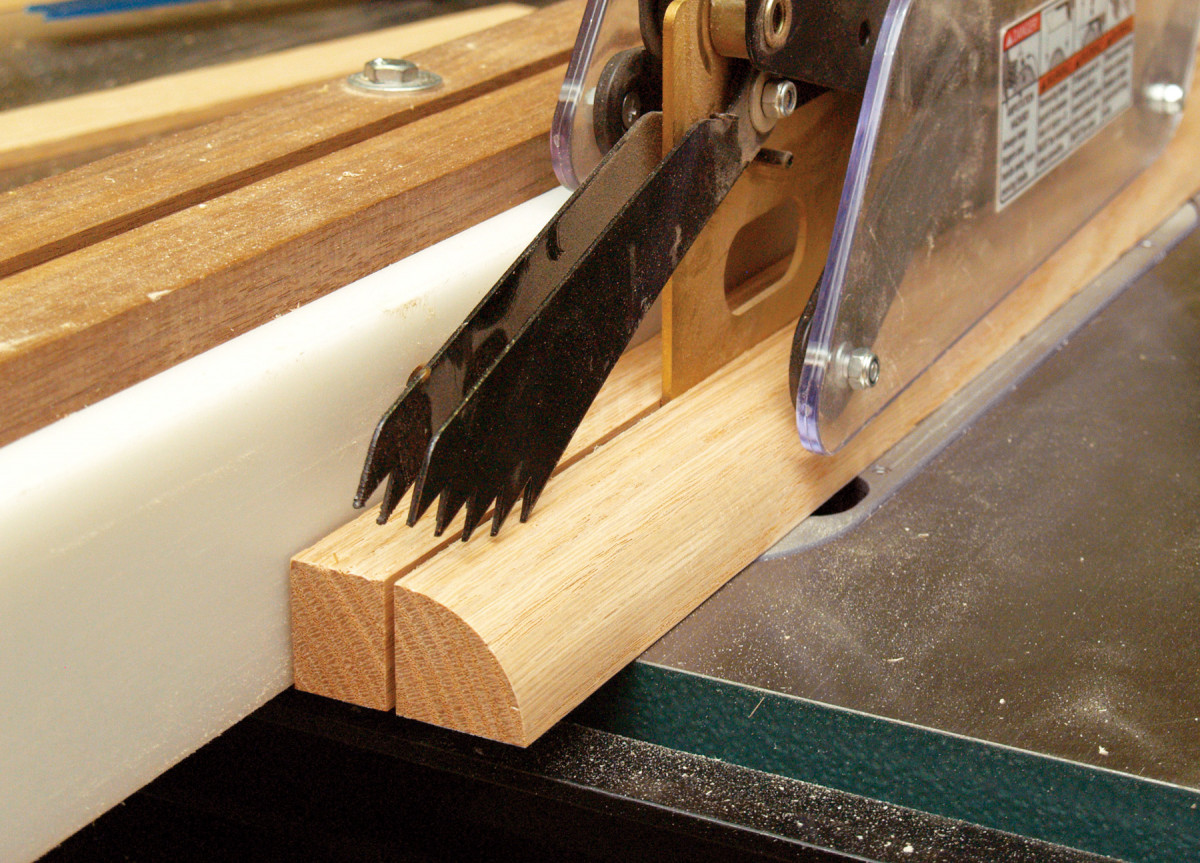
9. Cut the quarter-round molding from a wide blank that has been rounded over.
The rail’s second component is a simple 1″ square quarter-round molding. Mill the profile on a wide extra-long blank and then rip it on the tablesaw (Photo 9). Use the 1″ roundover bit to create the rounded profile—complete the cut in several passes, as this large bit removes a surprising amount of stock. When you rip the molding from the blank, the square edge goes against the tablesaw’s fence—the molding is the offcut.
10. Use the blank for the cap molding as a temporary stop to align the quarter-round molding and the top molding for gluing.
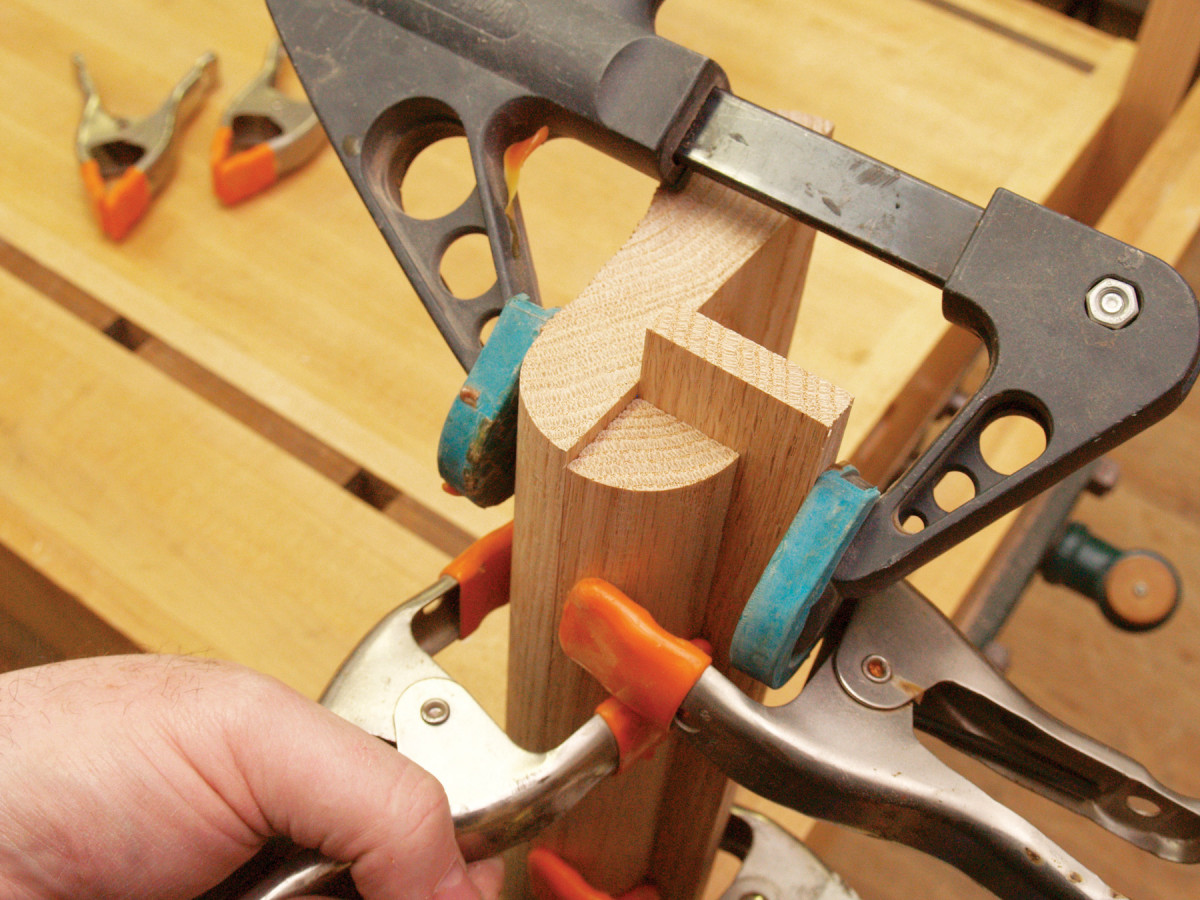
Mill an extra-long blank for the cap molding (the rail’s third component). Use this blank as a stop when you glue the quarter-round molding to the top molding (Photo 10).
Dry-clamp the top and quarter-round moldings to make sure their curved front edges align properly—adjust the stop if necessary. Then apply glue to the face of the quarter-round molding and use spring clamps to hold it in place against the top molding. As soon as these two sections are satisfactorily clamped, remove the stop, so it doesn’t get glued on unintentionally.
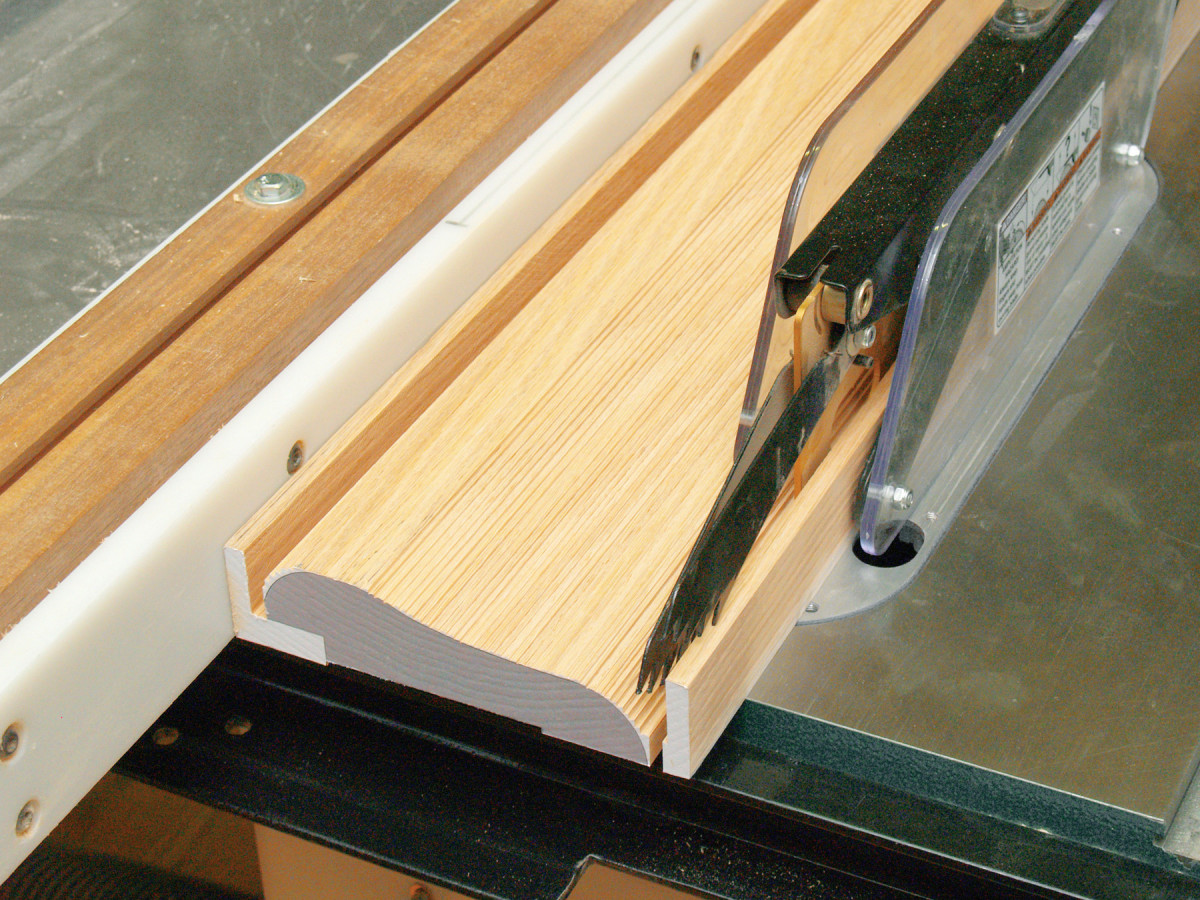
11. Create the cap molding’s profile by using a portion of the roundover bit. Lower the bit slightly below the table and position the fence in front of the bearing.
Use the 1″ roundover bit to create the cap molding’s profile (Photo 11). This profile is a small arc of the bit’s full radius, so it requires setting the bit slightly below the table and setting the fence slightly in front of the bit’s bearing. This setup will require a little trial and error, so use a test piece that’s identical in size to the cap molding blank. This thin blank is susceptible to chatter, so make light cuts and use several passes to complete the profile. Glue on the cap molding to complete the bar rail molding.

12. Complete the molding by smoothing the contoured surface with a card scraper or sandpaper wrapped around a can, plastic pipe or mailing tube.
The last step is to smooth the molding’s roughsawn contoured surface (Photo 12). This can be done with concave- and convex-shaped card scrapers or with sandpaper wrapped around a can, plastic pipe, mailing tube or dowel that fits the contours. It’s a good idea to leave this process until the end, so the tablesawn profiles and routed profiles can be worked to blend seamlessly.
John English teaches joinery at the Black Hills School of Woodworking in South Dakota. He’s the author of The Woodworker’s Guide to Sharpening and How to Choose and Use Bench Planes and Scrapers.
Here are some supplies and tools we find essential in our everyday work around the shop. We may receive a commission from sales referred by our links; however, we have carefully selected these products for their usefulness and quality.