We may receive a commission when you use our affiliate links. However, this does not impact our recommendations.
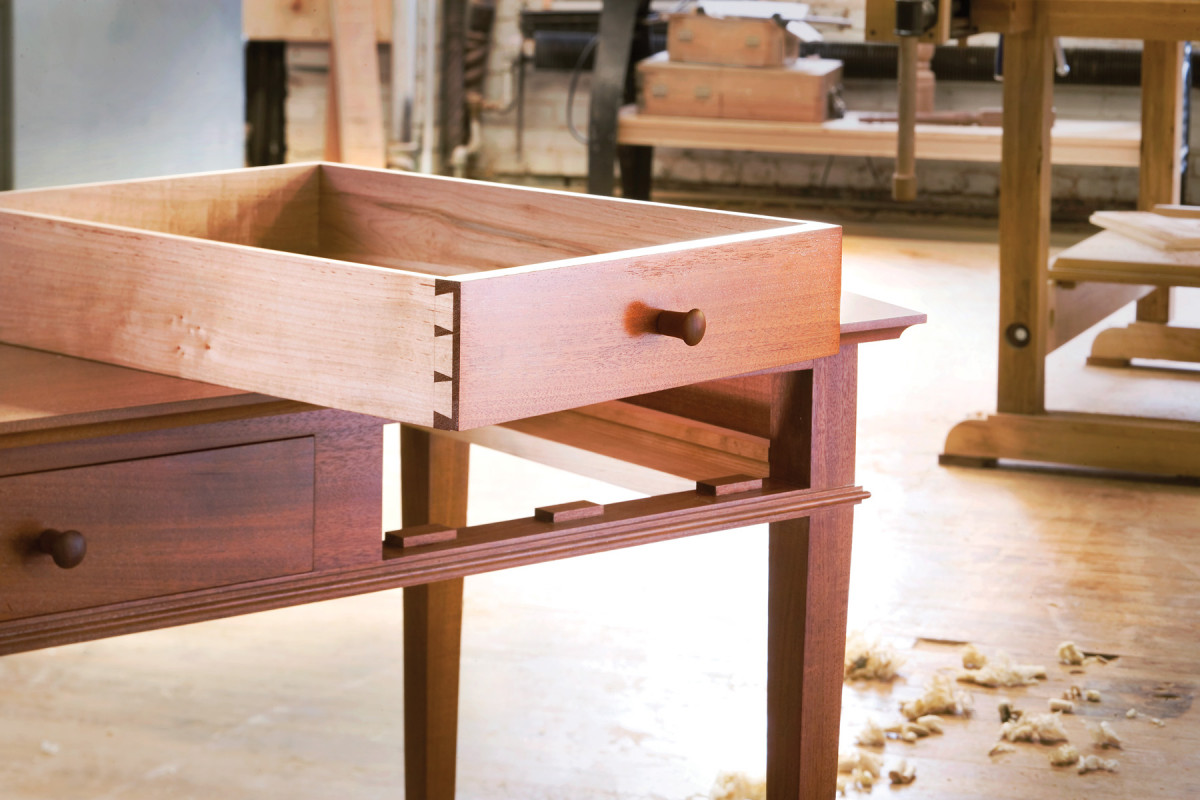
Smarter than your average drawer. The features that set this type of drawer apart from the rest of the pack include thin sides with slips to support the bottom, and guides and stop blocks to control movement.
Fine furniture calls for an elegant drawer. A master cabinetmaker shares his approach to design and fitting.
There are just a few things my partner at Philadelphia Furniture Workshops, Alan Turner, and I don’t see eye-to-eye on. But how to make a good drawer isn’t one of them. When building furniture, we probably spend as much time making the drawers as we do making the piece itself. But this is an aspect of furniture-making many woodworkers don’t devote enough attention to. In this article, I’ll explain and illustrate how I built a pair of drawers for a small writing desk.
Drawers bestow even the finest hand-crafted furniture with a utilitarian character by arranging, storing and providing access to objects. Yet it’s important that their number, size and placement contribute to the purpose and appearance of a piece, not detract from it.
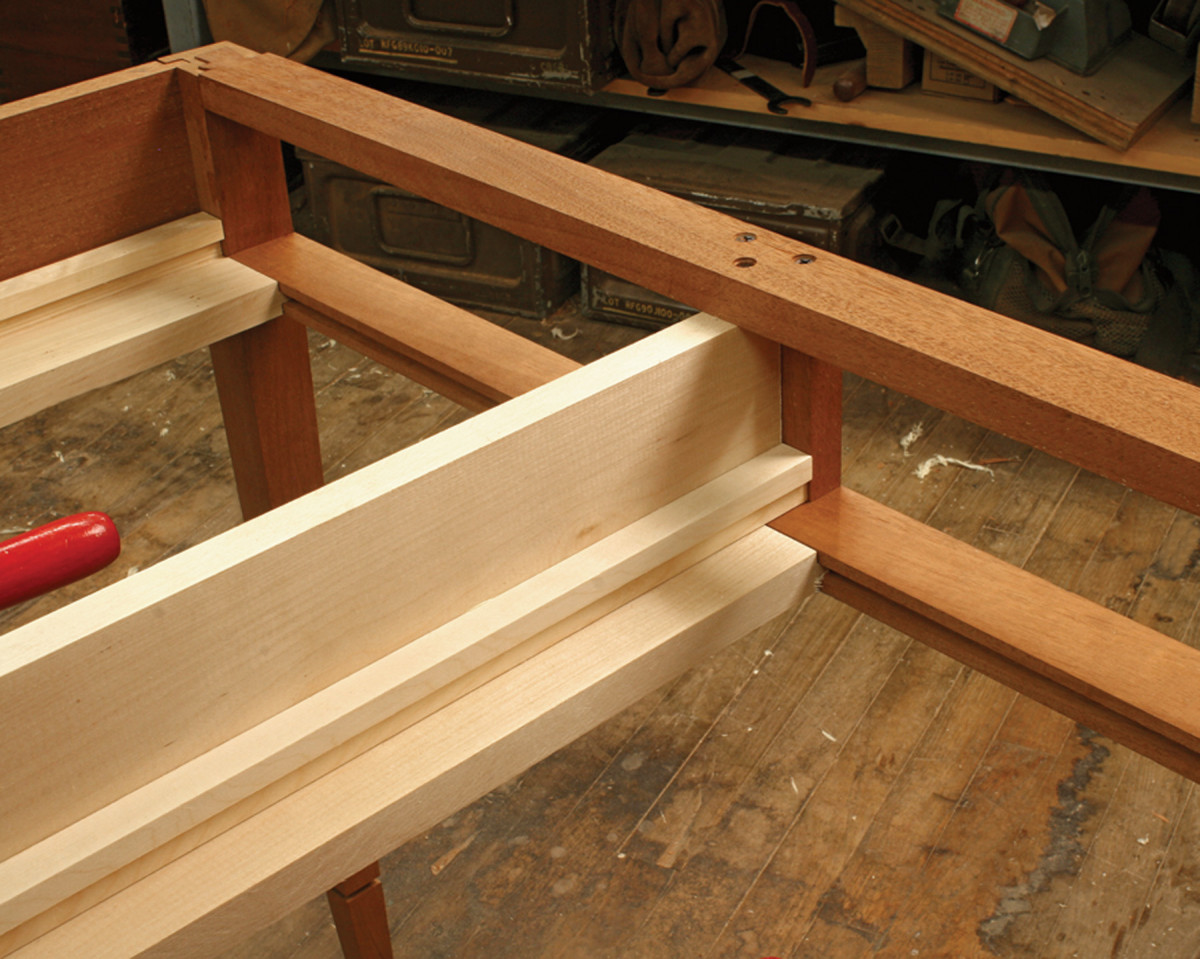
Details make the difference. The drawers ride on the rails of the web frame, and the guides restrain movement from side to side.
Drawers are expected to operate easily, without sticking or rattling around. Drawer bottoms shouldn’t sag or be left rough-sawn, and joints shouldn’t be sloppy. Drawers shouldn’t be an afterthought, disappointing the viewer and diminishing the experience.
When open, a drawer should reveal craftsmanship and quality consistent with the rest of the piece. You wouldn’t go to the trouble of reproducing a Philadelphia highboy, then fit its drawers with metal slides.
Features of a First-class Drawer
No matter what type of drawers you build, there are several essentials to good drawer making:
- Good design. Drawers should be consistent with the piece being built.
- Good material. Use the best that can be obtained; whether it’s solid or plywood.
- Careful measurements. Your measurements must be exact; measure carefully, then double-check the figures.
- Good, sound techniques. Basic skills on machines and with hand tools will produce crisp, clean work.
- Patience. Take it easy; making and fitting a drawer will take time and may test your patience.
These drawers are supported by and ride upon a web frame consisting of two latitudinal rails (front and rear) and three longitudinal rails (two side, one center). Drawer guides were attached to the web to track the drawers into the openings at the front of the desk. When initially installed, each guide intrudes slightly into the drawer opening by 1⁄16“. Later, the guides are carefully planed to allow the drawers easy and smooth travel.
The height of this desk is 29″ below the top. I allowed 24-1⁄2” leg clearance, giving me 4-1⁄2” for top and bottom rails, and my drawers. The combined thickness of the rails is 1-1⁄2“, so I had 3″ for the drawers. That is a good height for most objects stored in a typical desk. These drawers will be almost 14″ wide and 18” deep, which is also a good size. A drawer that is deeper than it is wide will operate easily without racking or sticking.
Selecting Material
For the drawer fronts select clean, well-behaved material – something mild and easy to plane. For this desk, I selected a single piece of mahogany, long enough for both drawer fronts and the center dividing strip between the drawers, then milled it to 3⁄4” thickness.
For the drawer sides carefully choose your stock. Quartersawn stock is ideal; it’s stable, won’t twist or warp, and is easy to plane. I carefully went through a stack of maple boards, and selected the ones with the cleanest, straightest grain. Maple is a tight-grained hard-wearing wood, ideal for drawer sides. Mahogany or oak are other good choices.
Many woodworkers make the mistake of using material that is too thick, which produces heavy, clunky drawers. This is a small desk and the drawers will hold small, lightweight objects and supplies, so milling the sides to thin dimensions maintained the delicate nature and scale of the piece. You should proportion your drawer stock to the piece. For instance, drawer stock for an 18th-century spice box or a contemporary jewelry box might be as thin as 1⁄8“.
Hardwood isn’t usually commercially available in less than 1″ thickness, so I re-saw my stock. This often means interior surfaces of the wood with different moisture content than the exterior will be exposed, which can cause some movement. If you resaw, anticipate some slight twisting or cupping, so mill extra stock and select the best for your drawers.
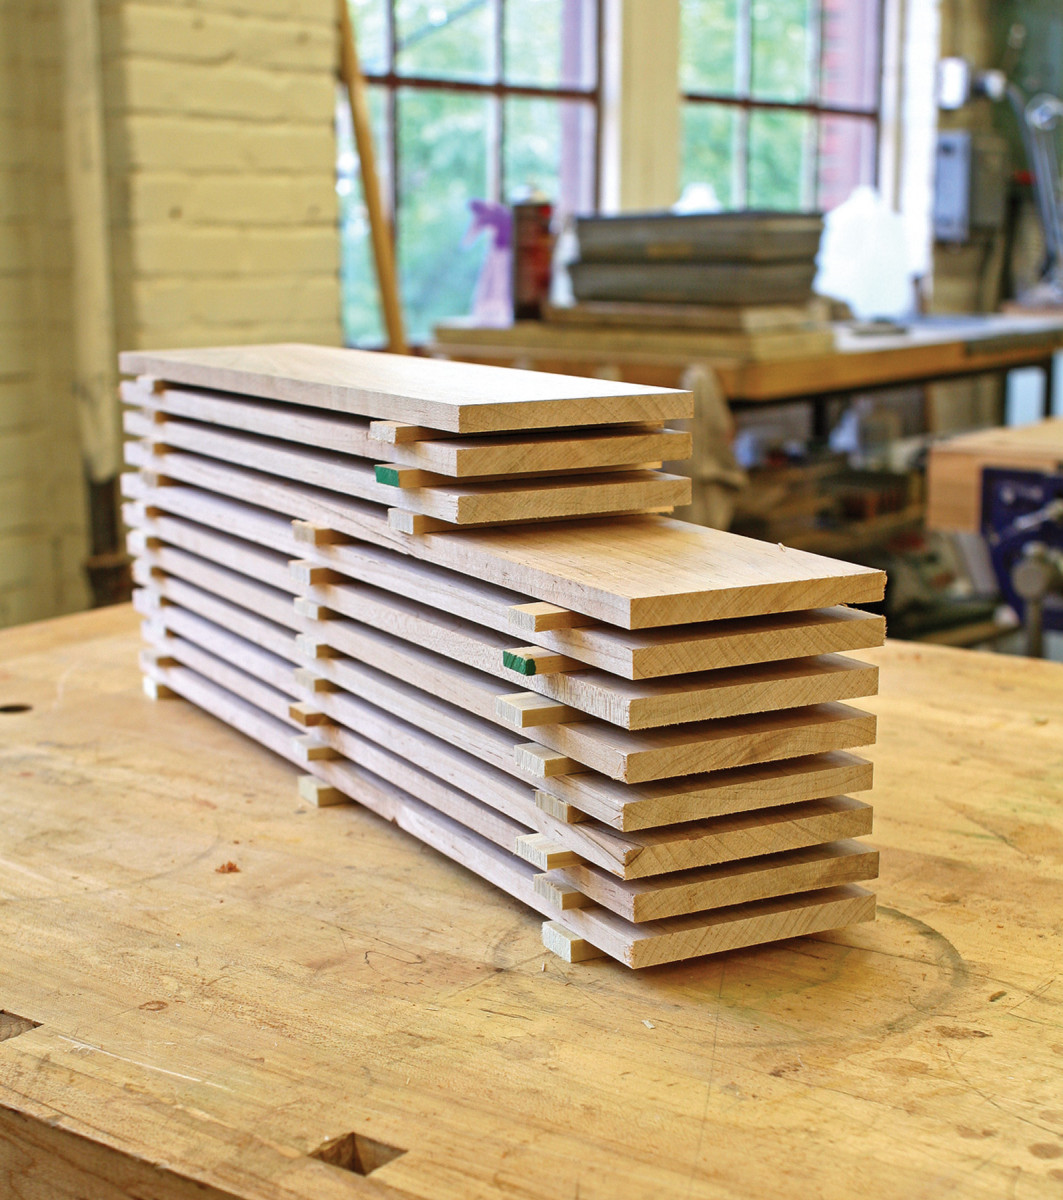
Let it rest. If you resaw thicker boards for drawer material, sticker them and let them sit for several days to acclimate before milling the stock to final dimensions.
Milling and Joining the Parts
After a preliminary milling, sticker the stock while you work on the rest of the project to help it acclimate to the shop environment. Then, as you approach your drawer-making, take the boards down to their finished thickness.
Rip the sides 1⁄32” narrower than the opening and leave them about 1″ longer than necessary in case you need to re-cut the dovetails. And, if possible, orient the grain direction to make it easier to plane and fit the completed drawer later.
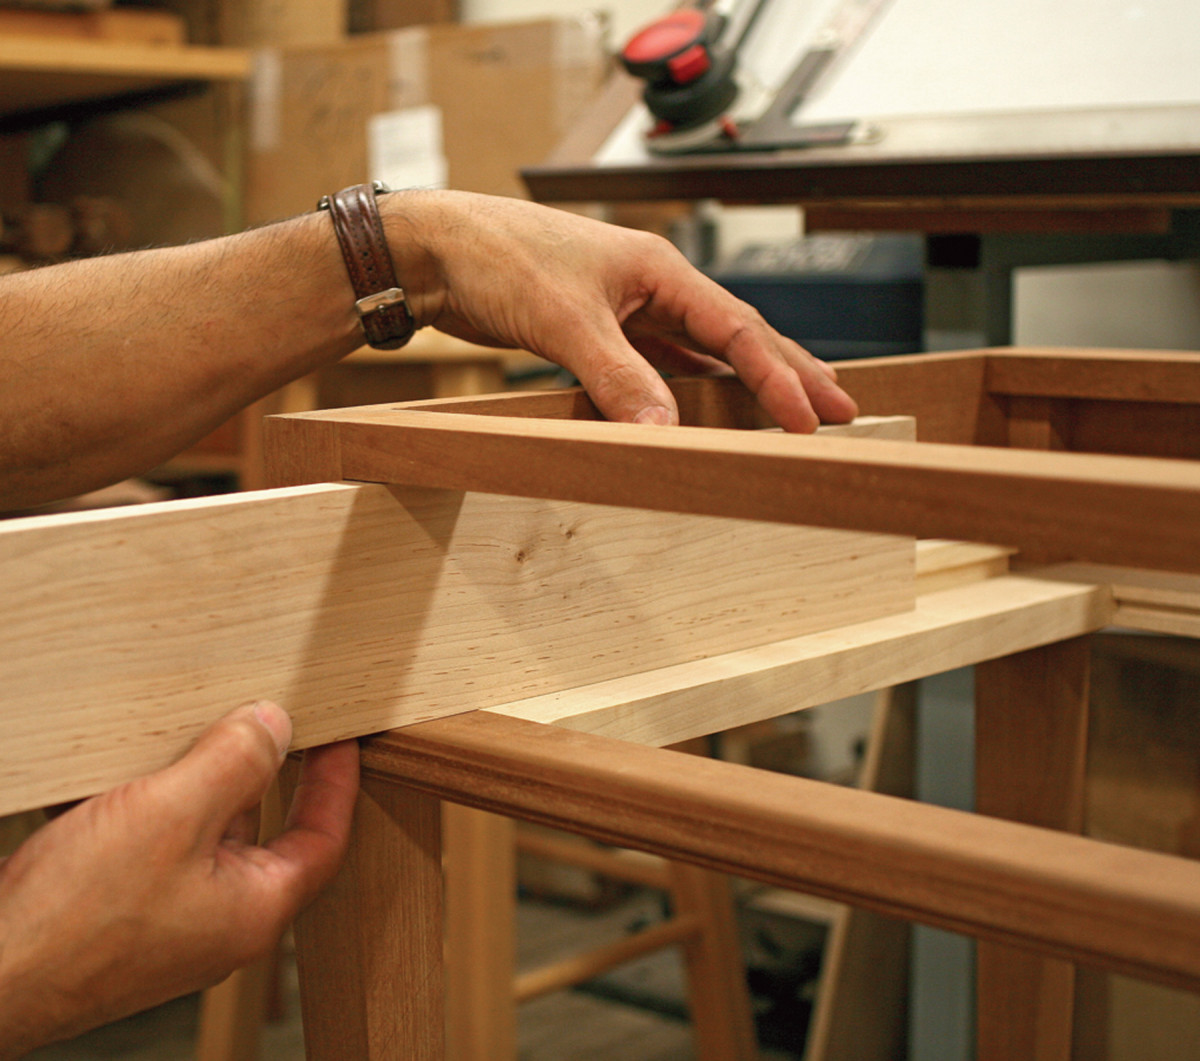
A fitting start. Fitting the width of the drawer side to the height of the opening before building the drawer gives more control of the process.
Drawer fronts should be ripped and cut to fit precisely into their openings, with barely a hairline gap all around. You should try for a tight, close fit at this stage. When fitting the completed drawer boxes, the drawer front can always be planed to achieve the desired fit and appearance.
Dovetails are regarded as the strongest and most attractive way to join two perpendicular pieces of wood with the grain running the same direction. I like to use half-blind dovetails to join the drawer sides to the fronts and through-dovetails for the side-to-back joints. They have a distinctive and attractive appearance. They also provide the added benefit of squaring the drawer during glue-up, often eliminating the need for clamps.
To lay out your dovetails, follow the 1:8 rule or just lay them out at 10º, with half tails at each end and two full tails centered on the remaining space. I first make a sheet-metal template that gives me a clear pattern (that can be reused) to mark onto the drawer sides.
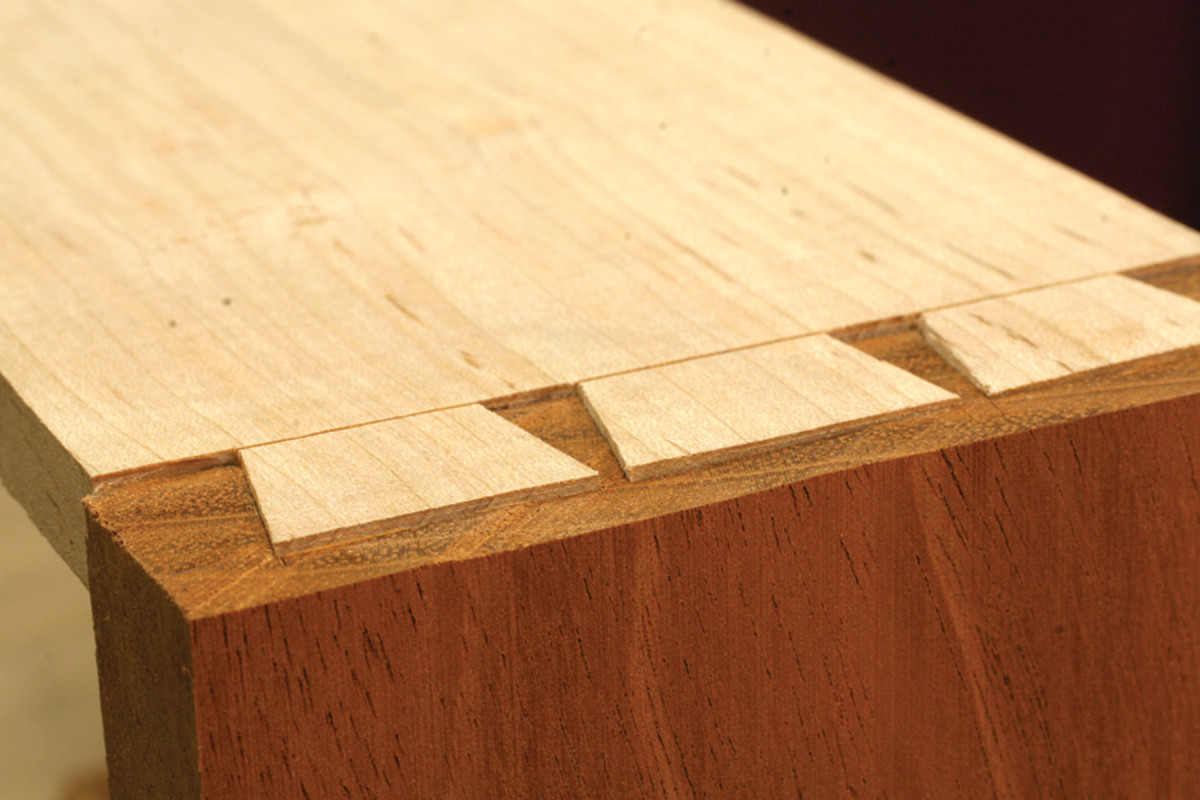
Proud sides. Cutting the dovetails to leave the sides extended from the drawer front simplifies fitting and maintains the smallest possible gap between the drawer and carcase.
After marking the tails on the drawer sides, scribe the dovetail baseline onto the ends of the drawer front about 1⁄4” from the face. This amount makes for a good appearance and a strong joint. On the interior surface of the drawer front, scribe a line about 1⁄32” less than the thickness of the drawer side. That way, when the drawer box is assembled, the drawer side will sit proud of the drawer front, which allows the side to be planed flush with the end of the drawer face, without altering the size of the carefully fitted drawer front. This also makes glue-up easier because you won’t have to worry about damaging the delicate pins.
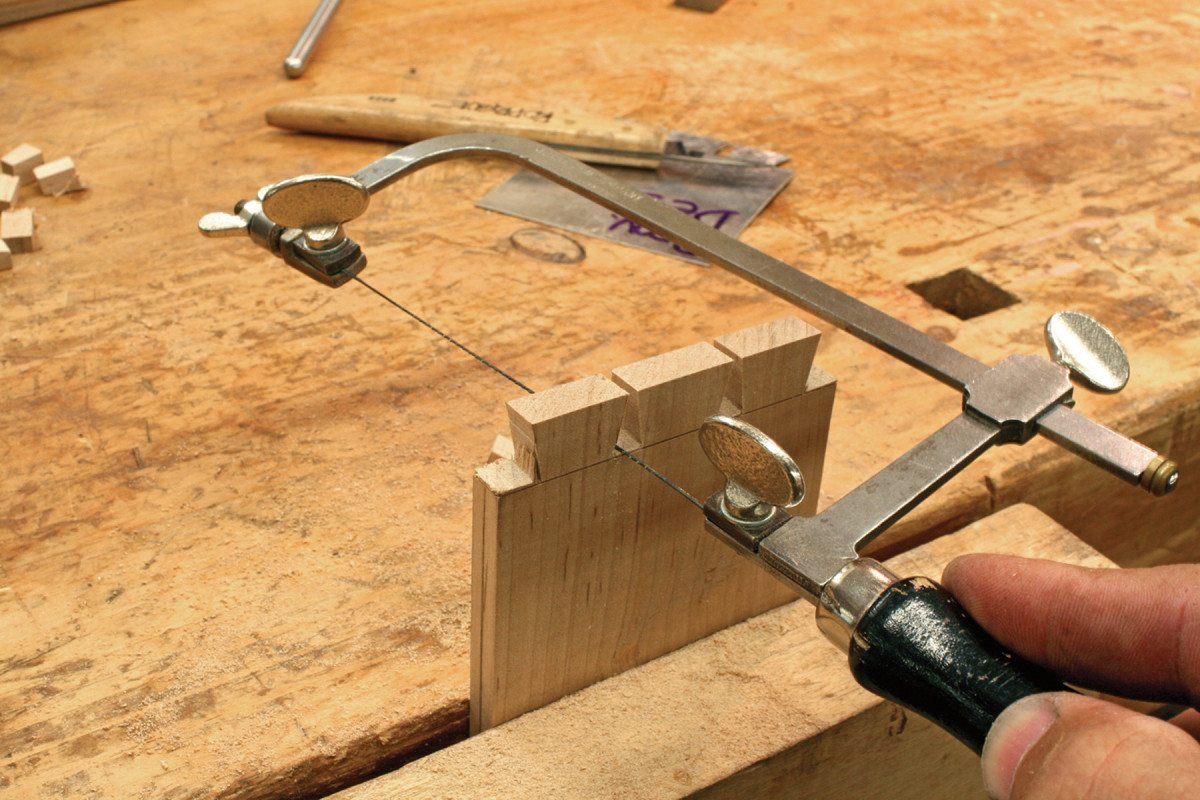
Wasting away. With thin drawer stock a jeweler’s saw or coping saw will remove the waste between tails quickly and without the risk of damaging the work by chopping between the tails with a chisel.
When cutting your tails first, you can cut directly to the line, remove the waste at the baseline and not fiddle with lots of tedious clean up. If the saw drifts a little, that’s OK – as long as the kerf is narrow, clean and straight. Any deviation from the scribed outline can be transferred over to the pin board. Remember: Half-blind dovetails are only seen from one side, so the parts can be undercut and relieved to ease the fit without compromising the appearance or strength of the joint.
Next, carefully mark the outline of the tails onto the pin board (drawer front). Cut the pins fat and pare them just shy of the line. The wide spaces between the pins will provide easy access from two angles. A partial test fit will reveal any excess material that has to be removed. I always say that folks won’t notice a small discrepancy in spacing or angle in your dovetails – they’ll only notice the gaps!
In the groove. The slot for the drawer bottom is located in the space for the lowest tail in the drawer front.
After fitting the drawer fronts to the sides and checking the dovetails for fit and appearance, cut a groove between the pins along the inside of the drawer fronts to accept the drawer bottoms. The placement of this groove is important for two reasons. First, it should be hidden when the drawer is assembled. Second, it should be situated to maximize your storage space.
Thin Sides Call for Slips
If you mill your sides to a thin dimension, you should consider using drawer slips for reinforcement and extra strength. Thin drawer sides might not be thick enough to support the drawer bottom, which is commonly held in place with a groove cut into the sides.
Drawer slips are small mouldings, placed along the interior of the drawer sides to prevent their splitting under a load or heavy use. They also add character and detail.
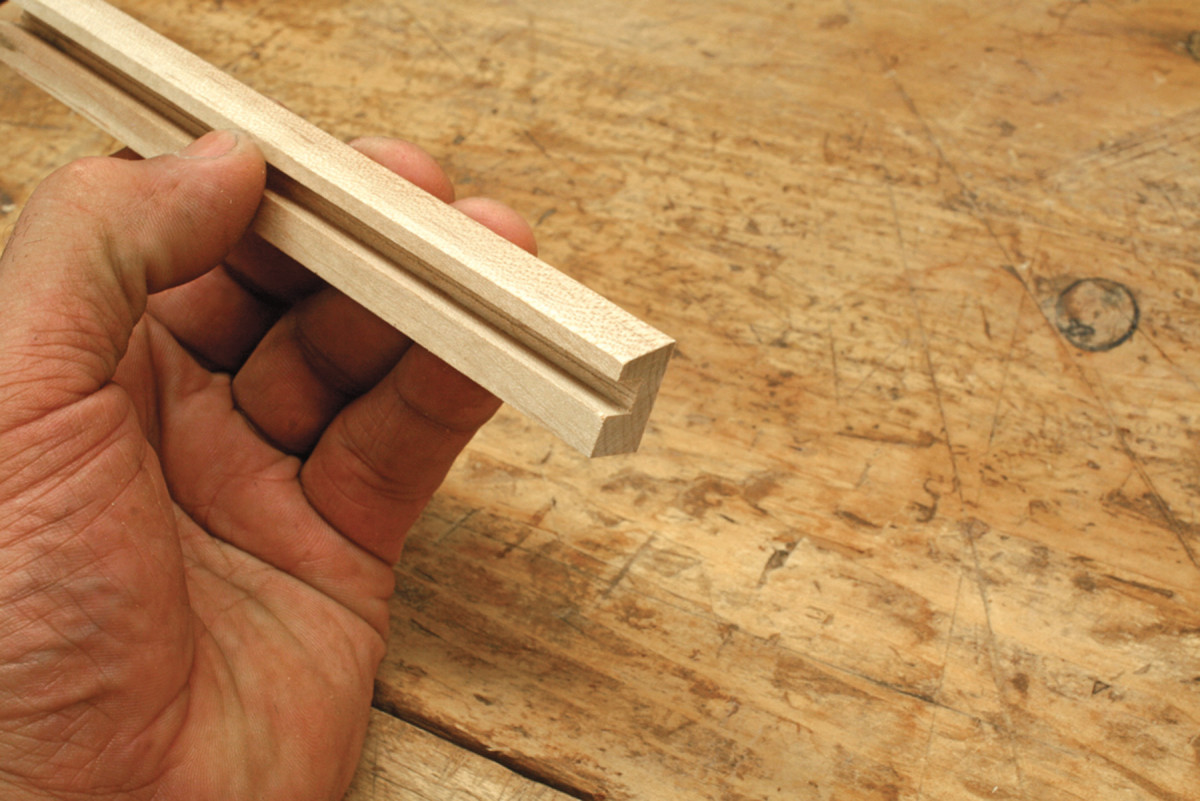
Smooth transition. The angled top of the slip bridges the corner between the sides of the drawer and the bottom.
I cut the slips on the table saw with a careful sequence of cuts that yielded the slender parts. I milled them to a profile that was adequate to support the drawer bottom, yet would only minimally intrude upon the usable space of the drawer.
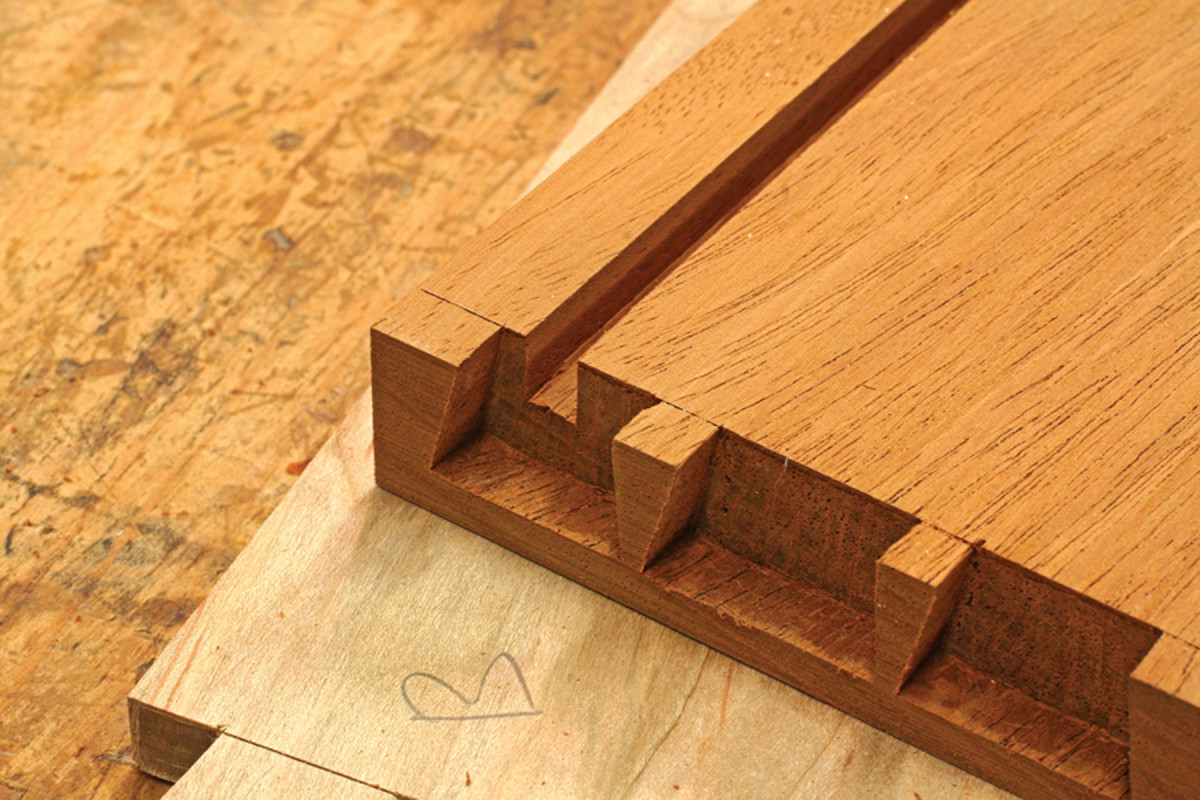
Slip sliding away. Glued in place, the slip strengthens the lower portion of the drawer bottom. The back of the drawer is narrower than the side so that the drawer bottom can be slid into place after finishing.
The sides and back of the drawer are joined with through-dovetails. These can be a little tricky because thin stock will dictate small dovetails. And if the stock is very thin, it can split when you cut the joint. However, one small advantage is they won’t be seen unless the drawer is fully withdrawn.
Before laying out the joint, measure the location of the drawer-bottom groove (from the drawer front) and cut enough material off the drawer back to allow the drawer bottom to be slipped underneath it when the drawers are assembled. Don’t forget to cut off the excess length of the drawer sides. My sides-to-front dovetails turned out good enough that I didn’t need a second chance at them.
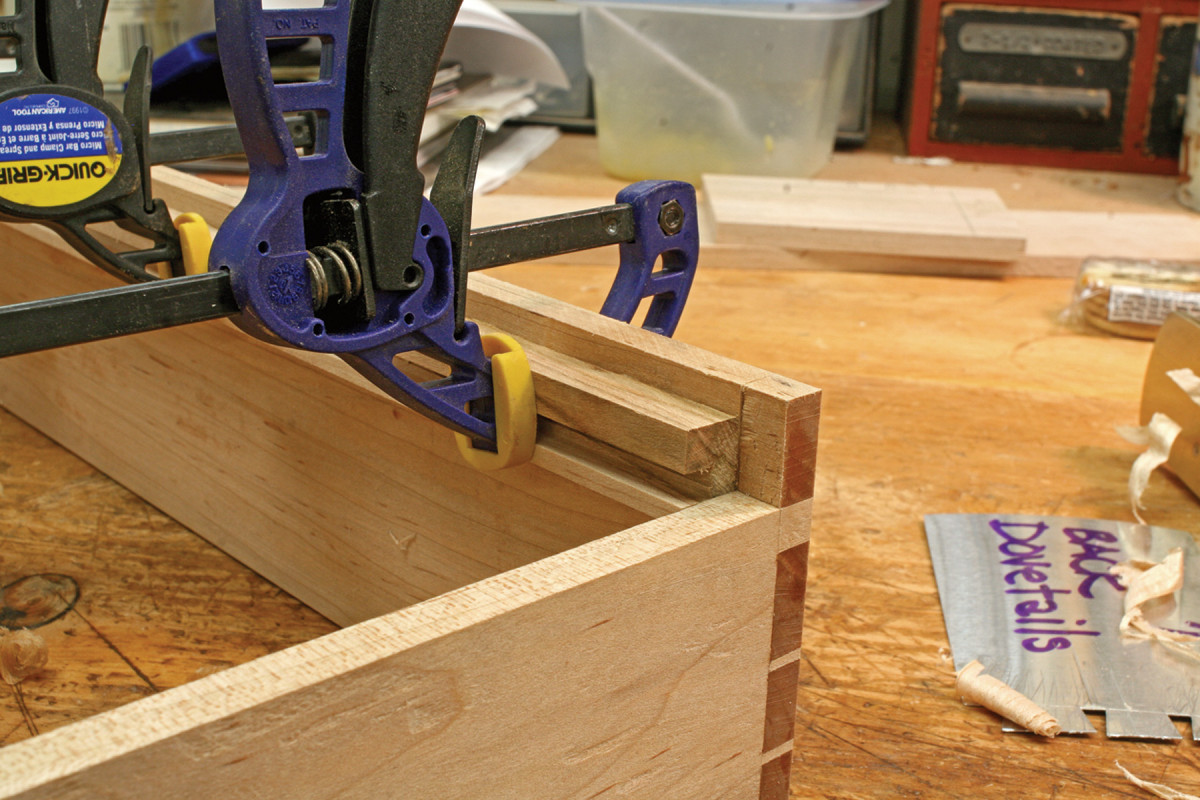
After cutting the through-dovetails for the side-to-back joints, dry-fitting the drawer boxes, checking dimensions and sanding the parts, I glued them up. If the dovetails are well executed, the drawers should come together without clamps. However, if you do need clamps, check the drawers for square. You should also check for flat by placing them on a flat surface. A twisted drawer will severely complicate the installation later.
When gluing up, keep a damp rag nearby. It’s a lot easier to remove excess glue from the inside of the drawer at glue-up than to allow it to dry and have to chisel it out later.
When the glue in the drawer boxes is dry, measure and cut the drawer slips to fit against the inside of the drawer front and back. Then align the slips with the groove on the drawer front and the bottom of the drawer back; glue and clamp them in place.
Match the groove. The rabbet in the drawer bottom matches the width of the grooves in the drawer sides and front. The extra thickness in the bottom keeps it from sagging.
When appropriate, use solid wood for the bottoms. For this desk, I cut a couple of 5⁄16“-thickness leaves from a 1”-thick piece and bookmatched them. After gluing up the panels, sand them to fair the seam and smooth the surface.
Taking the bottoms down to 5⁄16” kept them thick enough while making them lightweight, too. After cutting them to size, I rabbeted three edges. By rabbeting the edges I could slip them into a 3⁄16” groove, yet maintain their 5⁄16” thickness.
Because the drawers were narrow, I oriented the grain front-to-back, because I wasn’t concerned with any significant wood movement. This means that grain shrinkage or swelling will take place across the drawer. When making your drawer bottoms and orienting the grain, take the size of the drawer into account. Generally, you want to run the grain in the direction of the longest dimension. So, a drawer that measures 16″ deep and 24″ wide would have the grain running side to side.
Fits Like a Glove
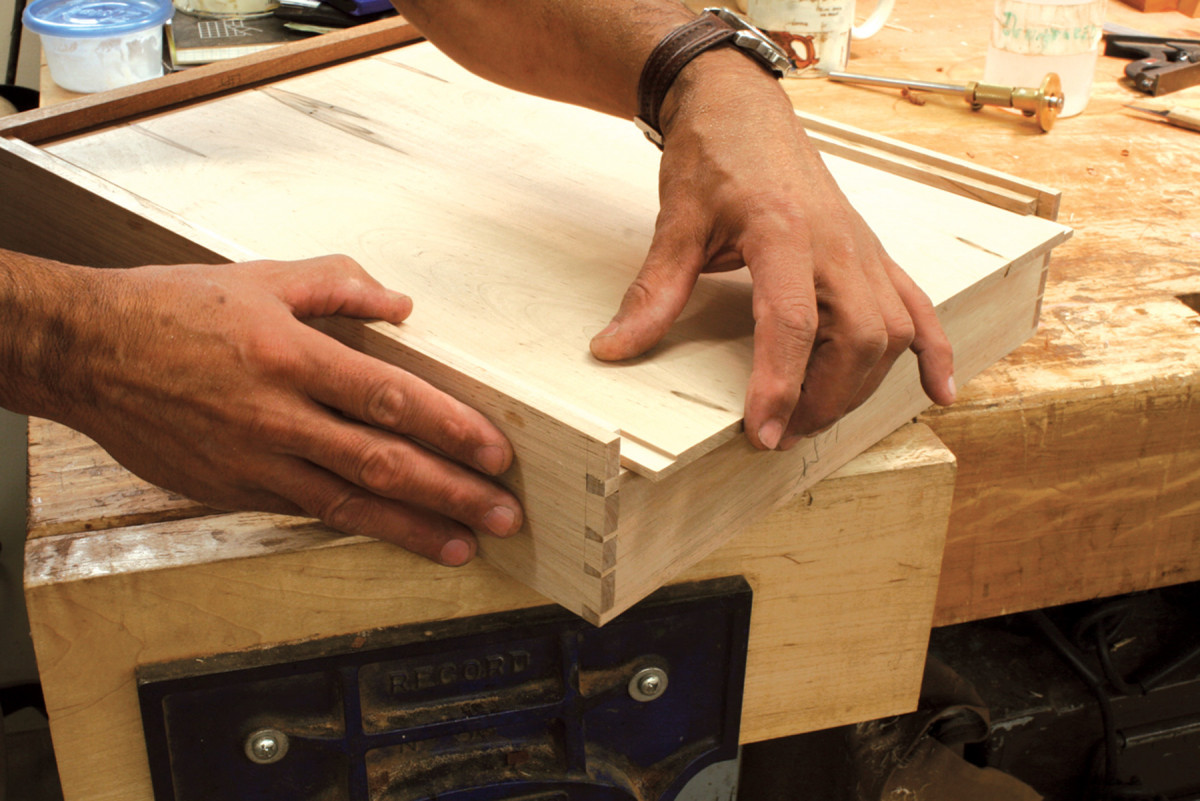
On a cabinet, I would remove the back before fitting the drawers. This provides easier access and the opportunity to “eyeball” any problems not visible from the outside. In this case, I left the top off the desk.
When the drawers are ready, plane the sides flush with the front; be careful not to reduce the size of the drawer front. I plane a little more off the back end of a drawer, making the back slightly narrower than the front. This allows the drawer to initially enter the cavity with ease and tighten up slightly as it hits home.
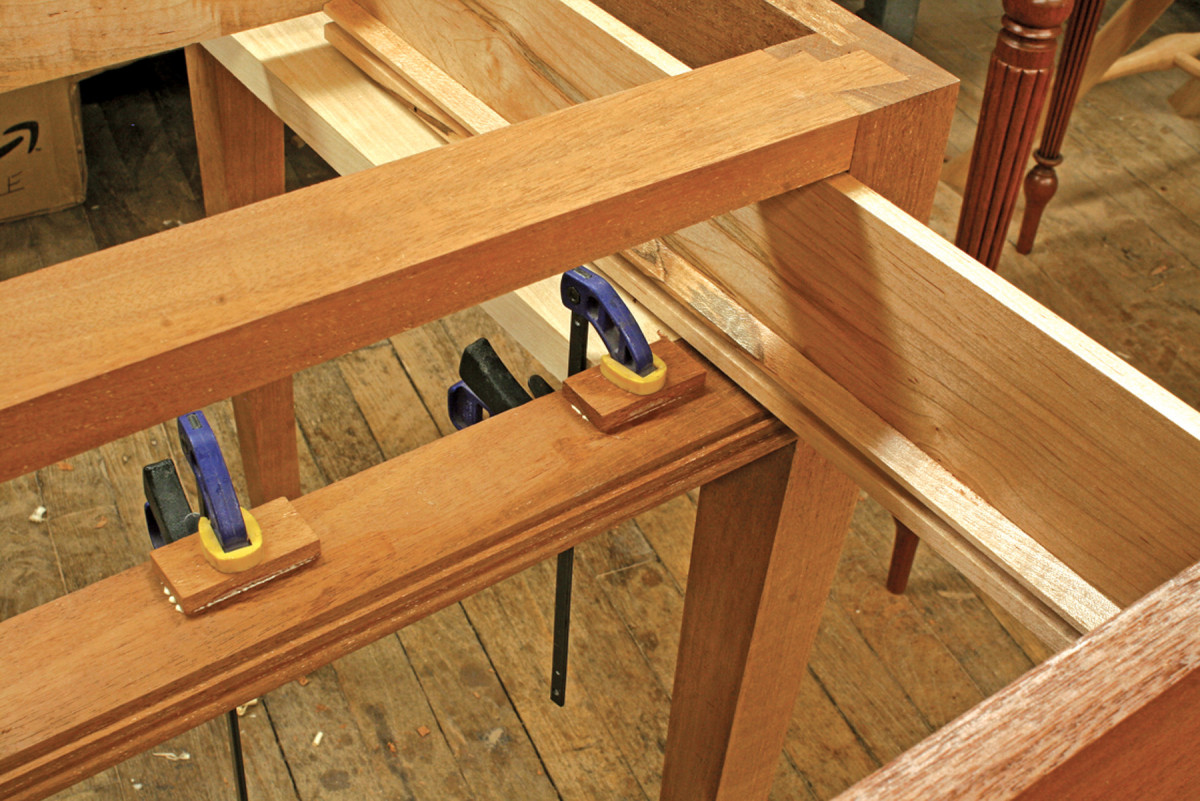
Short and sweet. The drawer guides have a rabbet on the bottom and stop short of the back. This allows them to be planed during the fitting process.
I attempted to slide the drawer into its recess. But it was still too large to clear the opening. A few careful passes with a plane over the drawer sides fixed that. However, the box still wouldn’t slide fully into the desk. With a sharp block plane, I took light shavings from the drawer guides (which were glued to the drawer web and flanked the opening) on each side. The guides are rabbeted and stop 2″ short of the back apron, so their full length can be easily trimmed with a block plane. With several light, careful strokes, the drawers were planed to a tight fit.
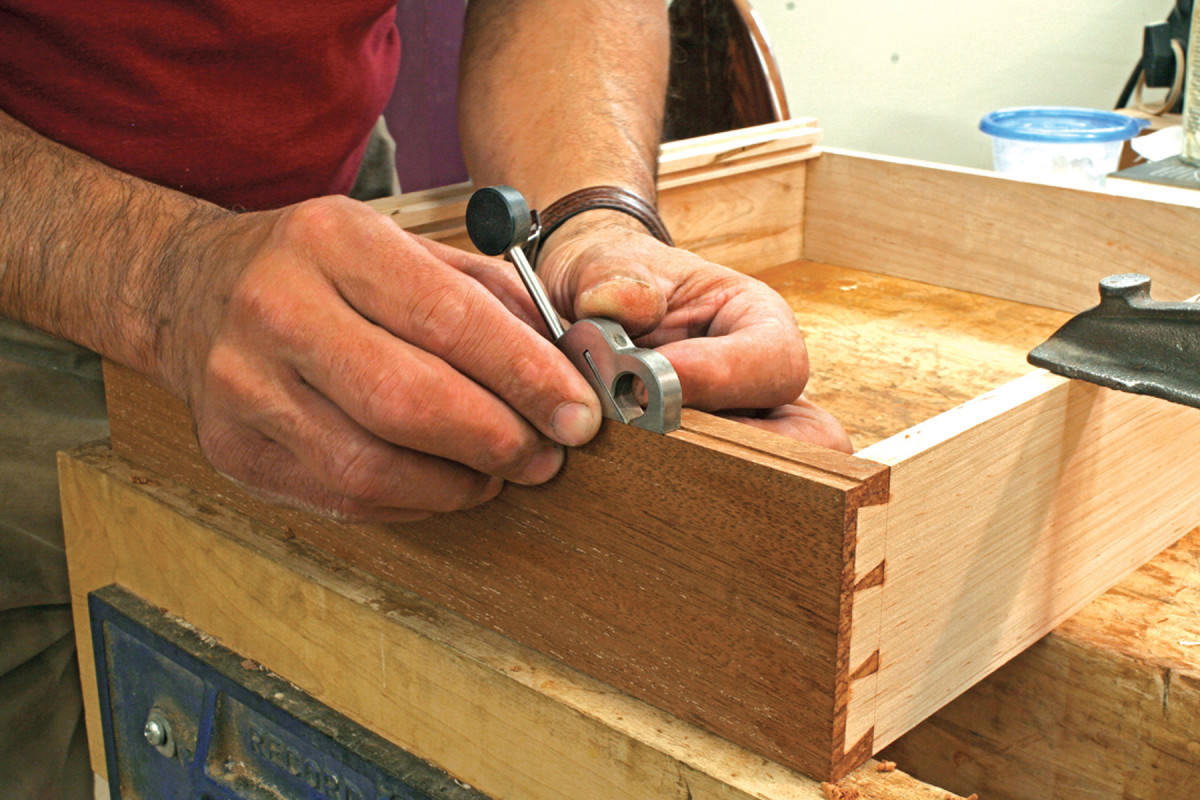
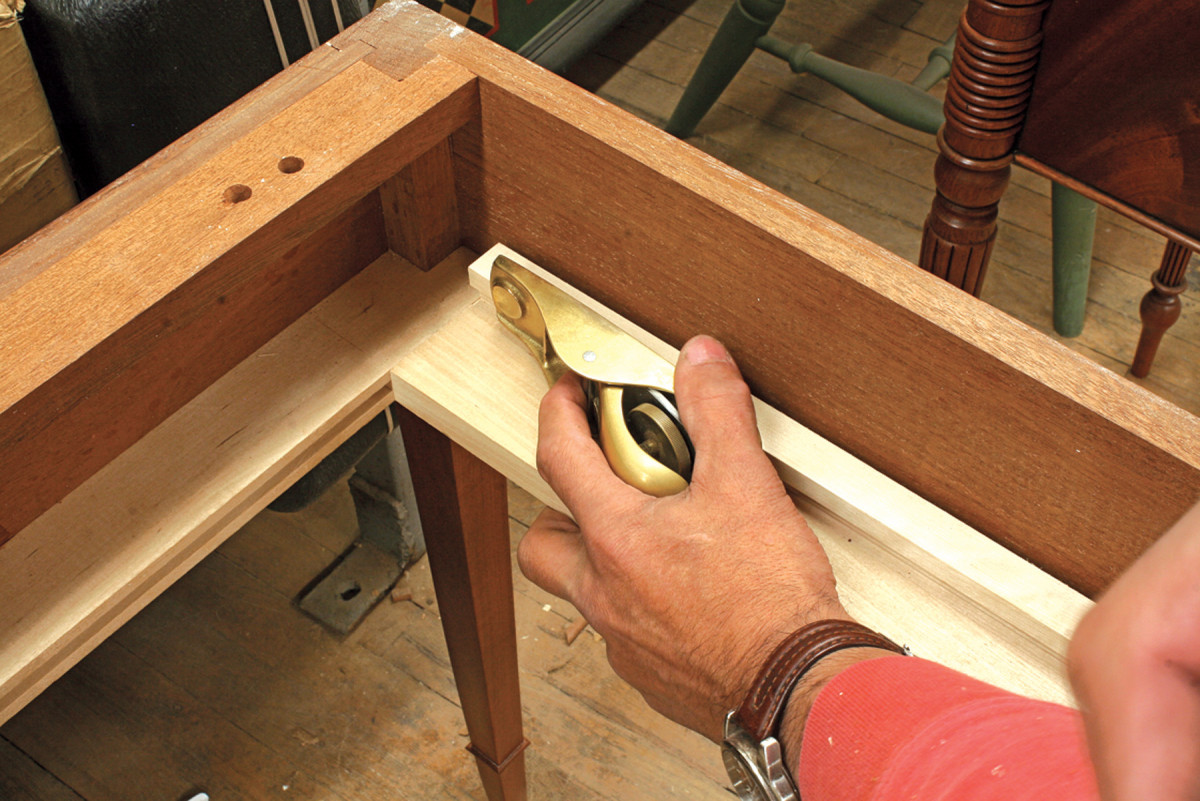
Rabbeted reveal. A small rabbet on the underside of the drawer front provides an even reveal to match the gaps at the top and sides.
Now the opening can be adjusted more precisely. By carefully planing the sides of the drawers I was able to achieve a tight 1⁄32” gap all around the drawer front. But with the drawer resting on the frame, there was no reveal/gap along the bottom. This is one of the last steps in fitting a drawer and should be performed in a slow and careful manner.
To create an even gap, I scribe a line with a marking gauge and, using a tiny rabbet plane, I cut a small rabbet along the bottom edge of the drawer front. On a larger drawer, I’d use my shoulder plane.
Once the drawers are fitted, you can apply a small amount of wax to the bottom edges of the drawer sides and the guides. When you’re satisfied with the operation of the drawers and their alignment with and to the front of the desk, you can set the drawer stops in place. These are three small blocks that are glued and clamped onto the front rail of the drawer web, just behind the drawer fronts.
Stop right there. Assembling and fitting the drawer before installing the drawer bottom allows precise placement of stops glued to the lower rail.
Some woodworkers choose to leave the drawer interiors unfinished; others finish them exactly as the rest of the piece. It’s a good idea to provide some form of protection. I recommend a light coat of shellac, lacquer or just wax. I finished these drawers with a very light coat of sprayed-on satin lacquer, rubbed out and waxed.
Here are some supplies and tools we find essential in our everyday work around the shop. We may receive a commission from sales referred by our links; however, we have carefully selected these products for their usefulness and quality.