We may receive a commission when you use our affiliate links. However, this does not impact our recommendations.
A mark of true craftsmanship, bandings are much more than just decoration.
Stop for a moment and take a good look at a piece of furniture that you admire—say, a card table from the Federal era. At first glance, you take it in as a whole: You see a curved top supported by thin, tapered legs. Then you take a closer look, and things start to get interesting.
Your eye starts to move around the table—across the apron, down a leg and back up again. Sometimes this visual path is smooth and continuous; other times, you halt at various places of interest. How about that checkerboard inlay under the apron? Did you stop there? That’s the power of banding.
Banding vs. stringing
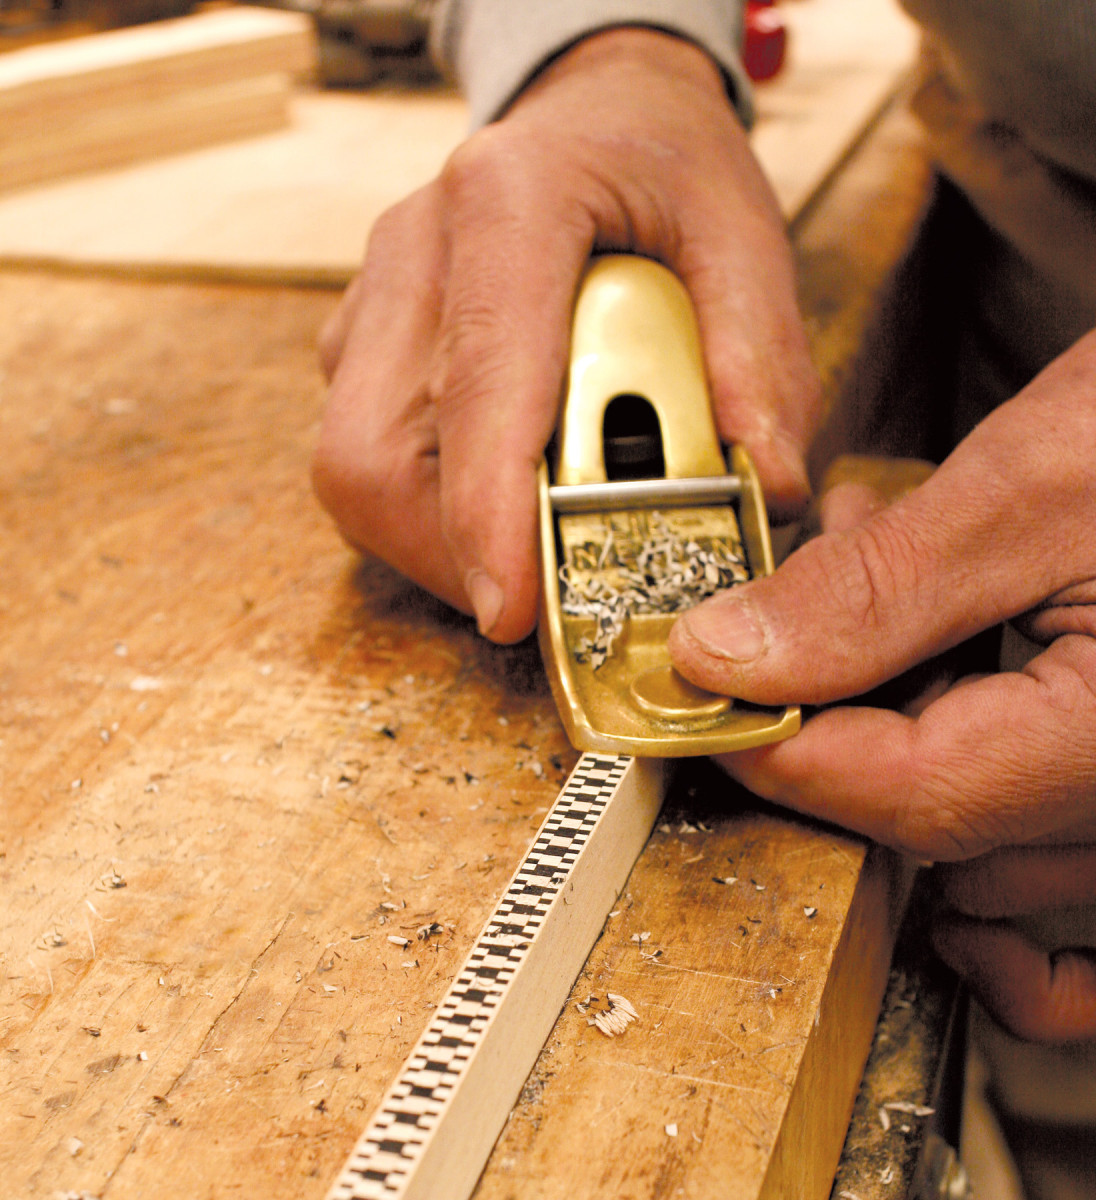
1. Banding and stringing serve different purposes. Stringing is linear; it moves your eye smoothly around a piece of furniture. A banding consists of geometric patterns; it forces you to pause.
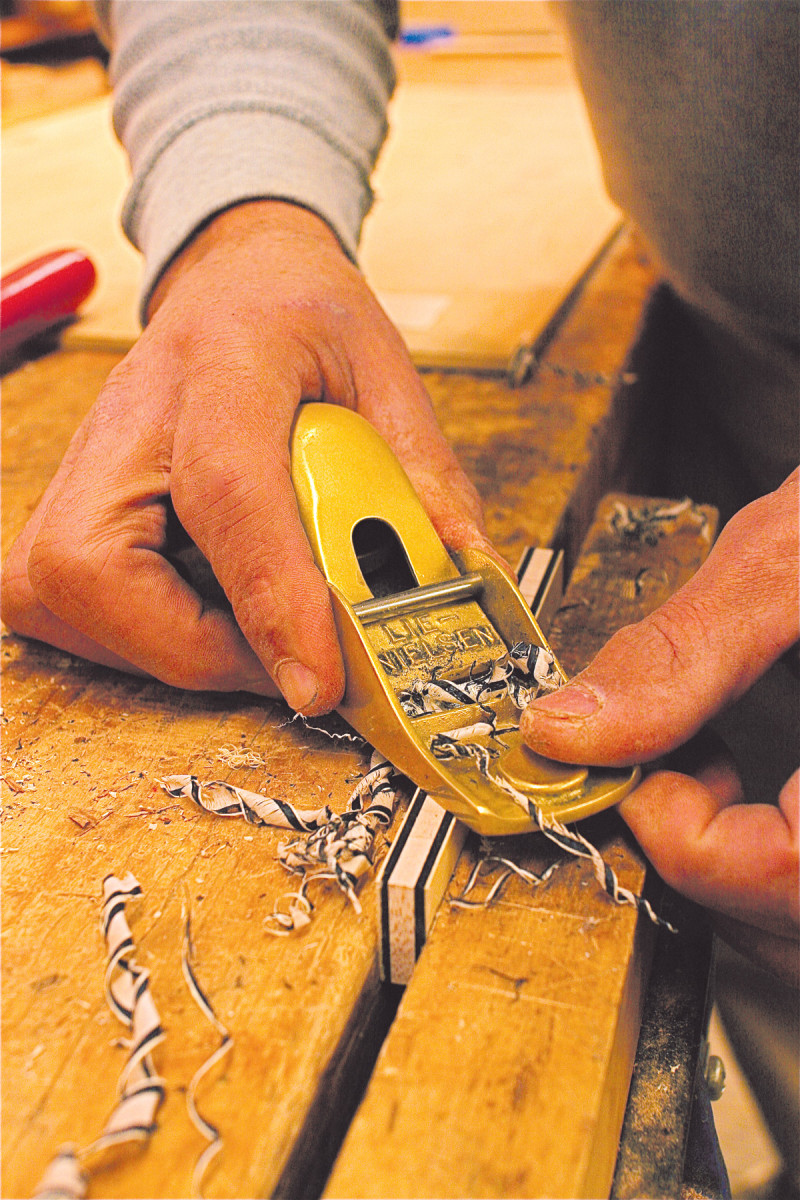
Inlay that consists of repetitive patterns is called banding (Photo 1). Inlay that’s just a simple line is called stringing. Banding and stringing are integral to the design of Federal furniture, but in different ways.
Stringing facilitates the movement of the eye from one area to another—it leads you on. Banding does just the opposite—it arrests your eye, forcing you to pause
momentarily. Banding gives you time to appraise the piece and consider what you’ve seen before moving on.

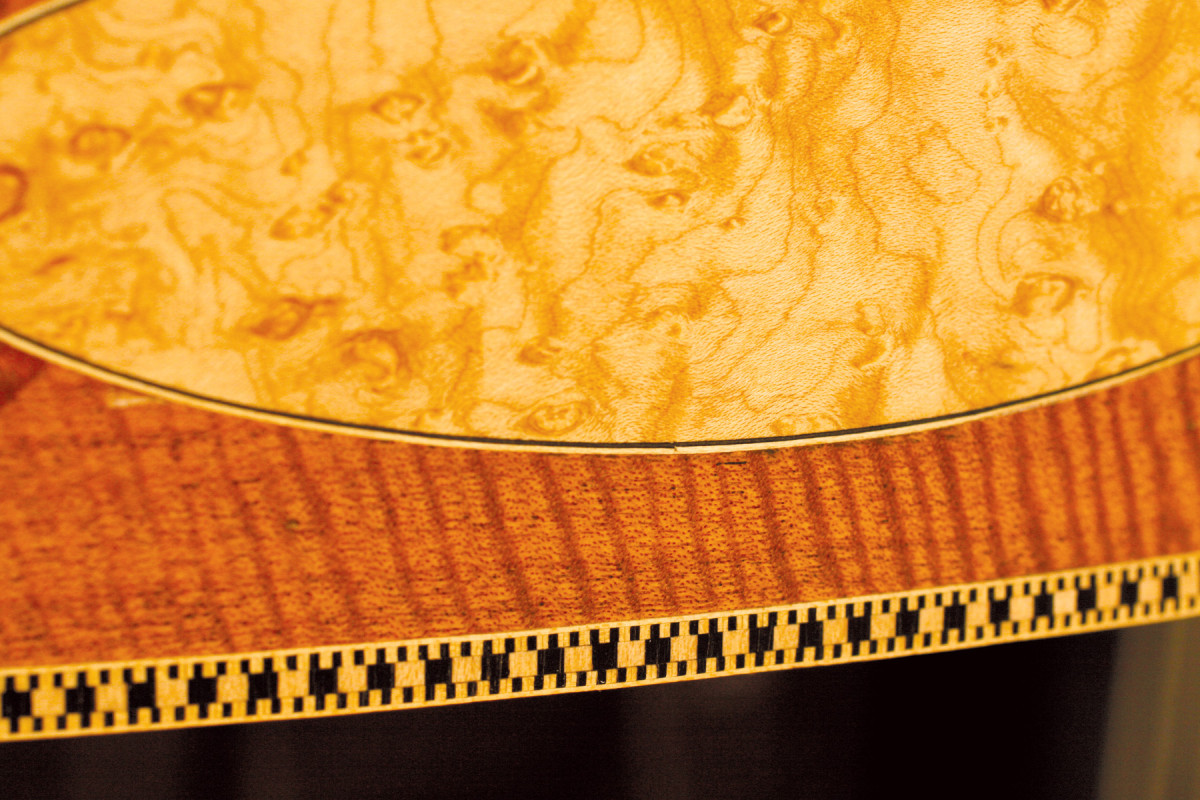
2. Bandings rely on their size, color and pattern to make an impact. While you can buy commercially made banding, it’s really not that hard to make yourself, once you understand the basic steps.
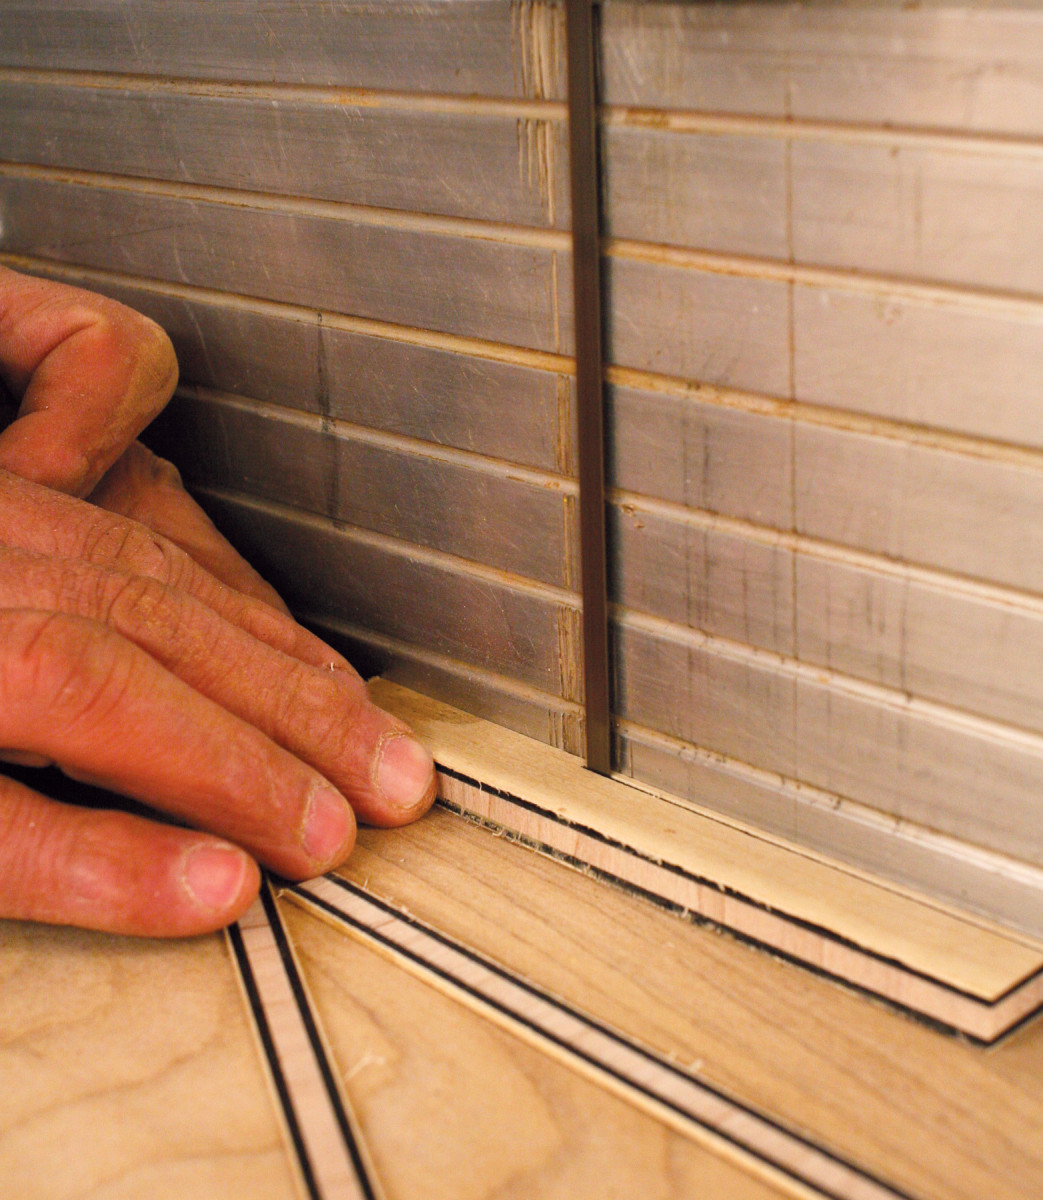
Banding can also serve as a border that separates areas of a piece, much like molding. But unlike molding, banding doesn’t project from the surface. It often has the illusion of three dimensions (Photo 2), but all bandings are flat, lying on a single plane, embedded in the wood. I find that fascinating!
The card table I mentioned before has three different types of banding. The principal banding is the checkerboard pattern, which divides the apron from the legs. Two narrower and simpler bandings play a smaller role, dividing less prominent areas of the table. In this article, I’ll give you some general principles for making any kind of banding, show you how to put together one of the table’s simple bandings, then unwrap the mystery behind the checkerboard.
Basic rules
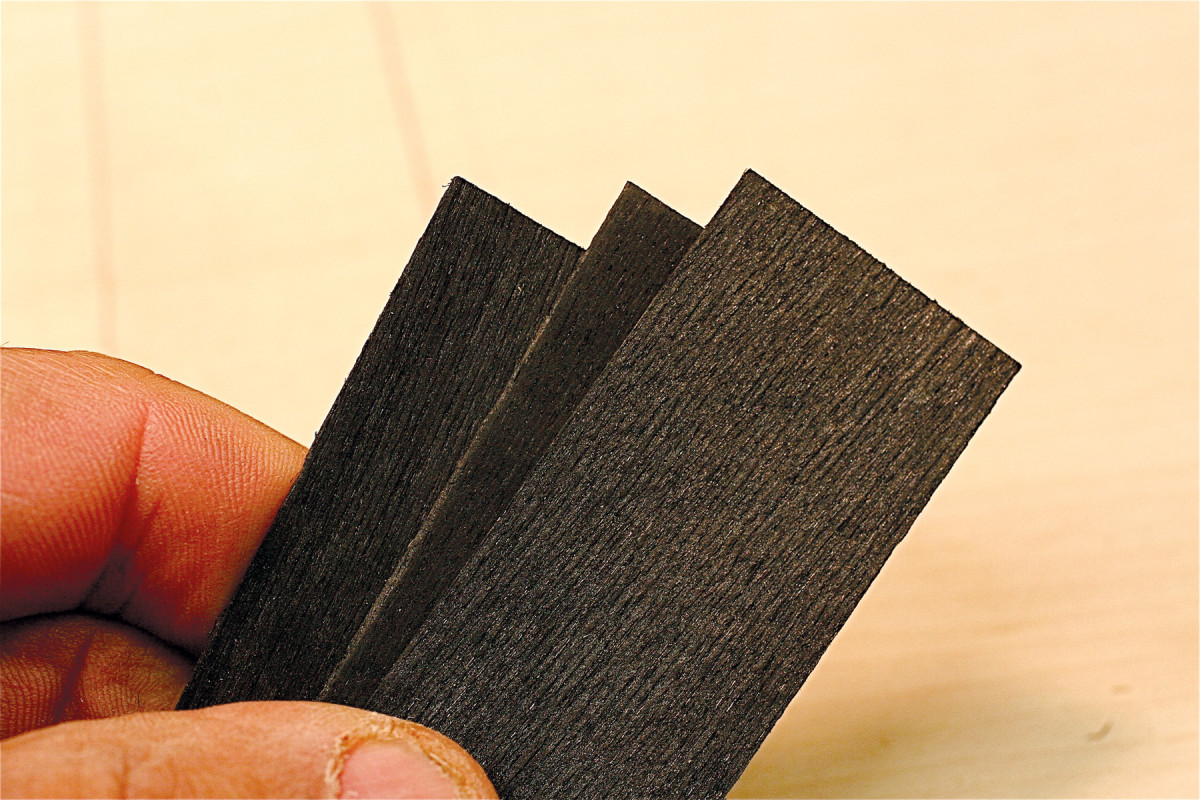
3. Bandings are made from layers of veneer and solid wood. Veneers that are dyed all the way through, such as this black harewood, allow you to work with a large palette of colors. Veneers are cut into narrow “strips” on the tablesaw.
Bandings are usually composed of “strips” of veneer (Photo 3) and “chips” of thicker wood or layers of veneer (Photo 4). Making a banding doesn’t require any specialized tools; you just have to be methodical and follow four important rules:
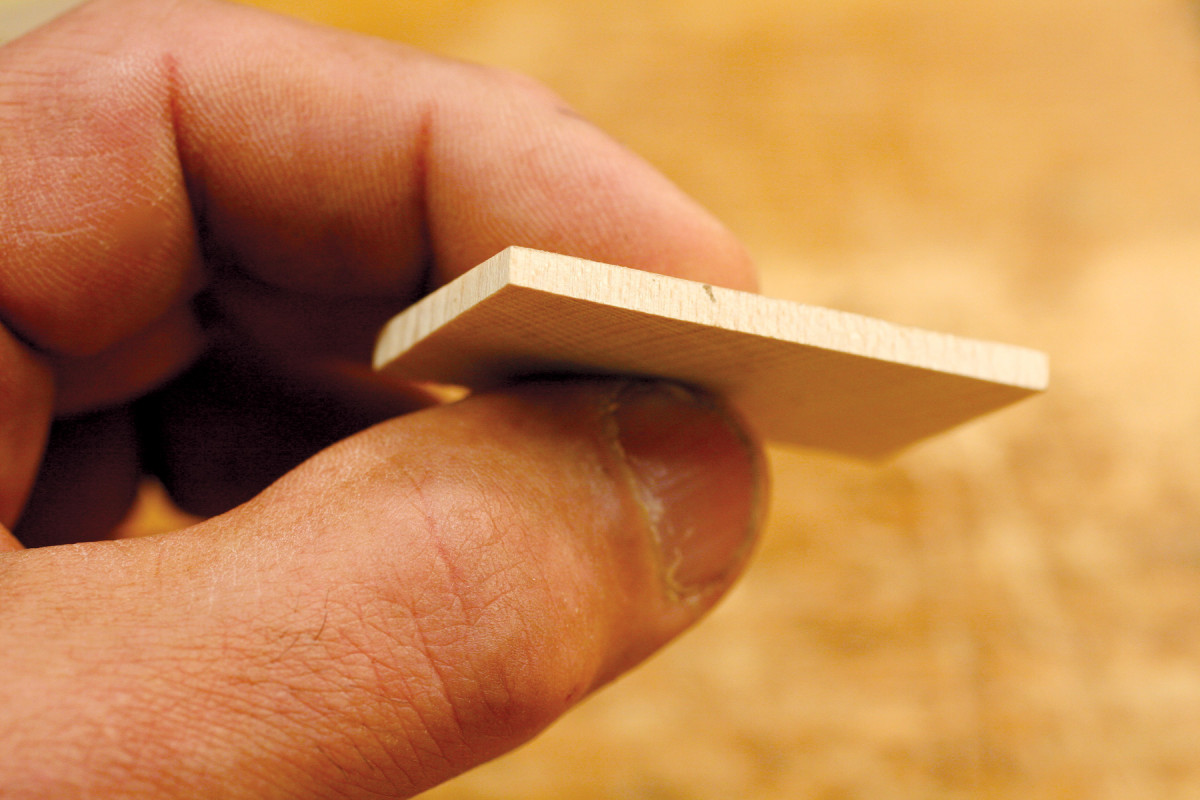
4. Solid wood layers are usually composed of “chips.” The grain of a chip runs the short way. Sometimes, chips are composed of multiple layers of veneer, called a “brick,” as you’ll see next.
• Rule 1. All bandings are cut to show long grain, not end grain. End grain is weak and won’t hold together. And it won’t maintain the strong contrast necessary for an
attractive end result.
• Rule 2. Material should be carefully selected. The wood should be free of knots and flaws, straight-grained, uniform in color, and have tight (not porous) grain.
• Rule 3. Banding materials must be uniform in dimension. This requires careful preparation when re-sawing, thickness planing or sanding, and crosscutting.
• Rule 4. Cuts must be clean. Any voids, tearout, burning or variation in dimension will adversely affect the appearance of your bandings.
Materials
The Portsmouth card table’s bandings are stark, relying on the contrast between black and white for effect. The materials I chose are typical for many styles of banding.
Historically, ebony and holly would have been used for black and white elements. These woods are available today, but at a premium price. In my experience, cutting high-quality strips from these woods generates enormous waste, so I use less expensive substitutes: dyed harewood veneer and tight-grained maple veneer and solid maple. (Dyed veneers are available in many different colors.) These woods are relatively easy to acquire and work. Once the veneers are cut into strips, they stay true and don’t warp, twist or split. Maple and black-dyed veneer are widely available in 1/32″ and 1/16″ thicknesses; other colors are usually only available in 1/32″ sheets.
Cutting strips
I use a tablesaw for cutting veneer into strips. To perform this operation safely, you’ll need two things:
• A zero-clearance throat plate. There can’t be a gap around the blade, where offcuts can get stuck.
• A good push stick. I make a new one each time. A push stick is essential to keep your hands at a safe distance from the blade and to guide the material past the blade.
Laminating strips
Strips can laminated into “bricks” to make stock of almost any thickness that a design requires. You can also alternate different colors of veneer, as I did to make the checkerboard section of the card table’s principal banding.
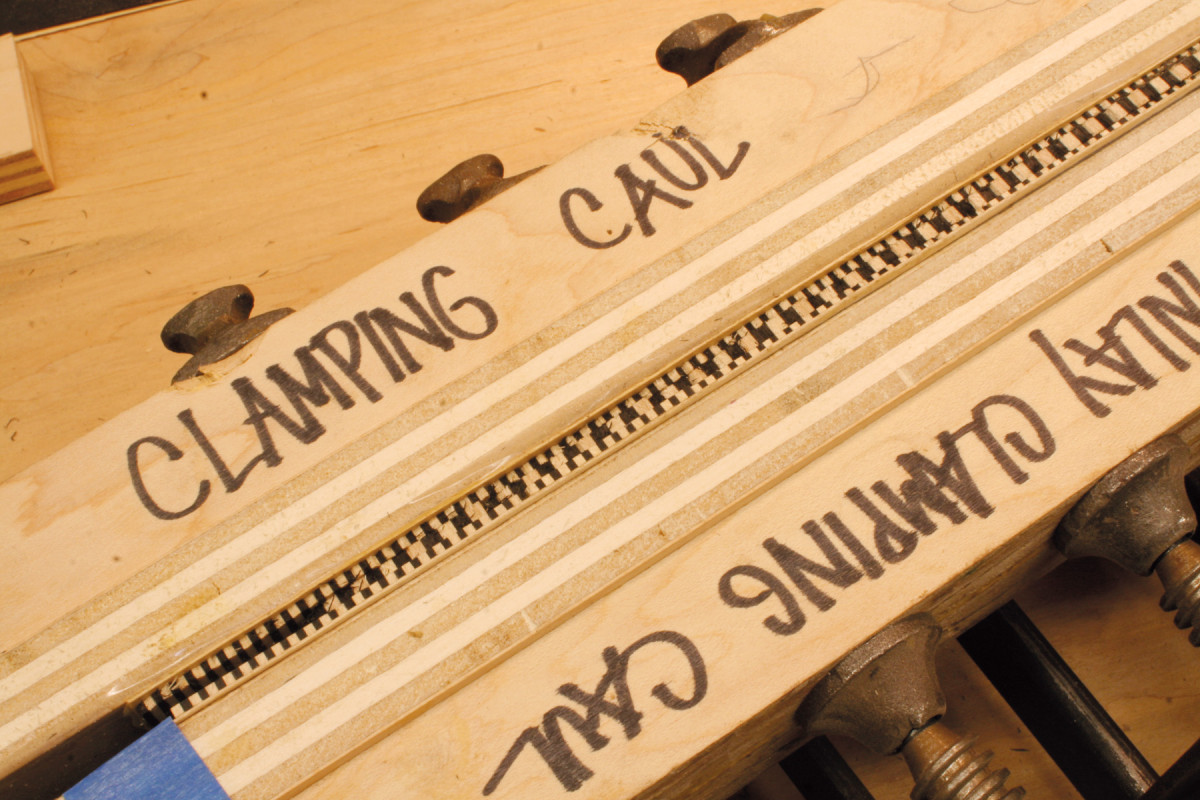
Always use stout cauls when gluing up banding. Cauls ensure that the resulting piece will be straight and flat. Apply cellophane or tape to the working surfaces of the cauls so the strips won’t adhere to them. Cauls also allow you to evenly spread clamping pressure. I usually place my clamps about 3″ apart. Using plenty of clamps ensures adequate and even pressure without requiring excessive force, which can result in an uneven thickness.
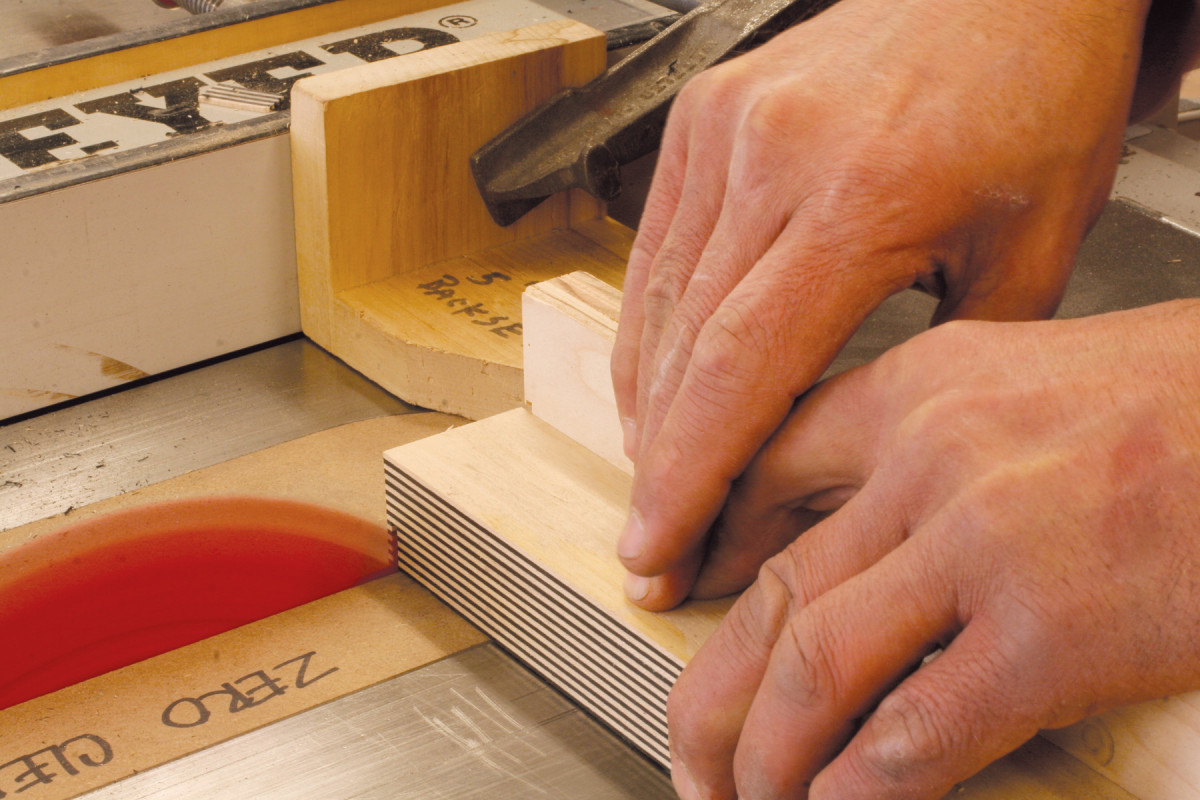
Slicing chips
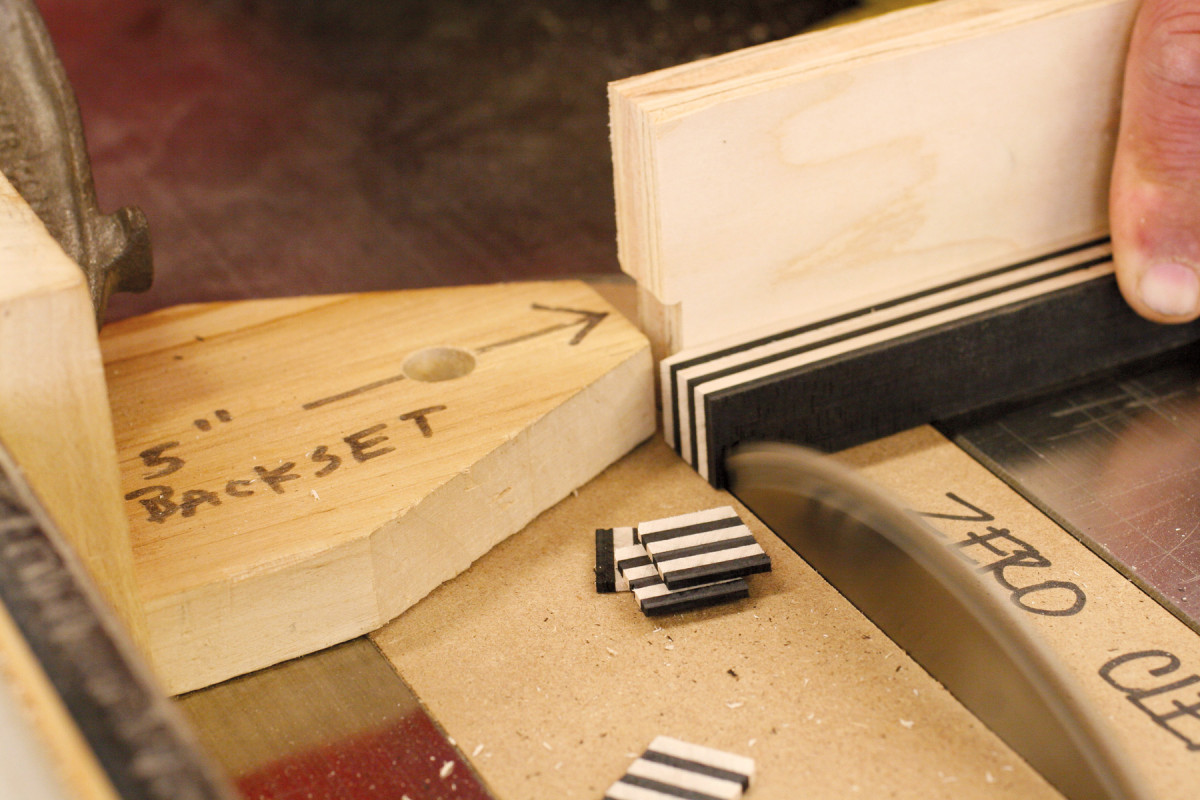
5. Chips are made by repeatedly slicing the end of a longer piece, such as this laminated brick. This operation requires a safe and accurate setup. You’ll need a zero-clearance throat plate and a standoff block clamped to the saw’s fence.
Bricks are next cut into chips (Photo 5). (Sometimes you make chips from solid wood, too.) Each chip must be exactly the same thickness, a process that requires careful preparation and due regard for safety.
To cut chips, I use a simple device called a standoff block. It’s 5″ long and 2″ wide; I clamp it to the tablesaw’s fence 2″ in front of the blade. I also use an aftermarket miter gauge that fits tight in the miter slot—so there’s no wiggle—and support the brick with a zero-clearance fence.
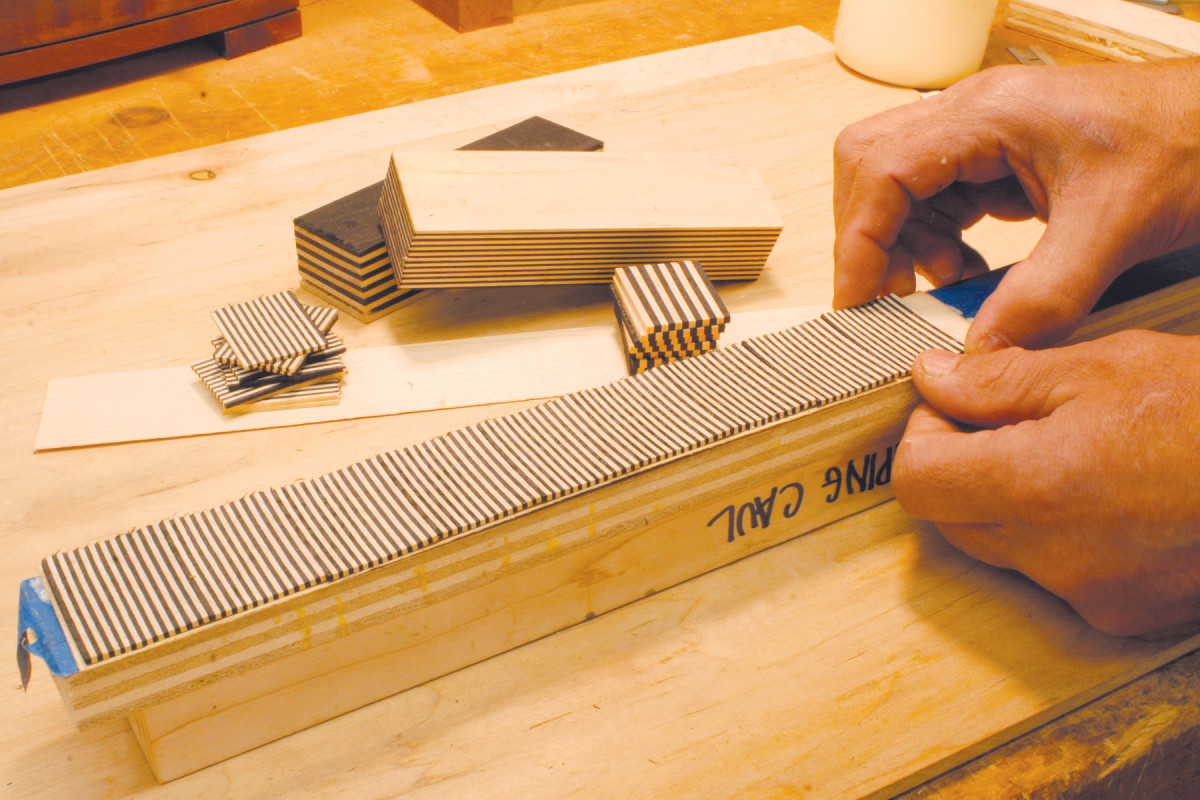
6. Veneer and chips are glued in layers between two cauls, creating a “loaf.” The loaf is then sawn into thin strips of banding. I’ll show you how to make two kinds of banding on the next pages.
Here’s how the standoff block works: You butt the brick up to the block, then push the miter gauge forward and slice off the chip. The chip falls away from the blade and joins other chips in the area behind the standoff block. After cutting a small number of chips, turn off the saw and retrieve them. It’s a good idea to cut about 25% extra chips and discard those that aren’t perfect. Chips are placed side-to-side in a banding (Photo 6). When you do this, you can see why they must be precisely uniform in thickness.
A simple banding
7. This banding is composed of solid maple chips and layers of maple veneer and black harewood veneer. It goes around the legs of the Portsmouth table, near the floor.
Let’s combine all these steps and make a simple banding (Photo 7 and Fig. A, page 42). On the Portsmouth card table, this banding goes around the legs, down near the floor. I call it an “ankle” banding.
Begin by ripping 1/32″ maple veneer and 1/16″ black veneer into strips that are 1-3/4″ wide and 9″ long. You’ll need two strips of each color. Laminate the strips, one maple strip glued onto one black strip, between cauls.
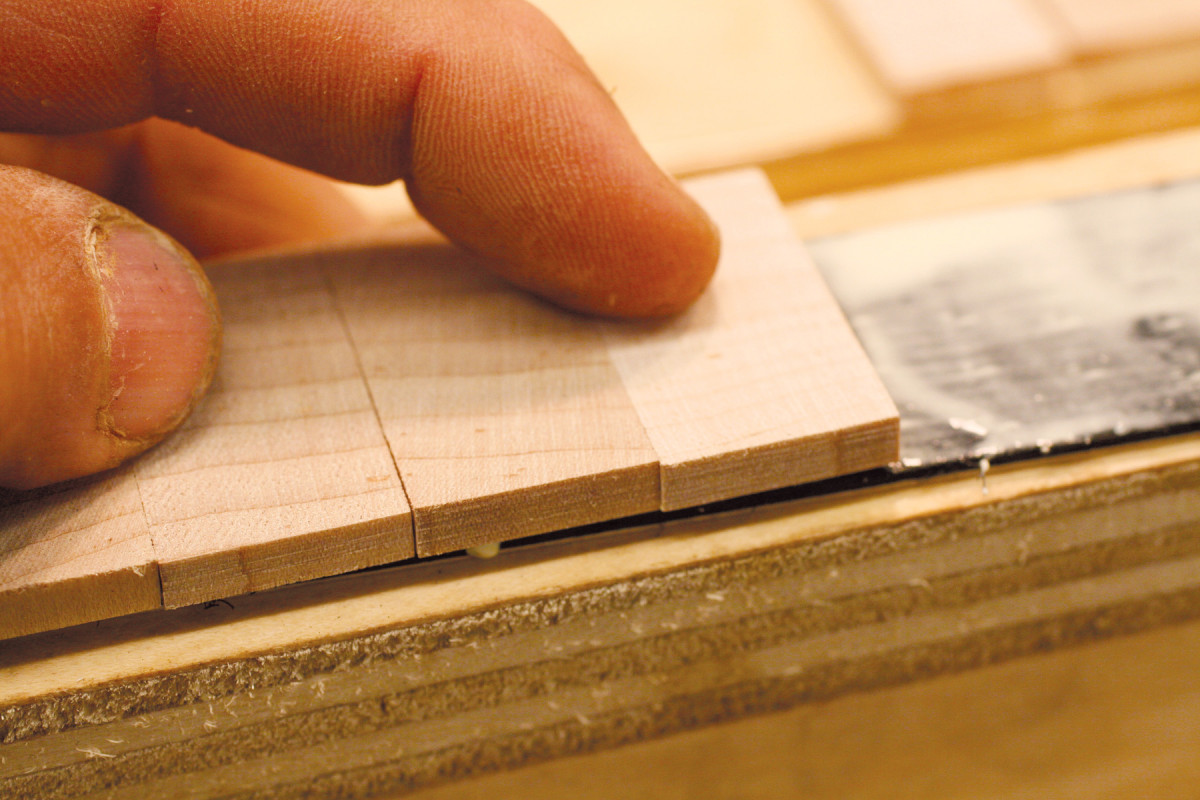
8. Maple chips are butted up to each other to make the core of the loaf. These chips sit on top of two strips of veneer, which were glued together beforehand.
Maple chips will go between the layers of veneer. Make the chips from stock that is 3/4″ thick, 1-1/4″ wide and about 12″ long. Clamp the standoff block to your fence, then adjust the fence to saw chips that are exactly 1/4″ thick.
9. Plane the sides of the loaf to even up all the layers.
Place one of the veneer laminations on a caul, black side up, and spread a thin layer of glue down its length (Photo 8). Place the chips side-by-side on the veneer (it’s not necessary to put glue between the chips). Spread glue on the black side of the other piece of laminated veneer and place it on the chips. Put a second caul on top and clamp. You’ve made a “loaf.”
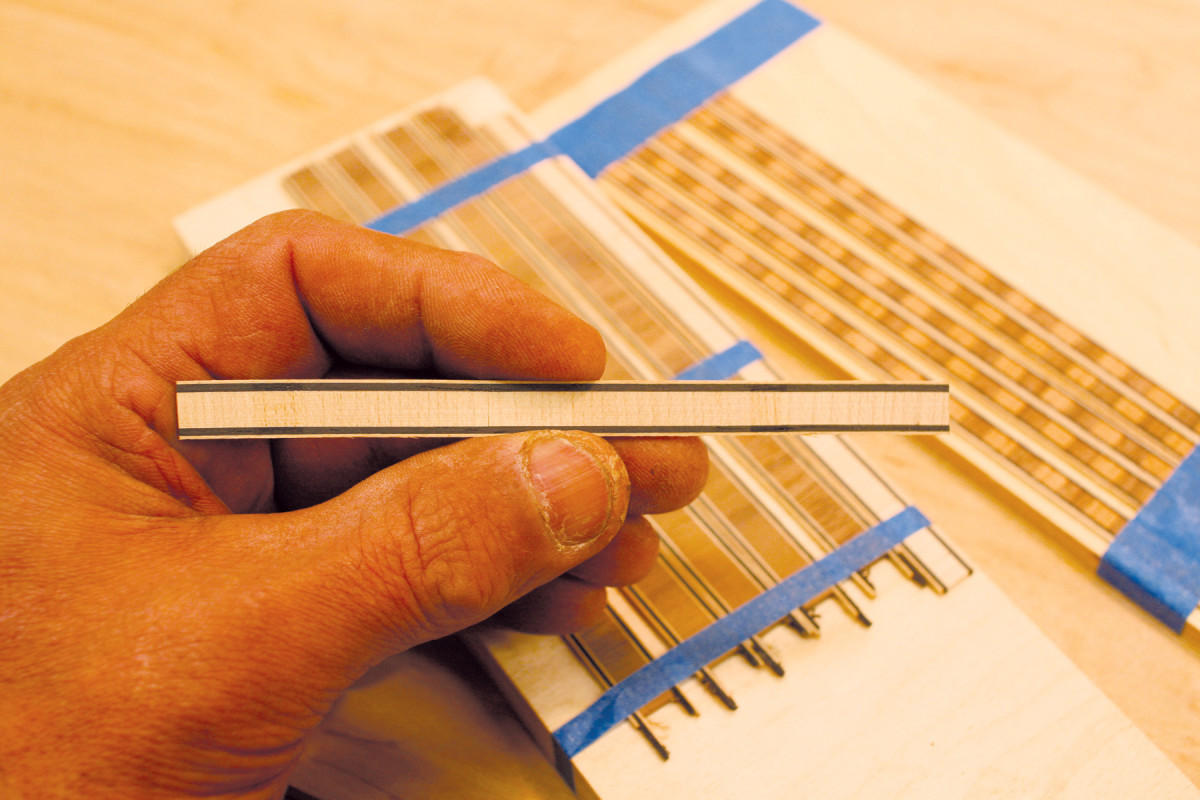
10. Bandsaw the loaf into 1/16″ thick strips of banding. A fine blade leaves the surface quite smooth.
The next day, after the glue is good and dry, plane the edges of the loaf square and straight (Photo 9). Now it’s ready to be sawn into 1/16″ thick strips (Photo 10). Use a zero-clearance table and a 1/4″ 6 tpi blade. After a few cuts, plane the surface of the blank again. Tape the banding pieces to a 1/4″ board for safekeeping.
A complex banding
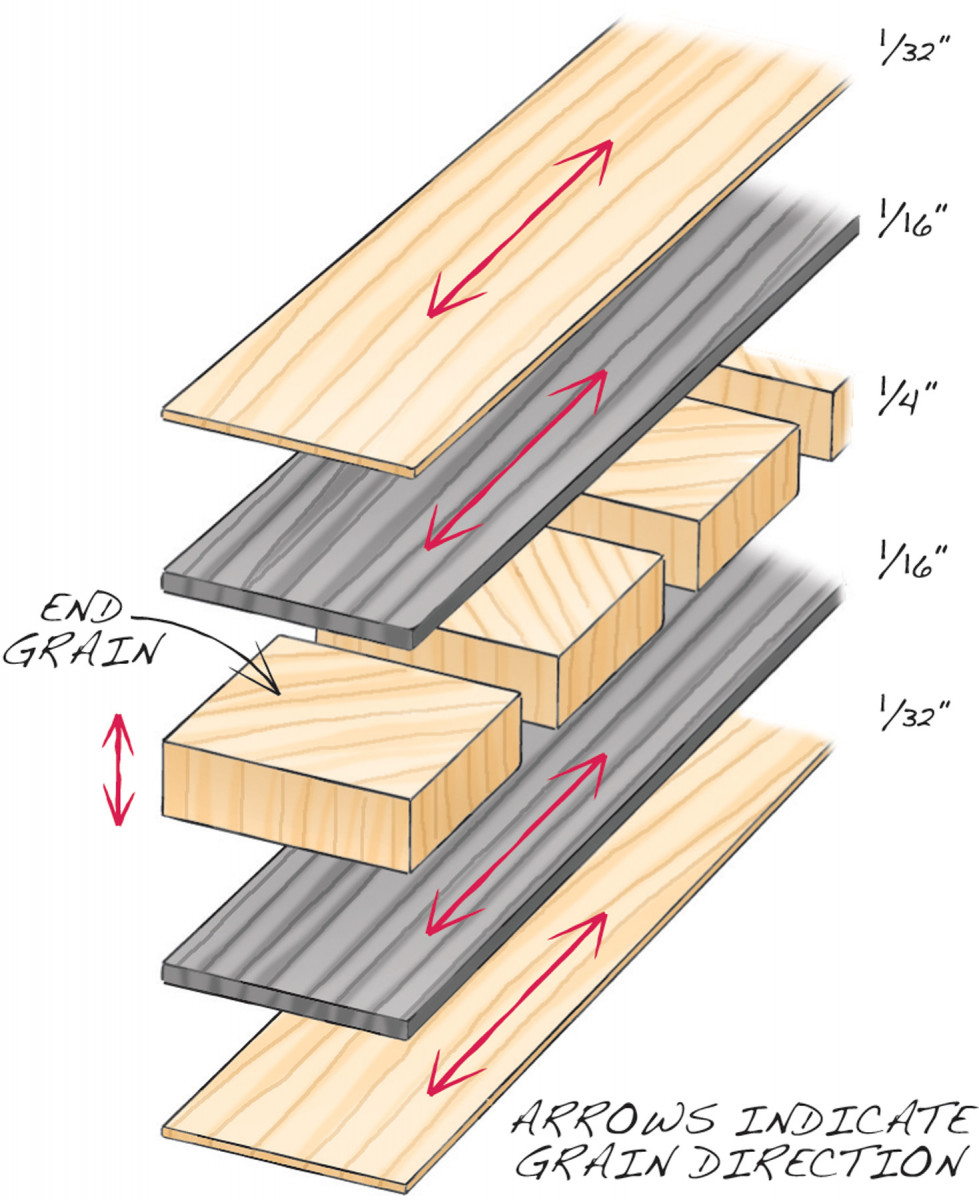
Fig. A) Portsmouth Ankle Banding
Now let’s make the banding that runs under the apron of the Portsmouth card table. Its staggered checkerboard pattern looks quite complicated, but when you deconstruct it, the parts are very simple (Fig. B).
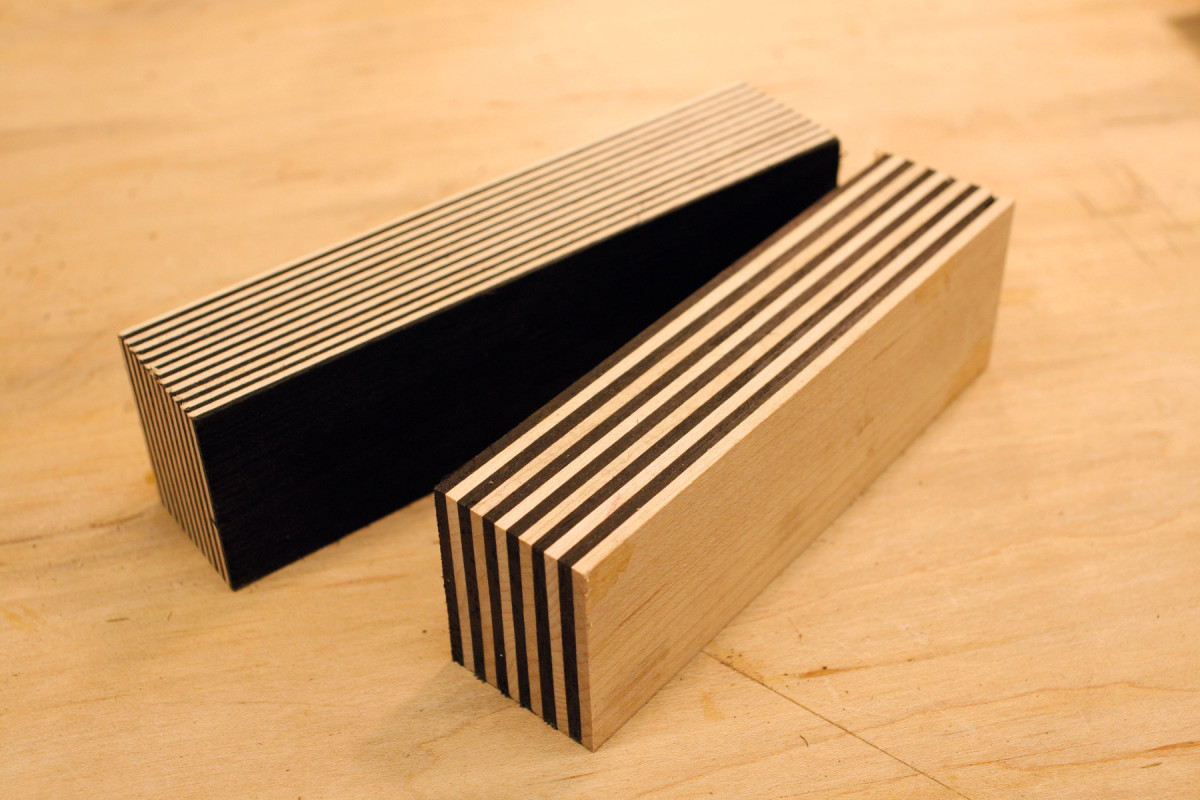
11. A complex banding can be made from bricks composed of glued-up layers of veneer. The brick in the foreground has 1/8″ thick layers; the other brick has 1/16″ thick layers.
The core of this loaf is made from 1/16″ and 1/8″ thick chips, which are cut from similar types of bricks (Photo 11). The bricks for the 1/16″ thick chips are made from 1/16″ thick laminations—that’s what produces the square pattern you see on the ends of the chips. The bricks for the 1/8″ thick chips, of course, are made from 1/8″ thick laminations. (I made these by gluing together two layers of 1/16″ veneer.)
12. The bricks are then cut into chips. The 1/16″ brick is sawn into 1/16″ thick chips, the 1/8″ brick into 1/8″ chips. This produces a square, checkerboard pattern on the ends of the chips.
To make the bricks, saw a number of strips that are 1-3/4″ wide by 9″ long. Make at least 24 strips from the 1/16″ veneer and at least 12 strips from the 1/8″ material. Prepare one stack of 1/16″ strips and another of 1/8″ strips, each 1-1/2″ high. Make sure the stacks start with a light layer and end with a dark one. Glue the stacks between cauls. After the glue is dry, rip both sides to make bricks that are 1-1/2″ wide. Cut the bricks into chips (Photo 12).
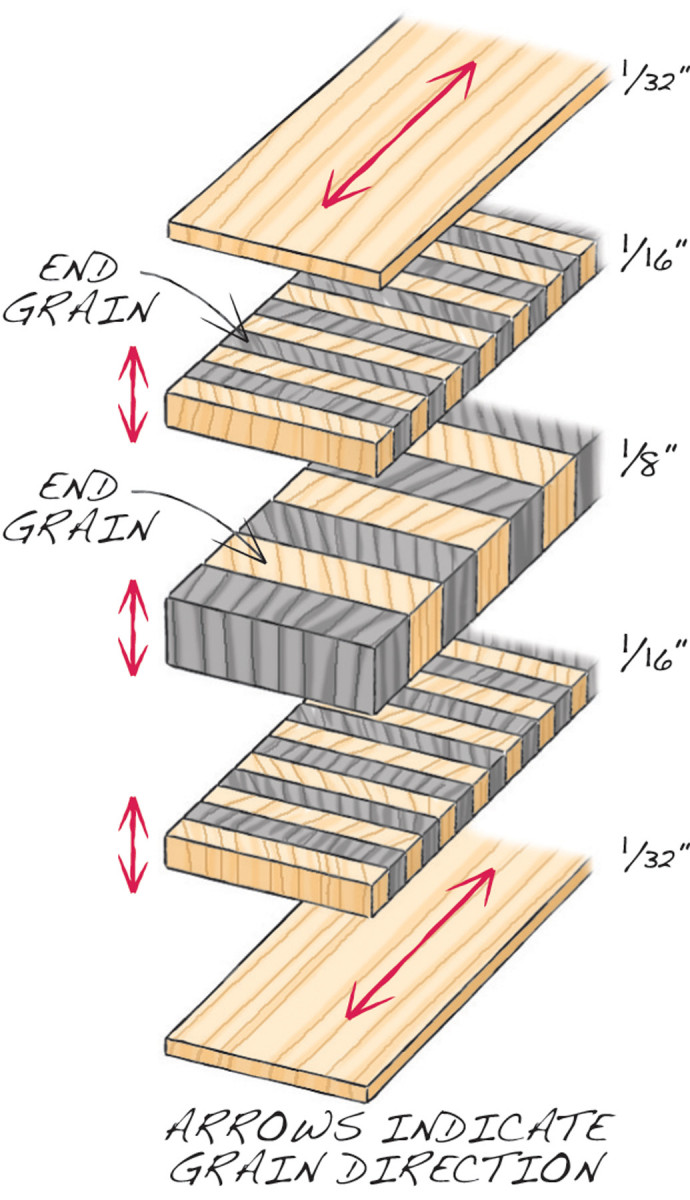
Fig. B) Portsmouth Apron Banding
The chips are sandwiched between layers of 1/16″ maple veneer. Cut the veneer into strips that are 1-1/2″ wide and about 20″ long.
13. Glue the 1/16″ chips on a strip of maple veneer and clamp the assembly between cauls. Make two of these.
Now that you have all the ingredients prepared, it’s time to glue up the loaf. There are too many pieces involved to glue the loaf all at once, so we’ll break it down into two stages, starting from the outside and working in. First, glue the 1/16″ chips to each piece of veneer (Photo 13). Place the chips carefully, black edge against white edge. Clamp these sandwiches between cauls and let the glue dry overnight.
14. Glue the 1/8″ chips in between these two pieces to complete the banding.
For the second stage, glue the 1/8″ chips between these two pieces (Photo 14). Plane the edges of the loaf and bandsaw it into individual pieces of banding.
SOURCE
Constantine’s Wood Center, constantines.com, 800-443-9667, maple and dyed veneers, prices vary.
Here are some supplies and tools we find essential in our everyday work around the shop. We may receive a commission from sales referred by our links; however, we have carefully selected these products for their usefulness and quality.