We may receive a commission when you use our affiliate links. However, this does not impact our recommendations.
 Below is a sidebar from my “Medicine Cabinet” article, from the June 2016 issue of Popular Woodworking Magazine – how to install butt hinges using hand tools (and there are, of course, other techniques…but this is how I do it).
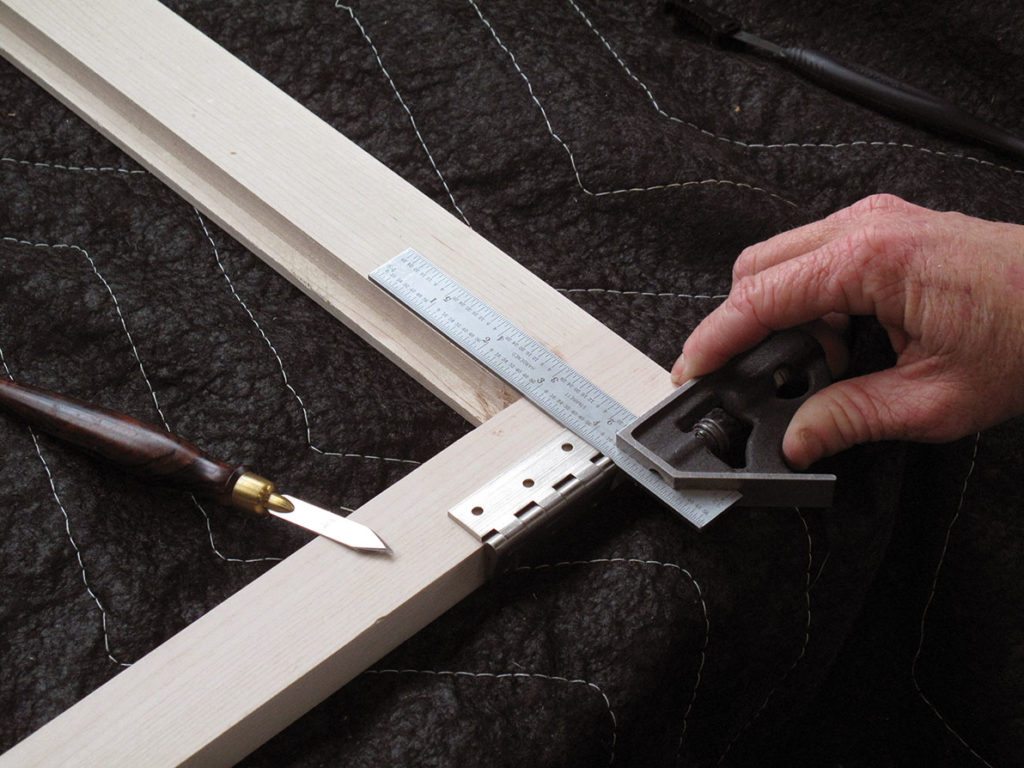
1. Locate. Hinges are typically installed in this type of build with the leaves registering off the door rails. So I use a combination square to line things up. I always start with the door, not the case.
2. Mark. Hold the hinge firmly in place with your off hand, and use a marking knife to score around the edges. A series of light cuts will be more effective than one deep cut. Now set a cutting gauge to the exact thickness of the leaf and mark the mortise depth. (I’ve penciled in the lines here for ease of viewing.)
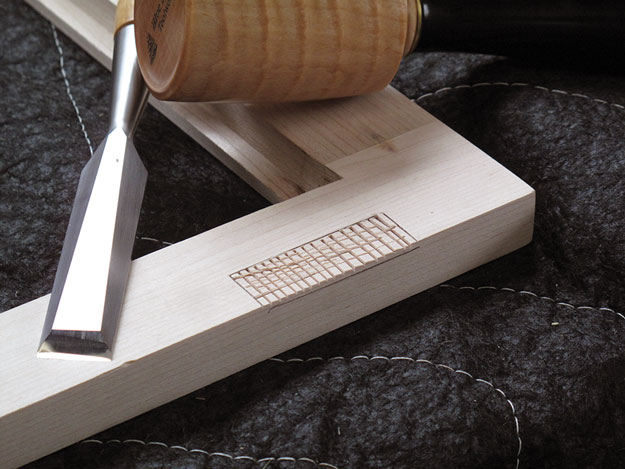
3. Chop. Make a series of cuts in the waste with a chisel, and use the tool to deepen the edges you marked with your knife (bevel facing into the waste, of course).
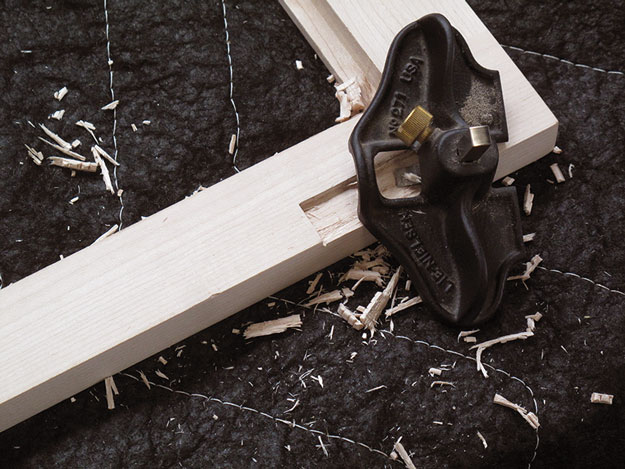
4. Clean. Drop the router plane blade in the baseline then tighten it. A few passes with the plane will lift out the waste and smooth the bottom of the mortise. (You can also set the router plane to the thickness of the hinge leaf, and use the plane to mark the bottom of the mortise, instead of a cutting gauge.)
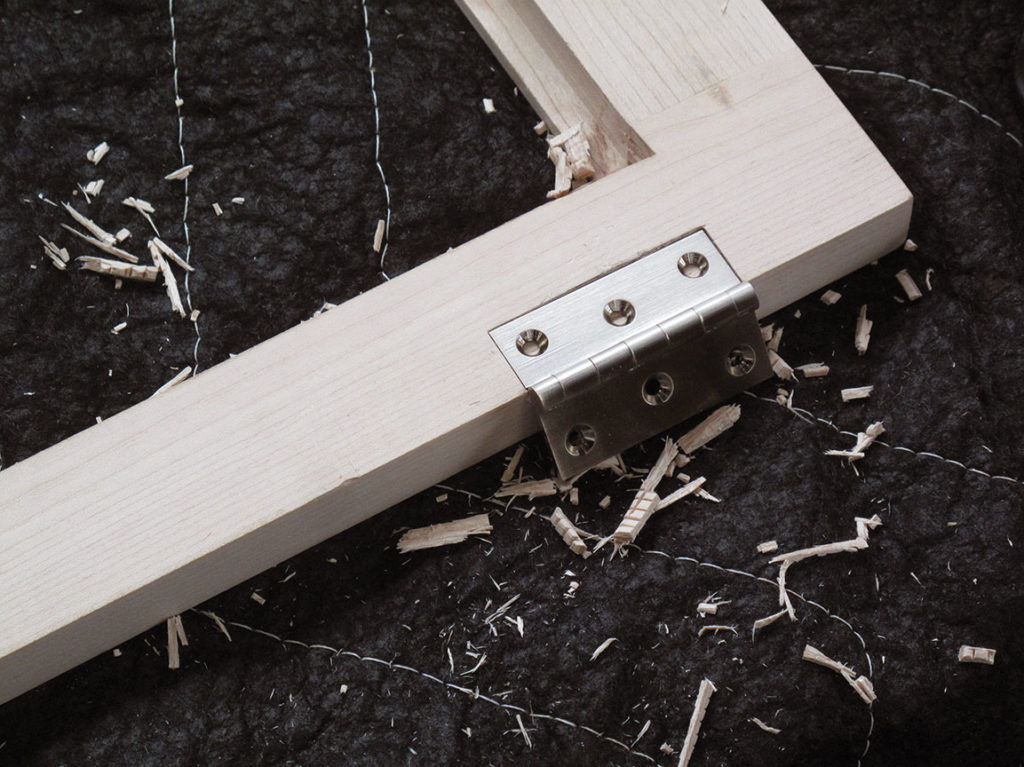
5. Screw holes. Drop the hinge in its mortise and mark the screw-hole locations, then drill. Be careful to not drill through the stile.

6. Screws. Screw the hinges in place; a little wax on the threads will make it easier. (I typically install only the top and bottom screws at this time; it saves time when removing the hardware before applying a finish.)
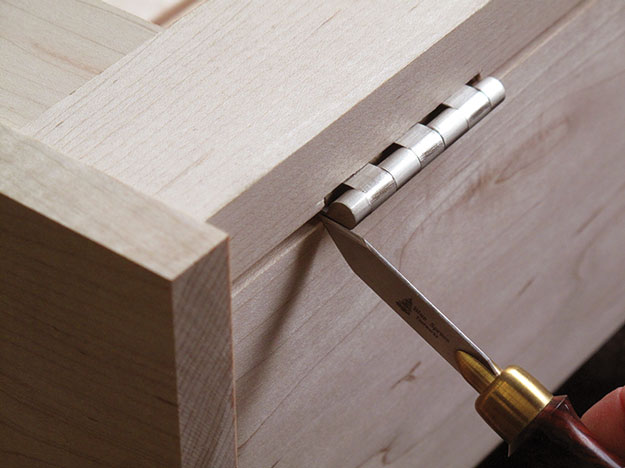
7. Mark the carcase. Now fit the door to its opening, with the desired reveal shimmed at the top and bottom. Hold the door firmly in place. Register the flat of the marking knife off the barrel of the hinge and make a nick. Do the same for the other hinge(s). I always mark the bottom of the leaf. It’s a habit that keeps me from cutting the mortise on the wrong side of my mark (that’s more of a fear for me when there’s also a middle hinge).
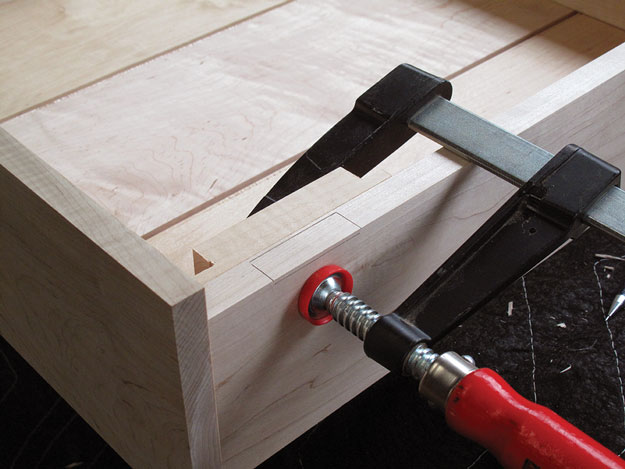
8. Narrow material. The process for the hinge mortises on the sides is the same as for the door – except that, if you want to retain the small amount of wood behind the hinge mortise, clamp a piece behind it for support as you’re chopping. If you don’t, it will certainly tear out. There is, however, no shame in simply cutting the mortise across the full thickness of the side.
Here are some supplies and tools we find essential in our everyday work around the shop. We may receive a commission from sales referred by our links; however, we have carefully selected these products for their usefulness and quality.