We may receive a commission when you use our affiliate links. However, this does not impact our recommendations.
Use a CNC service to make perfect patterns.
Woodworkers who make things consisting of more than straight lines need patterns. Patterns open up the worlds of form, shape and detail. They make furniture production faster and consistent. A CNC-machined pattern has perfect shapes, curves and detail. Plus, they’re the ultimate story sticks – you’ll be able to produce this piece of furniture over and over.
The greatest benefits of CNCs are precision and repeatability. However, most woodworkers don’t own a CNC, and that’s okay. I’ve got a great trick that gives you most of the benefits of a CNC without having to own or understand how to run one. How? If you make digital drawings of your furniture parts, you can have a CNC service machine your patterns for you. And, armed with a perfect pattern and a router table or shaper, you can make perfect parts for your next project.
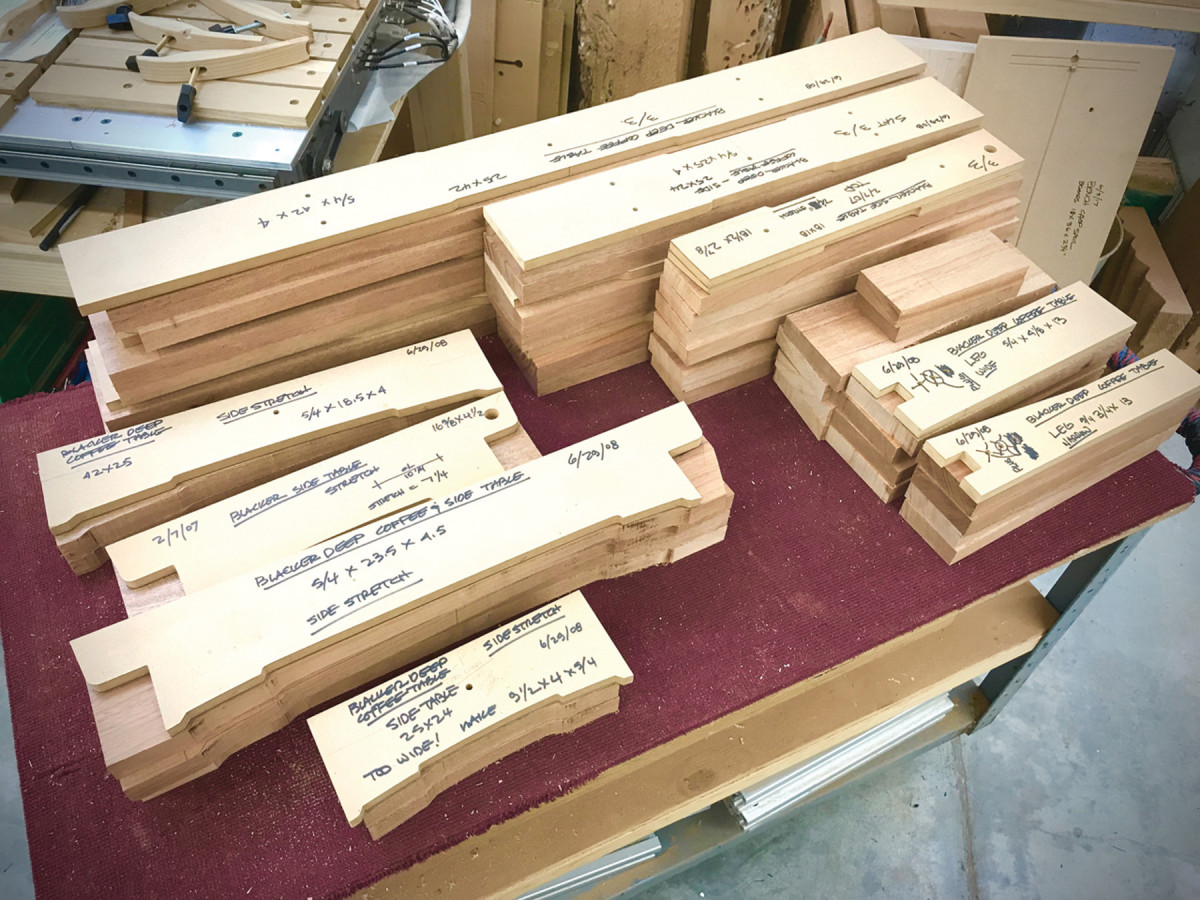
Stay organized. I keep my patterns with my parts through each step of a project. All the information is right there on each pattern.
It’s fair to say I’m a serious user of patterns. I have hundreds. Long before I owned a CNC, I had all of my patterns made by a service. As a furniture maker, I rely on patterns and use them every day. In my shop, the rules are, if you need to make two of anything, if there’s even the slightest chance you might make something again or if you just need a way to produce accurate details, it’s time to make a pattern.
I’ve found that good patterns are critical for accurate, efficient and error-free furniture making. They really work. I built a woodworking career using patterns. Here’s how.
It Starts with Drawings
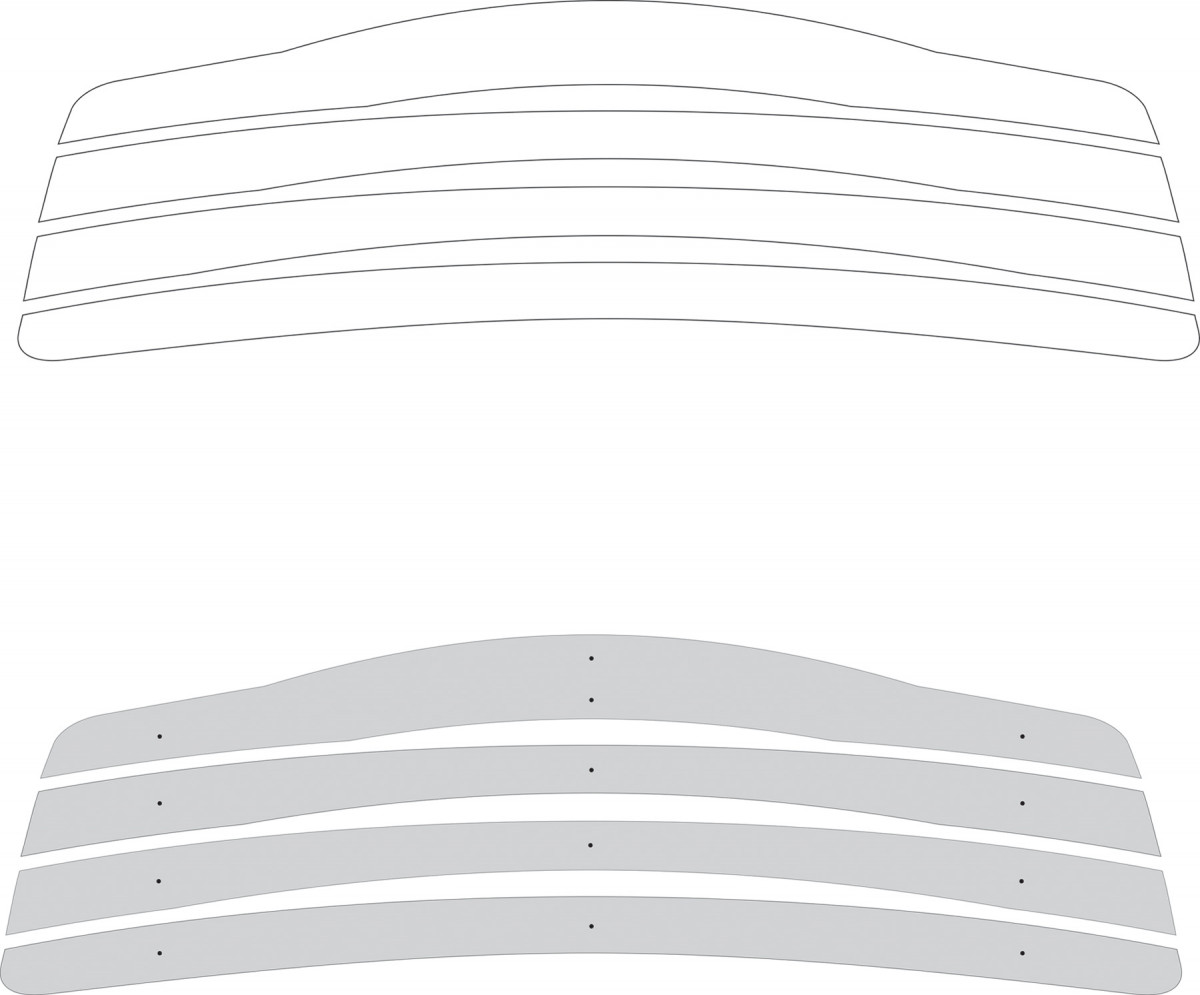
Easy to draw. Drawings just need to be simple 2D outlines of your parts. Here are four renderings that will become patterns.
My furniture designs are created on a computer. I prepare and hand off drawings to a CNC service to mill my patterns out of MDF. I used Adobe Illustrator initially then moved to CAD software to draw my furniture parts.
What kind of software do you need? Like me, you could do this with any designer-focused drawing program such as Inkscape, which is free. However, the better choice by far is to use CAD software. It’s designed for the kind of pre-cision drawing tasks that woodworkers need. And, CAD has capabilities that make it easier, faster and more efficient to use.
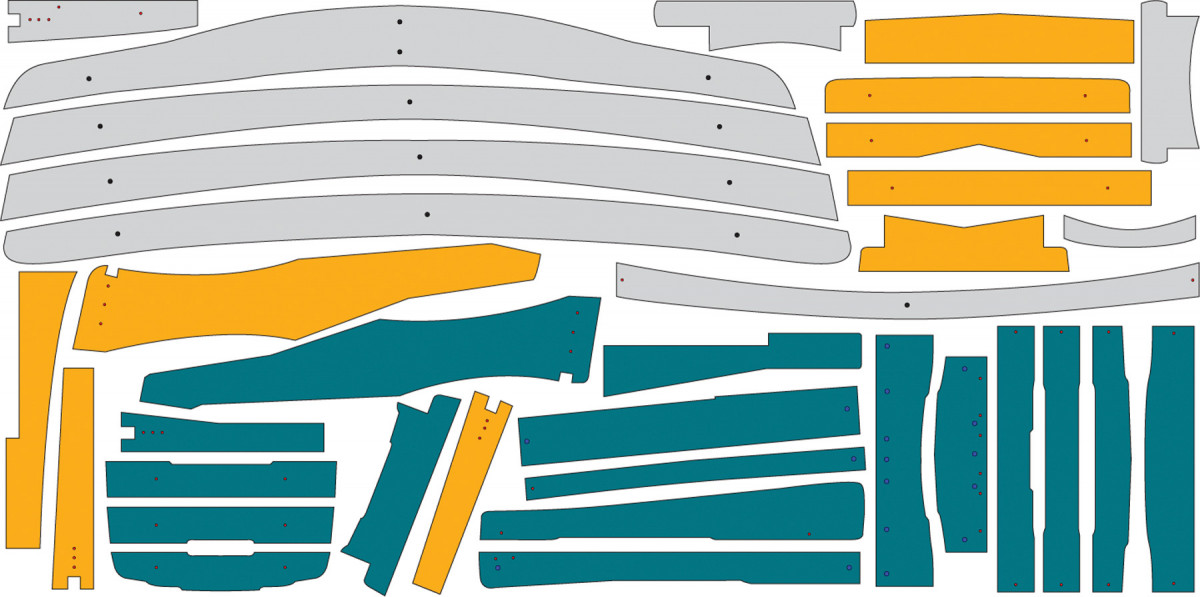
Take advantage of extra space. I try to gang my projects when I go to a CNC service. Projects are organized by color and spaced out for efficient machining on a full 4’ x 8’ sheet of MDF.
There are many choices when it comes to CAD programs, but for the purpose of making patterns most any 2D capable program will do. Free programs like Fusion360 or FreeCAD, low-priced TurboCAD, Vectric Cut2D, mid-price Rhino3D or CorelCAD and many others, all have the ability to create 2D drawings for woodworkers.
Unfortunately, Sketchup, does not produce quality 2D, machinable files needed for CNC work. Whatever your choice, the software needs to be capable of exporting or saving in standard file formats like DXF, SVG or AI, so that a CNC service can import your files into their own CAD/CAM software to prepare your designs for machining.
Drawing for CNC Patterns

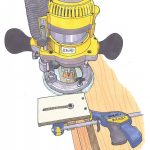
Rout with a top-bearing bit. A router table, a simple jig and a straight bit with a top bearing are all that’s needed to safely rout your pieces to size with patterns.
The drawings should be quite simple; patterns are intended to duplicate flat parts. We’re drafting in 2D, not 3D. Each part has to be drawn full-size, individually in 2D. Full-size is critical. If, for example, you’re making a 62″stretcher pattern for a table, draw it 62″ long. You can’t provide a drawing of a 31″ stretcher and ask the CNC ser-vice to double the scale.
Fortunately, CAD software includes tools to make measured, precise drawing easy. For efficiency, parts such as chair arms, legs, stretchers, back splats, seat parts, etc., can be ganged together in the same drawing.
Make sure the outlines of each part are completely closed and “joined.” This means the ends of lines, curves and shapes are connected so that a square, for example, is a unit rather than four individual lines. If you can click and the entire part is selected, you’re set. CAD and drawing software have joining tools just for this task. This is an important detail, so check your work because strange things can happen on the CNC if you leave something open.
Consider adding any additional details you may need machined. If there are any holes or openings needed in the part, there will be holes or openings cut on the CNC. Also, make sure that no detail is smaller than the bit that will be used. You can’t cut a 1⁄8” hole with a 1⁄4” bit.
Trying the Process
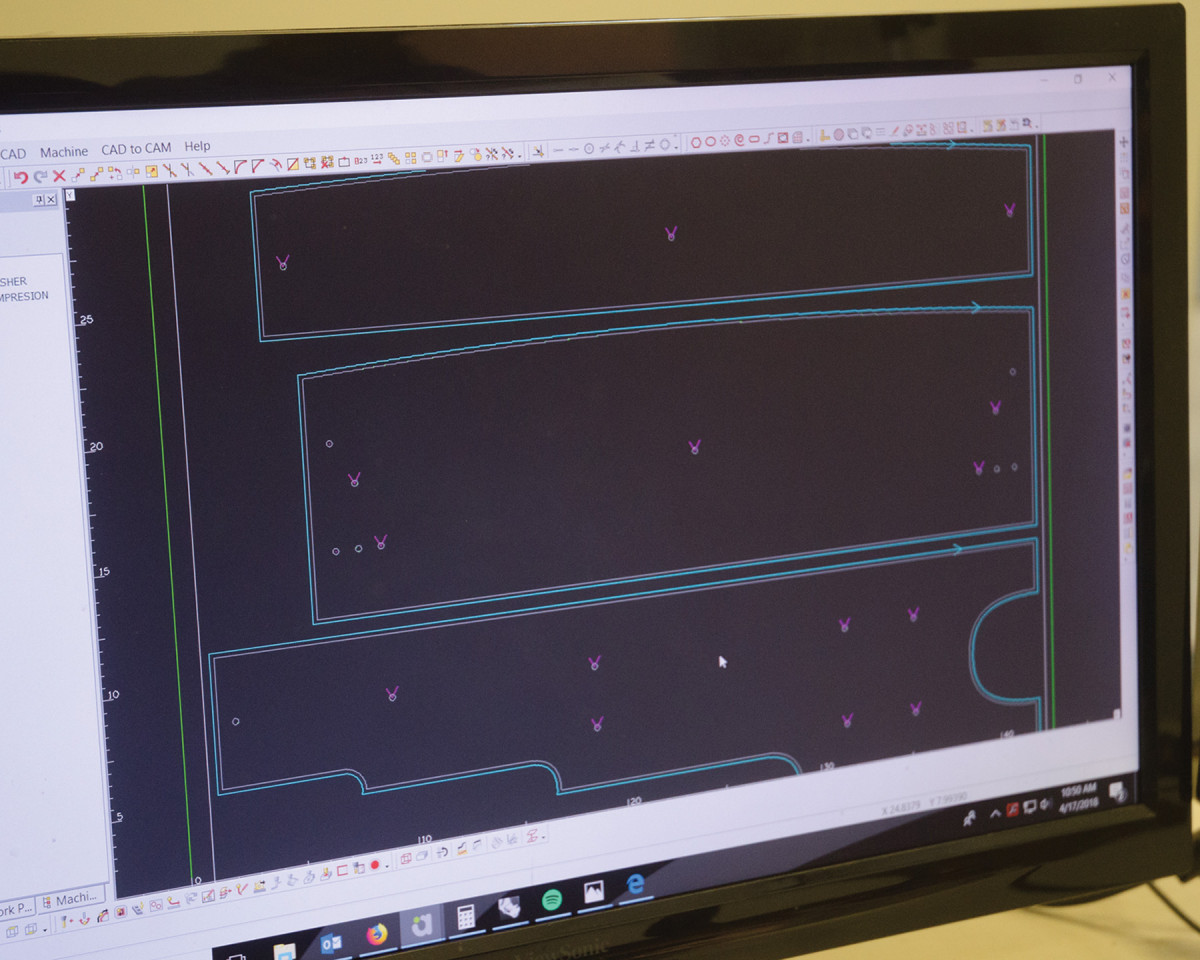
Perfection in 10 minutes. Edensaw Woods’ CNC service imported Todd’s drawing into their CAM software to program the machine operations. The blue lines show the tool paths the CNC will follow.
Though I’ve made a lot of CNC patterns, I wanted to see how somebody else handled the process. I asked my friend Todd Butler to give the process a try. Todd is an experienced woodworker but had never used CAD software or a CNC service. I explained my process and followed him along the way.
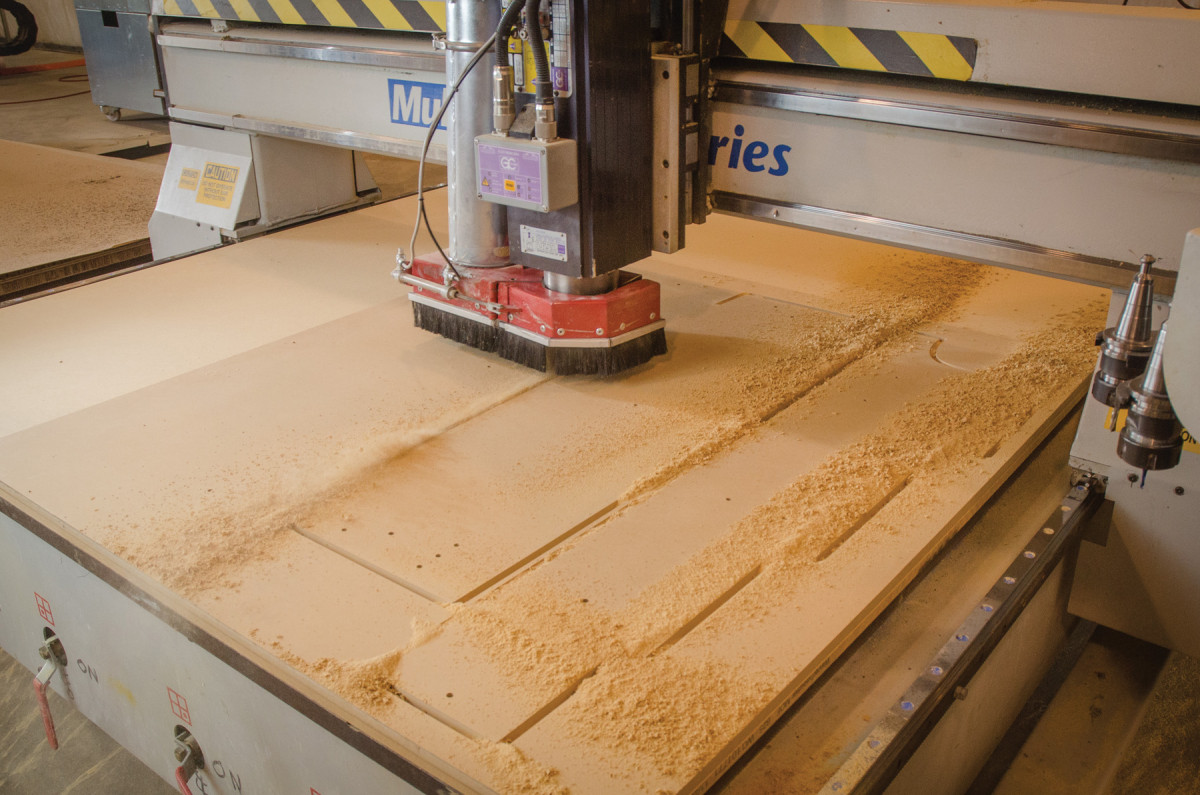
The CNC works very quickly and cuts the patterns in just 10 minutes.
For this project, Todd wanted to modify and build a classic, late 18th-century bookcase from The Woodworker, Volume 4. His goal was to change a few dimensions, bow out the shelves and lay it out for future builds using tusk tenons. He used my favorite CAD program, Rhino3D. He used readily available online courses and videos, many of which are free, to learn the basics. Studying the drawings in his book, he recreated the sides in CAD and drew up new bowed shelves. On my suggestion, he added 1⁄4” holes at center points and key joinery locations for reference.
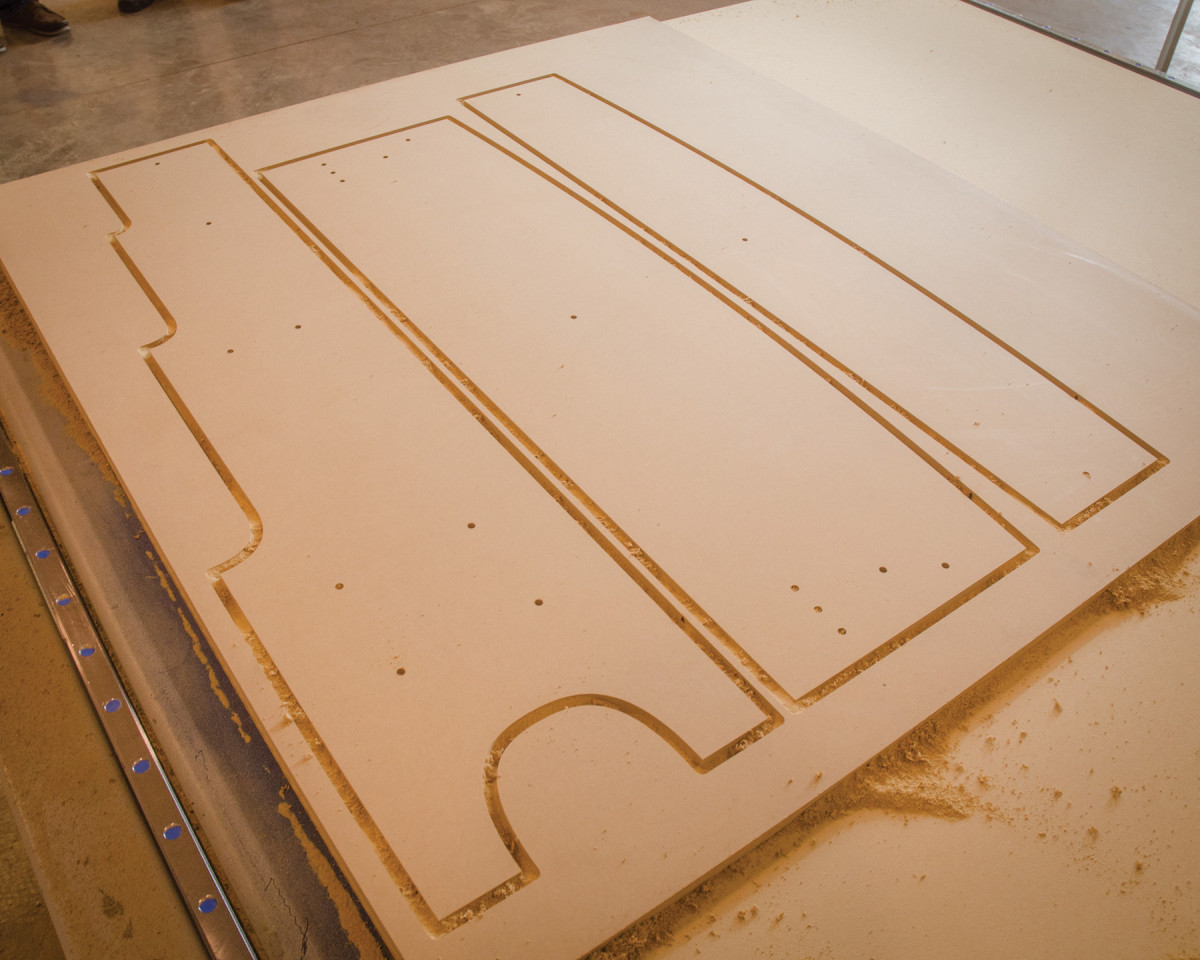
MDF is material of choice. The completed patterns are machined out of 1⁄2″ MDF.
Once the drawings were complete, he prepared them for a CNC service. He organized his patterns to fit efficiently on a small board leaving 1⁄2” spacing between each part and 1˝ along the outside edges, to allow room for the cutter to travel between parts. He put the 1⁄4” marker holes on a separate layer to help the CNC service plan and program their machine processes.
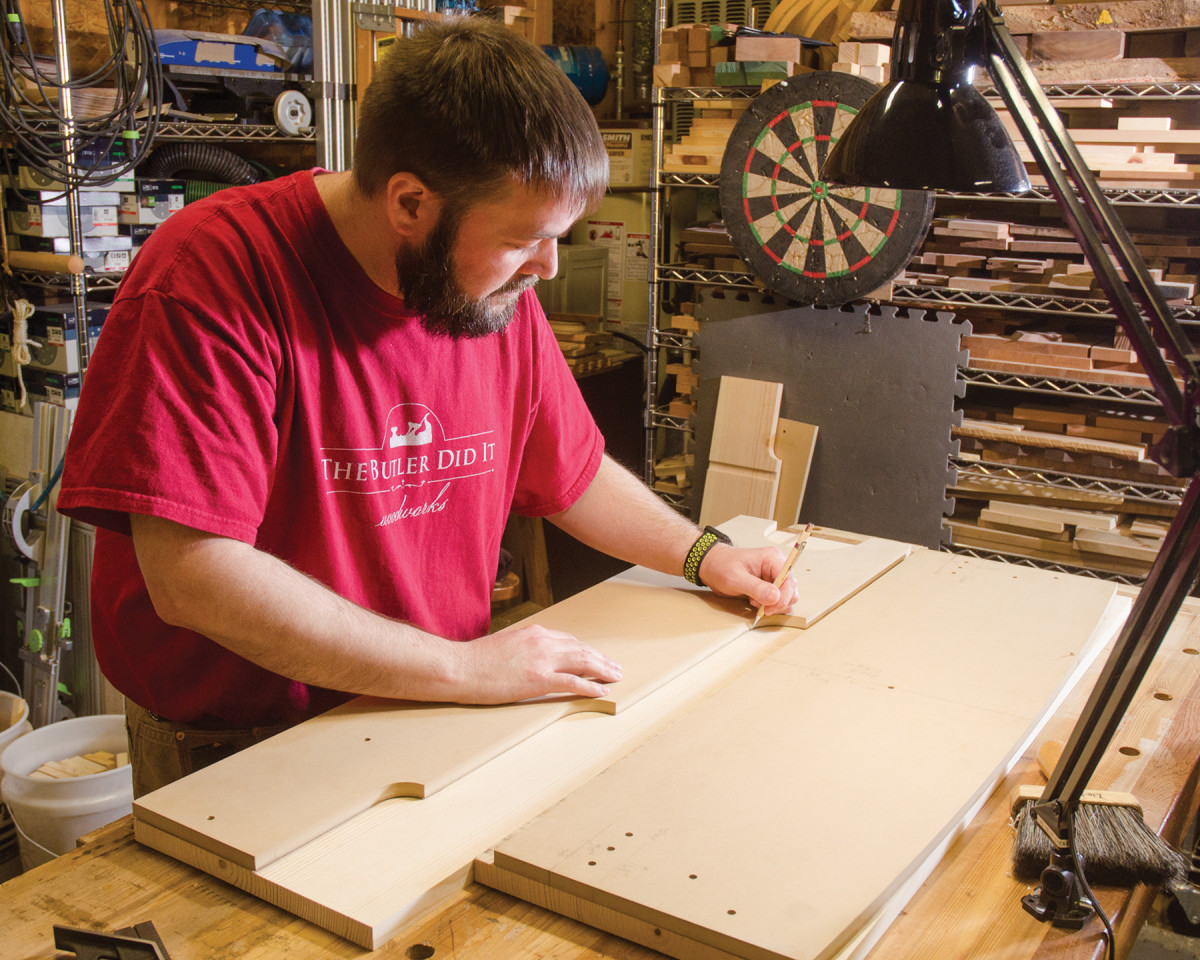
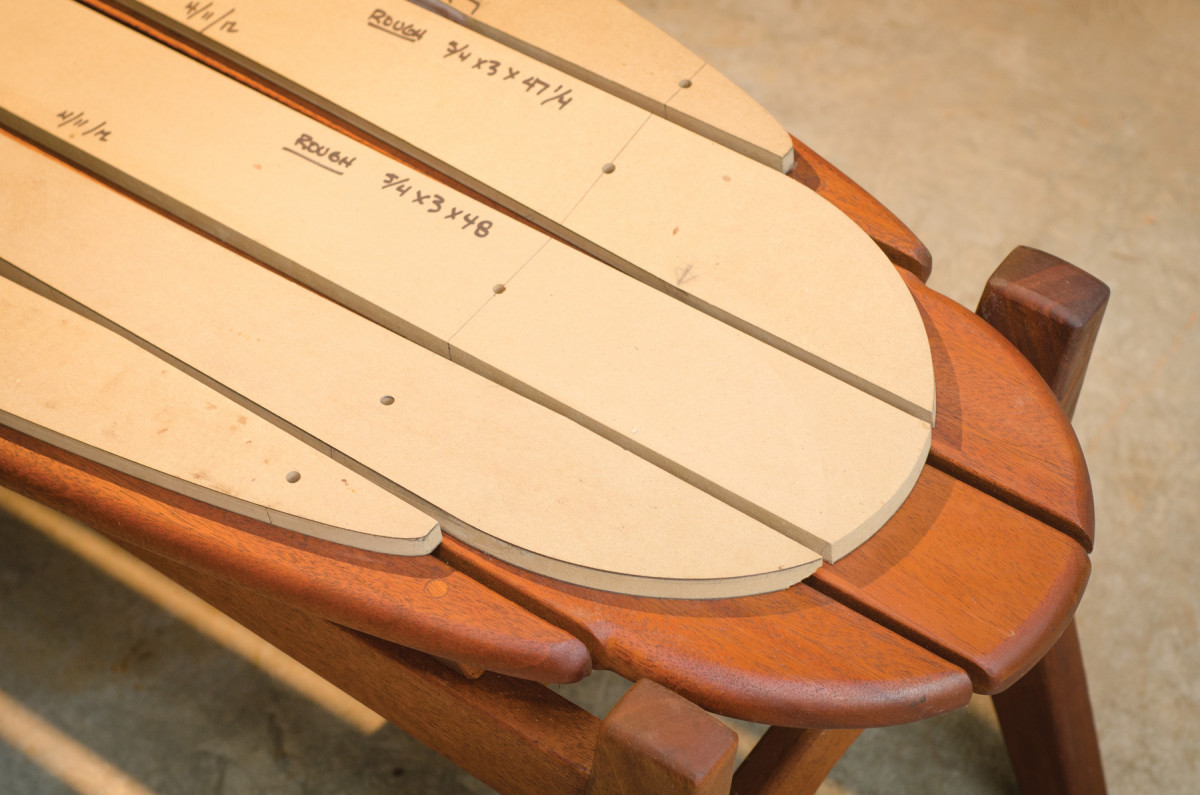
Prepping for routing. Back at his shop, Todd traces the patterns onto his boards.
He then draws a centerline through the .250″ holes for his joinery locations.
Next, Todd needed a CNC service to make his patterns. He lives outside of Seattle and went to a popular hardwood lumber supplier in Port Townsend called Edensaw Woods. They recently started offering CNC services and were eager to give pattern making a try. As recommended, Todd specified 1⁄2” MDF for his patterns and a 1⁄4” bit. Since he only needed a few patterns, the job was completed in about 10 minutes and billed at the minimum shop rate.
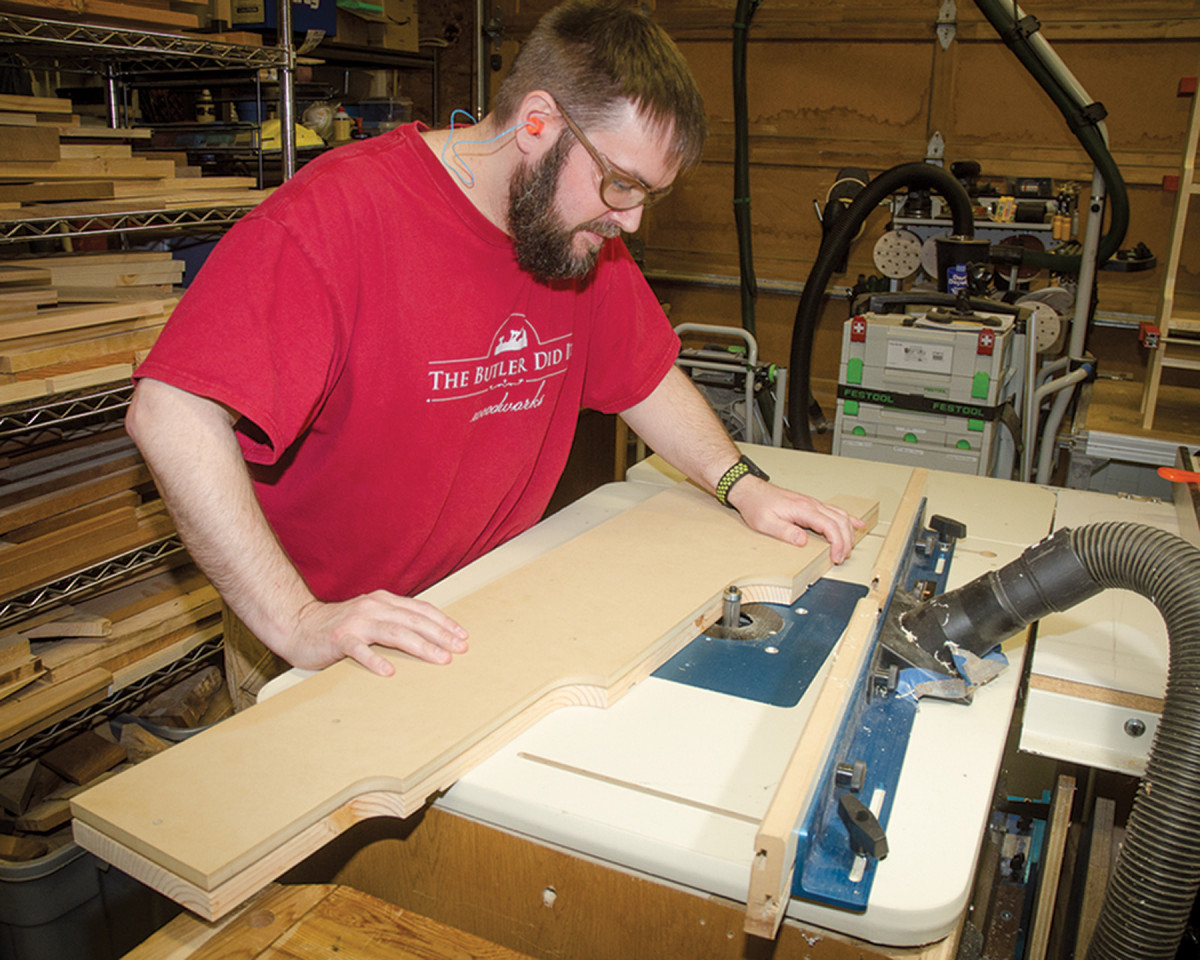
Start shaping. After roughing out the parts, Todd shapes them to exact size at the router table.
Back at his shop, he used the patterns to lay out the materials to be cut and shaped for his project. Using layout markers for joinery connections and center points, he transferred them to his boards.
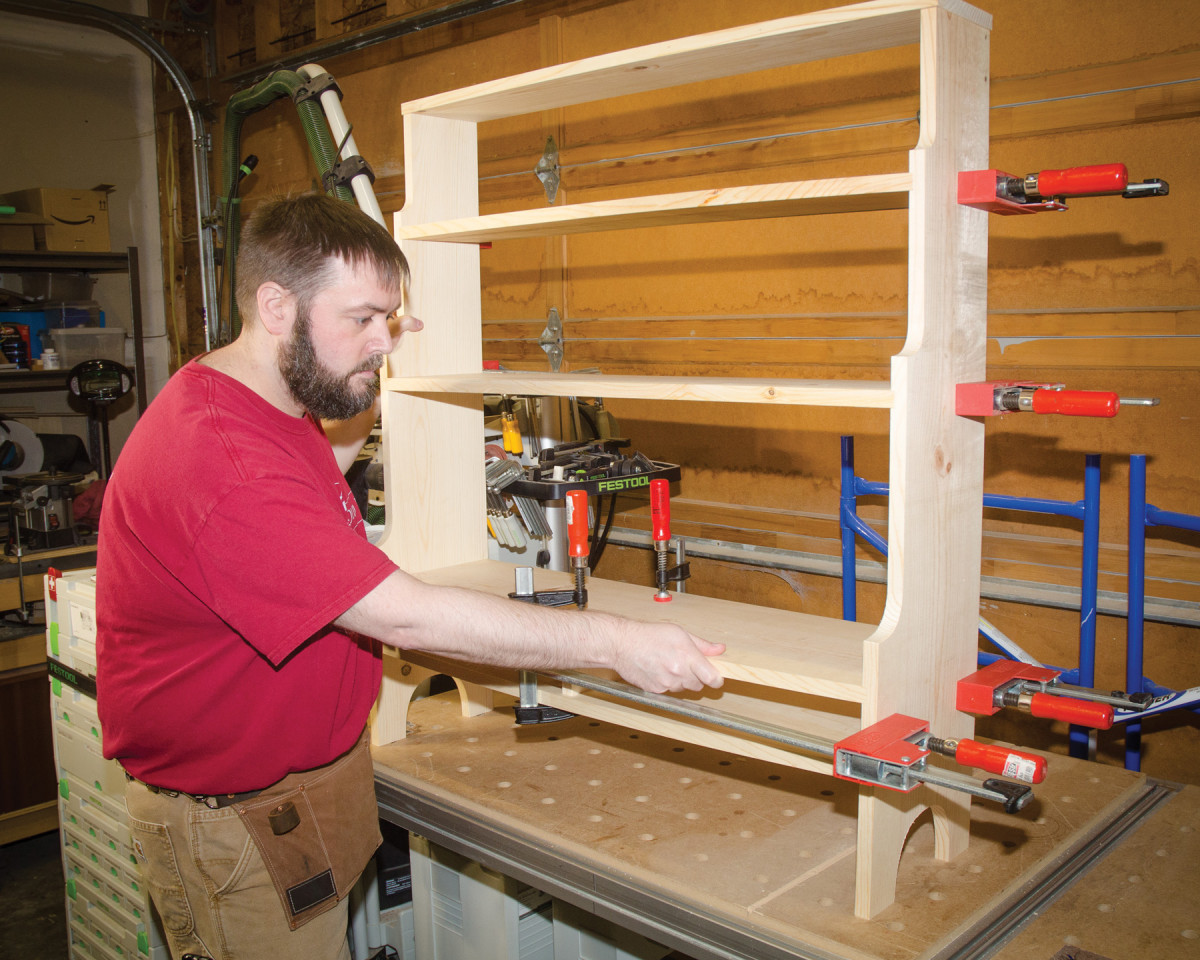
A perfect fit. Todd’s bookcase gets a dry fit before final assembly.
After rough cutting the sides and shelves on a band saw, the patterns were used for shaping on his router table. The final result is a bookcase with smooth shapes that fits together perfectly plus a set of patterns he can use to make more furniture in the future.
Finding a Local CNC Service
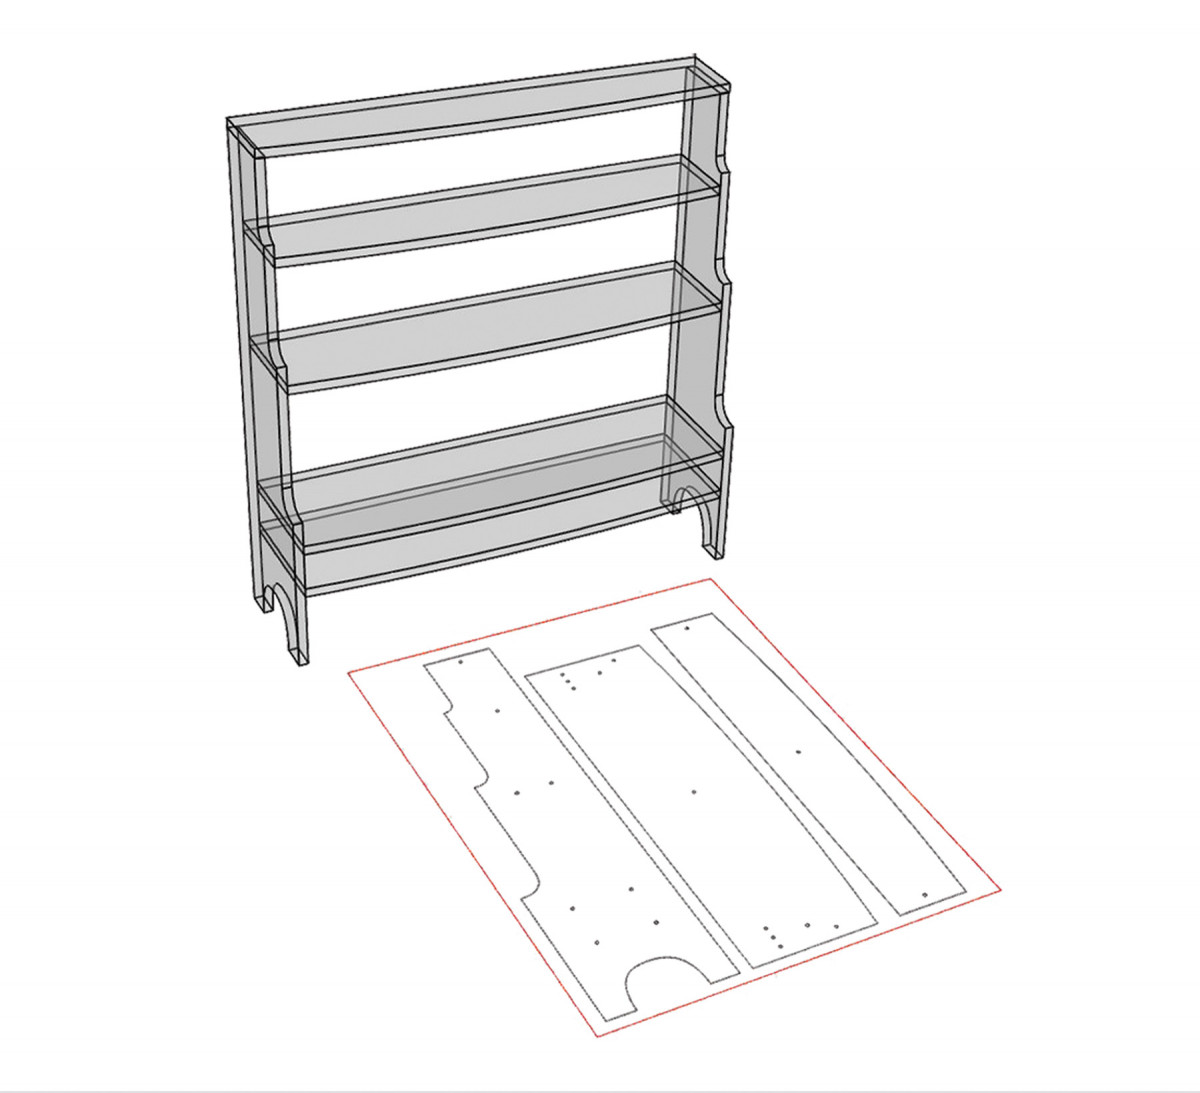
Virtual drawing to reality. Todd used Rhino 3D CAD software for the 2D drawing that’ll be used for CNC-machined patterns. The 3D rendering shows what the cabinet will look like when done.
Look for a local CNC service that could make your patterns for you. Because patterns are usually made out of MDF or plywood, I prefer a vendor with a common 48″x 96″or larger CNC that uses vacuum hold down.
Places to Look
• CNC Service Bureaus
• Cabinet Shops
• Sign-Making Shops
• Maker Spaces
• Furniture Makers
How Much Does it Cost?
Prices can range from under a $100 for half a 4×4 sheet full of patterns to twice that for a full sheet. Create precision drawings, take advantage of them, skip measurements whenever possible and use smart patterns.
Organize Your Patterns

Patterns are the ultimate story sticks. All the information you need is right there on each pattern. Patterns have furniture name, pattern function, sequence and dimensions for a cut list. Add joinery specifications and positions plus finishing details.
Once your designs are complete, organize your individual patterns in a way that’s efficient for the CNC service, and therefore, economical for you. That means you’ll want to gang all your patterns together and lay them out in a drawing the size of a minimum piece of blank stock that could encompass all of them.
Most CNC service vendors will ask that you leave at least 1″ around a sheet of plywood or MDF to allow for clamping and at least at 1⁄2” between individual parts if your patterns are being cut with a 1⁄4” bit. It doesn’t matter where patterns are located or if they line up. A CNC doesn’t care how you lay it out as long as there’s an adequate gap between parts. Move parts around to make best use of the space.
I always specify my patterns to be cut with a 1⁄4” bit. I do this for a couple of reasons. For one thing, it’s a small enough that I get a reasonable level of detail in tight areas and yet cut efficiently. For another, it allows me to place the patterns close together to make efficient use of raw materials.
Prepare Your Files
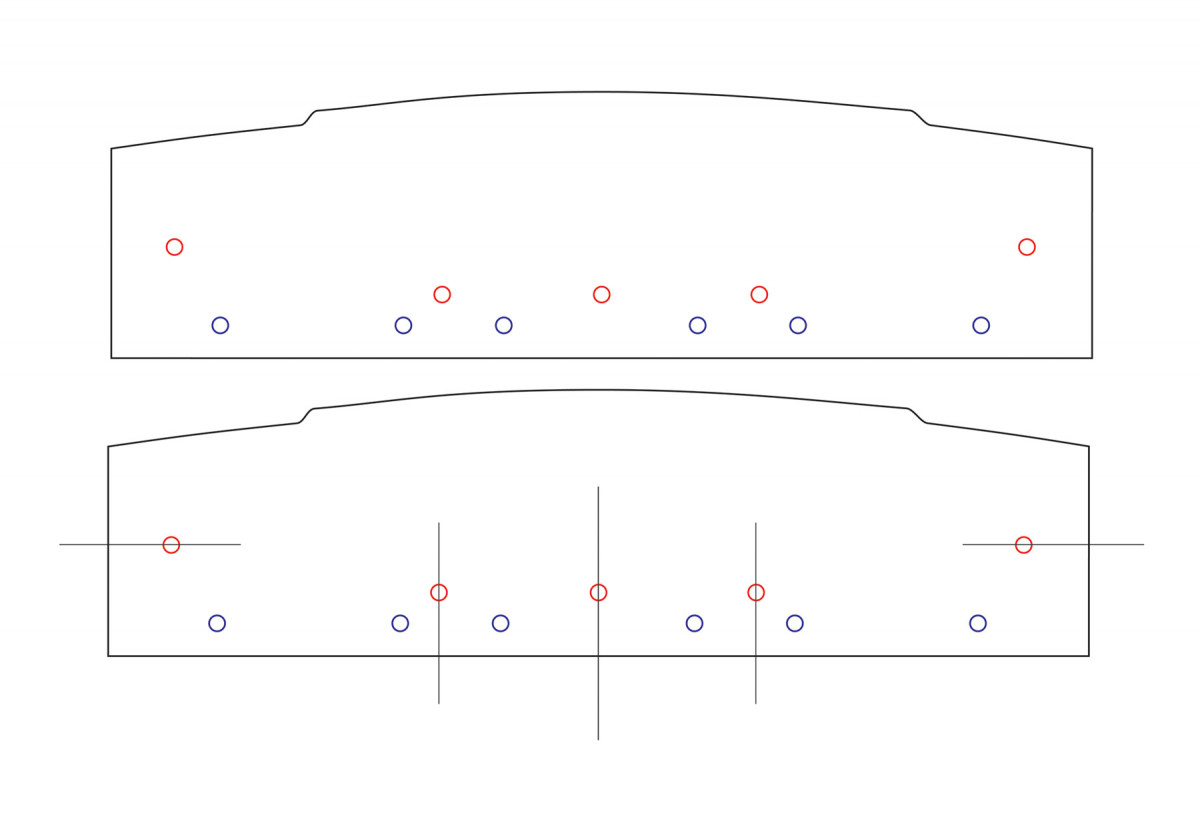
Take advantage of CNC capabilities. Add precision layout to your drawings in the form of CNC machined .250” holes at key locations. Red holes show joinery positions. Blue holes are for square plug locations in this crest rail. Centerlines are drawn on the patterns later for positioning.
Each CNC service will have its own requirements for file preparation. First, contact them, tell them what you have in mind and the software you’re using, and find out exactly how they want their files prepared. They will use some kind of CAD or sign-making software plus CAM software to program the CNC. You don’t need to use the same programs they use, but you do need to provide them with files they can read or import. For example, if you’re using a drawing program it’s likely they can import “AI” (Adobe Illustrator), “EPS” format or “SVG” files. For CAD, almost all of them can export the universal “DXF” format files.
Include Instructions
Instructions to the CNC service can be simple. Ask them to cut around the outside of your parts and to use a .250 bit. If there are openings in the middle of a part or holes to be milled for markers, make sure they are in the drawing and let the service know that they need to be cut out. Some CNC programming software will auto detect these openings, but just in case, I place all my holes and openings on a different drawing layer so the CNC operator can easily find them and program the CNC accordingly.
Pattern Materials
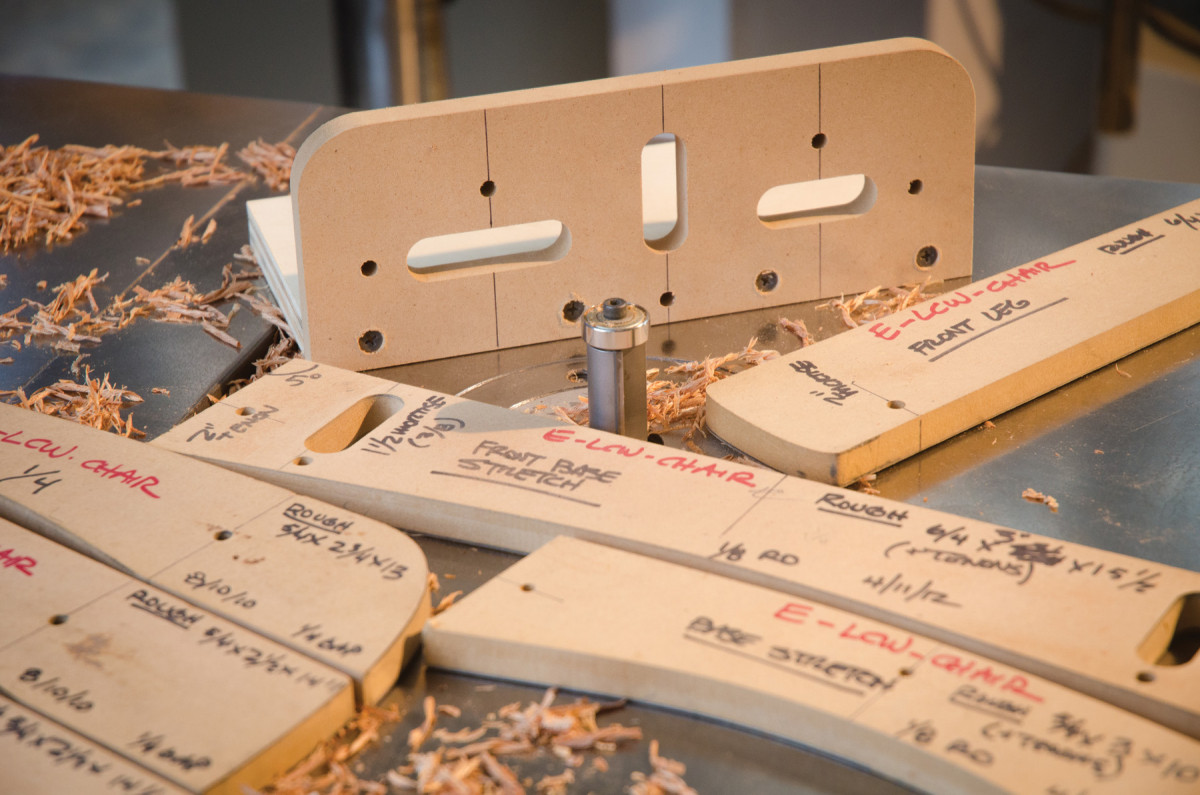
Taking it one more step. Sometimes I add router joinery templates right into my patterns. I mill 5⁄8″ router bushing slots at joinery locations.
Every woodworker has a preference for which material is best for patterns. Though Baltic birch plywood might last longer, I’ve always used 1⁄2” MDF. It’s flat, cheap, simple and available. I’ve never worn out a pattern even after hundreds of uses. Check with your CNC service to find out if they will supply your pattern stock or if you need to deliver the material for your job.
Add Precision Where It Counts
Patterns are a convenient aid to help you repeat shapes and details. But, a CNC produced pattern can add a lot more by making use of the .001″ precision available. So, why not add precision markers to your CNC machined patterns that will greatly improve your setups and layouts?
When you add high precision to key locations, layout information and joinery positions in the form of .250″ holes as markers, it takes patterns to a level beyond simple story sticks. I think of them as “smart patterns.”
If you deal with curved shapes, accurate reference points help to keep everything lined up. First, I make sure I add a center point on every symmetrical part. For example, with a semicircle shape, I place a marker where the centerline is located. That gives me a reference point for alignment. On long parts, I sometimes make the pattern a little over half the length and add a center point marker to line each half up. If a hole or other detail – like a plug, mount point, inlay, etc. –is needed, markers are added to their locations. Next, at every joinery position or attachment point, I put a centerline marker at the joint intersection. If there’s a mortise on one part and a tenon on the other, a centerline marker is placed on both parts where they’ll meet with the joint closed. Sometimes, I even build router joinery templates right into patterns.
These .250″ markers need to be accurately placed and tested in your drawings prior to machining. Essentially, you’re testing a joint to make sure everything lines up the way you intend, before machining. Use guidelines in drawing software or take advantage of various snap-to or alignment features that are common in CAD programs to help line parts up. This is easier to do than it sounds.
Marking Up Your Patterns
In furniture classes, students frequently ask about plans and instructions for my furniture. They expect to see the usual printed drawings with pages of instructions. I tell them that I don’t have any plans or instructions because I never use them. I keep no notes, notebooks or story sticks on anything I build. Every detail I need to build a particular part is written onto my full-size, CNC patterns. The patterns, notes and key positions are how I keep my work organized and accurate.
Using a marker, I write the name of the furniture piece, the part name, the function the pattern is intended for and the rough and nal dimensions of the blank material. This is what I use to make up my cut lists. I add the date the pattern was made in case there are variations of the design or series. If there’s a pattern count for a given furniture piece, I include it and assign a number to each pattern so I can spot if one is missing from the series. If there are subgroups of patterns or sets, such as parts for a tabletop, each pattern is identified individually and noted where it fits in sequence.
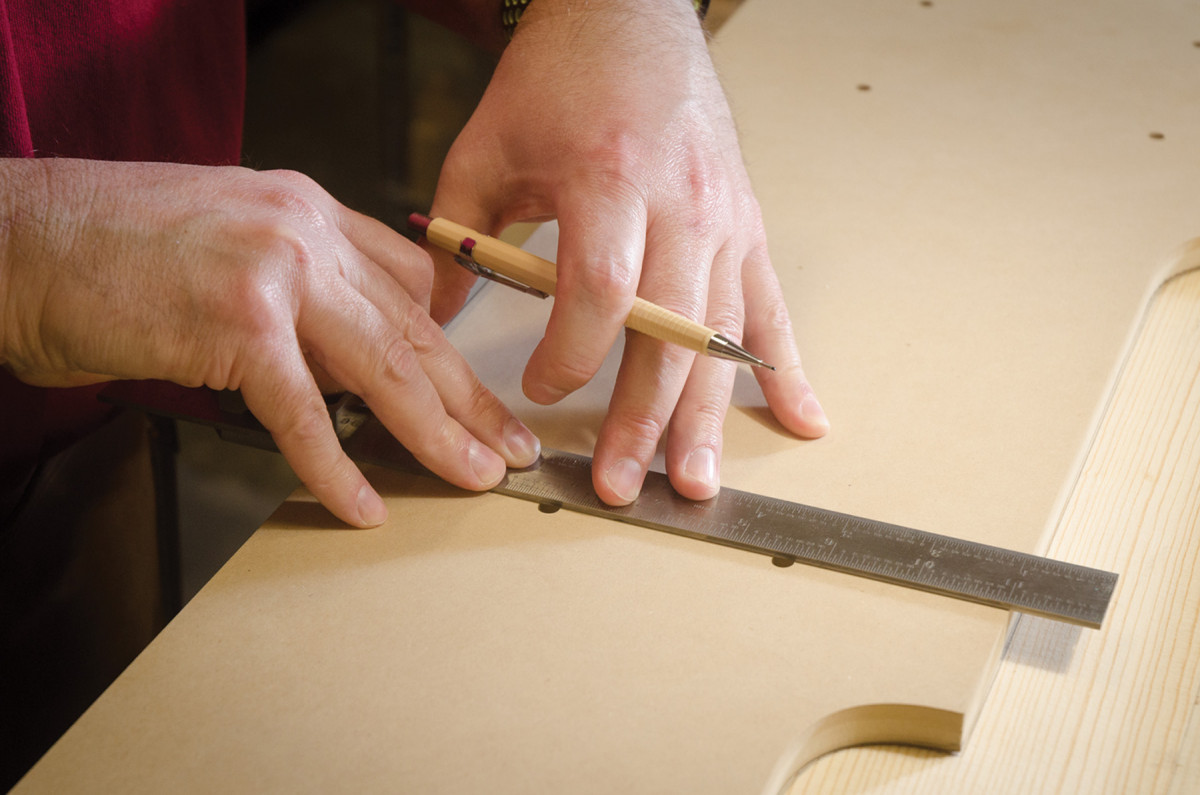
Next, I use a square and fine-point marker to draw alignment or centering lines from the center of my .250″ marker holes out to the edge and wrap them around the pattern with a small square. Also, I always make my patterns at final size without added length for joinery. At joinery locations, I note how much to add for tenons, dovetails and the size of the joints and other details.
Extra info, such as roundovers or chamfer edge detailing, is noted at the appropriate locations on the pattern. Special blank stock alignment points are added to align odd-shaped parts. I’m careful to indicate any 90˚ locations, confusing angles and special trim angles to be saw cut later. Finally, I include notes about any “gotchas” that might come up during construction.
Better Than Patterns
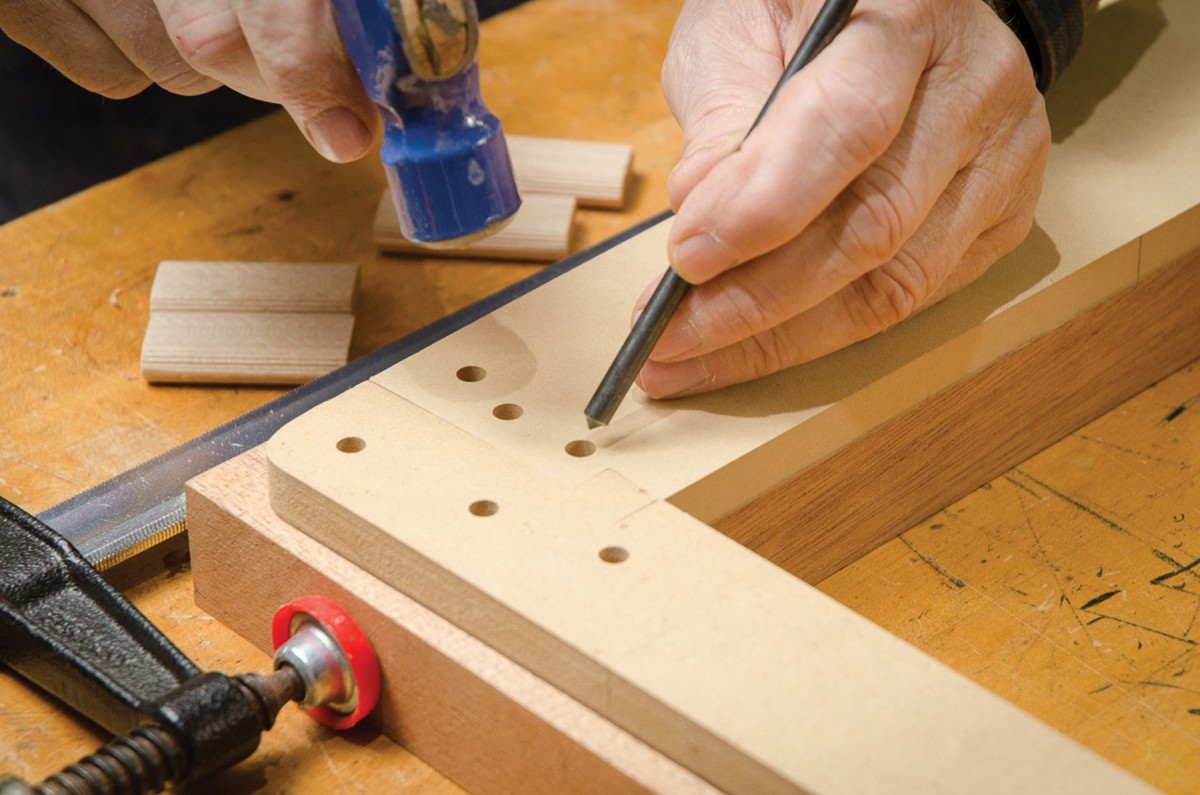
With a tap and a .250” machinist center punch, locations for holes and plugs are transferred through the pattern holes.
A CNC-made pattern is precision digital woodworking where it counts. Creating them is smart, inexpensive, accurate and easy to do. Precision patterns make your projects more consistent and less prone to errors. Any woodworker benefits from this trick and can still build their projects with their choice of tools, skills and methods. As a bonus, it’s a giant step beyond the adage, “measure twice, cut once.” I think it’s better to create precision drawings, take advantage of the precision, skip measurements whenever possible and use smart patterns.
Of all the digital woodworking recommendations I’ve made to readers, getting patterns CNC machined by a service is at the top of my list. You don’t have to be a computer expert, you just have to commit to learning how to make basic digital drawings. Finally, in future Popular Woodworking projects, I’ll include not just printed information to work from, but will offer project pattern files for CNC machining. I hope it starts a trend.
Tim Celeski is a furniture designer and artist based in Seattle, Wash. See more of his work at celeski.com.
Here are some supplies and tools we find essential in our everyday work around the shop. We may receive a commission from sales referred by our links; however, we have carefully selected these products for their usefulness and quality.