We may receive a commission when you use our affiliate links. However, this does not impact our recommendations.
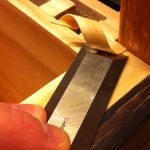
At around $1 an eraser shield is one of the best buys in your drafting toolkit. This little bit of punched stainless steel if often in my hand when I am drawing a set of plans and is invaluable for cleaning up corners and errant lines.

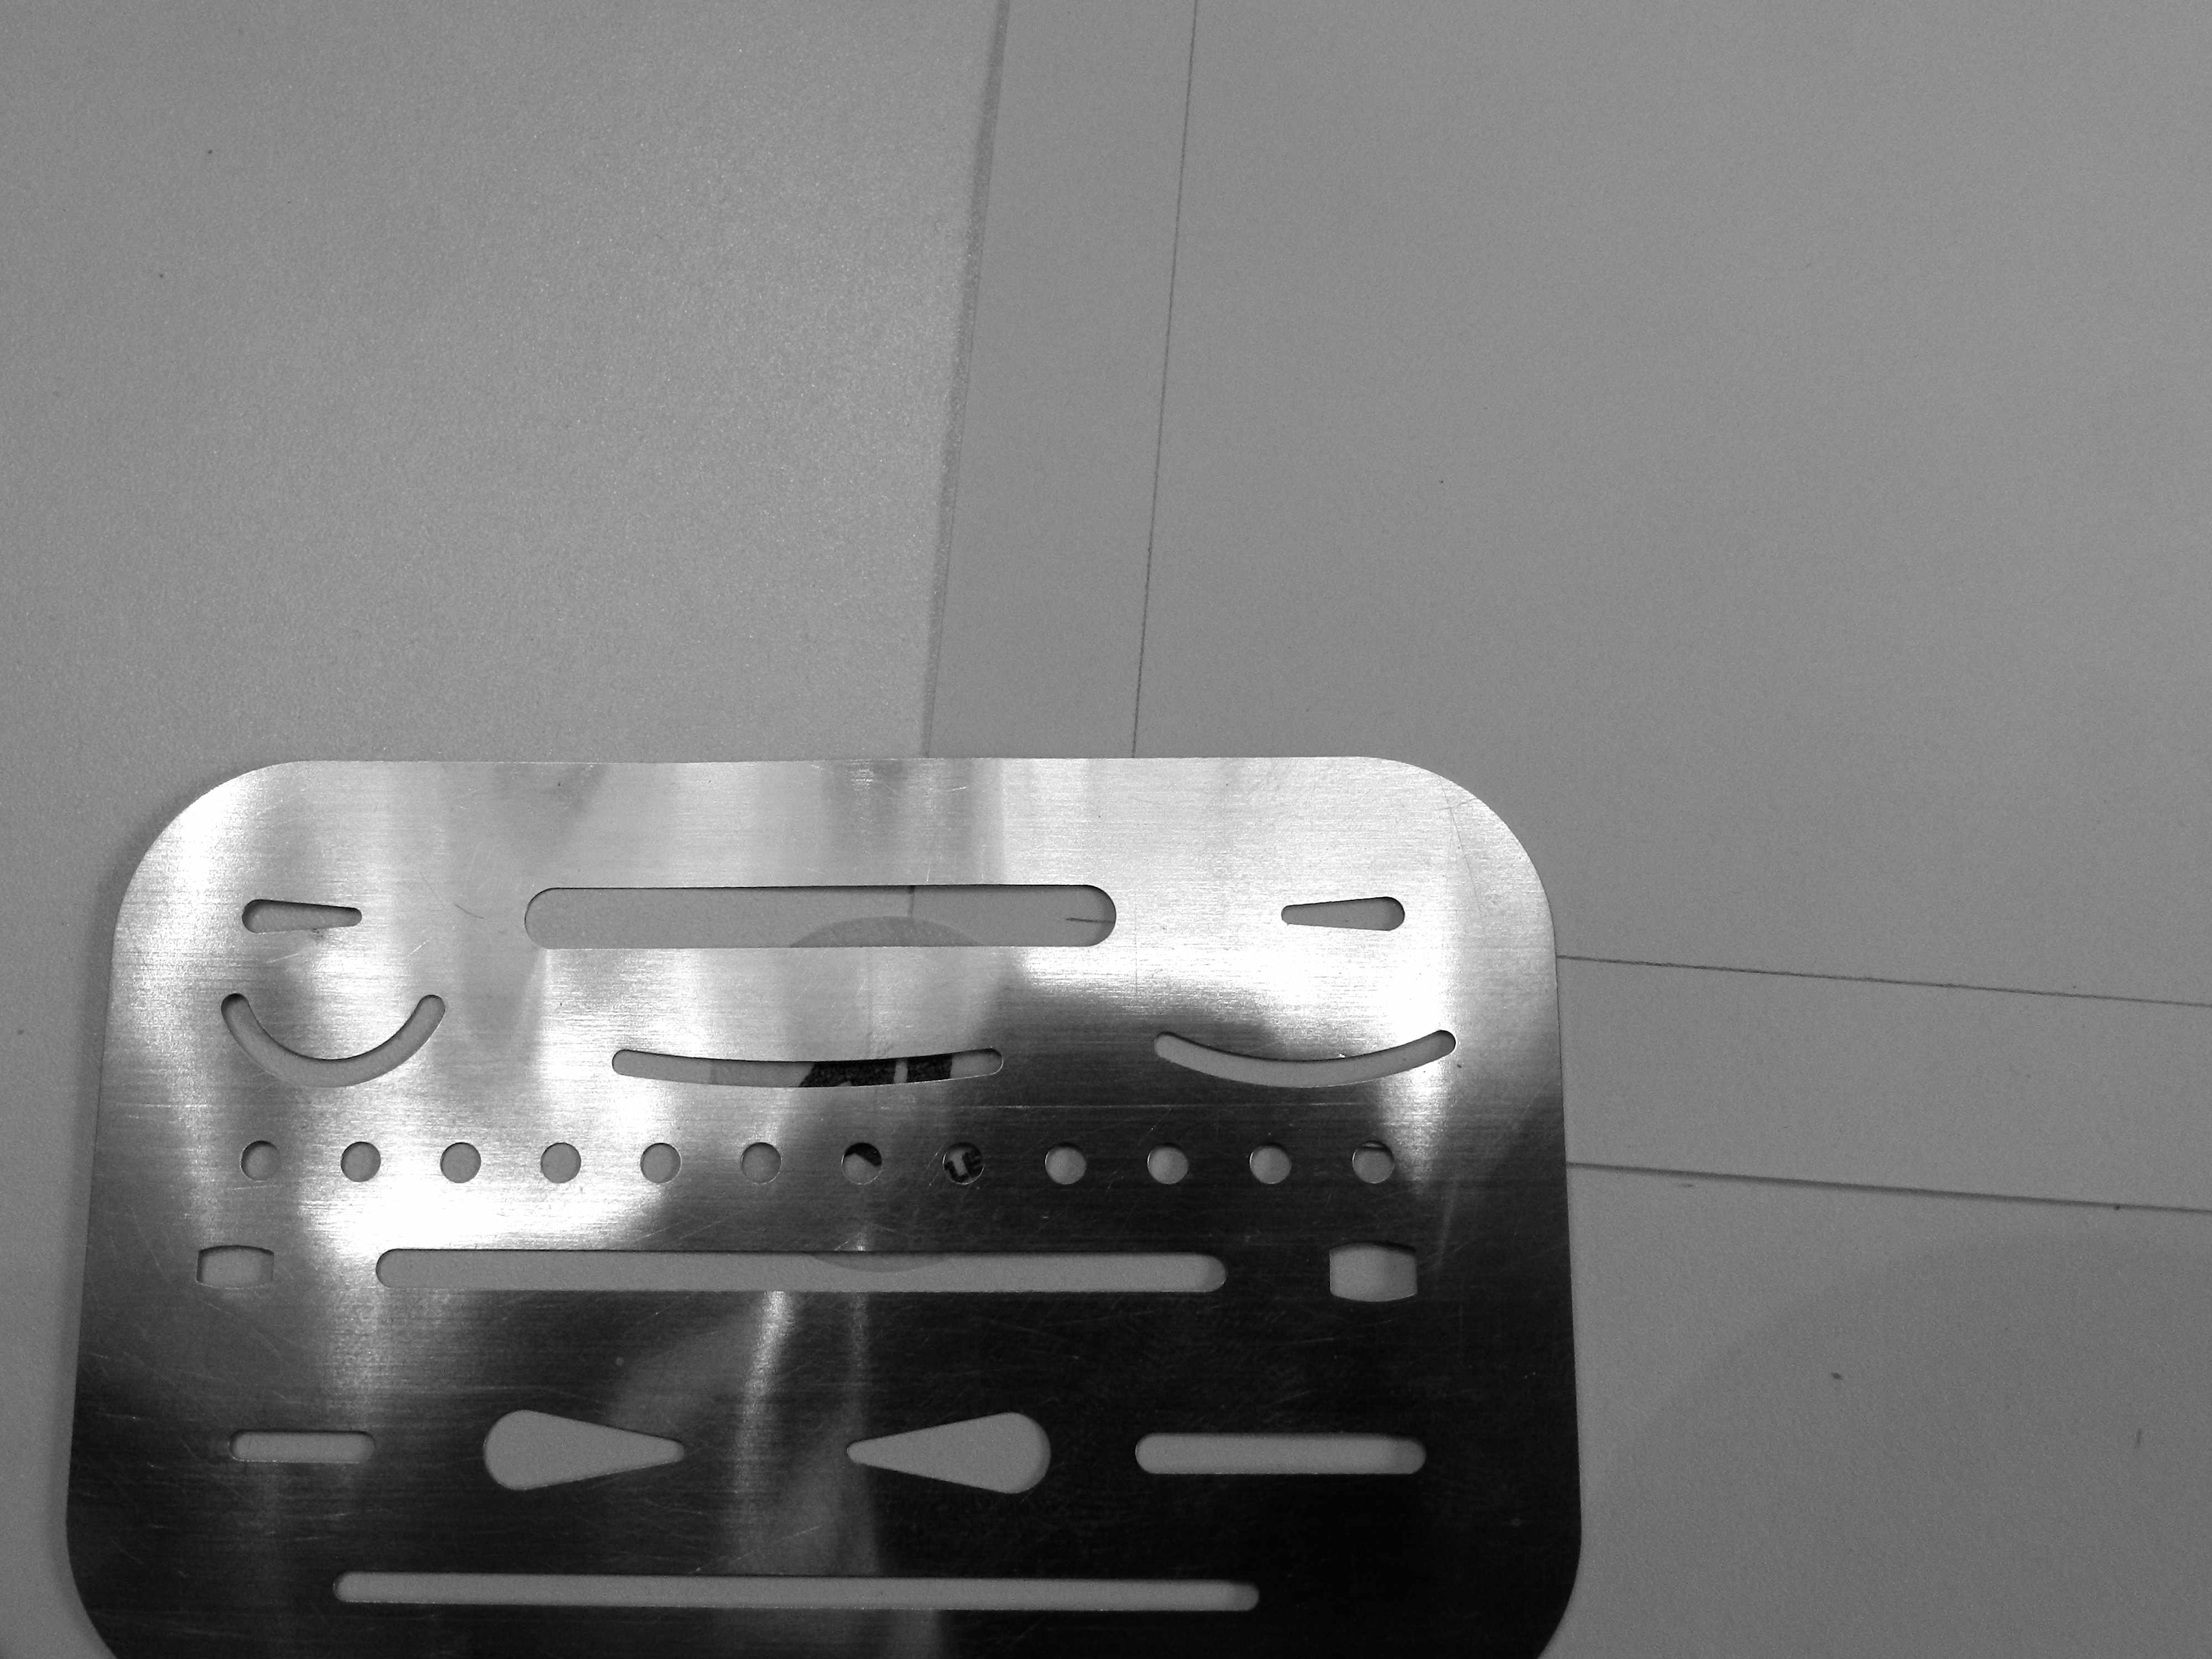
Eraser Shield and Erasers
Most folks can intuitively figure out how to use this tool – you place it on your drawing and use a high quality eraser (preferably white vinyl or similar non marking) to erase whatever bits of drawing should not be there. After using this tool for a while you’ll likely have a few favorite punched holes you prefer to use and develop a routine.
Cleaning up an errant line with an eraser shield
Given the many shapes on this tool I often wondered ‘Am I getting the most out of my eraser shield? What are all those other shapes for?‘
Here are my top 5 tips for getting more out of an eraser shield:
- You are not limited to the holes in the shield. You can also use the edge of the shield itself. Don’t be afraid to use the rounded corners as well if it helps you get close to the lines you want to clean up.
- The series of round dots allow you to make a hidden (dotted) line quickly. Simply draw a solid line as you normally would, place the shield over the line and run the eraser over the holes. This will create a nice uniform dotted line.
- There are three curves with varying radii punched into the shield. They allow you to get close to the edge of many curves and erase any bits that need to be removed.
- Some of the conical or arrow head shaped holes are used for quickly erasing an arrow head at the end of a dimension line and not disturbing any elements around it.
- The holes that look like a small rectangle with bulging sides come in handy when you need to erase an individual letter.
Different manufacturers will vary the exact set of holes they punch into their eraser shield, but the tips above should help you get more out of whatever model you have in your drafting kit.
Take care,
–Bill Rainford
RainfordRestorations.com
Learn about hand drafting for furniture design in Bill Rainford’s one-week Popular Woodworking University course, Hand Drafting Boot Camp, starting April 15.
Here are some supplies and tools we find essential in our everyday work around the shop. We may receive a commission from sales referred by our links; however, we have carefully selected these products for their usefulness and quality.